#I was playing around with the new gpose feature
Photo


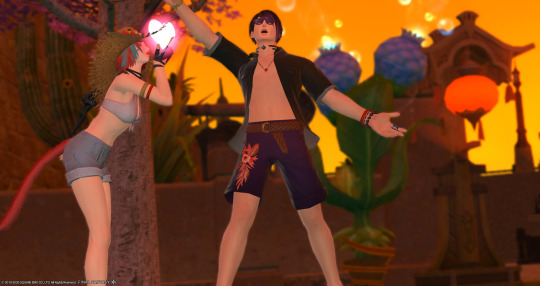
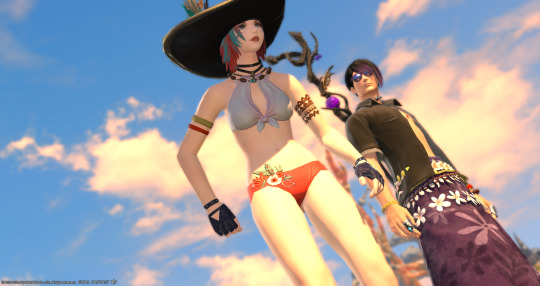

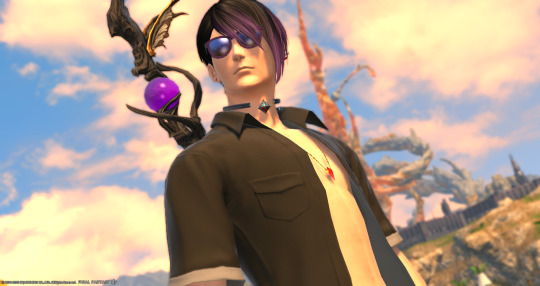
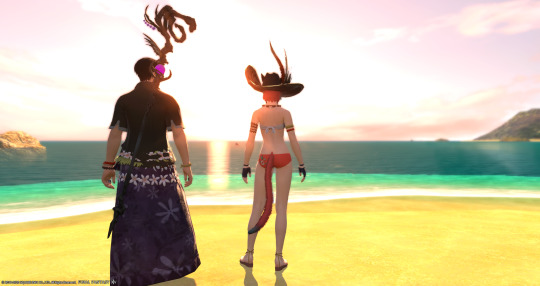
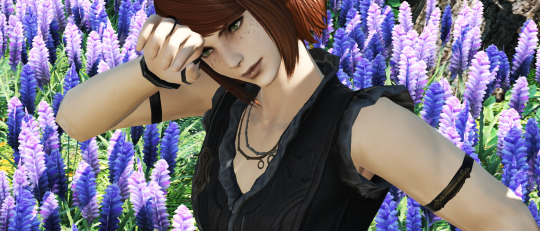
2020 Moonfire fun. Aly and Victor had a good time flying around Costa Del Sol and once again solving all the world’s problems. Digging the new attire; it’ll compliment a lot of different characters’ aesthetics. My first time playing around with the new sticker feature of gpose, too. I wish you could edit the text! Having options at all is a cute new feature tho. Also why is there not an orchestrion roll of the fire dance music? It’s chill af and I have a mighty need.
#ffxiv#gpose#final fantasy 14#screenshots#ffxiv characters#moonfire faire#moonfire faire 2020#hyur male#miqote female#swimsuits#beachtime#alyona amariyo#victor vallakovich#victor in sunglasses and aly in those gigantic hats gives me life
5 notes
·
View notes
Text
Rosa’s Most-Basic-of-Basic Gpose Tutorial
Hello, I’m Rosa! And I’m here to attempt to help those out there who are either new to using gpose, are confused/intimidated by it, or simply don’t know what gpose is.
To put it simply: gpose is short for Group Pose, a feature in FFXIV mainly used to change how your in-game screenshots look in various ways.
I’ve lost count how many times I’ve seen people either struggle with learning how to utilize gpose for nice screenshots, or even just straight-up never realize it’s a thing that exists in FFXIV to begin with. And it results in so much ‘I suck at this’, ‘I can’t take pretty pictures like you guys’, etc.
And I’m here like, ‘YES. Yes you can!’
I know there are bigger and better tutorials out there, but I want to offer what I can in the easiest-to-understand way possible, since gpose is incredibly fun to tinker and experiment with once you get the basics down.
For the record, I will not be using any Reshade filters or mods for this. This is all 100% FFXIV gpose.
This tutorial also only contains PC keybinds, since I’m a PC player. If you’re a PS4 player, I recommend searching up the appropriate binds for your needs!
So without further ado, let’s start at the beginning! Pretty pictures abound!
1. Open gpose.
Simply go to your chatbox, and type /gpose in there. Like so:

When you hit Enter, you’re now in what’s known as Camera Mode. This gives you more freedom to move the position of your camera than in regular game mode, and lets you access a handy-dandy control panel to fiddle with various settings. We’ll get to that in a moment.
(You can also access gpose in your Actions & Traits menu, found under Extras.)
If you used an emote, expression, or combat action before opening gpose, it will now be cycling over and over. The easiest way to reset this is to exit gpose, have your character /sit and then hop back up, and re-enter gpose.
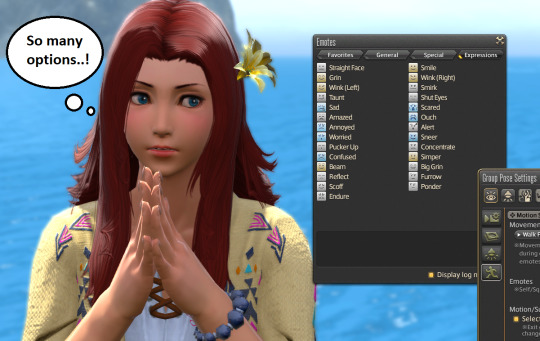
If there is a certain emote/expression you want your character to be doing for your screenshot, you can do it before entering gpose OR access the list of emotes from the gpose control panel. Note that combat actions can only be performed before entering gpose.
2. Move the camera!
As mentioned, you can access a lot more camera angles now! Try using your W and S keys, for instance, and pull the camera way up..

Or down low!

Your A and D keys can also move the camera horizontally (left/right)!
First person also works in gpose, so hit your Home key to try it out!
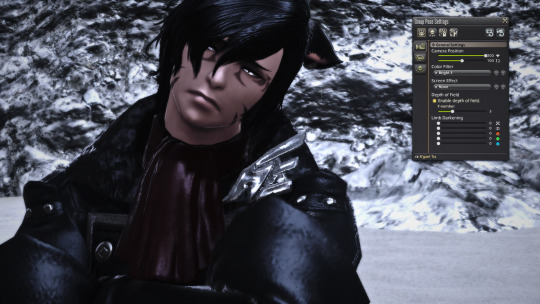
3. The control panel, also known as Group Pose Settings.
It’s not visible when you open gpose, but it’s the key to using the feature to its fullest. Usually the default keybind to bring it up is R, but if that does nothing, hit the key/button that your Auto-Run is bound to. It’s bound to the same key.
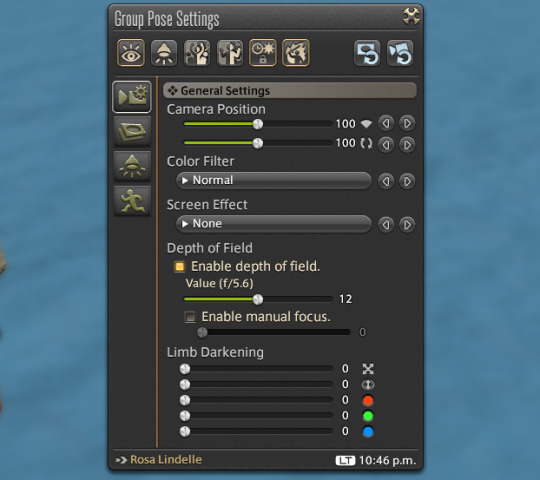
There’s a lot of stuff here, I know. But it’s really not as scary and convoluted as it looks, and all the settings are labeled to give you an idea of what they do. I won’t go into every single setting; experimenting is half the fun, so don’t be afraid to press buttons and try things out! But I will point out the ones that will solve a lot of the ‘I don’t know how to do this’.
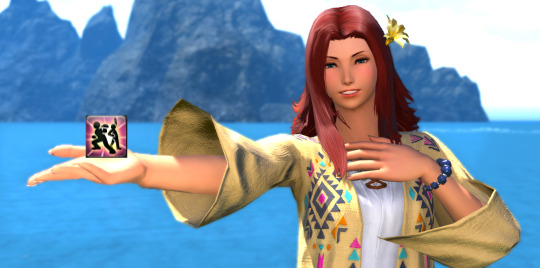
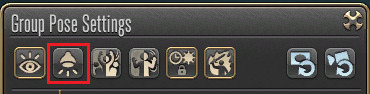
4. The Face Camera button.
This utilizes your character’s head-tracking; meaning that wherever you position your camera and toggle the button on (you’ll know it’s on by the border around the button), they will look at you!

You can also turn this on/off easily with the spacebar.
This toggle can be used in many ways to make your character look in a certain direction. Depending on what you have them doing, their whole body may turn during an emote/ability, or sometimes it’s just their eyes that move. It varies between emotes/actions.
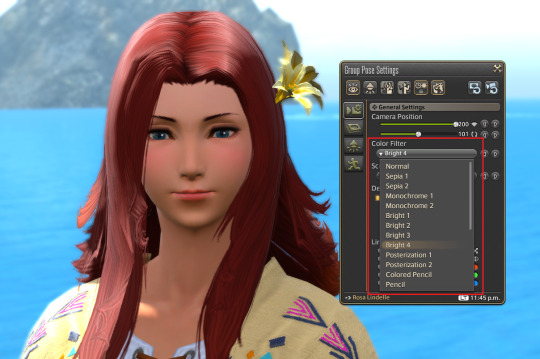
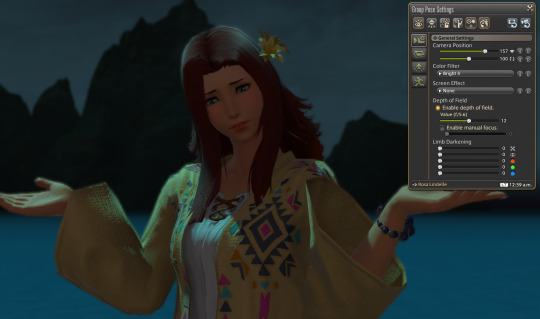
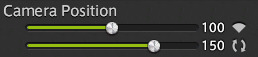
5. Camera Position and Color Filter make a ton of difference alone.
The first slider for Camera Position allows you to zoom in and out a lot further than you normally can. (Try using your scroll function after adjusting the slider too!) This is how people get those nice close-ups!

The second slider is used to turn your view clockwise or counter-clockwise. This can also be done with the Q and E keys on your keyboard.

This slider is largely useful for artistic angles, and makes taking full-body shots a breeze!

Color Filter is just what it says! It’s a drop-down list, and there are many to choose from, so try ‘em out and see what you like! One I tend to favor is Bright 4, since it makes the colors far more vibrant.
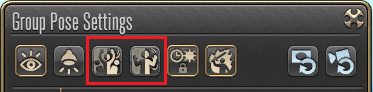
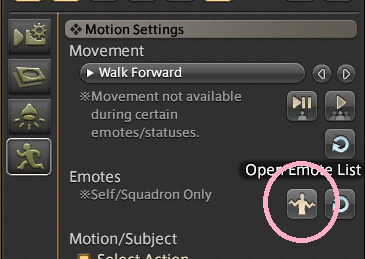
6. Emotes and Expressions time!
Note the little running man icon on the left side of the controls, and click on it.

This will bring you to the Motion Settings panel. Here, you can:
Toggle your character walking/running/sprinting in place.
Access your emote window.
Toggle whether gpose picks up combat actions, or makes your character face someone you’re currently targetting outside gpose when the Face Camera button is off.
When you apply an emote, you can:
Pause/unpause your character’s animations using the Disable/Enable All Motion button up top (bound to your 1 key). This also applies to the animations of others around you if they’re on your Friends List/in your FC or Party. This is HIGHLY useful for easy rapidfire pauses to get that pose just right.
You can also use the button beside it, Disable/Enable Target Motion (bound to your 2 key) to adjust ONLY your character, or whoever you are currently controlling. If you have a friend with you, you can click on their character (or use the Tab key) and switch to their perspective!
But keep in mind, you cannot change someone else’s emotes/expressions.
Note that emotes and expressions can be applied at the same time! Try mixing and matching different ones together and see what kinds of poses you can create!
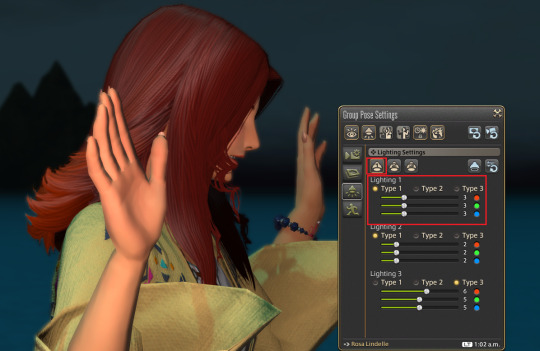
7. Light ‘er up!
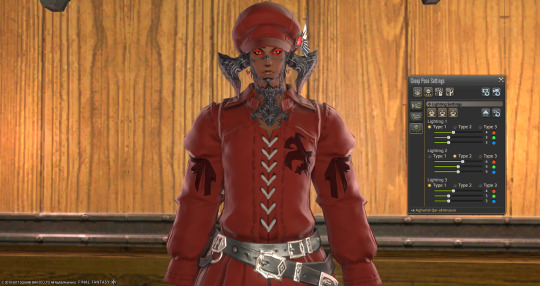
The last thing I will touch on is lighting, which can be accessed by clicking on the lamp icon on the left.

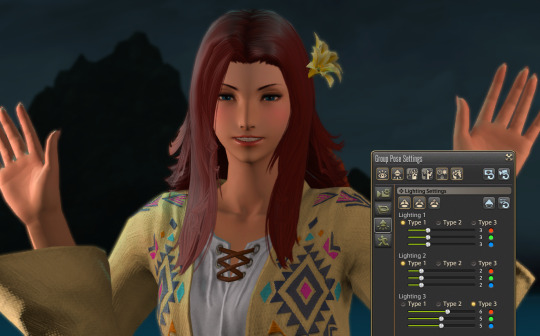
Here we have Lighting Settings. And wouldn’t you know it, it turned to night-time when I briefly left gpose!
Moonlight is nice and all, but using gpose, we can use a maximum of 3 extra light sources to brighten things up a bit.

These buttons toggle each light source, which can be adjusted with the sliders below.

(Note that Lighting 1 can also be toggled with the lamp icon up top.)
The Types under each Lighting simply determine how big/bright that light’s radius is.
Type 1 is the smallest/dimmest and Type 3 is the largest/brightest.
Type 1 is ideal for lighting up just a small area, like around your character, and the other two will cover more of your character’s surroundings.
Each set of 3 sliders are simply the Red-Green-Blue values.
You can also choose where to put down your light sources, as well as how close or far they are by zooming in/out. So if we place one down on one side of Rosa..
And a slightly dimmer one on the other side..
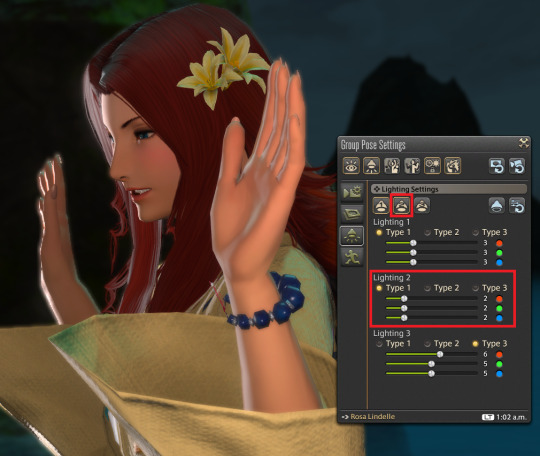
Now we can see her lovely face again!
You can do a lot of neat things with lighting, and the effect will differ depending on things like your selected filter, location, weather, and time of day/night as well. It can completely change the mood of your environment, so experiment!
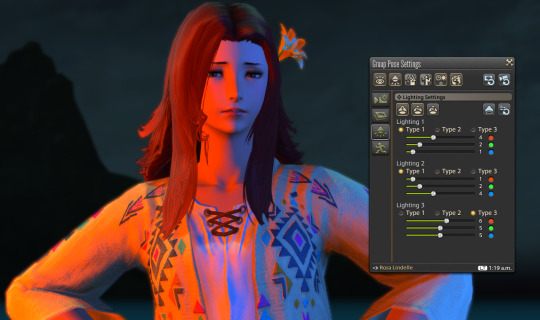
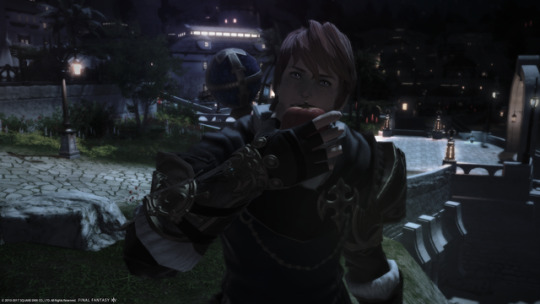
Or you can just torment your victim subject like me.
The possibilities are endless.
And those are what I consider the basics of gpose knowledge! There are other things to play with as well, but the majority of them are simply extras for personal preference. There’s no such thing as a ‘perfect’ way to do it, just play with things and see what strikes your fancy!
As another beloved redheaded lady says: Take chances, get messy, make mistakes!
And most importantly..
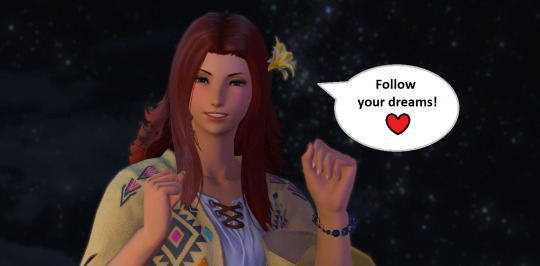
I hope this tutorial helps some of you in your screenshotting endeavors! Thank you for taking the time to read it! ❤
#ffxiv#gpose shenanigans#gpose tutorial#gpose guide#long post#screenshot tool#this was actually kinda fun to do#i really hope it helps some people!#pls forgive my piddly Paint skills
591 notes
·
View notes
Text
taking commission reference screenshots (1/?): portrait/bust
A while ago I got a request for advice on what sorts of visual references to provide an artist you are commissioning, and ever since then I’ve been meaning to whip up a guide. And then the guide became several guides because I have specific tips for specific things. I’ve bought a lot of commissions AND I am an artist myself, so I have experience on both sides of the transaction. As such, I have definitely learned how to make life easier both for the person paying and for the person drawing.
Tips are below the cut.
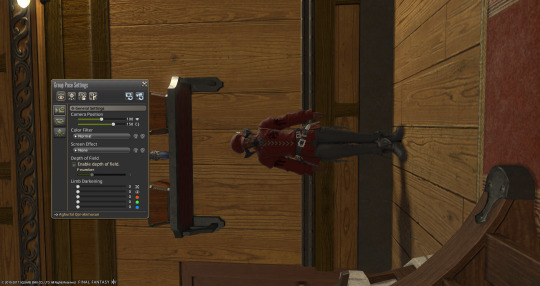
Tip #1: Camera position + zoom

Meet your new best friend: camera position slider. This adjusts the distance of the camera from its target (your character) which will allow you to get very close but also zoom way out if you want to take shots of your environment. From a closer distance, you can then zoom in and out (mouse wheel for me on PC). I like to get up to about 175ish and tweak it from there.

This is also essential for shots of your gear!
Tip #2: SOFT lighting
With your newly adjusted camera angle, you can shine some light if you need it.

The above settings will provide a very soft light you can shine directly on the character’s face without blinding them or washing them out. Adjust the strength of each “bulb” (the color sliders), usually 1 or 2 is what you’ll want for very close lighting. You may have to play with the angle. When you zoom out to take body/gear shots, you’ll want to increase the brightness.
You can use the other types as well, but I find that Type 1 is the best for avoiding reflection and keeping the colors true. Only use Type 3 if you have your camera distance set far enough away or you’ll be squinting! Play around with it and see what works best in your current lighting environment.
...Speaking of environment, as both a lover of good screenshots and drawer of things: please just go inside or wait until daylight to take your references. It is possible to adjust the lighting so that it looks passable in the dark, but it will ALWAYS be better for reference in full and “natural” lighting. Your artists will thank you.
Tip #3: Expressions & Angles
The ability to change emotes while still in /gpose is still quite new, and I find lots of people don’t realize this also means you can easily change facial expression.
I recommend getting at least two other expressions in addition to your /straightface. I usually do /beam and /smirk, but it depends on the mood of the piece your commissioning! I like to have a wide selection of expression references on hand just in case.
Last but certainly not least, get all of your angles. You should provide at least one shot of each: frontal, profile, 3/4 (ideally both profiles and 3/4 from both sides). It’s also nice to include a shot of the back of the head, especially if your hairstyle is actually interesting in the back.
Additional notes / considerations:
- Please provide additional references for things like scars, makeup, specific facial features, hair, etc if they are not in or as they appear in-game.
- Please do not rely soley on the use of other commissioned art as visual reference for a commission. At most, provide it as supplemental reference. Every artist has a different style and even though you might have a piece you feel portrays your character perfectly, this can be kind of uncomfortable from the artist’s side. YOU DO YOU, of course, this is just my recommendation based on working with lots of artists and being one myself.
Thank you to @azurexskies for asking about this ages ago, sorry it took me so long to answer properly (and only partially...oops). Next round I’ll go over full-body and specific armor/weapon reference tips! If you have any questions or if there’s anything else you want me to explain let me know.
#hope this is helpful#i always overthink tutorials#emily blabs about gpose#screenshot tutorial#gpose tutorial#commission reference guide#disclaimers:#this is all my opinion#your mileage may vary#yadda yadda
89 notes
·
View notes
Text
How to screenshot Part 1.
I don't mean to toot my own horn, but I've been told on more than one occassion "I wish I could take screenshots like you" and "oh my god youre so good at screens." and I always tell people the same thing - "Practice practice practice."
Case in point:

(Yes - thats my archive where I store my ffxiv screenshots. Yes, the folder for 2018 has 5,756 files. Yes. that means 5,756 screenshots.)
But that doesn't mean that there aren't certain things to bear in mind when taking eye-catching screenshots. Yes, there are tools out there that will help you along the way - multiple mods exist, as well as Reshade, but an artist is more than the tools at their disposal. There are certain things to look out for that no addon or reshade setting will fix for you.
Of course, by no means is this the ONLY way or the BEST way to take screenshots. I am just here to walk you through a part of my process.
PART 1. Camera Angles, Distractions, Color Filters and Body Language.
Lets start with an amateur screenshot.
This is a picture I have seen a million times - a male miqo’te in the quicksand. ORIGINAL. Of course, this is my own character @rgael looking rather unfortunately BORING in this shot. I see this exact shot SO often when people are making a new character and wanting to make RP connections. It physically pains me when I see this picture.

So whats wrong here.
1. The composition is boring
2. Distractions
3. He’s blending in
4. No expression, a basic bitch pose.
These 4 issues are what I’m going to tackle in this tutorial - how to overcome each of them.
So lets start at the beginning. The composition. Dull. Boring. There is a time and a place for having a character placed in the direct center of a screen, with a head-on camera angle like this - but cool screenshots is NOT IT!
Distractions. - I hate those lamps. They offer nothing to the overall image. They’re not aesthetically pleasing - theyre not even symmetrical. Theyre brighter than he is, leading your eye away from him.
He’s blending in. There is nothing eyecatching about this, the picture has very little contrast.
No expression. A Basic bitch pose. Look, lets not kid ourselves. This is a stock miqote pose. Everyone can do it. and many do. Body language is so important, and there’s nothing about this that portrays R’gael the way I want to. From this view, there appears to be NOTHING unique about him - and why would that capture ANYONE’S attention? It wouldn’t. And it shouldn’t. this is a bad screen.
Now, lets take that EXACT same pose and location and see what we can improve on.

Just zooming in, we’re already looking a bit better. At least we can see his face clearly. The lamps are cut out, but I’m not crazy about that railing to the right. Still, the colors are kind of washed out, and Gael’s most striking feature is his eyes - I want to draw attention to his eyes whenever I can.
So lets discuss color filters for a second.
THEY ARE MOSTLY TRASH.
I only use a few of gpose’s color filters - ever.
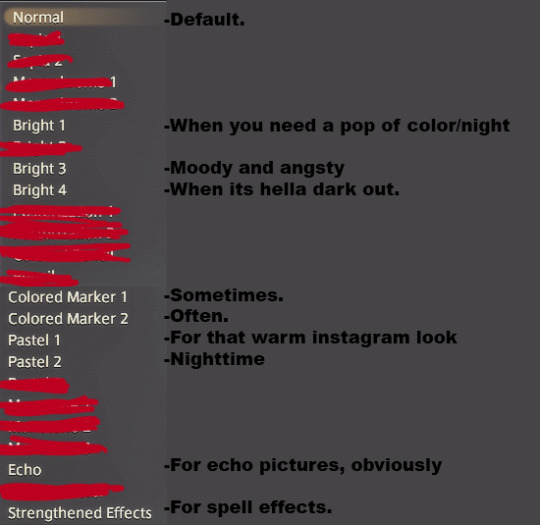
There is no official rule when some will be better than others. It depends on your subject matter, the time of day, etc. These are the only effects I use, ever. Anything thats crossed out is either never used, or used by me so little that its not even worth including on the list.
I like Colored Marker 2, Pastel 1, and Pastel 2 the most.
Lets try Colored Marker 2 in this picture.

Nice.
It’s a subtle effect, but his eyes are brighter, the contrast is a bit higher. we’re getting closer to a more acceptable screenshot. Lets mess with the angle.

By just adjusting our camera angle a few degrees, we’ve eliminated the annoying distractions. Also note how the lines in the background are literally guiding the eye to the focal point of the image - his face. This is already looking a lot better as a portrait, but its still kind of boring to me.

This is looking better. As a portrait, this is much more expressive. His body is turned one way, but his face is looking another. The expression is unchanged technically, but there is a billion times more emotion shown here.
PROTIP: You can use the spacebar in gpose to make your character look at the “camera” in many poses - try making them look one way, then adjust the camera angle after. They dont always have to look at the camera, that gets boring.
Just look at the comparison tho.


for emphasis - I didn’t change anything the character is doing - its the same pose, in the same location, with the same expression.
Lets do it again - this time I’m picking another location. Gael wears a lot of black, and I want him to stand out. I’m going to go somewhere bright - I have an apartment in the mists, so I’m going down to the beach.
Cool its raining.
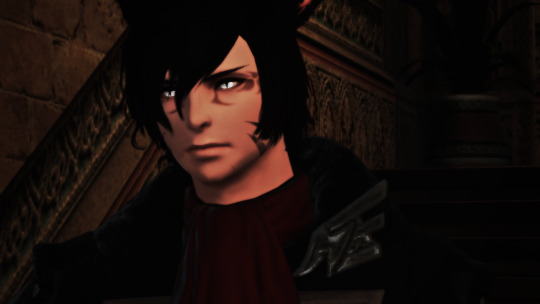
So since its raining. I’m gonna go for something angsty. Lets try crossing our arms and being sad.
the /sad emote is a little too bitch-ish for gael - so lets try /disturbed instead. Basic standing pose, /disturbed emote, and Bright 3 for that blue and moody atmosphere.

awful.
Again, dull composition.
the emotion..it just doesn’t make sense. His face says sad but his body language is confident.
And a bad background.
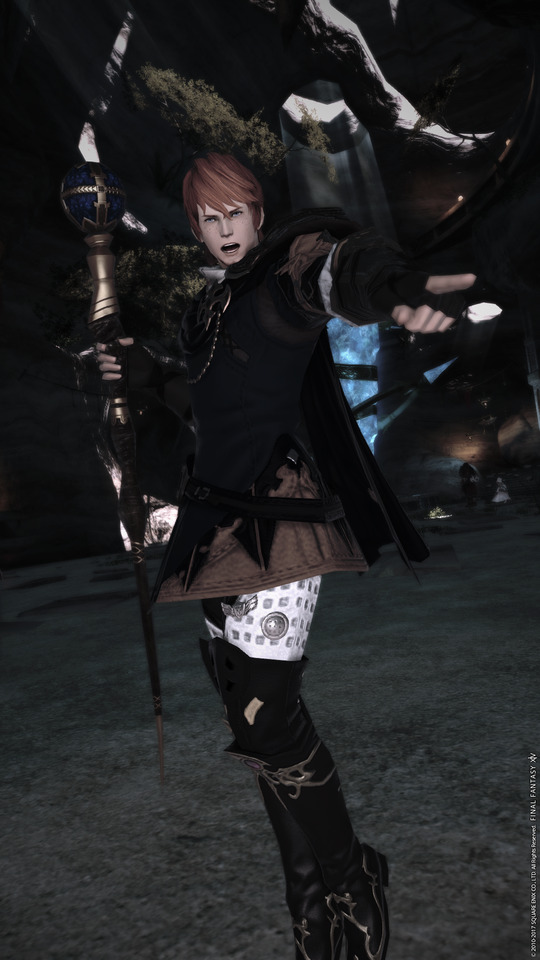
Play with combining emotes and expressions. The male miqo’te /doze is my go-to for R’gael. Look at what a different this makes if you combined it with /disturbed and pause it at the beginning.

This is a MUCH more interesting pose! His head is tilted to the side, his weight is shifted to the side, his ears are tilted BACK. This body language portrays emotion much better. Its way more natural. Lets play with this.
Okay, we’re head-on now. Its still not great. I can do better.
Shifting the composition to the side. by moving the camera around him - its a crisp, clean background (Though the mountain to the right is a little annoying. I would be torn about using this in a post, I feel like the mountain would bother me too much.)

Now this one I’m digging - we’re zoomed in close, its an intimate picture. It has excellent contrast against the background - we can sort of see the emotion on his face - but its concealed. We’re cropped in so close that we dont even see the top of his head - its very personal. We’re up in his shit. I like this one. I would use this.
Again, these two images are the same pose, the same face, the same filter. All thats different between them is the position and angle of the camera.
I hope this has provided a little insight into some of my process. If there is enough interest, I’ll make more “guides” like this in the future. Touching on the Rule of Thirds, Tumblr Image post composition, reshade filters, Gpose lighting/screen effects, couples, color composition, choosing locations...basically whatever people want to see lolol.
177 notes
·
View notes
Photo


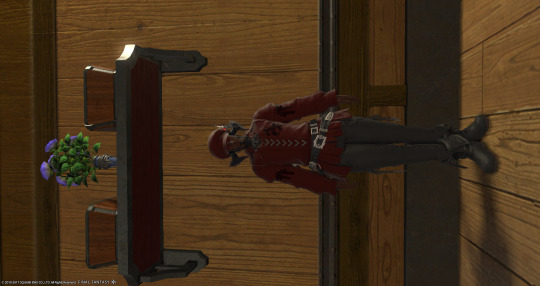
Played around with the new features of /gpose! I also found out you can use it with consumables!
15 notes
·
View notes
Text
some pro tips for getting reference pictures of outfits/characters
so lots of other people have written a lot of posts about what angles/backdrops make good reference pics and i’m just here to share some extra things that new /gpose has given us to make it easier to get good ones
1. zoom and tilt
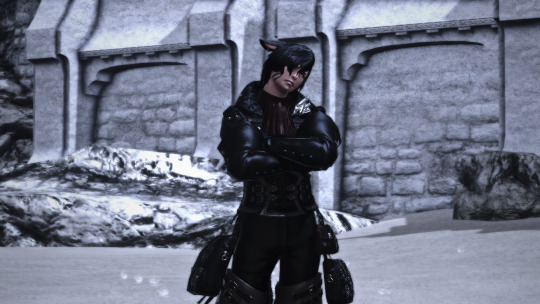
so here’s a regular ole screenshot showing my character’s full outfit. but he’s really small in the screen, and if i zoom in any further his feet get cut off...

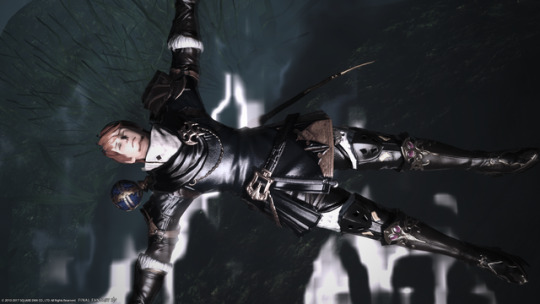
so let’s grab /gpose and tilt the camera a little bit!
50 points, to be exact. so you want to be either at 50 or 150, it doesn’t matter
now we can zoom in a bit further without losing my guy’s feet! and if you only need waist-up, you can go in even further.
just turn it upright afterwards in some 3rd party software (Windows lets you do this by right clicking the file and selecting “rotate”) and you’re good.
you can also use this to fit characters’ faces into the shot when you’re using gpose’s extra zoom-in feature, since it naturally zooms on their chest, and for most non-lalafell this means cutting off their face.


this works for any angle, so be sure to take the 3/4 front, side, and back pics that artists usually like to work with!
2. Lighting
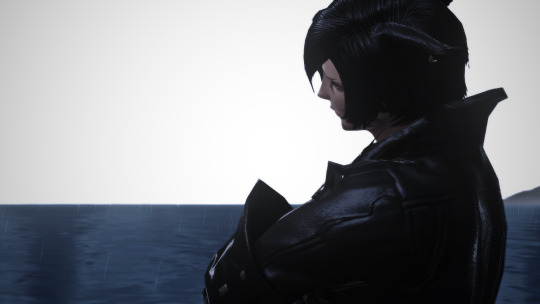
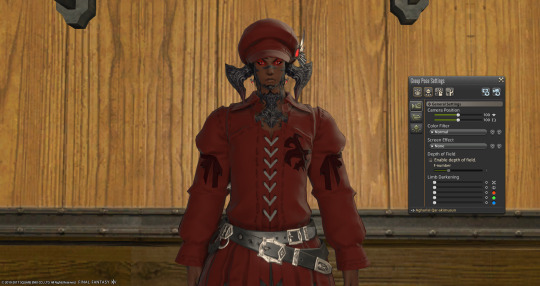
so since they first started upgrading gpose with the settings panel, we’ve had some new lighting options. we can front light our character, like so:


which is cool, but it’s such a bright light source - and only one - that it sometimes washes out the colours and makes them look a little odd. It can also leave some pretty stark shadows:

we can solve that by zooming out to place the light source and back in to take the screenshot, but then it loses some of its effectiveness.
BUT. with 3.5, it gave us the option for multiple light sources. click this bottom button to the side:
and this comes up.
I highly recommend playing around with these settings in general because you can do some really creative stuff, but for reference pictures I’m just going to talk about placing them to eliminate stark shadows.
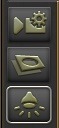
each time you click one of these:

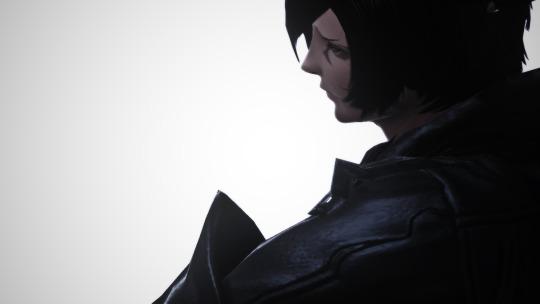
it will position that light in the place the camera currently is, at the time you press the button. so here are the places I recommend you put them:


that’s a bit bright, so I’m going to use the new “Type” setting to turn them down. “Type 1” is dimmest, and “Type 3” (default) is brightest. I recommend you make your front light a little brighter than the other two

you can also knock the colour sliders down a bit (while maintaining the same ratio to one another) if Type 1 still isn’t dim enough:
for comparison:

play with the brightnesses and positions until you’ve got something that looks natural and brings out all the edges properly, then snap. the new options should make it much less frustrating!
lastly:
the new walls/partitions make really good plain backdrops for taking reference screenshots with. i didn’t have one on hand for this post, but it’s surely worth tracking one down if you’re taking references for something you’re paying for!
58 notes
·
View notes
Last Seen Blogs
chubbykitt
PlumpPerfectionist

gogthings
제목 없음

another20somethinggal-blog
Untitled

ohfuckoffplease
Howdy

matit
Matit Design Studio