#art video tutorial
Text
Here’s a video on why I only use a pen to sketch ✅ Hope you try it out, it has helped me tremendously to streamline my process and improve faster ☺️💕
13K notes
·
View notes
Text
a little tutorial
#reserved#mishima technique#mishima pottery#pottery#ceramics#ceramic#ceramic art#carving#underglaze#timelapse#video#art video#art techniques#ouroboros#snake#tutorial#sgraffito#greenware
639 notes
·
View notes
Text
Common perspective mistakes (proko)
#witchcraft!!!#art tips#art advice#tiktok#art appreciation#proko#how to draw#drawing advice#drawing tips#art help#drawing tutorial#drawing tutorials#drawing help#art reference#art references#artist advice#advice for artists#art tutorial#tiktok video#3d art#drawing mistakes#perspective#how to draw perspective
497 notes
·
View notes
Text
How To Draw Ninjas!✍️🥷
youtube
Guys, this video has helped me SOOOOOO much. It's a tutorial from an official Lego Designer on how to draw the Ninjas and Lego Minifigures in general! I highly recommend you watch. It's excellent!
229 notes
·
View notes
Text
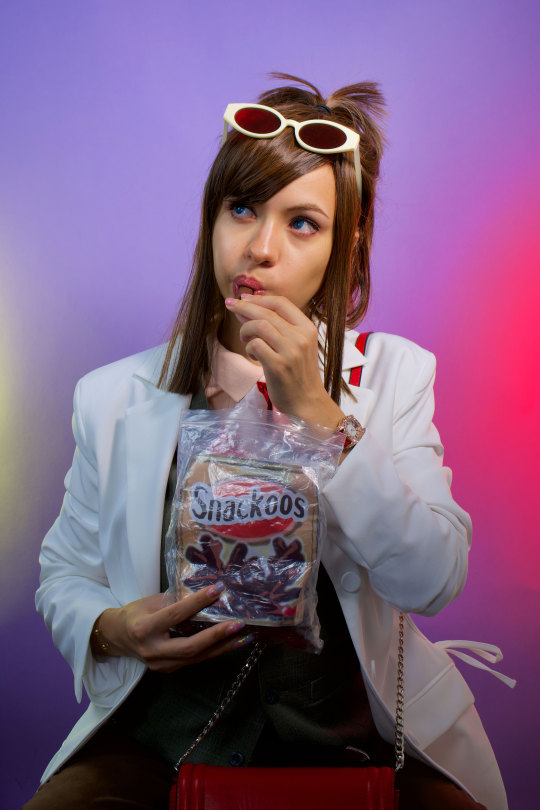
Ema Skye Cosplay VIDEO - The Opal Empress
#ema skye#ace attorney ema skye#apollo justice#the opal empress#game cosplay#ace attorney cosplay#ace attorney art#ace attorney#ace attorney fanart#ace attorney apollo justice#cosplay video#cosplay tutorial#cosplay
685 notes
·
View notes
Text
Finished neuvilette's fanart ☺💖 like and support please!
#genshin gaming#genshin art#genshin xiao#genshin impact#genshin fanart#genshin x reader#neuvilette fanart#neuvithesley#neuvillette fanart#neuvilette genshin#neuvillette#neuvifuri#genshin wanderer#genshin wriothesley#fanart drawing#video games fanart#fypシ#tumblr fyp#fyp#fypage#art tumblr#timelapse#speedpaint#art tutorial#art tips#commisions open
152 notes
·
View notes
Photo


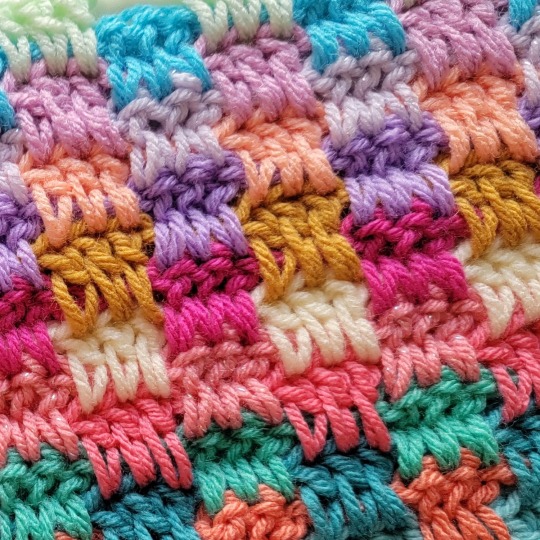
It's #wipwednesday! What are you working on this week? 👋🌟💝
Next free blanket on my hook! This is the Triple Interlocking Block Stitch, video on my YouTube channel! Tutorial here! 💖
Link to my blog/website: https://crochetml.com/
https://crochetml.com/free-crochet-patterns/
Check out the tiktok here!
#yarn#fiber#fiber art#fiber arts#fiber artists#fiber artist#crochet#crocheting#crocheted#crochet pattern#crochet patterns#free crochet pattern#free crochet tutorial#free crochet patterns#free crochet tutorials#crochet tutorial#crochet tutorials#video#videos#tiktok#tiktoks#diy#how to#crafts#crafting#crafty#craft#wip#wips#work in progress
868 notes
·
View notes
Text
Estimated process time - 8 hours 22 minutes
Music: League of Legends, Cailin Russo, Chrissy Costanza — Phoenix (Instrumental)
#mass effect#concept art#digital art#2d drawing#process#asari#video tutorial#tutorial#aria t'loak#liselle t'loak#zuria alaris#art#polsav
105 notes
·
View notes
Text

Let's tie this honeycomb karada - it takes some time but once it's built, you can pop it off yourself or a partner and have it ready to go in your rope kit as a portable full body harness - it's based off of my experience with macrame techniques and my love of ferking around with wearable rope art and I hope y'all enjoy ❤️🐝🪢
#shibari#rope art#self tie#learning the ropes#solo#ropeart#quick guide#rope tutorial#rope video#kink education#decorative tie#honeycomb#karada#portable#wearable art#macrame
83 notes
·
View notes
Text

@sex-plants
hopefully this will help! it can’t fix everything but it is a great way to cover a mistake
sold
I wish I’d taken better pictures of this piece once it was done but… it’s too late now lol
#pottery#ceramics#asks#ask#sgraffito#carving#underglaze painting#before and after#timelapse#video#art process#tutorial#ram skull#greenware
114 notes
·
View notes
Note
HOW DO YOU DO GRADIENTS IN PAINT LIKE THAT???
okay first off thank you for reminding me i was going to make a tutorial
So what you do is take your canvas (any size) and draw a diagonal line across it like so (can be any colors)
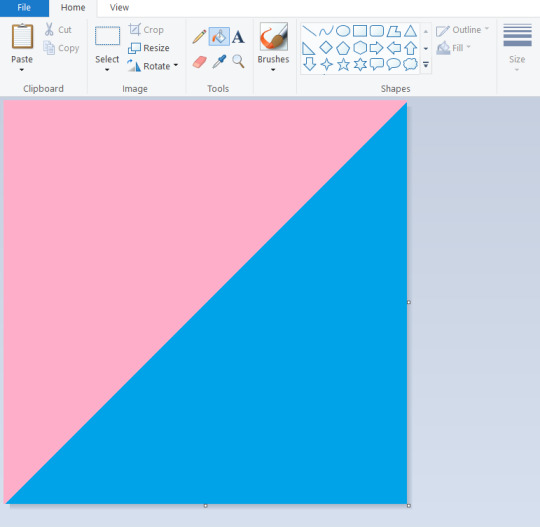
(Protip- hold shift while dragging the line tool to get a perfect diagonal)
Then go to the resize panel, resize by pixels, and change the horizontal size to 1 (TURN OFF ASPECT RATIO or it will make your entire canvas super small)
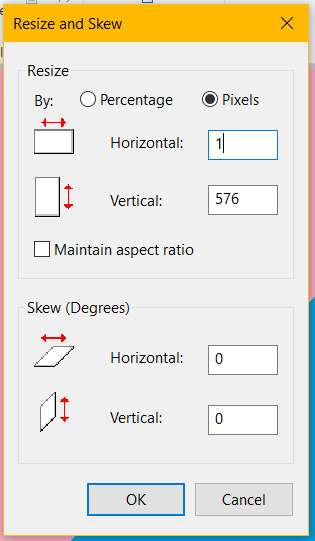

it will make your canvas the skinniest thing on planet earth but now what you do is go back to the resize panel and change the horizontal size back to what it was originally (in my case 576 but it works with everything)

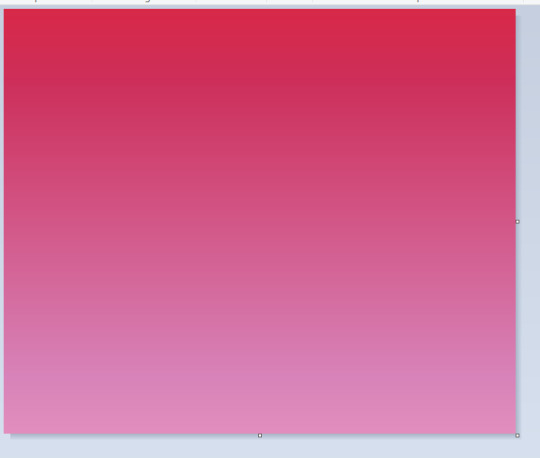
and now you have a gradient made entirely in paint! super clean too
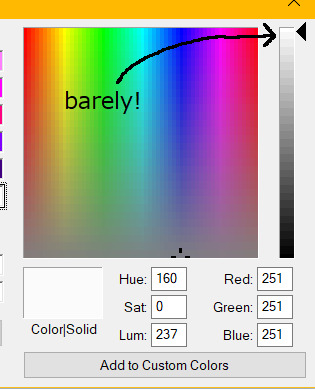
on the right is an example of one made with 3 lines (red, purple, pink) as an example of one with more than 2 colors if you want a smoother gradient. experiment! get wacky with it!
Now obviously with the gradient it gets hard to draw on (especially if you're going to be fillbucketing stuff) so under the cut is a bonus tutorial on how to transfer a drawing to a background (yippie!)
Start by drawing up your whatever on a seperate canvas but one that's the same size as your background
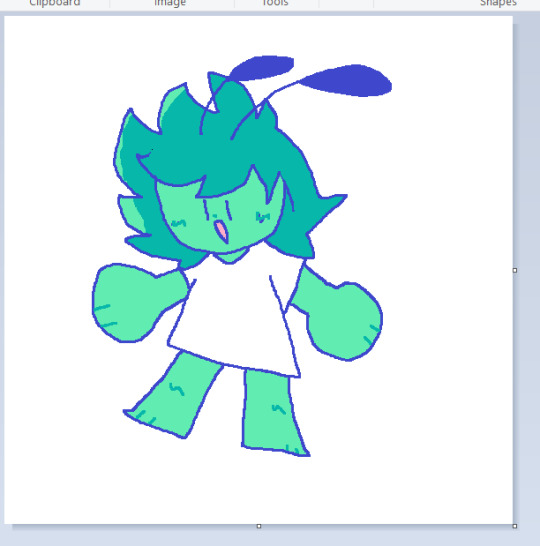
Do note that the way this works you have to make your color 2 on both canvases the same color and one that's NOT used in your drawing, else it becomes transparent- if you want to keep the color 2 white on both, make sure to color all white parts on your drawing with a very very slightly off-white to prevent this
Ctrl + A to select everything on your drawing canvas, then go back to your gradient and (making sure transparent selection is on) paste it in

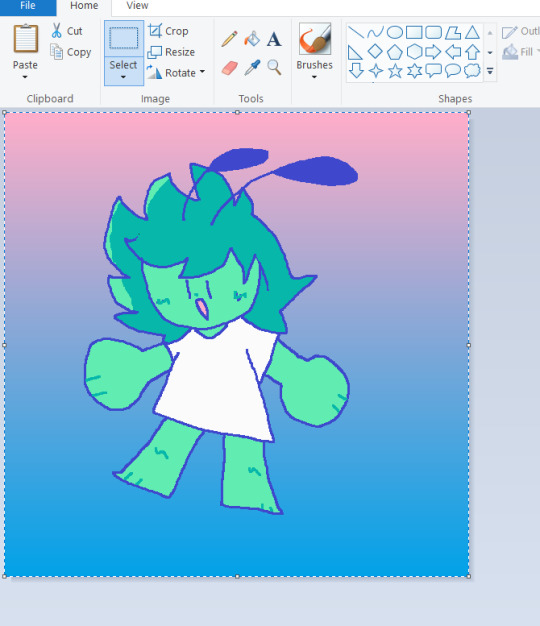
Move the drawing however you want if it's not perfectly centered, add whatever else you want, and bam you're done

paint has a lot of cool tricks like this and when used it becomes as easy as any other program (save for, well, multiple layers)
#ask#tutorial#art tutorial#ms paint#should note that i did not find this myself i just watched copious amounts of ms paint trick videos at the age of 11#but i enjoy sharing my knowledge regardless :)
2K notes
·
View notes
Text
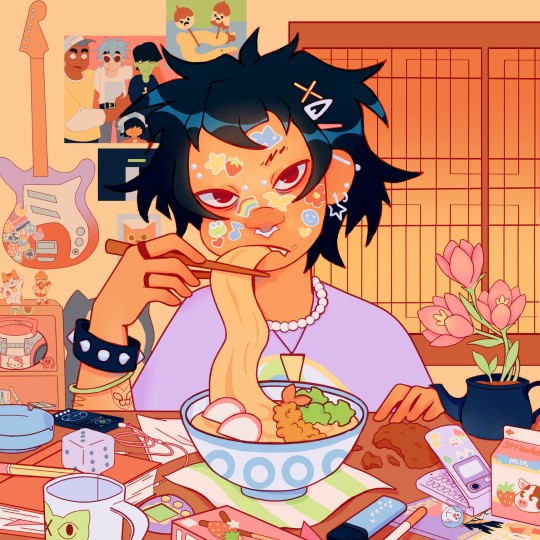
🍜🫤
#gorillaz#my art#artists on tumblr#noodle guitarist from gorillaz#fanart#aesthetic#do they look like noodles idk i cant draw them#this is what watching one 1 colouring tutorial video does to a mf#lile the original one sucked SOO BAD i didn't know where i was going with the colours but thank god youtube exists 🩷 and artists on youtube#not that this js perfect but the original one was atrocious lemme tell you ..... i understand why i stopped drawing for so long now#i hated my art lol#because i didn't study enoughhh but now that im learning its better 🩷#anyway idk#digital art#illustration#beginner artist#artwork#noodle gorillaz#i drew her so many times shes my blorbo#lgbt#she is bi ! bicon !#hidden snorlax big plushie hehe#and adventure time posterrr#and and sailor moon snoopy tamagotchi doraemon miffy things ... plus nana akira manga but kinda too hidden#OH AND those sanrio characters i forgot the name tho#and kirby#tiny murdoc 2d and russel 😺#y2k aesthetic
104 notes
·
View notes
Text
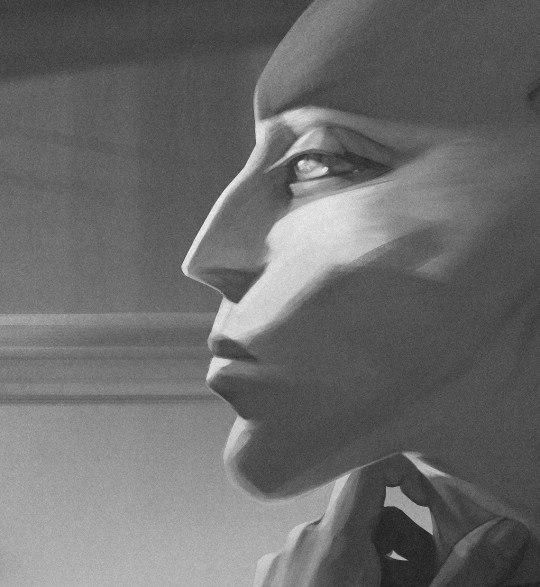
Here is a SUPER short version of the painting process of "Crosshair's Eyes." Enjoy!
#star wars#tbb fanart#star wars fanart#tbb#thebadbatch#the bad batch fanart#star wars tbb#art#illustration#the bad batch crosshair#art education#digital art#artwork#art process#art video#lightspringrain#art tutorial#tbb crosshair#tbb season 3#tbb season three
75 notes
·
View notes
Text
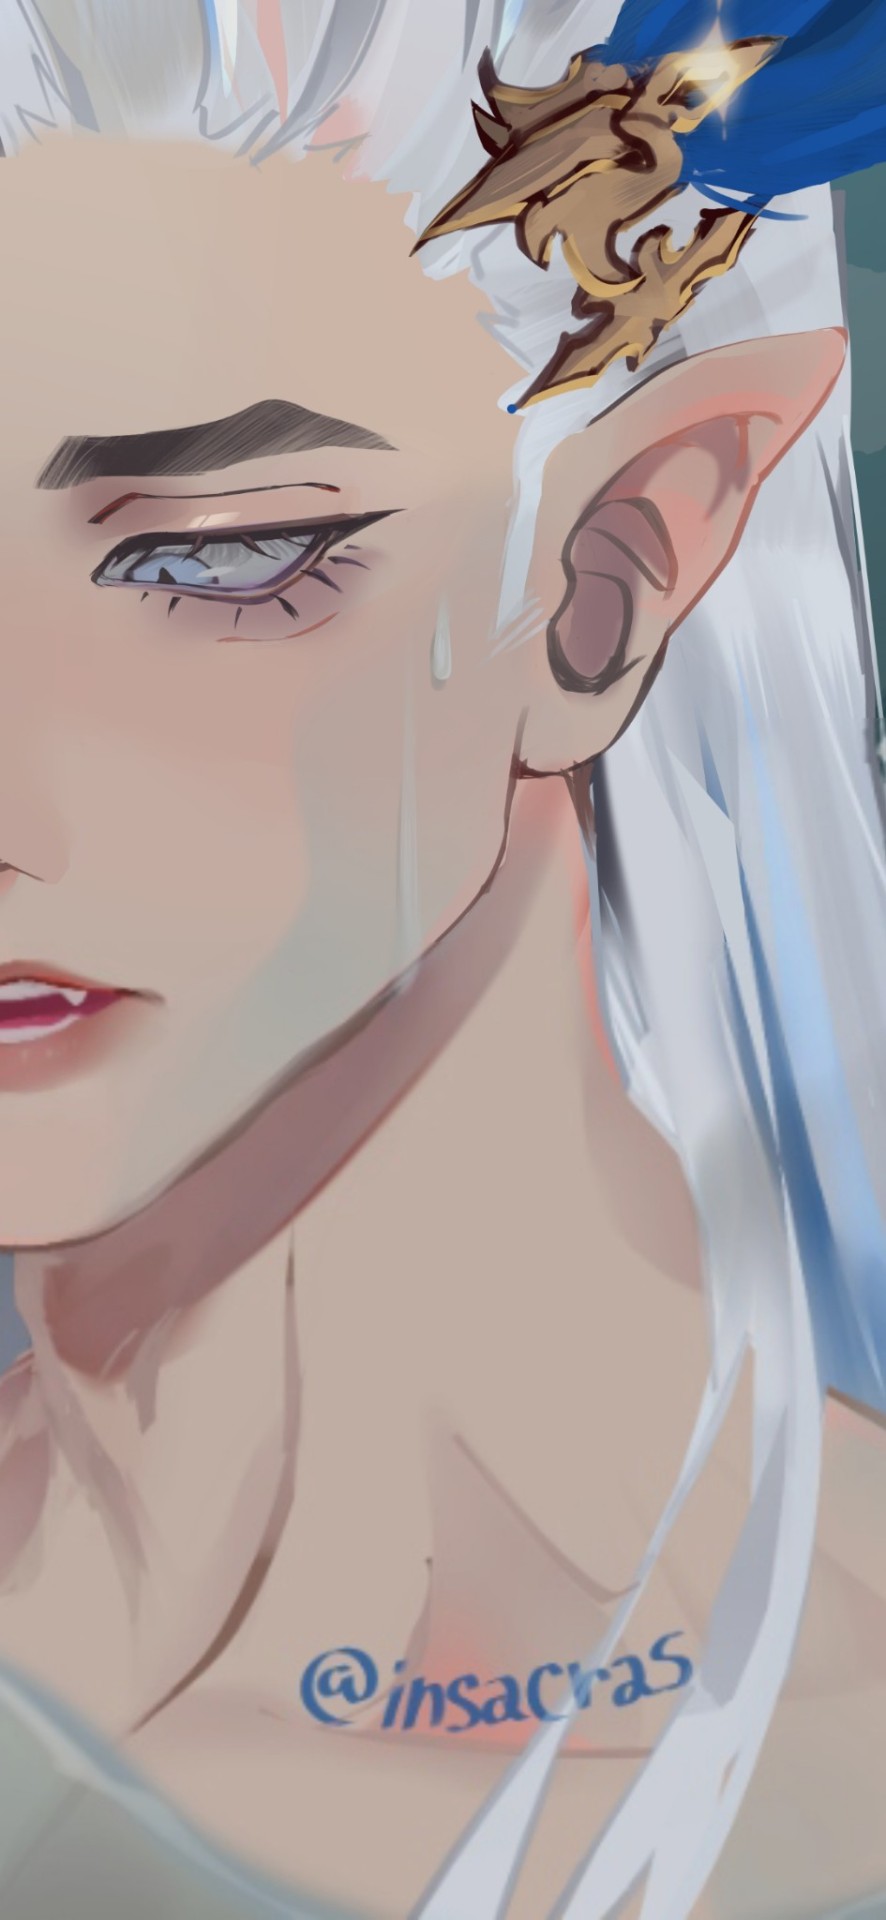
OKAY SO. ANON WHO SENT ME THAT ASK ASKING HOW I DRAW FACES I THINK TUMBLR ATE UR ASK 😭😭I TRIED TO PUT IT INTO MY DRAFTS AND IT GOT YEETED INTO THE VOID. SO IMMA ANSWER IT HERE. IF IT SHOWS BACK UP I WILL LINK U TO THIS POST AND RESPOND TO IT.
FIRST OF ALL thank u very very kindly for ur compliments 🥺🥺 i was very happy for your enthusiasm and it was a big mood boost.
SECOND OF ALL: I'M SO SORRY TO HEAR YOU'RE HAVING TROUBLE LEARNING HOW TO DRAW SIDE PROFILES 😭😭😭 I remember being at that point, trying to draw them was a NIGHTMARE.
I'm pretty awful at teaching things??? BUt Imma give this a good ole college try:

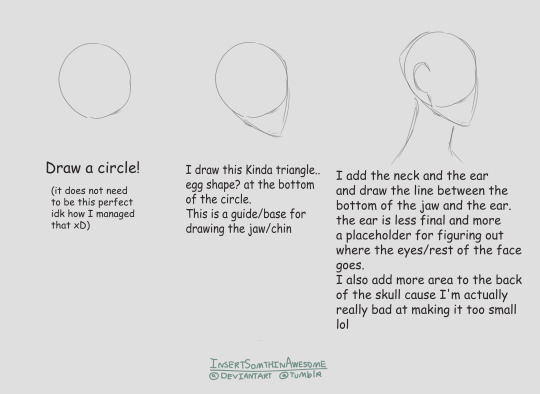

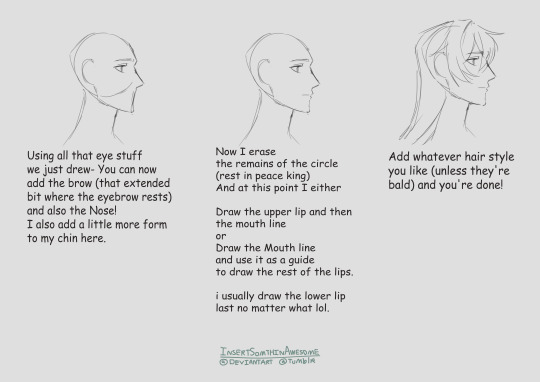
I recorded myself drawing the First image in case that's more helpful than my attempts to explain xD
As for what you were saying about The nose and Mouth being on the same line: I'm imagining what you're talking about is the line starts at the tip of their nose and goes down to their chin? Kinda like some anime styles?
My recommendation would be to do what I show above: Draw an egg-ish shape. And the make sure to draw the nose as a Spike/Orb/Whatever shape is your dream desire, popping out of it. Kinda think of it like a mountain in the middle of a flat Plane. Sticking out like a sore thumb.
Besides that!!! References are your best friend!! Reference other artists!!! Reference IRL people!! And keep on keeping at it!! Like I said, I used to be TERRIBLE at drawing them, and here I am now :D I'm not always happy with them, and sometimes I still hate how I draw faces (working on that tho) but I'm miles better than when I was a kid. And if I can do it you can do it too :) Best of luck Anon! U got this!!
#isa screams#ask#anonymous#(since this was SUPPOSED TO BE AN ASK DAGNABBIT TUMBLR SLDJFADLKSFJSLDG)#Luocha hsr#tagging he for my own organization mostly. I wave at the people in the tags HAHAHA#Art Tutorial#Tutorial#Video#There is no audio. I thought about just keeping in my sped up audio xD BUt decided against it#drawing tutorial#isa's fanart#December2023#insertsomthinawesome#feels weird to tag this with those tags WHEEZE#i'm still learning how to teach people the things that Are in my head#how do you explain stuff you do on autopilot....#and not cause i'm like. some genius. I've just been doing it forever lol#Its hard man#ALSO HARD TO SPEAK IN LAYMAN TERMS... INSTEAD OF. SUPER ARTIST NERD LANGUAGE WHEEZE
147 notes
·
View notes
Text
video transcription:
start by drawing a guideline.
on the guide, draw a series of squished circles slightly overlapping.
using an eraser that is about 2-3 pixels smaller than your drawing brush, erase half the inner circle alternating sides as you go down the line.
then erase the rest of the inner circles the same way, but in smaller sections.
adjust the size of the eraser depending on how thick you want the inner lines.
--
i hope this helps and i hope it's easy to understand! using chain brushes can be helpful, but they sometimes look too stiff, so i find doing it this way can look more fluid
Edit: I'm just using a basic round brush with min size up to 100% brush size varies depending on canvas size
#art tutorial#chain tutorial#drawing chains#chains#video art tutorial#art help#why do i always feel embarrassed showing how i work lmao#text is all you get bc i hate my voice#also i don't want people to laugh at my accent 😅
82 notes
·
View notes
Text
Coloring Tutorial is OUT!!
youtube
have you ever wondered how I get that nice crispy texture on my art or how I do highlights??? well BOY do i have the video for you ^^
thank you for being so patient with me on this one!! it's been a really long while in the making, but im really excited that I now get to share my process with people :D pls lmk if this was helpful!!
224 notes
·
View notes
Last Seen Blogs

corfu06
Corfu ‘06

psychgazer
PSYCHGAZER
sunnialicia
Lady’s Labrynth

sweetlaces
deaddolls
hellspirits
HELLSPIRITS