#i crumbled some feta + added more herbs
Text
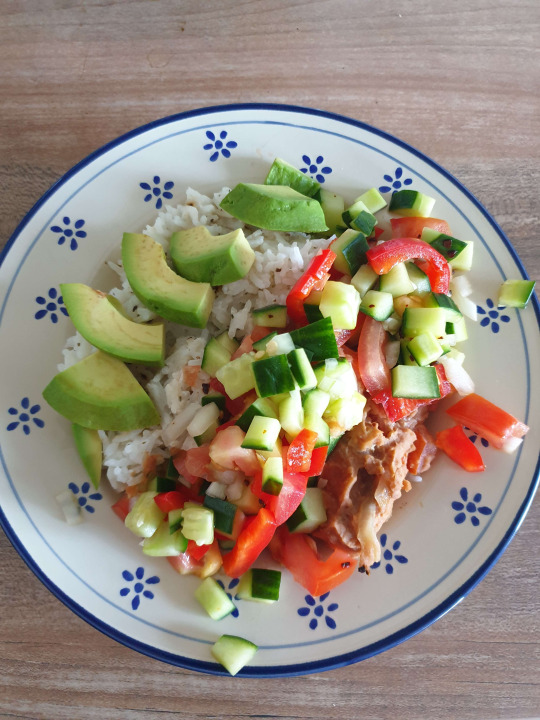
Lemon Rice, Baked Chipotle Beans with Tofu, with Salsa (Fisch Style)
Ingredients for 4 servings, adjust as necessary
Important! If you don't have canned chipotle beans, use:
- 200g of canned and drained black or kidney beans
- 1 generous tablespoon of tomato paste
- either some chipotle paste or, if you have access to those, 1-2 whole chipotles
- alternatively, you can use some jalapenos and some smoke salt or a few drops of liquid smoke
Mix the beans, the tomato paste, the chipotle paste or the alternative options together and either use a blender or a blending stick to blend them into a smooth homogenous paste. If it sticks to your blender too much, add a bit of water or ketchup, set aside until needed.
If you have canned chipotle beans or have prepared them as described above, continue with the other ingredients:
- 2 cups of rice
- 2 cups of water
- 1 lemon
- 1 cup / 200g of plain yoghurt of choice
- 4 large tomatoes
- 2 large red bell peppers or 3-4 pointy peppers
- 1 avocado
- 1 cucumber
- 2 small or 1 large brown or red onions
- garlic (no measurements given because in this house we answer the question of 'how much garlic?' with YES)
- half a block of smoked tofu
- some oil for frying (I prefer rapeseed), more oil for the salad
- some red wine vinegar or apple vinegar
- salt, pepper, sugar, a bay leaf
- dried oregano, rosemary and tarragon (or fresh if you have), ancho chilli
- 1 can / 200 g of chipotle beans
1. Pour rice into a pot, bring the water to a boil either with the rice on the stovetop or with a kettle and pour it on rice. Add a pinch of salt, pepper and the bay leaf. Put lid on the pot and turn off the heat, let rice soak up hot water.
2. Meanwhile, peel the onions and garlic and cut them into fine slices. Cut the tofu block into thin sticks, ca 5 mm wide. Bring oil to medium high heat in a large pan and first add tofu. Push it around a little to keep it from sticking. Once tofu begins to brown, add half the onion and garlic and let it slightly brown as well. Add the chipotle beans and heat up the mix while stirring a few times to keep it from sticking to the bottom of the pan.
3. Cut the cucumber, tomatoes and red bell pepper into small cubes (5mm-1cm in size), transfer to a large bowl. Add the remaining half of the onion and garlic. Cut the lemon in halves and squeeze the juice of one half over the veggies in the bowl. Add the vinegar and a little bit of oil, the herbs, salt, pepper and sugar to taste. Stir until mixed well.
4. Squeeze the remaining half of the lemon's juice over the rice, remove the bay leaf and add the yoghurt of choice. Stir until well combined.
5. Cut up the avocado, remove the stone and cut into slices according to taste.
6. Prepare by dividing up the rice and chipotle-tofu-beans to 4 large bowls or medium size plates with rice on one side and beans on the other. Add salad/salsa (I really need to learn the difference) and decorate with avocado slices. Enjoy!
Addition: you can mix up the ingredients as you like. I think black olives would be a great addition, as would sunflower seeds or some nuts be. You could also add crumbled or diced feta or fry some sliced or diced halloumi and add it. Or maybe make an omelette and cut it into strips. Most important is, have fun and prepare something to eat that you enjoy.
Addition's addition: If you realise you made more than you can eat in one meal, even if you changed the measurements, no worries. The salad and rice can be combined to a rice-salad and stored in the fridge in an airtight container for up to 4 days. I would keep the bean paste separate though, because it gets too soggy if stored in the same container as the salad. However, if you give it a slightly more viscous texture (by adding water or ketchup), I imagine it would be a nice spread on some breakfast bread.
6 notes
·
View notes
Text

How to Make the Jennifer Aniston Salad
I used @ihartnutrition‘s recipe from Instagram, which seems to accurately recreate Aniston’s original post with the addition of handy measurements. First, cook up some bulgur following the package directions. (You might know bulgur wheat best as an ingredient in tabbouleh.) I cooked one cup dry to make this salad, which worked out perfectly, and let it cool a bit while I prepped the other ingredients.
Next, chop up a few Persian cucumbers (or one big guy will work, too) along with fresh parsley and mint. Finely chop red onion, roughly chop some pistachios, and crumble in feta cheese. Add your rinsed and drained chickpeas —the recipe calls for 2 cups, but I used one can which is slightly less — and top with a simple dressing of fresh lemon, olive oil, salt, and pepper.
Toss everything together and there you have it: Jennifer Aniston’s favorite salad (in 2015, anyway).
My Honest Review
I was excited to try this salad because it seemed nutritious, filling, and good for meal prep. Turns out, it’s all of those things! The whole-grain bulgur adds fiber and fills you up while having a pleasing texture, and the chickpeas add protein and more fiber. The cucumber and red onion add much-needed crunch along with the pistachios.
I especially enjoyed the herbs, which kept the salad feeling fresh. I’ll also eat anything with feta cheese on it — this salad very much included. It’s a great dish for meal prep, especially because the recipe makes four servings. I ate it four times for lunch and, you know what? I’d do it again.
3 Tips for Making the Jennifer Aniston Salad
Soak the onions. Raw red onion can pack a punch, and if you have to see people after lunch, you might be worried about your breath. To take a bit of the edge off, soak the chopped onion in cool water for 10 minutes, then drain well before adding to the salad.
Use the recipe as a template. While this salad recipe works well as written, it’s easy to tweak. I ended up adding more lemon and a bit more feta, but you might want more beans or cucumber. Adjust acccording to your tastes.
Add other ingredients. Next time I make this salad, I’m going to add halved cherry tomatoes. It would also be good with a bit of dried fruit for sweetness, like cranberries or currants. You can also try swapping the mint for dill or cilantro. You could easily sub goat cheese for the feta, replace the bulgur with quinoa, and more.
4 notes
·
View notes
Text
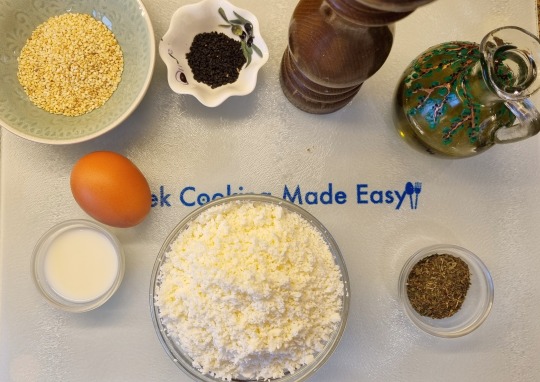
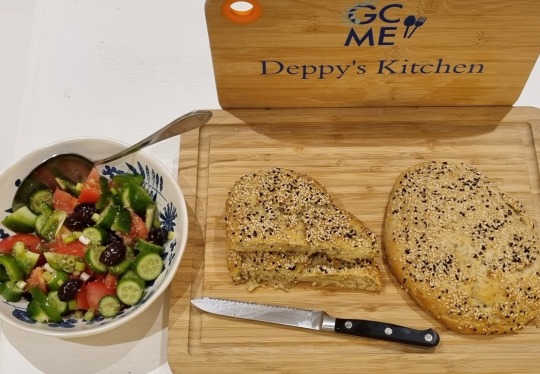
Greek Feta Cheese Bread aka Tiropsomo
🥖

Greek Feta Cheese Bread aka Tiropsomo
BY: Greek Cooking Made Easy
SUBSCRIBE TO MY YOUTUBE CHANNEL: https://www.youtube.com/greekcookingmadeeasy
Check my YouTube Video: HERE
Κοιτάξτε επίσης την συνταγή μου σε YouTube βίντεο, το λίνκ είναι: ΕΔΩ
SERVES 🍴⃒ PREP. TIME 🕔⃒
2 loaves enough 20 min + 2 hrs wait
for 8 p.
COOK. TIME ♨ DIFFIC. LEVEL 👩🍳⃒
40-45 min Easy
youtube
Tbh I do love tasting all kinds of bread. And this one is really special! A very easy to prepare homemade bread that is filled with feta cheese and herbs.
Homely, tangy and rustic it's the kind of bread that tastes similar to Tyropita (cheese pie) but with the earthy bread taste. All over Greece, you will find varieties of this bread with the "Thrace Tiropsomo" being the most popular.
Simply put, just think about this: is there a better combination than bread + cheese? I don't think so!
Would you like to try making this beautiful Bread? Check my recipe!
Suitable for lacto-ovo vegetarians.
P.S. Tiropsomo is a compound Greek word meaning: Cheese within bread.
INGREDIENTS:
Ingredients for the dough:
· 300 gr. / 10.5 oz / 2.4 cups Bread Flour (strong)
· 3/4 cup / 187.5 ml Water, lukewarm
· 20 gr. / 0.7 oz Fresh Yeast
· 1/2 tsp. Sugar
· 1/2 tsp. Salt
· A bit Olive Oil

Ingredients for stuffing and garnishing:
· 200 gr. / 7 oz Feta cheese, finely crumbled in a food processor
· 1/2 tbsp. dried Mint (or fresh, finely chopped)
· 2 tbsp. / 30 ml Extra Virgin Olive Oil
· Some ground black Pepper
· 1 small Egg mixed with
· 1 tbsp. / 15 ml fresh Milk
· About 2.1 tbsp. / 20 gr. / 0.7 oz Sesame Seeds
· 1/3 tbsp. / 3 gr. / 0.1 oz Black Sesame Seeds
METHOD:
A. Prepare the dough:
1. Pour 1/3 of the lukewarm water in a bowl adding the fresh yeast and sugar.
2. Whisk to mix them together, making sure the yeast is completely dissolved.
3. Leave the mix for 20' to rest and for the yeast to activate.
4. Next pour the rest of water in the bowl of an electric mixer with the hook adjustment.
5. Add the salt and then gradually start adding the flour, spoon by spoon, beating slowly to blend it in.
6. Pour the dissolved yeast mix in the dough and continue beating.
7. After about 5', you will notice that the dough becomes one mass (lump) around the hook and has detached from the bowl. Stop the mixer!
8. The dough should be elastic, soft but not sticky! Place the dough in a plate or bowl.
9. Brush the mixer's bowl with a bit of olive oil.
10.Return the dough in the oiled bowl.
11.Place a clean kitchen towel on top of the bowl with the dough.
12.It now needs time to rest, but also for the yeast to activate and to help it rise.
13.You could either place the covered dough near a warm source (like by a window near the sun or a radiator) or put it in the oven setting: “Dough Proving” like I did.
14.The dough needs 1h-1h 30' to rise.
B. Make the stuffing:
15.In the meantime, place finely crumbled feta cheese in a large bowl.
16.Season with some black pepper.
17.Pour on top the EVOO and dried mint, pressed between your palms to release its aromas.
18.Using a large spoon, mix all stuffing ingredients very well.
19.Tip: The stuffing can also be done earlier in the day and be stored, covered in the fridge.
20.Blend together sesame and black sesame seeds.
21.Break the egg in a small bowl, whisk it and add the milk, blending it in. Reserve.
22.After a bit more than 1h, remove the kitchen towel from the bowl. You will see that the dough has quadrupled in size.
23.Return under the mixer and start beating gently.
24.Add the feta mix in the dough and beat just enough to incorporate them.
25.Stop the mixer.
C. Make the Tiropsomo loaves:
26.Line a large oven tray with parchment paper and brush a bit olive oil on it.
27.Take out the dough and divide it in two halves, shaping them like loaves.
28.Place them on the oven tray with some space between them.
29.Brush the egg-milk mixture on both loaves and then sprinkle the sesame mix on top.
30.When both loaves are shaped and garnished, set them aside for 40', so they can rest and rise once more. I returned them in the oven for some more "Dough Proving".
31.Ready for some delicious baking.
D. Baking instructions:
32.Bake Tiropsomo in a preheated oven, FAN @180 ℃ / 350 ℉ for 40'-45' or until both loaves are golden and fluffy (depends on the oven).
33.Note: In my case, I had to add 10' to the total baking time for the oven to be heated, since breads were already in for proving!
34.After about 45' the bread loaves (tiropsomo) should be ready. Remove from the oven.
35.Wow the smells in my kitchen.
E. Serving suggestion:
36.Place the tray with Tiropsomo loaves on the kitchen bench and let them cool down. Cut and serve!
Scrumptious, fluffy and so appetizing! Its taste is out of this world!

It can be eaten at home, school, work, anytime of day as a snack or to accompany any meal you prepare-either with vegetables, meat or chicken.
For example, I served it for lunch just with a Greek Village-Horiatiki Salad.
Here it is served to dip in homemade Hummus.

Crazy delicious or as we say in Greek "Lahtaristo"!

You won't believe how good this is! I hope you'll enjoy it like I did! Ooops, the camera caught me stealing a piece!

F. Storage Info:
After it cools down, Tiropsomo can be stored in plastic wrap, in the fridge for 1 week, or in the freezer for 1 month. Reheat it before serving it again.

Check my YouTube Video: HERE

Εύκολο Τυρόψωμο
BY: Greek Cooking Made Easy
SUBSCRIBE TO MY YOUTUBE CHANNEL: https://www.youtube.com/greekcookingmadeeasy
ΜΕΡΙΔΕΣ🍴⃒ ΠΡΟΕΤΟΙΜΑΣΙΑ 🕔⃒
2 καρβέλια 20 min. + 2 ώρες αναμονή
για 8 άτομα
ΜΑΓΕΙΡΕΜΑ ♨ ΒΑΘΜ. ΔΥΣΚΟΛΙΑΣ 👩🍳⃒
40-45 min. Εύκολο
Για να πω την αλήθεια μου αρέσει να δοκιμάζω όλα τα είδη ψωμιού. Και αυτό το ψωμί είναι πραγματικά ξεχωριστό! Ένα πανεύκολο σπιτικό ψωμί γεμάτο με φέτα και μυρωδικά.
Σπιτικό, πικάντικο και χωριάτικο έχει γεύση παρόμοια με την Τυρόπιτα αλλά με τη γήινη γεύση του ψωμιού. Σε όλη την Ελλάδα θα βρείτε ποικιλίες αυτού του ψωμιού με πιο δημοφιλές το «Θρακιώτικο Τυρόψωμο».
Με απλά λόγια, σκεφτείτε μόνο αυτό: υπάρχει καλύτερος συνδυασμός από ψωμί + τυρί; Δεν νομίζω!
Θα θέλατε να δοκιμάσετε να φτιάξετε αυτό το πανέμορφο ψωμί; Δείτε τη συνταγή μου!
Κατάλληλο για χορτοφάγους.
ΥΛΙΚΑ:
Υλικά για τη ζύμη:
• 300 γρ. / 10,5 oz / 2,4 φλ. Αλεύρι για ψωμί (ή σκληρό)
• 3/4 φλ. / 187,5 ml Νερό, χλιαρό
• 20 γρ. / 0,7 oz φρέσκια Μαγιά
• 1/2 κ.γ. Ζάχαρη
• 1/2 κ.γ. Αλάτι
• Λίγο Ελαιόλαδο
Υλικά για τη γέμιση και το γαρνίρισμα:
• 200 γρ. / 7 oz τυρί Φέτα, θρυμματισμένη ψιλά στο μούλτι
• 1/2 κ.σ. Δυόσμος ξερός (ή φρέσκος, ψιλοκομμένος)
• 2 κ.σ. / 30 ml Εξαιρετικό Παρθένο Ελαιόλαδο
• Λίγο φρεσκοαλεσμένο μαύρο Πιπέρι
• 1 μικρό Αυγό αναμεμειγμένο με
• 1 κ.σ. / 15 ml φρέσκο Γάλα
• Περίπου 2,1 κ.σ. / 20 γρ. / 0,7 oz Σουσάμι
• 1/3 κ.σ. / 3 γρ. / 0,1 oz Μαυροκούκι
ΜΕΘΟΔΟΣ:
Α. Ετοιμάστε τη ζύμη:
1. Ρίξτε το 1/3 από το χλιαρό νερό σε ένα μπολ προσθέτοντας τη φρέσκια μαγιά και τη ζάχαρη.
2. Χτυπήστε με το σύρμα να ανακατευτούν μεταξύ τους, μέχρι να διαλυθεί τελείως η μαγιά.
3. Αφήστε το μείγμα για 20' να ξεκουραστεί και να ενεργοποιηθεί η μαγιά.
4. Στη συνέχεια, ρίξτε το υπόλοιπο νερό στο μπολ ενός ηλεκτρικού μίξερ με το εξάρτημα γάντζο.
5. Προσθέστε το αλάτι και μετά αρχίστε σταδιακά να προσθέτετε το αλεύρι, κουταλιά-κουταλιά, χτυπώντας αργά μέχρι να ομογενοποιηθεί.
6. Χύστε κατόπιν το μείγμα της διαλυμένης μαγιάς στη ζύμη και συνεχίστε το χτύπημα.
7. Μετά από 5' περίπου, θα παρατηρήσετε ότι η ζύμη γίνεται μια μάζα (σβόλος) γύρω από το γάντζο και έχει αποκολληθεί από το κάδο. Σταματήστε το μίξερ!
8. Η ζύμη πρέπει να είναι ελαστική, μαλακή αλλά να μην κολλάει! Τοποθετήστε τη ζύμη σε ένα πιάτο ή μπολ.
9. Αλείψτε με πινέλο το κάδο του μίξερ με λίγο ελαιόλαδο.
10. Επιστρέψτε τη ζύμη στο λαδωμένο κάδο.
11. Τοποθετήστε μια καθαρή πετσέτα κουζίνας πάνω από το κάδο με τη ζύμη.
12. Τώρα η ζύμη χρειάζεται χρόνο για να ξεκουραστεί, αλλά και να ενεργοποιηθεί η μαγιά και να τη βοηθήσει να φουσκώσει.
13. Θα μπορούσατε είτε να τοποθετήσετε τη σκεπασμένη ζύμη κοντά σε μια ζεστή πηγή (όπως δίπλα σε ένα παράθυρο κοντά στον ήλιο ή σε καλοριφέρ) είτε να τη βάλετε στη ρύθμιση του φούρνου: “Φούσκωμα Ζύμης” όπως έκανα εγώ.
14. Η ζύμη χρειάζεται 1h-1h 30' για να φουσκώσει.
Β. Φτιάξτε τη γέμιση:
15. Στο μεταξύ, σε ένα μεγάλο μπολ βάλτε τη ψιλοτριμμένη φέτα.
16. Καρυκέψτε με λίγο μαύρο πιπέρι.
17. Ρίξτε από πάνω το ελαιόλαδο και τον ξερό δυόσμο, πιεσμένο ανάμεσα στις παλάμες σας για να απελευθερώσει τα αρώματά του.
18. Με ένα μεγάλο κουτάλι ανακατέψτε πολύ καλά όλα τα υλικά της γέμισης.
19. Συμβουλή: Η γέμιση μπορεί να γίνει και νωρίτερα μέσα στη μέρα και να διατηρηθεί σκεπασμένη στο ψυγείο.
20. Ανακατέψτε μαζί το σουσάμι και το μαυροκούκι.
21. Σπάστε το αυγό σε ένα μικρό μπολ, χτυπήστε το με σύρμα και προσθέστε το γάλα ανακατεύοντάς το να ενσωματωθεί. Κρατήστε το στην άκρη.
22. Μετά από λίγο παραπάνω από 1 ώρα, αφαιρέστε την πετσέτα κουζίνας από το κάδο. Θα δείτε ότι η ζύμη έχει τετραπλασιαστεί σε μέγεθος.
23. Επιστρέψτε το κάδο κάτω από το μίξερ και αρχίστε να χτυπάτε απαλά.
24. Προσθέστε το μείγμα φέτας στη ζύμη και χτυπήστε τα μαζί μόνο όσο χρειάζεται για να ενσωματωθούν.
25. Σταματήστε το μίξερ.
Γ. Φτιάξτε τα καρβέλια Τυρόψωμου:
26. Στρώστε μια λαμαρίνα με λαδόκολλα και αλείψτε με λίγο ελαιόλαδο.
27. Βγάλτε τη ζύμη και χωρίστε τη στα δύο πλάθοντάς τα σαν καρβέλια.
28. Βάλτε τα στο ταψί με κάποια απόσταση μεταξύ τους.
29. Αλείψτε και τα δύο καρβέλια με το μείγμα αυγού-γάλακτος και μετά πασπαλίστε από πάνω το μείγμα σουσαμιού.
30. Μόλις πλάσετε και γαρνίρετε και τα δύο καρβέλια, αφήστε τα στην άκρη για 40', ώστε να ξεκουραστούν και να φουσκώσουν για άλλη μια φορά. Εγώ τα επέστρεψα στο φούρνο για λίγο ακόμα "Φούσκωμα ζύμης".
31. Έτοιμα για νόστιμο ψήσιμο.
Δ. Οδηγίες ψησίματος:
32. Ψήστε τα Τυρόψωμα σε προθερμασμένο φούρνο, στον αέρα @180 ℃ / 350 ℉ για 40'-45' ή μέχρι και τα δύο καρβέλια να ροδίσουν και να φουσκώσουν (εξαρτάται από τον φούρνο).
33. Σημείωση: Στην περίπτωσή μου έπρεπε να προσθέσω 10' στο συνολικό χρόνο ψησίματος για να ζεσταθεί καλά ο φούρνος, μιας και τα ψωμιά ήταν ήδη μέσα στο πρόγραμμα "Φούσκωμα ζύμης"!
34. Μετά από 45' περίπου τα τυρόψωμα πρέπει να είναι έτοιμα. Αφαιρέστε τα από το φούρνο.
35. Ουάου οι μυρωδιές στην κουζίνα μου.
Ε. Πρόταση σερβιρίσματος:
36. Τοποθετήστε το ταψί με τα καρβέλια στον πάγκο της κουζίνας και αφήστε τα να κρυώσουν καλά. Κόψτε και σερβίρετε!
Πεντανόστιμα, αφράτα και τόσο ορεκτικά! Η γεύση τους είναι πραγματικά απίστευτη!
Το Τυρόψωμο μπορεί να καταναλωθεί στο σπίτι, στο σχολείο, στη δουλειά, οποιαδήποτε ώρα της ημέρας σα σνακ ή για να συνοδεύσετε οποιοδήποτε γεύμα ετοιμάζετε -είτε με λαχανικά, κρέας ή κοτόπουλο.
Για παράδειγμα, το σέρβιρα για μεσημεριανό μόνο με μια χωριάτικη σαλάτα.
Εδώ σερβίρεται για βουτηχτές σε σπιτικό χούμους.
Τόσο Λαχταριστό!
Δεν θα πιστεύετε πόσο νόστιμο είναι! Ελπίζω να το απολαύσετε όπως κι εγώ! Ουπς, με έπιασε η κάμερα να κλέβω λίγο!
Ζ. Πληροφορίες φύλαξης:
Αφού κρυώσει, το Τυρόψωμο μπορεί να φυλαχτεί σε πλαστική μεμβράνη στο ψυγείο για 1 βδομάδα ή στη κατάψυξη για μήνα. Ξαναζεστάνετε το πριν το φάτε.
Κοιτάξτε επίσης την συνταγή μου σε YouTube βίντεο, το λίνκ είναι: ΕΔΩ
#τυρόψωμο#τυροψωμο#breakfast#meze#lunch#sandwich#snacks#fingerfood#pastry#cheese#fruit#lowcost#vegetarian#children#tiropsomo#tiropsomo bread#greek feta cheese bread#greek feta cheese bread aka tiropsomo#school#back to school
1 note
·
View note
Text
Ah, a delightful American veggie salad cuisine recipe using tomato, cucumber, crumbled feta cheese, and Olive Garden creamy Italian dressing. I must say, this combination will create a refreshing and flavorsome dish. Here are the detailed instructions for each ingredient:
1. Tomato:
- Begin by washing the tomato thoroughly under running water.
- Slice the tomato into thin, even rounds.
- Sprinkle a pinch of salt and pepper on the tomato slices for added flavor.
2. Cucumber:
- Wash the cucumber to ensure it is free from any dirt or impurities.
- Slice the cucumber into thin, uniform rounds.
- If preferred, you can peel the cucumber beforehand, or leave the skin on for added texture.
3. Crumbled Feta Cheese:
- Take the desired amount of crumbled feta cheese and gently sprinkle it over the tomato and cucumber slices.
- The tangy and salty flavor of feta cheese will complement the freshness of the vegetables.
4. Olive Garden Creamy Italian Dressing:
- Drizzle the Olive Garden creamy Italian dressing over the salad.
- The dressing will enhance the flavors of the vegetables while adding a creamy and tangy element to the dish.
- Feel free to adjust the amount of dressing to suit your personal preference.
Additional Steps and Tips:
- You can add some fresh herbs like basil or parsley to lend a hint of extra freshness to the salad.
- For added crunch, you can toss in some toasted pine nuts or sunflower seeds.
- If you prefer a more substantial salad, you can include other ingredients like avocado, red onion, or olives.
- Consider using a mix of different colored tomatoes for a visually appealing presentation.
- Serve the salad chilled to maximize its refreshing nature.
Remember, cooking is an art, and feel free to experiment with the ingredients and quantities to suit your taste. Enjoy your American veggie salad cuisine creation!
0 notes
Text
Greek Chicken Salad Recipe | Healthy and Hearty

Greek Chicken Salad is a delicious and nutritious dish that combines the flavors of the Mediterranean with the goodness of lean protein. This salad is not only satisfying and packed with flavor, but it also offers numerous health benefits. Whether you're looking to lose weight, maintain a healthy lifestyle, or simply enjoy a delicious meal, this Greek Chicken Salad is an excellent choice.
Recipe Card: Greek Chicken Salad
Health Benefits of Greek Chicken Salad
Greek Chicken Salad is a powerhouse of nutrients. It provides a balanced combination of lean protein, healthy fats, and fiber-rich vegetables. The chicken offers high-quality protein, which helps in muscle repair and growth. Vegetables, such as tomatoes, cucumbers, and bell peppers, are rich in vitamins, minerals, and antioxidants, promoting overall health and well-being. The olives and feta cheese add a dose of healthy fats and calcium, while the dressing made with olive oil provides heart-healthy monounsaturated fats.
Variations
There are several ways to customize your Greek Chicken Salad according to your preferences. Here are a few variations you can try:
- Vegetarian Option
Skip the chicken and add chickpeas or grilled tofu for a vegetarian version.
- Quinoa Addition
Cook some quinoa and mix it into the salad for added fiber and protein.
- Greek Yogurt Dressing
Instead of using a traditional vinaigrette, make a creamy dressing using Greek yogurt, lemon juice, and herbs.
- Avocado Twist
Slice some ripe avocado and add it to the salad for a creamy and nutritious addition.
- Grilled Vegetable Option
Grill some zucchini, eggplant, or asparagus and include them in the salad for a smoky flavor.
Frequently Asked Questions
Can I make the Greek Chicken Salad in advance?Yes, you can prepare the salad ingredients and dressing separately in advance, then combine them just before serving to keep the salad fresh and crisp.Can I use other types of meat instead of chicken?Absolutely! You can substitute chicken with grilled shrimp, beef, or even lamb for a different flavor profile.Can I make this salad vegan?Yes, you can omit the chicken, feta cheese, and olives, and add more vegetables, like roasted eggplant or artichoke hearts, for a vegan-friendly version.Can I use store-bought dressing?While homemade dressing is recommended for the best flavor, you can use a store-bought Greek dressing as a time-saving option.Can I add more vegetables to the salad?Of course! Feel free to add your favorite vegetables, such as red onion, artichoke hearts, or even fresh herbs like parsley or dill.How long will the leftovers last in the refrigerator?The leftover Greek Chicken Salad can be stored in an airtight container in the refrigerator for up to 3 days.Can I serve this salad as a side dish?Yes, this salad can be served as a main course or as a side dish alongside grilled meats or fish.Is Greek Chicken Salad suitable for a low-carb diet?Yes, this salad is low in carbohydrates and can be enjoyed as part of a low-carb or keto diet.Can I use a different type of cheese instead of feta?If you're not a fan of feta cheese, you can substitute it with goat cheese or even crumbled queso fresco.Can I add nuts or seeds to the salad for extra crunch?Absolutely! Adding toasted pine nuts, sliced almonds, or sunflower seeds can add a delightful crunch and extra nutrition to the salad.
Read the full article
#ChickenGreekSalad#ChickenSaladwithMediterraneanFlavors#diet#diet-friendly#Fitness#fitnessmeal#GreekChickenandVegetableSalad#GreekChickenSalad#GreekChickenSaladwithFeta#GreekSaladwithChicken#GreekSaladwithGrilledChicken#Greek-inspiredChickenSalad#Greek-styleChickenSalad#HealthyGreekSalad#healthyrecipe#Mediterranean#MediterraneanChickenSalad#nutrition#nutritioussalad#Salad
0 notes
Text
Power Bowl of Quinoa with Green Goddess Dressing

This Quinoa Power Bowl with Green Goddess Dressing is loaded with vegetarian protein and topped off with a healthy homemade dressing. This bowl is like a quinoa salad that is designed to keep you feeling full and energized throughout the day!
This recipe is versatile and can be adjusted to add any other ingredients you love or have on hand!
Ingredients you’ll need for this recipe
- Quinoa: This is the bases of the bowl. Quinoa is filled with protein, carbs and fibre to keep you feeling full!
- Avocado: Seriously, what’s a bowl without avocado?
- Kale: For a serving of green veggies. You can use any greens you like
- Corn: For some added colour, sweetness and carbs.
- Chickpeas: A great source of plant-based protein and fibre.
- Red peppers: For some crunch and flavour.
- Green onion: For flavour.
- Feta cheese: Another protein source in this salad. Omit for dairy-free.
- Pumpkin seeds: Can you any nuts or seeds
- Sesame seeds: Can use any nuts or seeds
- Fresh herbs: Basil and cilantro are used in this bowl, but any herbs you love will do!
How to make this recipe
Cook the quinoa according to package directions, then prep all the vegetables and ingredients. (cut, crumble, slice…etc.)
Mix all the ingredients together in a large bowl. Add more or less of any ingredients you like!
Top it off with homemade green goddess dressing and mix it all together.
Tips for making this recipe perfectly
When cooking the quinoa, I recommend using 1 cup of quinoa to 1 3/4 cups water so the quinoa doesn’t become mushy.
Use toasted seeds in this recipe, they will give much more flavour than raw seeds.
If you make this recipe for food prep, leave the dressing separate so the salad doesn’t become soggy. Dress only right before serving.
Add in any other vegetables, grains or protein sources you love if desired.
Description
Description This Quinoa Power bowl is perfect for a healthy vegetarian lunch!
Ingredients
2 cups quinoa, cooked (about 1 cup uncooked)
1 avocado, cut into cubes
2 cups kale, chopped
1 red bell pepper, chopped
1 cup chickpeas
1/2 cup corn
2 green onions, chopped
1/3 cup cubed feta cheese
2 tbsp toasted pumpkin seeds
2 tbsp toasted sesame seeds
handful of fresh basil & cilantro. (or any herbs you love.)
2–3 tbsp homemade green goddess dressing
salt and pepper to taste
Instructions
Mix all the ingredients together in a large bowl.
Make the green goddess dressing and pour 2-3 tbsp over the bowl, mixing everything togetehr until combined. Season with salt and pepper to taste.
Notes
This recipe makes two bowls.
When cooking the quinoa, I recommend using 1 cup of quinoa to 1 3/4 cups water so the quinoa doesn’t become mushy.
Use toasted seeds in this recipe, they will give much more flavour than raw seeds.
If you make this recipe for food prep, leave the dressing separate so the salad doesn’t become soggy. Dress only right before serving.
Add in any other vegetables, grains or protein sources you love if desired.
Nutrition
serving size: 1/4 recipecalories: 350fat: 12gcarbohydrates: 25gfiber: 10gprotein: 15g
Read the full article
0 notes
Text
Grilled vegetable pasta
This Roasted Vegetable Pasta is flexible, so use whatever veggies you have! Garnished with fresh herbs, it's simple and delicious.
Cooking this Pasta Dish with Roasted Vegetables brings a smile to my face! While veggies are roasting, the kitchen is filled with a scent that is both sweet, earthy, and savory. I remove them from the oven when they have achieved a golden brown and caramelized appearance, and then I combine them with hot sauce, hot pasta, fresh herbs, and cheese. I do not make use of any measuring spoons, and there is no requirement for you to do so too. Instead, I taste and make adjustments in order to obtain the flavor profile that best captures the late summer season. A helpful hint is that you'll know it's perfect when you find that you can't stop biting.
The preparation of this Roasted Vegetable Pasta takes around thirty minutes, and it is simple, adaptable, and enjoyable. It's a delightful dish that puts any produce from the farmer's market on display, thanks to its vibrant colors and powerful flavors.
Several alterations to the recipe for vegetable spaghetti
You are going to adore this dish exactly as it is written, but it is also a fantastic recipe for tinkering with. You are welcome to use whatever you already have on hand or whatever appears to be in the greatest condition at the farmers market. The following are some of my personal favorite variants:
Swap out the vegetables here. The roasted vegetable spaghetti is a dish that goes nicely with nearly every late summer vegetable. You could change some of the zucchini for eggplant or peppers; you could switch out the green beans for carrots; or you could add broccoli, cauliflower, fennel, or corn.
Grill vegetables. It's too hot to turn the oven on, right? This vegetable pasta has the same mouthwatering flavor as when you cook your vegetables on the barbecue.
Replace or omit the cheese in the recipe. If you don't have any feta on hand, you can substitute crumbled goat cheese or shredded Parmesan cheese in its place. If you want to make this dish suitable for vegans, omit the cheese and replace it with one tablespoon of capers.
Include some crisp elements. Add a handful of pine nuts that have been toasted, as well as chickpeas that have been roasted.
Mix the herbs into the sauce. The spaghetti should also have pesto added to it in addition to the fresh basil.
Please report back to me with any variations you come up with!
Vegetable Pasta Recipe Tips
Roast fattier vegetables longer. You can find the roasting timings for the veggies in the recipe below if you plan on making this Roasted Vegetable Pasta using the same vegetables that I did. However, the length of time each vegetable requires to cook will definitely change depending on which ones you choose. Cooking time for more robust vegetables such as root vegetables, onions, and cauliflower is approximately 30 minutes, while cooking time for more delicate vegetables such as zucchini and asparagus is approximately 20 minutes. Please refer to my cooking guides for cauliflower, broccoli, asparagus, squash, and Brussels sprouts for further information and guidance.
The vegetables should be dipped until they are warm. When vegetables are still hot from the oven, they are better able to absorb the tangy, spicy sauce. For the maximum flavor, toss the vegetables with oil and vinegar before allowing them to cool completely.
Taste and adjust. When it comes to creating this roasted veggie pasta, one of the aspects that I like best is that you don't have to measure anything until you're ready to taste it and make any necessary adjustments to the final dish. This results in less dirty dishes. Too little money? You can season the dish with additional salt, red pepper flakes, herbs, or cheese. Inaccessible, or just the appropriate amount of light? Add extra lemon or vinegar. Is it too dry? Please add a bit more olive oil to your dish. As long as you season it properly, you will end up with something tasty.
More favorite pasta recipes
If you enjoy this pasta with roasted vegetables, you might like this other dish for healthy pasta:
Ingredients
4 carrots, each one sliced into quarters measuring 1 inch
2 Vidalia onions or 1 small yellow onion, each halved lengthwise and sliced into one-inch chunks
5 tiny zucchini, sliced in half
2 small zucchini, cut into 1-inch pieces
10 small tomatoes cut in half
1 tablespoon extremely virgin olive oil, more for drizzling
1 teaspoon of sherry vinegar (optional)
2 garlic cloves, chopped, and set aside.
½ teaspoon Herbes de Provence
Eight sprigs of fresh thyme are left, with more used for garnish.
1 package of brown rice penne pasta weighing 16 ounces
12 cup of feta cheese in crushed form
a half a cup of fresh basil, with extra for the garnish
Juice from one-half of a small lemon, with more to taste
A scant amount of dried red pepper flakes
kosher salt and black pepper that has been freshly ground
Instructions
Prepare two big baking sheets by lining them with parchment paper and preheating the oven to 400 degrees Fahrenheit. Put the carrot and onion on the first sheet, and the tomatoes, squash, and zucchini on the second sheet. Olive oil, along with a dash of salt and pepper, should be drizzled over both of the vegetable leaves. Put the baking sheet with the carrot and onion on it in the oven first and roast it for thirty to thirty-five minutes, or until the onions are soft and have a small burnt flavor and the carrots are soft and have a brown color. After placing the second layer inside, roast the vegetables for twenty minutes, or until the tomatoes have slightly burst and the squash and zucchini have a golden brown rim around their circumferences. Remove from oven and set aside.
Mix together one tablespoon of olive oil, sherry vinegar, garlic, herbs de Provence, thyme, one-fourth teaspoon of salt, and a few turns of a pepper mill in the base of a big bowl. Mix in the vegetables that have been roasted.
Cook the pasta until it reaches the "al dente" stage, following the instructions on the package. After draining the pasta, place it in a large bowl along with the roasted vegetables, and then mix to combine everything.
Mix everything together well before adding the feta, basil, lemon juice, and crushed red pepper. If desired, season with salt, pepper, and lemon juice. Be sure to do so carefully!
Finish with additional fresh herbs and a liberal amount of olive oil drizzled on top.
1 note
·
View note
Text


my first attempt at tortilla 😳 egg to potato ratio was a little off but its still gud
#i crumbled some feta + added more herbs#and i loaded the mixture w herbs before cooking too...oh well#food#omg i was so scared to flip it wtf
3 notes
·
View notes
Text
Coming off your fast safely
While I don't encourage undereating nor fasting, I do believe in harm reduction. After coming off a long fast (especially longer than 36 hours) your body is particularly sensitive to the food you eat which can result in gaining back that weight (only on the scale not in fat), which can be distressing or can cause other physical symptoms like breakouts. The general advice is to avoid carbs and heavy food on day 1 and 2 but as a fussy eater that is also vegetarian I struggled to find foods that fit this criteria.
So I have found a couple of foods that are low carb (fruit isn't low carb but is perfect after a fast, not all carbs should be avoided!) and really easy and yummy to make. Try not to overeat after a fast and instead choose slightly higher calorie foods than usual that will keep you from wanting to binge. I generally like to start on a very light meal high in protein and nutrients and then throughout the day introduce carbs back into my diet slowly. By day two I will start similarly, low crab and light but now introduce more carbs later in the day. By day three I have found I can go back to my usual diet.
I know that it can be scary incorporating more fat (and potentially calories) into your diet for a day or two but trust me, it helps you not gain back the weight and is good for your body! You will not gain anything on 1300 calories and it is good for your metabolism!! I also used it as an opportunity to satisfy my cravings for cheese and dark chocolate :)
Here is an example of my diet the last two days after coming off a 60 hour fast and didn't gain any weight back:
Day 1:
Breakfast:
Cucumber salad (340)
Green Tea with fresh ginger and basil (3)
Lunch:
Grated carrot and apple (130)
Sweetened Low Fat Yogurt (100)
Dinner:
Scrambled Eggs with onion (310)
Cheese (220)
Snacks:
Tea with milk (20)
2 Tablespoons of Peanut butter (135)
Total Calories: 1258
Day 2:
Breakfast:
Cucumber Salad (340)
Green tea with fresh ginger and basil (3)
Lunch:
Grated Carrot and Apple (115)
Low Fat Sweetened Yogurt (100)
Dinner:
40g Bran Flakes (100)
1/3 cup Sweetened Almond Milk (15)
Snacks:
40g Dark Chocolate (210)
Total Calories: 883
Day 3:
Eat as you normally would :)
Recipes:
Cucumber salad:
If this is too scary you can also halve it and spread it over two meals, but it will benefit your post fast weight loss far more than low calorie, refined carb options)
My new favourite recipe at the moment. Kind of high calorie but keeps you full is amazing after a fast as it is high fat and protein. Also really tasty!
1/2 a cucumber
1 Round of FULL FAT Feta (this is important after a fast)
1/8 cup raw sunflower seeds
1/8 cup raw pumpkin seeds
On a dry pan toss in your pumpkin and sunflower seeds and toast them on a medium heat for a few minutes, tossing them gently to evenly toast both sides until they begin to crackle and pop and look golden brown. These taste amazing and are honestly really good by themselves if you are low on protein (which prevents hair loss). Put them aside in a bowl to cool.
While they cool chop your cucumber into rounds then quarters and crumble your feta. Next mix all your ingredients and enjoy a really healthy delicious salad!
Grated Carrot and Apple:
This was a childhood favourite of mine and I have recently rediscovered it to be honestly a really yummy, crunchy and sweet salad that tastes like a dessert :)
Not to mention it is probably the simplest meal ever!
1 large Apple (Sweet apples work best here)
2 medium carrots
All you do it peel your carrots, grate both the apple and carrots and mix them together in a bowl and enjoy!
Amazing Scrambled eggs:
This is just how I make scrambled eggs and is perfect for people who like me, like to mask the flavour of egg a bit. This is quite high calorie but will satisfy you completely and is an excuse to finally treat yourself to some cheese.
This is high fat and protein and very low carb which is perfect for a post fast meal and will prevent you from gaining the weight back again. :)
2 tsp Butter + 1tsp more (Scary I know but fat is essential for you and will aid in your weightless in moderation. Can be replaced with flavourless coconut oil with some salt added))
2 Eggs
1/4 Milk
1/2 White onion
1 Clove Garlic
Fresh or dried herbs (I like basil, rosemary and orgegano)
125g Cheese (I had a lot of calories left over for the day and went a bit mad, feel free to use your own amount)
Chop your herbs if they are fresh and lightly fry them in a dray pan before putting them aside.
Next chop your onions and garlic finely and mix with herbs. Sautee these at medium heat till caramelised in 2tsp butter.
Beat two eggs and milk together and add pepper.
Mix your onion mixture into the egg and fry in remaining 1sp butter.
Enjoy and add cheese if you want because it is yummy and you deserve it :)
#anatips#ana recipes#fasting#fast#harm reduction#anamia#notprojustusehashtags#notproforanyonejustforme#bulimia#weightloss#anaorexia#ana#mia#ed#ed thoughts#disordered eating tw#disordered eating#eating disoder thoughts#eating disoder things#restrictive
635 notes
·
View notes
Text
Go Big With Your Burgers

Photo courtesy of America’s Test Kitchen/ Keller + Keller
Memorial Day Weekend is around the corner. Just the other day, I was thinking, the gas grill needs to be brought out from winter’s hibernation and the propane tank filled so it is ready for dad’s arrival from Florida. For three months a year, he enjoys grilling, especially those juicy burgers he makes by hand.
A couple of years ago, I found the the perfect Father’s Day gift for him, “The Ultimate Burger: Plus DIY Condiments, Sides, and Boozy Milkshakes,” by America’s Test Kitchen (2019, America’s Test Kitchen, $26.99).
Whether you want a beef burger or a cauliflower burger, are cooking on the grill or stovetop, or want to try making homemade buns and condiments, all the inspiration is in the book to achieve burger perfection.
In the “Anatomy of an Ultimate Burger,” it says, “no one element makes a burger ultimate, it’s the result of a combination of flavors and textures coming together.”
In this section, buns, sauce, toppings, cheese and the patty are discussed. I found the Dos and Don’ts of Store-Bought Ground Beef helpful. “Go Beyond Beef” introduces other burger options.
For those who want to really want to get into the “meat” of it, “Be Your Own Butcher” gives the knowledge in choosing the right cuts to create your signature blend and how to grind your meat without intimidation.
“Get Ready to Cook” ensures that every burger you make is tender and flavorful. You’ll learn how to properly grill (on a gas or charcoal grill) , shape a burger, and how to test the level of doneness. America’s Test Kitchen spent the time, often days and months, testing the recipes, the best equipment to use for burger making and the best store-bought burger fixings.
The book’s recipes don’t stop with burgers. Included are recipes for all of the trimmings; sauces, fries, potato and macaroni salads, buns, and milkshakes.
From the recipes here to pretzel buns, beer-battered onion rings, buttermilk cole slaw and ultimate cookies and Irish cream milkshakes to grilled Portobello burgers with goat cheese and arugula, and Connecticut steamed cheeseburgers (the latter two can be found at https://bit.ly/2VTJGpt, America’s Test Kitchen’s “The Ultimate Burger” will make your barbecues varied and delicious.
If you look around, burgers are everywhere. You can find local, regional and national restaurants dedicated to burgers. Some think of the hamburger as the “cuisine” of the country. Chefs have come up with creative signature craft burgers, plant-based patties and home cooks are getting into grinding their own meat.
As many know, the hamburger has roots in New Haven. Louis’ Lunch claims to be the inventor of the hamburger. Today, they are still cooked in the original vertical broilers as they were in 1900. And remember, no ketchup allowed!
Grilled turkey burgers with spinach and feta
The headnote says, “Why This Recipe Works: Ground turkey is a great neutral canvas, making it an ideal choice as the base for a burger with lots of mix-ins. We wanted super flavorful turkey burgers that take full advantage of this fact, but first we had to start by addressing the problems that plague ground turkey. Despite their popularity, turkey burgers are notorious for being bland and/or dry. This is because turkey has a mild flavor, and its leanness means it can easily dry out during cooking. We wanted to reinstate the turkey burger’s good reputation with an easy way to crank up the flavor and add some much needed moisture. We boosted the flavor of our patties by stirring some melted butter and feta cheese into the ground meat; these simple additions provided plenty of richness and flavor while preventing the burgers from drying out. For textural interest, we added fresh baby spinach to the meat mixture. Chopped dill lent a hit of freshness, and minced garlic rounded out the flavors. Be sure to use 93 percent lean ground turkey, not 99 percent fat-free ground turkey breast, or the burgers will be tough.”
1 1/4 pounds ground turkey
2 ounces (2 cups) baby spinach, chopped
2 ounces feta cheese, crumbled (1/2 cup)
2 tablespoons unsalted butter, melted and cooled
2 teaspoons minced fresh dill
1 garlic clove, minced
1/4 teaspoon pepper
1/2 teaspoon table salt
4 hamburger buns, toasted if desired
Break ground turkey into small pieces in large bowl. Add spinach, feta, melted butter, dill, garlic, and pepper and gently knead with hands until well combined. Divide turkey mixture into 4 equal portions, then gently shape each portion into 3/4-inch-thick patty. Using your fingertips, press center of each patty down until about 1/2-inch thick, creating slight divot.
For a charcoal grill:Open bottom vent completely. Light large chimney starter filled with charcoal briquettes (6 quarts). When top coals are partially covered with ash, pour evenly over grill. Set cooking grate in place, cover, and open lid vent completely. Heat grill until hot, about 5 minutes.
For a gas grill: Turn all burners to high, cover, and heat grill until hot, about 15 minutes. Turn all burners to medium.
Clean and oil cooking grate. Season patties with salt. Place patties on grill, divot side up, and cook (covered if using gas) until well browned on first side and meat easily releases from grill, 4 to 6 minutes. Flip patties and continue to cook until browned on second side and meat registers 160 degrees, 5 to 7 minutes. Transfer burgers to platter and let rest for 5 minutes. Serve burgers on buns. Serves 4
Variations
Grilled turkey burgers with miso and ginger: Omit spinach, feta, salt, and pepper. Whisk 2 tablespoons miso paste and 1 tablespoon water together in bowl until combined. Add miso mixture to turkey with melted butter. Substitute 1 teaspoon grated fresh ginger for dill and 2 minced scallions for garlic.
Grilled turkey burgers with herbs and goat cheese: Omit spinach and garlic. Substitute 3/4 cup crumbled goat cheese for feta. Add 1 large minced shallot and 2 tablespoons minced fresh parsley to turkey with melted butter.
Smoky grilled potato salad
The headnote says, “Why This Recipe Works: Creamy potato salad may be the classic, but we wanted a modern, summery option that could cook on the grill from start to finish right alongside some of our delectably charred burgers. For smoky potatoes with tender insides and crispy, grilled outsides, we started with halved, unpeeled red potatoes. Leaving the skins on helped the potatoes stay intact, as their firm, waxy texture stood up to the heat of the grill. Crumbled bacon was an obvious choice to add smokiness, and we found that we could infuse our salad with even more savory bacon flavor by reserving some of the fat and coating the potatoes with it before grilling. Grilling our onions with the potatoes gave them a beautiful char that heightened their flavor. Instead of a thick dressing that would hide the spectacular grill marks on our potatoes, we opted for a bold vinaigrette with a kick of chipotle to add even more smoky depth. Halving our potatoes after they cooled exposed their creamy center and allowed them to soak up the spicy, tangy flavors of the dressing. Use small red potatoes 11/2-2 inches in diameter. If you don’t have 2 tablespoons of fat in the skillet after frying the bacon, add olive oil to make up the difference.”
4 slices bacon
2 tablespoons red wine vinegar
11/2 tablespoons mayonnaise
11/2 teaspoons minced canned chipotle chile in adobo sauce
1/2 teaspoon table salt, divided
1/4 teaspoon pepper
2 tablespoons extra-virgin olive oil, plus extra for brushing
2 pounds small red potatoes, unpeeled, halved
1 onion, sliced into 1/2-inch-thick rounds
3 scallions, sliced thin
Cook bacon in 12-inch skillet over medium heat until crisp, 7 to 9 minutes. Using slotted spoon, transfer bacon to paper towel-lined plate. When cool enough to handle, crumble bacon and set aside. Reserve 2 tablespoons bacon fat. (If necessary, add olive oil to equal 2 tablespoons.) Whisk vinegar, mayonnaise, chipotle, 1/4 teaspoon salt, and pepper together in large bowl. Slowly whisk in oil until combined; set aside.
For a charcoal grill: Open bottom vent completely. Light large chimney starter three-quarters filled with charcoal briquettes (41/2 quarts). When top coals are partially covered with ash, pour evenly over grill. Set cooking grate in place, cover, and open lid vent completely. Heat grill until hot, about 5 minutes.
For a gas grill: Turn all burners to high, cover, and heat grill until hot, about 15 minutes. Turn all burners to medium.
Clean and oil cooking grate. Toss potatoes with reserved bacon fat and remaining 1/4 teaspoon salt in bowl. Push toothpick horizontally through each onion round to keep rings intact while grilling. Brush onion rounds lightly with oil and season with salt and pepper. Place potatoes, cut side down, and onion rounds on grill and cook, covered, until charred on first side, 10 to 14 minutes.
Flip potatoes and onion rounds and continue to cook, covered, until well browned all over and potatoes are tender, 10 to 16 minutes. Transfer potatoes and onion rounds to rimmed baking sheet and let cool slightly.
When cool enough to handle, halve potatoes. Remove toothpicks and coarsely chop onion rounds.
Add potatoes, onion, scallions, and bacon to dressing and toss to combine. Season with salt and pepper to taste. Serve warm or at room temperature. Serves 4-6
Grilled bacon burgers with caramelized onions and blue cheese
The headnote says, “Why This Recipe Works: Smoky, salty bacon can take any burger to the next level, but burgers with just a few strips on top failed to deliver bold bacon flavor. Our version nixes the strips and mixes bacon directly into the burger for bacony bliss in every bite. Mixing raw bacon with raw ground beef overworked and compressed the patties so that they cooked up tough and dry, and cooked crumbled bacon — though it mixed in better — was too crunchy. For the perfect balance of bacon flavor and juicy texture, we processed raw bacon in the food processor and then cooked it briefly in a skillet. The par cooked pieces incorporated easily into the ground beef and dispersed bacon flavor more evenly throughout while the burgers stayed moist and juicy. Instead of tossing the leftover bacon fat we used it to sauté some onions, which provided salty balance to their sweet flavor. To turn these burgers into a savory showstopper, we topped them with rich and creamy crumbled blue cheese.”
8 slices bacon
1 large onion, halved and sliced thin
1/4 teaspoon table salt
11/2 pounds 85 percent lean ground beef
1/4 teaspoon pepper
4 ounces blue cheese, crumbled and chilled (1 cup) (optional)
4 hamburger buns, toasted if desired
Process bacon in food processor to smooth paste, about 1 minute, scraping down sides of bowl as needed. Cook bacon in 12-inch nonstick skillet over medium heat, breaking up pieces with wooden spoon, until lightly browned in spots but still pink (do not cook until crisp), about 5 minutes. Drain bacon in fine-mesh strainer set over bowl. Transfer bacon to paper towel-lined plate and let cool completely. Reserve bacon fat.
Add 2 tablespoons reserved fat to now-empty skillet and heat over medium heat until shimmering. Add onion and salt and cook until well browned, about 20 minutes. Transfer to bowl and set aside.
Break ground beef into small pieces and spread into even layer on rimmed baking sheet. Sprinkle with bacon and gently toss to combine using 2 forks. Divide beef mixture into 4 equal portions, then gently shape each portion into 3/4-inch-thick patty. Using your fingertips, press center of each patty down until about 1/2-inch thick, creating slight divot.
For a charcoal grill: Open bottom vent completely. Light large chimney starter filled with charcoal briquettes (6 quarts). When top coals are partially covered with ash, pour evenly over grill. Set cooking grate in place, cover, and open lid vent completely. Heat grill until hot, about 5 minutes.
For a gas grill: Turn all burners to high, cover, and heat grill until hot, about 15 minutes. Leave all burners on high.
Clean and oil cooking grate. Season patties with pepper. Place patties on grill, divot side up, and cook until well browned on first side, 2 to 4 minutes. Flip patties, top with blue cheese, if using, and continue to cook until well browned on second side and meat registers 120 to 125 degrees (for medium-rare) or 130 to 135 degrees (for medium), 3 to 5 minutes. Transfer burgers to platter and let rest for 5 minutes. Serve burgers on buns, topped with onions. Serves 4.
Recipes courtesy of ....

2 notes
·
View notes
Text
Vegetarian Homemade Feta

Alright, here it is, the recipe I used for my first batch of cheese. I was just going to have two cheese making posts, but in the process of writing this post I realised that there are a few other things that I need to talk about, so there are going to be some other posts. I’m only going to talk about the recipe and methods here, and I’ll have a separate post to discuss tweaks and DIYing the equipment. I’ll link those at the bottom.
Vegetarian cheese is made without rennet, which is the enzyme responsible for curdling milk to make many of the harder cheeses of the world. Rennet is extracted from the stomach lining of animals like cows and goats, hence, it’s not vegetarian. Instead, some substance with a low pH (an acid) is used to curdle the milk, like white vinegar or lemon juice. Neither of these have a strong enough flavour that it will be terribly noticeable in the end product.
However, because this is a different method of curdling, this cheese will be softer and more prone to crumbling than rennet cheese, so you’ll need to keep that in mind. It’ll require a little more time to strain out, because you’ll want to force out as much whey as you can to get it to hold a shape.
1 gallon milk
your choice of culture, optional
1/2 cup of vinegar or lemon juice, roughly
stockpot or slow cooker
cheesecloth
colander
wire rack, or some porous surface
salt, several tablespoons
herbs and spices, optional
form & follower
a container for brining
1. Heat the milk slowly in your stockpot or slow cooker, up to about 90F/32C, stirring it constantly. The trick here is to not let it heat unevenly, or burn on the bottom. Once it’s warm, add in your choice of culture, if you’re using one. If you’re not, skip to step 3.
2. Once your culture is added, stir a little and cover the pot. You want to keep it warm, but not hot, and let it go relatively undisturbed for an hour or two. If you have a pot, turn the burner off but don’t move it away and wrap it in towels. If you’re using a slow cooker, put the lid on and keep it on warm.
3. After you’ve let it sit, pour the vinegar or lemon juice in, a little at a time. Continue stirring as you pour. You can stop once you see the curds have formed, they’ll look like the clumps on the slice of bread in the picture, but smaller and looser.
4. Once the milk has curdled, strain it through a colander lined with cheesecloth. The curds should look like little white clumps, and the whey should be a yellowish clear liquid. If you can, save they whey.
5. Now you want to get as much whey as you can out of the cheese. Let it sit in the colander until it has mostly stopped dripping (keep it covered to protect it from flies), then lift the cheesecloth up around the curds. Bring the ends together and twist, so the curds are squeezed by the cheesecloth and more whey is released. Be careful that you don’t force the curds through the loosely woven cheesecloth.
6. After you’ve squeezed it out well, sprinkle about a tablespoon of salt over the curds and mix them around. The salt will dry them out and push more whey from them. At this point, add in whatever herbs or additions you’d like to your cheese.
7. Settle the cheese, still inside the cheesecloth, into your form and place your follower on top. (If you don’t know what I’m talking about, see the DIY equipment post) Put the whole contraption on a drying rack and set it over something to allow it to drip. After an hour or two, flip it over, sprinkle more salt across it, and put in back in the form. Let it sit in there for a while, until you feel like you’ve wrung all the moisture out of it and it holds the shape of the form. Usually, I let this part happen overnight.
8. At this point, it’s time to brine the cheese. Fill a container with a couple cups of water, or some of the whey from the cheesemaking process. It should be just enough to cover the cheese. Stir in some salt, how much depends on you. The cheese will absorb the saltiness of the brine, so you should only make the brine as salty as you’re willing to eat. If you fuck up, you can always increase or decrease the salinity of the solution later. Place your cheese in the container, cut it up if necessary.
9. Now, you can store it in the fridge or eat it right away! It’ll age in the brine and keep for 4-6 months (which seems incredible, compared to the shelf life of store bought feta??) but it’ll probably taste the best after a month. Enjoy!
Links
Homemade Feta (Non-Vegetarian)
DIY Equipment
Tweaks and Notes
Uses for Whey
43 notes
·
View notes
Text
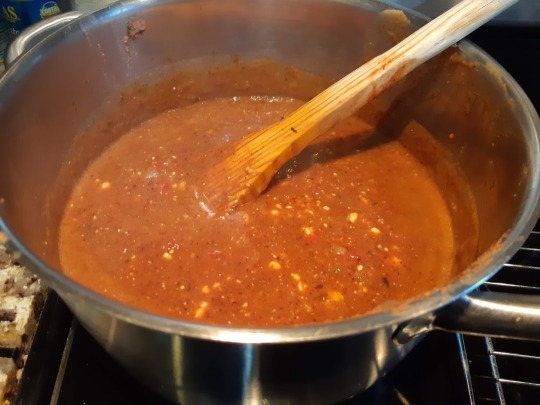
Black Bean, Butternut Squash and Chorizo Soup with Green Rice
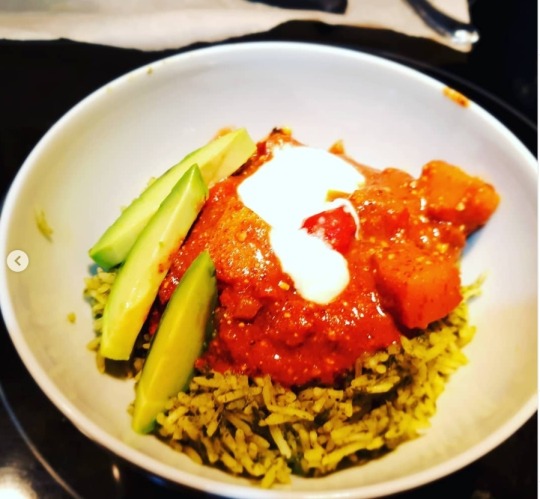
Aka “the soup so good it got me evicted from my apartment”. (Sort of. Long story). This recipe as written makes enough soup to feed an army, but it’s a lot of work and freezes so perfectly it would be a shame not to make it in quantity and freeze a bunch of containers for later. I usually treat it more like a sauce for the rice than a soup because of how rich it is, but it can be eaten on its own too.
Note this recipe involves some slightly tricky timing, so read it carefully ahead of time.
Ingredients:
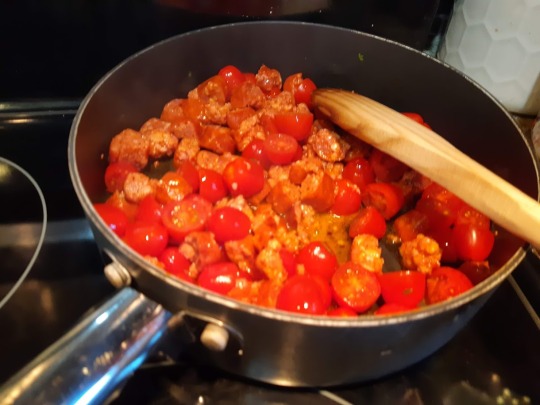
3 small chorizos, skin removed if necessary and chopped into small pieces
3 tblsps lard
One onion, chopped
One punnet cherry tomatoes, cut in half
1.5 tsp finely chopped garlic, about six cloves
One can diced tomatoes, (I use fire roasted with added herbs, but plain is fine).
One can chipotles in adobo
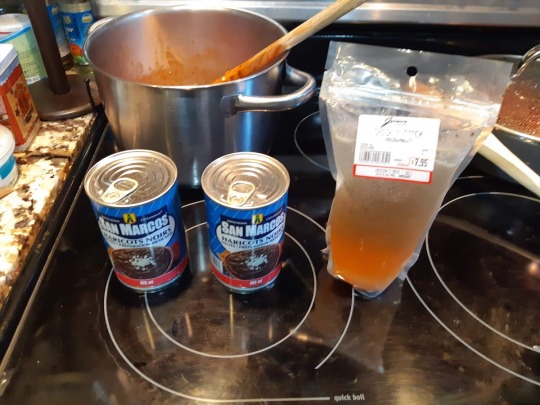
Two cans mexican blended refried beans
About 4 cups chicken stock
One large or two small butternut squash, sliced into wedges, then peeled and cut into chunks
One lime
One package feta cheese, about 200 grams
For the squash spice rub:
1.5 tsp dried oregano
4.5 tsps ground cumin
1.5 tsp smoked salt
1 tsp olive oil
1.5 tsp chipotle flakes
3 tsps ancho chili powder
1/2 tsp ground panela sugar (unrefined mexican cane sugar, substitute dark brown sugar if unavailable)
For the green rice:
400g long grain rice
5 cubes frozen spinach, defrosted and squeezed in a cheesecloth or paper towel to remove excess water
2 bunches cilantro
1 bunch parsley
1 clove of garlic
1 small onion
4 tblsps olive oil
600 ml chicken stock
Olive oil to coat the pan
To garnish:
Sour cream
Sliced avocado
1. Prepare and chop the chorizo, onion, tomatoes, garlic, and butternut squash as directed. Crush together all the ingredients for the spice rub in a mortar and pestle.

2. Blend two or more of the chipotles in adobo and some of the sauce and onions from the can in a food processor. How many chiles you use can vary depending on your spice tolerance- I normally just use three.
3. Preheat the oven to 400 F.
4. Combine three chopped chorizos, a tablespoon of lard, and a punnet of halved tomatoes in a large frying pan. Cook on high heat, with a lid and stirring occasionally until the tomatoes have cooked down in the fat, 10 to 12 minutes. Set aside.
5. Fry the onions in two tablespoons of lard until soft in your soup pot, about five minutes.
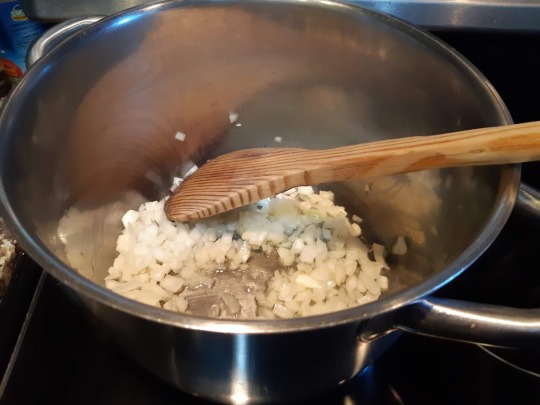
6. Add HALF the sausage and tomato mixture to the onions.
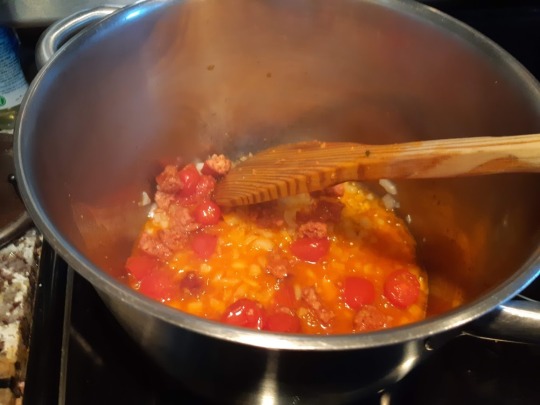
7. Add the can of diced tomatoes and the garlic to the onions, sausage and tomato. Stir and let cook for two minutes.
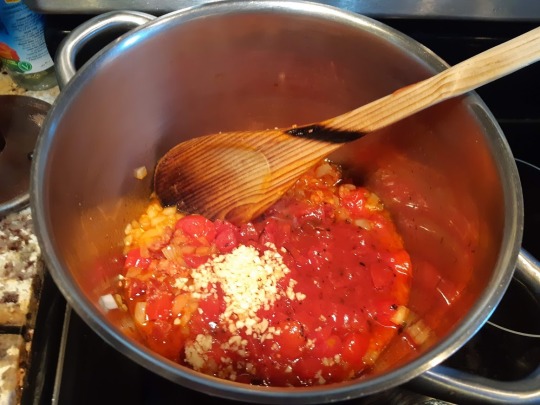
8. Add the blended chipotles. Stir. Let cook for two minutes.
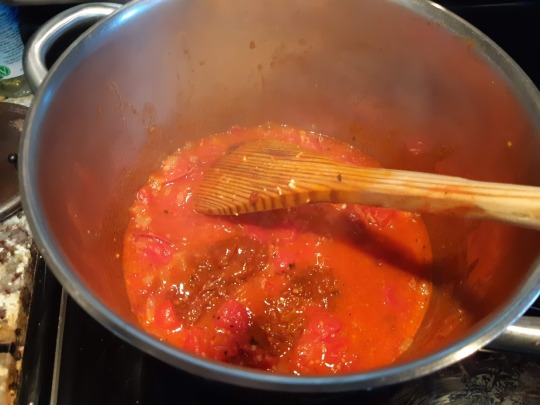
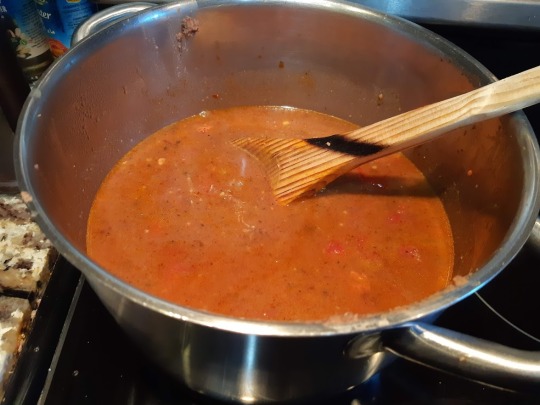
9. Add the two cans of refried beans and all the chicken stock. Stir to combine and let simmer on medium while you prepare the squash. Set a timer for forty minutes.

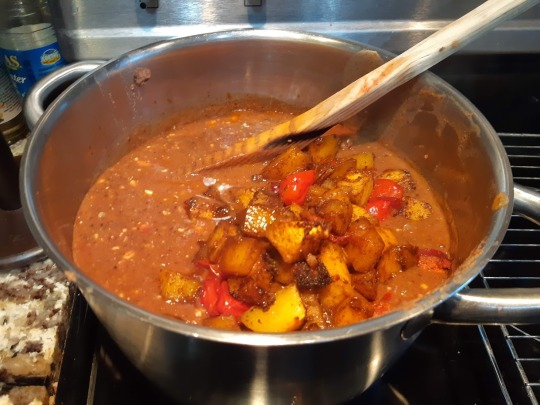
10. Toss the squash pieces with the spice rub with your hands, then add the tiniest drizzle of olive oil (about a teaspoon). Mix again with your hands, and pour into a baking tray.

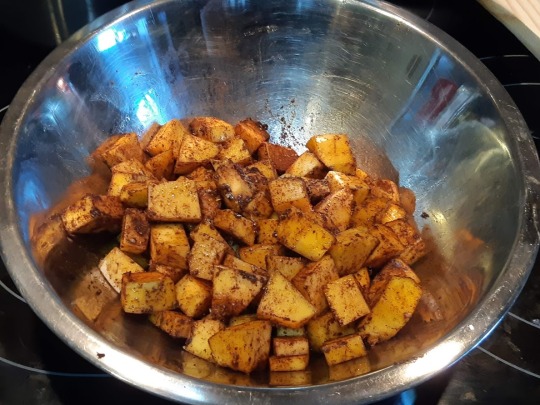

11. Put the squash in the heated oven. Set a second timer for forty minutes for the squash.
12. When the soup has been cooking for forty minutes, add the juice of a lime, and the pack of feta crumbled with a fork. Stir to combine, then turn the heat to the lowest setting.
13. When the squash has cooked for forty minutes, take it out of the oven and pour the other half of the tomato chorizo mixture you set aside earlier on top of the very hot squash. Put it back in the oven, set a timer for twenty minutes.

14. When the twenty minutes are up, remove the tray of the spiced squash, chorizo and tomatoes from the oven and add them all directly into the soup. Bring the heat back up and cook for another fifteen minutes.

For the green rice (not strictly necessary, and can be made the next day):
1. Rinse the rice under cold water until it runs clear.
2. Preheat the oven to 225 f. Very roughly chop the parsley, coriander, garlic and onion (only enough that they don’t block up your food processor).
3. Combine the spinach, parsley, coriander, garlic, onion, frozen spinach, olive oil and a splash of water in a food processor to a smooth paste.
4. Coat a large, lidded pan you can fit in the oven with olive oil, bring to medium heat. Add the green paste, and allow to fry for about ten minutes, taking care it doesn’t burn.

5. Add the rice and stir well to combine.

6. Pour in the stock and let simmer for fifteen minutes, until most of the liquid has been absorbed. Cover with a sheet of baking paper, then the lid, and stick in the oven for thirty minutes to finish cooking.

To finish, serve each portion with mexican green rice, sour cream, and a few slices of avocado.
18 notes
·
View notes
Text

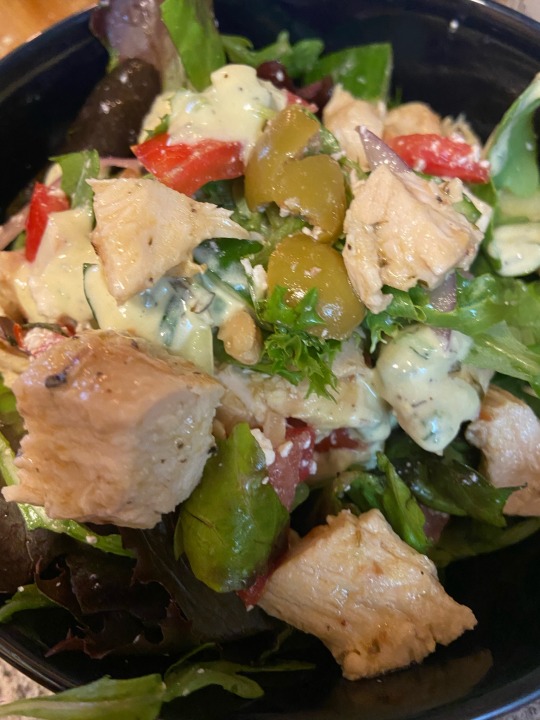
Made the best fucking Herby Mediterranean chicken Salad today except I forgot I didn’t have any Kalamata olives or bell peppers so I used pickled Pepperoncini and hot and spicy green olives instead.
Stir together some finely chopped fresh herbs (I used mint and chives but dill and parsley would also be good; about a palmful of each), olive oil, lemon juice, red wine vinegar, garlic salt and minced fresh garlic, lemon pepper or Greek seasoning, dried oregano, and, if you have it on hand, some packaged baba ganoush, or if not, a few tbsps of packaged Greek yogurt.
Slash three or four chicken breasts across the thickest part, then take a couple of tbsps or slightly less than half of the marinade/dressing and rub it into the chicken. Marinate for about an hour. Meanwhile, for the remaining dressing, balance it out by adding more herbs/acid/yogurt/garlic/etc and stirring in some well-mixed tahini.
Preheat oven to 425. While it preheats, toast some walnuts in a pan. Finely slice a little bit of red onion and soak for ten minutes in ice cold water. Cut half an English cucumber into chunks and dice a couple good, firm tomatoes, smash and tear some good olives like kalamatas, and seed and slice a hot pickled pepper like a Pepperoncini. Throw everything into a bowl with some crumbled feta and the drained onion.
Put the marinated chicken in the oven and bake for 15-25 minutes depending on the thickness (check with a thermometer or cutting into the middle of the thickest one). If you want you can broil for about five minutes at the end for more of a souvlaki/grilled sort of flavour. Let the chicken rest for about ten minutes, then add a big handful of arugula and a big handful of mixed greens to the salad vegetables, drizzle with dressing and toss. Dice the chicken, and if you want, toss it in the pan with the cooking juices and another squeeze of fresh lemon. Top the salad with a scoop of diced chicken and serve
2 notes
·
View notes
Photo
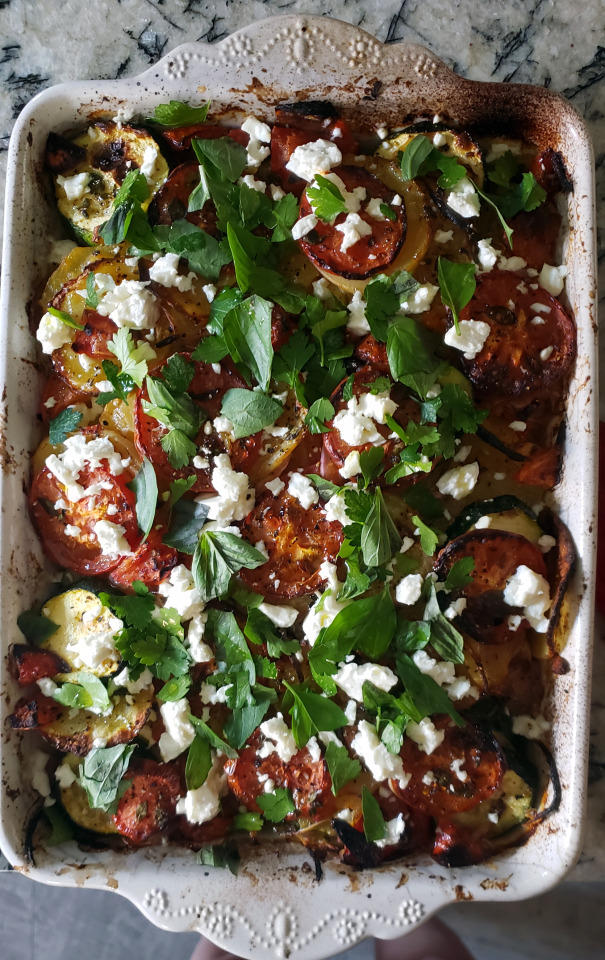
Greek vegetable casserole! [Though now that I say it, this was actually more fruit than vegetable, technically...] I couldn’t actually tell if this was supposed to be a side or an entree dish. We ate it as an entree though - very tasty! Perfect proportion of potatoes (I used a basic golden variety since I couldn’t track down any Yukon gold) to the rest of the summer produce, giving a nice balance of starch to the lighter squash and tomatoes. The feta crumble and fresh herb finish at the end added just the right brightness to the dish. My main recommendation would be some crusty bread to go alongside next time - would have been a great textural contrast and way to soak up a lot of the juices (plus, I was kind of craving some carbs with this one).
https://www.177milkstreet.com/recipes/greek-baked-vegetables-briam
2 notes
·
View notes
Text
Oh Stumptown my Stumptown!

Portland likes to keep it weird. Officially. You could even buy the tee shirt if tee shirts weren’t so predictable.
From a poster invitation to “Hear my TED Talk about DIY and Impending Doom” to the Big Legrowlski (sic) night club that hangs carpets on the walls - not to balance the sound for the band but because they really bring the room together - the City has an off-beat vibe that feels authentic even while it gets you scratching your head. And where else would you queue round the block for a voodoo-doll shaped doughnut with a pretzel stick through its ‘heart’?

You probably won’t be surprised when I tell you that Portland is the Hipster Capital of the World. You know it’s hipster because it sells more coffee and has more microbreweries per head than anywhere else in the US.
We came for the food because People That Know told us to. It’s not simply that everything is delicious but that chefs, cooks, carts and food enthusiasts are trying to do different. It’s like Masterchef has landed in Twin Peaks. Entrepreneurs are making ice cream out of chickpeas and it works. A pastry chef has re-interpreted her favourite childhood book on a plate and you rejoice in the complex flavours of her tiny reconstructed bunny. So who’s the bunny boiler now?
One thing that puzzled me is why the City changed its name from the original Stumptown (pretty weird) to Portland (the Holiday Inn of city names). Devon, a local lawyer who we chatted to most mornings in Baristas Cafe, explained that Portland was never officially called Stumptown. It became its nickname due to all the trees they had to cut down to build it, leaving the eponymous stumps in their wake. Stumptown is also the name of their iconic coffee brand, which I always assumed was NYC’s greatest invention. This is one of the many ways in which travel expands your mind.
Devon embodied something else about Portland: its friendliness. Even the passport officers are anxious that you have a good time. Full disclosure, it wasn’t just Devon that we sought out each morning - it was Pepper, his cute little dog. I would eat Barista’s fresh, flaky rhubarb hand pie just to drop crumbs that Pepper would breakfast on.

Devon put us onto a couple of great places to eat - one we made it to, one we didn’t. But more of that later.
Where to begin to describe this steel guitar food odyssey? Let me take you through our many highlights from the mountain of food we consumed. Set it to the soundtrack of Chris Isaak’s Wicked Thing.
Our first evening, tired and hungry, we stuck to our guns and found Andina, the City’s Peruvian eatery. When you are both tired and hungry it’s easy to get seduced by posters boasting ‘Meatball Monday’ and forget your mission, but our persistence paid off. That legendary Portlandia hospitality squeezed us into a nook where there really wasn’t a free table, and we dined greedily on humitas, ceviche, lamb shank and seafood, washed down with Oregon’s finest home-grown Pinot Gris. I didn’t quibble that they brought something different from my order. In my fractured Spanish ‘Arroz con Pato’ probably did sound like ‘Seafood Risotto’ - and the risotto was obviously going to be delicious before fork met lip, so I didn’t send it back.
Next day, which coincidentally was Taco Tuesday, we hit the street food.

Portland is big on street food (see: hipster capital of the world). Most food vendors have carts - permanent fixtures where the chef builds enough of a following over months or years to be able to open a small restaurant. Nong’s Khao Man Gai was just one of these. They do one dish - a Vietnamese poached chicken with a secret chilli sauce, accompanied by rice cooked in the chicken broth. You can also have a version with shrimp, pork or Tofu. We bought a bottle of the sauce to bring home. Life’s too short.
It’s not all carts - there are a fair few trucks too.

One which specialised in cheese toasties challenged “ Come and relive the taste of your childhood. But if your childhood sucked, we’ll share the memory of ours”. Have you eaten a cheese toastie recently? I mean really felt the embrace of a sandwich of molten cheese and fried bread? Maybe your childhood did suck after all.
That evening it was the turn of The Hairy Lobster restaurant, and that bunny dessert I mentioned earlier. Little Bunny Foo Foo to give it it’s full name. A delicate carrot cake, covered in cheesecake mousse, accompanied by a ginger crumb, caramel sauce and a marshmallow rabbit.

Despite it’s show-stopping appearance and fusion of flavours, it was their roast squash with curry sauce and pumpkin seed praline that was the stand-out dish for me. The Lobster picnic for our main was pretty damn good too.
Friday brings me to Devon’s first recommendation, Pok Pok, a teeny Thai eatery in the suburbs. Getting there had the added advantage of passing through a neighbourhood full of rambling old houses in the Amityville Horror style. I recalled the first time I had heard of Portland was from a TV thriller full of witches and jabberwocks called Grimm. They had definitely filmed it’s eerily beautiful moments around here.

If I had to single out a food highlight in a week of next-to-no food lows, I would choose Pok Pok. It gave me my first food coma in a long while. Something about it’s smoked aubergine, pork belly curry, marinated chicken with two dips, sublime mango with sticky rice and that rhubarb blush cocktail… I sense I am sharing my food coma with you now. Their signature dish is hot spicy chicken wings. The couple on the table next to us were too full to finish theirs so offered them to us. Maybe it was the wings that tipped me over the edge. I’ll never know.

And so to our last day, and the big daddy of Portland nights out: Jake’s Crawfish. Over 100 years old, walking into Jake’s is like walking into one of Sinatra’s memories. It has a justifiably stellar reputation, and seems to have maintained it for a century. I ate Steel-head trout for the first time, fished on their doorstep from Oregon’s Columbia River, coated with a horseradish crust, and preceded by half a dozen of the plumpest oysters I have ever eaten.
I haven’t yet mentioned Portland’s biggest hipster foodie habit: brunch. No matter what day of the week, the restaurants that brunch are always full. For most of our trip, we were waking up too early to really do brunch justice. Those rhubarb hand pies at Baristas had satisfied our hunger by around 8AM so a mid-morning banquet wasn’t really on. One day, however, we made it to Tasty & Alder in the Pearl DIstrict of the city and managed to sneak in a table for two before the queues built up. Worth it for their Green Frittata with salsa verde (who ever thought of doing that before?) and lightest, fluffiest American biscuits. We never made it to Devon’s second recommendation: Burmasphere, his friend’s Burmese cart on the other side of the river. And now we have an excuse to return.
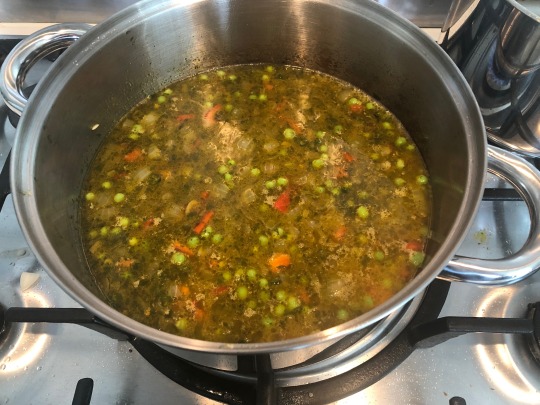
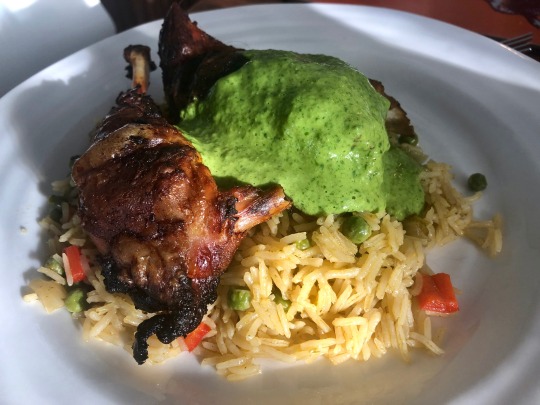
When it came to rustling up some recipes that take me straight back to Portland weird, I whittled my list down to three: my version of Tasty & Alders’ green frittata with feta and salsa verde; a less labour-intensive version of Andina’s Arroz con Pato, made with chicken or guinea fowl; and in the spirit of weird, though by no means original, a cake inspired by Churros con Chocolate. The best possible end to a Taco Tuesday.
I messaged a friend of mine that had moved to Portland a few years back and asked why she had ever left. “ Too much rain and not enough art.” she said.
You missed the point Sweetie. Great Food IS great art. And if you can’t stand the rain, get into the kitchen.
Green Frittata with Feta and Salsa Verde

A great little brunchy-lunch dish packed with flavour for the carb-conscious. If you want to add some carbs, slices of toasted sourdough will go down a treat. Serves 4
Ingredients
8 large free-range eggs
1tblspn, double cream
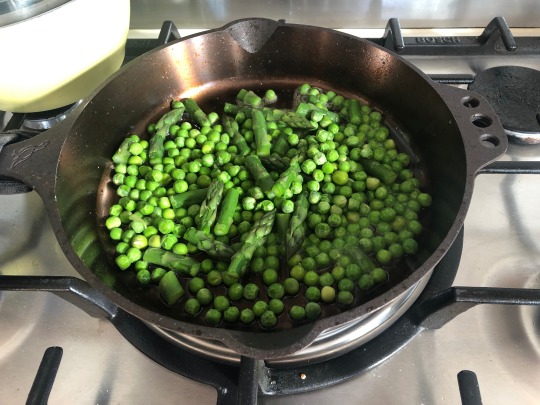
100g asparagus spears, chopped into 2 cm chunks
100g shelled garden peas or petit pois
50g feta cheese
Salt and freshly ground black pepper
For the salsa verde:
Small pack of flat-leaf parsley (around 15-20g)
½ a small pack of mint leaves
3 tbsp. Capers
7 anchovy fillets
1 clove garlic
1 tbsp dijon mustard
8 tbsp extra virgin olive oil
How to make:
Bring a small saucepan of salted water to the boil, then add the peas. After a couple of minutes, add the chopped asparagus and continue simmering for another 2 minutes. Drain and refresh under cold water. Put to one side.
Next, make the salsa verde. Put all the ingredients except the olive oil into a blender, season generously with pepper and go easier on the salt (anchovies and capers are already pretty salty). Then, add the olive oil and blend again. Don’t over blend at each step - it's nice to keep the texture a little rough.

Put a skillet on the stove and melt a knob of butter. Beat the eggs, add the cream and season. Lightly saute the green vegetables in the butter for a minute or two.
then pour the eggs over and crumble the feta cheese over the top. Cook for a couple of minutes until the bottom is starting to brown.

pop under the grill to continue cooking, until the top is a light golden colour and the frittata has firmed up with a slight wobble (keep a close eye on this, probably takes 2-3 minutes).
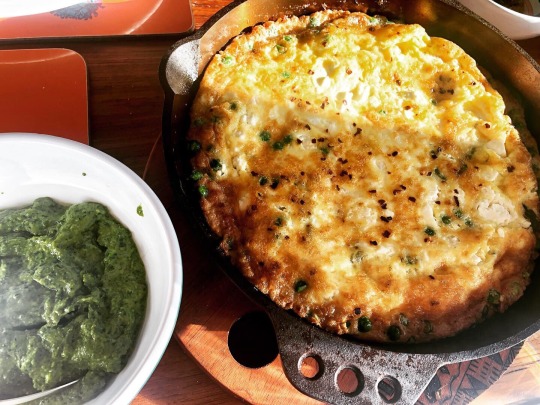
Cut the frittata into 4 wedges and serve with a dollop of salsa verde on top.
Arroz con Gallina Picante

I never did get to eat Arroz con Pato in Andina, but while I adore the rich flavour of duck, devoting two or three days to confitting it before finishing the dish is only for the dedicated dinner party cook. This version with a spicy chicken and a feta-enriched herb sauce (based on a Melissa Clark recipe) goes down just as well - or the richer Guinea Fowl, which I have used here. And Peruvian aji amarillo is now more available by mail order - substitute ordinary chile powder if not. Serves 4.
Ingredients:
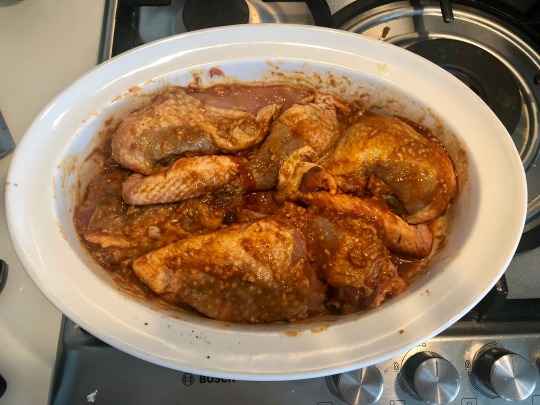
1 medium-sized chicken or guinea fowl, jointed into 2 breasts, 2 drumsticks and 2 thighs (discard the back or freeze to make stock at a later date)
For the marinade:
6 garlic cloves, crushed
3 tbsp light soy sauce
1 tbsp paste made with aji amarillo powder and olive oil
Juice of 1 lime
1 tsp sriracha sauce
1 tsp. Dijon mustard
2 tsp ground cumin
Salt and freshly ground black pepper
For the sauce:
½ a large bunch coriander leaves, broken up
2 jalapeno chilies, chopped
75g feta cheese, crumbled
1 garlic clove, crushed
Juice of 1-2 limes
2 tsp chopped fresh oregano
½ tsp dijon mustard
½ tbsp aji amarillo paste (see marinade earlier for method)
1 tsp honey
1 tsp ground cumin
½ cup extra virgin olive oil.
For the Peruvian Rice:
3 tbsp sunflower oil
2 cloves garlic, crushed
1 onion, finely chopped
3 heaped tsp aji amarillo paste (see marinade earlier for method)
½ large bunch fresh coriander, broken up and blended till smooth with a tblspn water
500g fresh chicken stock
300g bottle of beer or lager
2 x small green chillies, chopped finely
500g basmati rice
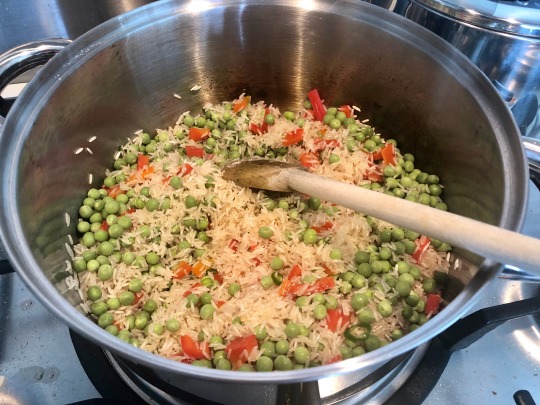
1 red pepper, chopped into small chunks
100g fresh garden peas or petit pois
How to make
First, make the marinade. Mix all the marinade ingredients in a large bowl, cover the fowl of your choice in it, cover with cling film and pop in the fridge for at least 4 hours or overnight.
For the sauce: put all the ingredients into a blender, and blend till smooth. Pour into a bowl, cover and refrigerate, taking out about 15 minutes ahead of eating to bring to room temperature.

For the rice. Heat 2 tbsp oil in a saucepan, add the onion and garlic and saute until starting to turn golden. Add the blended coriander and chili paste and cook for a couple of minutes until the paste has thickened slightly and smells delicious.
Pour the beer into the saucepan, cook for a few minutes then add the chicken stock. Bring to the boil, season, then take off the heat, cover and put to one side.
Heat the oven to 200C. Pat the chicken or guinea fowl pieces dry, then pop onto a shallow baking tray, season and drizzle with olive oil. Put the tray into the oven and roast for 35-40 minutes.

While the meat roasts, finish the rice. Heat 2 tbsp oil in a medium sized saucepan, add the peppers and cook for a couple of minutes. Then add the rice and stir into the oil and peppers until it starts to crackle a little at the bottom. Add the peas and chilies and stir again, then add the stock, beer and onion garlic mix. Stir, season if needed, then cover and simmer on a low heat for 25 mins.
Fluff up the rice and spoon onto plates. Top with the chicken or guinea fowl pieces, and crown with a dollop of sauce.
Churros Bundt Cake with Dipping Chocolate Sauce

I love churros, and I love a Bundt cake. If you want all the flavours but none of the faffing or frying, then give this a try. The cake will keep, covered in a tin. Just remember to reheat the chocolate sauce for dipping or pouring each time. Serves 8-10
Ingredients:
For the cake:
2 ¾ cups plain flour
2 tsp. Baking powder
2 tsp ground cinnamon
½ tsp. Salt
170g unsalted butter
130g caster sugar
50g soft brown sugar
4 large eggs
1 egg yolk
1 375g punnet of sour cream
2 tsp. Vanilla extract
For the cinnamon sugar ‘glaze’
2 tsp ground cinnamon
4 tsp caster sugar
For the chocolate sauce:
½ cup cocoa powder
Pinch chilli flakes
100g dark chocolate (70%)
1 cup double cream
½ cup dark brown sugar
1 tsp vanilla extract
½ tsp cinnamon
How to make
Preheat the oven to 160C. Grease and flour a large bundt cake pan (make sure to get into all the nooks and crannies).
Beat the butter and sugar in a mixing bowl (ideally using an electric stand mixer) until light and fluffy. Add the eggs one by one and continue to mix between each addition, finishing with the egg yolk. Add the sour cream and vanilla extract and beat again until just incorporated. Mix all the dry ingredients, add them to the butter and egg mix and fold in until smooth.
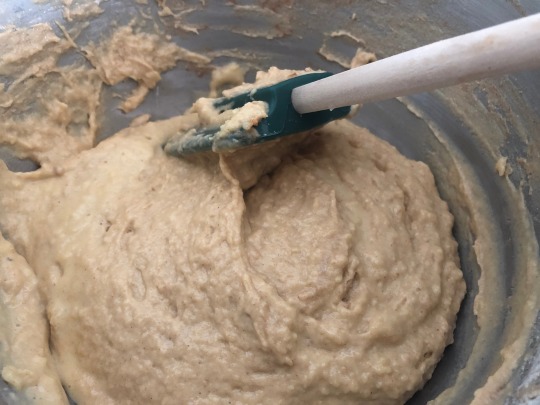
Pour the cake batter into the bundt tin and bake for around 50-55 minutes until a skewer inserted near the middle comes out clean (I usually check the cake after 45 mins). Invert the cake onto a rack to cool.

Mix the remaining sugar and cinnamon in a small bowl. Melt the butter and paint all over the surface of the cake. Dust the cinnamon sugar over the buttered cake, making sure you pat it in places to stick.

To make the chocolate sauce. Pop all the ingredients into a saucepan, then cook, stirring constantly, on a low heat until the chocolate has melted, everything is smooth and custardy. Let it bubble slightly then turn off the heat.

Serve slices of the churros cake with warm chocolate sauce poured over. There are some who prefer their chocolate sauce served cold. That’s fine too.
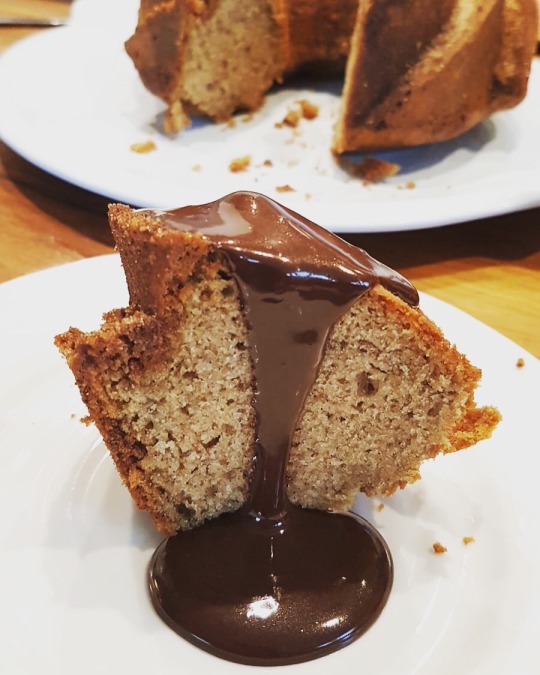
3 notes
·
View notes
Text
Greek Spinach Pie w/homemade Pastry
🥧

Greek Spinach Pie with Homemade Pastry-Spanakopita me spitiko phyllo
BY: Greek Cooking Made Easy
https://www.youtube.com/greekcookingmadeeasy
Check my YouTube Video: HERE
Κοιτάξτε επίσης την συνταγή μου σε YouTube βίντεο, το λίνκ είναι: ΕΔΩ
youtube
Serves 4-5 persons as main course
Well, what can I say about this amazing recipe? Can you think of anything better than fresh wild spinach, plenty of aromatic herbs, spicy Greek cheeses and crispy homemade pastry sprinkled with virgin olive oil? Because I can't!
Although it's a bit of extra effort to roll the pastry, the result is definitely worth it. Because nothing can compare with homemade pastry!! Try it and thank me later!
If you need a simpler Spanakopita version with ready made pastry, check my separate recipe.
Suitable for vegetarians.
INGREDIENTS

Ingredients for filling:
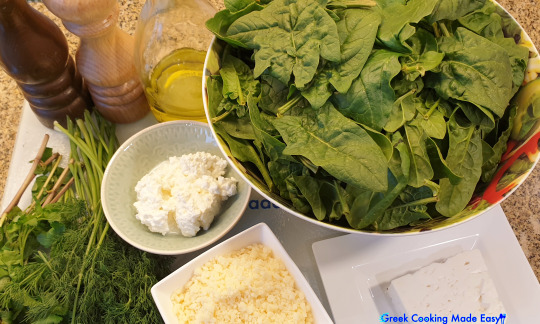
500 gr / 1 lb 2 oz Fresh Wild Spinach
3 Spring Onions
Half bunch of fresh Mint
Half bunch of fresh Parsley
A bunch of Fresh Dill
150 gr / 5.5 oz Feta Cheese
100 gr / 3.5 oz Cottage Cheese or Anthotyro
100 gr / 3.5 oz Kefalotyri Cheese grated (altern: Pecorino)
2 tbsp. Olive Oil for sautéing
Salt and ground Pepper
Ingredients for the homemade pastry dough:
250 gr / 9 oz /2 cups All-purpose Flour (or bread flour)
½ tsp. Salt
50 ml or 1/4 cup Olive Oil for making the dough and
About 100 ml or 1/2 cup Olive Oil for sprinkling between the pastry sheets
120 ml or 1/2 cup Water
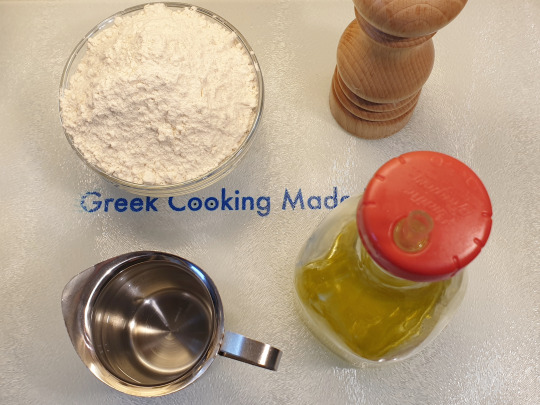
Method:
Prepare the pastry (very easy):
Using a mixer with the hook attachment, pour in the olive oil. Then add the flour.
Add also the water and salt and start beating them.
When the dough has become like a ball around the hook and has detached completely from the sides of the bowl, then it is ready. Stop the mixer!
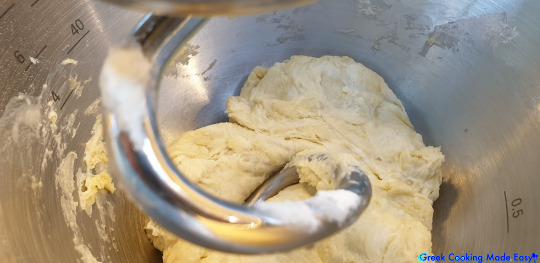
Remove the hook and leave the dough in the bowl to rest for 30'-40'. If it sticks to your fingers, just add a bit more flour.
While waiting for the dough to rest, prepare the filling:
Chop all the herbs.
Start with the fresh dill. Chop it and discard its twigs. Place it on a separate bowl.
Remove the mint leaves from their twigs. Chop them finely as well and add in the same bowl with dill.
Chop the parsley too and add in the same bowl.
Wash the spring onions and chop them in thick rounds.
Next, wash the fresh wild spinach under plenty of running cold water.
Use a sieve to strain the spinach and to wash it once more. Then strain it as much as possible by shaking the sieve.
Pour some Olive oil into a deep pot over medium-high heat.
When it heats up, sauté the spring onions for 2'. Lower the heat and add the spinach leaves, cut in fourths between your hands. Stir to sauté the spinach all around.
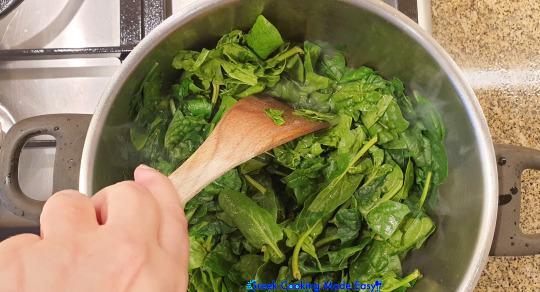
After 5', you will see that the spinach has shrunk to 1/8 of its original size!! Keep cooking it for 12'-15' more, so that most of its water has evaporated. Then turn off the heat. Place the cooked spinach in a new bowl to help it cool down.
Make the filling:
Add all the cheeses in to the boiled spinach.
Start with the cottage cheese, then the grated kefalotyri.
Tip: I have used a total of 350 gr / 12 oz of various cheeses. You can also use other cheese combos (but do not omit feta cheese!).
Season with ground Pepper and Salt (not too much salt though, because you will add all the cheeses as well!!)
Now add all the fresh herbs into the mixture.

Last, crumble the feta cheese between your fingers and add into the mix.
With a big spoon, mix all ingredients for the filling well. Reserve in the fridge.
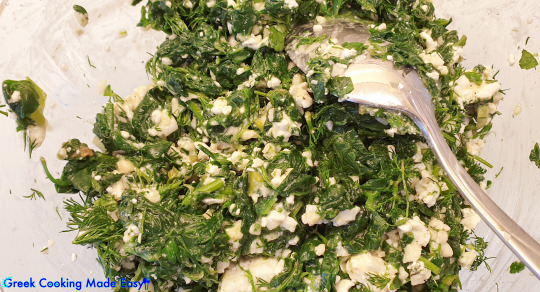
Time to roll the pastry dough:
Knead the dough and shape it like a loaf of bread. Divide it with a knife into 6 pieces to work more easily (3 pieces for the bottom and 3 for the top, not necessarily equal).
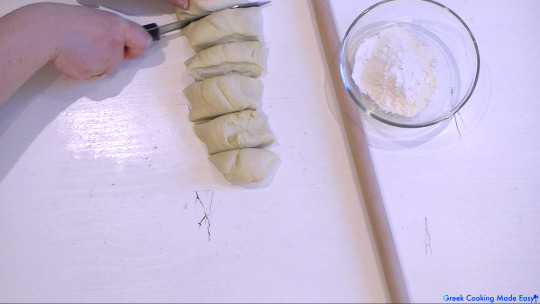
Sprinkle a bit olive oil into a round pie dish of 26 cm / 10 in.
Flour a clean flat surface and place a piece of dough on it.
Roll it using a slim and long rolling pin until the pastry is so thin that it becomes almost transparent!!
The 1st pastry sheet will be the base for your pie. Stick it to the bottom and sides to cover the pie dish. Continue rolling the other pastry sheets, which do not necessarily need to cover the whole pie dish.
Sprinkle a bit olive oil on the 1st layer, before adding the next pastry sheet.
Repeat the procedure for 1 more piece of dough. Work those arm muscles lol! Place it on top of the other 2 layers. Sprinkle some more olive oil on top. This is the bottom of the pie!
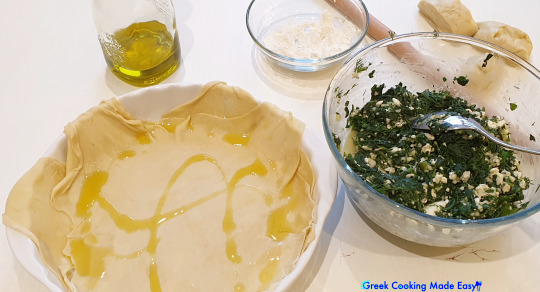
Next, pour the spinach filling into the dish. Level it with your spoon.

Repeat with rolling the dough for the 3 top layers.
You can also make some creases on top of each pastry layer by pulling the dough together a bit with your fingers. That helps trapping some air between the layers and the pie becomes crunchier!! Again, sprinkle a bit olive oil on top.
Although for the between layers it didn't matter how big they were, for the last pastry layer, you should make sure it is rolled out to cover the pie dish exactly!
Roll and then place the last layer on top. Fold the edges all around to seal the pie.
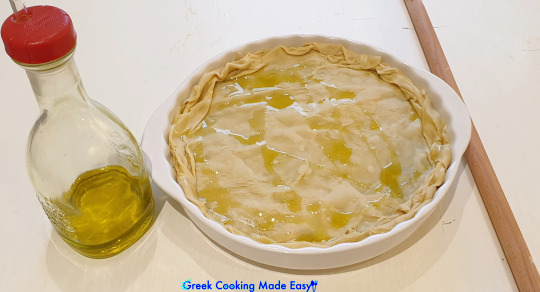
Sprinkle a bit olive oil on top. The Spinach Pie is ready for the oven.
If it is easier for you, score the pie now, before it is baked. I usually do it after!
Tip: If preparing ahead, you can at this point freeze the pie covered with plastic wrap for up to 1 month.
Bake the Spinach Pie into a preheated oven @190℃ / 375℉ for 55'-1h or until it becomes golden!
When the pie is ready, remove from the oven and place on a rack to cool down and set.

You can also score it now!
Look at this amazing pie! Simply wow 😮!!

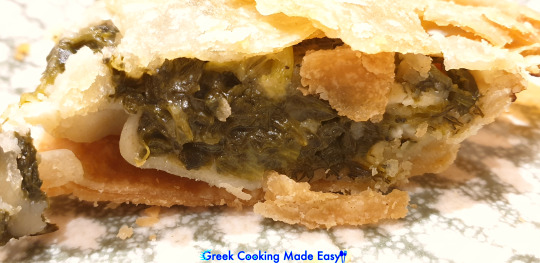
Crispy and super crunchy! And the filling is full with fresh Spring tastes and scents! Like my whole garden in a plate!!
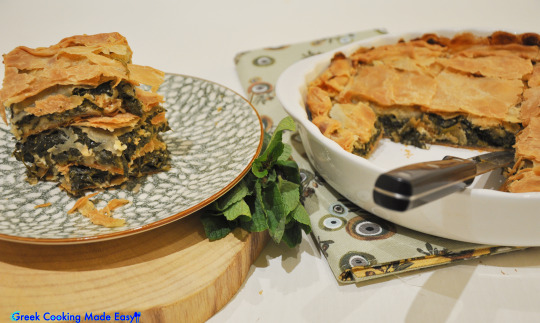
Serving suggestion:
The amazing Spinach Pie-Spanakopita can be served very hot or at room temperature. It can be eaten as main course, or as 1st course in smaller portions. It is the best way to get your kids to eat AND love spinach.
The perfect meze/appetizer, snack, lunch, school/work lunch, even a party treat! Just perfect!! Enjoy!

Greece Travel Tip:
Spinach is considered a superfood, because it is loaded with so many nutrients but has low-calories. The dark, leafy spinach greens are very important for bone health, skin and hair care. However, Spinach greatest benefit is that it’s a great source of iron, proteins, vitamins and minerals. It helps for a healthy bowel function and to fight anemia.

Spinach is used broadly in Greek cuisine, e.g. boiled to make pies or it can be eaten raw in a salad. In Greece, it can be found wild in the country side with the common name “Nana”. The city of Argos cultivates one of the best domestic spinach varieties called platyfyllo (i.e. broad leaves).
Photo: Argos with its ancient theatre.

Check my YouTube Video: Here
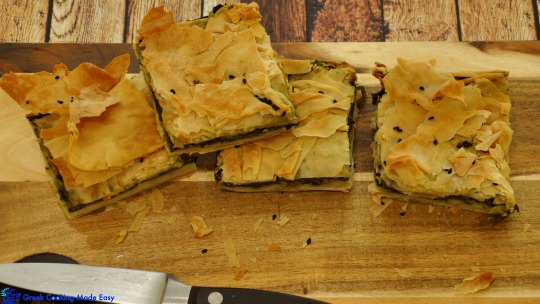
Σπανακόπιτα με σπιτικό Φύλλο
BY: Greek Cooking Made Easy
https://www.youtube.com/greekcookingmadeeasy
Σερβίρει 4-5 άτομα ως κύριο πιάτο
Λοιπόν, τι μπορώ να πω για αυτή την εκπληκτική συνταγή; Μπορείτε να σκεφτείτε κάτι καλύτερο από φρέσκο άγριο σπανάκι, πολλά φρέσκα μυρωδικά, πικάντικα ελληνικά τυριά και τραγανά φύλλα από σπιτική ζύμη πασπαλισμένη με παρθένο ελαιόλαδο; Γιατί εγώ δεν μπορώ! Παρόλο που είναι μια επιπλέον προσπάθεια να ανοίξετε τη ζύμη, το αποτέλεσμα αξίζει σίγουρα. Επειδή τίποτα δεν μπορεί να συγκριθεί με το σπιτικό φύλλο! Δοκιμάστε το και με ευχαριστείτε αργότερα!
Αν παρόλα αυτά, ψάχνετε για ευκολότερη λύση με έτοιμο φύλλο, κοιτάξτε τη ξεχωριστή συνταγή μου.
Κατάλληλο για χορτοφάγους.
ΥΛΙΚΑ
Υλικά για τη γέμιση:
500 γρ / 1 lb 2 oz φρέσκο άγριο Σπανάκι
3 φρέσκα Κρεμμυδάκια
Μισό ματσάκι φρέσκος Δυόσμος
Μισό ματσάκι φρέσκος Μαϊντανός
Ένα μάτσο φρέσκος Άνηθος
150 γρ / 5,5 oz Τυρί Φέτα
100 γρ / 3,5 oz Ανθότυρο
100 γρ / 3,5 oz Κεφαλοτύρι τριμμένο (εναλλακτικά: Πεκορίνο)
2 κ.σ. Ελαιόλαδο για το σοτάρισμα
Αλατοπίπερο
Υλικά για τη σπιτική ζύμη:
250 γρ / 9 oz / 2 φλιτζάνια Αλεύρι για όλες τις χρήσεις (ή αλεύρι ψωμιού)
½ κ.γ. Αλάτι
50 ml ή 1/4 φλιτζ. Ελαιόλαδο για την ζύμη και
Περίπου 100 ml ή 1/2 φλιτζάνι Ελαιόλαδο για το ράντισμα ανάμεσα στα φύλλα
120 ml ή 1/2 φλιτζάνι Νερό
Μέθοδος:
Προετοιμάστε τη ζύμη (πολύ εύκολη):
Χρησιμοποιώντας ένα μίξερ με το γάντζο (εξάρτημα), ρίξτε μέσα το ελαιόλαδο. Στη συνέχεια, προσθέστε το αλεύρι.
Προσθέστε επίσης το νερό και το αλάτι και αρχίστε να τα χτυπάτε.
Όταν η ζύμη έχει γίνει σαν μια μπάλα, έχει μα��ευτεί γύρω από το γάντζο και έχει αποκολληθεί τελείως από τις πλευρές του μπολ, τότε είναι έτοιμη. Σταματήστε το μίξερ!
Αφαιρέστε το γάντζο και αφήστε τη ζύμη μέσα στο μπολ να ξεκουραστεί για 30'-40'. Αν κολλά στα δάχτυλά σας, προσθέστε λίγο περισσότερο αλεύρι.
Ενώ περιμένετε να ξεκουραστεί η ζύμη, ετοιμάστε τη γέμιση:
Ψιλοκόψτε όλα τα μυρωδικά.
Ξεκινήστε με το φρέσκο άνηθο. Ψιλοκόψτε το και πετάξτε τα κλωναράκια. Τοποθετήστε το σε ξεχωριστό μπολ.
Ξεχωρίστε τα φύλλα δυόσμου από τα κλαδιά τους. Ψιλοκόψτε τα και προσθέστε τα στο ίδιο μπολ με με τον άνηθο.
Ψιλοκόψτε το μαϊντανό και προσθέστε κι αυτόν στο ίδιο μπολ.
Πλύντε τα κρεμμυδάκια και κόψτε τα σε χοντρά κομμάτια.
Στη συνέχεια, πλύντε το φρέσκο άγριο σπανάκι κάτω από τη βρύση με άφθονο κρύο νερό.
Χρησιμοποιήστε ένα σουρωτήρι για να σουρώσετε το σπανάκι και πλύντε το για άλλη μια φορά. Στη συνέχεια ανακινήστε το σουρωτήρι πολλές φορές για να φύγει όσο περισσότερο νερό γίνεται.
Ρίξτε λίγο ελαιόλαδο σε μια πολύ βαθιά κατσαρόλα σε μέση προς ψηλή θερμοκρασία.
Μόλις ζεσταθεί το λάδι, σοτάρετε τα κρεμμυδάκια για 2'. Χαμηλώστε τη φωτιά και προσθέστε τα φύλλα σπανακιού, κομμένα στα τέσσερα με τα χέρια σας. Ανακατέψτε για να σοτάρετε το σπανάκι γύρω γύρω.
Μετά από 5', θα δείτε ότι το σπανάκι έχει συρρικνωθεί στο 1/8 του αρχικού του μεγέθους !! Αφήστε το να βράσει για 12'-15' ακόμα, έτσι ώστε το μεγαλύτερο μέρος του νερού του να εξατμιστεί! Στη συνέχεια, σβήστε τη φωτιά.
Τοποθετήστε το μαγειρεμένο σπανάκι σε ένα νέο μπολ για να αρχίσει να κρυώνει.
Φτιάξτε την γέμιση:
Προσθέστε όλα τα τυριά μέσα στο βρασμένο σπανάκι.
Ξεκινήστε με το ανθότυρο και στη συνέχεια το τριμμένο κεφαλοτύρι.
Συμβουλή: Έχω χρησιμοποιήσει συνολικά 350 γρ / 12 oz από διάφορα τυριά. Μπορείτε να χρησιμοποιήσετε άλλους συνδυασμούς τυριών αν προτιμάτε (αλλά όμως μην παραλείψετε τη φέτα!).
Αλατοπιπερώστε (όχι πάντως πολύ αλάτι, γιατί θα προσθέσετε και όλα τα τυριά !!)
Τώρα προσθέστε όλα τα φρέσκα μυρωδικά μέσα στο μείγμα.
Τέλος, κάντε τρίμματα τη φέτα ανάμεσα στα δάκτυλα σας και προσθέστε τη στο μίγμα.
Με ένα μεγάλο κουτάλι, ανακατέψτε όλα τα συστατικά για τη γέμιση. Φυλάξτε τη γέμιση στο ψυγείο.
Ώρα να ανοίξετε τη ζύμη:
Ζυμώστε τη ζύμη και σχηματίστε τη σαν μια στενόμακρη φρατζόλα ψωμί. Διαχωρίστε τη ζύμη σε 6 κομμάτια με το μαχαίρι για να την δουλέψετε πιο εύκολα (3 κομμάτια για το κάτω μέρος του ταψιού και 3 για το πάνω, όχι απαραίτητα ίσα!).
Πασπαλίστε λίγο ελαιόλαδο σε ένα στρογγυλό ταψί για πίτες των 26 cm / 10 in.
Αλευρώστε μια καθαρή λεία επιφάνεια και τοποθετήστε ένα κομμάτι ζύμης πάνω της.
Ανοίξτε το φύλλο χρησιμοποιώντας ένα λεπτό και μακρύ πλάστη μέχρι να γίνει η ζύμη τόσο λεπτή, ώστε να είναι σχεδόν διαφανής!
Το πρώτο φύλλο θα αποτελέσει τη βάση για την πίτα σας. Απλώστε και πιέστε το στο κάτω μέρος και τις πλευρές του ταψιού. Συνεχίστε να ανοίγετε τα άλλα φύλλα, τα οποία δεν είναι απαραίτητο να καλύπτουν ολόκληρο το ταψί.
Πασπαλίστε λίγο ελαιόλαδο στο 1ο στρώμα, πριν προσθέσετε το επόμενο φύλλο.
Επαναλάβετε τη διαδικασία για ένα ακόμη φύλλο. Δουλέψτε τους μυς σας! Τοποθετήστε το πάνω από τα άλλα 2 φύλλα. Πασπαλίστε λίγο περισσότερο ελαιόλαδο από πάνω. Αυτό είναι το κάτω μέρος της πίτας!
Στη συνέχεια, απλώστε τη γέμιση στο ταψί. Ισιώστε τη με το κουτάλι σας.
Επαναλάβετε το άνοιγμα των φύλλων για τα 3 στρώματα πάνω από τη γέμιση.
Μπορείτε επίσης να μαζέψετε κάθε στρώμα φύλλου λίγο με τα δάχτυλά σας τραβώντας τη ζύμη και να φτιάξετε πτυχές. Αυτό βοηθά στην παγίδευση του αέρα μεταξύ των φύλλων και έτσι η πίτα γίνεται πιο τραγανή !! Και πάλι, πασπαλίστε λίγο ελαιόλαδο πάνω από κάθε στρώση φύλλου.
Παρόλο που για τα ενδιάμεσα φύλλα δεν είχε σημασία πόσο μεγάλα ήταν, για το
τελευταίο στρώμα θα πρέπει να σιγουρ��υτείτε ότι είναι ανοιγμένο ώστε να καλύψει ακριβώς τη πίτα σας.
Ανοίξτε το και μετά τοποθετήστε το σαν τελευταίο στρώμα. Διπλώστε τις άκρες γύρω γύρω για να σφραγίσετε την πίτα.
Πασπαλίστε λίγο ελαιόλαδο από πάνω. Η Σπανακόπιτα είναι έτοιμη για το φούρνο.
Εάν είναι ευκολότερο για σας, μπορείτε να χαράξετε την πίτα τώρα, πριν ψηθεί. Συνήθως εγώ το κάνω μετά!
Συμβουλή: Εάν θέλετε να ετοιμάσετε τη πίτα πιο μπροστά, μπορείτε σε αυτό το σημείο να την φυλάξετε στη κατάψυξη (καλυμμένη με πλαστικό περιτύλιγμα) για έως και 1 μήνα.
Ψήστε την Σπανακόπιτα σε ένα προθερμασμένο φούρνο @ 190 ℃ / 375 ℉ για 55'-1h ή μέχρι να χρυσίσει!
Όταν η πίτα είναι έτοιμη, αφαιρέστε τη από το φούρνο και τοποθετήστε τη στο πάγκο για να κρυώσει και να δέσει. Μπορείτε επίσης να τη χαράξετε τώρα!
Κοιτάξτε αυτή την εκπληκτική Σπανακόπιτα! Απλά ΟΥΑΟΥ 😮 !!
Εξαιρετικά τραγανή! Και η γέμιση είναι γεμάτη με φρέσκες γεύσεις και αρώματα της Άνοιξης! Σαν να είναι όλος ο κήπος μου σε ένα πιάτο !!
Προτάσεις σερβιρίσματος: Η καταπληκτική Σπανακόπιτα μπορεί να σερβιριστεί πολύ ζεστή ή σε θερμοκρασία δωματίου. Τρώγεται ως κύριο πιάτο, ή ως 1ο πιάτο σε μικρότερες μερίδες. Είναι ο μόνος τρόπος να πείσετε τα παιδιά σας να φάνε ΚΑΙ να τους αρέσει το σπανάκι.
Τέλειο σνάκ/μεζές, κολατσιό για το σχολείο ή τη δουλειά, ακόμα και για πάρτυ! Απολαύστε!
Τουριστικός Οδηγός Ελλάδας:
Το σπανάκι θεωρείται superfood, επειδή είναι φορτωμένο με τόσες πολλές θρεπτικές ουσίες αλλά έχει λίγες θερμίδες. Τα σκούρα, πράσινα σπανακόφυλλα είναι πολύ σημαντικά για την υγεία των οστών, την περιποίηση του δέρματος και των μαλλιών. Ωστόσο, το μεγαλύτερο πλεονέκτημα του σπανακιού είναι ότι είναι μια μεγάλη πηγή σιδήρου, πρωτεϊνών, βιταμινών και μετάλλων. Βοηθάει στην υγιή λειτουργία του εντέρου και στην καταπολέμηση της αναιμίας.
Το σπανάκι χρησιμοποιείται ευρέως στην ελληνική κουζίνα, π.χ. βρασμένο για πίτες ή τρώγεται φρέσκο σε σαλάτα. Στην Ελλάδα, μπορεί να βρεθεί άγριο στην εξοχή με την κοινή ονομασία "Νανά". Η πόλη του Άργους καλλιεργεί μία από τις καλύτερες εγχώριες ποικιλίες σπανακιού που ονομάζεται πλατύφυλλο.
Φωτογραφία: Το Άργος με το αρχαίο θέατρο του.
Κοιτάξτε επίσης την συνταγή μου σε YouTube βίντεο, το λίνκ είναι: ΕΔΩ
#meze#lunch#snacks#maincourse#dinner#pie#pastry#vegetables#cheese#party#kids#children#vegetarian#greece#greek#greekrecipes#spinachpie#σπανακόπιτα#love#SPINACH
1 note
·
View note
Last Seen Blogs

sygin
Sygin.


isin-exile
unaware/desprevenido

main-midas
#2 Oil Paint Eater

bssrev3
Blue Screen Stuff