#photo restoration
Photo

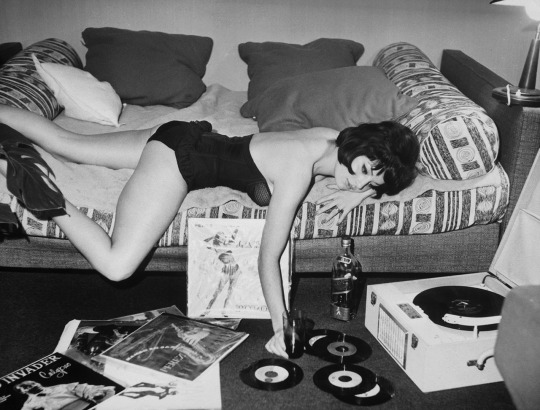
Jane Greer dreaming she is pursued by the ghosts of three actors she has to bump off in her forthcoming movie, Out of the Past.
Peter Stackpole, “Jane Greer,” Life, Jun 2, 1947
#jane greer#life magazine#old hollywood#out of the past#1940s#vintage#peter stackpole#dream#nightmare#photo montage#photo restoration#black and white#photography
118 notes
·
View notes
Text

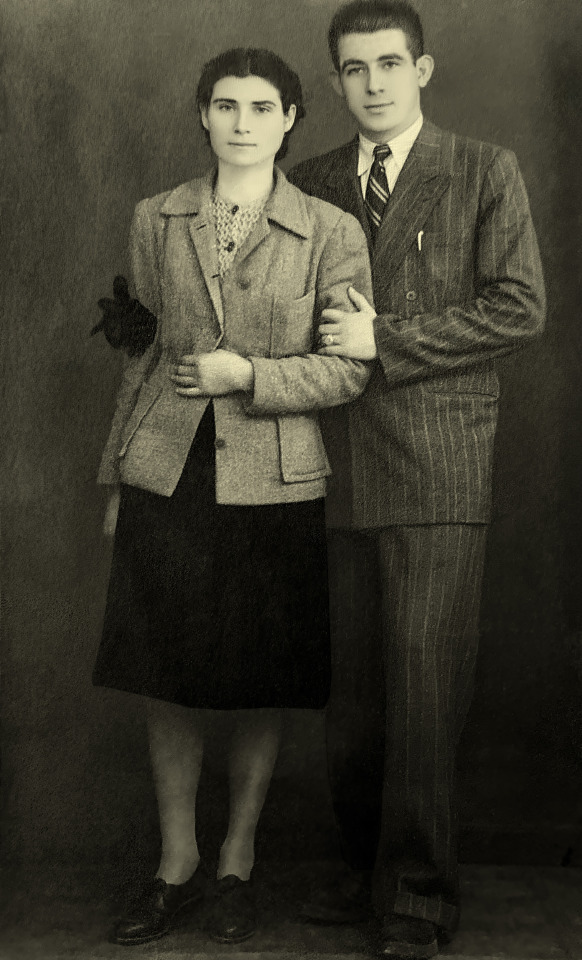
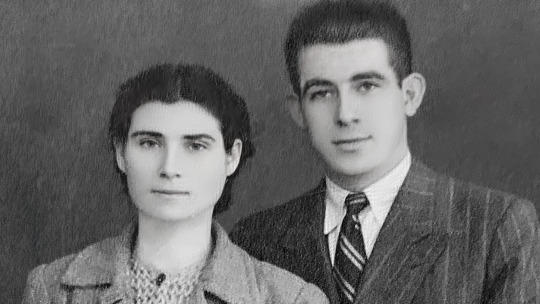
When I got to this photo in Katrina's collection of vintage family imagery, I was pretty stumped as to how to approach it.
There is a major problem when you zoom in to 100%.
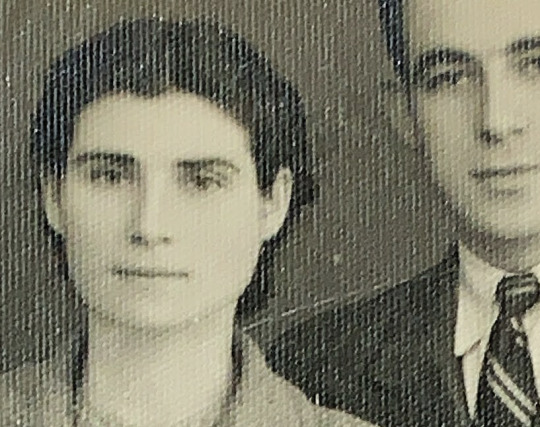
The paper it was developed on has little micro bumps. When it was scanned, the light from the scanner caused a highlight on one side of the bump and a shadow on the other. This causes a pattern which is nearly impossible to eliminate using traditional techniques.
The easiest way to fix this is actually quite clever. You scan it once, then turn it upside down and scan it again. The second pass reverses the side the highlight and shadow appear on, so you can combine the images in Photoshop and blend them together, essentially canceling out the bumps. It's weirdly analogous to noise canceling headphones.
But I don't have access to the physical copy of this image.
So... now what?
Enter Fast Fourier Transform or FFT.
This is a filter that uses extra fancy math to recognize patterns in the image and eliminate them. There is a pretty good filter for Photoshop, but it does not work easily with newer Macs with Apple Silicon. I really did not want to figure that out, and I also was too tired to go downstairs to my PC. However, I learned that a Photoshop competitor, Affinity Photo, has this filter built in. So, I downloaded a trial copy and started the process of trying to figure out how to fix this image.
It was amazingly simple. It brings up these star patterns and you just paint black circles over every one but the center. It literally felt like magic. (Full screen with sound recommended)
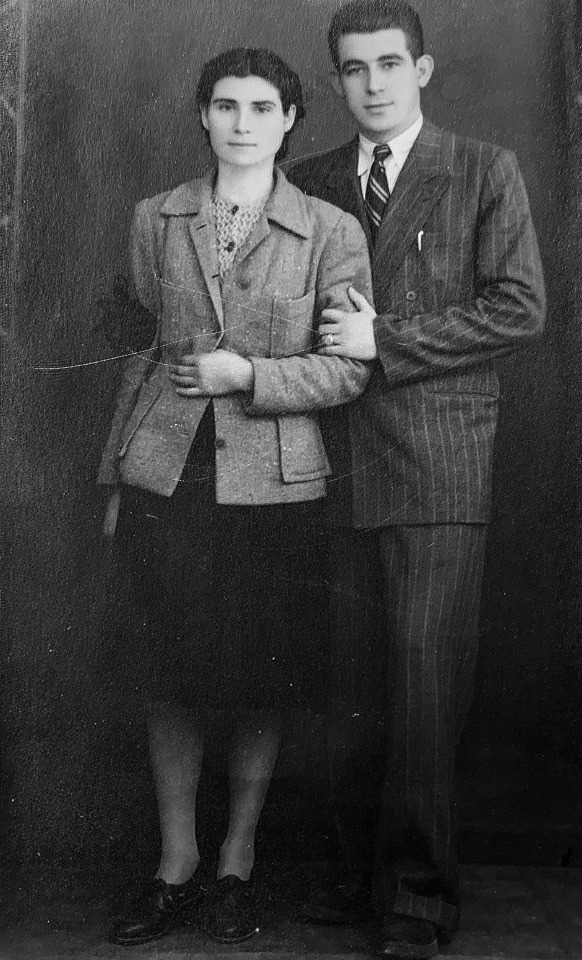
So once I did this process I ended up with this...
The paper still had a rough texture but it was much easier to work with using traditional techniques. I started with a black and white conversion and meticulously went through the photo zapping scratches and flaws and balancing tones and sharpening facial features. All of my photo restoration tricks were needed.
I eventually landed here...
I then thought maybe I should match the sepia tone of the original print, so I got to here...
I think the black and white looks nicer in this instance, but I always like having options and this is the most faithful representation of how the photo originally looked.
But there is something else I have been playing around with lately. Photoshop has these experimental neural filters that use cloud processing to do various tricky enhancements. Most of them are in beta and they can be very quirky. But they have a colorizer that tries to detect people and things and adds color to them. Not every black and white photo is a good candidate. I have found these professional portrait photos work decently, but the filter is very hit-and-miss. And there are tools within the filter to help you make a miss more of a hit, but often I have to accept the photo isn't going to work.
But I decided to give it a shot with this one and surprisingly, the colorizer got me most of the way there.
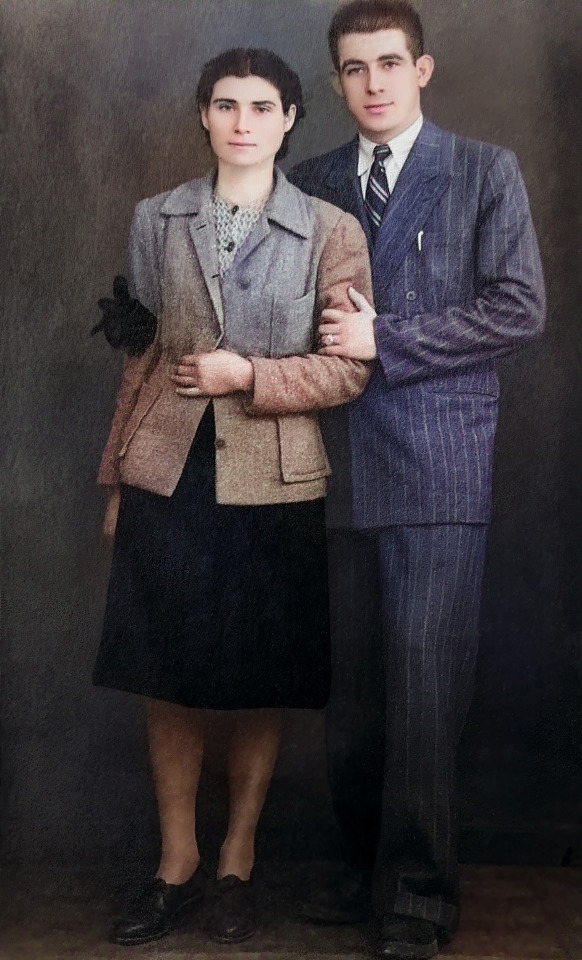
I can work with that.
The one thing it does well is skin. Manually painting color onto skin is tricky and requires more skill and knowledge of traditional painting techniques than I have. But if a filter can do that part for me, I can do the rest.
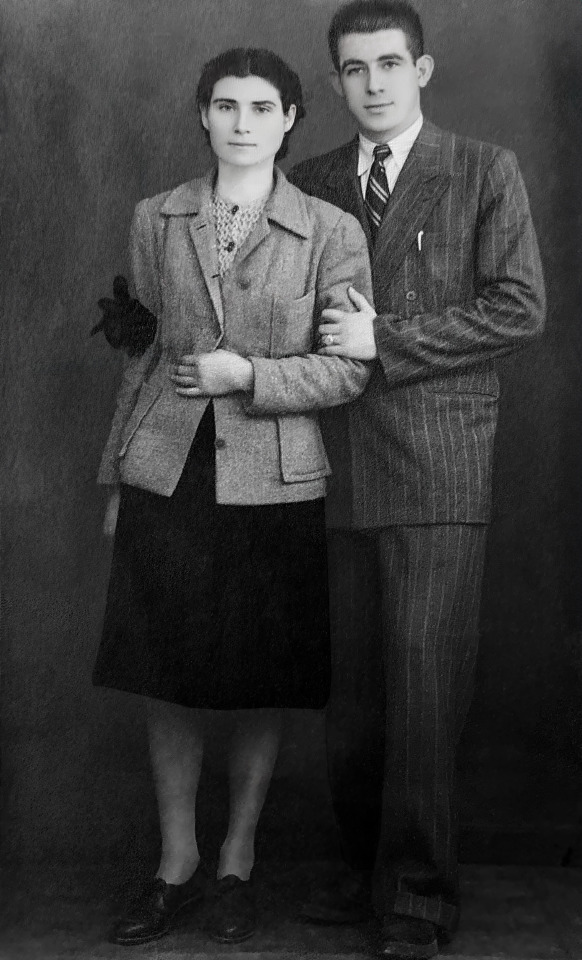
So after my touchups, I got the image to here.

All I have left to do is my standard color enhancements to make them a little less ghostly and a little more human.
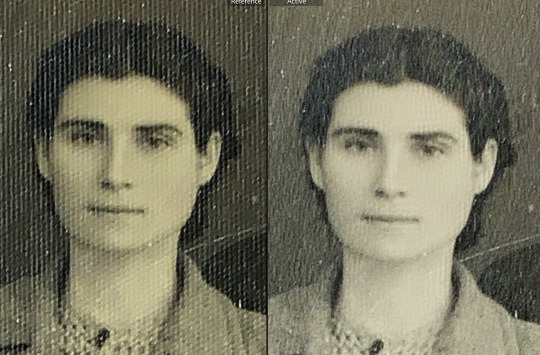
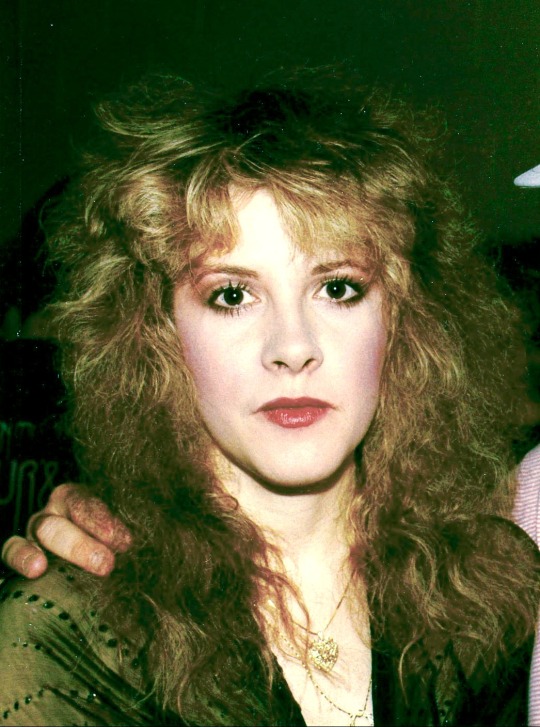
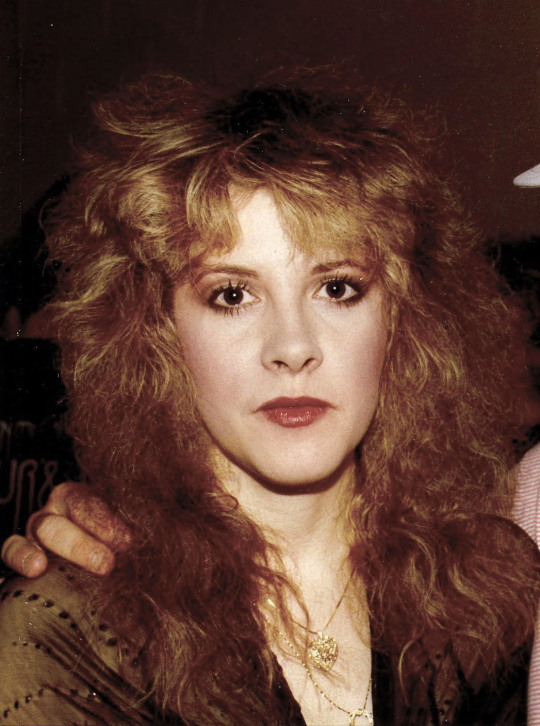
And I present to you where I started and the finished product. I encourage you to flip back and forth.
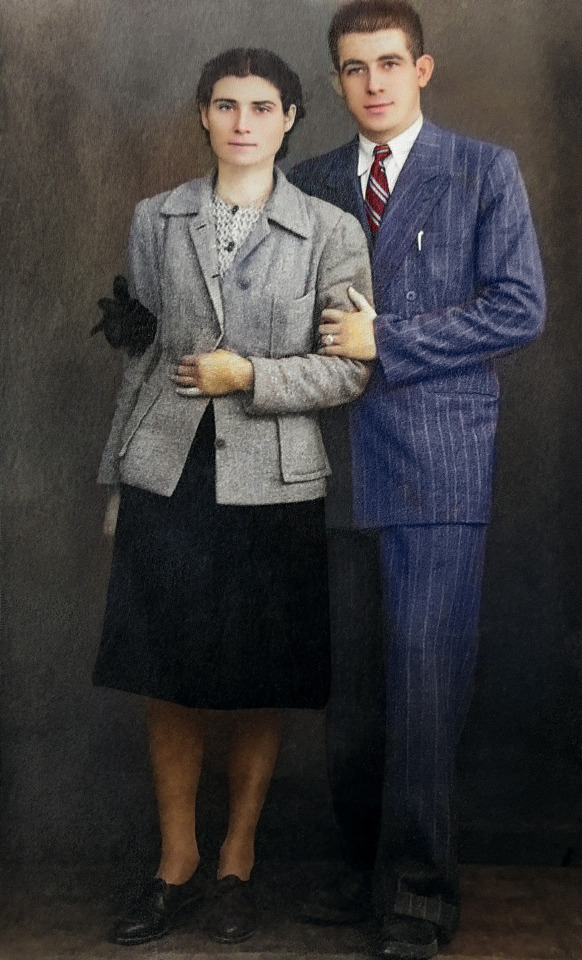
I'm not sure how, but I was able to go from an image I thought was impossible to edit to a beautiful colorized memory for my best friend's mom. I cannot wait to show her.
868 notes
·
View notes
Text
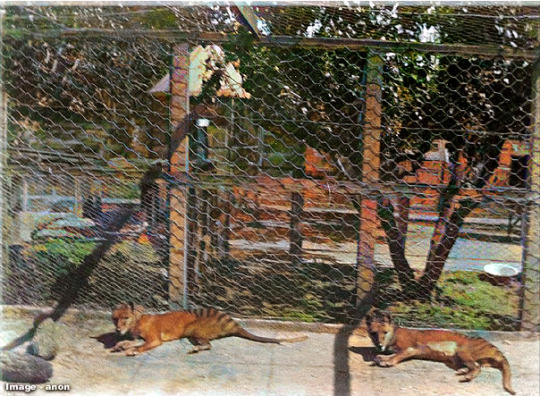
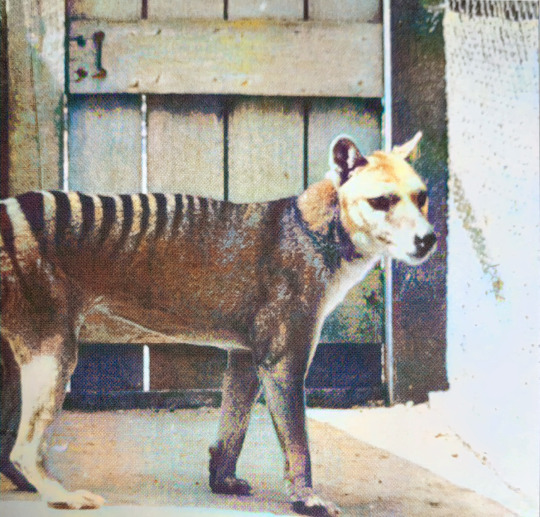
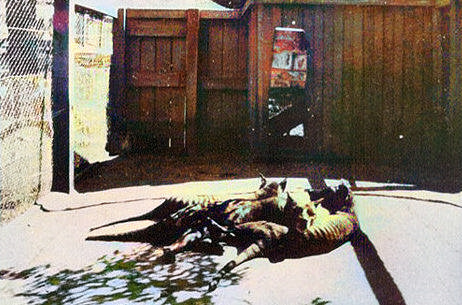
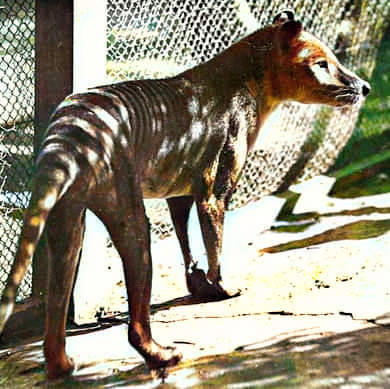
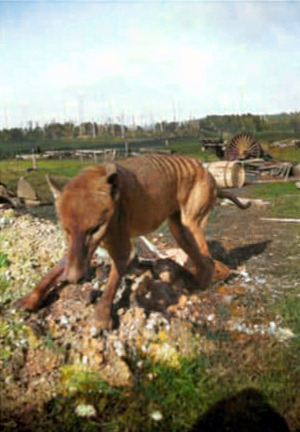
Here are some more thylacine recolors for y'all!!
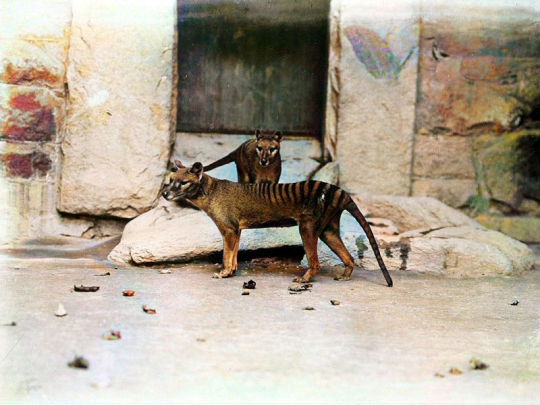
#tasmanian tiger#thylacine#thylacinus#thylacinus cynocephalus#recolor#photo restoration#historic photo
696 notes
·
View notes
Text
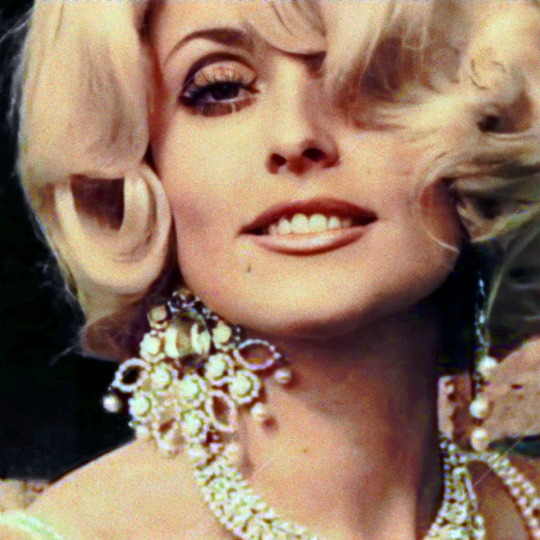
Sharon Tate / Don't Make Waves / 1967 / Edit
56 notes
·
View notes
Text

#selena#selena quintanilla#selena quintanilla perez#tejano#tejano music#90s#queen of tejano#1990s#90s fashion#music#photo restoration
49 notes
·
View notes
Text
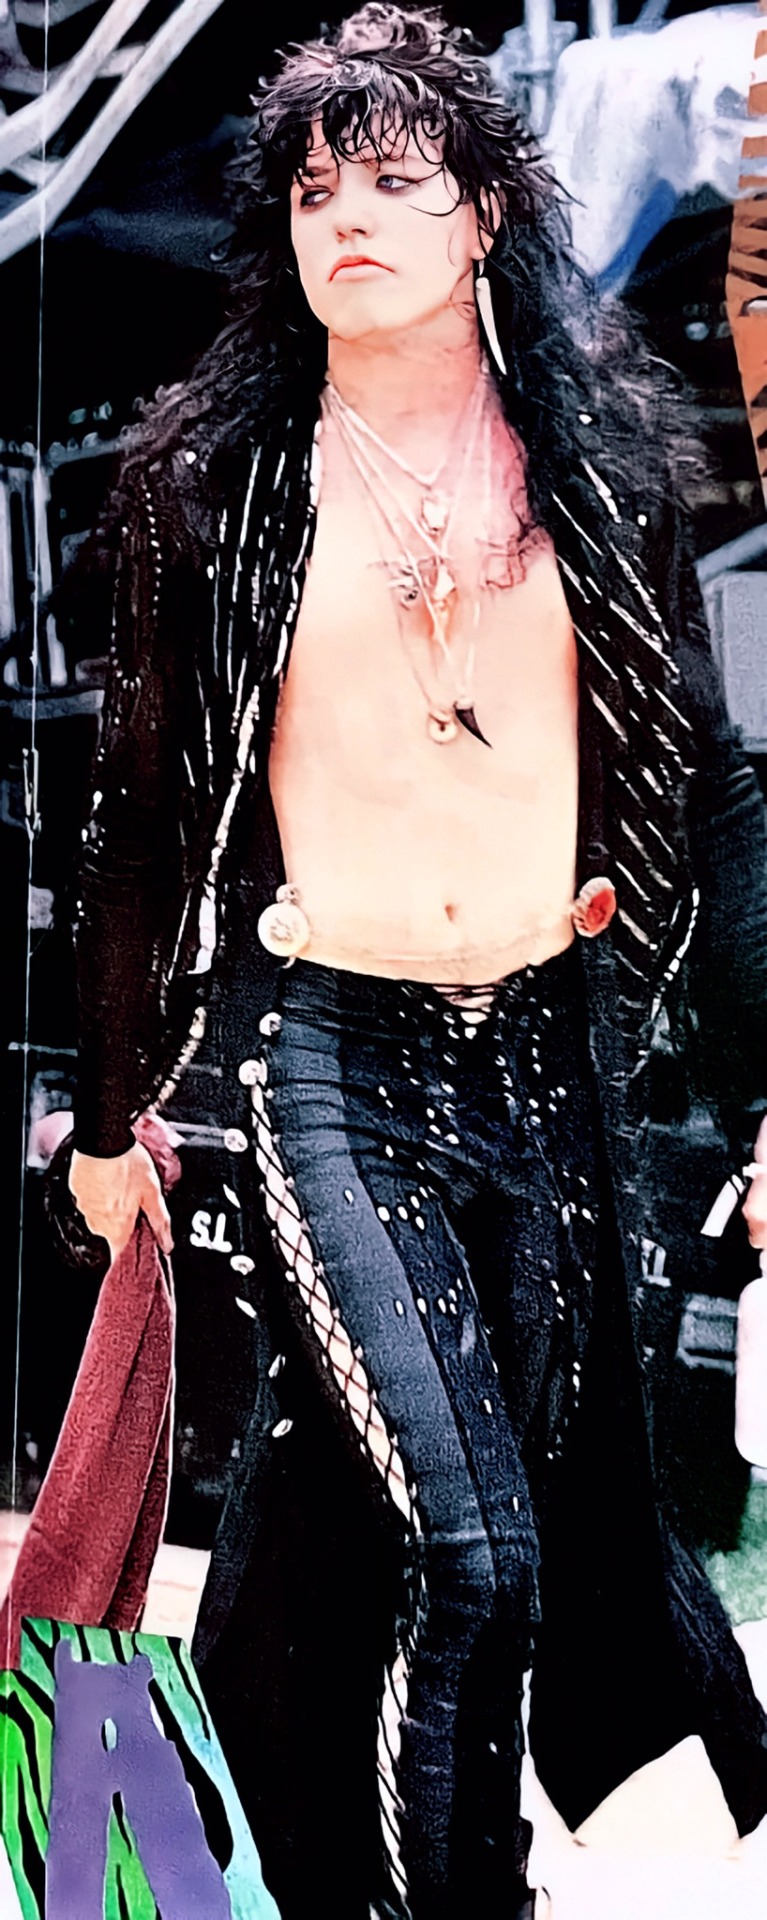
HAPPY BDAY TOM 💋🎈🤘🎤
#happy bday tom#80s metal#cinderella band#tom keifer#heavy metal#glam metal#rock n roll#metal#blues metal#hard rock#rock#my edit#photo restoration#my old love
48 notes
·
View notes
Text
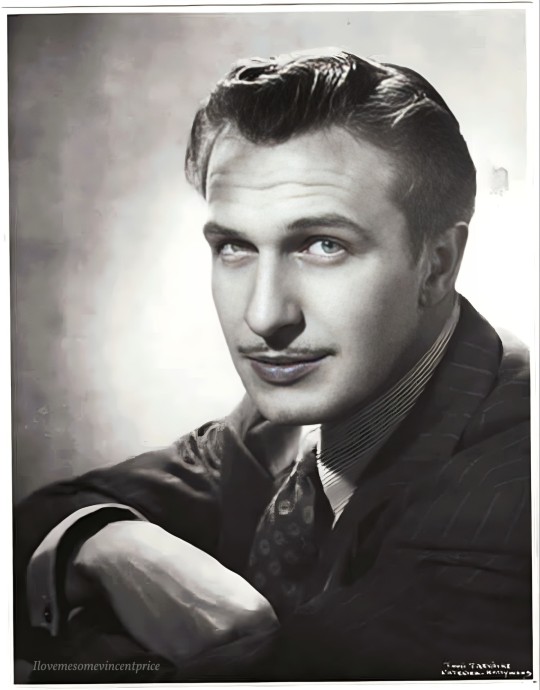
Vincent Price circa 1938
Photo restoration by me.
#vincent price#b&w photograph#photo#so beautiful#gahhh hes gorgeous#those lips and eyes#he's so.gjgdsdfghjkkhgb#sorry. i just can't#photo restoration#photo edit by me#horror#old horror movies#vintage#movie#actor#handsome#bicon#bisexual#god
63 notes
·
View notes
Text
Photo Restoration
19 notes
·
View notes
Text
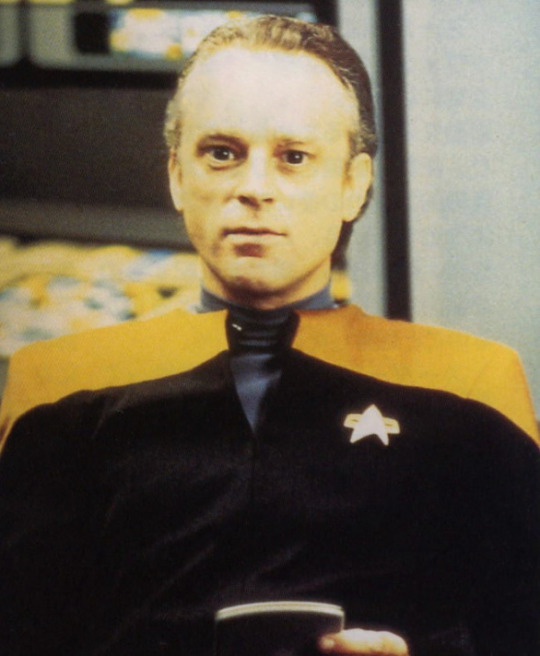
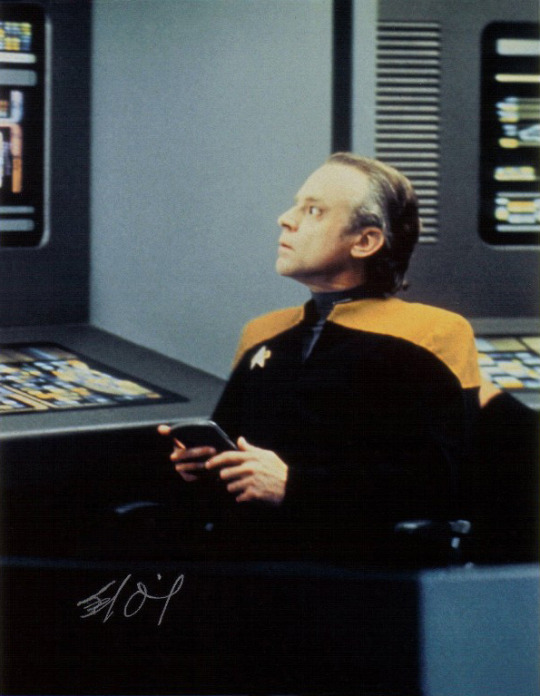
Brad Dourif as Lon Suder - Star Trek Voyager
Given Suder's sociopathic tendencies, how perfect a place was the Maquis for him?
BD: He was at home with the Maquis. He did what they needed him to do, which was the dirty work.
At the end of the episode, after your demise, Tuvok says a Vulcan prayer wishing you in death the peace that you couldn't find in life. How fitting a farewell was that for Suder?
BD: I think that was dead on. It was a short little thing. There was another death there, which I think had more meaning to other people, but it was just a private little thing for Tuvok, giving Suder some closure. And I thought that was also appropriate because Suder was sort of an alone person and only one person recognized him. For a sociopath, empathy is impossible and you almost have to create it intellectually, and you never feel it. But I think people felt for him. Suder tried. He really, really tried.
full Interview @ startrek.com
#friendly reminder that he actually wanted to be a good person#he jumped at the chance to change without hesitation when tuvok offered his help#he really really tried#ugh#my blorbo#lon suder#star trek voyager#brad dourif#analogue photo#photo restoration#star trek#st:voy#interview
45 notes
·
View notes
Text
I think this is as good as I'm gonna get it, so -
First attempt at photo restoration in years - photo of Rory Storm and the Hurricanes taken from The Liverpool Echo. Altered colour settings, painted out scratches, restored details to a face, ran it through an image upscaler, and then fixed a few more things.
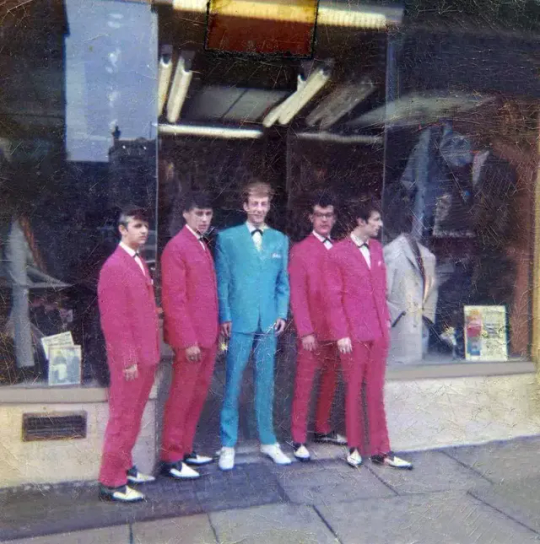

From left to right: Richard Starkey (Ringo Starr), I think Charles O'Brien (Ty O'Brien), Alan Caldwell (Rory Storm), Walter Eymond (Lu Walters), and I think Johnny Byrne (Johnny Guitar). O'Brien and Guitar may be round the wrong way.
8 notes
·
View notes
Text

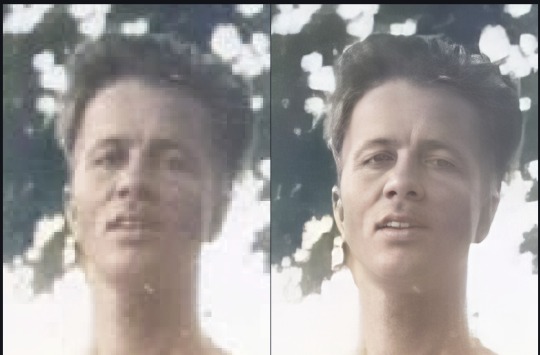
I used Topaz Photo AI on really old photos of my Mom and Dad. Used upscale and face restore. the result is quite amazing
11 notes
·
View notes
Photo
Nightclub singer at home, ca. 1960s
12K notes
·
View notes
Text
Photo Restoration Project - Part 1
A long time ago, Katrina sent me some old photos of her family I could restore. Her parents have been helping me from afar for years and I really wanted to do something nice for them. Unfortunately my dad got much worse and I pretty much forgot about this project for quite some time.
But then I decided to visit Katrina in Orlando and we discussed having dinner with her parents and I remembered these photos. So I thought I would fix them up so I could present them as a gift in person.
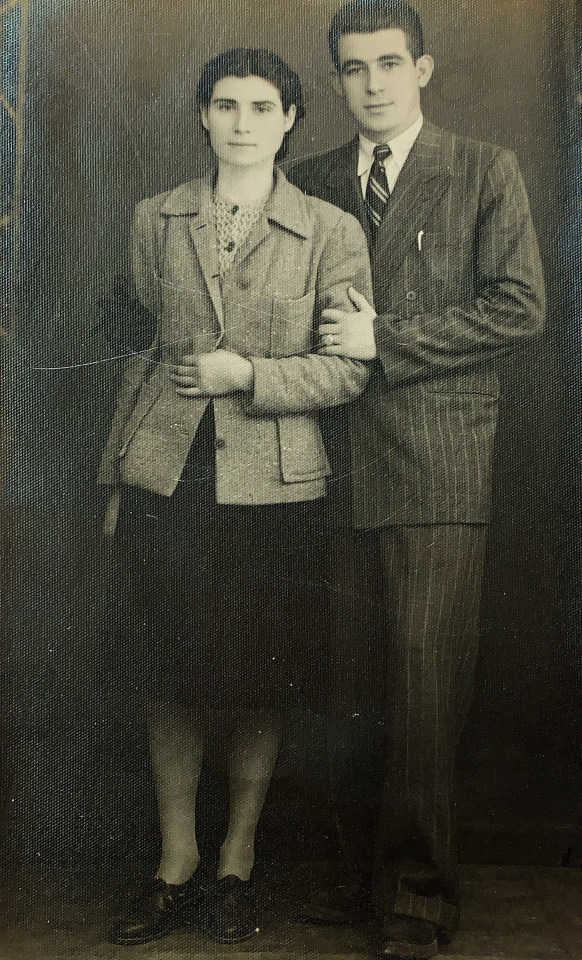
The first and most important photo was from her parents wedding.
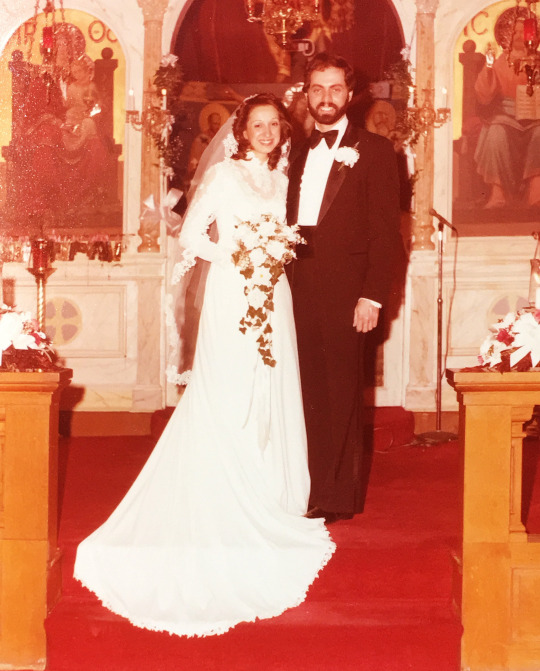
Old photo prints can fade over time due to UV light exposure. From what I understand, different colors fade at different rates and red/orange tones tend to be the least susceptible to this fading. Thankfully all of the color information is still there, it's just that the darks are not as dark and the lights are not as light. The dynamic range got squeezed like an accordion. However, if you do a levels adjustment on the red, blue, and green channels individually, you can unsqueeze the accordion and balance everything back to the way it was.
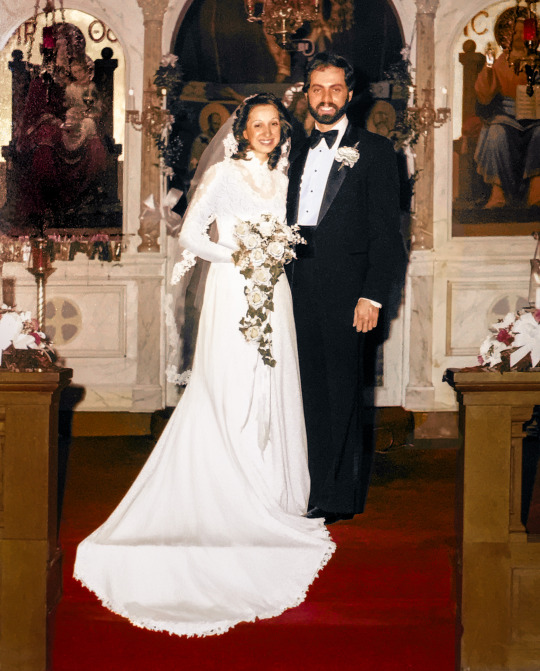
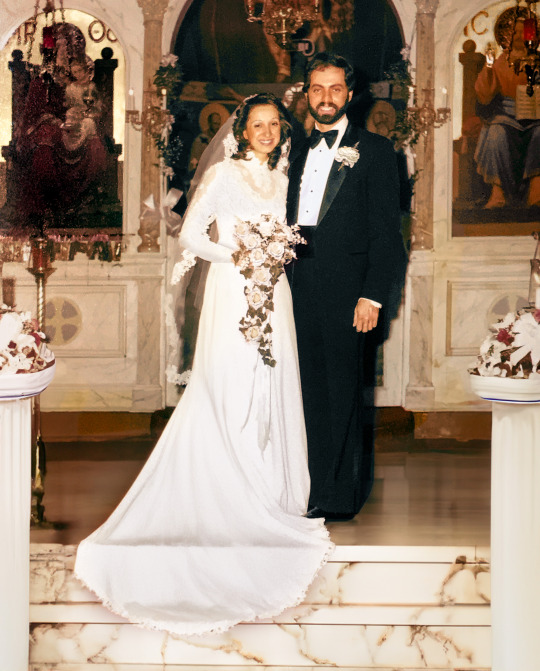
But you can't always save everything and there may be other damage that needs fixing. If something becomes pure white, there is no way to restore that detail. Thankfully I was able to use the new generative fill feature to bring back detail in the dress, the flowers, and the tuxedo shirt.
And because I hate front facing flash and how it makes colors look ugly and sterile, I may have also added a marble floor and pillars.
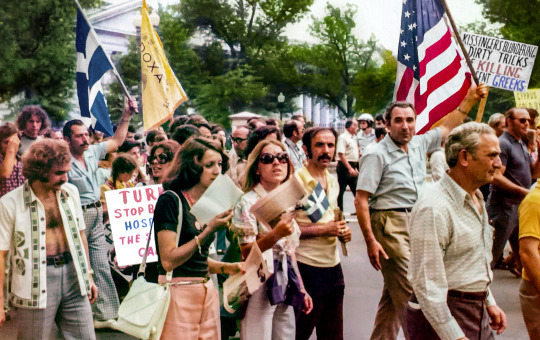
Next up was a photo of Anastasia, Katrina's mom, protesting Henry Kissinger on behalf of her home country of Greece. This suffered from the same color fading issues.
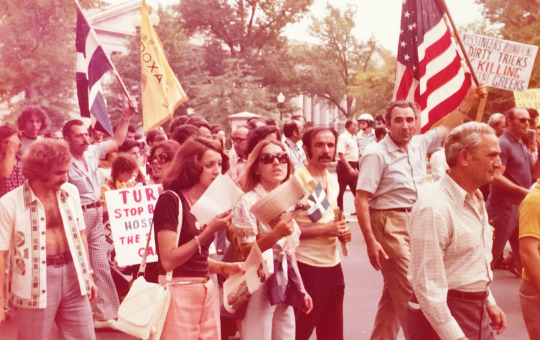
What made this one a little more tricky was an uneven fading. The left side had to be adjusted independently and the top was even more faded. I had to isolate the trees to bring back their color. And the protest signs were difficult to read, so I enhanced those as well.
Next we have this lovely photo of Anastasia tending to some house plants.
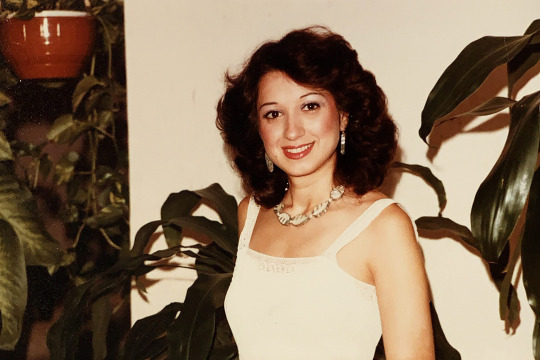
This photo was actually in decent shape. It lost a little contrast, had a little bit of fading, and her top retained almost no detail I could recover. Recovering accurate skin tones is probably one of the most important skills I learned when restoring these photos. I wanted to keep that filmic look of the era while avoiding making people look jaundiced or pale. Lightroom's new masking feature that let's you isolate every aspect of the people it detects in a photo. This made fixing skin tones much easier. I could isolate just her face or her lips or her hair or her eyes and make precise individual adjustments. This process could have taken a great deal longer without this feature. But, I brought back proper contrast and color, added a little bit of detail to her top with gen fill, and hopefully got fairly accurate skin tones as well.

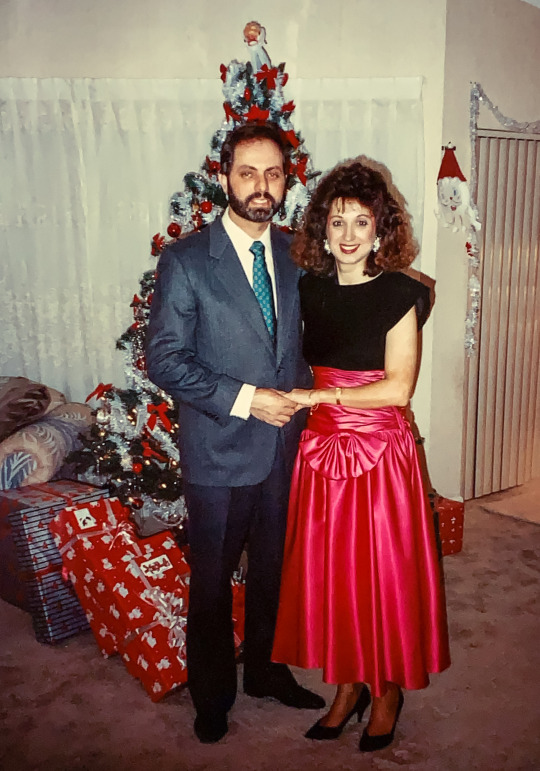
Next up, forward facing flash strikes again in a photo of Mike and Anastasia during Christmas.
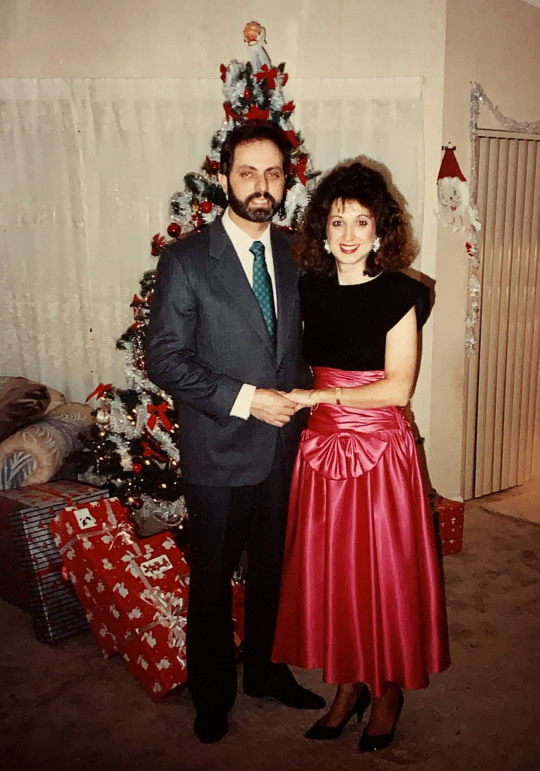
Film did not do well in low light. If it was indoors and nighttime, you pretty much had no choice but to use flash. But a flash is a very small, bright light source and this causes a very unflattering result on humans. Today we have much more powerful flashes with rotating heads. We can bounce the light into the ceiling or off a wall and increase the size of the light source to get a more flattering result.
In this photo I wasn't able to do much, so I just balanced the skin tones and brought out some hidden detail and called it a day. It's still a lovely memory and thankfully film has such character that it negates a lot of the unflattering aspects of direct flash.
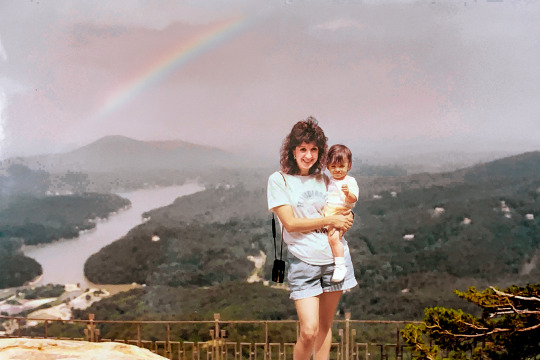
Next up is some cuteness...
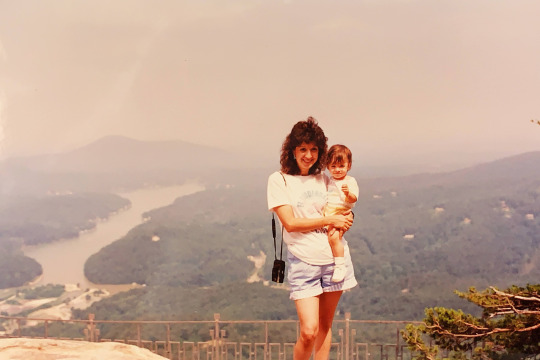
A big priority when editing photos is to make sure the subjects are the star of the photo. And in this one their faces were a bit obscured in shadow. There was also a lot of haze in the background hiding the beautiful vista. Not to mention when I cleared that haze, there was this super faint hint of something in the sky. I can't tell if it was a rainbow, but I decided to believe it was a rainbow. The only thing that I am still struggling with, and this seems to be common with a lot of old photos, is green. Getting a good, saturated, natural green to look right has been very difficult. Everything I try ends up looking toxic or fake. The only thing that ends up looking right with the rest of the photo is more of a yellow-y brown. It's something I'll have to work on as I learn, but as long as the overall photo looks balanced and natural, I'm okay with not perfectly nailing the greens.
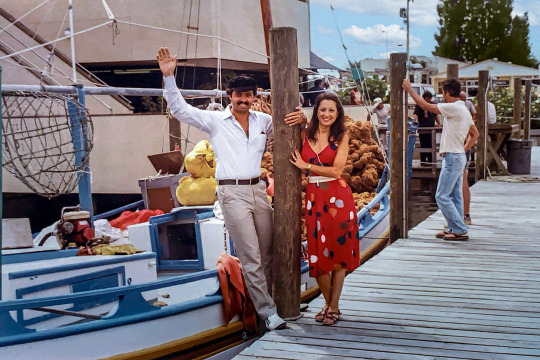
Up next we have a lovely scene on a Greek dock...
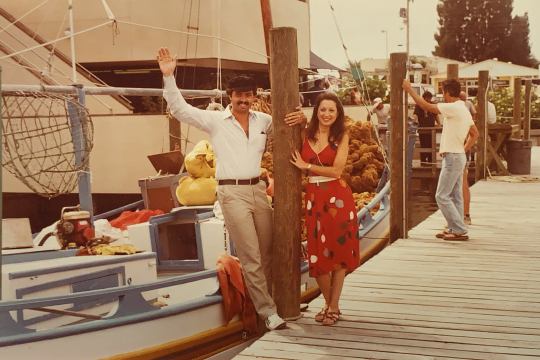
As far as editing goes, this was pretty basic. I just undid the fading, adjusted the skin tones, replaced the blown-out sky, and made the colors pop. But I think this is actually one of my favorite before and after shots. I just love how such a simple fix brought this scene to life.
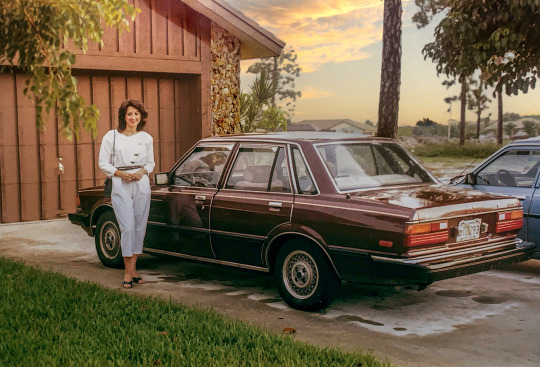
A new car is a big deal and Anastasia looks so proud here...
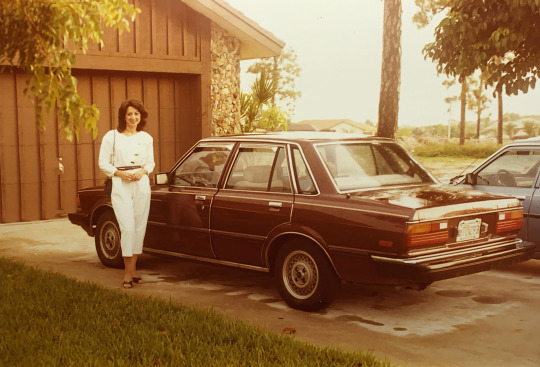
This image has another common issue in addition to the typical fading of colors. It has a yellowish orange color cast. This could have been an issue with the film used or the development process or a chemical reaction on the print. A color cast is a lot like looking through colored glasses. It's like a translucent color material was put on top of the image. This can be a little trickier to deal with, but if you know your color theory, you might already know the solution. Blue is the opposite of yellow/orange on the color wheel, so if you introduce blue to the image it should balance out. Also, add a sky if it was missing.
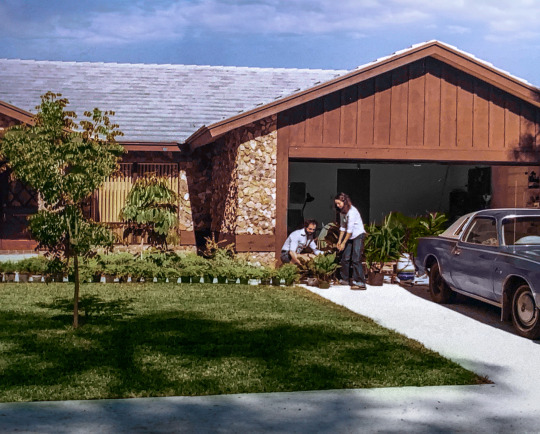
Next up we have a landscaping project...
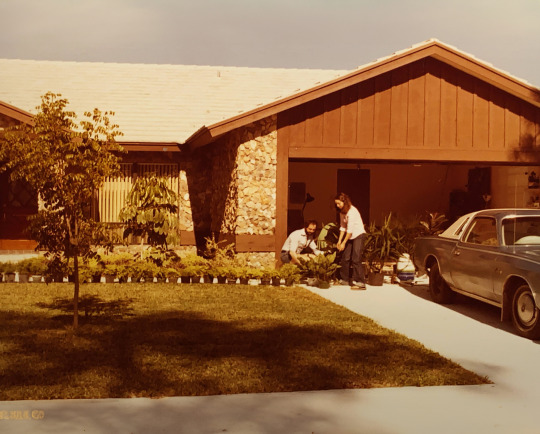
This one wasn't too tricky, but there was one interesting issue I had to address. All light has a color temperature. Daylight has a temperature of around 5500K. But the inside of the garage was being lit by reflected light and so that light took on the color temperature of the things it was bouncing off of. So I had to mask out the people and the car and address the color temperature inside the garage to make everything look balanced. Also, the green fought me hard on this one. And with the theme of this picture being plants, I felt I really needed to find a tone that worked. I think I finally got there, but I spent way too much time in the color picker doing trial and error of green tones. Also, new sky.
With this next one I actually did a pretty thorough explanation of how I edited it. But this was probably my favorite puzzle to solve from this collection of photos.
I'll do the abridged explanation...
The physical photograph was printed on a paper with a very heavy texture. And when it was scanned, the light from the scanner bounced off that texture and created a pattern of unwanted highlights.

I was worried this was impossible to fix and I almost gave up on this photo. But after one final Google search I discovered something called "Fast Fourier Transform." It's a mathematical formula that can be used to detect patterns. And the image editing software Affinity Photo, just so happens to have a filter called FFT denoise that helps you remove unwanted patterns from scanned photos.
And thanks to that filter, I was able to remove a substantial amount of that pattern...
Then I did my standard clean up techniques...
Oh, and I decided to try learning how to colorize.
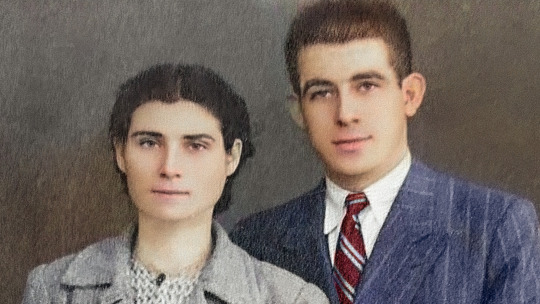
Photoshop has a new set of experimental filters and a colorization tool is one of them. It is not great yet, but it is a great starting place. Instead of having to hand paint every single thing in the photo, Photoshop gave me a base to work with and I could take it from there with traditional techniques.

That's all I have the energy for today, but there are a bunch of cool restorations to talk about. Hopefully you all find this interesting. It was such a great gift to give to Katrina's parents. And spending that time with them and making them happy felt like I was with my own parents again. So we all got a gift in that wonderful evening.
Part 2 coming as soon as I have the energy!
435 notes
·
View notes
Text
Thought y'all might enjoy this.
I used an app to recolor black and white photos of thylacines.


1K notes
·
View notes
Text
today’s 10 minute project: fixing a dark photo
It happens, the lighting in a picture isn’t what it should be and you get something you can’t really see so well. Here, take for instance this snapshot taken at Disneyland in 1975 on slide, as seen through the handheld viewer:
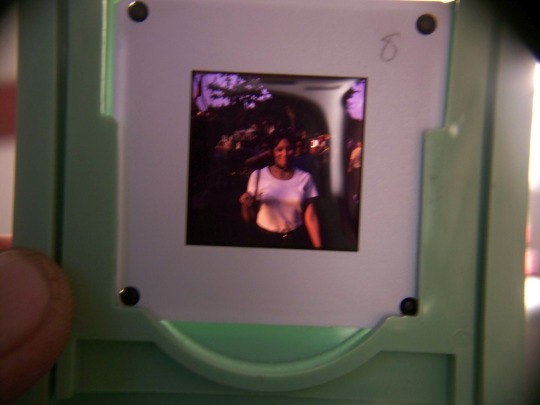
Not the worst but definitely not the best. So first let’s give it a scan at 2400dpi... and I made the executive decision not to turn on ICE to remove the dust, since it would probably attack the image rather than just the aberrations. Not shown here are what the previews of what the scanner’s color restoration tools produced since they came out too light, and since they’re inflexible to tame that down I chose not to use them.
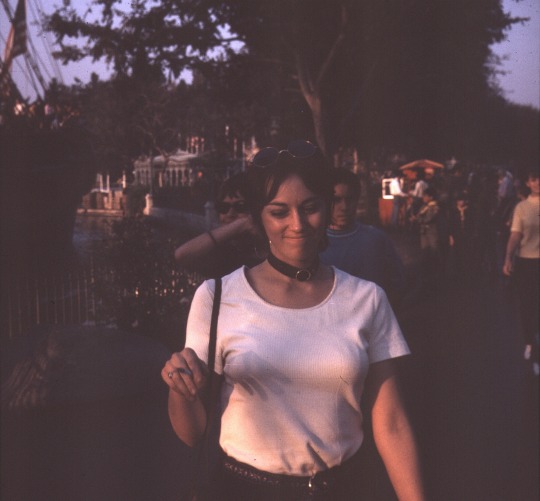
First I hit it with a tool specifically for fixing darkness and shadows, Kodak’s SHO (Shadows & Highlights Optimizer) filter, though IrfanView. Tweaking it to improve the highlights and shadow reduction control, and because it’s got a lot of sunset coloration reduce the saturation just a little.

Now a runthrough, while it’s still in the editor [sorry, no intermediate image included here], with Kodak’s ROC (Restore Original Colors) filter to cut back on the sunset coloration instantly and brighten this up a bit by adjusting the brightness, then the limits for less black and more white.

The result is a slight bit grainy, as too-dark photos tend to turn out, but I won’t try to fix that because it’s actually not that noisy. Saving the result...
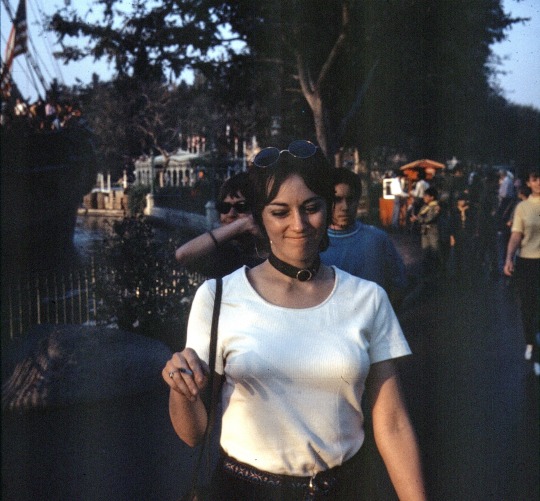
Yeah, that’s more like it!
59 notes
·
View notes
Text

This photo of Selena was taken on March 27th, 1989 for a story published on April 9th that covered her wins at the Tejano Music Awards, as well as her signing her recording contract with EMI Latin!
**NOTE:
I colorized this photo from a black-in-white image, then manually removed certain specs of dust that remained using a Huion drawing monitor, and finally, I did a two-pass upscale. I think it came out pretty good :)
#selena#selena quintanilla#selena quintanilla perez#queen of cumbia#tejano#tejano music#photo restoration
22 notes
·
View notes
Last Seen Blogs

theburrellbusinessgroup
The Burrell Business Group

placewares
Placewares

gattius-starfrost
Gattius Starfrost

thefoodgriot
Tonya Hopkins: The Food Griot

kgoodner
THE ILLEST-STATOR