#walkthrough
Note
Hey there! Long time lover of your art, and my curiosity got the better of me. I've checked your FAQ but I'm dying to know if you have any tips/tricks for how to render gold. No matter which style you draw it in, whether more painterly or simplified (like for Étienne & Benoît), your gold accents always feel like they have the crucial elements of both warmth and the like. reflectiveness?? ITS THE GOOD STUFF either way
OGH THIS IS GONNA BE A BIT HARD TO EXPLAIN BECAUSE it's a lot of accumulated studies but I'll try ;u;
FIRST OFF: I feel like I have to say that these are all just shortcuts- I've learned just enough about gold to be able to convey the illusion of gold on what I draw, in the fastest way I could do it, for quickly putting the ideas in my head on paper, but this is by no means a comprehensive guide!
If you really want to study the physics of it all, the way it would work with different materials and styles, then I highly suggest doing a lot of self-studies!
Even when painting smth new- if it's really something I want to work hard on, I tend to have gold references open on the side so I can look at them and figure out how they work!
Ok, so moving on:
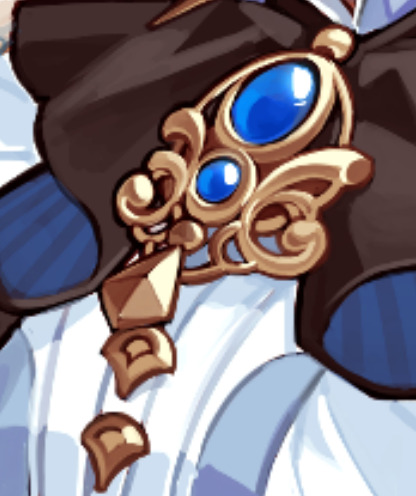
I like to look for references because the type of gold/material is going to affect the reflectivity and the way I'd shade it, but by default I love doing the more chrome-y type of material on my stuff bc it reads the best as gold, yanno? Unless of course the thing I'm doing calls for more matte/textured types...

Then depending on the colors surrounding the gold item, as well as the colors on the gold item, I can figure out the colors I want to use!
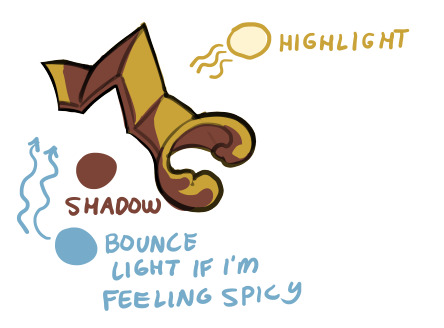
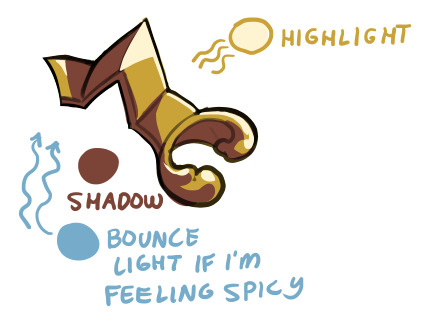
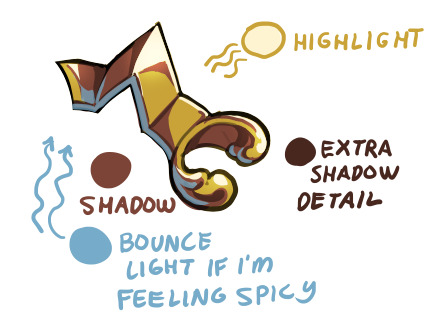
By default though I like using a sort of yellow or yellow-orange with deep browns for the gold itself, light cream/white for the highlights and light blue for the bounce light (which is actually the simulation of an effect where the blue sky's color bounces off the ground and up onto your item!)

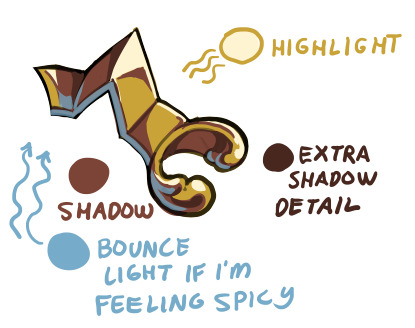
I feel like the 'warmth' that you are seeing is the interaction between the reds and yellows of the gold, contrasted and made much warmer with the blue bounce light!
It's hard to see on the next one, but I airbrushed the Highlight color on an Overlay (sometimes an Addition) layer, which helps add a glow!
For the Genshin style mockups I had to do some research because the specific way of shading gold that the MHY artists utilize usually go for less saturated, lighter yellows and browns, and not everything is shaded chrome-like!

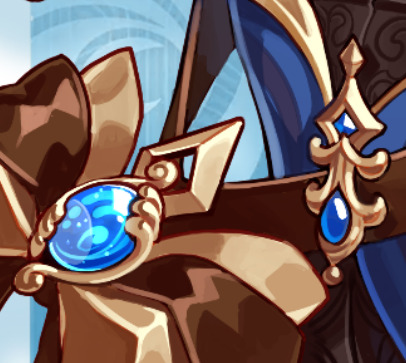
You can see my attempts to mimic the flatter shading on these parts of Etienne's outfit:

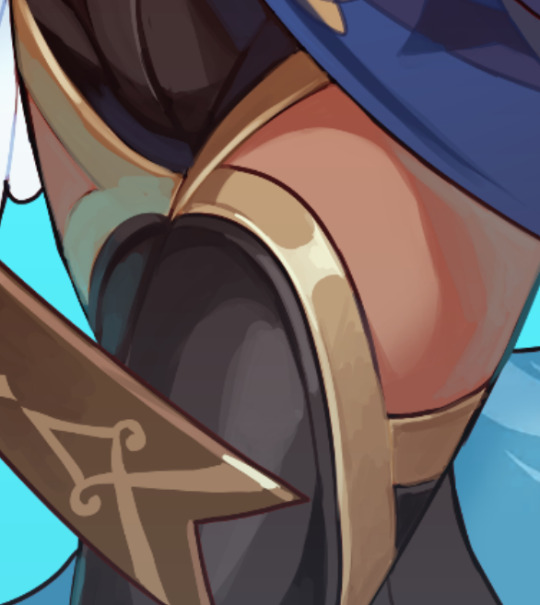
and then return to my more usual shading methods on these next parts, which were more in line with the shading on the red box in the examples above!
it's a bit long, but I hope you find what you were looking for in here somewhere! ;u;
489 notes
·
View notes
Text
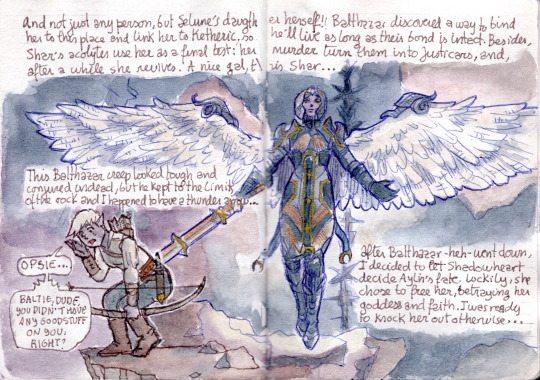


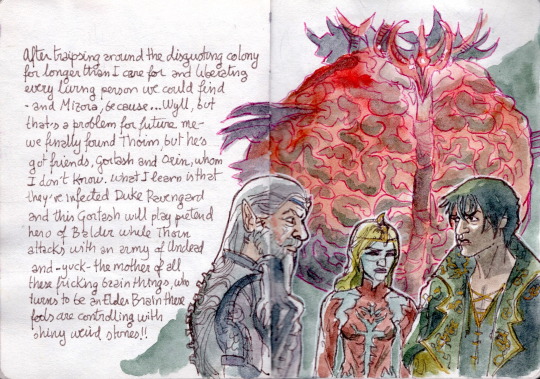


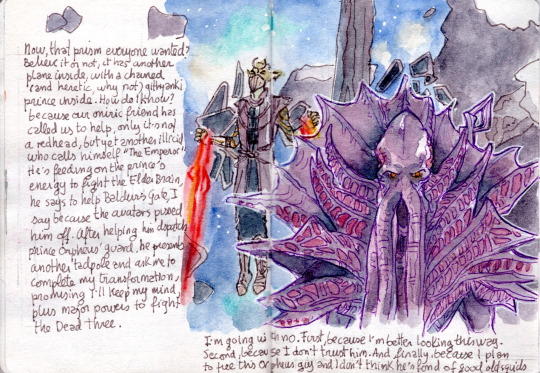
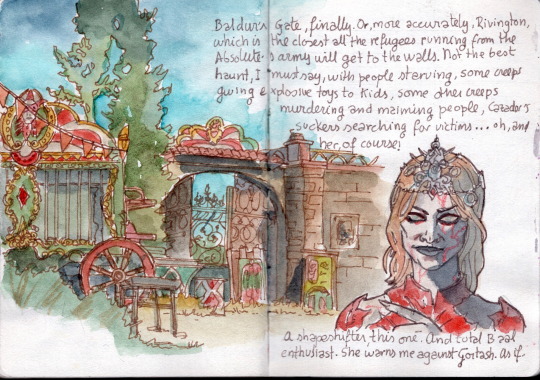
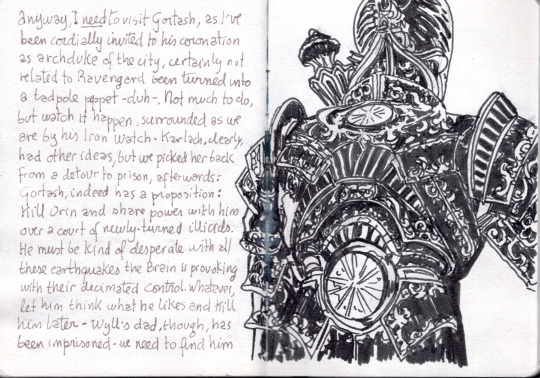
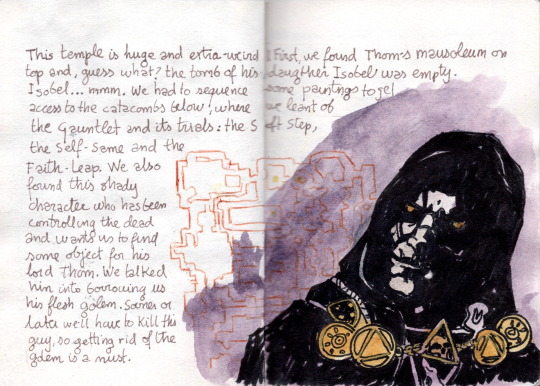
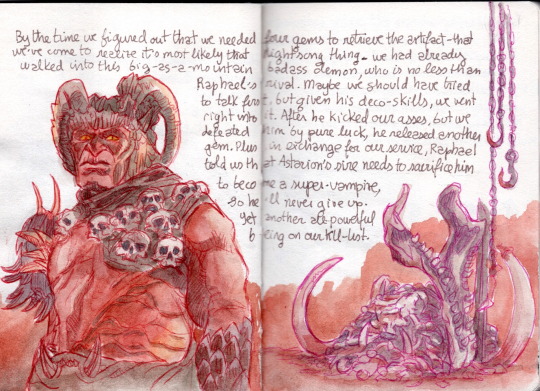
Assault on Moonrise towers, the colony and on to the outskirts of Baldur's Gate
An explorer's journal in Faerun:
Pages 1-10 - Pages 11-20 - Pages 21-30 - Pages 31-40.- Pages 41-50
#bg3#baldurs gate 3#videogame journal#walkthrough#larian studios#orin the red#the emperor#the dead three#enver gortash#ketheric thorm#myrkul
118 notes
·
View notes
Text

Horse Ranch - Tall Grass (Dry) - Walkthrough
If you want more realism in your game, download these additional tall grass objects where your Sims and pets will be able to walk through, instead of around. ;)
For more info, images and the download link itself, take a look at my Patreon post.
>>> CLICK HERE TO GO TO MY PATREON + DOWNLOAD <<<
I've also made videos about most of my previous mods. You can find them in my Bakie's The Sims 4 Custom Content Series on YouTube.
>>> If you want to support my work, take a look at my Patreon page <<<
#BakieGaming#ts4cc#s4cc#Grass#Walkthrough#Tall#Walk-through#Plant#Horse Ranch#Horse#Ranch#TheSims4#Sims4#MaxisMatch#MaxisMatchCC#bts4cc#Sims 4 Custom Content#Sims 4 cc#Custom Content#Sims4CustomContent#CustomContent#TheSims4CC#Bakie#YouTube
382 notes
·
View notes
Text

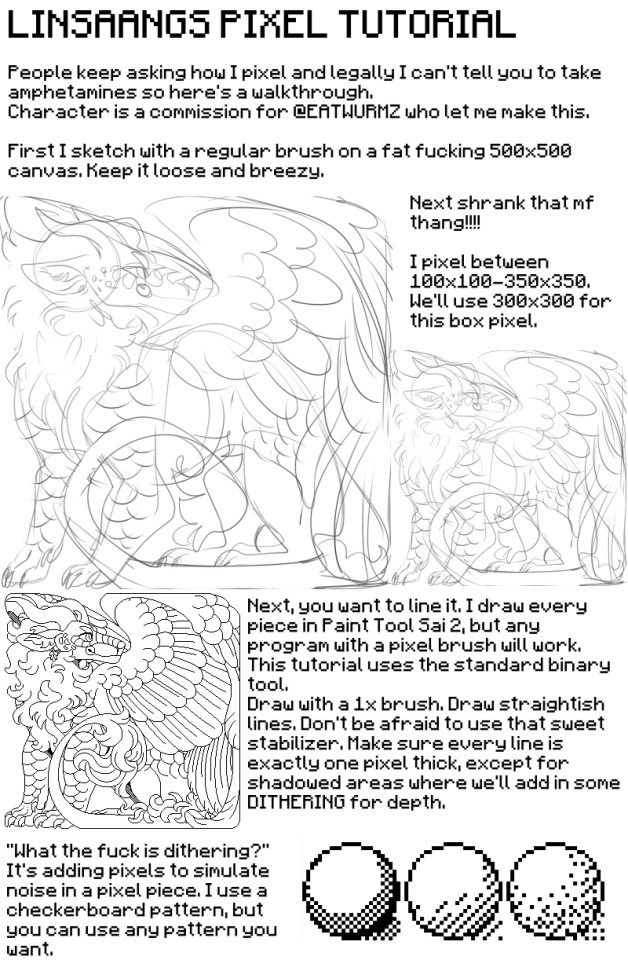


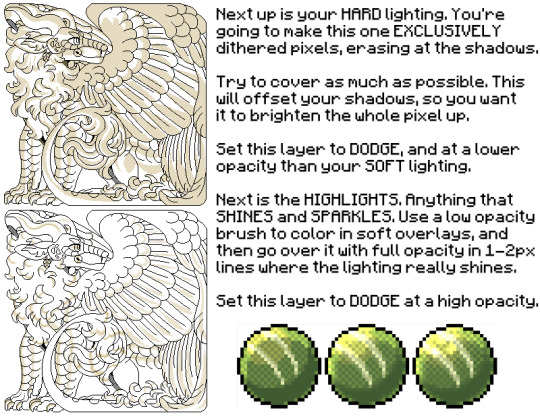

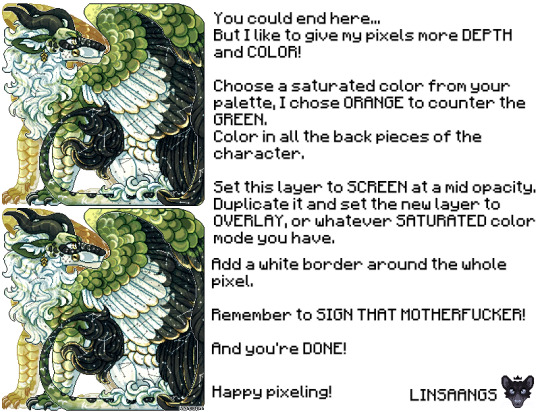
commission for eatwurmz and a PIXEL ART TUTORIAL!
#my art#artists on tumblr#pixel art#digital art#art tutorial#tutorial#art guide#guide#walkthrough#pixel#dragon#dragon art#peakwing#wof#wof fantribe
1K notes
·
View notes
Text

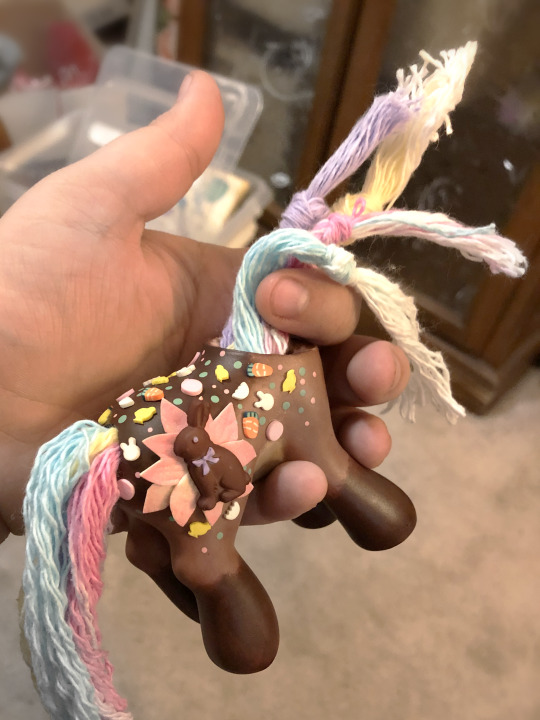
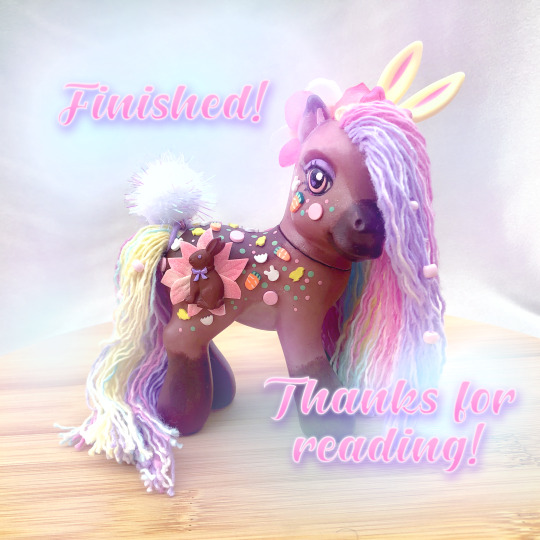
Hello! I wanted to share my process of how I made my Easter Pony! She is my second ever custom and she made all the trouble I had with the first one seem like a walk in the park in comparison ಥ_ಥ Let's begin!
DISCLAIMER: Custom ponies like this one are not to be played with by children nor made by children. This pony was made with the use of nail polish remover (acetone) which is toxic. You need to wash your hands throughly after use and use in a well ventilated area. This pony was also made with sharp tools such as an xacto knife, sewing pins, rehairing needles, and an awl.

First, the concept art! Trial and error caused her to look a little different than the concept art but I still love the end result!
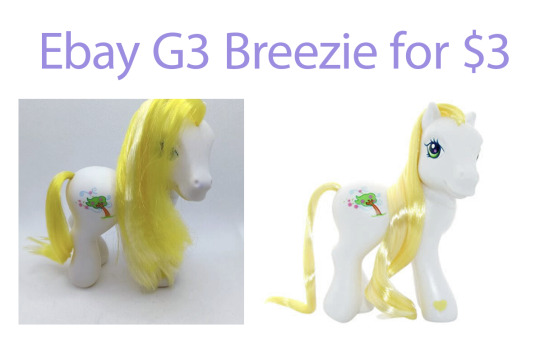
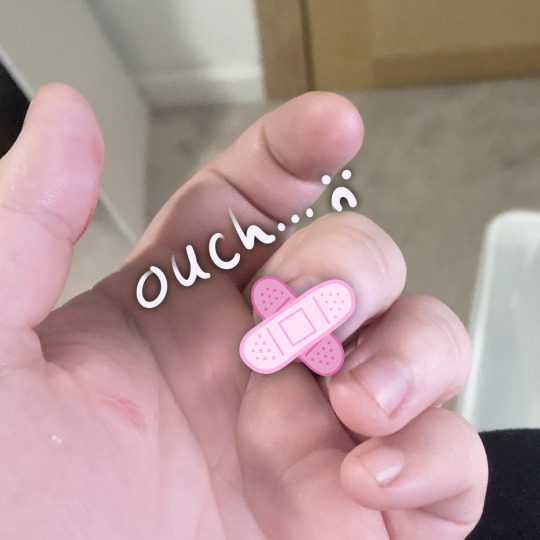
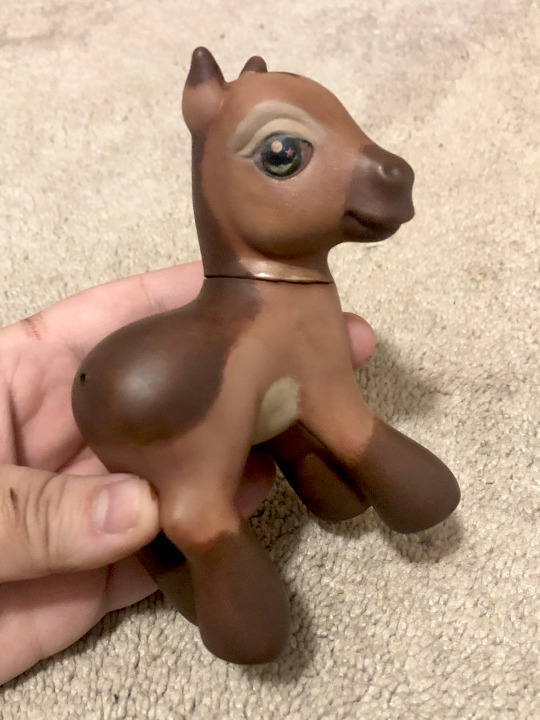
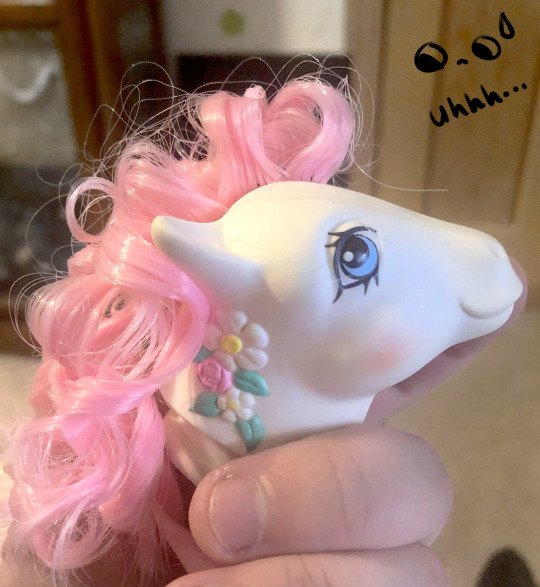
I wanted to start with a white base to give myself a clean canvas for dyeing so I got this G3 Breezie off Ebay for only $3. I decided to first remove her mane and tail which requires removing the head. If you know anything about G3 pony customzing, you know their heads are difficult to get back on once they come off. Even when you run them under warm/hot water. So to get it back on for dyeing, I tried trimming a little excess of vinyl off the neck ring with my xacto knife. It slipped and got me right under my nail! Bad omen for what's to come!
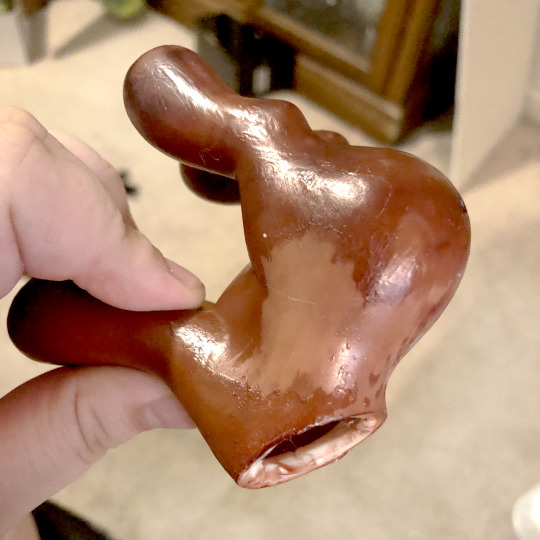
After getting her prepped (removing her mane and tail, cleaning her, using acetone (nail polish remover) to remove her cutie mark) she was ready for a dye bath! I used Rit DyeMore as regular Rit Dye won't dye the vinyl material that ponies are made of. This was my first ever time dyeing anything that wasn't fabric so I was thrilled when she came out this warm rich brown! So pretty!

I read online that dyed ponies will leach dye onto other ponies if they touch, so I wanted to try and prevent this as much as possible with some matte sealer. Lesson #1: Even though she was dry, the matte sealer reactivated the dye! The smallest touch left a print! :(

I pushed forward! And tripped immediately after! I thought, "Surely matte Modge Podge will seal her just that much more" and to my dismay, the Modge Podge kept every brush stroke I made when it dried!! She looked like a leather hand bag! ˚‧º·(˚ ˃̣̣̥᷄⌓˂̣̣̥᷅ )‧º·˚ I learned later you can buy matte Modge Podge spray online but all I had was the type you brush on to your surface.
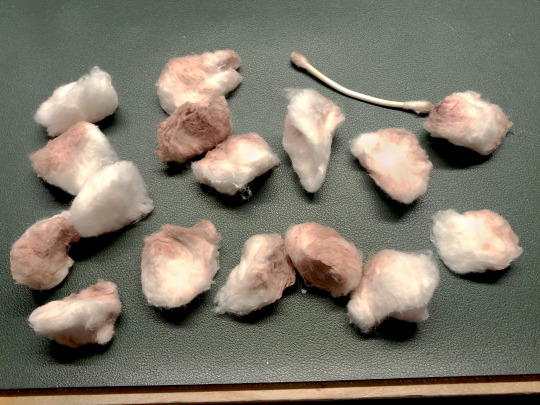
Thankfully, with the help of sixteen cotton balls and a q-tip with acetone, I managed to remove all the sealer but she was no longer that nice rich brown. Oh well I still loved her!
And whoever said the paint will protect the eyes from the dye has clearly never dyed a dark pony! Her eyes were so brown after this lol


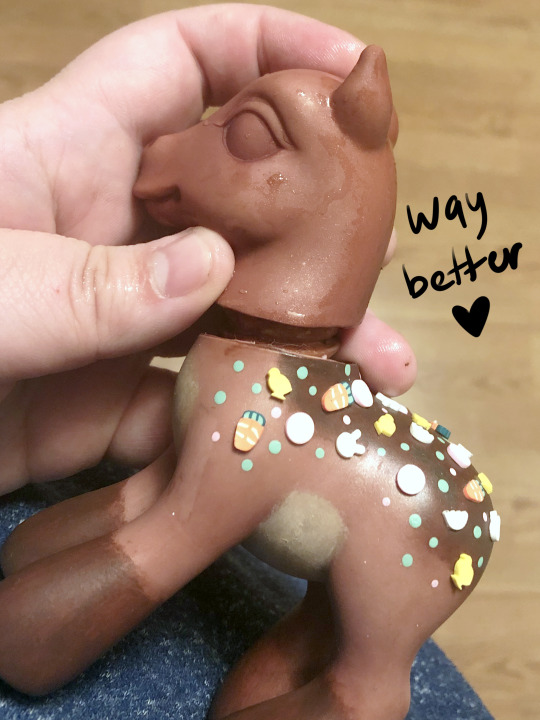
Painting, adding of polymer clay easter themed confetti, and adding her 3D chocolate bunny cutie mark went great! It was all going well until the eyes.
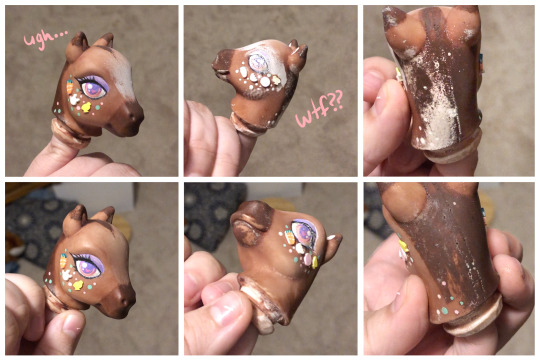
I had never fully painted pony eyes before so the first attempt was pretty bad. Not even my multiple attempts at glitter and using clear nail polish as a cheap gloss on the eyes could save them.
It was so bad that I almost didn't take any pictures but when I went to seal her head, this weird white powder covered half of her face?? I had never seen this before and it freaked me out thinking I just ruined her. I managed to get it off with a cotton ball and some acetone but her paint was fully damaged.
Turns out this was caused because I didn't shake the can of sealer well enough. I needed a break....
While I took a break for a few days, I decided to watch tutorials on how to paint doll eyes and learned that it's actually pretty common to use high quality watercolor pencils; either Faber Castell or Derwent (which is what I ended up buying).
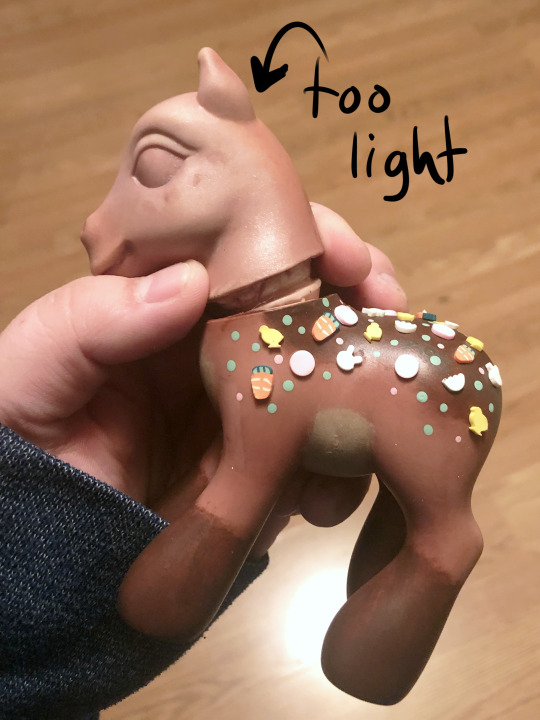
When I came back, I made the hard decision of removing all the paint and decorations from the head and starting over. Hours of work gone but it was so worth it! 🩷 Removing the paint with acetone ended up making her head lighter than her body so I had to redye her head lol. This time I mixed Derwent pencils with acrylic paints for her eyes.


Time for the hair! I've never done curls before and my original plan was to buy curly hair online but it's so hard to find in the color and curl size I wanted.
So my second idea was to buy small curlers to use on regular nylon doll hair bought from ShimmerLocks on Etsy. But when I tested them out on poor Flower Bouquet it looked so bad ಥ_ಥ
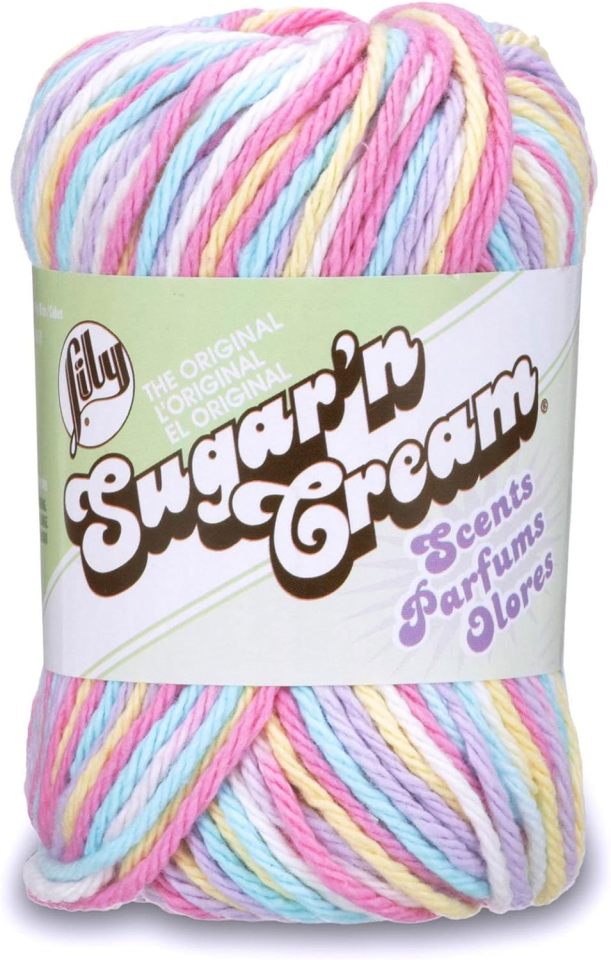
I discovered a Youtube channel you may know called Dollightful where in one of her Stock Box videos she used yarn that she unraveled to make super cute tight wavy hair for a doll. It was a perfect solution! It looks so good but omg it was tedious haha! I used it for her tail too; sectioning off the colors hoping they'd stay separated (they didn't lol).
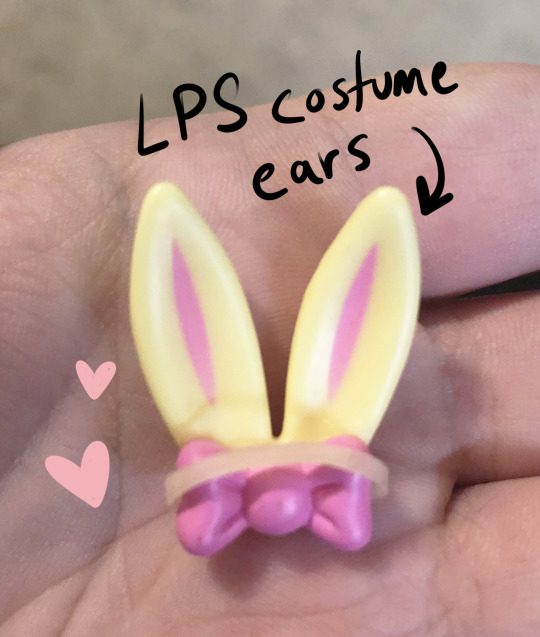
She's nearly complete! Time for small decorations! I tried so many different ears from air dry clay to stealing some from bunny decorations I bought at the store and nothing was working! But I had one last idea...
I gave these old Littlest Pet Shop costume bunny ears some use with a flat top sewing pin and some glue so now my pony has bunny ears! Yay!
I forgot it in the concept art, but I originally wanted to add flowers to her mane but I couldn't figure out how to do that without glue which I didn't want to do, too permanent, so I opted for some beads I had on hand. I didn't have any light blue so I made some with the use of acetone (nail polish remover in my case) and boom! Light blue beads! Then I washed them off so the acetone wouldn't damage anything :)
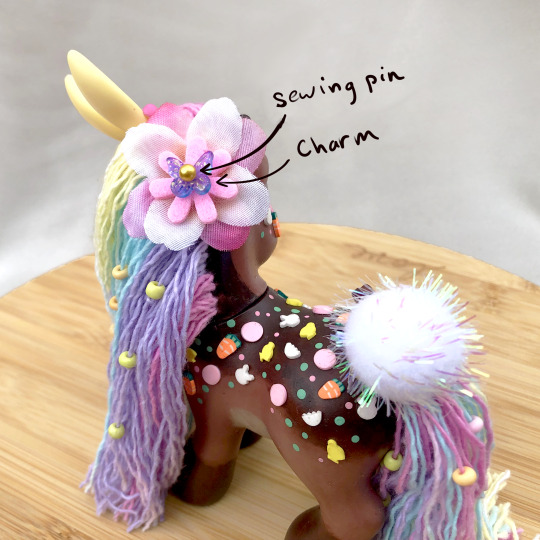
I used a gold topped sewing pin, a butterfly charm, a felt flower and two faux flowers to create a cute hair accessory!
Finally I sewed a hair tie to a puffball to give her a removable cottontail if I ever wanted to take it off.

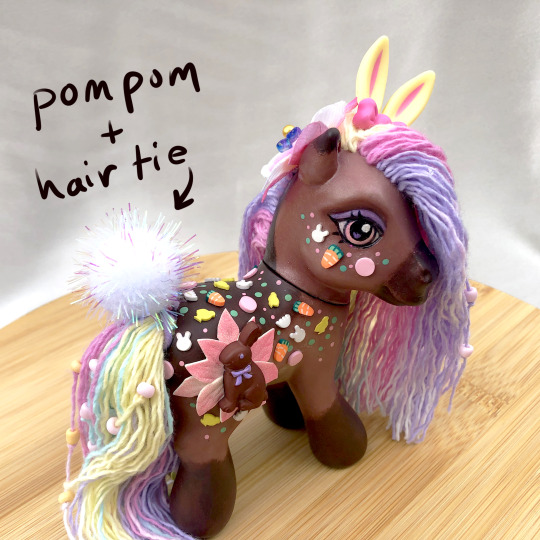
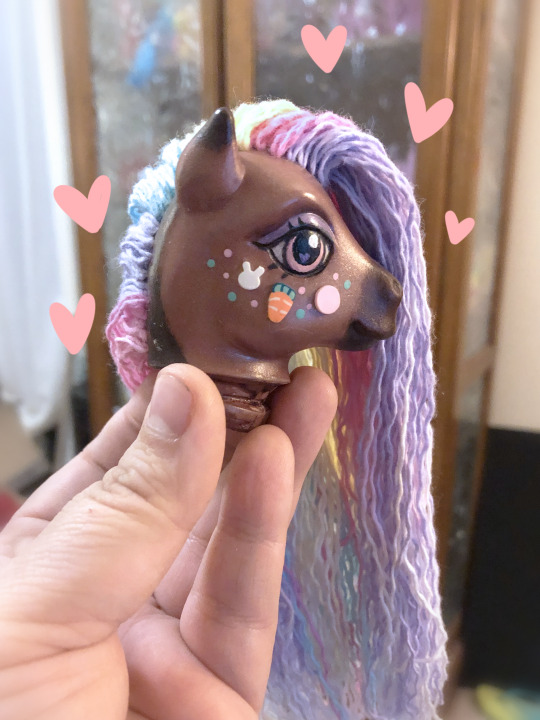
And DONE! She looks so good after so much time and effort! I worked on this girly for two weeks I think? She actually had a partner I designed but I've run out of time to make her :') Maybe next year? 👀 🩷🩷
#my art#art#horse#pony#equine#equine art#artist on tumblr#mlp#mlp art#mlp g3#my little pony g3#g3 mlp#custom pony#ooak#ooak doll#ooak mlp#ooak my little pony#custom mlp#my little pony#my custom ponies#easter#bunny#pastels#pastel rainbow#walkthrough#custom
88 notes
·
View notes
Text
NEW TWITTER REFUGEE’S!! HELLO!! HERE IS SOME INFORMATION!!!!!
this will (hopefully) help you find EVERYTHING you need to help you transition, or to use tumblr and twitter simultaneously.
how to use tumblr
how to post effectively
how to set up your main blog
how to set up side blogs
how to turn on asks
settings to turn off (highly recommended!)
tumblr etiquette/unspoken rules
how the algorithm works, and a few tips
how NOT to tag posts
how to properly tag on tumblr (it DOESNT work like tiktok or twitter! pls read!)
how to not be mistaken for a bot
“why do people talk in the tags/why aren’t people using tags properly?”
how to make tumblr function a tiny bit like twitter
how to add themes (advanced, not recommended for beginners!)
“what is xkit and why do people use it?”
“how do I install xkit and how do i personally use it?”
“what does it mean to ‘blaze’ a tumblr post?”
how to blaze other peoples posts
“how do people share updates on news and current events on tumblr?”
some of the inside jokes
watch this video that vaguely touches on some of the scandals of tumblr (doesn’t teach you anything other than the past scandals of tumblr 😋)
some advice: if you want to get into a fandom, start following people’s blogs and like and reblog their content! eventually you’ll get a couple people following you, and you’ll build your own little community and experience here on tumblr.
lastly: the website and mobile version are VERY different! they have completely different interfaces. your experience truly will be different depending on which you choose to use.
have fun, be safe, and remember to reblog things and decide on whether or not you want to turn your asks on!
#twitter#twitter refugee#new to tumblr#tumblr help#how to set up tumblr#reddit#instagram#tumblr guide#tumblr walkthrough#walkthrough#guide#alyssa speaks
372 notes
·
View notes
Text
#food#baking#food porn#recipe#foodphotography#foodpics#foodie#foodporn#yummy food#soup#snacks#bread#walkthrough#seafood#meal#rice#king crab#crab#animal#fish#lobster#time for crab#trending#viralshorts#viral video#shortvideo#trendingnow#viral
138 notes
·
View notes
Note
Hello! I wanted to ask for X route! I was curious why they respond better to a Crown that is like completely understanding and doesn’t get mad at them at all? I mean I kinda I get why but also I was very surprised by the differences and how one leads to a first kiss/is more emotionally charged? It doesn’t seem like you can be mad at X and still have wanted to protect them? Mostly, I’m asking specifically what goes through X’s head for each choice to understand the difference better! Thank you for your hard work this chapter was fantastic! I can’t wait to do all the other routes!
But the Crown did get mad, anon?
The interaction that precedes that choice is a scene of the Crown lashing out at X and being upset and angry at them for their attack. The whole display is out of the player's hands: the Crown canonically gets mad at X no matter what, and expresses their hurt.
After that is when X gives your Crown additional insight into their motives for why they did what they did, and that is when you have to decide what your Crown does with that information.
If your Crown still chooses to basically dismiss that Very Big Bombshell that is the impetus of all of X's trauma, the point at which their life completely changed and they lost everything they held dear, and your Crown chooses to prioritize remaining angry instead of showing X any empathy in that moment, then... yeah.
X will not be in the mood to be vulnerable to the Crown, because the Crown has given them no reason to think their vulnerability will be met with any understanding.
#hope that gives you more insight!!#atoc spoilers#chapter 11 spoilers#x route spoilers#ask#anonymous#walkthrough#character analysis
103 notes
·
View notes
Text
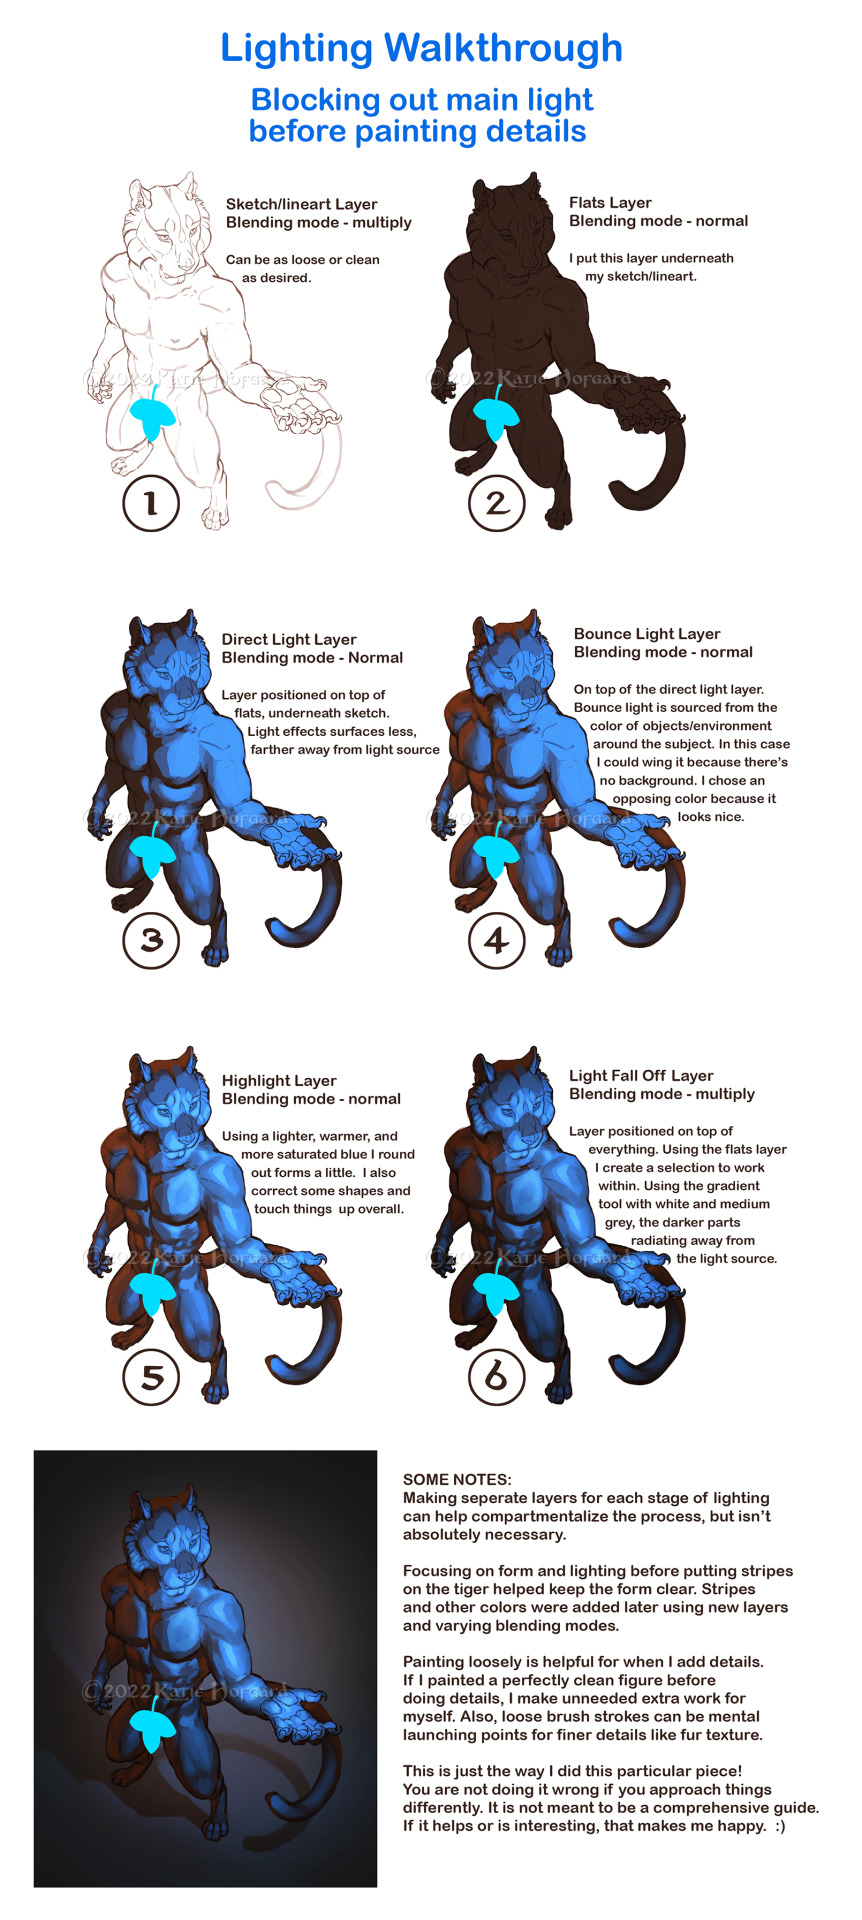
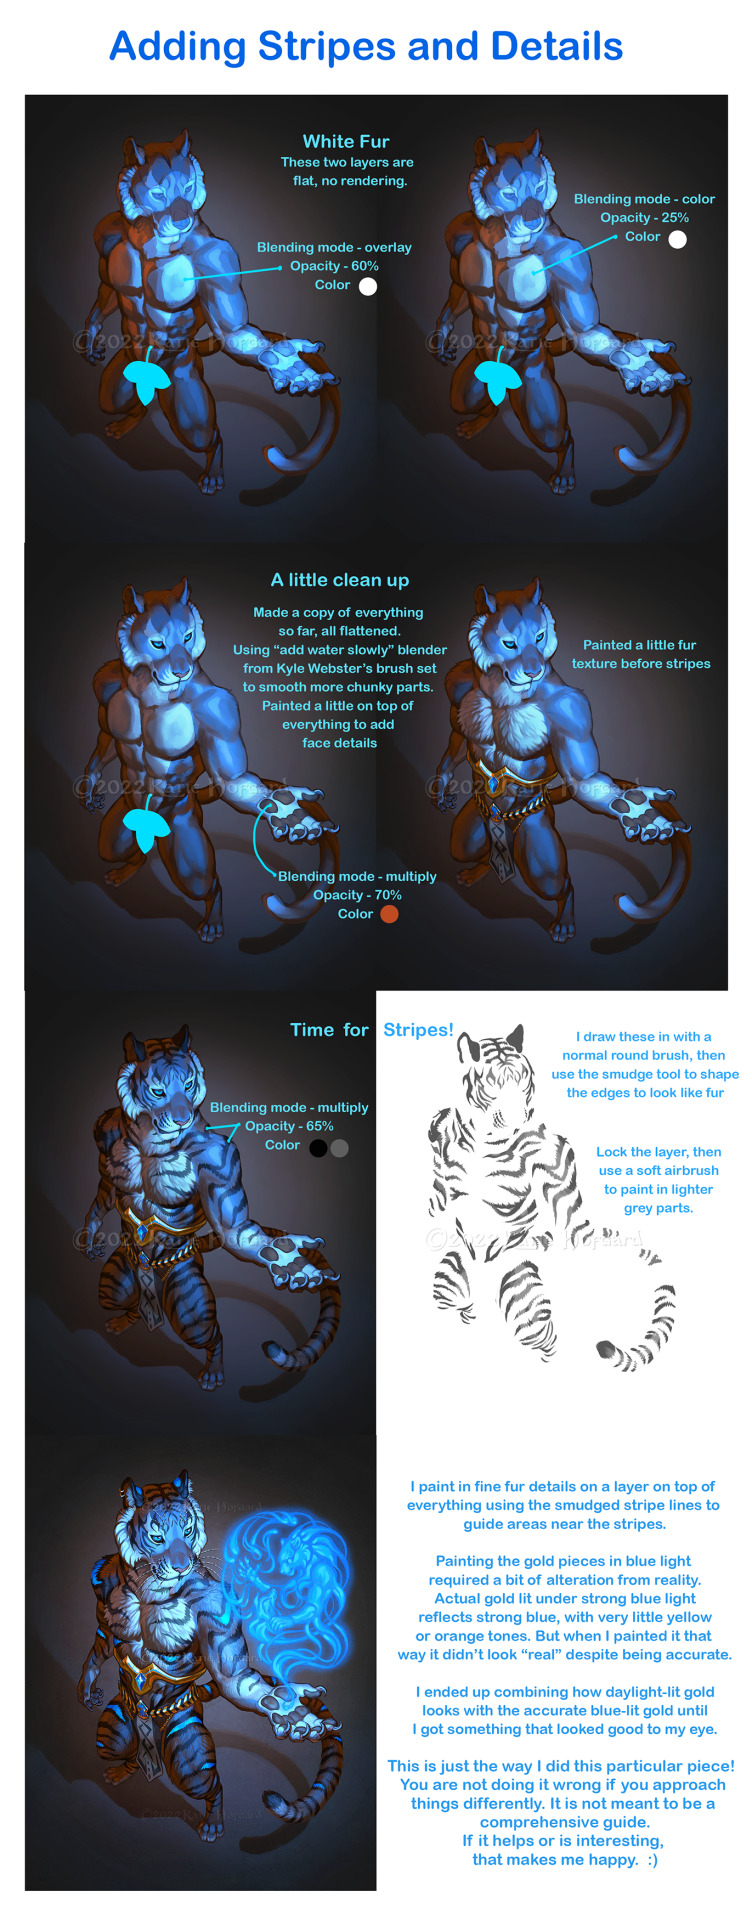
Made a walkthrough for my latest piece!
1K notes
·
View notes
Text
Soon.
#super paper roblox#spr#dusekkar#scriptliss#wiscara#game guide#walkthrough#complete guide#roblox#roblox youtubers#roblox guide#how to#100% completion#roblox youtube#teaser#paper roblox#youtube video#adventure forward#shark zypper#thumbnail
24 notes
·
View notes
Text
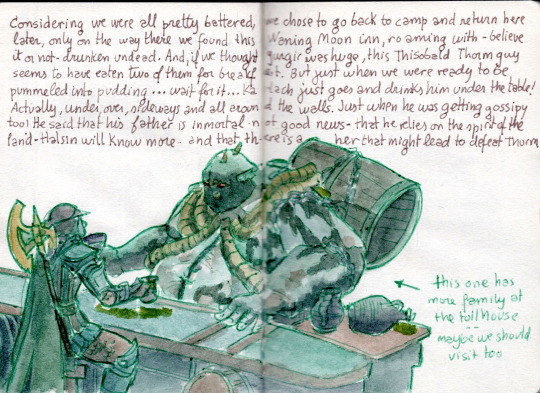

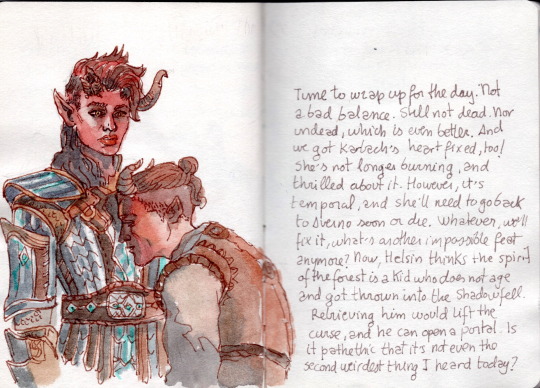
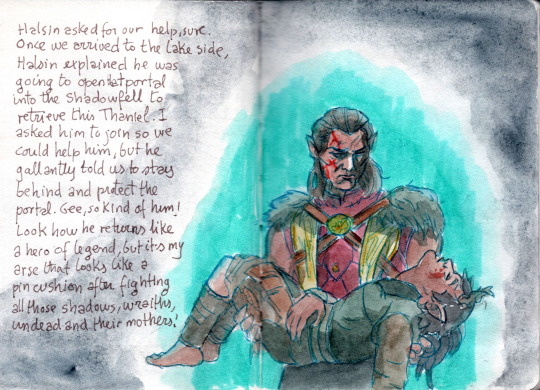
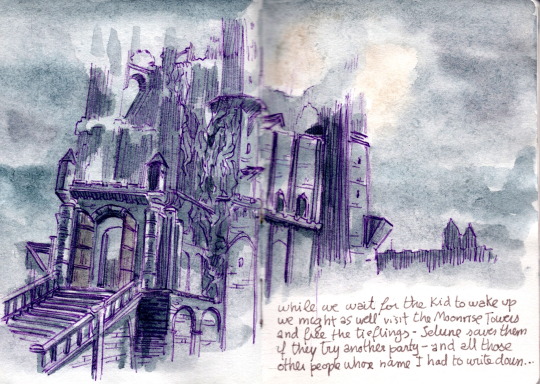

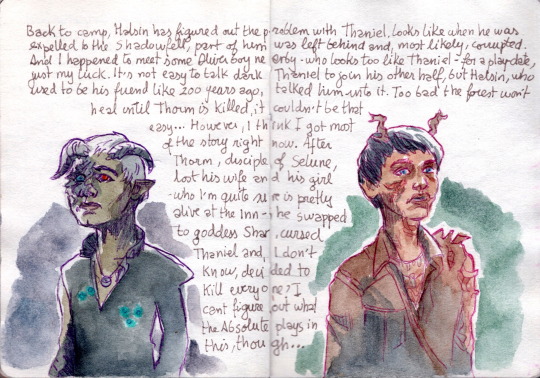
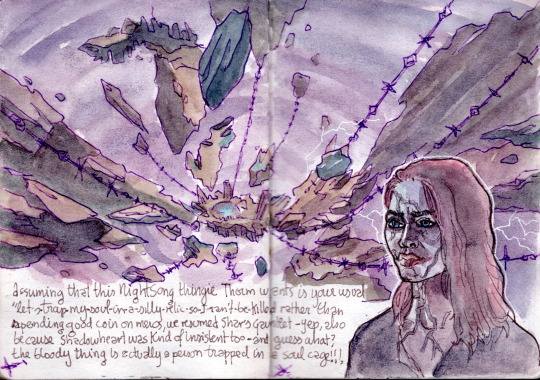
Shar's Sanctuary, the Thorms, Nightsong and Moonrise towers. On with the party!
An explorer's journal in Faerun:
Pages 1-10 - Pages 11-20 - Pages 21-30 - Pages 31-40.- Pages 41-50
#videogame journal#fanart#walkthrough#baldur's gate 3#bg3#larian studios#nightsong#thisobald thorm#ketheric thorm#halsin#moonrise towers#shar sanctuary#karlach
130 notes
·
View notes
Video
youtube
And here it is! After many months of work and even more months of hiatus, I'm finally ready to unveil
KINGDOM HEARTS: FINAL MIX - A PHILOSOPHICAL LET'S PLAY
Together with my friend Xeph @thatreallyminecraftsmygender @considermygenderminecrafted we brave the labyrinthine twists and turns of the Kingdom Hearts-series, discussing its merits and shortcomings, the philosophy behind it and much more!
The episodes will release weekly on Thursday evening European Time for next 15 weeks! I am beyond excited to have seen this project through to completion!
Special thanks also to my good friends Fletch @lazyliars and Dogin @dogin8 for helping me out with art assets and thumbnail design respectfully! They've been a massive help and I couldn't have it done it without them.
Please, if you enjoy this video and concept, please don't forget to like, comment and subscribe if you haven't! A like and reblog here on tumblr is also always appreciated!
I hope you will enjoy this journey!
-Luc
#Kingdom hearts#kh sora#kh riku#kh kairi#let's play#sora#kairi#riku#analysis#discussion#kingdom hearts explained#walkthrough#playthrough#kingdom hearts analysis#kingdom hearts critique
52 notes
·
View notes
Text
youtube
🎮 Superman (Mega Drive)
Complete Gameplay: https://youtu.be/vSRjMfUe3B0
#Superman #SegaGenesis #MegaDrive #Genesis #Sega #TecToy #SuperHomem #Spiderman #Batman #DC #DcComics #Marvel #MarvelComics #Sunsoft #Brainiac #メガドライブ #セガ #Viciogame #Gameplay #Walkthrough #Playthrough #Longplay #LetsPlay #Game #Videogames #Games
#Superman#Sega Genesis#Mega Drive#Genesis#Sega#Tec Toy#Super-Homem#Spiderman#Batman#DC#Dc Comics#Marvel#Marvel Comics#Sunsoft#Brainiac#メガドライブ#セガ#Viciogame#Gameplay#Walkthrough#Playthrough#Longplay#Let's Play#Game#Videogames#Games#Youtube
19 notes
·
View notes
Text
PLUST - Kotoha Walkthrough
I've been waiting for him!
The SHE is achievable without spending hearts.
1: b
2: c
3: b
4: b
5: a (12 hearts - CG) or b
6: a (9 hearts) or b
7: c
8: a (10 hearts) or b
9: a (8 hearts) or b
10: c
11: c
12: a (12 hearts) or c
13: c
14: a (19 hearts - CG) or b
15: a (15 hearts) or b
16: a
17: a (16 hearts) or c
18: a (24 hearts) or c
19: c
20: a (15 hearts - His PoV) or b
21: a (16 hearts) or b
22: c
23: a (25 hearts) or b
24: a (22 hearts - CG) or C
Last Chapter: 26 hearts (CG)
34 notes
·
View notes
Note
How do you get Syd to call you bossy?
hahaha they call you "boss" if you boss them
#fuck around and find out anon!!#walkthrough#to be fair i don't know if they actually use the nickname in chapter 3 if you earn it so you might just have to wait and see
79 notes
·
View notes
Note
hii, I have a question. Its kinda spoiler for the new readers.
Is it possible to impress lady naza and have her offer her service and preventing the scholar to be killed but also prioritizing the public? or i have to choose between the public or to impress lady Naza? Thank you!
It is absolutely possible to do all three of those, though it may be tricky.
First, you can definitely prevent the scholar from getting killed while still impressing Lady Naza and also prioritizing the public. The choices that affect the scholar's safety don't have anything to do with either of those two. See this post.
There are, however, two choices that affect both prioritizing the public and impressing Lady Naza: the CH5 decision of which factions to inform about the assassination attempt, and the decision in CH9 regarding the Office of Law. You can lose out points with the public or with Lady Naza depending on your choices there.
However, there is also a choice in CH8 that gives you enough points with Lady Naza so that you can still unlock her scene in CH10, while prioritizing the public in the other choices. It's the one that decides how your Crown addresses the nobility during the whole argument regarding the performance of the artists.
Hope that helps!!
134 notes
·
View notes
Last Seen Blogs