
Last Seen Blogs


Text
Stop Motion Evaluation
The subject of the project was Stop motion, i.e. creating animations based on frames that are photos. I liked the idea very much because it was a kind of return to childhood, when fairy tales for children were created in this way. I was excited to be able to make my own animation. I liked the project so much that I created 3 different animations.
Thanks to this project I learned that Photoshop is not only for processing photos but also for creating animations. I got to know another software which is Adobe Premiere Pro. Here you can edit video, add music and many other interesting and useful things. Another skill definitely was patience. Sending items did not always come out immediately and on time. It was a fight against gravity.
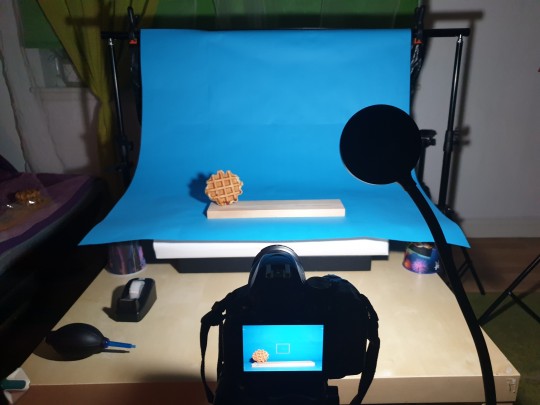
From the beginning, the idea for animations was round waffles, but I couldn't get them anywhere in the store. So I decided to buy pancakes. After creating the animation, I was not convinced that this is what I would like to present but I managed to buy round waffles at the last minute and create everything from scratch. The idea of the animation was the same, only the background and the product changed.
The biggest difficulty I had to face was loading photos in Photoshop. While loading photos, it freezes or crashes, claiming that there is not enough disk space.
I had a lot of fun during this project and I am happy with the animation I managed to do.
0 notes


Text
Structure Evaluation
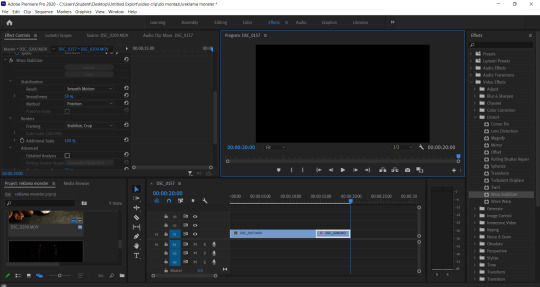
The theme of the project was Structure, as the name suggests, we were supposed to photograph the architects. In the project, we had to show our perspective control skills.
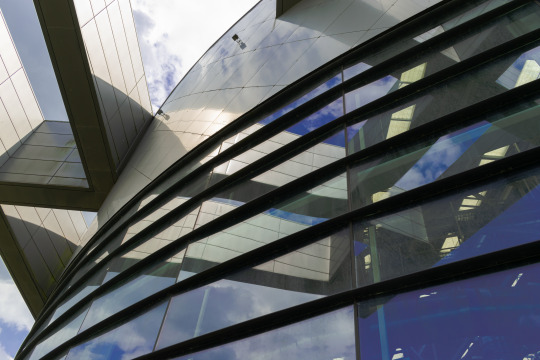
Ultimately choosing 5 photos in which it will be captured: the whole building, our creativity and details.
I had never taken pictures of this type before so the subject seemed interesting to me and just thinking about the new experience was exciting.
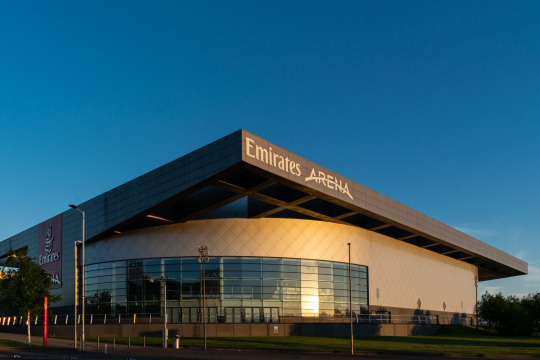
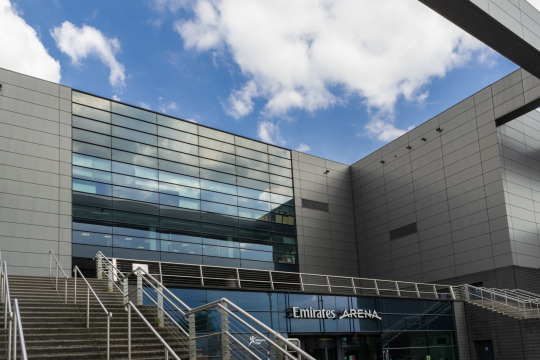
My first facility was an old school after renovation. The second building of the Emirates Arena. I approached the first building 3/4 times at different times of the day. It was hard to sense the weather despite the fact that I checked it on a regular basis, she often tricked me. In the end, we managed to capture both buildings but the old school is located right on a very busy street and although I liked the photos very much, I was not able to remove the cars that were parked under the building.
So I thought about the Emirates Arena and did a quick research about it. The final photos are taken at different times of the day. Retail in the afternoon and those with warmer colors in the golden hour, at sunset, which I was literally running to take pictures.
In this project I was very inspired by Lesley MacGregor, whom we had the pleasure of hosting at one of the meetings. I was hypnotized by her person. Full professionalism, style, aesthetics, how architecture feels and its individual approach to work.
I liked everything about this project. The photos gave me great pleasure and thanks to the optimization I learned to control the perspective and enjoy what it is to play with distortions.
The only problem I had was that I didn't have enough space to capture the entire building. the photos I found during the research were taken right after the building was finished. Now that I know the rules to follow when photographing architecture, I pay attention to literally every building I pass on the street.
1 note
·
View note
Text
Structure - Postproduction
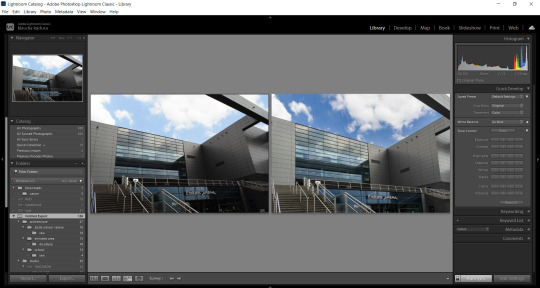
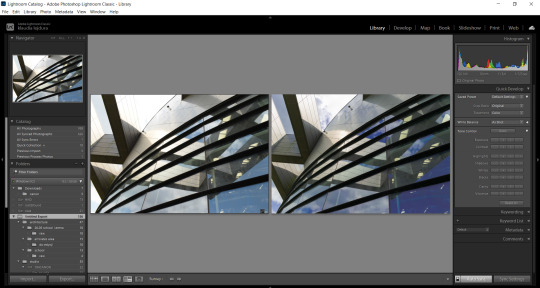
I chose Lightroom to edit the Structure photos. First I imported photos and then I opened one and started basic processing, step by step: remove chromatic aberration and lens correction, then manual perspective control adjusting vertical and horizontal lines, basic editing of white balance, exposure, backlight, black and shadows, adjust curves.
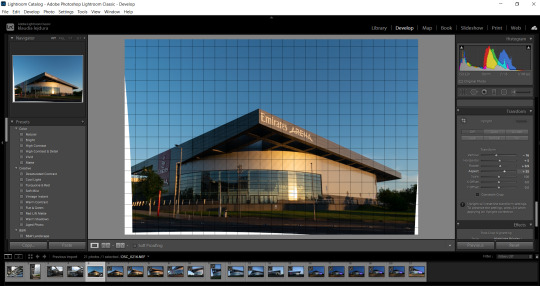
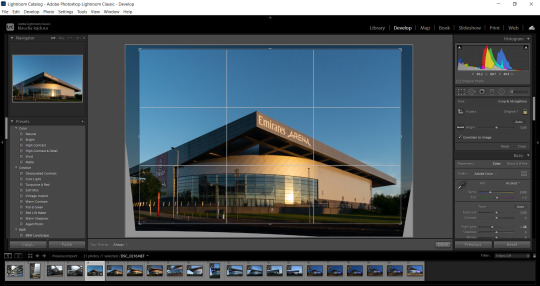
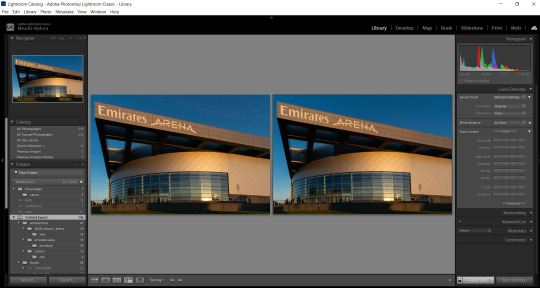
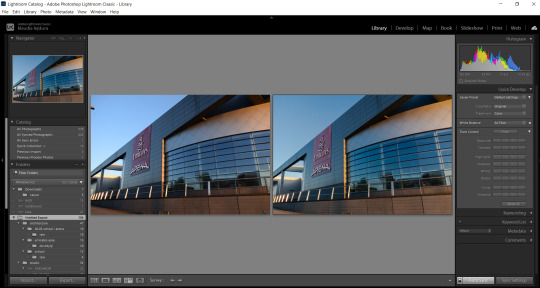
Images selected as final 5 before and after and some screenshots of the editing process.

0 notes
Text
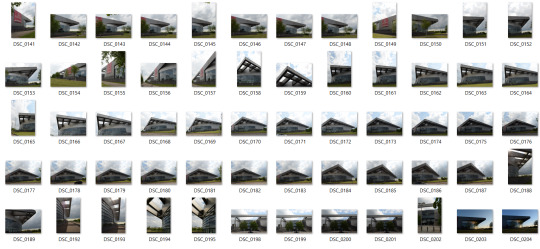
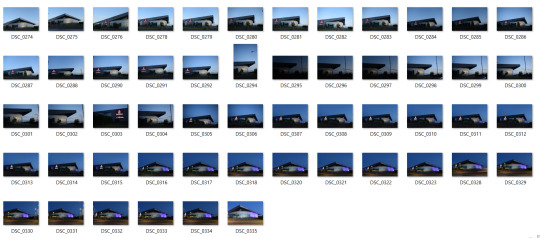
Structrure - contact sheet

1 note
·
View note
Text
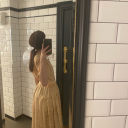
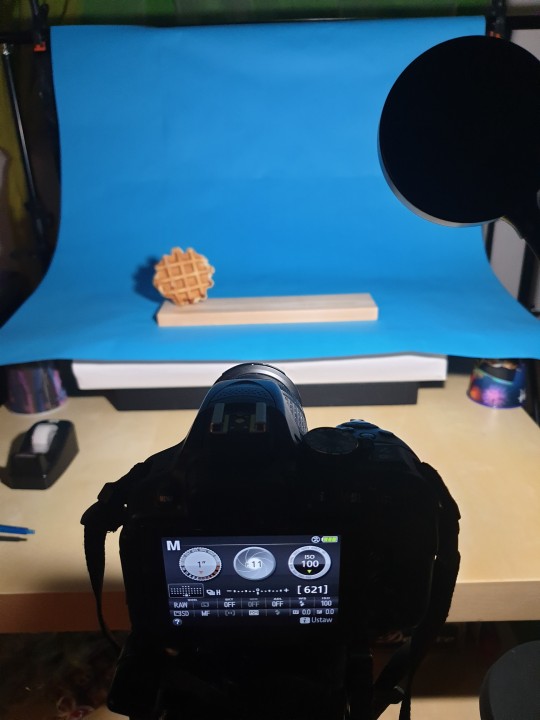
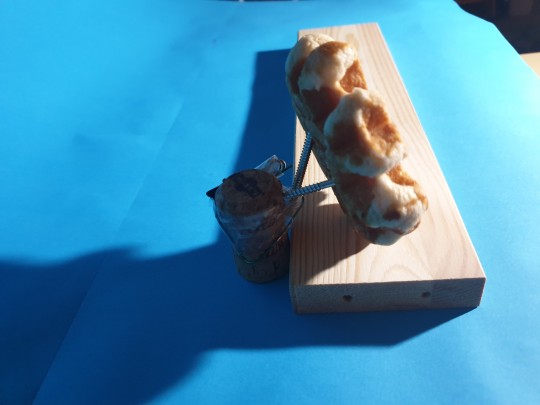
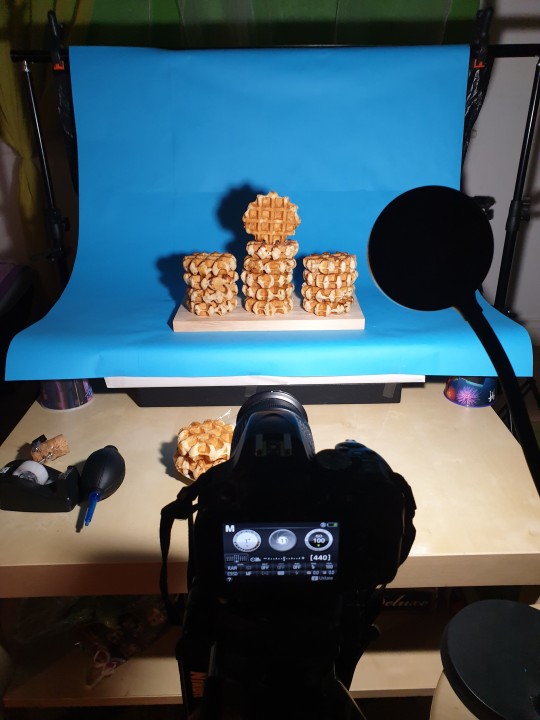
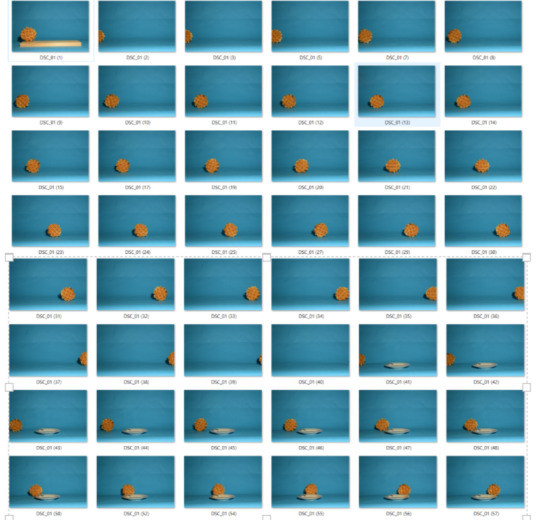
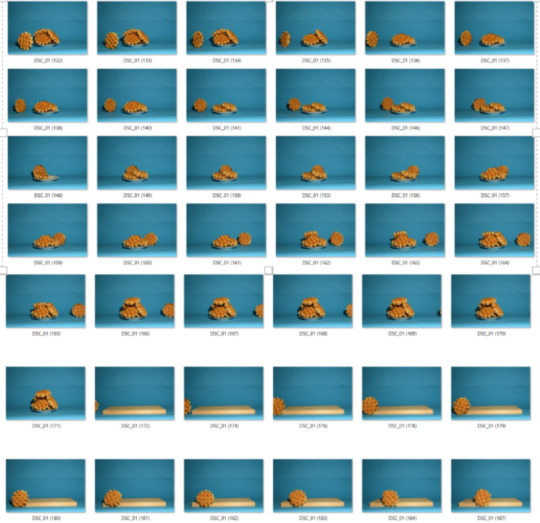
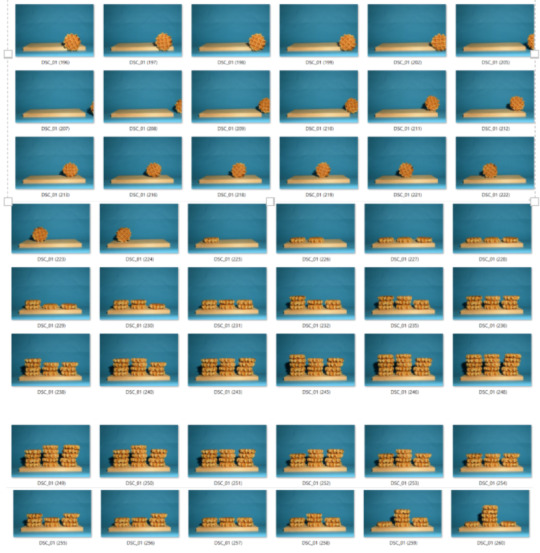
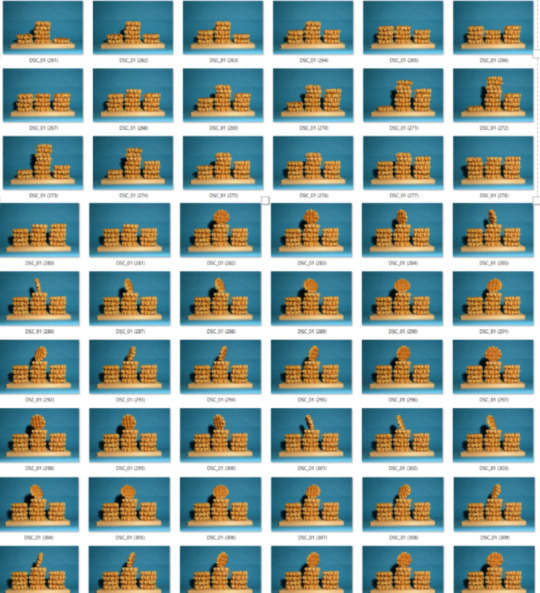
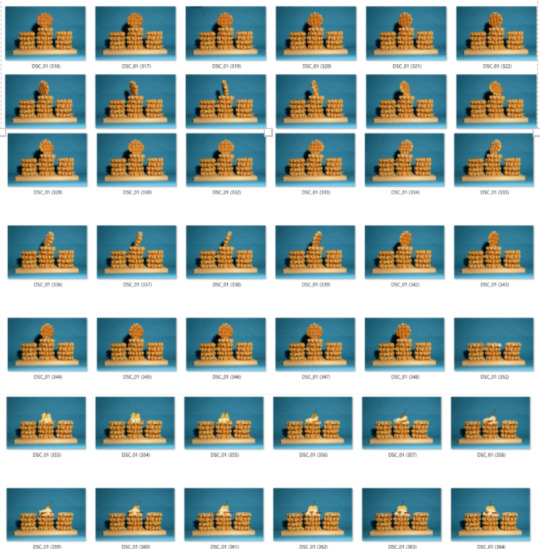
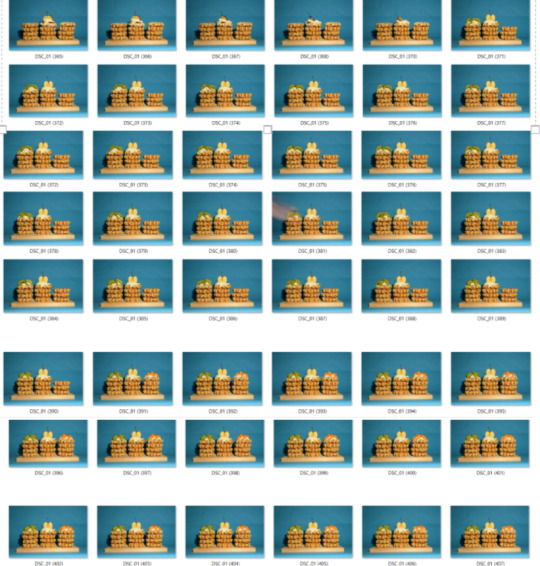
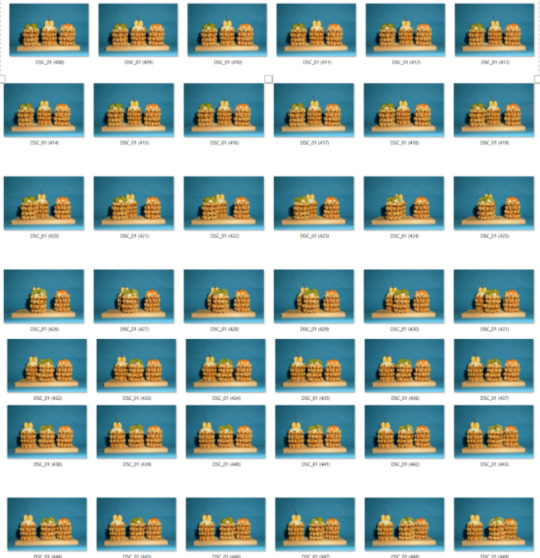
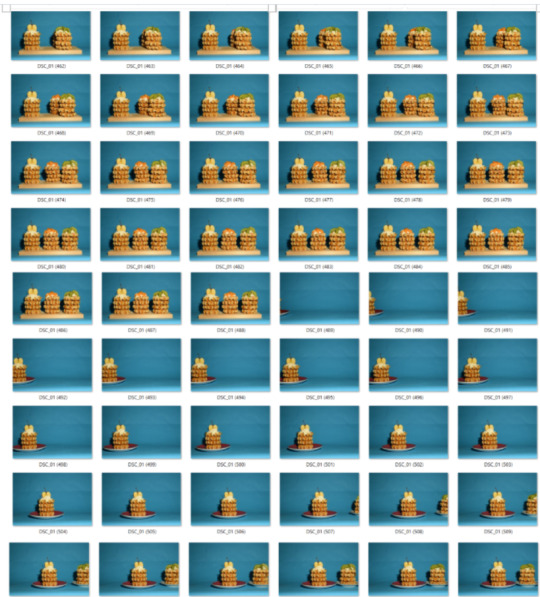
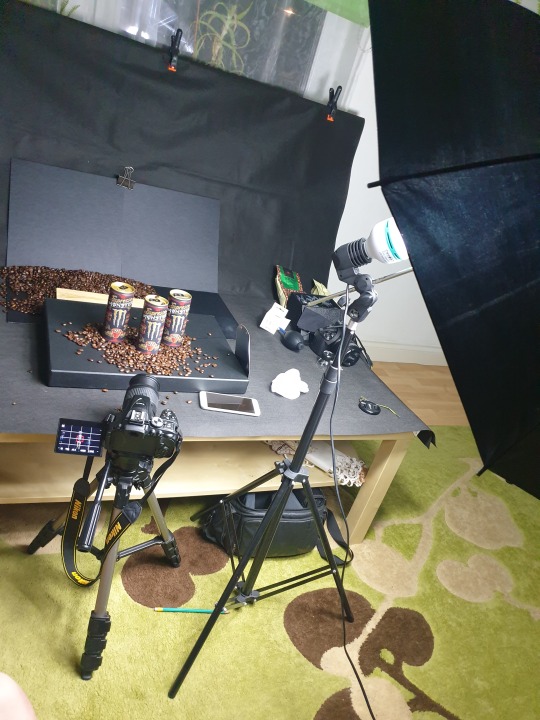
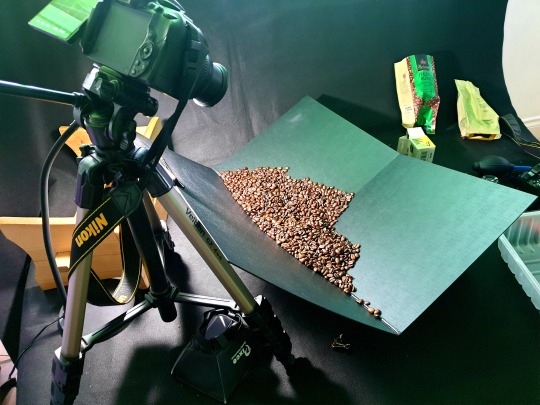
Stop Motion - set-up
Behind the scenes images
1 note
·
View note
Text
Stop Motion - Postproduction
Editing in Lightroom
First I import all my images to Lightroom. Opened one of image and make basic edition start from optics - remove chromatic aberration, geometry correction, white balance, then adjust sliders after applied auto correction.
In crop tool chose ratio 16:9 which is required for the brief and standard display option for most of the devices.
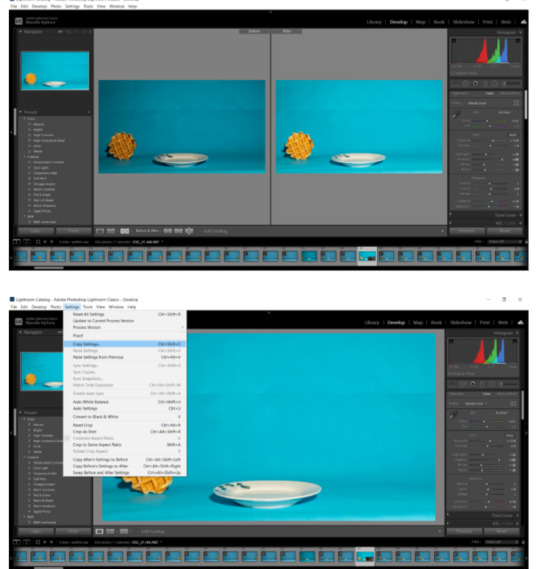
When I finish ediying image I Copy seting - Develop Settings >Paste Settings. I didn’t make any local adjustments so I selected all settings to paste.
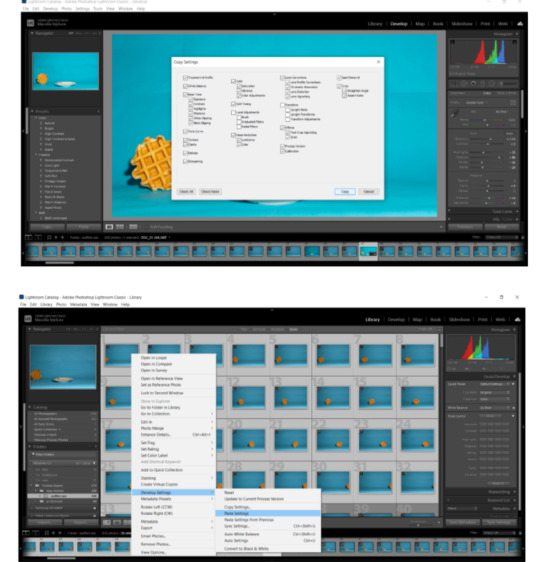
Choose the location or create new folder where processed images will be placed. I Select save as jpg and make sure to change quality for the highest option which is 12, than click Run. It may take a while to finish the process.
Photoshop
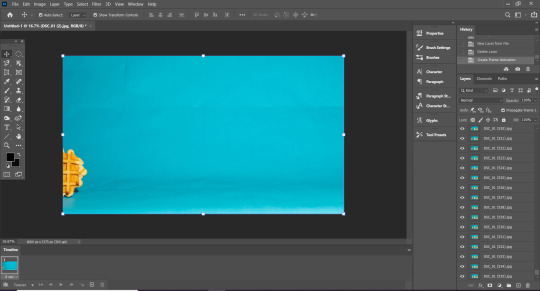
Next i opened Photoshop and from top toolbar choose File > Scripts >Load Files Into Stack, browse files and don’t thick any small boxes. Sort files by names and ok to load layers. Choose Window >Timeline and Timeline panel open on the bottom of the screen. Then select Create Frame Animation and I click on the bar, so the first frame appear in the Timeline.
In Timeline panel options I chose Make Frames From Layers and this bring all images as frames into Timeline.
On the bottom of each frame is an option to choose frame delay time, that be set for every frame individually but I apply to all selected frames at the same time.
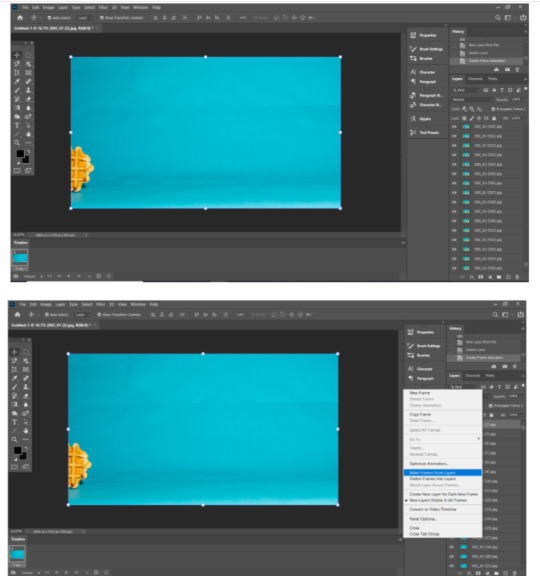

When I finish I save video. Photoshop bar File >Export >Render Video and name video so it saved as mp4 file.
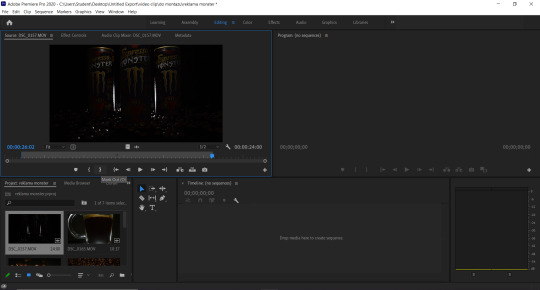
Adobe Premiere Pro
I used the Premiere Pro software to add an audio track to my clip. I opened Premiere Pro, imported my clip and then chose the sound from stock audio adding both files to one folder (bottom left corner).
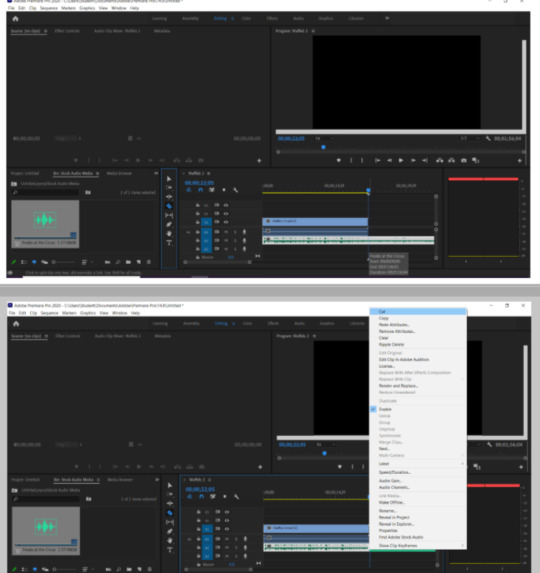
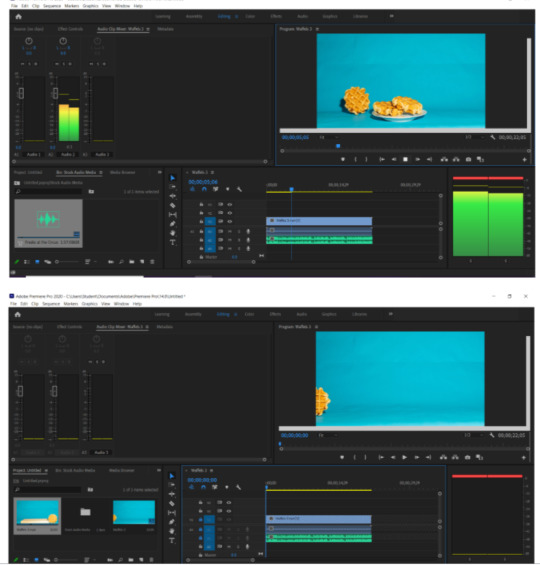
then I dragged the clip and audio in one line to the timeline, I used words to trim the audio to match the length of the clip.
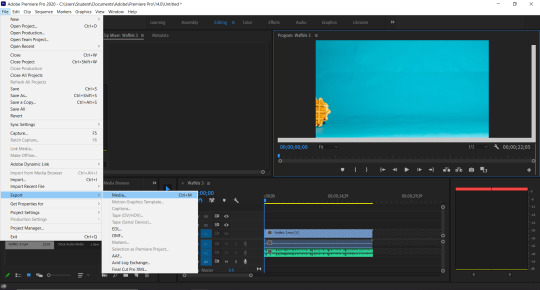
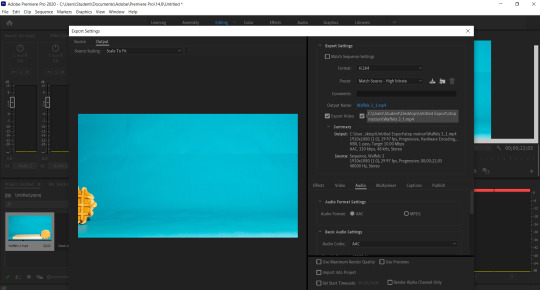
Finally, I saved the project in the right quality.
1 note
·
View note

Link
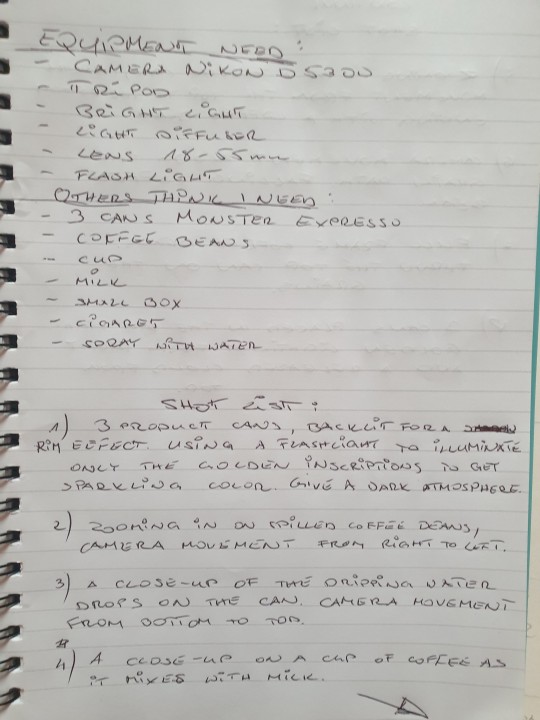
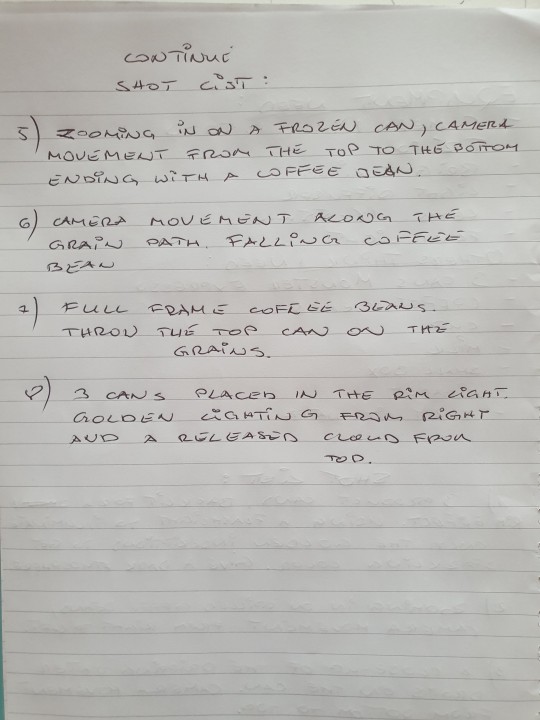
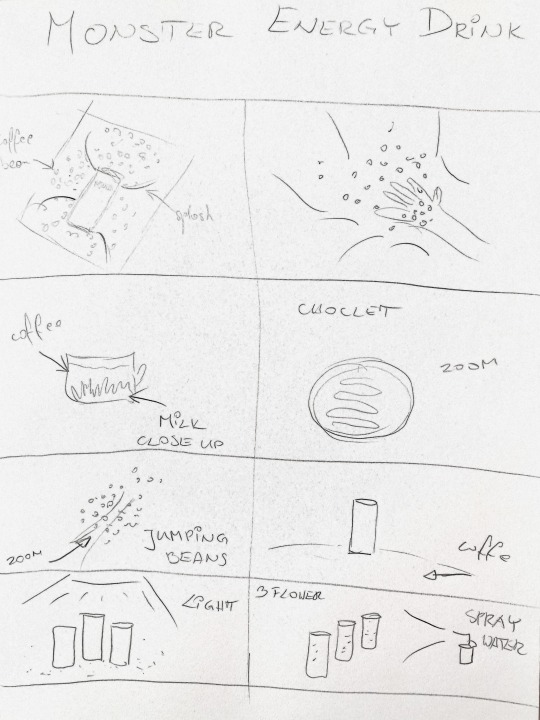
Moving Image - Monster expresso
1 note
·
View note


Text
Moving Image Research
My main inspiration is how easy it is to record a professional advertisement at home with an amazing final effect.
https://www.youtube.com/watch?v=kVvFaW3tWac
This ad does not look complicated. simple camera and product movements without unnecessary combinations. Also simple to do at home.
https://www.youtube.com/watch?v=fw6K4KdwUY8
I really like the variety of shots and how each shot connects. Fantastic special effects like a flying product but I know you need the right equipment for that. I will definitely get inspiration from this video but I want my ad to be simple because this will be my first video I ever did.
https://www.youtube.com/watch?v=aOvnTLs0ldY
0 notes
Text
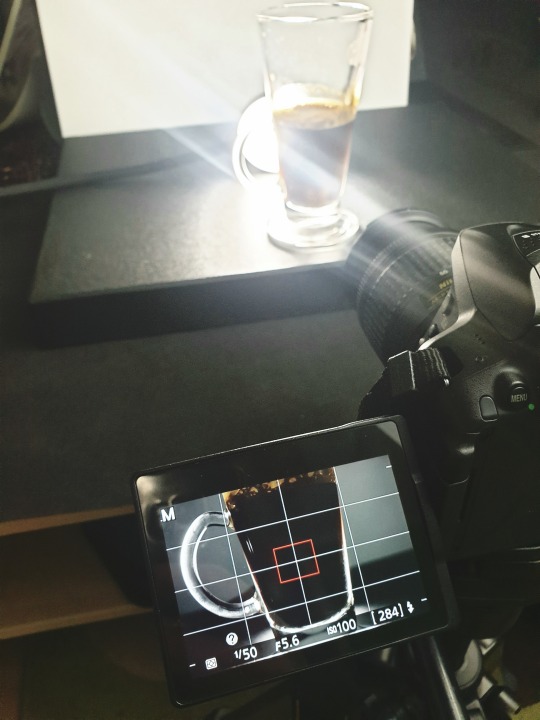
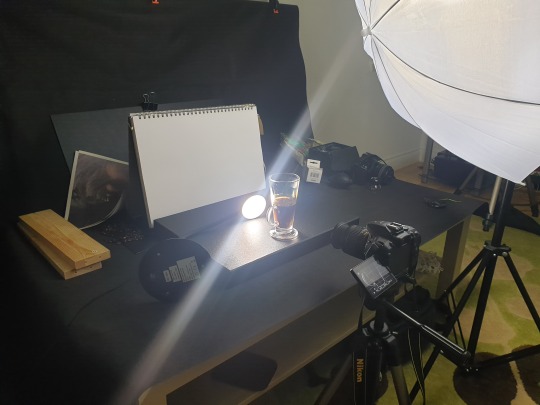
Moving Image - Set Up
here are a few set photos from my home studio. my product was Monster energy drink expresso.
I used a Nikon D5300 camera with an 18-55mm lens for this.
shuter speed 1/50, F 5.6, ISO400.
additionally I used tripot.
1 note
·
View note
Text
HND1 – MOVING IMAGE {RESEARCH TASK}
Task #1
Research a selection of memorable adverts that have stuck with you since your childhood.
• Describe what it is that you think makes these adverts so successful;
• Study the way your chosen adverts have been shot and edited and the important role that sound and narration play in the production of these Ads.
Red Bull advertising has been with me for many years. It seems to me that its effectiveness lies in a short cartoon film that reproduces children's drawings and is funny in its own way. I remember that each time I was curious what cartoon movie would be the next time.
The sound and narrative was always perfectly suited to the people who were talking and the moment that was at the moment.
here is a link to one of the many Red Bull ads
https://www.youtube.com/watch?v=SHdL4BgSz_U
Task #2
Research a variety of Moving Image techniques: -
Camera movements: panning, tilt, zoom, tracking, dolly, pull focus; Composition:
a} Focal length, long / standard / wide;
b} Viewpoint, high (birds eye), eye level, low (on ya hunkers);
c} Action, identify what is moving in the frame (to aid the transition 'cut on a move')
• Now go back to the adverts you have selected and try and see if you can match the camera movements and compositions with the various shots utilised within your adverts.
The simplest movement - pan.
This is the simplest camera rotation on the tripod head. The camera does not change its position here, but rotates along the axis. Movement in the image left-right (in the case of reportage it is the rule in accordance with the reading direction - if any text appears in the frame, it will be readable). It has to be smooth enough for your viewer to see the details of the surroundings, or very fast if you want to blur the background (and use it for a creative transition to another scene). Panorama is useful to, for example, track a moving object in the frame, show panoramic scenery or the distance between given objects.
Tilt
As before, the camera does not change its place, but rotates in the up-down axis. With this movement, you can show how tall a given object is (e.g. a building or a tree) or show the entire silhouette of the figure (from head to toe).
Dolly
The camera moves along with the operator on rails and moves closer or further away from the object in the frame. Of course, you can try to make such a move not only on a wheelchair on rails, but even on an armchair with wheels or a skateboard (I saw it in action). This movement allows the viewer to literally "enter" the action, gives the impression of following the protagonist and going deeper into the scene. With a small camera and a short distance of movement, you can use the slider. It is also visually much more plastic and natural than the zoom effect of a lens. If you combine the approach of the camera with the zoom, you can get a very interesting background effect, literally falling on the hero's head (the so-called vertigo effect).
Zoom (aka Transfocation)
Here the zoom is caused by the change of the focal length of the lens, the camera does not move. Once often seen in movies, today rather in television reports. The camera approach looks more natural. Telephoto shots give the impression of standing right next to the figure in the heart of the action.
-zoom in - for example, by filming the full set of a person reading a book, and then zooming in on the book itself in such a way that the viewer can read the title and author's name from its cover.
- zoom out - here it can be the other way around - it starts with the detail, i.e. the book, then you move away and it turns out that the book is in the hand of a girl sitting on a park bench!
Raising-lowering (pedestal)
This time the camera rises or lowers vertically along the axis. You can show, for example, the height of a basketball player or lower the staff by filming kids.
Truck driving
As before - the camera moves on rails (or wheels), but this time parallel to the scene. In this way, we can follow the action like an outside viewer from the side of the stage. It is possible to use a slider at a short distance.
Camera crane (jib)
The camera at the end of the long arm of the crane (typically 2 to 10 meters) moves a great distance and height. This is often used for coverage of events, concerts or sports events, the camera then flies over the audience's heads and hovers over the stage.
Handheld
In fact, maybe I should say that this is a basic shot, since it only requires a camera and operator. The operator holds the camera in his hand and can move freely with it. On TV, shoulder cameras are used in this way for quick interviews and reportage, and in the cinema, sometimes the camera effect is simulated by hand to give the pictures credibility and the impression of someone watching the action. Dynamic action scenes (e.g. in war movies) are also filmed in this way to conquer the drama even more. When shooting handheld, it is worth remembering not to use a high zoom, it is better to stay in wide-angle shots. First, the image shakes much less then, and second, it looks more like something that can be observed naturally.
Shots with mechanical (steadycam) or electronic (gimbal) stabilizers. Thanks to such devices, the movement of the camera held by the operator is extremely smooth and is not limited by the range of rails or slider. A great technique to follow the action, sometimes the operator can literally run after the protagonist deep into the stage, but without a shaky image, which would not be too much to be seen in such a run.
The movement of the camera is not only suitable for making the materials more dynamic, but it can also be used consciously to present information, show viewers the space where the action is taking place, make them “voyeurs” or be drawn into the very center of the plot.
Focal Lenght:
Long – This type of focal length gives the photographer a close crop effect and can be useful for nature and close portraiture (without the need to be right in at your subject’s face).
Best used for:
Bring far away subjects closer to the camera
Emphasize blurred backgrounds
Longer focal length is great for portraits
Great for landscape photography.
Standard - These lenses offer natural-looking perspective. They’re good for two-shots of people, and mid shots (hips to head) but they give slight distortion if you use them for closeups. 50mm prime lenses are usually small and ‘fast’ (they have a wide maximum aperture to let in a lot of light).
Wide - lens is any lens with a set focal length that is shorter than the length of the sensor or film. For full frame sensors, a wide angle lens would be any lens with a focal length equal to or less than 35mm.
These lenses are very useful for filming master shots of a whole scene, or getting in close and working in cramped spaces. They’re easy to handhold, perspective looks dramatic, and there’s good depth of field (a lot of the shot is in focus at the same time). The big drawback is that closeups will be distorted. If you want to shoot with just one prime lens, this may be the one to have.
Viewpoint - The position of the camera in relation to the subjects can affect the way the viewer perceives the scene. A scene may be shot simultaneously from multiple camera angles to amplify the cinematic effect and the emotions.
High (birds eye) An overhead shot is from way up high, looking down on your subject and a good amount of the scenery surrounding him or her. This can create a great sense of scale and movement.
The Eye Level Shot. When your subject is at eye-level they’re in a neutral perspective (not superior or inferior). This mimics how we see people in real life -- our eye line connecting with theirs.
A Low angle shot frames the subject from a low camera height looking up at them. These camera shots most often emphasize power dynamics between characters.
A superior character with the upper hand is often framed from down low. This makes an inferior feel like they are looking up to them.
Camera framing is the placement and position of the subjects in your shots. Shots are all about composition. Rather than pointing the camera at the subject, you need to compose an image. For filmmakers and videographers, a major consideration for framing is the number of subjects you feature in your shots, and their physical relationship to each other and the camera.
Considerations when camera framing a shot:
Size — the size of your subject has a direct relationship to the importance of that subject.
Relationships — when we see more than one character in a shot, we are meant to acknowledge their relationship (romantic, contentious, etc.)
Balance — a "balanced" frame includes elements on the left and right side of the frame.
1 note
·
View note
Text
HND1 Photography Exercise: Perspective Control
Tutorial on how to make the corrections in Lightroom:
https://www.youtube.com/watch?v=IOo07bs-bCw
Question: Image 1 shows BARREL distortion
Barrel distortion
In barrel distortion, image magnification decreases with distance from the optical axis. The apparent effect is that of an image which has been mapped around a sphere (or barrel). Fisheye lenses, which take hemispherical views, utilize this type of distortion as a way to map an infinitely wide object plane into a finite image area. In a zoom lens, barrel distortion appears in the middle of the lens's focal length range and is worst at the wide-angle end of the range.
Question: Image 2 shows PINCUSION distortion
Pincushion distortion
In pincushion distortion, image magnification increases with the distance from the optical axis. The visible effect is that lines that do not go through the centre of the image are bowed inwards, towards the centre of the image, like a pincushion.
Question: How can you avoid distortions?
To avoid shooting with an extreme wide-angle lens. Back up if you need to get more of the subject into the image. Keep any straight lines in the image as close to the center of the lens as possible. There will be less distortion toward the middle than there is on the edge.
In Lightroom
After you import the photo into Lightroom, decide if the distortion is distracting and needs correction. At this point, you should also make sure the photo is level, because applying the corrections is difficult if the photo isn’t level.
In the right hand side of the Lightroom Develop module is a panel called “Lens Corrections.” This is where we do our fixing.
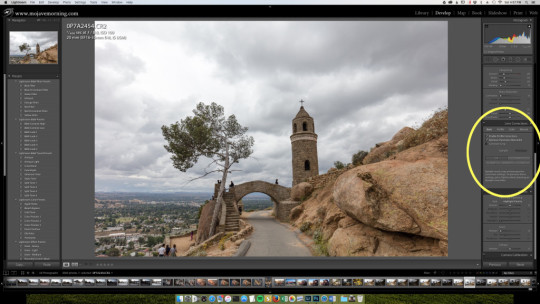
The module has four tabs called “Basic,” “Profile,” “Color,” and “Manual”

The Basic tab works best if your lens is a fairly common one that Lightroom has a profile for. It automatically corrects barrel and pincushion distortion (not vertical distortion, which is only created by how the camera is pointed,) as well as vignetting. Select “Enable Profile Corrections” and “Remove Chromatic Aberration” to get rid of some common distortion and color fringing.
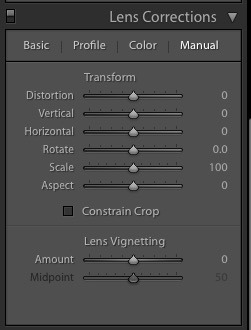
We’re interested in the Manual tab. Click on that; new controls appear.
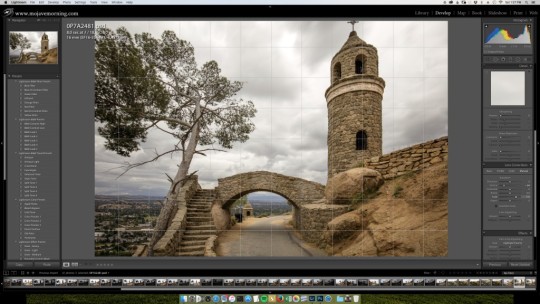
To address vertical distortion, we’ll use both the “Vertical” slider and the “Scale” slider. Slide the Vertical slider and notice how a grid appears over your photo; the vertical distortion can be adjusted to extremes in either direction.
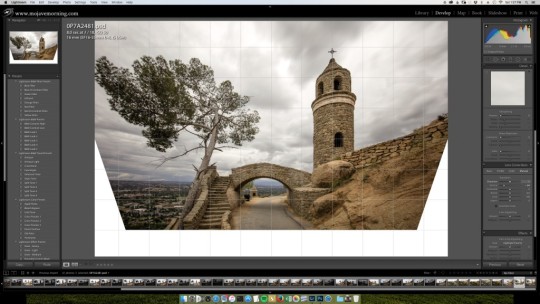
Adjust the “Vertical” slider until vertical elements in your shot look vertical, or until you like the look. Use the gridlines that Lightroom has superimposed on your picture to guide your choices. Notice that a lot of white space has opened at the bottom of the shot where Lightroom has pushed pixels away from the edges in order to fix the distortion.Use the “Scale” slider to enlarge the image until the white space disappears. Alternately, you can address the white space in Photoshop.
Practice; correct the perspective using your favoured option and have it ready for the next
class
0 notes
Video
Finaly Stop Motion Waffels.
3 notes
·
View notes