
abramsbooks
ABRAMS
The Art of Books. Photography, Art, Fashion, Comics, Cooking, Craft, and more.
2962 posts
Don't wanna be here? Send us removal request.
Last Seen Blogs

starshapedlg
🎸✰

queenofcages
Queen Of Cages🔐

brookekdelay-blog
brooke

istheh
The H

edmgroup-blog1
EDM Group Remodeling and Construction - Winchester
Photo
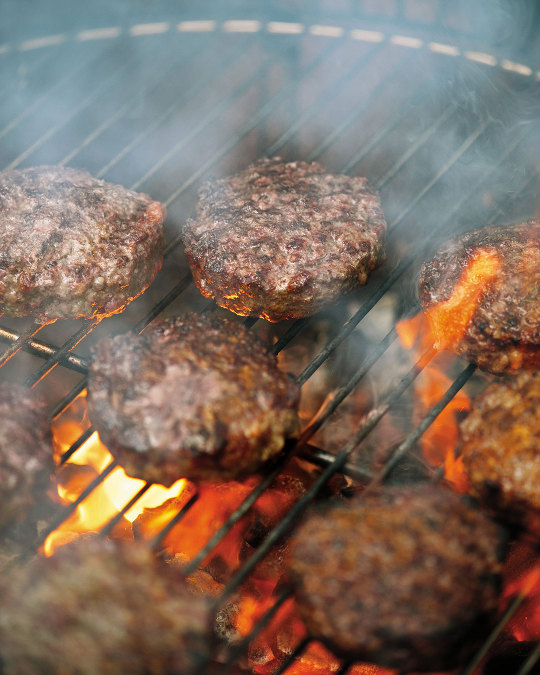
RECIPE: The Flame-Grilled Burger (from The Great American Burger Book (Updated and Expanded Edition))
Cooking over direct flame is one of the most difficult ways to make a hamburger. One of the reasons so many of the hamburgers made a hundred years ago were cooked on flat tops was simply because the results were predictably good. Squash a ball of beef on a skillet and reap the rewards of the path of least resistance. I also would imagine that way back then, lighting a big charcoal grill and flame cooking at small burger stands and joints throughout America would have been pretty dangerous. But we all know that a burger cooked on a flame grill is a very different burger.
It’s easy to master the skillet-cooked burger. Grilling a burger on open flame requires more dedication to the craft, more time, more equipment, and a willingness to fail. That’s because cooking on an outdoor grill can be very unpredictable. The grill master is at the mercy of uneven temperatures, depending on the type of coals used and where those coals are in relation to the grilling grate. Even the weather can be a factor. The outdoor propane grill solves a few of these issues, but if you really want to experience a flame-cooked burger, super-hot charcoal is the only way to go.
There’s something fundamental and primal in our desire to harness fire and grill. “The greatest advantage to cooking over flame is the grilled flavor,” Michael Ollier, corporate chef at Certified Angus Beef®, told me once, adding with a smile, “I crave that.” It’s a flavor that you cannot ever achieve cooking on a flat top or by any other method. Chef Ollier explained the science behind this perfectly: “The fat that drips onto the coals becomes airborne, flavoring your burgers.”
The keys to grilling success are high heat and confidence. Get your coals super hot and your tools, patties, and condiments ready to go, and you’ll be all set up to grill like a pro. When family and friends are hovering around you at the grill, waiting for magic, it may feel like there’s a lot at stake. Just follow the recipe below for the classic grilled cheeseburger—and remember, practice makes perfect.
Makes 8 burgers
Equipment
A 3½-inch (9-cm) food ring or round cutter
Parchment paper
A charcoal chimney
Charcoal briquettes or lump charcoal
A charcoal kettle grill, hibachi, or similar
A stiff spatula (with a long handle)
The Burger
2½ pounds (about 1 kg) fresh-ground 80/20 chuck
Salt and coarse black pepper, for seasoning
8 soft white buns
The Toppings
8 thick slices American, cheddar, or any other good melting cheese
Green-leaf lettuce
1 or 2 red beefsteak tomatoes, sliced
1 medium Vidalia or Walla Walla onion, sliced
Divide the beef into 8 equal portions (5 ounces/140 g each).
Place the food ring on a cutting board or clean surface lined with parchment paper and add a portion of beef. Gently press the beef into the ring to create a perfectly round patty. (I use the ring for consistent thickness, but you can eyeball the size if you prefer. Both methods work fine. Just be sure not to over-press the meat—you want it to maintain a somewhat loose grind.)
Return the patties to the fridge to chill until you’re ready to grill (hey, that rhymes).
Using the chimney starter, light the charcoal. When coals are ready, transfer them to the grill, making sure that the bottom vent is open. Spread the coals out, leaving a small space on one side (as a rest spot in case things get too hot in there).
Place the grate over the coals and, using a grill brush, scrape off any residual buildup from your last grilling adventure. Cover the grill and make sure that the top vent is wide open. Give your grill grate a chance to heat up—you don’t want to plop raw burger patties onto a lukewarm grill. That grate should be ridiculously hot!
At this point, and not before, season both sides of your patties with a liberal amount of salt and pepper. Salting too early will bind the muscle fibers together and make your burgers tough (yuck).
Place the patties on the hot grill grate, cover the grill, and leave them alone. Allow the patties to cook for about 5 minutes. The cooking time can vary depending on environmental and equipment factors, so you’ll have to use your best judgment here. Chef Michael Ollier from Certified Angus Beef put it best when he told me, “Let the burger speak to you.” If you understand this statement, you’re probably drinking too much at the grill. But seriously, with experience comes wisdom—the burger will actually tell you when it’s time to flip. One good visual cue is when you see red liquid start to form on the uncooked surface of the burger. Go ahead and take a peek just shy of 5 minutes.
This would be a good time to toast your buns. Toast them indoors using a skillet on your stovetop, or toast them with butter in a small cast-iron skillet, directly on the colder side of the grill.
Cook the second side (again, untouched and covered) for an additional 4 minutes. With about 1 minute to go, top each patty with a slice of cheese and cover the grill. As the burgers finish cooking, slide them to the cooler rest spot section of the grill, away from the hot coals. Once all your burgers are done, remove them from the heat and allow them to rest for 1½ minutes. The internal temperature of the burgers should be about 143°F (62°C) for medium-rare.
Top the toasted buns with the lettuce, tomato, and onion slices, or your condiments of choice. (I love a good, crisp slice of onion on my grilled burgers, as well as mustard, pickle, and sometimes mayonnaise.) Transfer the patties to the toasted buns and serve.

The definitive guide to creating the most mouthwatering hamburgers by America’s leading burger expert—expanded and updated with new and improved recipes
The Great American Burger Book was the first book to showcase a wide range of regional burger styles and cooking methods. In this new, expanded edition, author and burger expert George Motz covers traditional grilling techniques as well as how to smoke, steam, poach, smash, and deep-fry burgers based on signature recipes from around the country.
Each chapter is dedicated to a specific regional burger, and includes the history of the method and details on how to create your own piece of American food history right at home. Written by Motz, the author of Hamburger America and hailed by the New York Times as a “leading authority” on hamburgers, The Great American Burger Book is a regional tour of America’s best burgers.
Recipes feature regional burgers from California, Connecticut, Florida, Hawaii, Illinois, Indiana, Iowa, Kansas, Massachusetts, Michigan, Minnesota, Mississippi, Missouri, Montana, Nebraska, New Jersey, New Mexico, New York, North Carolina, Ohio, Oklahoma, Pennsylvania, South Carolina, Tennessee, Texas, Utah, and Wisconsin. International locations include: Australia, Brazil, Denmark, Malaysia, and Turkey.
These mouthwatering recipes include Connecticut’s Steamed Cheeseburger, The Tortilla Burger of New Mexico, Iowa’s Loosemeat Sandwich, Houston’s Smoked Burger, Pennsylvania’s The Fluff Screamer, and Sheboygan's Brat Burger.
This is a book for anyone who loves a great burger, unique or classic. And who doesn’t love a great burger?
For more information, click here.
#abramsbooks#abrams books#the great american burger book#great american burger book#american burger book#george motz#motz burger#burger#burgers#burger recipe#grilling season#summer grilling#flame grilled burger
21 notes
·
View notes
Photo
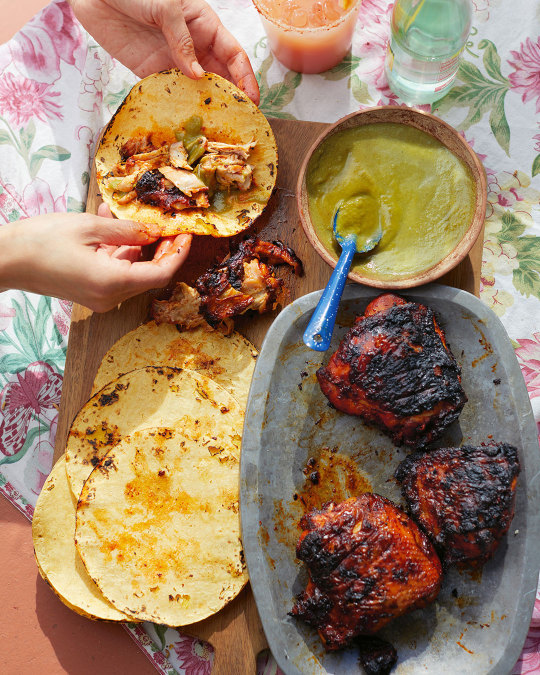
RECIPE: Pollo in Guajillo (from Asada by Bricia Lopez and Javier Cabral)
This grilled chicken has gotten me through so many long days working at Guelaguetza. There were times when I ate it for lunch every day, sometimes with a big salad, sometimes with homestyle french fries, or with rice, beans, and tortillas. It tastes great any way you eat it and it reheats beautifully. This is a solid recipe to make on a Sunday and eat throughout the week. I purposely did not soak the chiles, in order to create a rustic marinade that has more texture; the flavor of burnt chile once it is grilled makes this chicken recipe stand out.
Serves 4
12 guajillo chiles (1¾ ounces/50 g), stems and seeds removed
½ large white onion (5. ounces/150 g), roughly chopped
8 cloves garlic, peeled
¼ teaspoon black peppercorns (about 12 peppercorns)
1 whole clove
1 tablespoon dried Mexican oregano
2 tablespoons grapeseed oil
¼ cup (60 ml) orange juice
2 tablespoons seasoned rice vinegar
2 tablespoons fresh lime juice
¼ teaspoon ground cinnamon
1½ tablespoons sea salt
2 pounds (910 g) bone-in chicken thighs
In a cast-iron skillet over medium heat, lightly toast the chiles, about 2 to 3 minutes on each side. Remove from the skillet and set aside.
In the same skillet, add the onion and garlic, turning once or twice until they are lightly charred, about 10 minutes. Remove from the skillet and set aside.
Add the peppercorns, clove, and dried oregano to the pan and lightly toast until they are aromatic, about 2 minutes. Transfer the toasted spices and oregano to a molcajete or spice grinder and grind until finely ground.
In a high-performance blender or food processor, add the toasted chiles, onion, garlic, ground spices and oregano, oil, orange juice, rice vinegar, lime juice, cinnamon, and salt. Blend until most of the chiles have come apart.
Pat the chicken dry with paper towels. Using a gallon-size resealable bag, add the marinade and the chicken. Seal and let sit in the refrigerator for at least 30 minutes or overnight.
Remove the chicken thighs in their marinade from the fridge to allow them to reach room temperature before grilling.
Start a charcoal or gas grill. The gas should be set to high. If using a pellet grill, preheat your grill to 450°F (230°C) for at least 15 minutes. If using charcoal, the coals should be red but entirely covered with gray ash.
Remove the chicken from the marinade and put them on the grill directly over the medium fire, skin side up. Close the lid and cook, turning once, about 15 minutes on each side. The chicken is cooked when its internal temperature reaches 175°F (79°C) on a meat thermometer. Transfer the meat to a cutting board and let rest for 5 minutes.

Oaxaca authors Bricia Lopez and Javier Cabral are back with the first major cookbook about how to create asada—Mexican-style grilled meat—at home
In millions of backyards across Southern California, an asada means a gathering of family, friends, great music, cold drinks, good times, and community—all centered around the primal allure of juicy, smoky grilled meat with flavors and spices traditional to Mexico. The smell of asada is a cloud of joy that lingers in the streets of Los Angeles. With Asada: The Art of Mexican-Style Grilling, Mexican food authorities and the authors of Oaxaca, Bricia Lopez and Javier Cabral, are back with more than 100 recipes that show you how to prepare the right dishes and drinks for your next carne asada gathering. Asada will both guide you in crafting mouthwatering food and inspire the right laidback atmosphere.
Everyone says they love a spicy margarita and asada tacos, but very few understand the culture that informs these flavors. Divided into the eight crucial elements of any carne asada: botanas (appetizers), carnes (meats), mariscos (seafood), side dishes and vegetables, salsas, aguas frescas, cocktails, and dessert, Asada walks you through every step. From Lopez’s secret “michelada marinade” to game-changing salsas that will elevate any grilled meat, this cookbook is the ultimate guide to making and beginning to understand the magic of asada.
For more information, click here.
#abramsbooks#abrams books#asada#asada cookbook#mexican style grilling#bricia lopez#javier cabral#oaxaca#oaxaca cookbook#pollo in guajillo#mexican recipe#mexican grilling#grilling#grilling season
24 notes
·
View notes
Photo
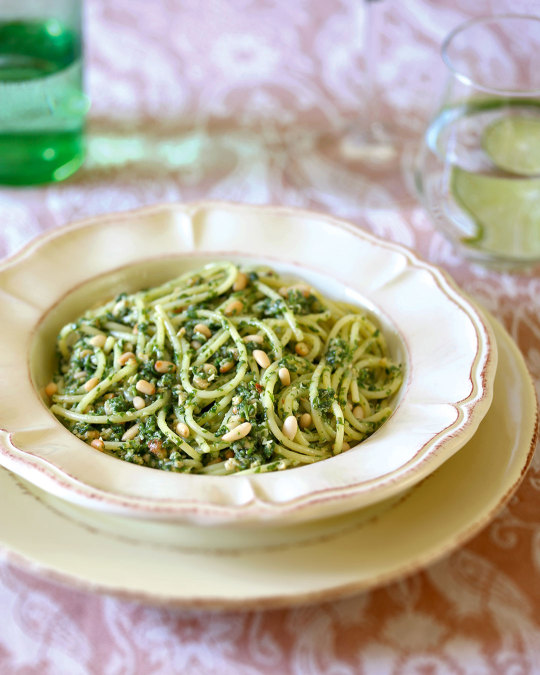
RECIPE: Arugula and Toasted Pine Nut Pesto (from Pasta Veloce by Frances Mayes and Susan Wyler)
Makes about 1½ cups (360 ml)
Ingredients
5 ounces (140 g) baby arugula
⅓ cup (80 ml) extra-virgin olive oil
½ cup (70 g) pine nuts
2 cloves garlic, crushed through a press
½ teaspoon crushed hot red pepper
½ cup (50 g) grated pecorino Romano
⅔ cup (160 ml) pasta water, or more if needed
Coarse salt and freshly ground black pepper
Put the arugula in a blender or food processor. In a small heavy saucepan, warm the olive oil over medium heat. Add the nuts, reduce the heat to low, and toast until they are very light brown, 2 to 3 minutes. Pour the nuts and hot oil over the arugula.
Add the garlic and hot pepper. Pulse to a coarse puree. Mix in the cheese. Add the pasta water and puree to a saucy consistency. Season with salt and black pepper.

From the famed author of Under the Tuscan Sun, the most delicious Tuscan pasta recipes that can be made in the time it takes to boil water and for the pasta to cook
Frances Mayes is known for transporting readers to the charming Italian countryside in her bestselling books. In Pasta Veloce, Mayes brings that irresistible Italian flavor right to your home with 100 of her favorite pasta recipes. These well-loved recipes blend traditional Italian technique with magic from the Mayes and Wyler home kitchens where experiments are always in progress.
Pasta is the most versatile food on Earth. And if you do it right: fast! Pasta Veloce offers a multitude of under-30-minute, luscious recipes, all accompanied by Mayes’s evocative text. While there are numerous pasta cookbooks, few feature a true Italophile’s passion and eye for detail that can get a dish to the table in, as Mayes describes, “the time it takes to boil water.” From a Tagliatelle with Duck Confit, Chestnuts, and Coffee Reduction to a glittering Capellini with Golden Caviar to the perfect vodka sauce, Pasta Veloce is your guide on those nights when you’re ready to skip the whole production of it but still want to eat like royalty in a rustic Italian village.
For more information, click here.
#abramsbooks#abrams books#pasta veloce#pasta veloce book#frances mayes#under the tuscan sun#susan wyler#pasta cookbook#italian cookbook#italian cooking
33 notes
·
View notes
Photo
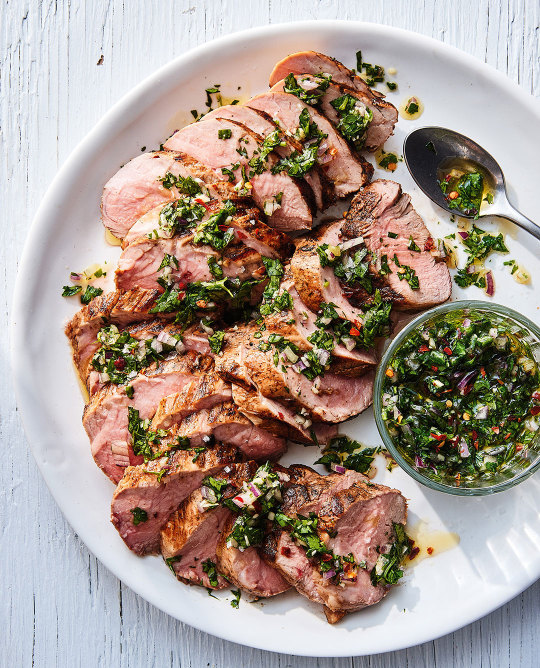
RECIPE: Grilled Pork Tenderloin with Chimichurri (from Meal Prep Magic by Catherine McCord)
It was in Argentina where I began my love affair with chimichurri; a pot of it accompanied whatever meat we were eating. Just the thought of pairing it with pork tenderloin makes me giddy.
PREP TIME: 15 minutes, plus 1 to 2 hours for marinating
COOK TIME: 15 minutes
SERVES: 4 to 6
¼ cup (60 ml) Dijon mustard
½ cup (120 ml) apple cider vinegar
3 tablespoons light or dark brown sugar
8 cloves garlic, minced
⅓ cup (75 ml) plus 2 tablespoons olive oil
1½ teaspoons kosher salt
2 to 2½ pounds (910 g to 1.2 kg) pork tenderloin, fat and silver skin removed
½ cup (15 g) packed fresh cilantro
½ cup (15 g) packed flat- or curly-leaf parsley
1 small shallot, peeled
2 tablespoons red or white wine vinegar
2 tablespoons fresh lime juice
Pinch crushed red pepper
Freshly ground black pepper
Place the Dijon mustard, apple cider vinegar, brown sugar, half of the garlic, 2 tablespoons of the olive oil, and 1 teaspoon salt in a large zip-top bag. Squish the bag to mix the marinade. Add the pork tenderloin and use your hand on the outside of the bag to move the marinade around the pork. Marinate for 1 to hours at room temperature or overnight in the refrigerator.
To make the chimichurri, in a food processor, place the cilantro, parsley, remaining garlic, shallot, the remaining ⅓ cup (75 ml) olive oil, the red or white wine vinegar, lime juice, crushed red pepper, remaining ½ teaspoon salt, and black pepper and pulse until finely chopped.
Heat a grill to medium heat. Grill the marinated pork on several sides for a total of 14 to 15 minutes, or until the internal temperature is 135 to 140°F (55 to 60°C) when checked with an instant-read thermometer inserted in the thickest part of the meat. (Alternatively, you can use a cast-iron skillet to roast the pork. Heat over medium-high heat and add 1 tablespoon of olive oil. Sear the pork all over for a total of 6 minutes. Transfer the pan to a 400°F (205°C) oven and roast for 15 to 20 minutes.)
Allow the pork to rest for at least 10 minutes to allow the juices to settle before slicing. Use a sharp knife to cut pork on a bias into ½-inch (12 mm) slices and top with the chimichurri sauce.
Make sure not to overcook the pork. Pork should never be cooked to more than 135 to 140°F (55 to 60°C). You want the internal color to be light pink.
Make double the amount of chimichurri sauce to serve with fish, shrimp, chicken, or steak later that week.
TO ENJOY LATER
The cooked pork can be cooled and refrigerated in an airtight container for up to 3 days. Enjoy at room temperature or warm for 30 seconds in the microwave. Store the chimichurri in an airtight container in the fridge for up to 5 days, or freeze in ice cube trays then transfer to labeled zip-top bags for up to 4 months.
PREP IN ADVANCE
Place the zip-top bag of the pork in its marinade in the freezer for up to 3 months. When ready to cook, place the pork chops in the zip-top bag in the refrigerator to thaw overnight; cook as directed.

Become a faster, healthier cook with secrets from Weelicious founder and meal prep genius Catherine McCord
With celebrated cookbook author and Weelicious founder Catherine McCord's step-by-step process, your kitchen will be beautifully organized and fast, healthy family meals will be at your fingertips—starting with 100 of her favorite recipes. McCord believes that success in the kitchen comes down to two things—organization and meal prep—and she’ll show you how to master both in Meal Prep Magic.
One step beyond the ideological approach of Marie Kondo and The Home Edit, McCord brings you a practical guide to organizing the most important space in your home and using it. If you’ve ever lost leftovers to the back of the fridge, failed to find a spice that you know you bought, or faced a cabinet full of mismatched Tupperware, her advice will forever change your relationship to your kitchen.
After showing how to maximize your space for efficiency, McCord offers up her favorite family recipes. Including tried-and-tested secrets for saving time, these recipes are easy to prep ahead, make entirely ahead, contain basic ingredients that are always in your pantry, and/or strategically employ your freezer, air-fryer, Instant Pot, slow cooker, and more. Think grab-and-go breakfasts like Raspberry Creamy Chia Puddings, creative packed lunches including easy-to-assemble Salad Jars, healthy snacks like air-fryer crispy artichokes, and irresistible dinners that are even better leftover, such as lemony chicken thighs with lots of herbs.
By following McCord's simple strategies for meal prepping, you’ll always have food on-hand to enjoy throughout your busy week, limiting your trips to the grocery store and time spent in the kitchen. Eat healthy meals you love, while saving time, money, and your sanity. Never again stress out about what to make for dinner! Meal Prep Magic is a lifesaver for any and all home cooks, busy parents, and fans of Weelicious and McCord's popular book Smoothie Project.
For more information, click here.
#abramsbooks#abrams books#meal prep magic#meal prep#meal prepping#meal prep tips#smoothie project#catherine mccord#recipe#free recipe#pork tenderloin#chimichurri#quick dinner idea#dinner idea#dinner recipe
29 notes
·
View notes
Photo
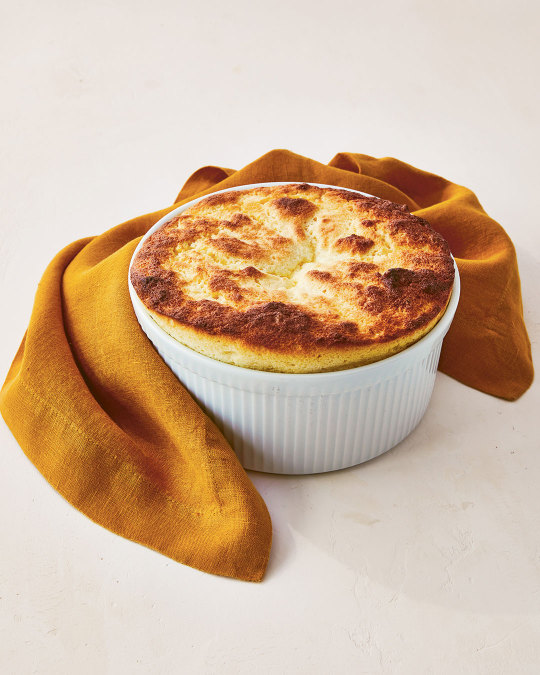
RECIPE: Lemon Pudding-Soufflé (from In Praise of Home Cooking by Liana Krissoff)
This was my mom’s go-to pudding-like dessert for a long time, and probably one of my all-time favorites. Fluffy “soufflé” topping a tart warm custard; it isn’t beautiful or fancy, but if you love lemon there are few better ways to enjoy it.
Serves 6
5 tablespoons (70 g) unsalted butter, at room temperature
1 cup (200 g) sugar
3 large egg yolks, plus
6 large egg whites
1/3 cup (75 ml) lemon juice
2 teaspoons finely grated lemon zest (from about 2 lemons)
¼ cup (45 g) all-purpose flour
1 cup (240 ml) half-and-half
Pinch of cream of tartar
PRACTICE SKILLS
Using an electric mixer
Folding beaten egg whites into a yolk mixture
Baking in a hot water bath (a bain-marie)—setting it up on the hot oven rack and pouring boiling water into the larger pan. Removing the bain-marie from the hot oven
Preheat the oven to 350°F (175°C). Find a deep 8-inch (20 cm) square baking dish (or a 2-quart round soufflé dish) and a larger baking dish or pan that the smaller dish fits into—a 9 by 13-inch (23 by 33 cm) one works well. Use about 1 tablespoon of the butter to very generously butter the smaller baking dish all the way up the sides. Set the small baking dish inside the larger dish. Put a kettle of water on to boil.
In a deep bowl, using an electric mixer with the beater attachments, beat the remaining butter and the sugar together until thoroughly combined. Beat in the 3 egg yolks one at a time, then continue beating until the mixture is pale yellow. Gradually beat in the lemon juice and zest, then the flour and half-and-half, scraping the side of the bowl a couple times so everything is smooth and well incorporated. Set aside.
Switch to a whisk attachment on the electric mixer. Put the 6 egg whites in a clean, dry, deep bowl. Whisk until foamy, then add the cream of tartar and continue to whisk until firm peaks form (when you lift the whisk, the whites should stand up straight in a peak and not flop over). Use a rubber spatula to stir about one-third of the whites into the egg yolk mixture, then add half of the remaining whites and gently fold them in until mostly combined. Fold in the remaining whites until just combined and no large clumps of whites remain in the batter. Scrape the batter into the buttered baking dish.
With potholders, carefully pull the center rack partway out of the oven. Place the small baking dish (in the large dish) on the rack and carefully pour hot water from the kettle into the large dish until it comes about 1 inch (2.5 cm) up the sides of the small dish. Gently slide the rack back into the oven and close the door. Bake for about 50 minutes, until puffed up and evenly browned on top. Remove both baking dishes from the oven, taking care not to spill the hot water, then lift the small dish onto a wire rack and let cool for 20 minutes. Scoop portions of the soufflé (and the soft pudding underneath) into dishes and serve warm.
Award-winning cookbook author Liana Krissoff presents an evocatively written ode to home cooking with all the guidance you need to perfect your own easy-to-master family recipes
Trusted cookbook author Liana Krissoff is back. Previously, she showed you fresh, clever canning recipes; modern slow-cooker recipes; and easy vegetarian crowd-pleasers. Now, Krissoff brings you In Praise of Home Cooking—fit for anyone looking to perfect the staples, parents who want to whip up something tasty, curious kids who want to learn grandma’s secret recipes, and everyone who has gotten tired of those absurdly labor-intensive recipes.
To Krissoff, developing resourceful habits and perfecting uncomplicated dishes––a pot of fluffy rice and one of creamy beans, a seared steak and a colorful salad––are integral to living with great pleasure, and so she shows us the way. Krissoff explores these simple but vital subjects—ranging from how to start a fire in a clearing in the woods to making a simple but celebration-worthy layer cake, and even remembering to make a mug of hot cocoa just because it’s the first cold, gray day of fall—reminding us that appreciating these moments is key to a life well-lived.
In this cookbook infused with memoir, there are charming step-by-step illustrations that demystify key kitchen skills, vibrant food photographs, and short essays that reveal keen insights gleaned from a life as a recipe tester, cookbook author, and mom interspersed among the recipes. The more than 85 recipes in this book are Krissoff’s essentials, perfected for your ease. They represent a chronicle of how she learned to cook but also of ongoing efforts to help her daughter develop a level of competence with improvisatory home cooking. From kneading your own yeasted bread dough to refining your classic tahini dressing, Krissoff brings you all the foolproof recipes you always wished you had, while offering insight into the meaning and beauty behind these simple moments.
For more information, click here.
#abramsbooks#abrams books#in praise of home cooking#home cooking#cookbook#free recipe#recipe#spring recipe#spring dessert#lemon pudding souffle#lemon pudding#lemon recipe#dessert recipe
19 notes
·
View notes
Photo
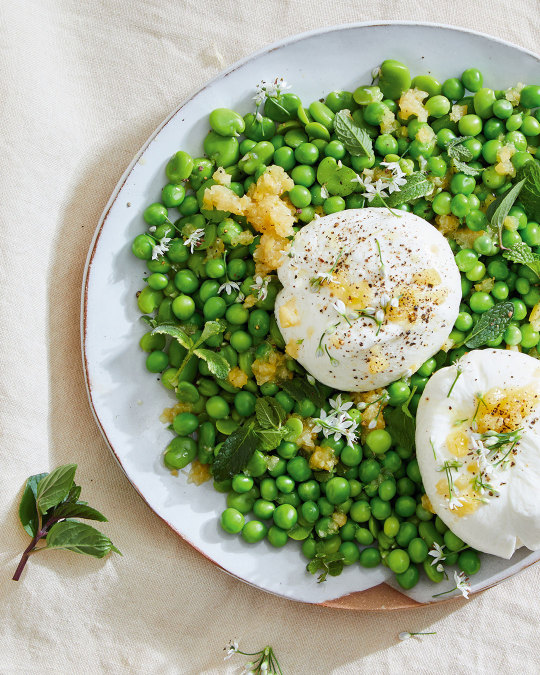
RECIPE: Burrata with favas, peas, and preserved lemon (from Salad Freak by Jess Damuck)
When English peas are in season and finally sweet, I can’t get enough of eating them straight out of their shells. Squeezing the fava beans out of their little jackets is pretty fun too—I love the moment the skin splits to reveal the brightest, most amazing green inside. This simple dish is so beautiful and clean and allows the flavors of the favas and peas to shine.
PRODUCE
1 cup (170 g) shelled fava beans, preferably fresh from 1½ pounds (680 g) beans
2 cups (290 g) shelled English peas, preferably fresh from 1½ pounds (680 g) peas
Fresh chive blossoms (or just some chopped chives, mint, or other fresh herbs)
DAIRY
2 balls burrata (about 8 ounces/225 g)
PANTRY
Kosher salt and freshly ground black pepper
2 tablespoons finely chopped preserved lemon
Extra-virgin olive oil (use your very good kind)
Flaky salt
COOK: In a small pot, bring heavily salted water to a boil. Prepare an ice bath with a fine-mesh sieve placed over the bowl (to contain your beans and peas). Blanch 1 cup (170 g) favas for 3 to 5 minutes. Transfer to the ice bath, and then to a paper towel–lined plate.
Boil 2 cups (290 g) peas for 3 to 5 minutes, until crisp-tender and bright green. Transfer to the ice bath. Once cool, transfer to a paper towel–lined plate. Unzip all of your fava beans by squeezing them out of their jackets to reveal the beautiful, bright green pod within.
ASSEMBLE AND SERVE: Transfer all of the fava beans and peas to a serving bowl. Add the 2 balls burrata and sprinkle 2 tablespoons finely chopped preserved lemon over everything. Drizzle with your very good olive oil and grind plenty of black pepper over it. Sprinkle with flaky salt and chive blossoms or fresh herbs.
One of TIME’s most anticipated cookbooks of Spring 2022
One of Food & Wine’s best cookbooks of Spring 2022
A USA TODAY and PUBLISHERS WEEKLY bestseller!
Delicious and beautiful recipes from Martha Stewart’s personal salad chef and the self-proclaimed “Bob Ross of salads.”
Offering more than 100 inspired recipes, recipe developer and food stylist Jess Damuck shares her passion for making truly delicious salads. Salad Freak encourages readers to discover and embrace their own salad obsessions. With the right recipes, you will want to eat salad for every meal and never get bored. By playfully combining color, texture, shape, and, of course, flavor, Damuck demonstrates how a little extra effort in the kitchen can be meditative, delicious, and fun. The recipes—such as her Citrus Breakfast Salad; Tea-Smoked Chicken and Bitter Greens Salad; Caesar Salad Pizza Salad; and Roasted Grapes, Ricotta, Croutons, and Endive Salad—are meant to be hearty enough for a meal all year round but versatile enough to be incorporated into a larger menu. For Damuck, the perfect salad balances each bite, with something tart enough to twinge your cheeks, something sweet to balance out the bitter, and something with a little salty crunch to finish. Salad Freak is not just about eating to feel good; it’s about confidently combining flavors to create fresh, bright, and satisfying meals that you will want to make again and again.
For more information, click here.
#abramsbooks#abrams books#salad freak#salad freak recipe#jess damuck#salad recipe#spring recipe#spring#i love spring#burrata#burrata recipe#free recipe
28 notes
·
View notes
Photo

RECIPE: Irish Goodbye (from Cure: New Orleans Drinks and How to Mix 'Em by Neal Bodenheimer and Emily Timberlake)
Matt Lofink describes this as a dry, not-too-sweet, “very crushable” whiskey sour. Fennel and peach is an unexpected but delicious flavor pairing that works amazingly well with the spice notes of the whiskey.
¾ ounce (22.5 ml) fresh lemon juice
1 medium egg white
1. ounces (45 ml) Tullamore D.E.W. Irish whiskey
¼ ounce (7.5 ml) Giffard crème de pêche liqueur
¼ ounce (7.5 ml) Fennel Syrup (recipe follows)
4 mint leaves
10 drops Peychaud’s bitters, for garnish
Mint sprig, for garnish
Combine the lemon juice and egg white in a shaker tin without ice and dry-shake for 30 seconds. Add the whiskey, pêche liqueur, fennel syrup, and mint leaves to the shaker tin, fill the shaker with ice, and shake until chilled. Double-strain into a double old-fashioned glass filled with ice. Dot the bitters on the surface of the drink, then use a toothpick or cocktail straw to swirl the bitters in an attractive pattern. Garnish with the mint sprig and serve.
RECIPE: Fennel Syrup
Makes about 2 cups (480 ml)
2 tablespoons fennel seeds
2 cups (480 ml) hot (190 to 200°F/88 to 93°C) water
2 cups (400 g) white sugar
In a small skillet over medium heat, toast the fennel seeds until fragrant, 1 to 2 minutes. Transfer to a bowl, add the water, and infuse until the water is cool. Add the sugar, stir until dissolved, then fine-strain and store in the refrigerator for up to 4 weeks.

From the foremost figure on the New Orleans' drinking scene and the owner of renowned bar Cure, a cocktail book that celebrates the vibrant city
New Orleans is known for its spirit(s)-driven festivities. Neal Bodenheimer and coauthor Emily Timberlake tell the city’s story through 100 cocktails, each chosen to represent New Orleans’ past, present, and future. A love letter to New Orleans and the cast of characters that have had a hand in making the city so singular, Cure: New Orleans Drinks and How to Mix 'Em features interviews with local figures such as Ian Neville, musician and New Orleans funk royalty, plus a few tips on how to survive your first Mardi Gras. Along the way, the reader is taken on a journey that highlights the rich history and complexity of the city and the drinks it inspired, as well as the techniques and practices that Cure has perfected in their mission to build forward rather than just looking back. Of course, this includes the classics every self-respecting drinker should know, especially if you’re a New Orleanian: the Sazerac, Julep, Vieux Carré, Ramos Gin Fizz, Cocktail à la Louisiane, and French 75. Famous local chefs have contributed easy recipes for snacks with local flavor, perfect for pairing with these libations. Cure: New Orleans Drinks and How to Mix 'Em is a beautiful keepsake for anyone who has fallen under New Orleans’s spell and a must-have souvenir for the millions of people who visit the city each year.
For more information, click here.
#abramsbooks#abrams books#cure#cure cocktail book#cure nola#cure new orleans#st. patrick's day#irish goodbye#cocktail recipe#cocktails
17 notes
·
View notes
Photo
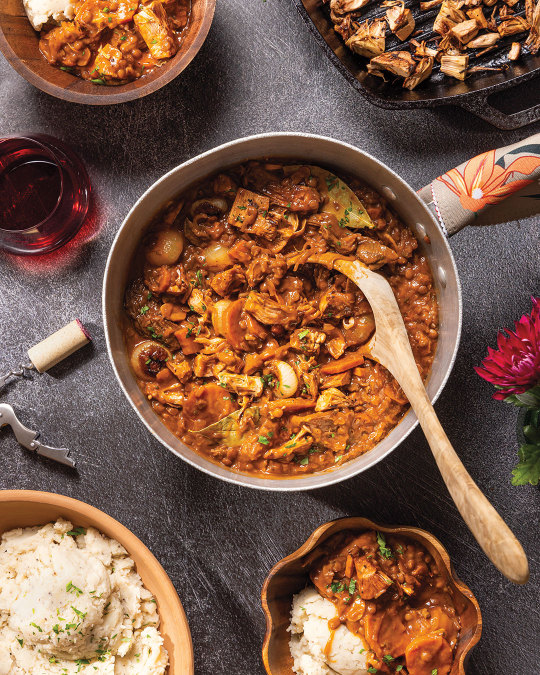
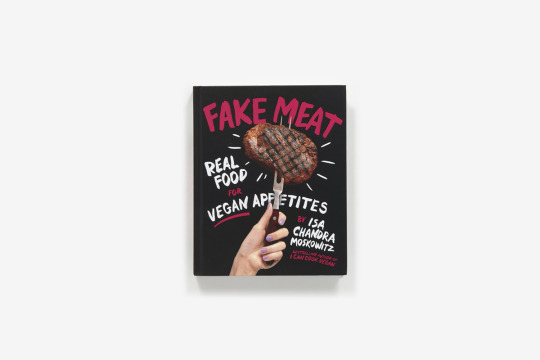
RECIPE: Jacques’s Boeuf Bourguignon (from Fake Meat by Isa Chandra Moskowitz)
Is Julia Child smiling down on us for this one? Probably not. But damn, it’s delicious. All the wine-kissed smoky satisfaction that you want in boeuf Bourguignon. Jackfruit is grilled and charred to rep the meat, along with its trusty sidekick, porcini mushrooms. Lentils add beefy body and smoked paprika brings that bacon kick that vegans love so much. Toasting slices of garlic for this stew creates big, garlicky bites that really make it, so don’t you dare mince it instead. Pearl onions are an iconic component to Julia’s recipe, so I use them here. They’re cooked on the grill right after the jackfruit so that you aren’t using too many dishes. But if you leave them out, no big deal. Julia is already disappointed in us so it can’t get any worse. Serve over ridiculous amounts of mashed potatoes.
Serves 6 to 8
2 (20-ounce/570 g) cans green jackfruit, packed in water
6 tablespoons (90 ml) olive oil
Salt
2 cups (260 g) pearl onions
2 cups (230 g) sliced shallots
¼ cup (35 g) sliced garlic
2 cups (280 g) peeled and sliced carrots, in ¼-inch coins
3 tablespoons chopped fresh thyme
4 bay leaves
2 teaspoons smoked paprika
1½ cups (360 ml) dry red wine
Freshly ground black pepper
½ cup (95 g) uncooked green or brown lentils
1 ounce (28 g) dried porcini mushrooms
5 cups (1.2 liters) vegetable broth
2 tablespoons tomato paste
¼ cup (30 g) all-purpose flour
¼ cup (13 g) chopped fresh parsley, for garnish
HOT TAKE
Double-check that the jackfruit is canned in water, not in syrup. You don’t want any sweetness here; even if you wash it off, it would still be super weird.
Drain and rinse the jackfruit. Pat dry. Remove and discard the core from the jackfruit pieces; it looks kind of like a seed. Toss the rest in a bowl with 3 tablespoons of the olive oil and a big pinch of salt.
Preheat a cast-iron grill over medium heat. When the pan is hot, place the jackfruit in as much of a single layer as possible. You will need to do this in two batches. Grill for about 5 minutes, until charred and smoky, then use a thin metal spatula to toss and grill again for 3 more minutes. Transfer to a bowl and set aside to add back later. Repeat with the second batch.
In the same bowl used for the jackfruit, toss the pearl onions in 1 tablespoon olive oil and a pinch of salt to coat. Place them on the hot grill. Let cook until softened and charred in some spots, flipping occasionally, about 15 minutes.
In the meantime, preheat a 4-quart (3.8 liter) pot over medium-high heat. Sauté the shallots and a pinch of salt in the remaining 2 tablespoons olive oil until translucent, 5 to 7 minutes. Add the garlic and carrots and sauté for about 5 more minutes. Add thyme, bay leaves, smoked paprika, and 1 teaspoon salt and toss around for a minute.
Pour in the wine to deglaze the pan, scraping the bottom with a wooden spatula, and bring to a boil. The liquid should reduce in about 3 minutes. While it’s reducing, grind in ample amounts of fresh black pepper.
Add the lentils, porcinis, broth, and tomato paste, cover the pot, and bring to a full boil for 5 minutes or so. Lower the heat, leaving the lid ajar for steam to escape, and simmer until the lentils are tender, about 30 minutes.
In a measuring cup, mix the flour into ½ cup (120 ml) water with a fork until no lumps are left. Slowly add the water-flour slurry to the pot, mixing it in well. Let cook for about 10 minutes, stirring often. If it appears too thick, thin with a little water.
Mix in the reserved jackfruit and pearl onions and heat through. Shut off the heat and let the stew hang out for about 15 minutes, for the flavors to marry. Serve with mashed potatoes and garnish with parsley.

Bestselling author Isa Chandra Moskowitz shows you how to create your own vegan meats, like deli slices and ground beef, that will satisfy every craving
“I’m an animal lover and that love doesn’t end when I get hungry. Do I miss meat? Not really. But here’s what I do miss: Aromas. Experiences. Methods. Traditions.
“I remember all the tastes and sensations from my omnivore days, even though they were so long ago. My grandmother’s meatballs, burnt on one side. Slurpy seafood pasta at a café along the bay, my teeth scraping against the hard oyster shells. My favorite pizza burger from a diner underneath a Midtown office building, the feel of the vinyl seat as I bounced with excitement at the sight of the melty mozz arriving at the table.
“These are the moments you could say I miss. Maybe you do, too. But we don’t have to.”
—from the Introduction
Fake Meat is packed with 125 recipes that will satisfy every kind of meat craving, from a vegan Philly cheesesteak and a basket of wings to a rich, gooey lasagna.
For more information, click here.
#abramsbooks#abrams books#isa chandra moskowitz#fake meat#fake meat book#vegan cookbook#vegan book#vegan recipe#vegan#boeuf bourguignon
14 notes
·
View notes
Photo

RECIPE: Mochi Doughnuts (From Win Son Presents A Taiwanese American Cookbook by Josh Ku, Trigg Brown, and Cathy Erway)
Taiwan is famous for Q or QQ textures, which may be best translated as “Bouncy” or “Springy.” Think boba, gummy bears, and mochi, a sticky rice treat popular throughout East Asia. These doughnuts are made with sticky rice flour for a chewy bite that stretches in a very Q way. Mochi doughnuts are definitely a thing in Taiwan, and Danielle really gravitated to the ones she sampled throughout Taiwan, having made many fried doughnuts fresh to order in her time at Craft, working under doughnut and overall pastry legend Karen DeMasco.
In Tainan, we also sampled mochi doughnuts made with millet flour in addition to sticky rice flour, and Danielle was eager to start recipe-testing as soon as she returned. She landed on this formula that’s satisfyingly QQ, delicious, and also completely gluten-free. Once they’re out of the fryer, they can be coated with sugar and your choice of additional seasonings—at Win Son Bakery, we love a classic sugar and cinnamon topping, but you can add to yours some toasted and ground black sesame seeds, ground black cardamom, ground ginger, and any other spices you love. Or just toss them with sugar—sometimes that’s all you need.
Makes about 12
INGREDIENTS
FOR THE BATTER:
5 cups (800 g) glutinous rice flour
1½ cups (165 g) millet flour
12⁄3 cups (335 g) sugar
1⁄3 cup (65 g) baking powder
3 tablespoons salt
3 cups (720 ml) whole milk
1 cup (225 g) unsalted butter, melted and cooled
6 eggs
FOR SHAPING AND FRYING:
2 quarts (2 L) neutral oil for frying, such as soybean
1/4 cup (40 g) glutinous rice flour, plus more for cutting out the donuts
TO FINISH:
1 cup (200 g) sugar
2 tablespoons ground cinnamon (optional)
MAKE THE BATTER: In the bowl of a stand mixer, combine all of the ingredients for the batter and mix with the paddle attachment until a smooth dough forms. Wrap the dough in plastic wrap and refrigerate for 3 hours or overnight.
SHAPE AND FRY THE DOUGH: In a fryer or Dutch oven, preheat the oil to 325°F (165°C), when measured with a candy thermometer.
Sprinkle 1/4 cup (40 g) rice flour on a flat surface and on top of the dough and roll it out until it’s about ½ inch (12 mm) thick. Cut doughnuts about 3 inches (7.5 cm) in diameter using a doughnut cutter, concentric cookie cutters, or a drinking glass and a shot glass, flouring the cutters to avoid sticking. Combine the leftover pieces and roll out the dough again into a ½-inch-thick (12 mm) layer as many times as possible, to create as many doughnuts as you can.
Work in batches so as not to overcrowd the fryer. Once the oil is up to temperature, gently place as many doughnuts as will comfortably fit into the oil and allow to fry for 3 minutes before carefully turning them over. Fry the other side for 3 minutes and drain on a cooling rack with something underneath to catch any excess oil.
To finish, on a plate, mix the sugar and cinnamon, if using. Toss the doughnuts with the mixture and serve immediately.
A modern, brashly flavorful guide to cooking Taiwanese-American food, from Brooklyn’s lauded Win Son, Win Son Bakery, and Cathy Erway, celebrated writer and expert on the cuisine.
Josh Ku, born in Queens to parents from southern Taiwan, and Trigg Brown, a native Virginian whose mentor was a Taiwanese-American chef, forged a friendship over food—specifically, excellent tsang ying tou, or "flies’ head," a dish of chopped budding chives kissed with pork fat. Their obsession with Taiwanese food and culture propelled them to open Win Son together in 2016. The East Williamsburg restaurant quickly established itself as a destination and often incurs long waits for their vibrant and flavorful Taiwanese-American cuisine.
Ku and Brown have teamed up with Cathy Erway, Taiwanese food expert and celebrated writer, to create this book which explores and celebrates the cuisine of Taiwan and its ever-simmering pot of creative influences. Told through the eyes, taste buds, travels, and busy lives of Ku, Brown, and Erway, this book brings the cuisine of this misunderstood island nation into the spotlight. With 100 creative, yet accessible recipes, this book will unravel the history of this diaspora cuisine. While featuring classic dishes and well-known favorites, this cookbook also stretches this cuisine's definition, introducing new dishes with brazen twists that are fun, flavorful, and decidedly American-born in style.
For more information, click here.
#abramsbooks#abrams books#win son#win son presents a taiwanese american cookbook#taiwanese american#taiwanese#taiwanese food#taiwanese recipe#win son bakery#josh ku#trigg brown#cathy erway#recipe#free recipe#doughnut recipe#donut recipe
12 notes
·
View notes
Photo
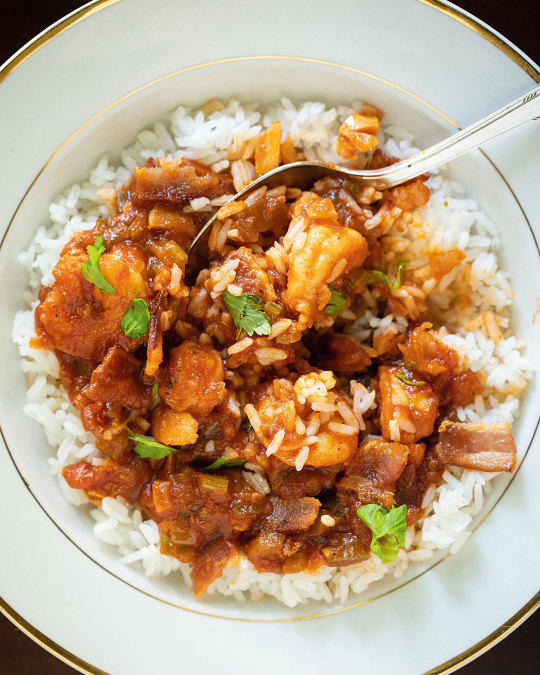
RECIPE: Creole Shrimp (from Gullah Geechee Home Cooking by Emily Meggett)
In South Louisiana, many dishes use what’s called the “holy trinity.” The holy trinity—onion, bell pepper, and celery—is a big part of Cajun cuisine and Louisiana creole cooking. My creole shrimp use this holy trinity, and like many creole dishes, the herb smell that fills the kitchen during cooking is just as wonderful as the taste of the shrimp once they reach the plate. The bacon adds a rich, crispy texture, while the tomatoes serve as the fresh base for this wonderful sauce. Shrimp cooks quickly, so be careful to sauté only until pink. Serve creole shrimp over a bed of white rice.
Serves: 4 to 6
5 slices bacon
1 large onion, finely chopped
1 bell pepper, finely chopped
1 cup (100 g) diced celery
2 garlic cloves, finely chopped
10 small tomatoes (2 pounds/910 g), peeled and diced
2 teaspoons sugar
¼ cup (½ stick/55 g) unsalted butter
2 pounds (910 g) shrimp, peeled and deveined
Seasoning salt, preferably
Gold Medal, to taste
Cooked long-grain white rice, for serving
In a 10-inch (25 cm) cast-iron skillet, cook the bacon over medium-high heat until crisp. Remove from the heat and let cool. Cut the cooled bacon into small pieces. Set aside.
In the skillet, cook the onion, bell pepper, celery, garlic, tomatoes, and sugar for at least 1½ hours over low heat. This mixture needs to “cook down,” which means that the sauce needs to thicken and shrink. The consistency should be a thick sauce, similar to a spaghetti sauce.
About 5 minutes before the mixture finishes cooking, melt the butter in a small skillet. Add the shrimp and cook over medium heat until pink, 1 to 2 minutes.
Drain the shrimp. Add the shrimp and cooked bacon to the tomato mixture. Add Gold Medal seasoning salt. Taste, and add more as needed. Stir, and serve over white rice.

A NEW YORK TIMES BESTSELLER
NAMED A BEST BOOK OF THE YEAR BY NPR
This is the first major Gullah Geechee cookbook: Emily Meggett, the matriarch of Edisto Island, shares the recipes and the history of an essential American community
The history of the Gullah and Geechee people stretches back centuries, when enslaved members of this community were historically isolated from the rest of the South because of their location on the Sea Islands of coastal South Carolina and Georgia. Today, this Lowcountry community represents the most direct living link to the traditional culture, language, and foodways of their West African ancestors.
Gullah Geechee Home Cooking, written by Emily Meggett, the matriarch of Edisto Island, is the preeminent Gullah cookbook. At 89 years old, and with more than 50 grandchildren and great-grandchildren, Meggett is a respected elder in the Gullah community of South Carolina. She has lived on the island all her life, and even at her age, still cooks for hundreds of people out of her hallowed home kitchen. Her house is a place of pilgrimage for anyone with an interest in Gullah Geechee food. Meggett’s Gullah food is rich and flavorful, though it is also often lighter and more seasonal than other types of Southern cooking. Heirloom rice, fresh-caught seafood, local game, and vegetables are key to her recipes for regional delicacies like fried oysters, collard greens, and stone-ground grits. This cookbook includes not only delicious and accessible recipes, but also snippets of the Meggett family history on Edisto Island, which stretches back into the 19th century. Rich in both flavor and history, Meggett’s Gullah Geechee Home Cooking is a testament to the syncretism of West African and American cultures that makes her home of Edisto Island so unique.
For more information, click here.
#abramsbooks#abrams books#gullah geechee#gullah geechee home cooking#gullah geechee food#emily meggett#creole shrimp#lowcountry#south carolina#gullah geechee cookbook#gullah cookbook#recipe#free recipe
60 notes
·
View notes
Photo
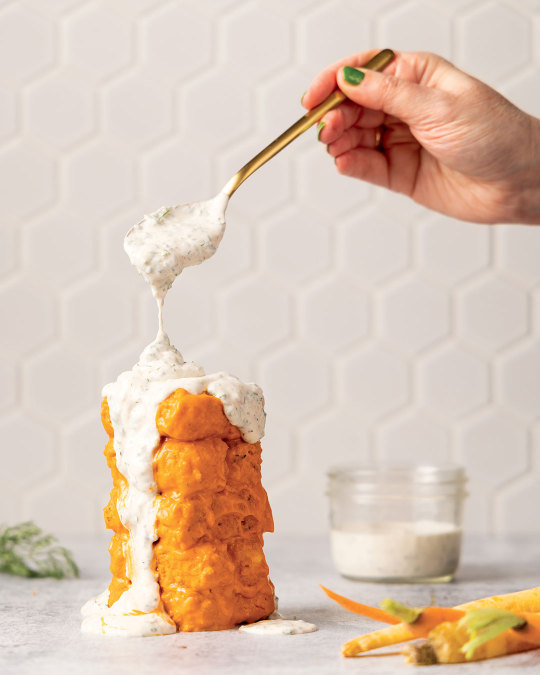
RECIPE: Kate’s Buffalo Tofu Wings (from Fake Meat by Isa Chandra Moscowitz)
Let’s start with the OG of vegan wings. Once again, we take a trip to the golden era of veganism, the 1990s. We were lousy with veggie burgers and scrambled tofu. Packages of vegan cheese didn’t even bother to advertise “IT MELTS,” because we all knew it didn’t. And no one, but no one, even considered that a wing could be vegan. Except Kate’s Joint in Alphabet City. I could write a whole think piece on the place, but let’s just focus on the buffalo wings. Fat rectangles of chewy tofu in an herbed breadcrumb coating, and dripping with buffalo sauce. On the side, a pinch dish of creamy tofu ranch. No table was without a few orders. On your first bite, everything just burst into your mouth in the most obscene way. Now you can create that feeling at home! So scruff up your tables, hire some crust punks to sit outside your window, and enjoy.
Makes 16 wings
1 (14-ounce/400 g) block extra-firm tofu, sliced into 16 rectangles
1 teaspoon salt
3 tablespoons olive oil
1 tablespoon fresh lemon juice
3 tablespoons cornstarch
1 cup (240 ml) cold unsweetened soy milk
1 tablespoon tamari
2 cups (160 g) panko breadcrumbs
3 tablespoons chopped fresh rosemary
Safflower oil, for frying
FOR THE SAUCE:
¼ cup (55 g) vegan butter, melted (I like Miyoko’s)
¾ cup (180 ml) buffalo hot sauce (like Frank’s Red Hot)
FOR SERVING:
2 cups (200 g) carrot sticks
2 cups (150 g) celery sticks
Rescue Ranch Dressing (see below)
HOT TAKES
I don’t press the tofu for these. I don’t know, Kate’s might have, but I like the moisture when you bite into one, as well as the fact that it cuts down on a lot of prep time.
Kate’s tofu wings were rectangles, so I re-created the shape for mine. You can use any shape you like, but don’t expect any points for authenticity. Here are directions for butchering tofu to end up with the correct shape: sixteen stubby little rectangles. Don’t press the tofu; a drain and a quick little squeeze with some kitchen towels to keep it dry are all you need. Now let’s proceed.
Use a 14-ounce (400 g) rectangular block of tofu; this will work best. Place the tofu on one of its long sides and slice it in half down the middle into two planks, like you’re making an open book. You should have two large rectangles. Now slice both of them in half the short way. You’ll have four rectangles. Take each rectangle and cut it vertically into four pieces.
Press each tofu rectangle with a paper towel to quickly dry it. Place in a single layer on a small baking sheet. Sprinkle with ½ teaspoon salt and drizzle with the olive oil and lemon juice. Toss to coat. Let rest while preparing everything else. You will be using this same tray for the breaded tofu.
Now make the slurry and breading: Scoop the cornstarch into a wide-rimmed bowl, add half the soy milk along with the tamari, and stir well until it’s a thick smooth paste. Mix in the remaining milk. On a large rimmed plate, mix together the panko, rosemary, and remaining ½ teaspoon salt.
Dip a piece of tofu into the the slurry with one hand, letting the excess drip off. Transfer to the panko bowl and use the other hand to sprinkle a handful of breadcrumbs over the tofu to coat it completely. Return it to the tray and bread all the other pieces in the same way. Make sure you use one hand for the wet batter and the other for the dry batter, or you’ll end up with crumb hand.
Preheat a large cast-iron pan over medium-high heat. Pour in a layer of oil, about ¼ inch thick. Fry the tofu in the hot oil until golden on the top and bottom, working in batches if necessary; it will take about 8 minutes total. The sides will get fried in the process, but add a little more oil if needed. Use a thin metal spatula to flip.
While the tofu is frying, make the sauce: Simply mix the melted butter with the buffalo sauce. You can melt the butter in a large ceramic bowl in the microwave then mix in the hot sauce to save on doing dishes.
Lift each wing from the oil and dunk it into the buffalo sauce to coat. Transfer to serving plates and serve immediately with the carrots, celery, and ranch.
RECIPE: Rescue Ranch Dressing
If we replaced all the dairy ranch dressing on earth with vegan ranch dressing, we would reverse the climate crisis and save millions of lives. It’s a fact, look it up. But I’m not here to preach, I’m here to give you a creamy, herby, zesty dressing that you will want on hand at all times. You don’t need any tips on what to do with ranch dressing; you will naturally dip anything and everything in it. Wings, obviously. But being in Nebraska, I’ve seen people take this dressing in some weird directions. Pizza? OK. Nachos? You do you. Except that one person who dipped samosas in it. What were you thinking?
Makes about 1 cup (240 ml)
2 tablespoons finely chopped fresh parsley
2 tablespoons finely chopped fresh dill
2 tablespoons finely chopped fresh chives
1½ teaspoons onion powder
½ teaspoon garlic powder
¼ teaspoon ground black pepper
½ teaspoon salt, plus more if needed
2 tablespoons fresh lemon juice
¾ cup (180 ml) vegan mayo
In a small mixing bowl, add the parsley, dill, chives, onion powder, garlic powder, black pepper, and salt. Drizzle in the lemon juice and give it a stir. Let sit for about 5 minutes, soaking up the flavors and wilting the herbs.
Add the mayo and stir well. Depending on the kind of mayo you used, you may need to add a little water to thin it out. Do this by the tablespoon until the consistency seems correct, thick but pourable. Taste again for salt and seasoning. The flavors enhance as it sits, so it’s even better the next day! Seal in an airtight container and refrigerate for up to 5 days.
Bestselling author Isa Chandra Moskowitz shows you how to create your own vegan meats, like deli slices and ground beef, that will satisfy every craving
“I’m an animal lover and that love doesn’t end when I get hungry. Do I miss meat? Not really. But here’s what I do miss: Aromas. Experiences. Methods. Traditions.
“I remember all the tastes and sensations from my omnivore days, even though they were so long ago. My grandmother’s meatballs, burnt on one side. Slurpy seafood pasta at a café along the bay, my teeth scraping against the hard oyster shells. My favorite pizza burger from a diner underneath a Midtown office building, the feel of the vinyl seat as I bounced with excitement at the sight of the melty mozz arriving at the table.
“These are the moments you could say I miss. Maybe you do, too. But we don’t have to.”
—from the Introduction
Fake Meat is packed with 125 recipes that will satisfy every kind of meat craving, from a vegan Philly cheesesteak and a basket of wings to a rich, gooey lasagna.
For more information, click here.
#abramsbooks#abrams books#fake meat#fake meat cookbook#vegan cookbook#vegan#vegan food#vegan cooking#vegan super bowl#vegan superbowl#vegan wings#vegan buffalo wings#buffalo wings#tofu
5 notes
·
View notes
Photo
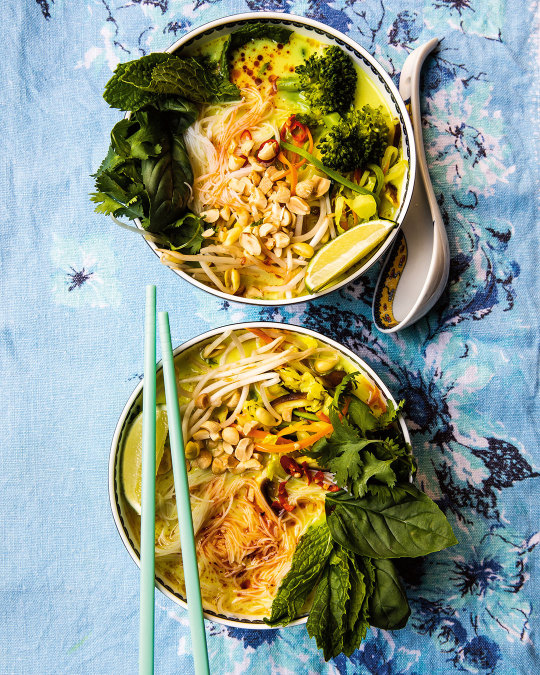
RECIPE: Coconut Pho Bowls (from Body Harmony by Nicole Berrie)
This might be my favorite thing to make in the winter. Actually, in the summer too. It reminds me of the piping hot bowls Nick and I would get on the beach in Phuket. In fact, eating hot, steamy, soupy bowls can be quite cooling in the hotter months. The creamy, salty broth is so easy to make and, shockingly, you don’t even need that much time. Fifteen minutes for a fragrant multilayered broth? You bet. It’s also hard to mess up if you have the right aromatics. You can add pretty much any vegetables you have on hand and it’ll still be great. What makes this soup, though, are the fresh and bright herbs and the crunchy, spicy fixings. And don’t forget the lime wedge for extra alkalinity.
Makes 4 to 5 bowls
Ingredients
2 tablespoons coconut oil
2 cloves garlic, smashed and minced
1 large yellow onion, minced
1‑inch (2.5‑cm) knob turmeric, or ½ teaspoon dried
1½- to 2‑inch (4- to 5‑cm) knob ginger, grated
1 teaspoon sea salt
3 scallions, halved
2 cups (115 g) cooked vermicelli
1 (131/2-ounce/398-ml) can full-fat unsweetened coconut milk
1 cup (75 g) napa cabbage, thinly sliced
3 carrots, peeled and shaved
1 red bell pepper, cored and thinly sliced
1 cup (96 g) shiitake mushrooms caps, sliced
2 cups (142 g) broccoli florets and stems, roughly chopped
1 tablespoon coconut sugar
Juice and zest of 1 lime
2 tablespoons tamari sauce
1 zucchini, shaved into “noodles” with a serrated vegetable peeler or thinly sliced into long strips
Optional
¼ cup (60 ml) Vegan Fish Sauce
Garnish
½ cup fresh mint leaves
½ cup fresh cilantro leaves
½ cup lightly packed fresh basil leaves
¼ cup roasted peanuts, crushed orroughly chopped
1 lime, quartered
Thinly sliced Bird's Eye Chili, or, redchili flakes, or chili oil
½ cup raw bean sprouts
METHOD
In a 3-quart (2.8-L) stockpot, heat the coconut oil. When it has melted, add the garlic, onion, turmeric, and ginger and sauté on medium low for 2 minutes, until fragrant, being careful not to brown. Add 6 cups (1.4 L) water, the fish sauce, if using, and the scallions. Season with salt. Bring to a boil, then simmer for 15 minutes or up to an hour, depending on how much time you have.
While the broth is simmering, in a pot of boiled water, off heat, hydrate the vermicelli, loosening the strands for 3 to 4 minutes. Drain and rinse with cold water. Separate the strands with your hands. If you’re not using the noodles right away, you can add 1 tablespoon avocado oil and massage them to prevent clumping.
Once the broth has finished simmering, turn off the heat and add the milk. Combine well. Bring to a low simmer and add the cabbage, carrots, bell pepper, mushrooms, and broccoli. Simmer for 3 to 5 minutes, until the vegetables are tender but still bright and al dente. Add the sugar, lime juice and zest, and tamari and salt to taste.
In 4 or 5 deep soup bowls, nestle ½ cup cooked noodles and ¼ cup zucchini noodles then ladle 1 to 2 cups vegetables and broth over the noodles. Garnish with mint, cilantro, and basil and crushed peanuts. Add a lime wedge, bean sprouts, and the chili flakes or chili oil. Serve immediately.

Founder of the popular lifestyle brand Bonberi, Nicole Berrie presents a guide to food-combining for a healthier, more balanced life
In Body Harmony, Nicole Berrie reveals how she personally transitioned from the partying years of her teens and twenties to the fast-paced world of fashion and media, eventually settling into a thriving and balanced life and career in wellness. Sharing recipes, advice, and thoughtful guidance, this book is an inspirational lifestyle manual and cookbook dedicated to those seeking the ever-elusive answer to how to nourish themselves with clean, plant-based foods while still indulging in the joys and delicacies of life.
In the introductory chapters, Berrie outlines the founding tenets of the Body Harmony lifestyle and discusses topics ranging from plant-based cooking and intuitive eating to the importance of nontoxic beauty rituals and self care. In addition, the book includes more than 50 original vegan recipes for juices, smoothies, salads, and soups, and grounding grain-based dishes, all meant to cleanse and nourish the body and soul while keeping the reader both pretty and full.
For more information, click here.
#abramsbooks#abrams books#body harmony#body harmony cookbook#nicole berrie#soup#recipe#soup recipe#nicole berrie cookbook#free recipe#winter recipe#pho#pho recipe#vegan pho
34 notes
·
View notes
Photo
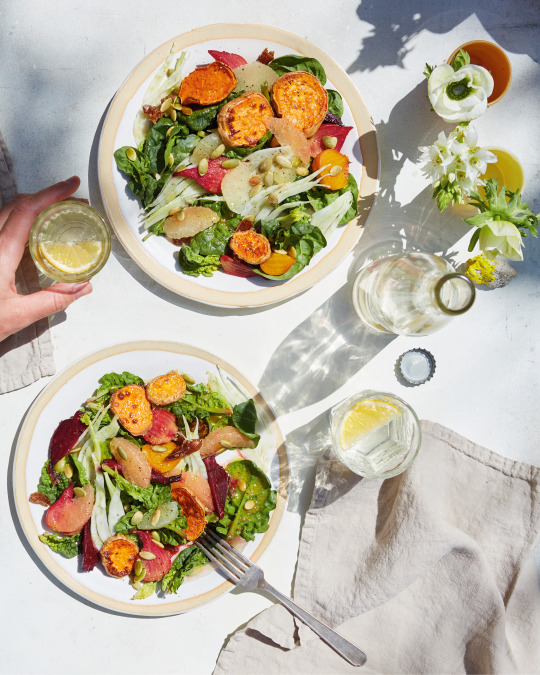
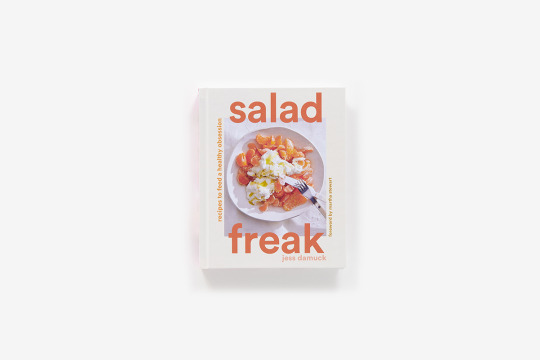
RECIPE: Immunity Salad (from Salad Freak: Recipes to Feed a Healthy Obsession by Jess Damuck)
You don’t need to already be sick to make this salad—but doesn’t just looking at it brighten your day a little bit? Eating it regularly during the colder months gives your immune system a boost but also just feels really clean and fresh when we may be eating a lot of things that aren’t.
Serves 2 as a light meal
(This is great served with your favorite brothy soup.)
PRODUCE
2 large beets
2 sweet potatoes
1 (1-inch/2.5 cm) piece ginger, peeled
1 clove garlic, peeled
1 head fennel
1 grapefruit
4 cups (80 g) baby spinach
PANTRY
Extra-virgin olive oil
Kosher salt and freshly ground black pepper
1 tablespoon apple cider vinegar
½ teaspoon honey
6 Medjool dates
½ cup (65 g) hulled pumpkin seeds (pepitas), toasted
COOK: Preheat the oven to 425°F (220°C).
Trim the leaves from 2 large beets (reserve for another use; for instance, sauté them in a little garlic and olive oil!). Roast the beets for 60 minutes. (Note from Abrams: You can find Jess' technique in Salad Freak!)
When the beets have been in the oven for 20 minutes, slice 2 sweet potatoes in ¼-inch thick (6 mm) rounds, place them on another rimmed baking sheet, and toss them with olive oil salt and pepper. Roast for about 30 minutes, tossing the potatoes once, until they are golden brown and the beets can be easily pierced with a knife. Let them cool to room temperature or until they are able to be handled.
MAKE THE GINGER, GARLIC, AND APPLE CIDER VINAIGRETTE: Into a large bowl, grate 1 inch (2.5 cm) ginger and 1 clove garlic, then add 1 tablespoon apple cider vinegar, ½ teaspoon honey, and 2 tablespoons olive oil. Season with salt and pepper.
PREP: Make an ice bath. Cut the stalks and fronds from the fennel bulb and cut in half, and then in half again, and then thinly slice on a mandoline right into the ice bath. Let crisp up for about 10 minutes, then pat dry on paper towels or a clean dish towel.
Cut 1 grapefruit into supremes.
Pit and slice 6 dates.
ASSEMBLE AND SERVE: Add the fennel, grapefruit, dates, 4 cups (80 g) baby spinach, beets, and sweet potatoes to the large bowl with the dressing. Toss everything to combine, arrange on serving plates, and then sprinkle with ½ cup (65 g) pumpkin seeds. And stay healthy!
One of TIME’s most anticipated cookbooks of Spring 2022
One of Food & Wine’s best cookbooks of Spring 2022
A USA TODAY and PUBLISHERS WEEKLY bestseller!
Delicious and beautiful recipes from Martha Stewart’s personal salad chef and the self-proclaimed “Bob Ross of salads.”
Offering more than 100 inspired recipes, recipe developer and food stylist Jess Damuck shares her passion for making truly delicious salads. Salad Freak encourages readers to discover and embrace their own salad obsessions. With the right recipes, you will want to eat salad for every meal and never get bored. By playfully combining color, texture, shape, and, of course, flavor, Damuck demonstrates how a little extra effort in the kitchen can be meditative, delicious, and fun. The recipes—such as her Citrus Breakfast Salad; Tea-Smoked Chicken and Bitter Greens Salad; Caesar Salad Pizza Salad; and Roasted Grapes, Ricotta, Croutons, and Endive Salad—are meant to be hearty enough for a meal all year round but versatile enough to be incorporated into a larger menu. For Damuck, the perfect salad balances each bite, with something tart enough to twinge your cheeks, something sweet to balance out the bitter, and something with a little salty crunch to finish. Salad Freak is not just about eating to feel good; it’s about confidently combining flavors to create fresh, bright, and satisfying meals that you will want to make again and again.
For more information, click here.
#abramsbooks#abrams books#salad freak#salad freak cookbook#jess damuck#immunity salad#immunity food#recipe#free recipe
10 notes
·
View notes
Photo
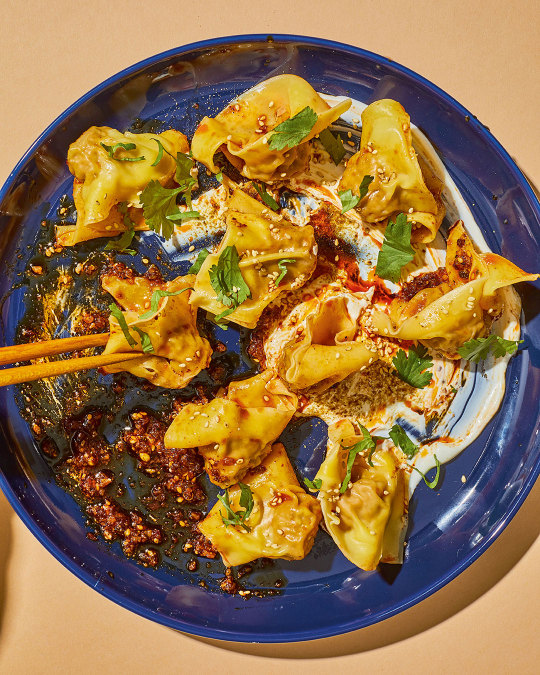
RECIPE: Lamb Wontons (from Win Son Presents A Taiwanese American Cookbook by Josh Ku, Trigg Brown and Cathy Erway)
One time Trigg’s friend Julia Sung was in the kitchen at Win Son and she shared this game her family plays every Lunar New Year. They make wontons and stash a whole peanut inside one wonton. The person who finds the wonton with the peanut gets an extra fat hongbao, or red envelope stuffed with money. The catch? If you accidentally eat the peanut, you get nothing.
We once held this contest in our restaurant where we put a peanut in one of our wontons and would buy the dinner for the winning customer. It’s tricky, though, since people have peanut allergies, so we had to warn everyone who ordered wontons and anyone with the allergy was obviously disqualified. We forget who won, but it was hilarious.
Though wontons are most commonly filled with pork, or a combo of pork and shrimp, these are made with an unconventional lamb filling, which is spiced up with cumin and coriander. It’s served on a bed of labneh and you can add chili oil at your own discretion. This makes for a fun twist on a familiar dish that never gets old.
INGREDIENTS
1 pound (455 g) ground lamb
1 tablespoon grated fresh ginger
1 tablespoon grated garlic
2 teaspoons red chile flakes, such as gochugaru or Sichuan chile flakes
½ teaspoon salt
1 teaspoon toasted white sesame seeds
1 teaspoon toasted sesame oil
1 tablespoon light soy sauce
2 teaspoons rice wine, preferably Taiwanese, or use Shaoxing rice wine as a substitute
1 heaping cup (45 g) packed flat chives or 4 large scallions, chopped
1 pack square yellow wonton wrappers (about 50)
2 teaspoons cumin seeds, for dusting (optional)
1 cup (240 ml) labneh
1 cup (240 ml) Sweet Soy Dipping Sauce (as featured in the book)
House Chili Oil (as featured in the book) or your favorite chili oil, such as Lao Gan Ma Spicy Chili Crisp (optional)
1 cup (16 g) chopped fresh cilantro leaves and tender stems (optional)
2 teaspoons “Lamb” Spice Mix (as featured in the book)
Fold together the lamb, ginger, garlic, chile flakes, salt, sesame seeds, sesame oil, soy sauce, rice wine, and chives (do not overmix). Marinate in the refrigerator overnight, or for up to 2 days.
To make a wonton, place a wrapper in a diamond shape on your palm. Place about 1 teaspoon of the filling horizontally along the lower half of a wrapper. Dip your finger in water and trace the sides of the wrapper to wet it; wet a line just above the center of the wrapper. Fold the bottom edge over the filling and seal along the sides, and at the top, leaving about ½ inch (12 mm) of the wrapper at the top edge. Be sure to seal the edges securely shut, and try to squeeze out any air pockets. Wet the corners of both bottom edges of the wrapper, and twist them backward to meet. Pinch where they meet to seal the wrapper there. Repeat with the rest of the filling and wrappers.
As you fold the wontons, place them on a lightly floured surface such as a sheet pan. Freeze if not using immediately; the wontons can be boiled from frozen without thawing.
Bring a large pot of water to a boil. Drop in the wontons in batches (according to however many you’re serving) so as not to overcrowd the pot. Cook for about 6 minutes, until they float and the skins are translucent. Carefully remove the wontons with a slotted spoon or spider and transfer to a bowl.
Using the back of a spoon, spread the labneh on a platter to serve family-style. Arrange the boiled wontons on top. Sprinkle with the cumin seeds, Sweet Soy Dipping Sauce, and the chili oil, if using, and finish with the chopped cilantro and “Lamb” Spice Mix.

A modern, brashly flavorful guide to cooking Taiwanese-American food, from Brooklyn’s lauded Win Son, Win Son Bakery, and Cathy Erway, celebrated writer and expert on the cuisine
Josh Ku, born in Queens to parents from southern Taiwan, and Trigg Brown, a native Virginian whose mentor was a Taiwanese-American chef, forged a friendship over food—specifically, excellent tsang ying tou, or "flies’ head," a dish of chopped budding chives kissed with pork fat. Their obsession with Taiwanese food and culture propelled them to open Win Son together in 2016. The East Williamsburg restaurant quickly established itself as a destination and often incurs long waits for their vibrant and flavorful Taiwanese-American cuisine.
Ku and Brown have teamed up with Cathy Erway, Taiwanese food expert and celebrated writer, to create this book which explores and celebrates the cuisine of Taiwan and its ever-simmering pot of creative influences. Told through the eyes, taste buds, travels, and busy lives of Ku, Brown, and Erway, this book brings the cuisine of this misunderstood island nation into the spotlight. With 100 creative, yet accessible recipes, this book will unravel the history of this diaspora cuisine. While featuring classic dishes and well-known favorites, this cookbook also stretches this cuisine's definition, introducing new dishes with brazen twists that are fun, flavorful, and decidedly American-born in style.
For more information, click here.
#abramsbooks#abrams books#win son#win son bakery#win son cookbook#win son presents a taiwanese american cookbook#taiwanese american#taiwanese american cookbook#recipe#free recipe#lunar new year#lunar new year recipe#chinese new year
15 notes
·
View notes
Photo
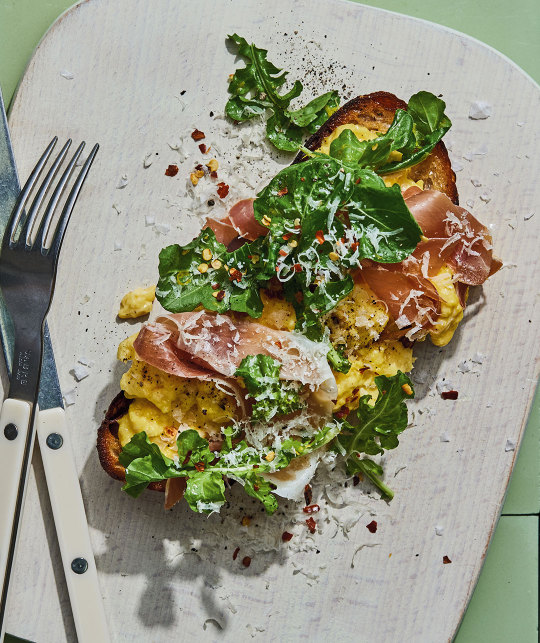
RECIPE: Soft Scramble Toast (from What’s Gaby Cooking: Take It Easy by Gaby Dalkin)
I’ll see your boring, plain toast and raise you crisped bread topped with a soft scramble, salty prosciutto, and plenty of freshly grated Parm. I can’t tell if this is an open-faced breakfast sandwich or an affirmation that everything’s going to be okay.
Serves 1
FOR THE SOFT SCRAMBLE:
1 tablespoon unsalted butter
2 large eggs, whisked
¼ cup (25 g) freshly grated
Parmesan cheese
Kosher salt and freshly ground black pepper
FOR THE TOAST:
1 (1-inch/2.5 cm) thick slice sourdough
1 tablespoon unsalted butter
FOR THE TOPPING:
¼ cup (5 g) packed arugula
Drizzle extra-virgin olive oil
½ teaspoon freshly grated lemon zest
2 tablespoons freshly grated
Parmesan cheese, plus more for serving
Kosher salt and freshly ground black pepper
1½ ounces (40 g) thinly sliced
Prosciutto (about 3 slices)
Crushed red pepper
In a medium nonstick skillet over low heat, melt the butter.
Add the eggs and cook until softly scrambled, stirring constantly. Fold in the cheese and season with salt and pepper.
Meanwhile, toast the bread in a toaster and spread with butter.
In a small bowl, toss the arugula with the oil, lemon zest, Parmesan, and some salt and black pepper.
Place the soft scrambled eggs on the toast and top with the arugula, prosciutto, and crushed red pepper.
New York Times Bestseller
Bestselling author Gaby Dalkin is back with What's Gaby Cooking: Take It Easy, sharing 100 recipes that put ease, flavor, and adaptability first
In her new book, Gaby Dalkin returns with her signature approach: Enjoy your life by eating the food you love. But this time around, she also emphasizes a no-fuss attitude. What's Gaby Cooking: Take It Easy offers 100 new delicious and stress-free recipes, suited for any and all occasions.
Everything we cook right now—whether it’s for a potluck picnic with friends or a solo night in binge-watching reality TV—needs to be crazy simple, easily pulled together from those lasting pantry items, still shockingly delicious at room temperature, and not requiring that one random ingredient you drove 45 minutes to get and will never use again. We want food that tastes like it took hours to prepare but doesn’t actually require anything too exact. Give us the forgiving recipes: Out of shallots? Try an onion. The more fail-proof, the better. If this low-maintenance approach sounds like your kinda thing, Dalkin has got your back. With 100 easy ideas for dishes to serve wherever you go (or don't go!), make-ahead dressings and sauces for lazy last-minute dinners, and of course—give the people what they want!—big, crunchy, fresh salads and rich, chocolatey, you’re-in-sweatpants-anyway desserts, Take It Easy is Dalkin’s first book bringing her tasty, crowd-pleasing concepts to quicker, simpler meals.
For more information, click here.
#abramsbooks#abrams books#what's gaby cooking#what's gaby cooking take it easy#take it easy#cookbook#recipe#free recipe#breakfast recipe#scramble#scrambled eggs#gaby dalkin
8 notes
·
View notes
Photo
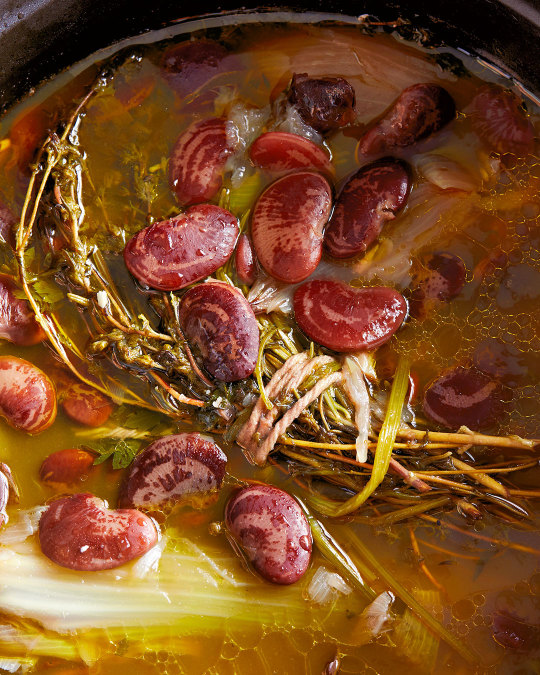
RECIPE: A Pot of Beans (from Colu Cooks by Colu Henry)
I have made beans on a weekly basis for years (mostly on Sundays), so I can use them in meals throughout the week. They are dependable, comforting, and delicious. Not only do they have the ability to serve as a satisfying, delightful meal on their own, they also offer you the flexibility of using them to transform an already existing dish. There isn’t much a bean can’t do.
INGREDIENTS
1 pound (455 g) dried beans
1 tablespoon kosher salt
1 large yellow onion, peeled and halved, or some leek tops, or a few peeled and halved shallots
1 celery stalk with its leaves, cut in half
6 cloves garlic, smashed with the back of a knife, skins discarded
Thyme, rosemary, and parsley sprigs, tied in a bundle with kitchen twine (optional)
Olive oil
SERVES Many
TIME Truly depends on the bean, likely about an hour or so, if soaked beforehand
METHOD
In a large Dutch oven or stockpot, add the beans and the salt and cover them by about 2 inches (5 cm) of water and soak overnight or 6 to 8 hours.
When you’re ready to cook the beans, do not drain them. Add the onion, celery, garlic, and herbs (if using) to the pot of beans. Add more water if needed to make sure the beans are still covered by about 2 inches (5 cm) and drizzle with a good glug or two of olive oil.
Bring the pot of beans to a boil and then turn down the heat to barely a simmer. Skim off any grit and cook until the beans are creamy and tender, adding boiling water along the way, if needed, to make sure your beans stay submerged. This can take anywhere from 1 to 2 hours. Taste your beans along the way; some types of beans will take longer than others. When they are creamy and make you sigh with joy when you bite into a small handful, they are done.
Remove the aromatics, salt to taste, and serve. To store, let cool and then refrigerate them in their broth for up to 1 week or freeze them for up to 6 months.
MAKE IT A MEAL
Weekday Cassoulet: Preheat the oven to 400°F (205 °C). Brown some well-seasoned chicken thighs in canola oil over medium-high heat, then brown a few sausages and set aside. Turn the heat down to medium and sauté finely chopped onion, celery, and garlic. If you have it, adding in a few teaspoons of fresh thyme or rosemary would be nice too. Stir in a handful of crushed tomatoes and some white beans and season with salt and pepper. Transfer the mixture to a 9 by 13-inch (23 by 33 cm) pan and nestle the chicken and sausage in the beans. Bake until the chicken is almost cooked through, 15 to 20 minutes. Top with fresh, coarse breadcrumbs and drizzle with plenty of olive oil. Broil until the top is crispy and golden, a few minutes more.
Tomato Confit and White Bean Stew: Sauté a thinly sliced onion, some garlic, and a pinch of red pepper flakes in a good glug of olive oil over medium heat. Add in 4 cups (680 g) beans and about 1 cup (240 ml) of their cooking liquid; smash ½ cup (85 g) or so of the beans to release some of their creaminess. Season with salt and freshly ground black pepper. Stir in 2 to 3 cups (300 to 450 g) tomato confit or other roasted or canned cherry tomatoes and simmer for 5 to 10 minutes. Taste and adjust seasonings accordingly. Ladle into bowls and shower with a handful of roughly chopped fresh flat-leaf parsley, lemon zest, some grated pecorino cheese, and a drizzle of olive oil.
Pasta e Fagioli Another Way: Toss 2½ to 3 cups (425 to 510 g) borlotti beans with some mezze rigatoni along with some of the bean cooking water to get it nice and saucy. Drizzle with plenty of olive oil and copious amounts of grated pecorino cheese and top with roughly chopped fresh flat-leaf parsley and basil.
NAMED A BEST BOOK OF THE YEAR BY NPR
From New York Times Cooking contributor Colu Henry, a collection of sophisticated recipes for everyday dinners
Colu Henry has been working in food for more than 15 years, and from her time at publications from Bon Appétit to the New York Times, she’s learned that what resonates with her readers is her always unfussy and empowering recipes. In this cookbook—a nod to home cooks who are happy to do everything but pastry—Henry helps readers assemble an amply stocked new-American pantry so that they can perfect (and build upon) classic everyday meals.
With 100 recipes and photographs, Henry offers ideas and solutions to get you out of your weeknight routine, explore new ingredients and techniques, build your confidence, and have a sophisticated dishes on the table in around 45 minutes.
For more information, click here.
#abramsbooks#abrams books#colu cooks#colu henry#recipe#free recipe#easy fancy food#colu cooks easy fancy food#pot of beans#cassoulet#white bean stew#pasta e fagoli
5 notes
·
View notes
Photo

RECIPE: Fudge Cake with Caramel-Bourbon Buttercream (from Christmas with Southern Living 2022)
This swoon-worthy layer cake is a chocolate-lovers’ dream!
Serves 16
Active: 1 hour
Total: 3 hours, 10 minutes
FUDGE CAKE
1½ cups bittersweet chocolate chips
½ cup butter, softened
1 (1-lb.) pkg. light brown sugar
3 large eggs
2 cups all-purpose flour, plus more for pans
1 tsp. baking soda
½ tsp. table salt
½ tsp. ground cinnamon
1 (8-oz.) container sour cream
1 cup hot strong brewed coffee
1 Tbsp. (½ oz.) bourbon
CARAMEL BUTTERCREAM
1 cup granulated sugar
1/3 cup water
1/3 cup heavy cream
¼ cup butter, chilled and cut into ½-inch pieces
1 cup butter, softened
4 oz. cream cheese, softened
½ tsp. vanilla extract
¼ tsp. table salt
4 cups unsifted powdered sugar
CHOCOLATE GANACHE
8 oz. semisweet baking chocolate (2 [4-oz.] baking chocolate bars), chopped
6 oz. bittersweet baking chocolate (from 2 [4-oz.] baking chocolate bars), chopped
1½ cups heavy cream
ADDITIONAL INGREDIENT
Shaved bittersweet chocolate
Prepare the Cake: Coat 2 (9-inch) square cake pans with cooking spray; dust with flour. Preheat oven to 350°F. Microwave chocolate chips in a microwavable bowl on MEDIUM (50% power) until melted, about 2 minutes, stopping to stir every 30 seconds. Stir until completely smooth.
Beat butter and brown sugar in the bowl of a heavy-duty stand mixer on medium until combined, about 5 minutes. Add eggs, 1 at a time, beating to combine after each addition. Add melted chocolate, beating until just combined.
Sift together flour, baking soda, salt, and cinnamon. Gradually add to chocolate mixture alternately with sour cream, beginning and ending with flour mixture, beating on low speed to blend after each addition. Gradually add coffee, beating on low. Stir in bourbon. Pour batter evenly into prepared pans.
Bake cake layers in preheated oven until a wooden pick comes out clean, 22 to 25 minutes. Cool in pans on wire racks 10 minutes. Remove cake layers from pans; transfer to wire racks to cool completely, about 1 hour.
Prepare the Buttercream: Place sugar and water in a saucepan; cook, stirring, over medium-high, until sugar dissolves, about 1 minute. Bring to a boil over medium-high. Cook, without stirring but swirling pan occasionally, until deep amber, about 10 minutes. Remove from heat. Add cream in a steady stream, stirring constantly. Stir in chilled butter until smooth; transfer to a bowl to cool, about 1 hour.
Beat softened butter and cream cheese in bowl of a heavy-duty stand mixer on medium until creamy, 3 minutes. Stir in vanilla and salt. Add 2 cups of the powdered sugar, beating on low until smooth, 2 minutes. Add caramel; beat on medium until combined, 2 minutes. Beat in remaining 2 cups powdered sugar on low to combine.
Prepare the Chocolate Ganache: Microwave semisweet and bittersweet baking chocolates and cream in a microwavable bowl on MEDIUM (50% power) for 1 minute. Remove and stir. Microwave until melted, 3 to 3½ minutes, stopping to stir every 30 seconds.
Assemble Cake: Place 1 cake layer on a platter; pour half of ganache on top, allowing some to drip over edges. Freeze to set, about 5 minutes. Spread half of buttercream to edges. Top with remaining layer; repeat with remaining ganache and buttercream. Garnish with shaved chocolate.

From the editors at Southern Living, warm and welcoming holiday recipes and creative ideas for decorating, entertaining, and handmade gifts
Discover fun and creative new ways to decorate, entertain, and handcraft gifts for the holidays. Sparkling menus and easy décor ideas, along with more than 100 brand-new recipes from the professionals of the South's most trusted kitchen, make entertaining a breeze for celebrations of all sizes. Inside, the editors of Southern Living reveal their favorite cooking tips and make-ahead secrets that take the pressure off hosting and put the focus on family and friends. There is also a special gifts-from-the-kitchen section with recipes for treats to wrap and share. More than 200 photographs show off dazzling holiday decorations and table settings to try, plus inspired designs for holiday wreaths, trees, centerpieces, and mantel arrangements. Christmas with Southern Living is the go-to resource for everything you need to make your holiday bright.
For more information, click here.
#abramsbooks#abrams books#christmas with southern living#christmas with southern living 2022#christmas#christmas dessert#christmas book#christmas tips#christmas recipes
37 notes
·
View notes