
anenigmaticobserversmindpalace
The Mind Palace of an Enigmatic Observer
The inner ramblings of an inquisitive individual on their journey to explore the impossible realm of fantastical structures.
42 posts
Don't wanna be here? Send us removal request.
Last Seen Blogs

marieleuge-blog
Marieleuge
cxlestialbeings-a
you're either bitten by heaven or in it

medcezir-group-blog
İsimsiz


dentistsinperth-blog
Untitled
Video
The Wonderous Hidden Fantastical Space
Here is the final rendered video of this fantastical space that my mind conjured - this place hopes to provide sanctuary to those who seek it.
0 notes
Photo

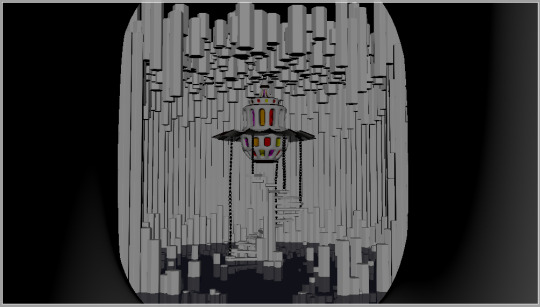
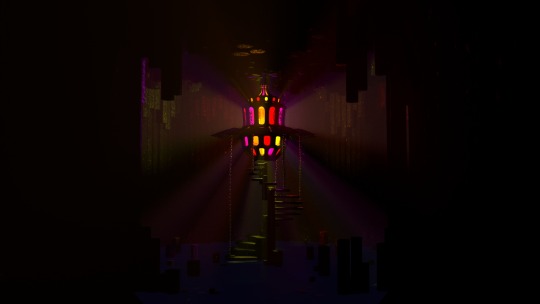
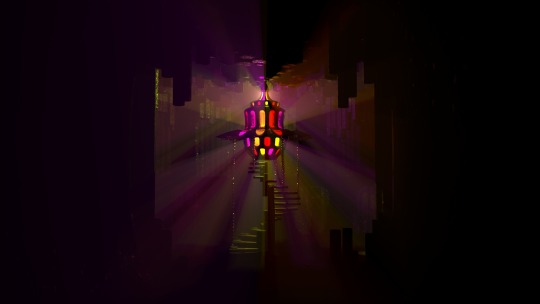
The Wonderous Hidden Fantastical Space
Here is the final rendered image with all the bells and whistles that I desired.
0 notes
Text
RANCH Rendering
Weighing out all the options I decided to use RANCH cloud renderer to render the 250 frames for the 10 secs video because by my calculations my computer would have taken more than a day to render and that wasn’t really viable. Initially, to test out the rendering service and how will video look, I rendered about 27 test frames with low settings. It took a couple minutes to render and not a lot of money. Upon inspection the frames looked fine, shown in image below.

So, I decided to render all 250 frames. Upon hearing other peoples stories in class I was worried that my video would take a while and cost quite a bit of money. But I accounted for this by only having one point light, low atmospheric volume and no water animations in the scene in hopes that the video still looked decent with the sacrifices made. Surprisingly, all the frames were rendered in about 11 mins (Low CPU) with the fastest frame taking 35 secs and the slowest frame taking 2:16 mins. Then, I did the subsequent processes in After Effects and Adobe Media Encoder to make a 10 sec video into the proper format.
0 notes
Text
Setting the Stage
Nearing the conclusion of this project I had 3 shot cameras that I constantly used to assess my scene. The locations of these cameras are marked in red in the image below.

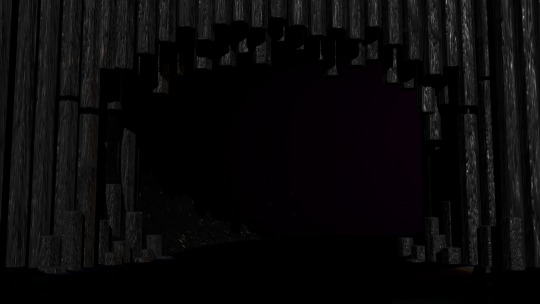
View from the shot cam at entrance to the cave shown below.

View from the shot cam of cavern shown below.
View from the shot cam of the structure shown below.
Once I was happy with how everything was modelled, textured, and had correct lighting. It was finally time to consider how my 10 sec video will look. I set up a playblast camera which had a total of 250 frames and played 25 frames per second.
The motion path of the playblast camera is shown below.
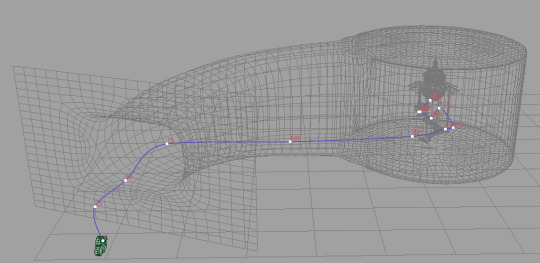
This took a lot of tweaking to get the final product how I wanted. But 250 frames was quite short and due to that it was quite fast in some places - especially going up the spiral staircase. I made many playblasts each trying to improve on the previous versions so that my final rendered video will highlight the best parts of my fantastical space.
(unfortunately there was a problem uploading the playblast)
0 notes
Text
Lighting vs Rendering Time
In class, the feedback I received was that my scene might take a long time to render with the amount of lights and atmospheric volume that I had. The following images experiment with lighting vs rendering times. I need to find a happy medium so that my scene looks good but doesn’t take a long time to render (if I choose to do it on my laptop). The render settings I chose to go with were:
Camera (AA) - 3, Diffuse - 2, Specular - 2, Transmission - 2
All other settings were 0.
Scene 1 - Two point lights and two spot lights with low atmospheric volume
Rendering Time - 9:08 mins

Scene 2 - Two point lights with low atmospheric volume (no spotlights)
Rendering Time - 6:54 mins

Scene 3 - One point light with low atmospheric volume
Rendering Time - 4:36 mins
Scene 4 - Cave entrance with one directional
Rendering Time - 6:25 mins
Scene 5 - Underside of structure with one point light (bit grainy)
Rendering Time - 14:14 mins

Scene 6 - Close up of structure with one point light
Rendering time - 7:48 mins

Based on all these trials the fastest rendering time was with the one point light with low atmospheric volume. The scene really didn’t look that bad, it had all the elements I desired. I might have to adjust the position of the point light in the structure to maximise its effect.
Even with one point light, the closer the camera got to the structure the longer it took to render due to the amount of elements there were in the scene. If I had more lights I’d imagine it would take longer than 14 mins which will take numerous days to render altogether.
Overall, if I were to render this on my laptop it would take a range of time from 4 mins to 14 mins to render each frame depending on the amount of elements in it. So, I might have to consider using the online RANCH rendering and hopefully it is faster and wont cost too much money. Also, not these scenes do not include water effects. I have decided to cut these out for the sake of rendering time and due to the low lighting the ripples/waves would not be clearly seen anyway.
0 notes
Photo
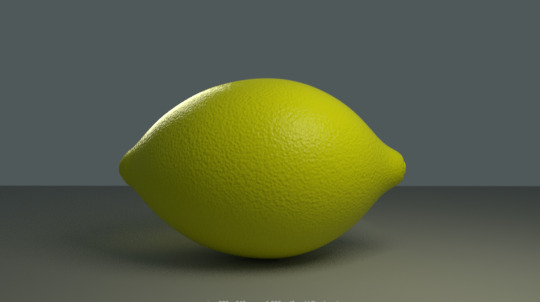

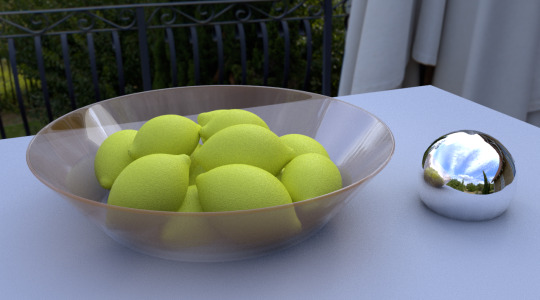
Maya Tutorial: 3 Point Lighting of Lemons
In this Maya tutorial, I learnt about the application of 3 point lighting - key, fill and rim light - via lighting a lemon and lemons in a fruit bowl. There are many different types of lights and using them in combination can create realistic lighting. The chrome ball is very important prop on a set so that editors, animators and modellers can use it to replicate the lighting in a virtual environment. The render settings are very important in how your final image will look, the higher the settings the more polished your image will look (less grainy) but the render time will be much longer. So this is an important consideration to balance.
0 notes
Text
Aqua Problems
The most difficulty I have had in this project has been trying to get the water correct in scale and movement. Unfortunately, I don’t have many pictures of the different processes I have tried. I used various water textures, ocean shaders, fractal and noise filters attached to an aiStandardSurface shader to try get the water as realistic as possible.
In the image below you can see some deformity in the water plane create by a noise filter but it just wasn't prominent or realistic enough.

I did have a little bit of success using a texture deformer then animating it to be mellow waves but due to the lack of animation knowledge it stopped working.
Maybe my problems steamed from the scene being too big. The settings they used in the tutorial videos didn't quite suit my scene. I did try low and high ploy planes but no success. I did realise that having animated water texture would take a lot of time to render (in addition to all the atmospheric lights I have currently). Also, you can’t really see the water/ripples throughout the entire scene because of how dark it is generally - an exception being at the entrance to the cave. Thus, I ended up placing a deep water pre-set on it using an aiStandardSurface shader and altering the colours. I'm glad I went through this struggle because I learnt and experimented with a lot of features in Maya that I wouldn’t have at all if I hadn’t had this problem. It was also interesting to see how many different ways you can model something so there is no correct way - everything is accepted as long as it looks realistic for the scene.
0 notes
Text
Changing Scale
Halfway through my project it became apparent that there were a lot of problems with my scene due to the scale of it being in metres. The cave casing was nearly 200 meters in length.

For the lights to even influence the scene the intensity values had to be very large (around 10000). I tried procedural texturing a rock surface onto the cave casing but it didn't work even when I used large values when compared to the tutorial I followed. This could be also due to the low poly smooth mesh that I was using as well. Nonetheless my point still stands. No matter how many different tutorials I followed to create water/pond/oceans it did not work. Since, I wasn’t working to real world scale, I decided to scale my scene back to centimetres. This really helped the lighting since I didn't need absurd values anymore. I didn't try procedural texturing again since the scene was too dark to see the texture of the cave casing anyway so why not save some time (I did add the same texture I used for the basalt columns). The water texturing still alludes me. But I am glad I changed scale and I am sure this will help me immensely when it comes to rendering.
https://www.youtube.com/watch?v=2_930qbqWe4
0 notes
Text
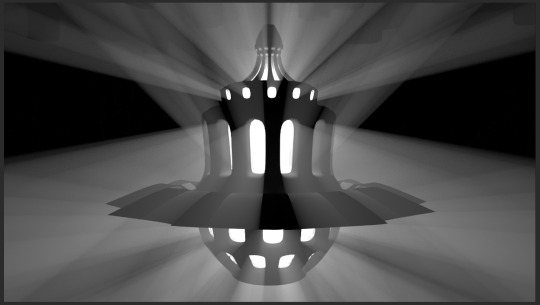
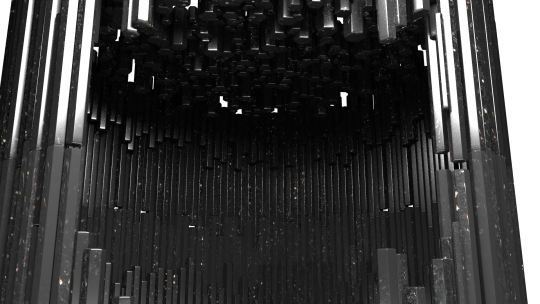
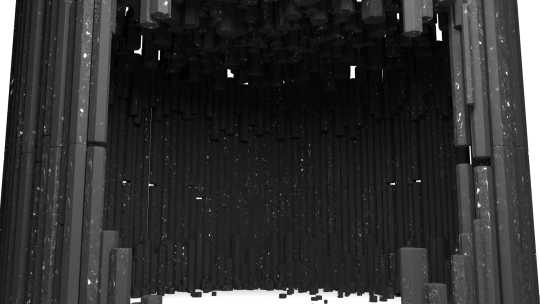
Experimentation of Lighting
Lighting was a vital part of my fantastical design, based on my research in game concept design lighting and colour really created the mood and evoked a specific feeling within a scene. The feeling I wanted to create was wonderment, a place of warmth and disbelief in this desolate world that I had intended. The cave was very dark and ominous, this was reflected in the dark stone, harsh edges and stalagmite and stalactite nature of the cave design. I wanted the structure to have an interesting shape, more rounded/soft edges and emit coloured god rays that danced among the cave walls. Since, this aspect was so important, it was tricky task to get right and many experiments of different lighting designs were iterated through.
The black and white image below shows a point light at the centre of the structure with the addition of aiAtmosphericVolume to create god rays emanating from the structure.
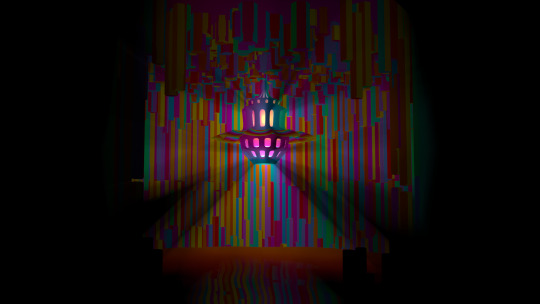
The tutorial I followed (linked in a previous blog post) suggested to add a ramp to the colour setting of the point light. I changed the white light to a rainbow gradient in the setting of the ramp. This change is shown in the image below.

I really did like the lighting effect it created. However, when the cave walls were added, the whole scene became psychedelic (shown in the image below). The light from the structure actually coloured the cave walls which rendered the stone texturing pointless. This was cool but not what I was looking for so. The ramp didn’t work so back to experimentation.
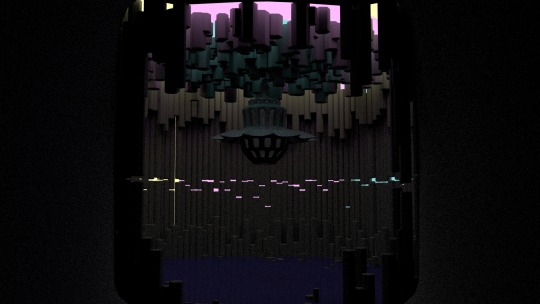
For the next experiment, I coloured the faces of the cave casing in different colours and increased the emissivity of it to create a glowing effect (shown in the image below). This did add more light to the scene and the layout of the cave walls were more visible but ultimately, didn’t give the wonderous vibe I wanted.
In this trial, I deleted the aiAtmosphericVolume and the ramp. I coloured the glass on the structure to various colours and I increased the intensity of the point light. The intensity was set to a ridiculous value approximately of 10000. I was starting to get the effect I wanted as it was more like the stained glass references. The texture of the cave walls was still visible while the coloured light reflected back. I really liked the pattern effect it had on the walls and water. However, I was concerned that such a high light intensity value could hinder my final render and the scene looked a bit like a disco ball. The god rays really created a unique atmosphere, that I wanted.
The reason why I had to use such high intensity values was because the scale of the scene was quite large where the diameter of the cave walls were 30m. So, at the stage I set up a new project in centimetres and scale everything down. This did solve the problem of high values.

I went back to doing more research and was suggested the following video by a fellow classmate: https://lesterbanks.com/2016/08/volume-scattering-arnold-god-rays/.
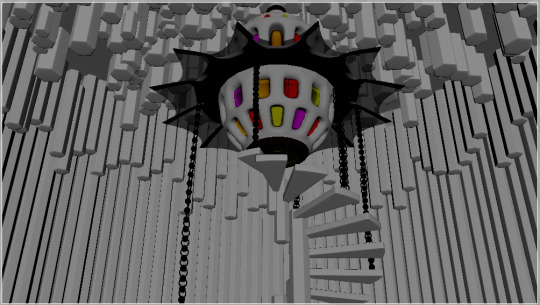
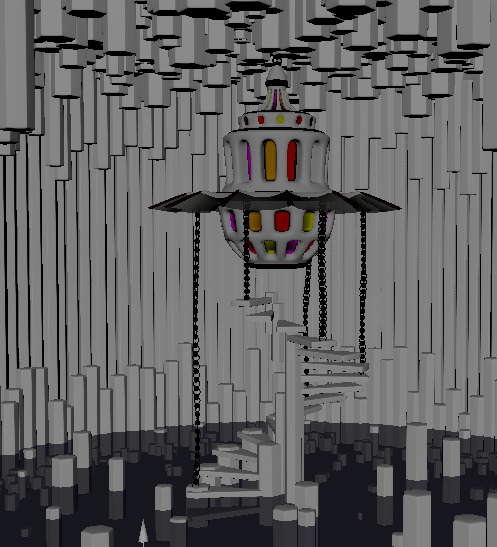
This really helped me as this tutorial took a different approach of using the aiAtmosphericVolume with spotlights. I created 4 spotlights each facing a cardinal direction inside the structure. A gobo filter was added to each of these lights to vary its intensity and frequency. The purpose of the spotlights were to create the god rays in conjunction to the volumetric light. While the purpose of the point lights (retained from the previous experimentation) was to bounce the light of the cave walls which you can see in the image below. I was really happy with the lighting I had created, it was the desired effect I wanted and the only thing now was to play with all the settings to get it where I wanted.

In the final image below, I reduced the amount of spotlights to 2 - facing up and down each with a large cone angle. I was concerned that I had too many lights which increased render time significantly. I also decreased the volumetric lighting intensity to 0.001 (the lowest setting). By implementing these steps, each ray of light became distinct and not blended/muddied. I really like how the different colours reflect of the stairs and the chains.
This was a long time consuming process to get it right but along the way I learnt a lot from my mistakes and how lighting works in Maya and Arnold. It was worth it to get an integral part of my fantastical design just how I desired.
0 notes
Text
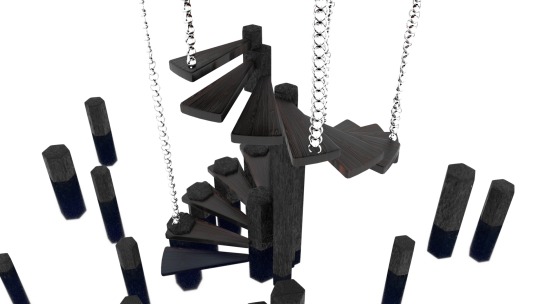
Staircase and Hanging Chains
I used the following two YouTube tutorial videos to modelling the staircase and the chains.
https://www.youtube.com/watch?v=H54ZRxjmx3Q
https://www.youtube.com/watch?v=OofQT6pepOU
These were actually quite easy to model and texture. I got to learn a couple new functions such as the deform - nonlinear twist tool for the stairs and attaching objects to motion paths, graph editing and creating an animation snapshot to model the chains. I modelled the chains a bit unevenly to create realism and interest.
I used the chrome pre-set on the aiStandardSurface on the chains. I uv mapped and applied a wood texture on to the stairs (diffuse, roughness and normal).

0 notes
Photo

Texturing of the Cave Walls
I uv mapped each layer of the cave wall (inner x 2, middle x 2, outer x 2) using the automatic setting due to the amount of entitles there were. It would have been a very tedious and time consuming process to go stitch each column together when it wasn’t necessary. Additionally, due to the dark environment it didn't really matter if there were any seems visible. The main reason I wanted to texture these walls was for the weathering effect which was achieved by applying a roughness and normal map. The diffuse texture was created by tessellating a stone texture and masking the harsh edges.
When the texture was first applied to the walls it was quite shiny, so with the adjustment of diffuse and specular roughness settings, the desired matte effect was achieved. I really like the speckled texture and uneven surface, it certainly added some realism to the scene.
0 notes
Text
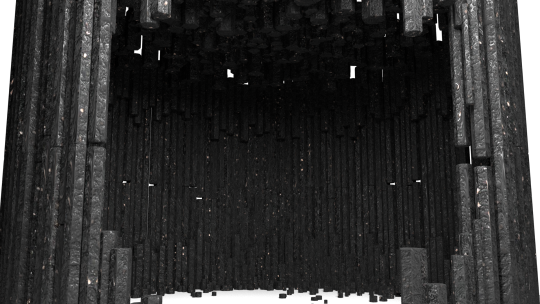
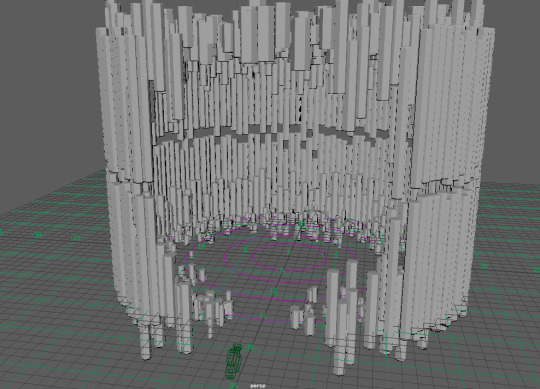
MASHing Cave Walls
An integral part of my scene is the cave walls that were inspired by the Fingal’s Cave in Scotland. These regular hexagonal basalt columns were formed in a lava flow millions of years ago. I think these are a unique naturally occurring geometric design that have an other worldly element to them.
In my preliminary Maya model concept I created these cave walls by hand. I started with one hexagonal column, replicated it number of times and placed each of them in a suitable orientation. This was really time consuming process and they didn’t have a random organic factor to them. In class, I found out about a process called MASH which could possibly aid me in my process. It was said that I could replicate any object as many times in the orientation that I wanted. So, I did a lot of research to educate myself on the capabilities of MASH.
To create my cave walls I used the following nodes in MASH:
I adjusted these nodes to a varying degree to create an inner, middle and outer cave wall layer. It was done in layers so that there was a natural gradation the cave walls. This can be seen in this top down view shown below.
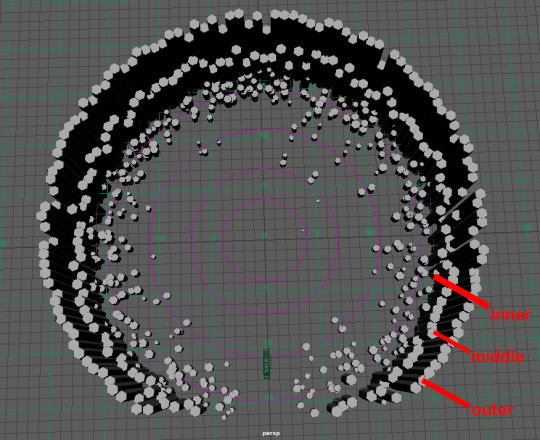
The image below shows the cave walls from a perspective view.
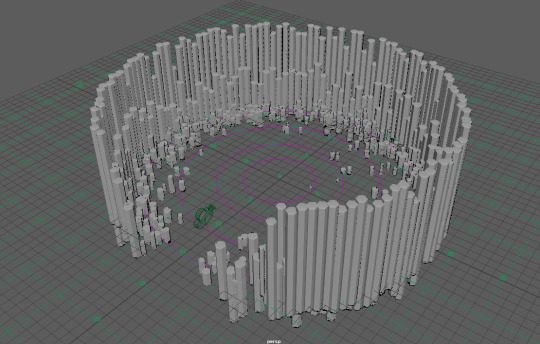
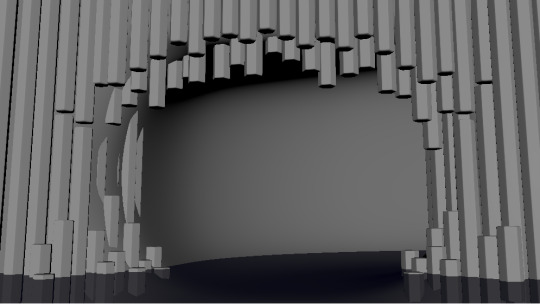
I repeated this three step process for the top of the cave which can be seen in the image below.
The image below shows the scene from a shot camera.

The cavern was coming together with the completion of the top and bottom walls. You can already get a sense of the harsh ominous environment that I was going for and when it is textured these walls will be weathered which will improve the realism tremendously. It was a challenge to balance the randomness and uniformity of theses columns and how closely I wanted to replicate the source material. But using MASH definitely did cut down the working time after I understood how to use it.
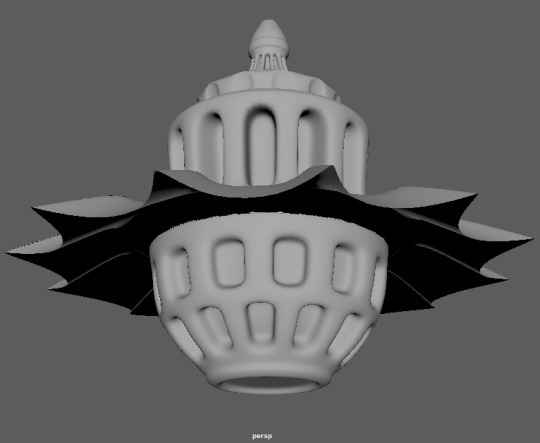
I did end up placing a casing around these walls to block out any external lights and to extend the cave system. This shown in the images below.

I started with a large cylinder encompassing the cave walls then extruded the edges to create this tunnel like shape.

Placed a plane at beginning to create an the entrance to the cave system.
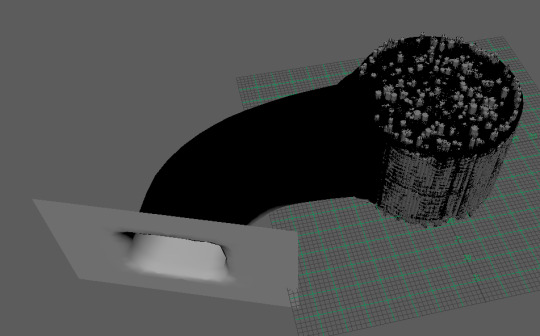
Manually placed some basalt columns at the entrance to create a bit of eerie interest and to mimic the reference images.

The image below shows the entrance from a shot cam established at the entrance of the cave.
0 notes
Photo
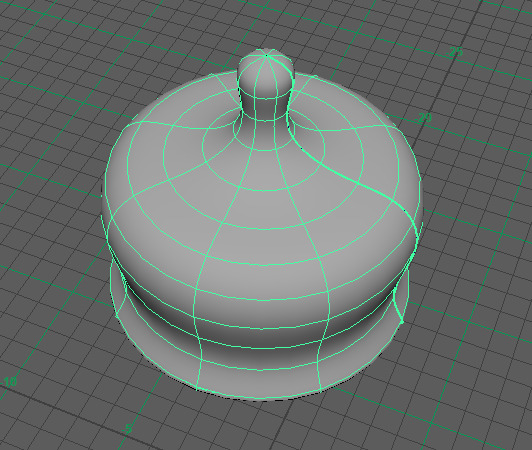

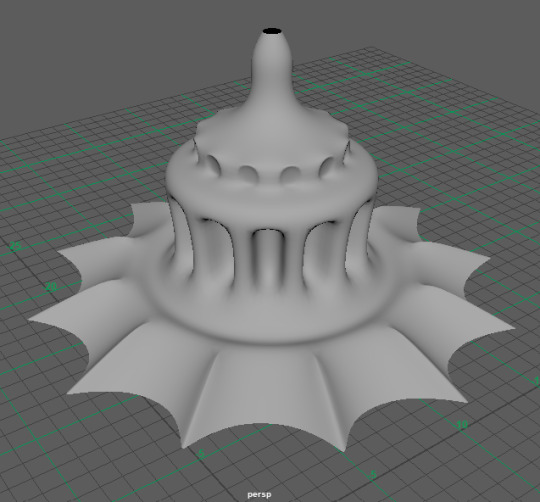


Structure Modelling Progression
Process:
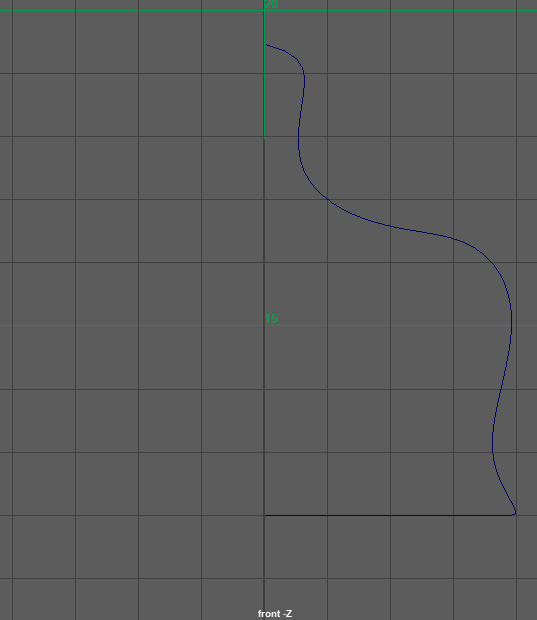
1. Drawing NURBs curve
2. Revolving the curve - 360 degrees
3. Changing from NURBs to Polygons and extruding/scaling edges in different directions
4. More sub-divisional modelling creating the windows and the scalloped overhang
5. Attached a hemisphere to the bottom of the pre-existing structure and target welding the edges of both polygons
6. Creating more windows and doing final adjustments using the move, rotate and scale tools to create the final structure
I think this is a unique design that encompasses a lot of elements from the research I have conducted previously on Haeckel’s work and mathematics in nature. This was a different type of modelling when compared to the MASH network used for the cave walls. This was a lot of finicky but I really got to shape it the way that I really wanted it to be.
I did UV map the whole structure taking time and patience to sew and cut things together and layout it a proper manner. I excluded the coloured glass from the uv snapshot which was a pre-set used in aiStandardSurface. I added some dark metal for the structural pieces and a translucent film material of the over hang.

I placed added a burled walnut wood texture because the wood grain doesn't have a particular direction so it saved me the time of masking the horizonal and vertical sections in photoshop. When the scene was fully rendered the texture of the structure wasn’t visible at all but I did this process because it was the professional thing to do and I got practise.

0 notes
Text
Maya Scene Planning
The first thing to do when modelling is to layout the scene and get all the settings correct.
I initially set the grid to be in metres thinking this would be good for water physics. I laid out a bunch of concentric circles as an estimate of the scale for the different elements in the scene. I did plan for a tree if time permitted.
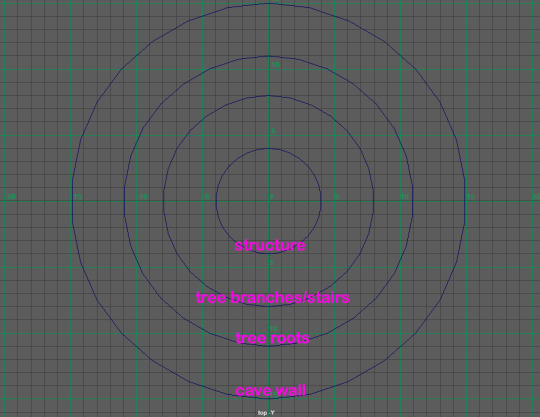
Additionally, I did establish two shot cameras - one looking at the cavern and the composition of the scene as a whole. The second camera looking at the structure and how it disperses the lights.

I placed these guidelines in a reference layer and they did help me model and adjust the composition of the scene.
0 notes
Photo

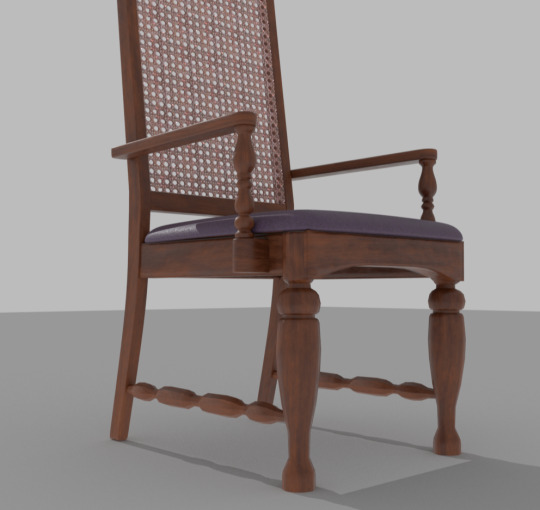
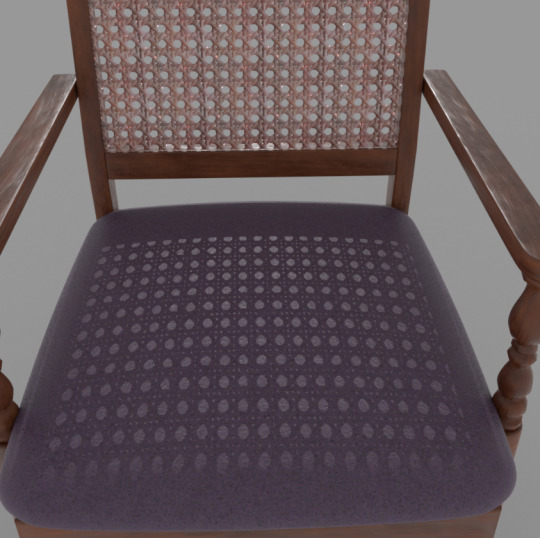
Maya Tutorial: Hypershade and Texturing of Chair
This tutorial was mostly about using photoshop to apply multiple textures with the guide of UVs. Also learnt how to create a diffuse, roughness and normal map and what the purpose of each was in enhancing the realism of the object. There were specific steps in hypershade to implement these textures. It was a bit confusing at the beginning how everything connected to each other but with recurrent practise I'm sure I’ll get the hang of it. I think my attempt at this was quite good but improvements could be made by making the wood and seat cover a little less shiny.
0 notes
Text
Sketches from the Imagination
So, what did I want my fantastical structure to be?
I wanted it to have a lot of different coloured windows so that when the light passes through it could illuminate the dim caves in a flurry of colours.
There has to be an orb of light in the centre of the structure to illuminate and provide warmth to the scene.
I wanted it to be unique in shape and have some organic features which reference some of Haeckel’s work. The cave will be very geometric and rigid so the structure must contrast this.
I would like it hanging from the ceiling by a chain but open to explore other options. I want it to have a staircase so the lonely traveller can reach his destination.
The image below illustrates all the different sketches I drew to flesh out the concept for my fantastical structure.
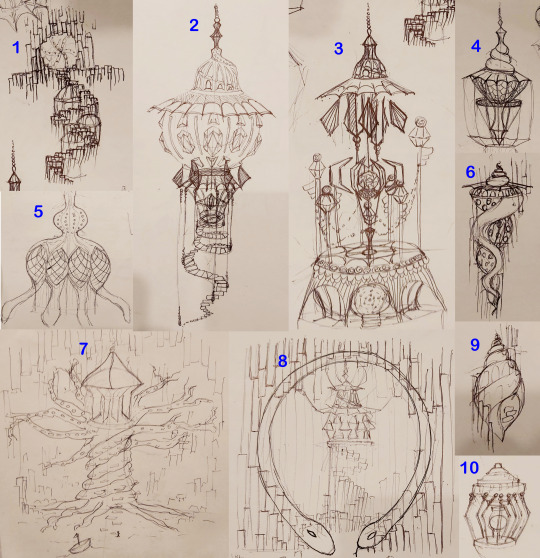
These sketches show an assortment of ideas that I explored. Some sketches are really out there and hardly reference my previous research but would look really interesting in the cave environment [3]. I tried to incorporate shells into my design based on the research I conducted about the Fibonacci sequence and mathematics in nature [4,6,9]. Sketch 5 is inspired by some of Haeckel’s work. Sketch 8 illustrates a really cool entrance design to the cavern of the cave incorporating some snakes. The motifs and connotations behind this animal are deeply rooted in mythology and fantasy. I think it would further enhance the ominous theme to the design. Hopefully, it shouldn’t be too hard to model and texturize in Maya if I chose to create this.
I did explore a couple of designs that weren't hanging, sketch 1 was a mysterious door inset into the wall with these stone stairs leading up to it and along the path there were pergolas that would bring some light. In the end, this design wasn’t the vision I wanted to create.
I also explored the fact the light is the precursor to life, so the light from the structure in the dark cave is capable of flourishing the only tree in this fantastical world. This twisted tree has grown so large in the cavernous space due to all the light it acquires. It could provide an abundant resources for the lonely traveller who would have to climb the stairs impaled into the trunk to reach the structure [7]. I really loved this concept it gave more purpose as to why the structure was hanging there, as it gives life to things and beings in the desolate world. However, this did add a complex element of a tree to the design so if time permits I could explore this design.
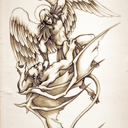
Solely, structure wise I really like the concept of sketch 2. I think it incorporated a lot of different elements that I had researched prior and retained the original concept idea that I was looking for which was a bejewelled hanging lamp. It has many facets to contain coloured glass so when the light is distributed it should produce a wonderful effect. So, I'm thinking to proceed with this general concept and see where the actually modelling takes me in Maya.
But I am glad I got all my different thoughts on paper so that I could really weigh the pros and cons of each design and moved forward from this uncertainty.
0 notes
Text
Commencement of my Creation

Beginning the actual modelling of this fantastical structure was a bit difficult for me because I was really unsure about the scale of my model and secondly, I was not quite set on a design for my actual fantastical structure. I knew the general layout of the cave and how I wanted the overall video to look but was a bit apprehensive because everything had to be in proportion with each other and that steamed from getting the scale of the structure correct. Therefore, I had to go back to the drawing board and devise an actual concept that I could realistically model of the structure so I could get started on this project.
Image Source:
https://imgur.com/SvUvHvK
0 notes