Last Seen Blogs

allennoblerickman
AllenNobleRickman


xyxly
Feigning Interest

aisuigetsu
Εὐρυδίκη

klarojonsa
Impossible Loves
Photo

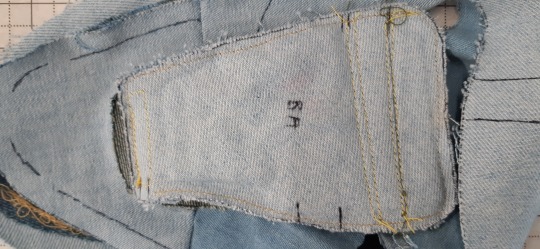
Some pages from my design portfolio.
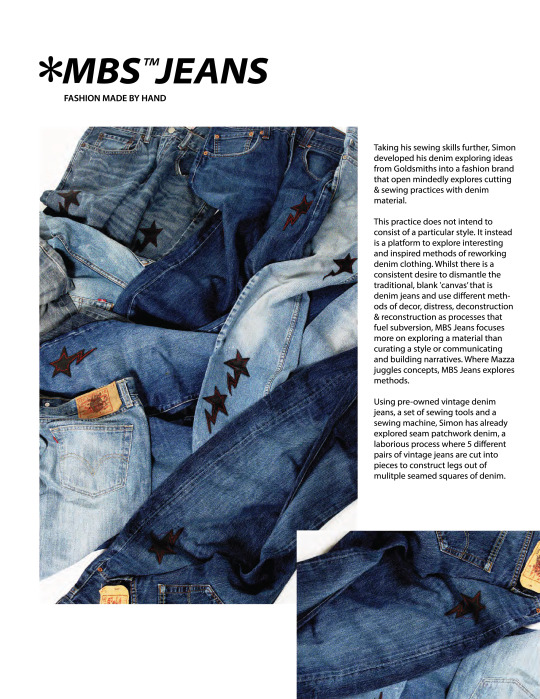
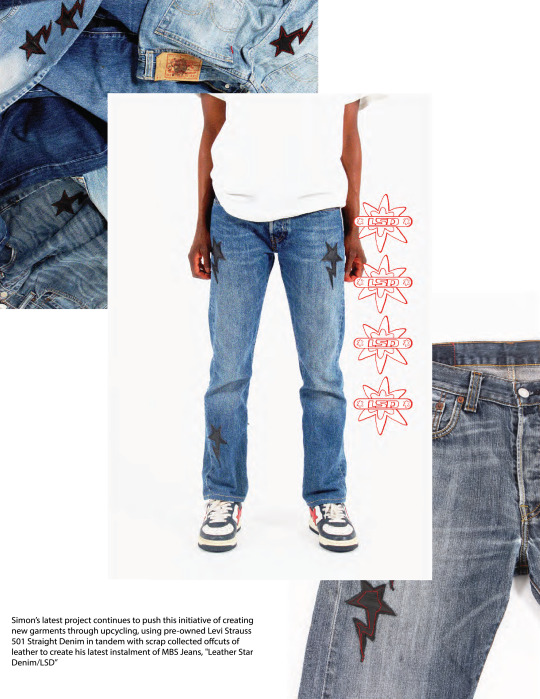
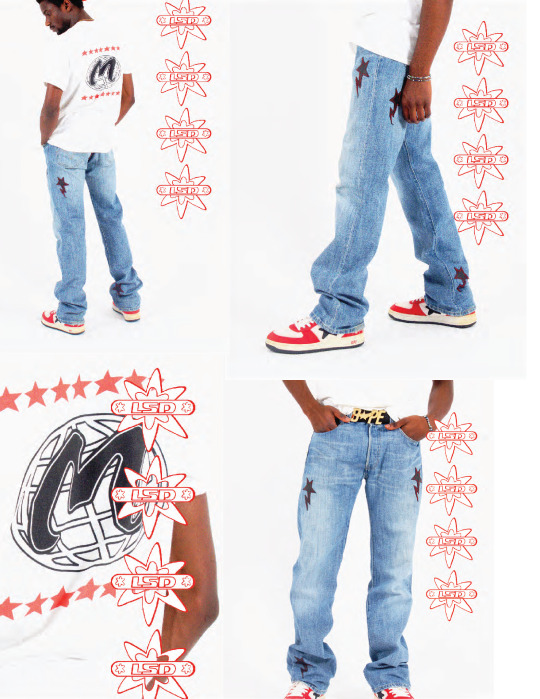
These pages detail my denim rework brand - @mbsjeans on instagram
www.mbsjeans.bigcartel.com
1 note
·
View note
Video
Construction 6C // Sneaker Studio
A video of the entire sample collection. My library of recreated Air Force 1s.
0 notes
Video
Construction 6B // Sneaker Studio
The main inspiration behind my desire to make sneakers, Maxio6 or Max Hanke, an independent sneaker craftsman who recently began an exploration of self taught sneaker building.
0 notes
Photo
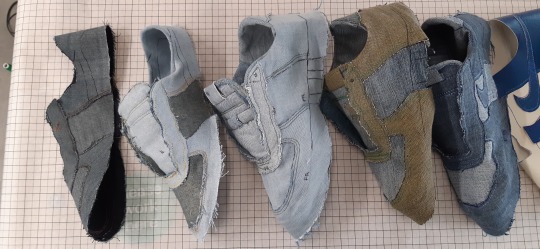
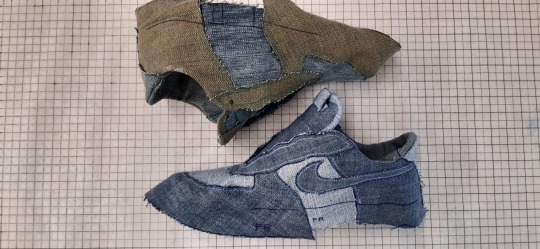
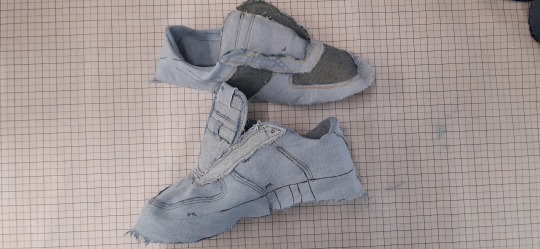
Construction 5 // Sneaker Studio
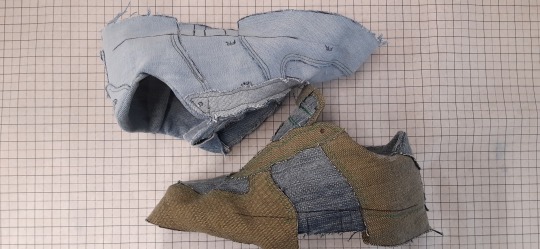
My entire catalogue of recreated Air Force 1 uppers.
It started with no lining, just the outer upper sections, no last allowance.
Then I tried making a tongue for the shoe, added the last allowance next, and tried to perfect the inner lining and all other attributes. I made around 3-4 models in between this stage, but I wanted to leave out the uppers that only show micro-developments, to emphasise how far I've come.
In a way, these shoes collectively act like a library, and each upper is like a book that visually registers what my mind was capable of creating at the time. They’re all checkpoints/milestones in the process of making shoes.
It’s all for a bigger purpose of course, this bespoke workshop. This is the foundation for that. For a space where people can co-create, and dictate the value of their shoes based on their own personal preferences. With my skills and their stories, we can take control.
That’s what I've been doing in a way, this entire time I've been taking control of the making of this thing that I enjoy. Instead of being a consumer I've learned how to do the construction. Instead of letting the sneaker market tell me what my options are, I've created a gateway into removing the options on my limits.
0 notes
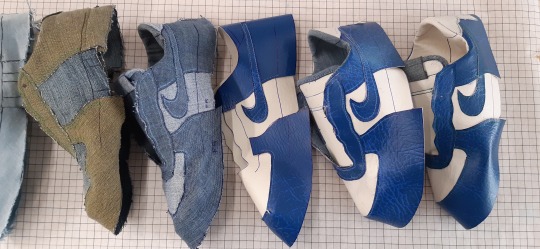
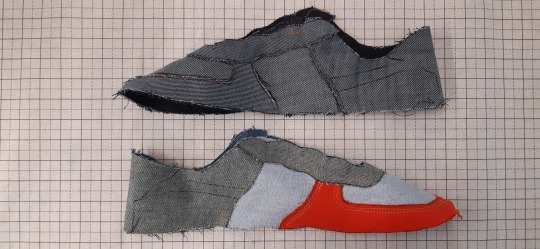
Photo
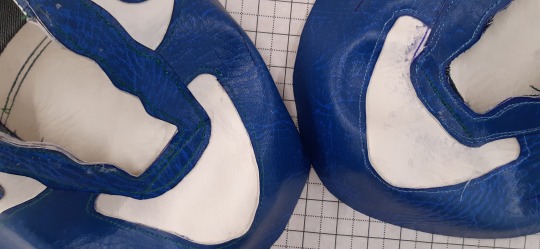

Construction 4 // Sneaker Studio
These are the first leather Air Force 1 recreation samples
Leather is very different to denim, its less stretchy, its thicker, it has a harder time bonding.
I had to change the toe tip stencils as you'll see in one of the final stencil posts, because it was actually too long.
I had to switch out the pritt stick and go for super glue, which was super effective, but it came with a fair share of glue stains I didn't plan for. I tried to make every piece of the shoe from leather, apart from the lining of the tongue, since that needed to me soft and flexible, plus the leather stuck better with super glue but it still didn't feel secure. Using leather made things seem more real? What I mean is utilising an everyday sneaker material gave the look of the shoes more of an official feel to them. Which I prefer.
The idea of what I'm doing looking more and more in-fitting with what one would see in an everyday, real setting, for me, makes the project seem easier to digest and be credible in regards to how its showing me how to make real shoes, which are most commonly leather.
I feel like making more of these will elevate the perception of where my learning is taking me. I see people finding more value in the leather recreations because of that reason.
0 notes
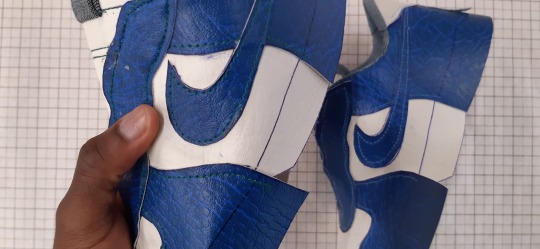
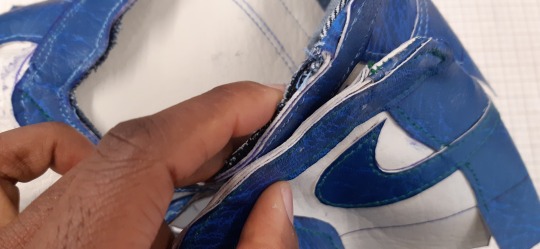
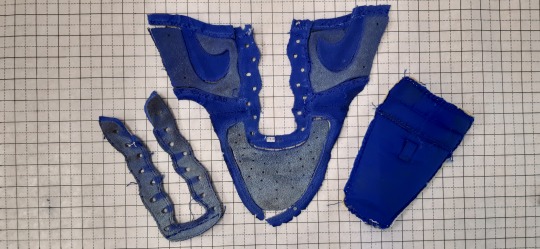
Photo
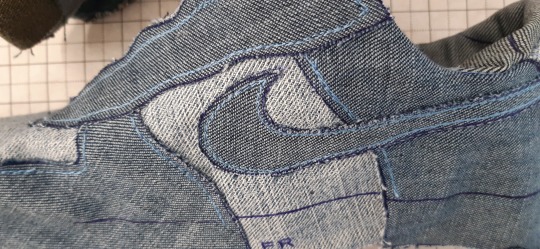

Construction 3 // Sneaker Studio
This time I brought in the swoosh. I’d delayed it for a while because I felt like the rest of the recreation build stencils had to undergo a cleaner development. Maxio6 is an independent designer on Youtube. The way he makes his stencils is buy digitally drawing the stencils. I realised doing that would help me get exact, symmetrical shapes so, I took everything into illustrator and created a new generation of stencils, which in turn, created a new generation of better Air Force 1 recreations.
I still wanted to work with denim because it stretched in a way that made it easy to work against miscalculations. What I mean by that is, if the stencil was too big, the denim could be pinched in a way that wasn't visually noticeable, and it could be stretched if I cut too much off any denim after stencilling. With denim, there was always room for error, it could always be hidden or compensated, plus the material by nature is more fragile and prone to fraying than leather, so rough mistakes stylistically blended in because of the atmosphere the material set.
*images from top to bottom, row by row, left to right*
Row 1: a) close up of the first AF1 recreation with a swoosh.
Row 2: a) two generations apart, an improved complete tongue model and at the first swoosh af1 build. b) top view, focusing on the lacestay, we have the last complete tongue model and the first swoosh model.
Row 3: a) the old toe tip stencils vs the new mudguard, drawn through illustrator.
Row 4: a) a comparison of two tongue stencils, old and new, as well as the new models each stencil created.
0 notes
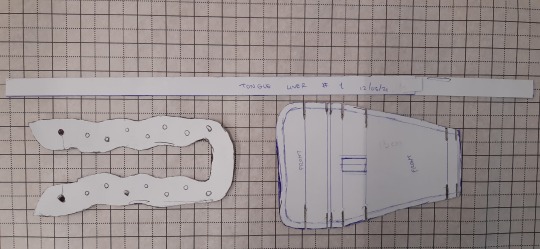
Photo

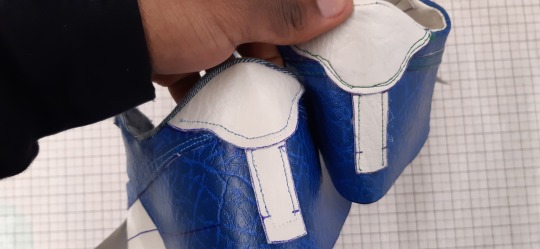
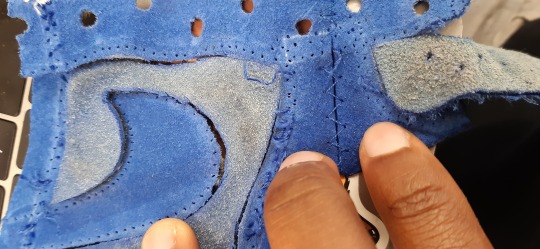
Construction 2 // Sneaker Studio
This time I made a stencil for the tongue.
I changed the entire set of stencils **see Deconstruction 2**
I accounted for last allowance because I knew I really wanted to last these shoes. Lasting is a process of pulling the shoe uppers over a last (a mould of the shape of the shoe + dimensions of a foot).
To get the tongue looking nice and thick I used scrap denim cuts, everything still stayed together with regular pritt stick glue surprisingly. It’s a good adhesive for denim. As you can see from the bottom photo, my stitching cleaned up a lot more, and I decided to stuff the tongue a bit less since it wasn’t flexible enough to be comfortable.
The main thing I kept in my concerns was how close the samples were coming to being like the real thing. Things like stuffing the tongue and stuffing the heel counter with card and scrap denim weren’t necessarily needed to achieve capturing the shape of the shoe and they didn't necessarily add any extra requirements to creating the stencils for these sections, but, I wanted it to be as close as possible. If I knew how to, I would have started punching holes through the lacestay to get the laces through, but I was stuck on that end.
These breakthrough moments that led to “breakthrough” pieces like the first recreated air force 1 with a tongue, and then the first complete tongue with tongue tag-model were quite satisfying for me. I felt like every shoe I made, made me smarter. I could visually track my process, and seeing the developments get closer to the real thing made me happy. I thought “I'm getting better, once I master this, I can make shoes look any way I want”.
*images from top to bottom, row by row, left to right*
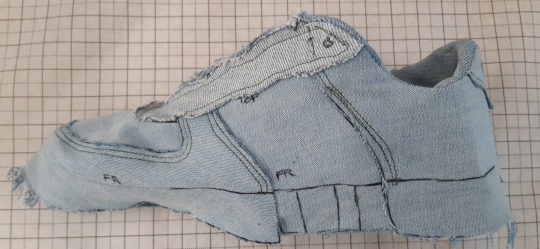
Row 1: a) not my first tongue model, but my first complete tongue-featuring AF1 model, next to the stencil it was built from.
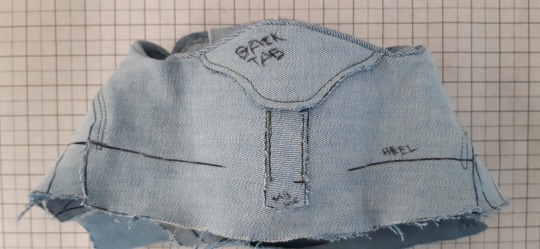
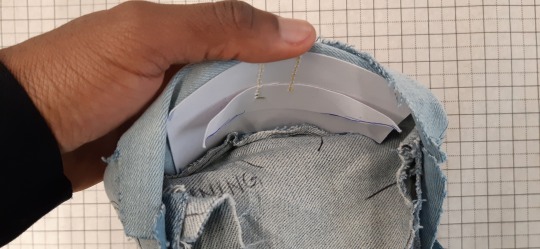
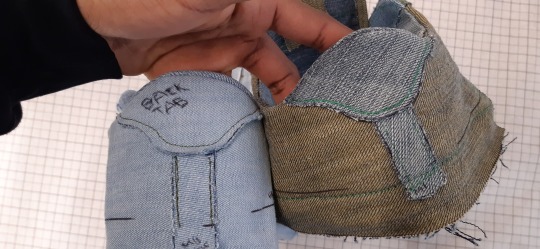
Row 2: a) Side view of the same AF1 model, the first in a new generation of recreated models with last allowance designed into the sneaker. b) from here on, with this model being the first, I always included a backstay and back tab, as you can see in the picture.
Row 3: a) This is card paper stuffed and stitched in between the lining. I thought stuffing the back of the Air Force 1 and putting card paper in the heel in between the lining, would give the shoe more rigidity and distinguish its shapes and curves.
Row 4: a) With a new sample next to the complete-tongue model, I decided to stuff the heel with card and cuts of denim, so it felt plush when squeezed. So I had to stitch the bottom to keep the denim cuts in.
Row 5: a) the first tongue model and the next, complete tongue model. b) the first complete tongue model and a two tone model.
1 note
·
View note
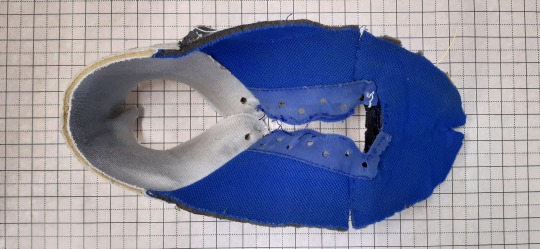
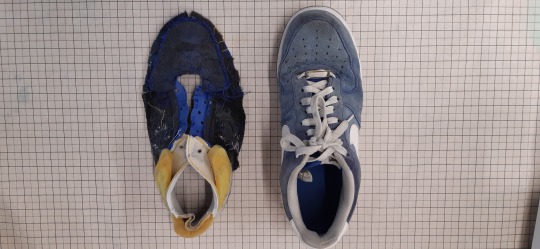
Photo
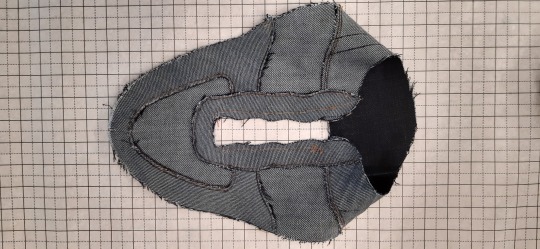
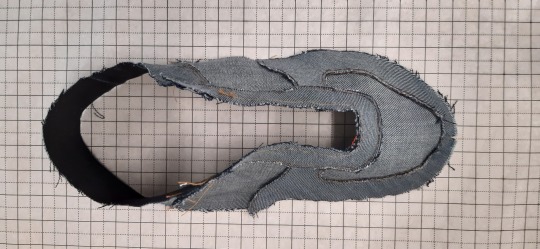
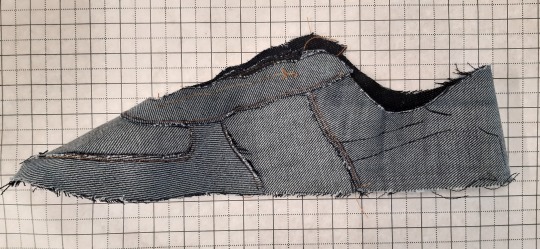
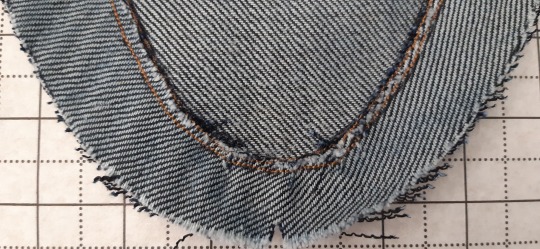
Construction // Sneaker Studio
These are the first Air Force 1 recreation samples
I used denim because, denim is all I had handy on me. I actually have bucket loads of denim from when I used to do patchwork denim pants.
Using the first stencils **see deconstruction 1** I made these first set of uppers.
I forgot about last allowance, so none of these work as practical uppers. They’re stuck as uppers and can’t be lasted. The general shape of the Air Force 1 was quite easy to get. I was surprised to see how separated shapes that don't really allude to the foot shapes, end up creating this distinct, foot shaped object.
Whoever invented this style of shoe design had to somehow imagine flat shapes curving and contouring into the shape of a foot. Imagine that.
Imagine thinking hmm I need to make a piece that laces can go through to pull both sides together onto the foot to lock it in.
Sneakers are really quite technical, I don’t think people really take that notion in too deeply. Sneakers are veryyyy deeply thought out.
I think my first set of uppers shows just how shallow I looked at shoes. I didn't cut any shapes for lining, for the tongue, I didn't even put on a backtab at first. I only had a few features in mind. The rest seemed too complicated. Lining up the lace stay just right & getting the toe tip to not get folded was difficult.
Because the mudguard I deconstructed from the Lunar Air Force 1 was probably distorted, the stencils weren't symmetrical and the angle of the curves probably weren't right, which is why I had trouble fitting the toe tip on the toe box.
Later, once I started trying to imagine the lining and tongue, I gave them both a rough try as you can see below. The idea was in the right place, but the execution was definitely off. The tongue has no lining, the stitching is crooked, the shape is crooked, and the lining on the inside wasn't seamed in the right places.
The inner lining is made of the same two parts as the main body and the heel counter, but inverted and joined by seams, I didn't seam the joints, and i stitched them at the wrong place so there was way too much excess lining.
I used my Bernette Sewing Machine, pritt glue to stick the pieces in place and a regular 120 needle.
*images from top to bottom, row by row, left to right*
Row 1: a) my first denim recreated Air Force 1 upper. b) my first denim recreated Air Force 1 upper again, it does stand up if you prop it up right.
Row 2: a) the first upper, laid on its side. You can see the Air Force 1 shape pretty well. b) I made another one with different colours of denim.
Row 3: a) the toe tip. Its too big, or the angle is too flat, so it struggles to curve without being folded to achieve its position. b) the lacestay on top of the main body. Turned around, you can see how they miss each other. The lacestay is too wide so I can't pull it in to match the main body even though that section is shaped for the lace stay to line up with it perfectly.
Row 4: a) I attempted to make a sample with lining and a tongue.
Row 5: a) tongue close ups. b) tongue close ups.
1 note
·
View note
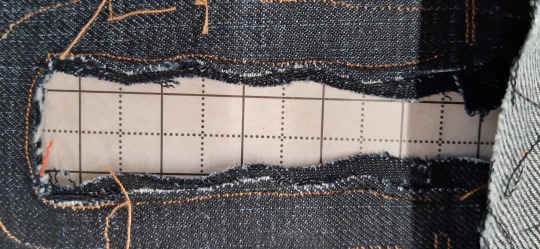
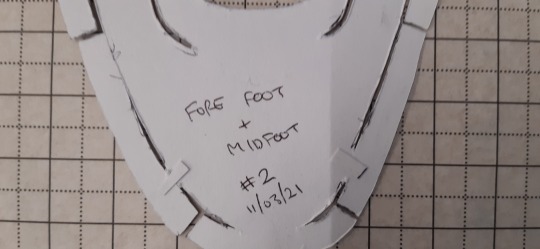
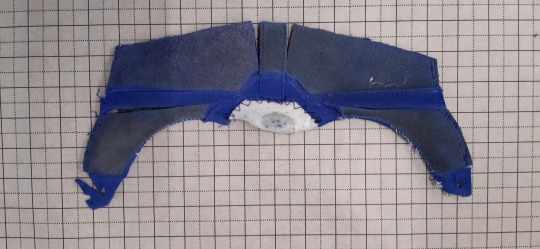
Photo

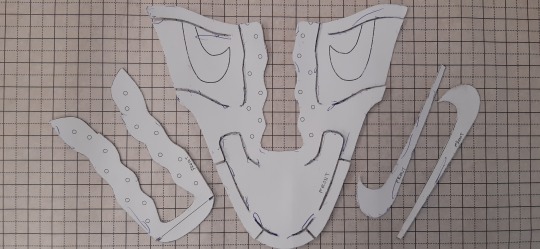


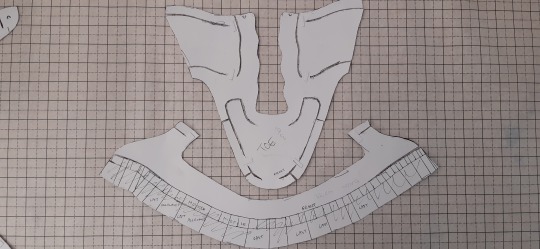
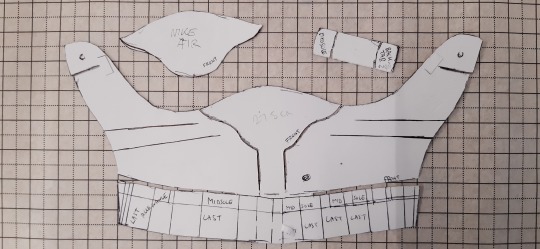
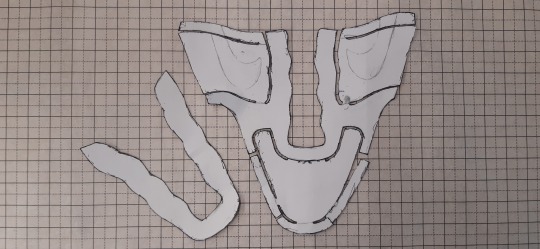
Deconstruction 4// Sneaker Studio
These are the third stencils I made.
The last picture at the bottom shows the evolution in the stencils from first too now. As much as I say the outcomes are educational and landmarking in my skills and knowledge, the stencils are a big proponent for reflecting my understanding in making these Air Force 1 samples.
This time, I scanned the old stencils, put the scans into adobe illustrator, redrew them with an attention to symmetry and printed them, once again with 2 pieces of card stuck together for rigidity in each shape.
I also started adding the swoosh. I had left it out for a long time, but now that I was confident in the rest of the shoe, I decided to add it in. I could’ve made a separate stencil in the shape of the main body for the lining that goes under it, but I decided to just reuse the main body stencil for the lining under it.
The heel lining is a bit more particular so it needs to be redrawn and have its own stencil rather than share its shape with the heel counter stencil.
*images from top to bottom, row by row, left to right*
Row 1: a) a pack full of the stencils. b) the toe tip. It was iterated 3 times, the first time it was too long, which I didn't notice until I started constructing the Air Force uppers out of leather instead of denim. You’ll see.
Row 2: a) the lace stay, the main body, the swooshes. b} the mudguards
Row 3: a) the tongue tag, the tongue body and tongue lining.
Row 4: a) the heel lining. b) the heel counter, backstay and backtab. c) both.
Row 5: a) the change in shape of the lace stay from each stage in stencil iterations.
Would I make another set of stencils? Maybe not, I think these are pretty spot on for the shape of the shoe and its elements. Im probably only missing a couple more elements on the tongue body, like the lace loop that sits under the tongue tag in the middle of the tongue, but apart from that I think the building just needs perfection at this point. The stencils are pretty good.
0 notes
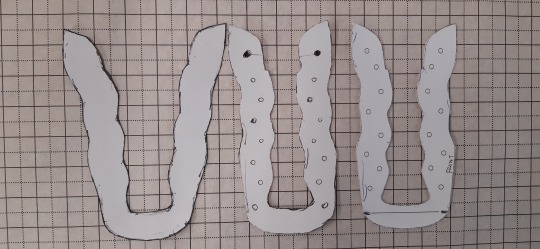
Photo

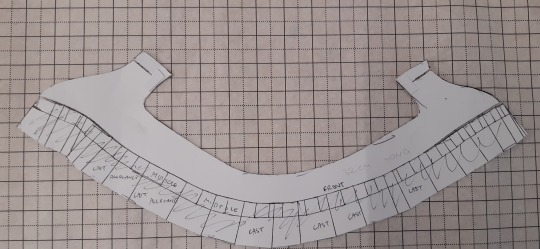
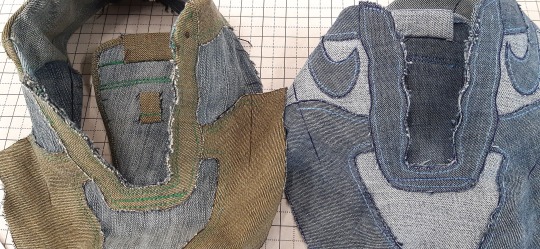
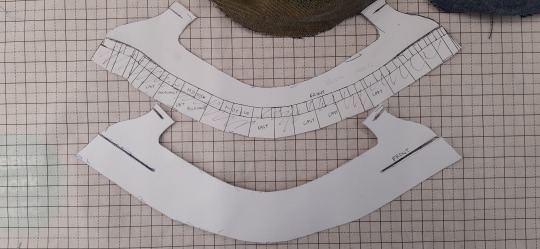
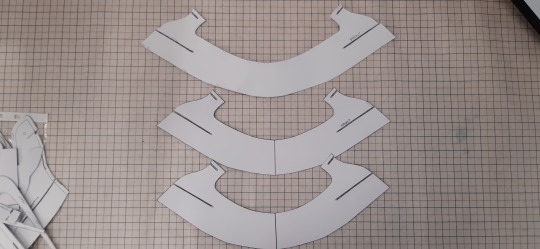
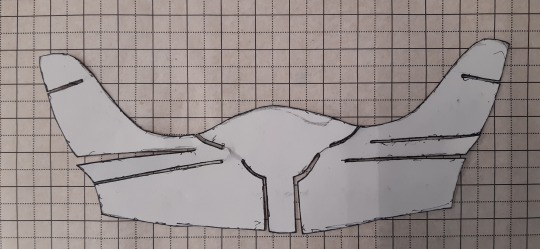
Deconstruction 3// Sneaker Studio
These are the second stencils I made.
The first ones were made out of card, but these were doubled down with two sheets of card paper glued together, since the last stencils ripped.
This time stencils had been iterated to account for lasting, so potentially any one of the samples made with these stencils could’ve been lasted.
I iterated on pretty much every element in the build, & started experimenting with making the lining by reversing the heel counter stencil, plus I added a piece for making the tongue.
*images from top to bottom, row by row, left to right*
Row 1: a) a pack full of the stencils.
Row 2: a) the back of the main body.
Row 3: a) the toe tip/mudguard, now with extra length for potential lasting and the main body (toe box, lace stay foundation and quarter).
b) the toe tip.
Row 4: a) the lacestay, the tongue body and the tongue border lining. b) the heel counter, with a lasting allowance added, and a backtab and a backstay.
0 notes
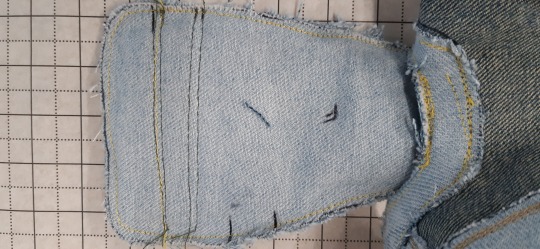
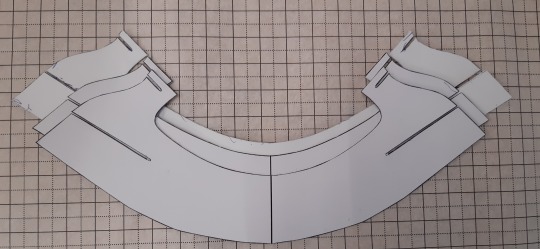
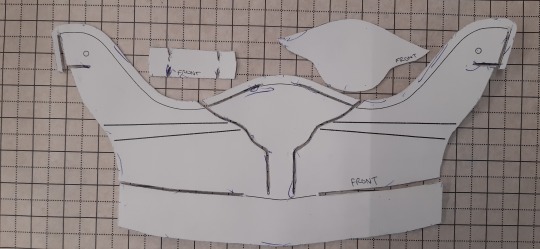
Photo

Deconstruction 2// Sneaker Studio
These are the first stencils I made.
I didn't think about it at the time, but working with a heavily worn Air Force 1 makes and in general a shoe that's had its parts glued together & stitched amongst who knows what else, makes the pieces distorted. So I'm probably using poor references.
The toe box and quarter aren’t actually one whole shape, but I improvised on that. *see row 4**
*images from top to bottom, row by row, left to right*
Row 1: a) a pack full of the stencils.
Row 2: a) the lace stay (the lace section), the main toe box & quarter body.
Row 3: a) the heel counter.
Row 4: the lunar Air Force 1 close up, as you can see the toe box and the quarter are joined by a zig zag stitch, but I didn’t separate them in my parts**.
These stencils didn’t create the best Air Force recreations, but they were a good start. In the end every piece made is an educational tool, so making recreations with flaws is a solid way to remember where you made mistakes and where you introduced a good design cues.
0 notes
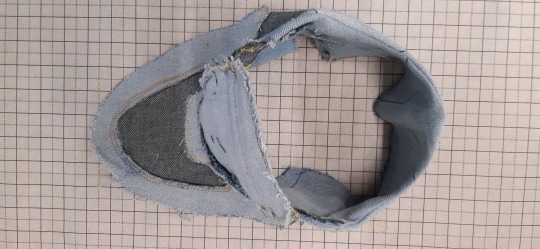
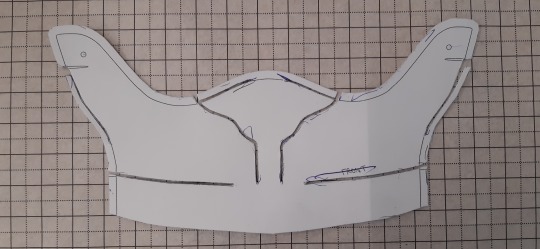
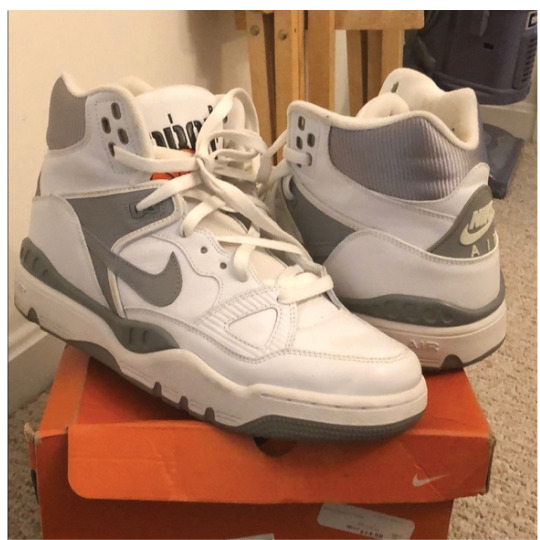
Photo


Deconstruction // Sneaker Studio
This is a Nike Air Lunar Force that I deconstructed.
*images from top to bottom, row by row, left to right*
Row 1: a) the lining. b) the lace stay, the toe box & quarter body, the tongue.
Row 2: a) A Nike Air Lunar Force 1 and the deconstructed body, it's just the lining.
Row 3: a) the heel counter, with the backtab removed. The toe tip/mudguard.
Row 4: a) another Air Force 1 upper, removed with acetone, with the lasting board intact**
Row 5: same as above**
I took it apart with a seam picker and a craft knife, and then used the parts to stencil some shapes so I could.
In retrospect, instead of cutting it off the soles, I should have used acetone/nail polish remover, peeled the upper off the soles with the underbelly, and then seam picked the parts off. I forgot about LAST allowance.
*see last two photos at bottom*
The upper stretches over a lasting insole board, the white piece under the shoe. When I cut the upper, I cut it just above the midsole, so my first stencils weren't really practical for fully fledged shoe crafting.
I approached it this way because it cost me nothing to deconstruct an old shoe, whereas it costs a lot to buy other independent designer’s stencils.
It’s something anyone can do really, best way to get started.
0 notes
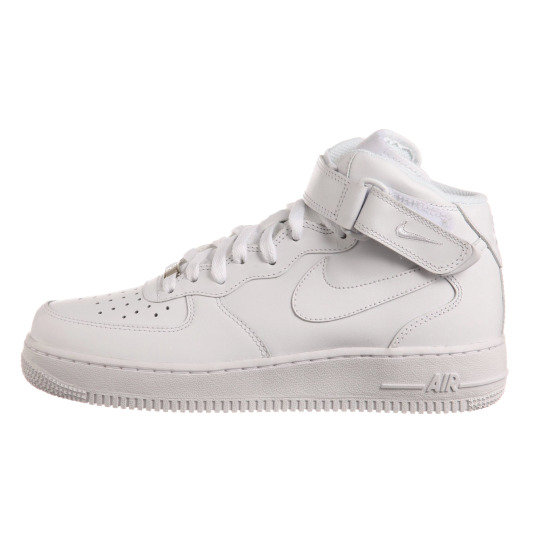
Photo
I need to choose my SUIT. I can't make every single shoe. I need one shoe. One blank canvas. With one I can learn quicker and refine better. And waste less material.
0 notes
Photo

Currently looking into Bespoke practice methods. With my project now gearing towards creating a personalisation process that brings life to people’s collective sneaker desires, I must understand the approach for custom making.
Most commonly, particularly in the suit-fashion industry, when bespoke services are sought after, they work with system of showing their buyers their catalogue of styles, materials and fittings.
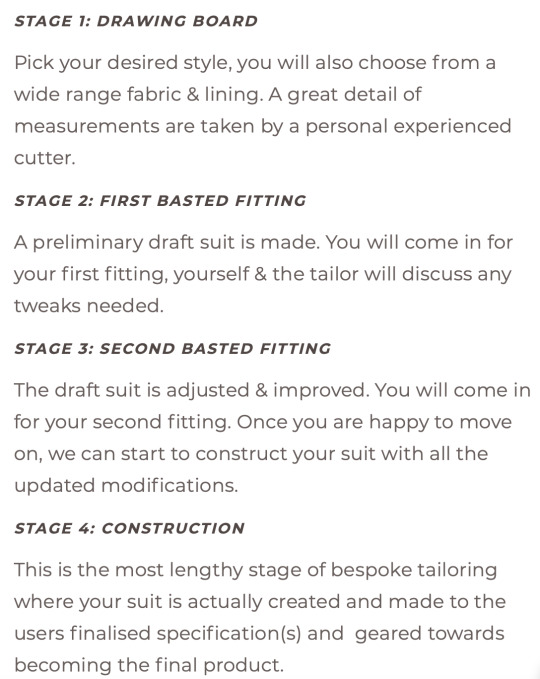
THE SWATCH STAGE
The buyer is given an understanding of the range of options on offer in order to understand the capabilities of the company and also be given the freedom to be spontaneous.
After the buyer expresses their desires based on the catalogue limitations, we approach the ...
DRAFT STAGE
The draft stage is where the ideas are prototyped into a beta-version of the final product. With the buyers assistance, the fitting of the article will be tested and critiqued for improvement. After the draft stage...
ITERATION STAGE
The draft must be continuously iterated until it meets the practical requirements necessary and the preferences desired by the client. This may require repeated visitations based on the task, the client and the craftsman...
FINAL STAGE
Once the iteration is done, the final product is created with a polished finish that considers the entire beta-stage and ends up with the finalised version of the commissioned bespoke piece.
Where I am now, I need to develop skills that can craft the ideal products. That’s sneakers for me. So I need to develop a flawless/good craftsmanship for sneakers. I then need to experiment and see what materials are in my reach in order to create a swatch book. I can't just make it up if its not within my reach.
Only then can I begin my bespoke simulation.
0 notes
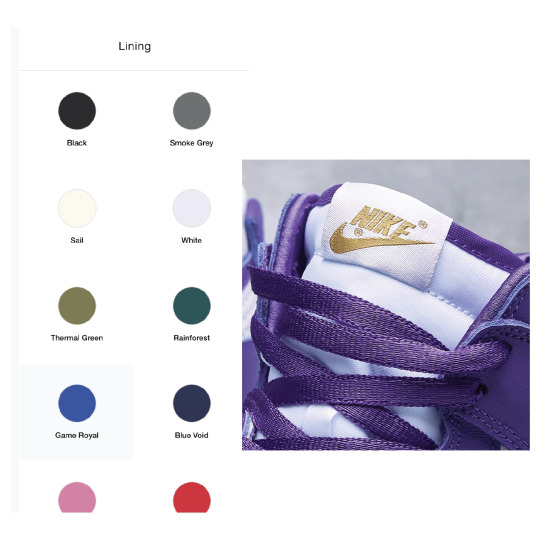
Photo
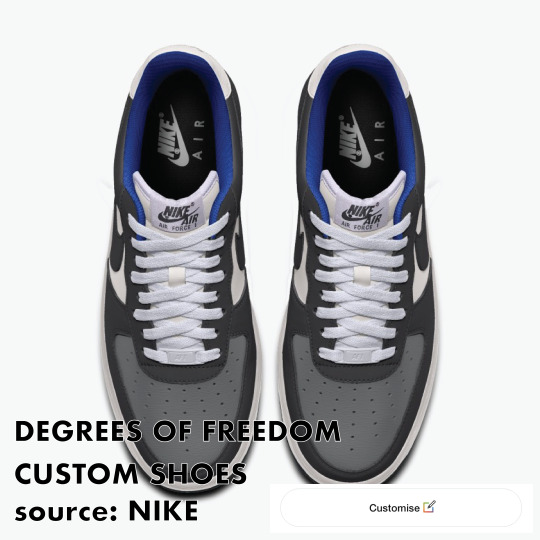
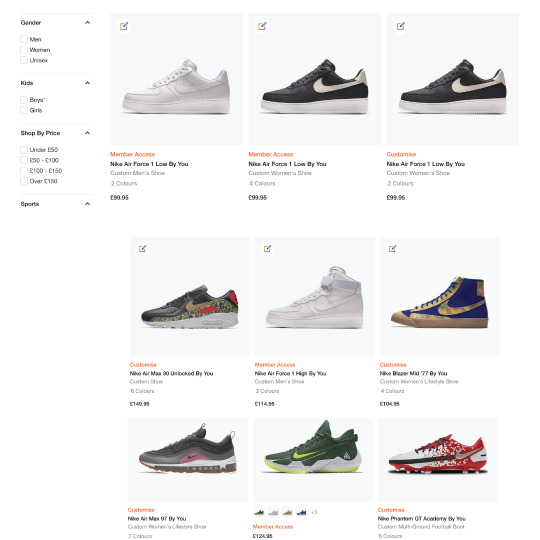
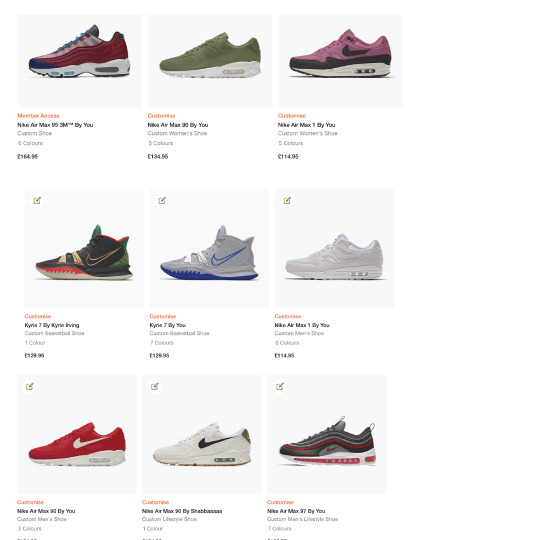
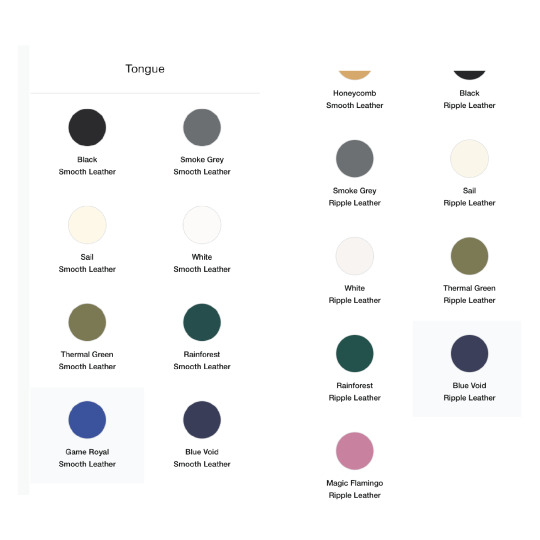
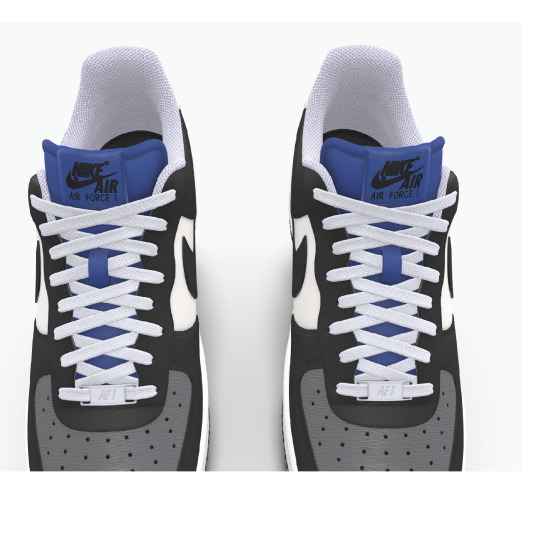

CAN:
can customise shoes with no minimum order
can choose between more than one shoe for lifestyle or performance
can choose between a range of colours specifically:
Navy Blue, Royal Blue, Red, Magic Ember, Black, White, Sail, Smoke Grey, Rainforest Green, Thermal Green, Flamingo Pink, Honeycomb Gold
can colour all basic parts of a shoe including:
the toebox, the tip - area around toe box, the quarter - mid section, the swoosh, the heel, the backtab, the midsole, the outsole, the tongue, the laces, the lace stay -holds the laces
CANT:
can’t print or embroider onto any section of the shoe
can’t change the lining to materials other than mesh
can’t change the shoe material to anything other than ripple leather such as
suede, patent leather, nylon ripstop, pony hair, nubuck, durabuck, foam, canvas, hemp, plastic, tumbled leather, synthetic leather
can’t colour the tongue tab without colouring the entire shoe
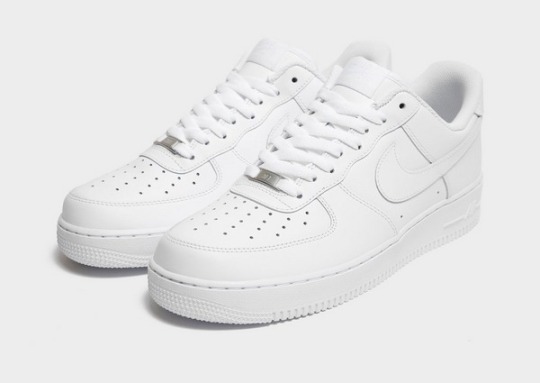
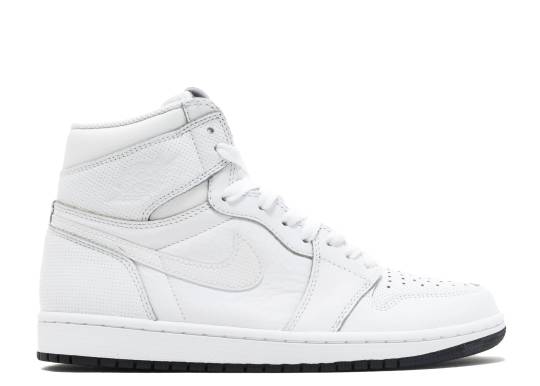
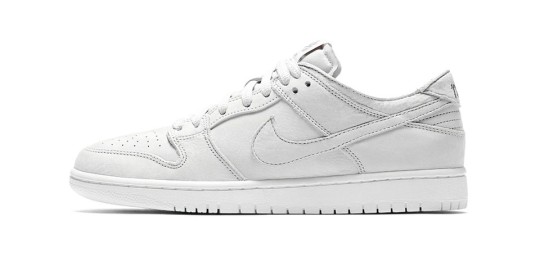
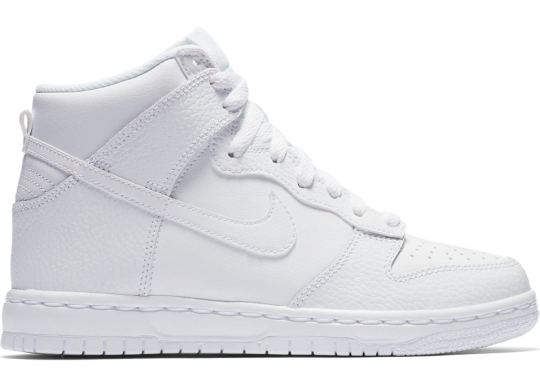
can’t customise any sneaker in the Air Jordan line, the Dunk line and many other shoes.
can’t even customise Air Force 1 mids
can’t choose literally every colour to exist or any colour outside the previous list
can’t choose the same colours listed on the upper section for the outsole section, specifically Ember, Royal blue & Pink.
can’t use patterns on any section of the shoe
can’t distort or reconstruct any section of the shoe
can’t mismatch the colour of either pair of shoes for an asymmetrical custom
can’t make a pair of sneakers with augmented asymmetrical sizing
can't add a lace lock or more lace jewellery
0 notes
Photo
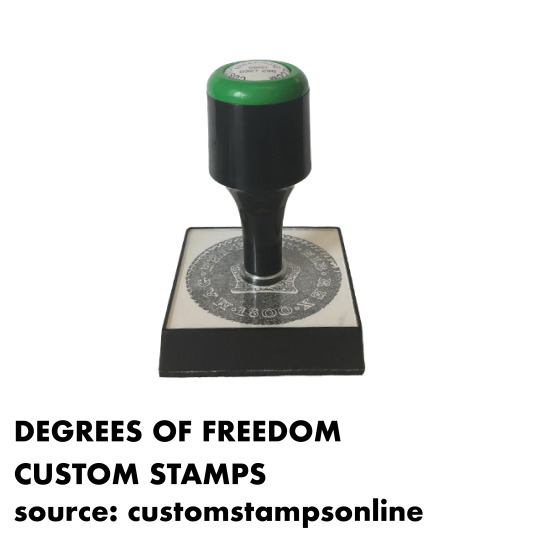

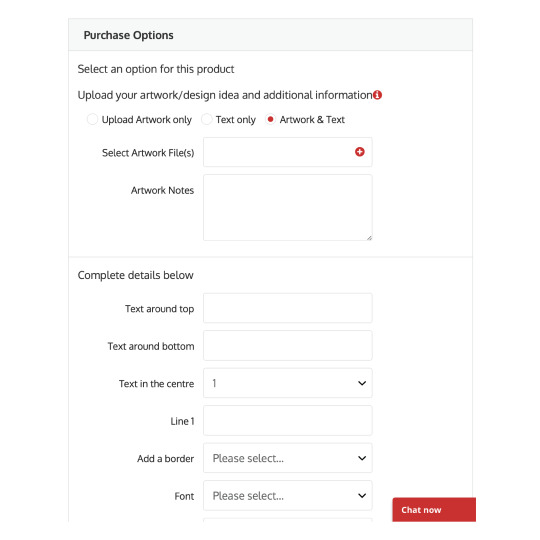
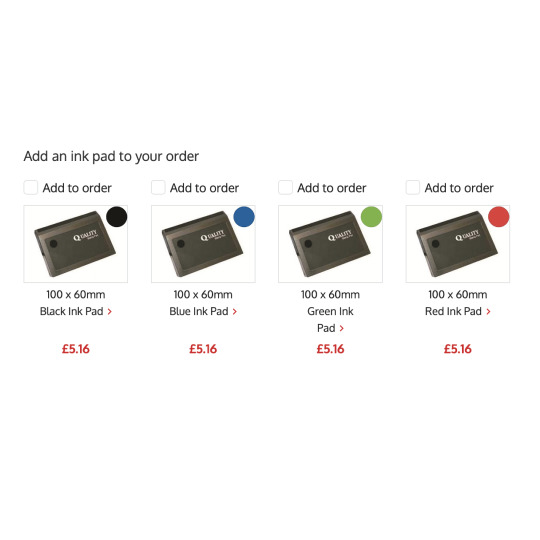
CAN:
can choose between self inking or manual ink stamps
can choose between different sizes of stamps
can upload your own design artwork instead of using only text
can buy stamps no minimum order
CANT:
can’t choose inks other than those that are used for paper
can’t choose literally every colour that exists as an ink colour
can’t make a stamp wider than 6.5cm in diameter
0 notes