
greekcookingmadeeasy
Greek Cooking Made Easy
Is Life Too Busy? Try Greek Cooking Made Easy!
Check my new website HERE
social media:
721 posts
Don't wanna be here? Send us removal request.
Last Seen Blogs

xangelicdistortionsx
Untitled

blue-floozy
post depending

lowcostinsurance
Home & Renters Insurance

downbound
DownBound - Hockey Slave

dodgingfoof
Foof Dodges The Fandom Law
Text
Chickpeas With Swiss Chard Fricassee From Tinos Island
🌿

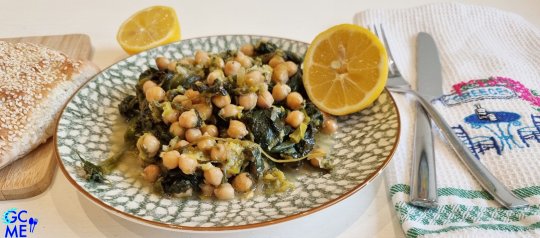
Chickpeas with Swiss Chard Fricassee from Tinos Island - Revithia me Seskoula Fricassee Tinou
BY: Greek Cooking Made Easy
SUBSCRIBE TO MY YOUTUBE CHANNEL: https://www.youtube.com/greekcookingmadeeasy
Check My YouTube Video: HERE
Κοιτάξτε Επίσης Την Συνταγή Μου Σε YouTube Βίντεο, Το Λίνκ Είναι: ΕΔΩ
youtube
SERVES 🍴⃒ PREP. TIME 🕔⃒
4 persons 45 min + 1 day wait
COOK. TIME ♨ DIFFIC. LEVEL 👩🍳⃒
Chickpeas: 30 min.
Swiss Chard: 15 min
Fricassee: 20 min. Easy-Moderate
Fricassee is a French word used also in Greek cuisine, describing a stew of meat slices with green vegetables, served in a white lemon sauce. Traditionally, the most common Greek fricassee recipe is with lamb.
This is a fairly easy, unusual Lenten fricassee, combining chickpeas and Swiss chard. They are cooked in the stove, together with spring onions and leeks in a rich lemony sauce (instead of the usual egg-lemon sauce).
The dish comes from my paternal island of Tinos in the Cyclades complex in the Aegean Sea.
An island, very close to my heart, prepares this fantastic, healthy meal with the delicious tastes of all the fresh vegetables.
Ready to give it a try?
Suitable for vegans and fasting.
Do you just love chickpeas and are looking for other Ideas/recipes? Check them all HERE
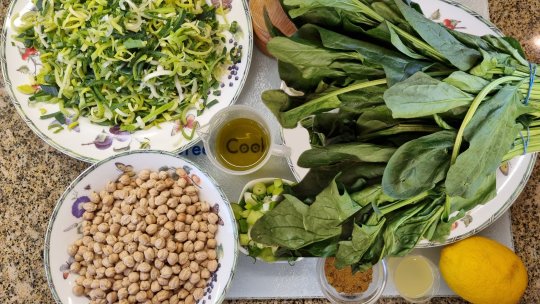
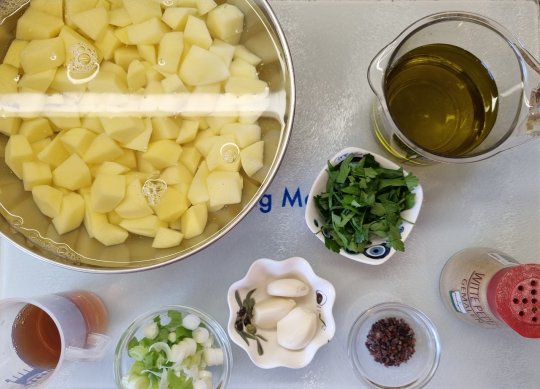
INGREDIENTS
Ingredients to soak and boil the chickpeas:
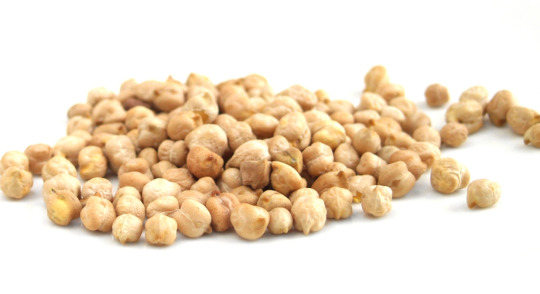
· 300 gr. / 10.5 oz Chickpeas (dried)
· 1 lt. / 4 cups Water
· Optional: 1 tsp. Baking Soda (if needed)
Ingredients for the Fricassee:
· 500 gr. / 1 lb 2 oz fresh Swiss Chard
· 200 gr. / 7 oz Leek, finely chopped
· 2 Spring Onions, in thin rounds
· 3/4 tbsp. ground Cumin
· 60 ml / 4 tbsp. Olive Oil
· 35-40 ml / 2-3 tbsp. fresh Lemon Juice
· Ground Salt and Pepper
METHOD:
A. Soak the chickpeas one day before cooking:
1. Place chickpeas in a deep bowl. Fill it up with plenty of water. This whole process will help dried chickpeas rehydrate, soften, swell and cook quicker.
2. If you are not sure how old your chickpeas are, you should better add 1 tsp. baking soda in the water and mix it in with a spoon.
3. Cover the bowl with plastic wrap and reserve for a minimum of 12 h, even better for a whole day, around 24h.
B. Parboil the chickpeas the next day:
4. Remove the wrap. Chickpeas should have swollen up and doubled in size.
5. Place them in a strainer, remove their water and rinse them well under running water for a couple min. While doing that, remove any detached peels.
6. Place a wide pot filled with 1 lt. water over medium heat. Add the drained chickpeas in the pot.
7. Let the chickpeas parboil for about 30' (this is an important step to soften the chickpeas and prevent bloating!).
8. With a mesh ladle, remove any foam from the surface.
9. After 30', chickpeas should be parboiled. Check them with a fork: it should go right through with a bit of effort. Turn off the heat.
10. Save aside 1 cup of the water where they boiled, to add to the sauce later.
11. Strain them once more and shed the rest of their water. Let them cool down a bit. Reserve.
C. Prepare the Swiss chard:
12. Cut the Swiss chard in half so they are not too long and place in a strainer.
13. Wash them thoroughly under cold running water to remove any soil remnants.
14. When greens are thoroughly washed, place them in a wide pot on top of low heat (without any extra water, as they will shed their own).
15. Press them to fit in the pot and place the lid on top. Greens may look too many, but they will shrink to 1/4 of their original size when boiled.
16. Gently simmer the greens for approx. 14'-15' or until their stems become soft and they wilt slightly.
17. Halfway, stir them a bit using a wooden spoon or a pierced ladle.
18. After a total of about 14'-15', check with a fork if they are done. The stems should be pierced through!
19. Remove from the heat, placing the boiled greens with their water in a deep plate. Let them cool down a bit.
D. Make the fricassee:
20. Pour 3 tbsp. Olive oil into a deep pot over high heat.
21. When oil heats up, add the spring onion rounds and chopped leak and let them sauté for 2'-3', stirring regularly.
22. Next reduce heat and add the parboiled chickpeas with their 1 cup reserved water in the pot.
23. Stir to mix them with the greens and sprinkle the ground cumin on top.
24. TIP: DO NOT add the lemon juice during baking-it will harden the chickpeas!!
25. Place the lid on top of the pot and simmer the dish for 15'.
26. After 15', add the boiled greens with their water and stir to mix them in. Boil them together for 5'.
27. Just before turning off the heat, season with ground salt and pepper, to taste. Drizzle the lemon juice on top.
28. Shake pot by its handles and lastly add 1 tbsp. olive oil on top. Turn off the heat.
29. Leave the pot aside with the lid on to cool down a bit and the sauce to set and thicken.

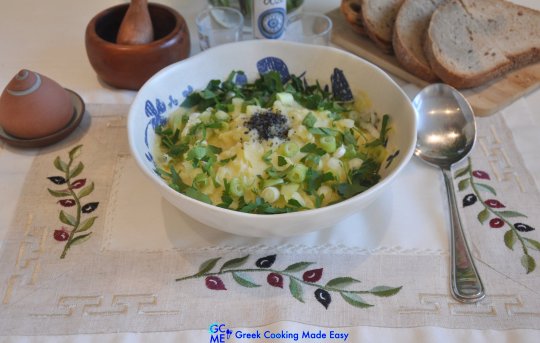
E. Serving suggestion:
Serve the Chickpea Fricassee while still hot.
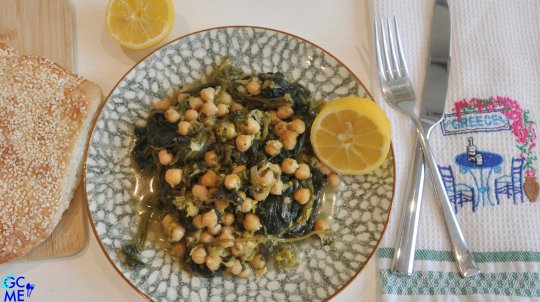
Serve it with a lemon wedge for those who would like it a bit more sour and plenty of Lagana bread (with tahini) to sop up the wonderful sauce.
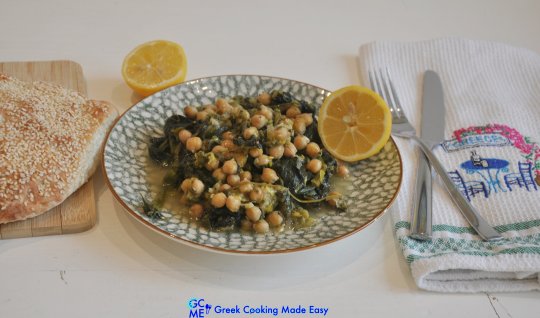
Yummy! The chickpeas melt in your mouth together with the spring onions and Swiss chard!
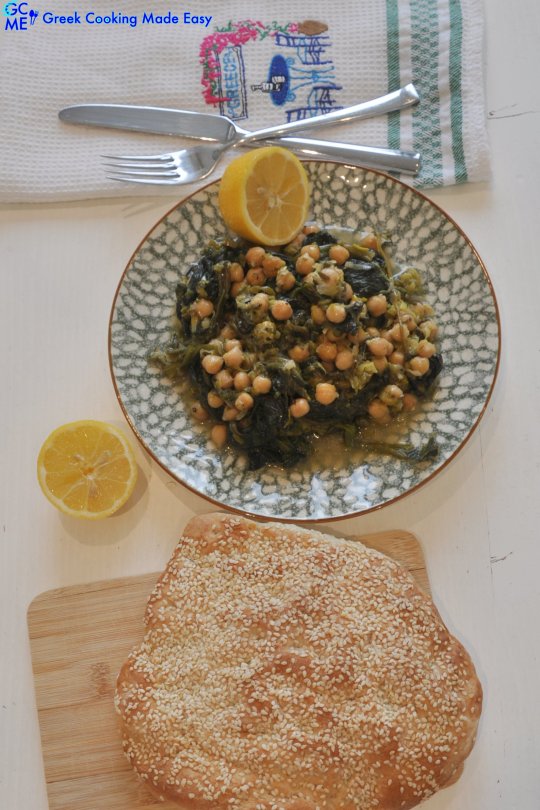
Enjoy!!
F. Storage info:
Leftovers could be stored in an airtight container in the fridge for 1 week.
G. Greece Tourist info:
The cultivation of chickpeas has been known from ancient times in the areas around the Mediterranean where chickpeas had been grown since 3000 to 4000 years BC. The first written reference for the chickpea is found in Homer's Iliad, at 1,000 to 800 BC. Theophrastos reports that chickpea has a deep root system while Dioscorides classifies it as a healthy food.
On the map of lentils on a world scale, chickpeas occupy the third place after beans and peas. In Greece, the Prefectures that chickpeas are mainly cultivated are Larissa, Fthiotida, Grevena and Kozani.
With excerpts from paragogi.net
Check my YouTube Video: HERE
Ρεβίθια με Σέσκουλα Φρικασέ Τήνου
BY: Greek Cooking Made Easy
SUBSCRIBE TO MY YOUTUBE CHANNEL: https://www.youtube.com/greekcookingmadeeasy
ΜΕΡΙΔΕΣ🍴⃒ ΠΡΟΕΤΟΙΜΑΣΙΑ 🕔⃒
4 45 min + 1 μέρα αναμονή
ΜΑΓΕΙΡΕΜΑ ♨ ΒΑΘΜ. ΔΥΣΚΟΛΙΑΣ 👩🍳⃒
Ρεβίθια: 30 min.
Σέσκουλα: 15 min
Φρικασέ: 20 min. Εύκολο-Μέτριο
Το Φρικασέ είναι γαλλική λέξη που χρησιμοποιείται και στην Ελληνική κουζίνα, περιγράφοντας ένα φαγητό κατσαρόλας από φέτες κρέας με φρέσκα χόρτα, σερβιρισμένο με λευκή σάλτσα λεμονιού. Παραδοσιακά, η πιο διαδεδομένη Ελληνική συνταγή για φρικασέ είναι με αρνί.
Αυτή η συνταγή είναι για ένα αρκετά εύκολο, ασυνήθιστο, νηστίσιμο φρικασέ, που συνδυάζει ρεβίθια με σέσκουλα. Μαγειρεύονται μαζί στη κατσαρόλα, με φρέσκα κρεμμυδάκια και πράσο σε μια πλούσια λεμονάτη σάλτσα (αντί για τη συνηθισμένη σάλτσα αυγολέμονο).
Το πιάτο προέρχεται από το πατρικό μου νησί της Τήνου στις Κυκλάδες.
Ένα νησί, πολύ κοντά στην καρδιά μου, ετοιμάζει αυτό το φανταστικό, υγιεινό γεύμα με τις πεντανόστιμες γεύσεις όλων των φρέσκων λαχανικών.
Είστε έτοιμοι να το δοκιμάσετε;
Κατάλληλο για βίγκαν και νηστεία.
Αγαπάτε τα Ρεβίθια και ψάχνετε και για άλλες Ιδέες/Συνταγές μου? Δείτε τις όλες ΕΔΩ
ΥΛΙΚΑ
Υλικά για το μούλιασμα και βράσιμο των ρεβιθιών:
• 300 γρ. / 10,5 oz Ρεβίθια (ξερά)
• 1 lt. / 4 φλιτζάνια Νερό
• Προαιρετικά: 1 κ.γ. Μαγειρική σόδα (αν χρειάζεται)
Υλικά για το φρικασέ:
• 500 γρ. / 1 lb 2 oz φρέσκα Σέσκουλα
• 200 γρ. / 7 oz Πράσο, ψιλοκομμένο
• 2 φρέσκα Κρεμμυδάκια, σε λεπτές ροδέλες
• 3/4 κ.σ. Κύμινο σκόνη
• 60 ml / 4 κ.σ. Ελαιόλαδο
• 35-40 ml / 2-3 κ.σ. φρέσκος χυμός Λεμονιού
• Φρεσκοαλεσμένο αλάτι και πιπέρι
ΜΕΘΟΔΟΣ:
Α. Μουλιάστε τα ρεβίθια μια μέρα πριν τα μαγειρέψετε:
1. Τοποθετήστε τα ρεβίθια σε ένα βαθύ μπολ. Γεμίστε το με άφθονο νερό. Όλη αυτή η διαδικασία θα βοηθήσει τα ξερά ρεβίθια να ενυδατωθούν, να μαλακώσουν, να φουσκώσουν και να μαγειρευτούν πιο γρήγορα.
2. Αν δεν είστε σίγουροι πόσο παλιά είναι τα ρεβίθια σας, καλύτερα να προσθέσετε 1 κ.γ. μαγειρική σόδα στο νερό και να την ανακατέψετε με ένα κουτάλι.
3. Καλύψτε το μπολ με πλαστική μεμβράνη και κρατήστε το για τουλάχιστον 12 ώρες, ακόμα καλύτερα για μια ολόκληρη μέρα, περίπου 24 ώρες.
Β. Την επόμενη μέρα μισοβράστε τα ρεβίθια:
4. Αφαιρέστε τη μεμβράνη. Τα ρεβίθια πρέπει να έχουν φουσκώσει και να έχουν διπλασιαστεί σε μέγεθος.
5. Βάλτε τα σε ένα σουρωτήρι, αφαιρέστε το νερό τους και ξεπλύνετε τα πολύ καλά κάτω από τρεχούμενο νερό για μερικά λεπτά. Ενώ το κάνετε αυτό, αφαιρέστε τυχόν αποκολλημένες φλούδες.
6. Βάλτε μια φαρδιά κατσαρόλα γεμάτη με 1 λτ. νερό πάνω από μέτρια φωτιά. Προσθέστε στην κατσαρόλα τα στραγγισμένα ρεβίθια.
7. Αφήστε τα ρεβίθια να μισοβράσουν για περίπου 30' (αυτό είναι ένα σημαντικό βήμα για να μαλακώσουν τα ρεβίθια και να μην σας φέρνουν φούσκωμα και αέρια!).
8. Με μια τρυπητή κουτάλα αφαιρέστε τυχόν αφρό από την επιφάνεια.
9. Μετά τα 30' τα ρεβίθια πρέπει να έχουν μισοβράσει. Ελέγξτε τα με ένα πιρούνι: πρέπει να τα τρυπάει με λίγη προσπάθεια. Σβήστε τη φωτιά.
10. Κρατήστε στην άκρη 1 φλιτζάνι από το νερό όπου έβρασαν, για να το προσθέσετε στη σάλτσα αργότερα.
11. Σουρώστε τα ρεβίθια άλλη μια φορά και χύστε το υπόλοιπο νερό τους. Αφήστε να κρυώσουν λίγο. Βάλτε τα στην άκρη.
Γ. Ετοιμάστε τα Σέσκουλα:
12. Κόψτε τα σέσκουλα στη μέση για να μην είναι πολύ μακριά και βάλτε τα σε σουρωτήρι.
13. Πλύντε τα καλά κάτω από κρύο τρεχούμενο νερό για να αφαιρέσετε τυχόν υπολείμματα χώματος.
14. Μόλις τα χόρτα πλυθούν καλά, τοποθετήστε τα σε μια φαρδιά κατσαρόλα πάνω σε χαμηλή φωτιά (χωρίς επιπλέον νερό, καθώς θα αποβάλλουν το δικό τους).
15. Πιέστε τα να χωρέσουν στην κατσαρόλα και τοποθετήστε από πάνω το καπάκι. Τα χόρτα μπορεί να φαίνονται πάρα πολλά, αλλά θα μαζέψουν στο 1/4 του αρχικού τους μεγέθους μόλις βράσουν.
16. Σιγοβράστε απαλά τα χόρτα για περ. 14'-15' ή μέχρι να μαλακώσουν τα κοτσάνια τους και να μαραθούν.
17. Στα μισά, ανακατέψτε τα λίγο χρησιμοποιώντας μια ξύλινη ή τρυπητή κουτάλα.
18. Μετά από συνολικά 14'-15' περίπου, τσεκάρετε με ένα πιρούνι αν έχουν βράσει. Τα κοτσάνια τους πρέπει να τρυπιούνται εύκολα!
19. Αποσύρετε από τη φωτιά, βάζοντας τα βρασμένα χόρτα με το νερό τους σε ένα βαθύ πιάτο. Αφήστε να κρυώσουν λίγο.
Δ. Φτιάξτε το Φρικασέ:
20. Ρίξτε 3 κ.σ. Ελαιόλαδο σε μια βαθιά κατσαρόλα πάνω από δυνατή φωτιά.
21. Μόλις ζεσταθεί το λάδι, προσθέστε τα φρέσκα κρεμμυδάκια και τα ψιλοκομμένα πράσα και αφήστε να σοταριστούν για 2'-3', ανακατεύοντας τακτικά.
22. Στη συνέχεια χαμηλώστε τη φωτιά και προσθέστε μέσα στην κατσαρόλα τα ρεβίθια με το 1 φλιτζάνι κρατημένο νερό τους.
23. Ανακατέψτε να αναμιχθούν με τα σοταρισμένα χόρτα και πασπαλίστε από πάνω το κύμινο.
24. ΣΥΜΒΟΥΛΗ: ΜΗΝ βάλετε το χυμό λεμονιού κατά τη διάρκεια του βρασίματος-θα σκληρύνει τα ρεβίθια!!
25. Βάλτε το καπάκι πάνω από την κατσαρόλα και σιγοβράστε το φαγητό για 15'.
26. Μετά από 15' προσθέστε τα βρασμένα σέσκουλα με το νερό τους και ανακατέψτε να αναμιχθούν. Βράστε τα μαζί για 5'.
27. Λίγο πριν σβήσετε τη φωτιά, αλατοπιπερώστε κατά βούληση. Περιχύστε από πάνω και το χυμό λεμονιού.
28. Ανακινήστε την κατσαρόλα από τα χερούλια της και προσθέστε στο τέλος 1 κ.σ. ελαιόλαδο από πάνω. Σβήστε τη φωτιά.
29. Αφήστε την κατσαρόλα στην άκρη με το καπάκι να κρυώσει λίγο και η σάλτσα να δέσει και να πήξει.
Ε. Πρόταση σερβιρίσματος:
Σερβίρετε το φρικασέ με ρεβίθια όσο είναι ακόμα ζεστό.
Σερβίρετε με μισό λεμόνι στο πλάι για όσους το θέλουν λίγο πιο ξινό και μπόλικη λαγάνα (με ταχίνι) για να βουτήξετε στην υπέροχη σάλτσα.
Πεντανόστιμο! Τα ρεβίθια λιώνουν στο στόμα μαζί με τα φρέσκα κρεμμυδάκια και το σέσκουλο!
Απολαύστε το!!
Ζ. Πληροφορίες φύλαξης:
Τα υπολείμματα μπορούν να φυλαχθούν σε αεροστεγές δοχείο στο ψυγείο για 1 εβδομάδα.
Η. Τουριστικός Οδηγός Ελλάδας:
Η καλλιέργεια των ρεβιθιών ήταν γνωστή από αρχαιοτάτων χρόνων στις περιοχές γύρω από τη Μεσόγειο όπου είχε αρχίσει να καλλιεργείται 3.000 - 4.000 χρόνια π.Χ.
Η πρώτη γραπτή αναφορά για το ρεβίθι απαντάται στην Ιλιάδα του Ομήρου, στο 1.000 έως 800 π.Χ.
Στο χάρτη των οσπρίων σε παγκόσμια κλίμακα, τα ρεβίθια καταλαμβάνουν την τρίτη θέση μετά τα φασόλια και τα μπιζέλια.
Στην Ελ��άδα σε επίπεδο Νομών οι μεγαλύτερες εκτάσεις καλλιεργούνται κυρίως στους Νομούς Λάρισας, Φθιώτιδας, Γρεβενών και Κοζάνης
Αποσπάσματα από το paragogi.net
Κοιτάξτε επίσης την συνταγή μου σε YouTube βίντεο, το λίνκ είναι: ΕΔΩ
#Youtube#dinner#maincourse#vegetables#beans#lowcost#vegetarian#vegan#diet#fasting#gluten#lactose#region#aegean#spring#chickpeas and swiss chard fricassee#lenten fricassee#vegan fricassee#ρεβιθια και σεσκουλα φρικασε#ρεβίθια και σέσκουλα φρικασέ#φρικασε#φρικασέ
0 notes
Text
Greek Mushrooms Stifado Aka Stew With Onions And Spices
🍄

Greek Mushrooms Stifado aka Stew with Onions and spices - Manitaria Stifado
BY: Greek Cooking Made Easy
SUBSCRIBE TO MY YOUTUBE CHANNEL: https://www.youtube.com/greekcookingmadeeasy
Check My YouTube Video: HERE
Κοιτάξτε Επίσης Την Συνταγή Μου Σε YouTube Βίντεο, Το Λίνκ Είναι: ΕΔΩ
youtube
SERVES 🍴⃒ PREP. TIME 🕔⃒
4 persons 15 min.
COOK. TIME ♨ DIFFIC. LEVEL 👩🍳⃒
About 1 hour Easy

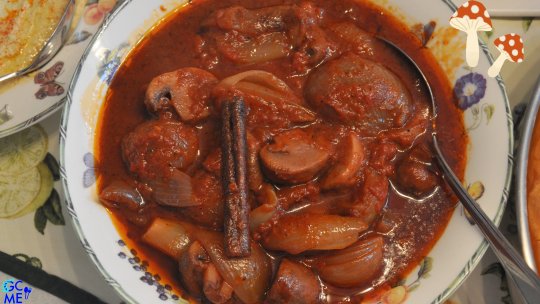
This is the Lenten and Vegan variation to the renowned, rustic Greek dish "Stifado".
Mushrooms are known for their unique flavor profile, referred to as “umami.” The white Mushrooms (buttons) used in this recipe, have a milder, lightly earthy and most importantly meaty texture and flavor. Cooking intensifies their flavor, giving them an even meatier taste with the extra advantage that they absorb all the flavors from the lush sauce and warming spices.
Onions are the most important ingredient in this recipe, so look out for my tip how to easily clean them and not cry!
Suitable for vegans and fasting.
INGREDIENTS:
· 600 gr. / 1.3 lb Shallots (Baby Onions) or large Onions, cut in half
· 400 gr. / 14 oz White Mushrooms (buttons), small or cut in half
· 400 gr. / 14 oz sliced Tomatoes, canned (concassé)
· 2 Garlic Cloves, cut in small slices
· 1/2 cup / 125 ml Olive Oil
· 2/3 cup / 165 ml. Strong Red Wine (like Xinomavro)
· 1 tsp. All-Spice (bahari)
· 2 Bay Leaves
· 1 Cinnamon stick
· Ground Salt and Pepper
METHOD:
A. Prepare the onions and mushrooms:
1. ADVICE: Peel the onions first. An easy way is to first cut both ends. Then cut a small slice of the skin vertically and easily peel off the rest. To prevent your eyes from running, open windows to make a draft and place a piece of soft bread between your lips! I promise you it works 🤣! Wash the cleaned onions to remove any leftover skin. Place them in a container with lukewarm water for an hour, to remove its sharp smell and taste.
2. Strain them and if you have purchased large onions like me, cut them vertically in half. Reserve.
3. Mushrooms should not be washed. Instead, clean them with a brush, removing any leftover soil from each mushroom.
4. Next, if they are large like mine, cut them vertically in half. Place them in a bowl. Reserve.
B. Make the Stifado:
5. Pour half of the Olive Oil into a deep pot over medium-high heat.
6. When oil heats up, sauté the onions first for about 3'. Shake pot regularly to sauté onions until glazed all around.
7. Next add the garlic slices and mushrooms and sauté them together 2'-3', stirring gently.
8. Adjust heat to low and deglaze by pouring in the wine.
9. Stir in the canned tomatoes and all-spice next.
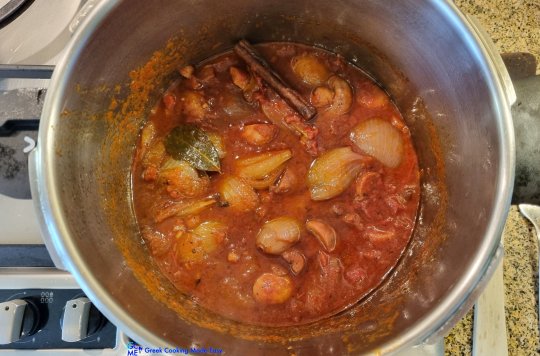
10. Dip in the sauce the bay leaves and cinnamon stick.
11. Lower heat to minimum! Take pot by the handles and shake stifado gently to mix all ingredients.
12. Place the lid on top of the pot and let Stifado slowly simmer for approx. 55' - 1 hour.
13. After 45', remove the lid and continue simmering for 15' more.
14. After about 1 h Stifado must be ready. Pierce with a wooden skewer a couple or mushrooms to check if they are fork tender!
15. Season with Ground Pepper and Salt, to taste and finally pour in the rest of oil.
16. Shake the pot by its handles once more to incorporate the seasoning and oil in the sauce and turn off the heat.
17. Let Stifado rest for 10' before serving. Sauce is now thicker with an aromatic, rustic, Umami taste!
C. Serving Suggestions:
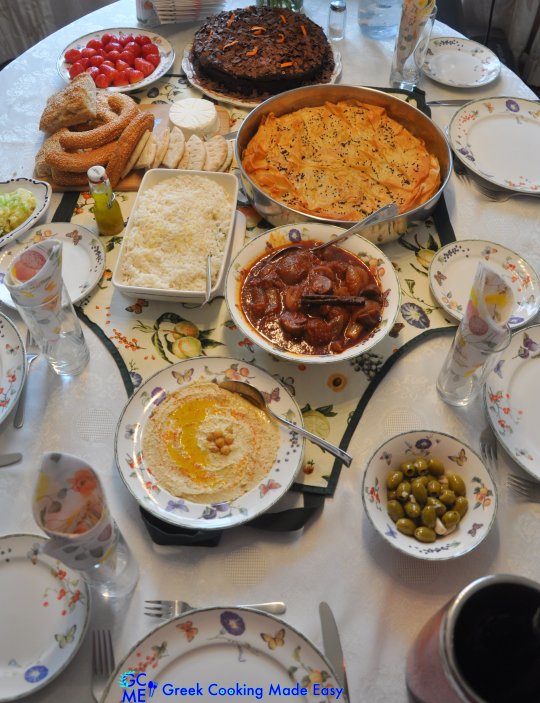
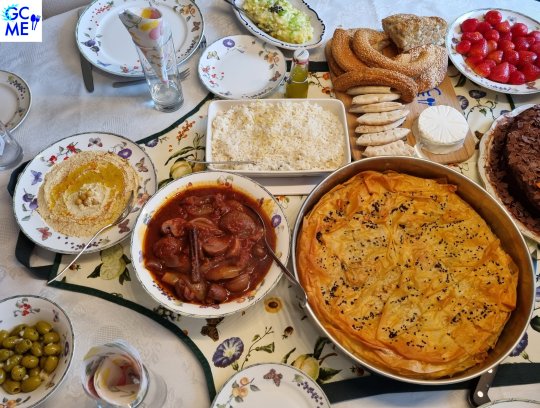
The best way to serve this lenten Mushroom Stifado is with Pilaf Rice.
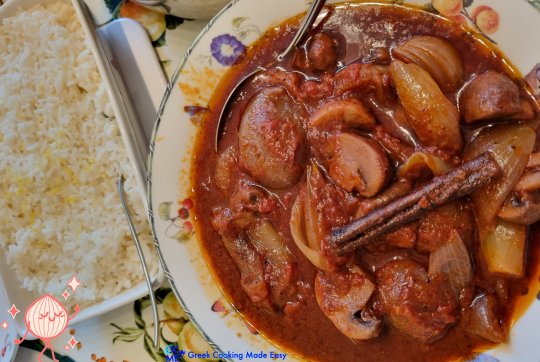
Here you see it as part of my Son's Birthday celebration where I prepared a whole Vegan dinner.
Mushroom Stifado is served together with:
🍄 Vegan Pilaf Rice (with margarine instead of butter)
🍄 Country Spinach and Leak Pie-Prasospanakopita
🍄 Skordalia with potatoes (garlic sauce)
🍄 Hummus
🍄 Lagana bread with Tahini (no oil)
🍄 Small Pita breads
🍄 Koulouri Thessalonikis Sesame Bread Rings
🍄 Green Olives
🍄 Chocolate Vegan Birthday Cake
🍄 Vegan "Brie" cheese and
🍄 A bowl with fresh Strawberries

An indulging, new way to enjoy the famous Stifado during fasting or if you are avoiding meat for health reasons or if you are a vegan.
An incredibly rich, umami dish, with onions and mushrooms perfectly glazed! Have a close look.
Needless to say that this dish can be made with a variety of meats, like beef, rabbit, as well as borlotti beans or even octopus!
Enjoy it!

D. Storage info:
Leftovers can be stored, in an airtight container, in the fridge for 1 week or in the freezer for 1 month.
E. More Info about Mushroom Stifado:
🚩 Info about Mushrooms:
Mushrooms are not just flavourful but also healthy and nutritious. Mushrooms are sources of potassium, Vitamine D, vitamin B6, and selenium. There are so many varieties to choose from, but are all considered quite healthy, low in calories and with the characteristic Umami flavour.
While mushrooms have been part of the human diet since antiquity, intensive commercial cultivation is relatively new in Greece.
The market opportunities for mushrooms in Greece are impressive. Presently Greece consumes about 11,000 tons mushrooms per year while only 3000 tons are locally produced. The other 7-9,000 tons are imported.
🚩 Info about the meaning of Umami:
Umami means “delicious savory taste” in Japanese. It's that fifth taste on the tongue that's often missed behind sweet, salty, sour and bitter, often described as robust and rich— reminiscent of meat— with a hint of saltiness. Some examples of Umami dishes are: seafood, meats, aged cheeses, seaweeds, soy foods, mushrooms, tomatoes, kimchi, green tea, and many others.
Interesting? See more examples of Umami Dishes HERE
🚩 Info about Stifado:
Stifado, pronounced stiff-ah-do, is a hearty Greek (usually) beef stew seasoned with warming spices, red wine, and loads of pearl onions.
The word Stifado comes from the ancient Greek word tifos meaning steam and it's similar to the cooking term stew. This is the root for the Latin word estufare, from which the Italian stufato (or Venetian stufado), the Italian word for stew, was born.
Originally the recipe was brought to Greece in the 13th century by the Venetians.
Check my YouTube Video: HERE
#Youtube#dinner#maincourse#vegetables#vegetarian#vegan#fasting#lowcost#region#foreign#gluten#lactose#keto#mushrooms stifado#stifado#vegan stifado#μανιταρια στιφαδο#μανιτάρια στιφάδο#στιφαδο#lenten greek stifado
3 notes
·
View notes
Text
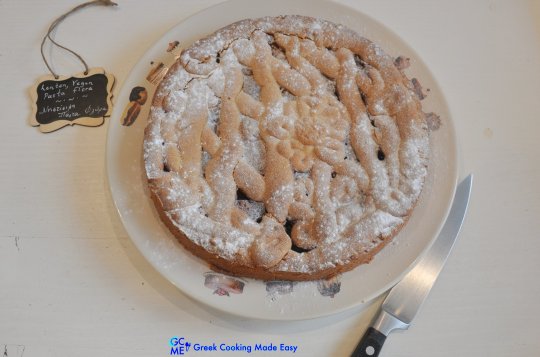
Greek Lenten & Vegan Two-Coloured Jam Tart Aka Pasta Flora
🥧

Greek Lenten & Vegan two-Colored Jam Tart aka Pasta Flora - Pasta Flora Nistisimi Dihrwmi
BY: Greek Cooking Made Easy
SUBSCRIBE TO MY YOUTUBE CHANNEL: https://www.youtube.com/greekcookingmadeeasy
Check My YouTube Video: HERE
Κοιτάξτε Επίσης Την Συνταγή Μου Σε YouTube Βίντεο, Το ��ίνκ Είναι: ΕΔΩ
youtube
SERVES 🍴⃒ PREP. TIME 🕔⃒
12 pers. 20 min. + 1 day wait
COOK. TIME ♨ DIFFIC. LEVEL 👩🍳⃒
45-50 min. Easy
To be clear, this is not a pasta dish; instead it's a delicious tart, with "pasta" meaning in Greek “a piece of sweet”.
The tart has a buttery, crispy cookie-like dough & two-colored jam filling, either ready-made or homemade which makes it taste even better.
This is the Lenten version to the authentic recipe, and I have some very good news for you: it tastes exactly the same, while it's healthier, plus it's suitable for vegans and for those fasting and yearning for something sweet!
Let's start with the recipe.
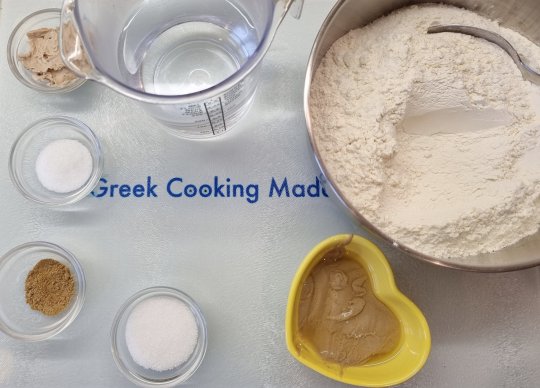
INGREDIENTS:
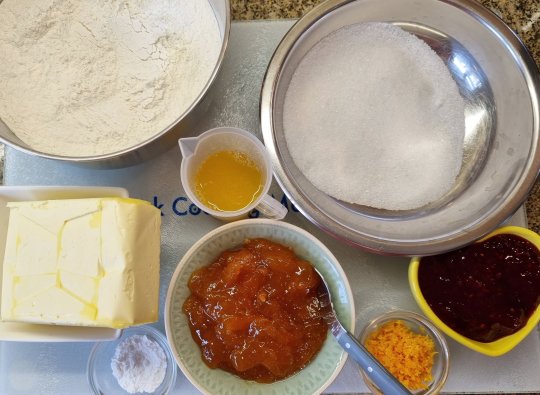
· 3.5 cups / 440 gr. / 14.5 oz Self-raising or All-purpose Flour
· 250 gr. / 9 oz Margarine, at room temp.
· About 0.5 cup / 100 gr. / 3.5 oz Sugar
· 1 cup / 315 gr. / 11 oz any (homemade) Jam (e.g. 1/2 Apricot, 1/2 forest fruits)
· 1 tsp. Baking powder
· 1/4 cup / 60 ml Fresh Orange Juice
· Zest of 1 Orange
· Optional: 1 shot Brandy or Pomegranate Liqueur or 1 tsp. Vanilla Essence
· Optional: Powder Sugar to garnish
METHOD:
A. Prepare the dough the day before:
1. Note: In this recipe I have used self-raising flour, which resulted in a fluffier, puffed pie. If you prefer a crispier pie, then use the all-purpose flour instead. Recipe works with either, tastes the same, only the texture differs a bit.
2. Using an electric mixer, cream the (soft) margarine together with the sugar on high speed for 5' or until mixture is light-colored and fluffy.
3. Reduce speed and fold in the flour spoon by spoon, blending it evenly into the mix.
4. Next add the orange juice and zest and optionally the brandy or pomegranate shot, before folding rest of flour.
5. Lastly add the baking powder, beating just enough to incorporate it.
6. Stop the mixer.
7. Test with your fingers to see if the dough is ready to be worked with.
8. If it is smooth and elastic and doesn’t stick to your fingers, then it is ready. If it is too hard and crumbly, add a bit of orange juice. If it is too soft and sticky, add a bit of flour.
9. Then let the dough rest, covered with plastic wrap, in the fridge for one day, for best result.
B. Assemble the pie:
10. Next day, take the dough out of the fridge one hour before assembling the pie to reach room temp.
11. Spray or brush some oil into a round pie tin of 26 cm / 10 in with side opening (bottom and sides).
12. Line 3/4 of the dough evenly into the cake tin, raising it with your fingers a bit around the edges. Reserve the 1/4 of the dough to make shapes on top of the pie.
13. With a small fork, make little holes all around the dough, to prevent it from rising too much during baking.
14. Spread the 2 jams evenly over the dough: the apricot jam on one half of the surface and the forest fruits jam on the other half.
15. Roll out the rest of dough into long thin strips on a flat surface. Lay them across the filling in a lattice pattern.
16. At this point, if you want to be creative, make other shapes like I did: small flowers, leaves etc.
17. Ready for baking.
C. Baking instructions:
18. Bake Pasta Flora Tart in a preheated oven FAN @170 ℃/340 ℉ for around 45'-50' or until it becomes golden brown (depends on the oven).
19. You will also know it is ready, when you insert a knife and it comes out clean! When ready, leave it on a rack to cool down.
20. When Pasta Flora has cooled down, remove the tin and easily serve it on a nice platter.
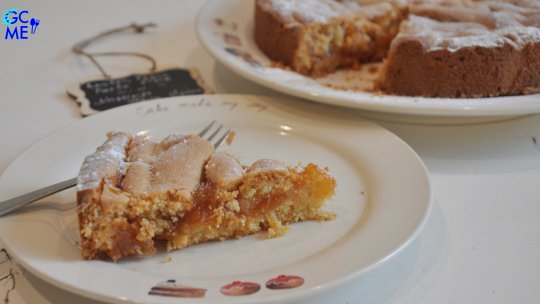
D. Serving instructions:
21. Optionally, you could garnish it by sprinkling some powder sugar on top.
To serve, cut it in triangular slices.
Makes for a great breakfast, as well as afternoon tea/coffee time treat.
An amazingly delicious tart that can be eaten all year round using seasonal fruit jams!

Crispy and crumbly outside while juicy and fruity inside! Yummy!
Enjoy it!!

E. Storage info:
To prevent it from becoming soggy, it can be stored for a whole week, if covered with a towel.
F. More info about Pasta Flora:
This tart is one of the most beloved sweets for the Greeks, served for breakfast or tea time, it is a common sight in Greek bakeries and pastry shops, in all sizes, from small individual tarts topped with jam to large family sized ones.
Pasta Flora was very fashionable in the 60's and my mom Elsa used to make it quite often, using homemade jam. I have fond memories of my childhood years "helping" her make the long strips on top. I was rolling and molding them on the table for so long as if they were play dough; at the end they were so dirty that they couldn't be used on the tart anymore.... 😂. I did admire her patience!

Recipe originates from Italy where Pasta Frola means dough that is rubbed. It is also found in many Latin American countries.
Check my YouTube Video: HERE
Πάστα Φλώρα Νηστίσιμη Δίχρωμη
BY: Greek Cooking Made Easy
SUBSCRIBE TO MY YOUTUBE CHANNEL: https://www.youtube.com/greekcookingmadeeasy
ΜΕΡΙΔΕΣ🍴⃒ ΠΡΟΕΤΟΙΜΑΣΙΑ 🕔⃒
12 20 min. + 1 μέρα αναμονή
ΜΑΓΕΙΡΕΜΑ ♨ ΒΑΘΜ. ΔΥΣΚΟΛΙΑΣ 👩🍳⃒
45-50 min. Εύκολη
Για να είμαι σαφής, αυτό δεν είναι ένα πιάτο ζυμαρικών. Αντίθετα, είναι μια νόστιμη τάρτα, μιας και «πάστα» σημαίνει ένα κομμάτι γλυκό.
Η Πάστα Φλώρα έχει βουτυράτη, τραγανή ζύμη σαν μπισκότο & δίχρωμη γέμιση από μαρμελάδα είτε έτοιμη ή σπιτική που της δίνει ακόμα καλύτερη γεύση.
Αυτή είναι η νηστίσιμη εκδοχή της αυθεντικής συνταγής και σας έχω πολύ καλά νέα: έχει ακ��ιβώς την ίδια γεύση, ενώ είναι πιο υγιεινή, συν είναι κατάλληλη για βίγκαν και για όσους νηστεύουν και λαχταρούν κάτι γλυκό!
Ας ξεκινήσουμε να δούμε τη συνταγή.
ΥΛΙΚΑ:
• 3,5 φλ. / 440 γρ. / 14,5 oz Αλεύρι που φουσκώνει μόνο του ή γ.ο.χ.
• 250 γρ. / 9 oz Μαργαρίνη σε θερμοκρασία δωματίου
• Περίπου 0,5 φλ. / 100 γρ. / 3,5 oz Ζάχαρη
• 1 φλ. / 315 γρ. / 11 oz οποιαδήποτε (σπιτική) μαρμελάδα (π.χ. 1/2 βερίκοκο, 1/2 φρούτα του δάσους)
• 1 κ.γ. Μπέικιν πάουντερ
• 1/4 φλ. / 60 ml φρέσκος χυμός Πορτοκαλιού
• Ξύσμα από 1 Πορτοκάλι
• Προαιρετικά: 1 σφηνάκι Μπράντυ ή λικέρ Ρόδι ή 1 κ.γ. Αρωμα βανίλιας
• Προαιρετικά: Ζάχαρη άχνη για γαρνίρισμα
ΜΕΘΟΔΟΣ:
Α. Ετοιμάστε τη ζύμη από την προηγούμενη μέρα:
1. Σημείωση: Σε αυτή τη συνταγή έχω χρησιμοποιήσει αλεύρι που φουσκώνει μόνο του, το οποίο είχε ως αποτέλεσμα πιο αφράτη, φουσκωτή ζύμη. Αν προτιμάτε πιο τραγανή ζύμη, τότε χρησιμοποιήστε το αλεύρι για όλες τις χρήσεις. Η συνταγή λειτουργεί και με τα δύο, η γεύση είναι ίδια, μόνο η υφή διαφέρει λίγο.
2. Χρησιμοποιώντας ηλεκτρικό μίξερ χτυπήστε τη (μαλακή) μαργαρίνη μαζί με τη ζάχαρη σε δυνατή ταχύτητα για 5' ή μέχρι το μείγμα να γίνει ανοιχτόχρωμο, κρεμώδες και αφράτο.
3. Χαμηλώστε την ταχύτητα και διπλώστε μέσα το αλεύρι κουταλιά κουταλιά, ανακατεύοντάς το ομοιόμορφα μέσα στο μείγμα.
4. Στη συνέχεια προσθέστε τον χυμό και το ξύσμα πορτοκαλιού και προαιρετικά το σφηνάκι κονιάκ ή λικέρ ρόδι, πριν διπλώσετε το υπόλοιπο αλεύρι.
5. Τέλος προσθέστε το μπέικιν πάουντερ χτυπώντας μόνο όσο χρειάζεται να ενσωματωθεί.
6. Σταματήστε το μίξερ.
7. Δοκιμάστε με τα δάχτυλά σας για να δείτε αν η ζύμη είναι έτοιμη για επεξεργασία.
8. Αν είναι λεία και ελαστική και δεν κολλάει στα δάχτυλά σας, τότε είναι έτοιμη. Αν είναι πολύ σκληρή και εύθρυπτη, προσθέστε λίγο χυμό πορτοκαλιού. Αν είναι πολύ μαλακή και κολλάει, προσθέστε λίγο αλεύρι.
9. Στη συνέχεια, αφήστε τη ζύμη να ξεκουραστεί, σκεπασμένη με πλαστική μεμβράνη, στο ψυγείο για μία μέρα, για να έχετε το καλύτερο αποτέλεσμα.
Β. Συναρμολογήστε την Πάστα Φλώρα:
10. Την επόμενη μέρα, βγάλτε τη ζύμη από το ψυγείο μία ώρα πριν συναρμολογήσετε τη πίτα για να φτάσει σε θερμοκρασία δωματίου.
11. Ψεκάστε ή αλείψτε λίγο λάδι στο κάτω μέρος και πλαϊνά μιας στρογγυλής φόρμας για πίτα 26 cm / 10 in με άνοιγμα στο πλάι (τσέρκι).
12. Στρώστε ομοιόμορφα τα 3/4 της ζύμης μέσα στη φόρμα, ανασηκώνοντάς την με τα δάχτυλά σας λίγο γύρω γύρω στις άκρες. Κρατήστε το 1/4 της ζύμης για να κάνετε σχήματα πάνω από την πίτα.
13. Με ένα μικρό πιρούνι κάντε τρυπούλες στη ζύμη, για να μην φουσκώσει πολύ κατά το ψήσιμο.
14. Απλώστε ομοιόμορφα τις 2 μαρμελάδες πάνω στη ζύμη: τη μαρμελάδα βερίκοκο στη μισή επιφάνεια και τη μαρμελάδα με φρούτα του δάσους στην άλλη μισή.
15. Ανοίξτε την υπόλοιπη ζύμη σε μακριές λεπτές λωρίδες πάνω σε επίπεδη επιφάνεια. Απλώστε τις κατά μήκος της γέμισης ώστε να κάνουν δικτυωτό σχέδιο.
16. Σε αυτό το σημείο, αν θέλετε να είστε πιο δημιουργικοί, φτιάξτε κι άλλα σχήματα όπως έκανα εγώ: μικρά λουλούδια, φύλλα κ.λπ.
17. Έτοιμη για ψήσιμο.
Γ. Οδηγίες ψησίματος:
18. Ψήστε τη Πάστα Φλώρα σε προθερμασμένο φούρνο στον αέρα @170 ℃/340 ℉ για περίπου 45'-50' ή μέχρι να ροδίσει (εξαρτάται από τον φούρνο).
19. Θα ξέρετε επίσης ότι είναι έτοιμη, όταν βάλετε ένα μαχαίρι στο κέντρο και βγει καθαρό! Μόλις είναι έτοιμη, αφήστε τη στη σχάρα να κρυώσει.
20. Μόλις κρυώσει η Πάστα Φλώρα, αφαιρέστε εύκολα το ταψί και σερβίρετε σε μια ωραία πιατέλα.
Δ. Οδηγίες σερβιρίσματος:
21. Προαιρετικά, μπορείτε να τη γαρνίρετε πασπαλίζοντας από πάνω λίγη ζάχαρη άχνη.
Για να σερβίρετε κόψτε τη σε τριγωνικές φέτες.
Αποτελεί ένα υπέροχο πρωινό, καθώς και κέρασμα για απογευματινό τσάι/καφέ.
Μια εκπληκτικά νόστιμη τάρτα που τρώγεται όλο το χρόνο χρησιμοποιώντας μαρμελάδες με φρούτα εποχής!
Τραγανή και εύθρυπτη απέξω ενώ ζουμερή και φρουτώδης εσωτερικά! Πεντανόστιμη!
Απολαύστε τη!!
Ε. Πληροφορίες Φύλαξης:
Για να μην πανιάσει, μπορεί να φυλαχτεί για μια ολόκληρη εβδομάδα, αν σκεπαστεί με πετσέτα.
Ζ. Έξτρα πληροφορίες για τη Πάστα Φλώρα:
Αυτή η τάρτα είναι ένα από τα πιο αγαπημένα γλυκά των Ελλήνων, σερβίρεται για πρωινό ή για τσάι, και είναι συνηθισμένο θέαμα στα αρτοποιεία και ζαχαροπλαστεία, σε όλα τα μεγέθη, από μικρές ατομικές τάρτες με μαρμελάδα μέχρι μεγάλες οικογενειακές.
Η Πάστα Φλώρα ήταν πολύ στη μόδα τη δεκαετία του '60 και η μαμά μου Έλσα την έφτιαχνε αρκετά συχνά, χρησιμοποιώντας σπιτική μαρμελάδα.
Έχω όμορφες αναμνήσεις από τα παιδικά μου χρόνια που τη «βοηθούσα» να φτιάξει τις μακριές λωρίδες από πάνω. Τις κυλούσα και τις έπλαθα στο τραπέζι για τόση ώρα σαν να ήταν πλαστελίνη. Στο τέλος ήταν τόσο βρώμικες που δεν μπορούσαν να χρησιμοποιηθούν άλλο στην Πάστα Φλώρα.... 😂. Θαύμαζα την υπομονή της!
Η συνταγή προέρχεται από την Ιταλία όπου Pasta Frola σημαίνει ζύμη που τρίβεται. Είναι επίσης πολύ γνωστή σε πολλές χώρες της Λατινικής Αμερικής.
Κοιτάξτε επίσης την συνταγή μου σε YouTube βίντεο, το λίνκ είναι: ΕΔΩ
#Youtube#πάστα φλώρα#πασταφλωρα#νηστισιμηπασταφλωρα#pastaflora#breakfast#desserts#pie#pastry#fruit#jam#lowcost#vegetarian#vegan#fasting#lentsweets#children#lactose#region#foreign
1 note
·
View note
Text
How To Make Bunny Napkins For Your Easter Table
🐰

How To make Bunny Napkins for your Easter Table - Πώς να φτιάξετε Κουνελάκια χαρτοπετσέτες για το Πασχαλινό σας Τραπέζι
BY: Greek Cooking Made Easy
SUBSCRIBE TO MY YOUTUBE CHANNEL: https://www.youtube.com/greekcookingmadeeasy
Check My YouTube Short Video: HERE
Κοιτάξτε Την Συνταγή Μου Σε Short YouTube Βίντεο, Το Λίνκ Είναι: ΕΔΩ
youtube
These super cute and easy to prepare napkins are made with just an Easter decorated paper napkin and a ribbon and are meant to hold your dyed Eggs. After all, a small detail can make a big difference in the decoration, bringing an extra festive note to your Easter Sunday table. Try them.
Αυτές οι σούπερ χαριτωμένες και εύκολες στην ετοιμασία πετσετούλες φτιάχνονται μόνο χρησιμοποιώντας μια πασχαλινά διακοσμημένη χαρτοπετσέτα και μια κορδέλα, και προορίζονται για να κρατήσουν μέσα τους τα βαμμένα αυγά σας.
Άλλωστε, μια μικρή λεπτομέρεια μπορεί να κάνει μεγάλη διαφορά στο στολισμό φέρνοντας μια έξτρα γιορταριστή νότα στο στο τραπέζι της Κυριακής του Πάσχα. Δοκιμάστε τις.


#party#lunch#χαρτοπετσετες κουνελακια#easter table#easter#easter food#egg#How to make Bunny Napkins for your Easter Table#How to make Bunny Napkins for Easter#Bunny Napkins#Bunny Napkins for your Easter Table#Πώς να φτιάξετε Κουνελάκια χαρτοπετσέτες για το Πασχαλινό σας Τραπέζι#Πώς να φτιάξετε Κουνελάκια χαρτοπετσέτες#Κουνελάκια χαρτοπετσέτες#Κουνελάκια χαρτοπετσέτες για το Πασχαλινό σας Τραπέζι#bunny napkins#Youtube#χαρτοπετσέτες κουνελάκια#κουνελακια#πασχα#πασχαλινη διακοσμηση
1 note
·
View note
Text
Boiled Beetroot And Cabbage Salad
🥗
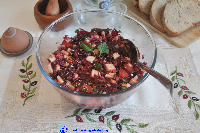
Boiled Beetroot and Cabbage Salad - Pantzaria kai Lahano Salata
BY: Greek Cooking Made Easy
SUBSCRIBE TO MY YOUTUBE CHANNEL: https://www.youtube.com/greekcookingmadeeasy
Check My YouTube Video: HERE
Κοιτάξτε Επίσης Την Συνταγή Μου Σε YouTube Βίντεο, Το Λίνκ Είναι: ΕΔΩ
youtube
SERVES 🍴⃒ PREP. TIME 🕔⃒
4-5 pers. 25 min.
COOK. TIME ♨ DIFFIC. LEVEL 👩🍳⃒
- Easy
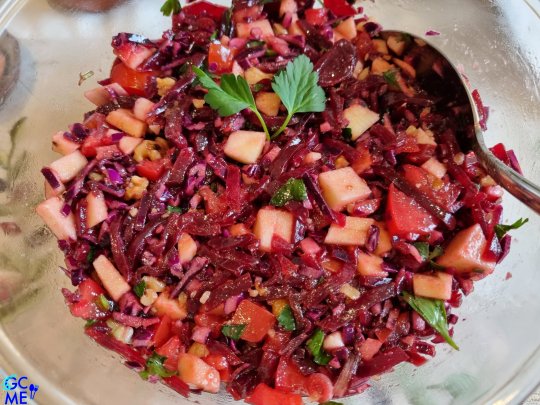
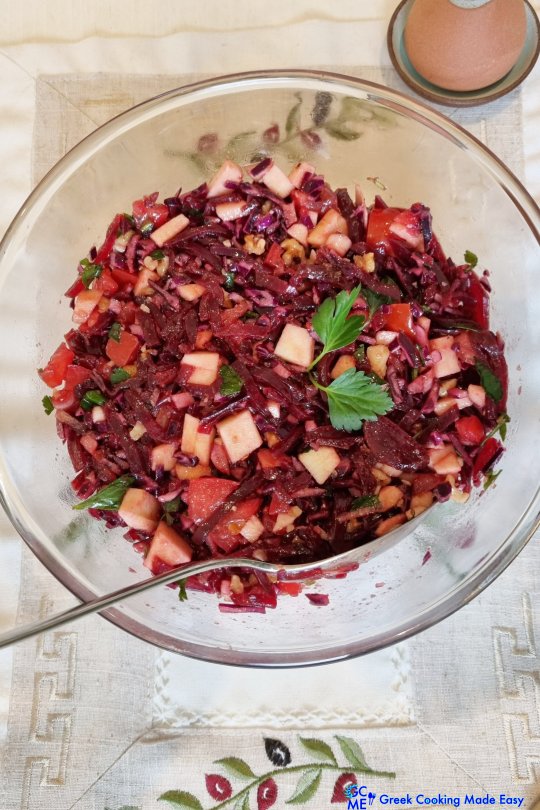
This beautiful Greek Super Salad is packed with amazing fresh and boiled vegetables, fruits and nuts and has a lush vinaigrette sauce. It's filled with so many complimenting flavors and nutrients to satisfy everybody.
I have prepared it to accompany my traditional dinner of fried salted cod and Garlic Sauce (aka Bakaliaros Skordalia) for March 25th, Greece's Independence Day. However, it can be prepared all year round to accompany any kind of meat, chicken or fish dishes.
It resembles somewhat the renowned Politiki Salad, but with beetroots as the main ingredient.
Let me show you how to prepare it.
Suitable for vegans and fasting.
INGREDIENTS
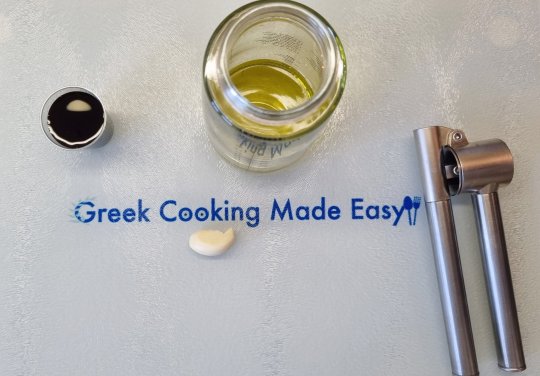
Ingredients for the vinaigrette sauce:
· 1/4 cup / 60 ml / 4 tbsp. Extra Virgin Olive Oil
· 30 ml / 2 tbsp. Balsamic Vinegar
· 1 small Garlic Clove
· Freshly Ground Salt and Pepper
Ingredients for the Salad:
· 250 gr. / 9 oz boiled Beetroots, cut in strips
· 200 gr. / 7 oz Red Cabbage (or white or combo), finely shredded
· 200 gr. / 7 oz Tomatoes, finely chopped
· 1-2 Spring Onions, finely chopped
· 2 tbsp. Celery leaves, finely chopped
· 60 gr. / 2.1 oz / less than 1/2 cup Walnuts, coarsely chopped
· ½ Green Apple, in cubes (Granny Smith, or other with sour taste)
· Optional: Feta cheese, crumbled (or vegan substitute)

METHOD:
A. Prepare the vinaigrette ahead of time:
1. If you have a bottle where you can make and mix the vinaigrette sauce (like me) that would be great. Otherwise, use a bowl with lid and a whisk.
2. Pour the Olive oil in the bottle, adding also the balsamic vinegar.
3. Add the garlic clove next, minced.
4. Season with ground Salt and Pepper, to taste.
5. Place the lid on top and shake the bottle to blend all ingredients very well. Reserve.
6. Tip: Prepare the sauce earlier and store it in the fridge.
B. Make the Salad:
7. Place the beet strips and red shredded Cabbage in a large, deep Salad bowl.
8. Add the chopped tomatoes, spring onions and celery leaves next.
9. Mix the salad ingredients very well using your gloved hands.
TIP: Rub them and squeeze them to release the aromas and the juices from the vegetables!
10. The Salad needs now time to set and chill, before adding the apple, walnuts and sauce.
11. Cover it with plastic wrap and store in the fridge for at least 1h!
12. Just before serving, peel the halved apple and cut it in cubes.
13. Bring the salad from the fridge and add the chopped walnuts.
14. Bring the bottle with sauce from the fridge, shake it once more and pour it on top of the Salad.
15. With a large spoon, mix the salad to incorporate the sauce with the vegetables.
16. Finish by adding the apple cubes (and crumbled feta if using) on top and toss to mix the salad once more.
17. Ready to serve.
C. Serving Suggestions:
A fine-looking, vibrant red, juicy Salad, really good!!

Served here with fried, fluffy salted Cod, Garlic Sauce (skordalia) and Ouzo, this salad brings the freshness and sweetness needed to contradict their tangy tastes and accompanies them impeccably.

In my plate now, ready to be enjoyed!

Grab all the nutrients of the fertile Greek land in this delightful Salad full with so many colors and flavors! So good!!
Do you love beetroot? Then see all of my delightful Recipes-Ideas HERE
D. More Info about the custom of Bakaliaros Skordalia- Fried Cod and Garlic Sauce:
A custom across the country on March 25th, is to eat crispy, fried Cod fish with garlic sauce (Bakaliaros skordalia)!
This day is an exemption to the Great Lent rules, where no animals or animal products are not consumed. However, Greek Orthodox Church allows this exception for the celebration of the Annunciation Day!

Read more about this special celebration and its recipes HERE

Check my YouTube Video: HERE

Παντζάρια και Λάχανο Σαλάτα
BY: Greek Cooking Made Easy
SUBSCRIBE TO MY YOUTUBE CHANNEL: https://www.youtube.com/greekcookingmadeeasy
ΜΕΡΙΔΕΣ🍴⃒ ΠΡΟΕΤΟΙΜΑΣΙΑ 🕔⃒
4-5 25 min.
ΜΑΓΕΙΡΕΜΑ ♨ ΒΑΘΜ. ΔΥΣΚΟΛΙΑΣ 👩🍳⃒
- Εύκολη
Αυτή η πανέμορφη σούπερ σαλάτα είναι γεμάτη με εκπληκτικά φρέσκα και βραστά λαχανικά, φρούτα και ξηρούς καρπούς και μια πλούσια σάλτσα βινεγκρέτ. Είναι πλημμυρισμένη με τόσες πολλές γεύσεις και θρεπτικά συστατικά για να ικανοποιήσει όλους.
Την έχω ετοιμάσει για να συνοδεύσω το παραδοσιακό μου δείπνο με τηγανητό παστό μπακαλιάρο και σκορδαλιά για την 25η Μαρτίου. Ωστόσο, μπορεί να ετοιμαστεί όλο το χρόνο για να συνοδεύσει κάθε είδους κυρίως πιάτα με κρέας, κοτόπουλο ή ψάρι.
Μοιάζει κάπως με τη φημισμένη Πολίτικη σαλάτα, αλλά με κύριο συστατικό τα παντζάρια.
Ελάτε να σας δείξω πώς να την ετοιμάσετε κι εσείς.
Κατάλληλη για βίγκαν και νηστεία.
ΥΛΙΚΑ
Υλικά για τη σάλτσα βινεγκρέτ:
• 1/4 φλ. / 60 ml / 4 κ.σ. Έξτρα παρθένο Ελαιόλαδο
• 30 ml / 2 κ.σ. Βαλσάμικο Ξύδι
• 1 μικρή Σκελίδα Σκόρδο
• Φρεσκοτριμμένο αλάτι και πιπέρι
Υλικά για τη σαλάτα:
• 250 γρ. / 9 oz βραστά Παντζάρια, κομμένα σε λεπτές λωρίδες
• 200 γρ. / 7 oz κόκκινο Λάχανο (ή λευκό ή συνδυασμός), ψιλοτριμμένο
• 200 γρ. / 7 oz Ντομάτες, ψιλοκομμένες
• 1-2 φρέσκα Κρεμμυδάκια, ψιλοκομμένα
• 2 κ.σ. Φύλλα Σέλινο, ψιλοκομμένα
• 60 γρ. / 2,1 oz / λιγότερο από 1/2 φλ. Καρύδια, χοντροκομμένα
• ½ Πράσινο Μήλο, σε καρεδάκια (Granny Smith, ή άλλο με κάπως ξινή γεύση)
• Προαιρετικά: τυρί Φέτα, θρυμματισμένη (ή βίγκαν υποκατάστατο)
ΜΕΘΟΔΟΣ:
Α. Ετοιμάστε τη βινεγκρέτ από πριν:
1. Αν έχετε ένα μπουκάλι όπου μπορείτε να φτιάξετε και να ανακατέψετε τη σάλτσα βινεγκρέτ (όπως εγώ) θα ήταν πιο εύκολο. Διαφορετικά, χρησιμοποιήστε ένα μπολ με καπάκι και ένα σύρμα.
2. Ρίξτε το ελαιόλαδο στο μπουκάλι, προσθέτοντας και το βαλσάμικο ξύδι.
3. Προσθέστε στη συνέχεια τη σκελίδα σκόρδο, λιωμένη.
4. Αλατοπιπερώστε, κατά βούληση.
5. Τοποθετήστε το καπάκι από πάνω και ανακινήστε το μπουκάλι για να αναμειχθούν πολύ καλά όλα τα υλικά. Βάλτε στην άκρη.
6. Συμβουλή: Ετοιμάστε τη σάλτσα νωρίτερα και φυλάξτε τη στο ψυγείο.
Β. Φτιάξτε τη σαλάτα:
7. Βάλτε τις λωρίδες παντζαριού και το κόκκινο λάχανο σε μια μεγάλη, βαθιά σαλατιέρα.
8. Προσθέστε στη συνέχεια τις ψιλοκομμένες ντομάτες, τα φρέσκα κρεμμυδάκια και το σέλινο.
9. Ανακατέψτε πολύ καλά τα υλικά της σαλάτας με τα χέρια σας, με γάντια.
ΣΥΜΒΟΥΛΗ: Τρίψτε και πιέστε τα λαχανικά για να βγάλουν τα αρώματα και τους χυμούς τους!
10. Η σαλάτα χρειάζεται τώρα χρόνο για να δέσει και να κρυώσει, πριν προσθέσετε το μήλο, τα καρύδια και τη σάλτσα.
11. Καλύψτε τη με πλαστική μεμβράνη και φυλάξτε στο ψυγείο για τουλάχιστον 1 ώρα!
12. Λίγο πριν τη σερβίρετε, ξεφλουδίστε το μισό μήλο και κόψτε σε καρεδάκια.
13. Βγάλτε τη σαλάτα από το ψυγείο και προσθέστε της τα καρύδια.
14. Βγάλτε το μπουκάλι με τη σάλτσα από το ψυγείο, ανακινήστε άλλη μια φορά και περιχύστε πάνω από τη Σαλάτα.
15. Με ένα μεγάλο κουτάλι ανακατέψτε τη σαλάτα ώστε η σάλτσα να καλύψει όλα τα λαχανικά.
16. Τελειώστε προσθέτοντας από πάνω τα καρεδάκια μήλου (και τη τριμμένη φέτα αν χρησιμοποιήσετε) και ανακατέψτε τη σαλάτα για άλλη μια φορά.
17. Έτοιμη για σερβίρισμα.
Γ. Προτάσεις σερβιρίσματος:
Μια πανέμορφη, ζωηρή κόκκινη, ζουμερή σαλάτα, τόσο καλή!!
Σερβιρισμένη εδώ με τηγανητό, αφράτο παστό μπακαλιάρο, σκορδαλιά και ούζο, αυτή η σαλάτα έχει τη φρεσκάδα και τη γλυκύτητα που χρειάζεται για να φέρει αντίθεση με τις πικάντικες γεύσεις των άλλων πιάτων, συνοδεύοντας τα άψογα.
Στο πιάτο μου τώρα, έτοιμη να την απολαύσω!
Πάρτε όλα τα θρεπτικά συστατικά της εύφορης Ελληνικής γης σε αυτή την απολαυστική σαλάτα γεμάτη με τόσα χρώματα και γεύσεις! Τόσο καλή!!
Αγαπάτε τα Παντζάρια? Τότε δείτε όλες τις φανταστικές Ιδέες-Συνταγές μου ΕΔΩ
Δ. Περισσότερες πληροφορίες για το έθιμο του Τηγανητού μπακαλιάρου με σκορδαλιά:
Ένα έθιμο σε όλη τη χώρα την 25η Μαρτίου είναι να τρώμε τραγανό, τηγανητό μπακαλιάρο με σκορδαλιά!
Η ημέρα αυτή αποτελεί εξαίρεση από τους κανόνες της Μεγάλης Σαρακοστής, όπου δεν καταναλώνονται ζώα ή ζωικά προϊόντα. Ωστόσο, η Ελληνική Ορθόδοξη Εκκλησία επιτρέπει αυτή την εξαίρεση για τον εορτασμό της ημέρας του Ευαγγελισμού!
Διαβάστε περισσότερα για αυτή την ιδιαίτερη γιορτή και όλες τις συνταγές της ΕΔΩ
Κοιτάξτε επίσης την συνταγή μου σε YouTube βίντεο, το λίνκ είναι: ΕΔΩ
#Youtube#boiled beetroot and cabbage salad#beet#beetroot#beetrecipes#lunch#dinner#salad#vegetables#fruit#party#children#celebrations#vegetarian#vegan#fasting#diet#gluten#lactose#independence#παντζαρια και λαχανο σαλατα#σαλατα με παντζαρια και λαχανο
0 notes
Text
Greek Traditional Fried, Fluffy Salted Cod And All Its Secrets
🐟

Greek Traditional Fried, Fluffy Salted Cod and all its secrets - Paradosiakos Pastos Bakaliaros Tiganitos me Kourkouti kai ola ta mystika tou
BY: Greek Cooking Made Easy
SUBSCRIBE TO MY YOUTUBE CHANNEL: https://www.youtube.com/greekcookingmadeeasy
Check My YouTube Video: HERE
Κοιτάξτε Επίσης Την Συνταγή Μου Σε YouTube Βίντεο, Το Λίνκ Είναι: ΕΔΩ
youtube
SERVES 🍴⃒ PREP. TIME 🕔⃒
15 pcs/4-5 pers. 30 min. + 48 h. wait
COOK. TIME ♨ DIFFIC. LEVEL 👩🍳⃒
12 min. Moderate
This is the traditional recipe of how Greeks are preparing salted Cod and frying it in a beer batter, that so many of you asked for.
In Greece, we like eating cod all year round, but there are two special days, March 25th, Virgin Mary's Annunciation day (plus Independence Day) and Palm Sunday where cod takes center stage!
Enjoy on this special celebration eating fluffy and crispy fried cod together with Greek Skordalia (garlic sauce), by following all my tips and secrets for 100% guaranteed success!
INGREDIENTS
• 900 gr. / 2 lb / 2 large slices Cod, salted
• About 0.4 cup / 40-50 gr. / 1.5 oz All-purpose Flour, to coat the cod
• For the batter: 1 & 3/4 cups / 220 gr. / 7.8 oz All-purpose Flour, sifted
• 330 ml / 1 can Lager Beer, very cold (altern: Soda water)
• 1 shot Ouzo
• 1/4 tsp. Ground Salt
• A bit white Pepper powder
• 2 lt. / 8 cups Oil for frying: half light Olive Oil, half Vegetable Oil
• To garnish: Paprika, 1 Lemon, 1 Spring Onion, finely chopped

METHOD:
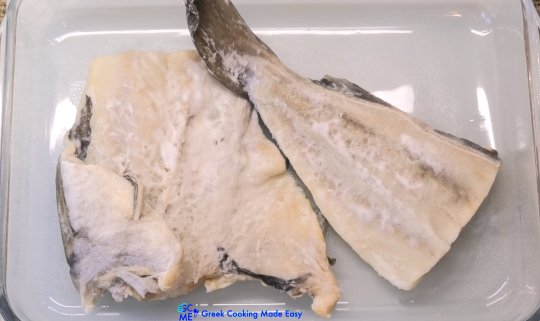
A. Prepare the salted cod 2 days before frying:
1. When using salted cod fish, this must be soaked in water for about 48 h.
2. Place salted cod in a large tray with enough tap water to cover it and seal it with plastic wrap.
3. Shed, flip fish and change water every 4 hours! This is done to ensure salt is extracted before preparing fish for frying.
4. After 48 h, drain fish and pat dry it very well with plenty absorbent paper.
5. Clean, remove skin remnants and debone both pieces to make filets-slices.
6. Pat dry the filets again in absorbent paper to remove any trace of moisture for at least 1 hour. They need to be very dry before flouring them!
7. Next dip one by one the cod slices into the flour to cover them well, shaking to remove any excess. This simple flouring technique helps remove any remaining dampness and it steadies the batter.
8. Place the floured cod slices in a plate. Reserve.
B. Prepare the batter (kourkouti in Greek):
9. Place the sifted flour in a bowl and add: the salt and pepper, ouzo and very cold beer (or soda water). Whisk to blend them well, making sure no lumps are left in the batter and it becomes smooth.
10. If the batter is too thick, just add a bit more water. It needs to be relatively thin and runny.
11. Now place the batter in the fridge for at least 30' to cool well and set.
12. Important: Batter needs to be very cold when coating the cod pieces to achieve maximum crunchiness!!
C. Frying instructions:
13. Place a deep frying pan with the combined two oils over high heat.
14. Let the oil heat up really well.
15. Dip one by one half of the floured cod pieces into the cold batter. Make sure they are covered with the batter all around, but do shake them a bit to drip excess.
16. When oil is hot, reduce the heat to medium and place one by one the 1st batch of cod filets in the oil.
17. Important Tip: Do not fry all cod pieces together!! The oil temperature will lower and cod will be cooked instead of fried. Moreover, batter will soften in lower temperature absorbing a lot of oil, resulting in cods not turning crispy and fluffy.
18. Flip the filets once after 3'. Fry them for 3' more, for a total of 6' and until they are golden all around. If your pieces are not that thick, reduce frying time.
19. Line a large plate with absorbent paper.
20. When 1st batch is fried, take out the cod filets using a pierced spatula, onto the plate to absorb the excess oil.
21. Repeat by coating the 2nd batch.
22. Place them in the hot oil and fry them as well for 6'. When ready, take out onto the same plate.
D. Serving Suggestion:
23. To serve, place the halved lemons in the middle of the platter and all fried cod pieces around them. Serve them immediately while still very hot!!
24. Don't sprinkle lemon juice now on top of the fried cods because it will soften their crispy batter. This should be done when served and ready to eat.
25. Only sprinkle some paprika and optionally finely chopped spring onion on top!

Fried Cod pieces look amazingly airy and fluffy! Don't they remind you of the beloved Greek Loukoumades (donuts)?
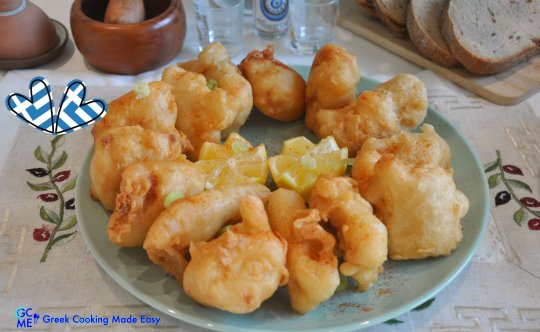
A delicious, traditional staple of crispy and fluffy fish!!
Eat fried Cod (bakaliaros) with Garlic Sauce-Skordalia, Special boiled beets and cabbage Salad, brown bread and Ouzo. This is the classic meal Greek people consume on March 25th-Greece's Annunciation and Independence Day!

Grab a bite of crispy hot cod and dip it on my delightful skordalia! What else can I say?!!

Kopiaste sto yiortastiko trapezi mou! Welcome at my festive table and Enjoy!!

E. Storage Info:
Leftover fried Cod filets can be stored, covered with plastic wrap, in the fridge for up to 1 week. Take them out to reach room temp. and reheat them briefly in the oven.
F. More Info about the custom of Bakaliaros Skordalia- Fried Cod and Garlic Sauce:
A custom across the country on March 25th, is to eat crispy, fried Cod fish with garlic sauce (Bakaliaros skordalia)!


This day is an exemption to the Great Lent rules, where no animals or animal products are not consumed. However, Greek Orthodox Church allows this exception for the celebration of the Annunciation Day!
Read more about this special celebration and more ideas/recipes HERE

Check my YouTube Video: HERE
Παραδοσιακός Παστός Μπακαλιάρος Τηγανιτός με Κουρκούτι και όλα τα μυστικά του
BY: Greek Cooking Made Easy
SUBSCRIBE TO MY YOUTUBE CHANNEL: https://www.youtube.com/greekcookingmadeeasy
ΜΕΡΙΔΕΣ🍴⃒ ΠΡΟΕΤΟΙΜΑΣΙΑ 🕔⃒
4-5 / 15 τεμ. 30 min. + 48 h. αναμονή
ΜΑΓΕΙΡΕΜΑ ♨ ΒΑΘΜ. ΔΥΣΚΟΛΙΑΣ 👩🍳⃒
12 min. Μέτριο
Αυτή είναι η παραδοσιακή συνταγή πώς οι Έλληνες ετοιμάζουν παστό μπακαλιάρο και τον τηγανίζουν σε κουρκούτι μπύρας, που τόσοι πολλοί από εσάς μου ζητήσατε.
Στην Ελλάδα, μας αρέσει να τρώμε μπακαλιάρο όλο το χρόνο, αλλά υπάρχουν δύο ξεχωριστές μέρες, η 25η Μαρτίου, η ημέρα του Ευαγγελισμού της Θεοτόκου (συν Ημέρα της Ανεξαρτησίας) και η Κυριακή των Βαΐων, όπου ο μπακαλιάρος βρίσκεται στο επίκεντρο!
Απολαύστε αυτήν την ξεχωριστή γιορτή τρώγοντας αφράτο, αέρινο και τραγανό τηγανητό μπακαλιάρο μαζί με Σκορδαλιά ακολουθώντας όλες τις συμβουλές και τα μυστικά μου για 100% εγγυημένη επιτυχία!
ΥΛΙΚΑ:
• 900 γρ. / 2 lb / 2 φύλλα Μπακαλιάρος, παστός
• Περίπου 0,4 φλ. / 40-50 γρ. / 1,5 oz Αλεύρι γ.ο.χ., για πανάρισμα μπακαλιάρου
• Για το κουρκούτι: 1 & 3/4 φλ. / 220 γρ. / 7,8 oz Αλεύρι γ.ο.χ., κοσκινισμένο
• 330 ml / 1 κουτάκι ξανθιά Μπύρα, πολύ κρύα (εναλλακτικά: σόδα)
• 1 σφηνάκι Ούζο
• 1/4 κ.γ. Φρεσκοαλεσμένο Αλάτι
• Λίγο λευκό Πιπέρι σκόνη
• 2 lt. / 8 φλ. Λάδι για τηγάνισμα: μισό ελαφρύ Ελαιόλαδο, μισό Ηλιέλαιο
• Για το γαρνίρισμα: Πάπρικα, 1 Λεμόνι, 1 φρέσκο κρεμμυδάκι, ψιλοκομμένο
ΜΕΘΟΔΟΣ:
Α. Ξαρμυρίστε τον παστό μπακαλιάρο 2 μέρες πριν τον τηγανίσετε:
1. Όταν χρησιμοποιείτε παστό μπακαλιάρο, πρέπει να μουλιάσει σε νερό για περίπου 48 ώρες για να ξαρμυρίσει.
2. Τοποθετήστε τα 2 φύλλα μπακαλιάρου σε ένα μεγάλο ταψί με αρκετό νερό βρύσης ώστε να τον σκεπάσει και καλύψτε τον με πλαστική μεμβράνη.
3. Χύστε το νερό, αναποδογυρίστε τα ψάρια και αλλάζετε νερό κάθε 4 ώρες! Αυτό γίνεται για να διώξετε όλο το αλάτι του πριν τον ετοιμάσετε για τηγάνισμα.
4. Μετά από 48 ώρες, στραγγίστε το ψάρι και στεγνώστε το πολύ καλά με άφθονο απορροφητικό χαρτί.
5. Καθαρίστε, αφαιρέστε τα υπολείμματα δέρματος και όλα τα κόκκαλα για να φτιάξετε φιλέτα-φέτες.
6. Στεγνώστε και πάλι τα φιλέτα μέσα σε απορροφητικό χαρτί να φύγει κάθε ίχνος υγρασίας για τουλάχιστον 1 ώρα. Πρέπει να είναι πολύ στεγνά πριν τα πανάρετε με το αλεύρι!
7. Στη συνέχεια βουτήξτε τις φέτες μπακαλιάρου μια μια καλά στο αλεύρι να πάει παντού, τινάζοντας για να φύγει το περίσσιο αλεύρι. Αυτή η απλή τεχνική αλευρώματος βοηθά στο να τραβήξει την υγρασία που έχει απομείνει και σταθεροποιεί το κουρκούτι.
8. Βάλτε τις αλευρωμένες φέτες μπακαλιάρου μέσα σε ένα πιάτο. Βάλτε στην άκρη.
Β. Ετοιμάστε το κουρκούτι:
9. Σε ένα μπολ βάλτε το κοσκινισμένο αλεύρι και προσθέστε: το αλατοπίπερο, το ούζο και την πολύ κρύα μπύρα (ή σόδα). Χτυπήστε με το σύρμα να αναμειχθούν καλά, φροντίζοντας να μην μείνουν σβώλοι στο κουρκούτι και να γίνει λείο.
10. Εάν το κουρκούτι είναι πολύ πηχτό, προσθέστε λίγο ακόμα νερό. Πρέπει να είναι σχετικά αραιό και ρευστό!
11. Τώρα τοποθετήστε το κουρκούτι στο ψυγείο για τουλάχιστον 30' να κρυώσει πολύ καλά και να δέσει.
12. Σημαντικό: Το κουρκούτι πρέπει να είναι πολύ κρύο όταν επικαλύψετε τα κομμάτια μπακαλιάρου για να επιτευχθεί μέγιστη τραγανότητα!!
Γ. Οδηγίες τηγανίσματος:
13. Βάλτε ένα βαθύ τηγάνι με τα δύο λάδια μαζί πάνω από δυνατή φωτιά.
14. Αφήστε το λάδι να κάψει πολύ καλά.
15. Βουτήξτε ένα ένα μέσα στο κρύο κουρκούτι τα μισά από τα αλευρωμένα κομμάτια μπακαλιάρου. Φροντίστε να ντυθούν με το κουρκούτι γύρω-γύρω, αλλά τινάξτε τα λίγο για να στραγγίσει το περιττό.
16. Μόλις το λάδι είναι έτοιμο, χαμηλώστε τη φωτιά σε μέτρια και τοποθετήστε ένα ένα την 1η παρτίδα φιλέτα μέσα στο καυτό λάδι.
17. Σημαντική συμβουλή: Μην τηγανίσετε όλα τα κομμάτια μπακαλιάρου μαζί!! Η θερμοκρασία του λαδιού θα πέσει και ο μπακαλιάρος θα βράσει αντί να τηγανιστεί. Επιπλέον, το κουρκούτι θα μαλακώσει στη χαμηλότερη θερμοκρασία απορροφώντας πολύ λάδι, με αποτέλεσμα τα μπακαλιαράκια να μην γίνουν τραγανά και αφράτα.
18. Αναποδογυρίστε τα φιλέτα μόνο μία φορά μετά από 3'. Τηγανίστε τα για 3' ακόμα, δηλ. συνολικά 6' και μέχρι να ροδίσουν ολόγυρα. Εάν τα κομμάτια σας δεν είναι τόσο παχιά, μειώστε το χρόνο τηγανίσματος.
19. Στρώστε με απορροφητικό χαρτί ένα μεγάλο πιάτο.
20. Μόλις τηγανιστεί η 1η παρτίδα, βγάλτε τα φιλέτα μπακαλιάρου χρησιμοποιώντας μια τρυπητή κουτάλα, μέσα στο πιάτο για να απορροφηθεί το περίσσιο λάδι.
21. Επαναλάβετε βάζοντας κουρκούτι στη 2η παρτίδα μπακαλιαράκια.
22. Βάλτε τα ένα ένα στο καυτό λάδι και τηγανίστε κι αυτά για 6'. Μόλις είναι έτοιμα, βγάλτε τα στο ίδιο πιάτο.
Δ. Πρόταση σερβιρίσματος:
23. Για να σερβίρετε, βάλτε στη μέση της πιατέλας τα 2 μισά λεμόνια και όλα τα τηγανητά κομμάτια μπακαλιάρου τριγύρω. Σερβίρετε τα αμέσως όσο είναι ακόμα καυτά!!
24. Μην τα πασπαλίσετε τώρα με χυμό λεμονιού επειδή θα μαλακώσει το τραγανό κουρκούτι τους. Αυτό πρέπει να γίνει μόλις τα σερβίρετε και είναι έτοιμα στο πιάτο για να τα φάτε.
25. Από πάνω πασπαλίστε μόνο λίγη πάπρικα και προαιρετικά ψιλοκομμένο φρέσκο κρεμμυδάκι!
Τα μπακαλιαράκια μου φαίνονται εκπληκτικά αέρινα και τόσο αφράτα! Δεν σας θυμίζουν τους αγαπημένους μας Λουκουμάδες;
Ένα πεντανόστιμο, παραδοσιακό ψάρι τραγανιστό και αφράτο!!
Φάτε τηγανητό μπακαλιάρο με σκορδαλιά, σπέσιαλ σαλάτα με βραστά παντζάρια και λάχανο, μαύρο ψωμί και ούζο. Αυτό είναι το κλασικό γεύμα που καταναλώνουν οι Έλληνες την 25η Μαρτίου - την ημέρα του Ευαγγελισμού!
Πάρτε μια μπουκιά τραγανό καυτό μπακαλιάρο και βουτήξτε τον στην απολαυστική σκορδαλιά μου! Τι άλλο να πώ!!!
Κοπιάστε στο γιορταστικό τραπέζι μου και απολαύστε! Χρόνια Πολλά Ελλάδα μας!!
Ε. Πληροφορίες φύλαξης:
Τα τηγανητά φιλέτα μπακαλιάρου που περισσεύουν μπορούν να φυλαχτούν, καλυμμένα με πλαστική μεμβράνη, στο ψυγείο για έως και 1 εβδομάδα. Βγάλτε τα για να φτάσουν σε θερμοκρασία δωματίου, και ξαναζεστάνετε τα για λίγο στο φούρνο.
Ζ. Περισσότερες πληροφορίες για το έθιμο του Τηγανητού μπακαλιάρου με σκορδαλιά:
Ένα έθιμο σε όλη τη χώρα την 25η Μαρτίου είναι να τρώμε τραγανό, τηγανητό μπακαλιάρο με σκορδαλιά!
Η ημέρα αυτή αποτελεί εξαίρεση από τους κανόνες της Μεγάλης Σαρακοστής, όπου δεν καταναλώνονται ζώα ή ζωικά προϊόντα. Ωστόσο, η Ελληνική Ορθόδοξη Εκκλησία επιτρέπει αυτή την εξαίρεση για τον εορτασμό της ημέρας του Ευαγγελισμού!
Διαβάστε περισσότερα για αυτή την ιδιαίτερη γιορτή και άλλες ιδέες για φαγητά ΕΔΩ

Κοιτάξτε επίσης την συνταγή μου σε YouTube βίντεο, το λίνκ είναι: ΕΔΩ
#Youtube#fried cod#greek fried salted cod#bakaliaro#bakaliaro skordalia#meze#lunch#dinner#maincourse#fish#party#celebrations#children#lactose#independence#μπακαλιαρος#μπακαλιάρος#μπακαλιάρος παστός#μπακαλιαρος παστος#μπακαλιαρος σκορδαλια
1 note
·
View note
Text
Greek Garlic Dip/Sauce I.E. Skordalia With Potatoes
🥣

Greek Garlic Dip/Sauce i.e. Skordalia with potatoes - Skordalia me patates se kommatia
BY: Greek Cooking Made Easy
SUBSCRIBE TO MY YOUTUBE CHANNEL: https://www.youtube.com/greekcookingmadeeasy
Check My YouTube Video: HERE
Κοιτάξτε Επίσης Την Συνταγή Μου Σε YouTube Βίντεο, Το Λίνκ Είναι: ΕΔΩ
youtube
SERVES 🍴⃒ PREP. TIME 🕔⃒
5-6 pers. 10 min.
COOK. TIME ♨ DIFFIC. LEVEL 👩🍳⃒
10-12 min. Very Easy
Greek Skordalia also called Aliada, is a thick purée (sauce, dip, spread), traditionally made by combining crushed garlic with a bulky base either of potatoes or soaked stale bread mixed with walnuts (or almonds).
This is another classic Skordalia recipe with potatoes, prepared to accompany fried Cod - as we call it in Greece “Bakaliaros skordalia”.
There are variations to the Skordalia recipe depending on what you'll eat it with. Usually it's made either with potatoes to accompany fish dishes or with bread to accompany vegetables.
Either way it is a very appetizing and pungent dip for the lovers of garlic! Let's begin!
Suitable for vegans and fasting.
If you love Skordalia, check all my Recipes HERE
INGREDIENTS:
· 1 kg. / 2.25 lb Potatoes, peeled, washed and finely cubed (weighed unpeeled)
· A pinch of Salt
· 2-3 Garlic Cloves
· 0.7 cup / 175 ml Extra Virgin Olive Oil
· About 4 tbsp. / 50-60 ml red wine Vinegar
· White Pepper powder
· To garnish: 1 Spring Onion, finely chopped
· 1 tbsp. fresh flat Parsley, finely chopped
· 1 tsp. Black Salt (or normal sea salt)
METHOD:
A. Boil the potatoes:
1. Place a large, wide pot with plenty of tap water over high heat and let water heat up until it starts to boil, adding a pinch of salt.
2. Next, place the cubed potatoes in the pot and reduce heat to medium.
3. When water starts to boil again, count 10'-12' of boiling or until when piercing a couple of potatoes with a fork, they will break.
4. Turn off the heat.
5. Drain them using a sieve. Let them cool down a bit, for 5'.
B. Make the Garlic Sauce:
6. NOTE: The original recipe calls for using fresh garlic in the sauce. If you don't want the garlic taste to be too strong, I suggest you bake the cloves in the oven. Place the tray with garlic cloves (skin on) in a preheated oven and bake them FAN @160℃ / 325℉ for about 20'. After 20', open the oven and pierce them with a knife. If they are soft and pierced through, it means they are ready. Leave them on a rack to cool down. Remove their skin by pressing with a thick knife. Reserve.
7. Using a food processor, pour in the olive oil and vinegar.
8. Season with white Pepper powder, to taste.
9. Next, add the (baked) garlic cloves and start beating.
10. Beat the sauce a little longer for the garlic to be mashed and blended entirely and the sauce to become smooth, shiny and fluffy. Stop the food processor.
11. Check the consistency of the sauce. It should be a bit runny.
C. Make the Skordalia dip:
12. Place the boiled potatoes in a deep Salad bowl.
13. While they are still a bit warm, mash them slightly with the special kitchen tool (Puree masher) or until you get half of the potatoes as a mash and half as smaller potato pieces.
14. There is also a variation where you mash potatoes completely and you get a mushy Skordalia.
15. At this point, you could prepare Skordalia ahead of time on the same day to save some preparation time. Place the bowl with boiled potatoes and the garlic sauce separately in the fridge to store them, but do take them out 2 hours before serving.
16. When ready to serve, pour gradually the beaten garlic sauce on top of the potatoes and blend them together.
17. To garnish Skordalia, sprinkle on top the chopped spring onions, chopped parsley and some black salt.
18. Skordalia is now ready to be served.
D. Serving Suggestion:
This type of Skordalia is best eaten warm or at room temperature.

Skordalia is so pungent, rich and fluffy. Just what you were yearning to dip into a hot piece of fried cod!!

Here it is, served at my festive table for the 25th March celebrations. Skordalia with fried Cod (bakaliaros), special Salad with boiled beets and cabbage, some brown bread and Ouzo.
This is the classic meal Greek people consume on March 25th-Greece's Independence Day! Bakaliaros and skordalia!
Yummy! Enjoy this special day!!

E. Storage info:
Skordalia leftovers could be stored in an airtight container in the fridge for a couple of days.
F. Info about Greece's National Independence Day and the Annunciation of Virgin Mary:
A custom across the country on March 25th, is to eat crispy, fried Cod fish with garlic sauce (Bakaliaros skordalia)!
This day is an exemption to the Great Lent rules, where no animals or animal products are not consumed. However, Greek Orthodox Church allows this exception for the celebration of the Annunciation Day!
Read more about this special celebration HERE

Check my YouTube Video: HERE
Σκορδαλιά με πατάτες σε κομμάτια
BY: Greek Cooking Made Easy
SUBSCRIBE TO MY YOUTUBE CHANNEL: https://www.youtube.com/greekcookingmadeeasy
ΜΕΡΙΔΕΣ🍴⃒ ΠΡΟΕΤΟΙΜΑΣΙΑ 🕔⃒
5-6 10 min.
ΜΑΓΕΙΡΕΜΑ ♨ ΒΑΘΜ. ΔΥΣΚΟΛΙΑΣ 👩🍳⃒
10-12 min. Πολύ Εύκολη
Η Σκορδαλιά γνωστή και ως Αλιάδα, είναι ένας παχύρρευστος πουρές (σάλτσα, ντιπ, άλειμμα), που παραδοσιακά φτιάχνεται συνδυάζοντας λιωμένο σκόρδο με μια βάση είτε από πατάτες ή μουσκεμένο, μπαγιάτικο ψωμί αναμεμειγμένο με καρύδια (ή αμύγδαλα).
Αυτή είναι μια ακόμη κλασική συνταγή Σκορδαλιάς με πατάτες, που ετοιμάζεται για να συνοδεύσει τον τηγανητό μπακαλιάρο.
Υπάρχουν διάφορες παραλλαγές στη συνταγή της Σκορδαλιάς ανάλογα με το τι θα συνοδέψει. Συνήθως φτιάχνεται είτε με πατάτες για να συνοδεύσει ψάρι ή με ψωμί για να συνοδεύσει λαχανικά.
Όπως και να ετοιμάσετε τη Σκορδαλιά πάντως, είναι ένα πολύ ορεκτικό και πικάντικο πιάτο για τους λάτρεις του σκόρδου!
Πάμε να τη φτιάξουμε μαζί;!
Κατάλληλη για βίγκαν και νηστεία.
Αν αγαπάτε τη Σκορδαλιά, δείτε όλες τις Συνταγές μου ΕΔΩ
ΥΛΙΚΑ:
• 1 kg. / 2,25 lb. Πατάτες, καθαρισμένες, πλυμένες και κομμένες καρέ (ζυγισμένες με φλούδα)
• Μια πρέζα Αλάτι
• 2-3 Σκελίδες Σκόρδο
• 0,7 φλ. / 175 ml Εξαιρετικό Παρθένο Ελαιόλαδο
• Περίπου 4 κ.σ. / 50-60 ml Ξύδι από κόκκινο κρασί
• Λευκό Πιπέρι σκόνη
• Για γαρνίρισμα: 1 φρέσκο Κρεμμυδάκι, ψιλοκομμένο
• 1 κ.σ. φρέσκος Μαϊντανός, ψιλοκομμένος
• 1 κ.γ. Μαύρο Αλάτι (ή κανονικό θαλασσινό αλάτι)
ΜΕΘΟΔΟΣ:
Α. Βράστε τις πατάτες:
1. Τοποθετήστε μια πλασοτέ κατσαρόλα με άφθονο νερό βρύσης πάνω από δυνατή φωτιά και αφήστε το νερό να ζεσταθεί μέχρι να αρχίσει να βράζει, προσθέτοντας και μια πρέζα αλάτι.
2. Στη συνέχεια, βάλτε τις πατάτες καρέ στην κατσαρόλα και χαμηλώστε τη φωτιά σε μέτρια.
3. Μόλις το νερό αρχίσει πάλι να βράζει, μετρήστε 10'-12' βρασμού ή μέχρι τρυπώντας με ένα πιρούνι μια-δυο πατάτες, να σπάνε.
4. Σβήστε τη φωτιά.
5. Στραγγίστε τις χρησιμοποιώντας ένα σουρωτήρι. Αφήστε να κρυώσουν λίγο, για 5'.
Β. Φτιάξτε τη σάλτσα σκόρδου:
6. ΣΗΜΕΙΩΣΗ: Η αρχική συνταγή απαιτεί τη χρήση φρέσκου σκόρδου στη σάλτσα. Αν δεν θέλετε η γεύση του σκόρδου να είναι πολύ έντονη, σας προτείνω να ψήσετε τις σκελίδες σκόρδο στο φούρνο. Τοποθετήστε το ταψί με τις σκελίδες σκόρδου (με το φλούδι) σε προθερμασμένο φούρνο και ψήστε στον αέρα @160℃ / 325℉ για περίπου 20'. Μετά από 20' ανοίξτε το φούρνο και τρυπήστε τις με ένα μαχαίρι. Αν είναι μαλακές και τρυπιούνται εύκολα, σημαίνει ότι είναι έτοιμες. Αφήστε να κρυώσουν. Αφαιρέστε τη φλούδα τους πιέζοντας με ένα χοντρό μαχαίρι. Βάλτε στην άκρη.
7. Χρησιμοποιώντας το μούλτι (επεξεργαστή τροφίμων), ρίξτε μέσα το ελαιόλαδο και το ξύδι.
8. Καρυκεύστε με λευκό πιπέρι σκόνη, κατά βούληση.
9. Στη συνέχεια, προσθέστε τις (ψημένες) σκελίδες σκόρδο και αρχίστε να χτυπάτε.
10. Χτυπήστε λίγο ακόμα τη σάλτσα μέχρι το σκόρδο να πολτοποιηθεί και να ανακατευτεί πολύ καλά και η σάλτσα να γίνει λεία, γυαλιστερή και αφράτη. Σταματήστε το μούλτι.
11. Ελέγξτε τη συνοχή της σάλτσας. Θα πρέπει να είναι κάπως ρευστή.
Γ. Φτιάξτε τη Σκορδαλιά:
12. Βάλτε τις βρασμένες πατάτες σε μια βαθιά σαλατιέρα.
13. Όσο είναι ακόμα λίγο ζεστές πολτοποιήστε τις ελαφρά με το ειδικό εργαλείο κουζίνας για πουρέ ή μέχρι να είναι οι μισές πατάτες σαν πουρές και οι άλλες μισές μικρότερα κομμάτια.
14. Υπάρχει και μια παραλλαγή όπου πολτοποιείτε εντελώς τις πατάτες και τότε έχετε Σκορδαλιά σε πουρέ.
15. Σε αυτό το σημείο, θα μπορούσατε να ετοιμάσετε τη Σκορδαλιά από πριν, την ίδια μέρα για να εξοικονομήσετε χρόνο ετοιμασίας. Βάλτε το μπολ με τις βραστές πατάτες και τη σάλτσα σκόρδου ξεχωριστά στο ψυγείο για να τα φυλάξετε, αλλά βγάλτε τα 2 ώρες πριν τα σερβίρετε.
16. Μόλις είναι η Σκορδαλιά έτοιμη για σερβίρισμα, ρίξτε σταδιακά τη χτυπημένη σάλτσα σκόρδου πάνω από τις πατάτες και ανακατέψτε.
17. Για να γαρνίρετε τη Σκορδαλιά, πασπαλίστε από πάνω τα ψιλοκομμένα φρέσκα κρεμμυδάκια, τον ψιλοκομμένο μαϊντανό και λίγο μαύρο αλάτι.
18. Η Σκορδαλιά είναι πλέον έτοιμη για σερβίρισμα.
Δ. Πρόταση σερβιρίσματος:
Αυτό το είδος Σκορδαλιάς τρώγεται καλύτερα ζεστή ή σε θερμοκρασία δωματίου.
Η Σκορδαλιά είναι πικάντικη, πλούσια σε γεύση και τόσο αφράτη. Ό,τι ακριβώς λαχταρούσατε για να βουτήξετε μέσα ένα ζεστό κομμάτι τηγανητό μπακαλιάρο!!
Εδώ τη βλέπετε σερβιρισμένη στο γιορτινό μου τραπέζι για την γιορτή της 25ης Μαρτίου. Σκορδαλιά με τηγανητό παστό μπακαλιάρο, σπέσιαλ Σαλάτα με βραστά παντζάρια και λάχανο, λίγο μαύρο ψωμί και ούζο.
Αυτό είναι το κλασικό γεύμα που καταναλώνουν οι Έλληνες την 25η Μαρτίου - Ημέρα της Ανεξαρτησίας της Ελλάδας και Ευαγγελισμό της Θεοτόκου Μπακαλιάρος σκορδαλιά!
Πεντανόστιμη! Απολαύστε αυτή την ξεχωριστή μέρα!!
Ε. Πληροφορίες φύλαξης:
Τα υπολείμματα της Σκορδαλιάς θα μπορούσατε να τα φυλάξετε σε αεροστεγές δοχείο στο ψυγείο για 2-3 μέρες.
Ζ. Πληροφορίες για την Ημέρα της Εθνικής Ανεξαρτησίας της Ελλάδας και τον Ευαγγελισμό της Θεοτόκου:
Το έθιμο σε όλη τη χώρα την 25η Μαρτίου είναι να τρώμε τραγανό, τηγανητό μπακαλιάρο με σκορδαλιά!
Η ημέρα αυτή αποτελεί εξαίρεση από τους κανόνες της Μεγάλης Σαρακοστής, όπου δεν επιτρέπεται η κατανάλωση ζωικών προϊόντων. Ωστόσο, η Ορθόδοξη Εκκλησία μας επιτρέπει αυτή την εξαίρεση για τον εορτασμό της ημέρας του Ευαγγελισμού!
Διαβάστε περισσότερα για αυτήν την ιδιαίτερη γιορτή του Ελληνισμού ΕΔΩ

Κοιτάξτε επίσης την συνταγή μου σε YouTube βίντεο, το λίνκ είναι: ΕΔΩ
#Youtube#σκορδαλια#σκορδαλια με πατατες κομματια#σκορδαλιά#meze#lunch#dinner#potatoes#vegetables#dips#salad#lowcost#fasting#vegetarian#vegan#gluten#lactose#independence#skordalia#greek garlic sauce#greek garlic sauce skordalia with potatoes
0 notes
Text
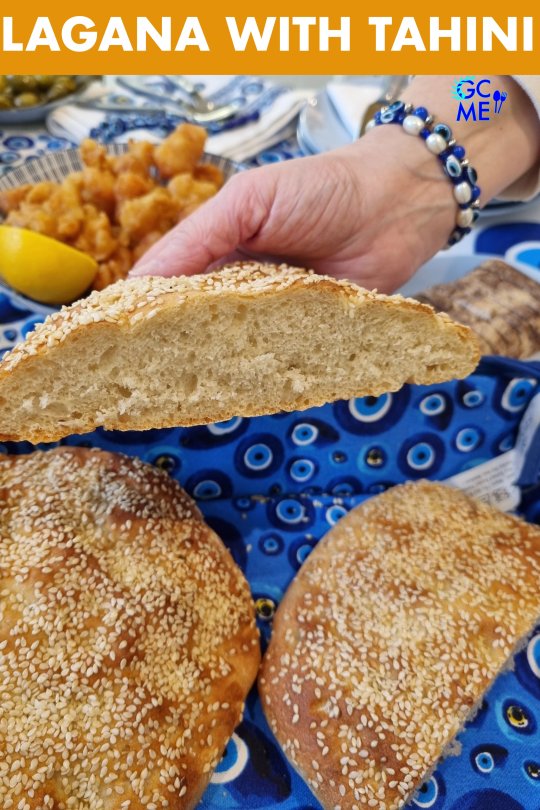
How To Make Greek Lagana Flatbread With Tahini (No Oil)
🥖

How to make Greek Lagana Flatbread with Tahini (no oil) - Pws na ftiaxete Lagana me Tahini Nistisimi
BY: Greek Cooking Made Easy
SUBSCRIBE TO MY YOUTUBE CHANNEL: https://www.youtube.com/greekcookingmadeeasy
Check My YouTube Video: HERE
Κοιτάξτε Επίσης Την Συνταγή Μου Σε YouTube Βίντεο, Το Λίνκ Είναι: ΕΔΩ
youtube
SERVES 🍴⃒ PREP. TIME 🕔⃒
4 medium breads 25 min + 2 hours wait
Εnough for 8 pers.
COOK. TIME ♨ DIFFIC. LEVEL 👩🍳⃒
25 min. Easy
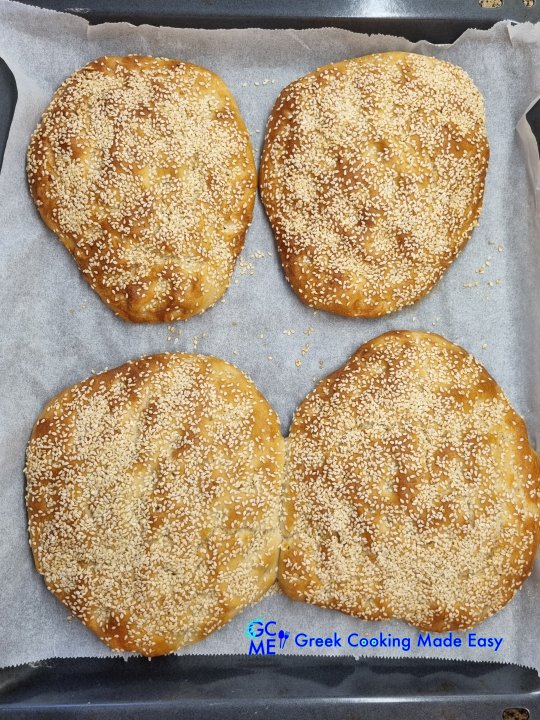
Lagana is a very special Greek Flatbread, traditionally baked only once a year for Clean Monday i.e. Kathara Deutera, the 1st day of Great Lent which lasts 40 days culminating with Greek Orthodox Easter.
It is flat, oval or round shaped, with its surface usually decorated with small holes and finger dents, using as topping Sesame seeds.
The recipe I show you this time is using Tahini paste to substitute oil; that's ideal for those following stricter fasting rules where no oil is allowed.
Although its texture and fluffiness is similar to Focaccia bread, it has no oil or vegetables like Focaccia and it has a much crispier crust.
Let's see how to prepare it together!
Suitable for Vegans and no-oil fasting.
INGREDIENTS
Ingredients for the Dough:
· 4 cups / 500 gr. / 1 lb 2 oz Bread Flour
· 1.2 cups / 300 ml. Water, lukewarm
· 25 gr. / 1 oz fresh Yeast
· 1 tbsp. Sugar
· 2 tbsp. / about 34 gr. / 1.2 oz Tahini paste
· 1/2 tbsp. Salt
· 1/2 tsp. Anise seed Powder
Ingredients for coating:
· 1 tbsp. Sugar
· 2 tbsp. Water, warm
· 4.5-5.5 tbsp. / 40-50 gr. / 1.4-1.8 oz Sesame seeds
· A Brush and a thick toothpick

METHOD:
A. Prepare the dough:
1. Combine lukewarm water, yeast and half of the sugar in the mixer’s bowl. Whisk them well.
2. Set the bowl aside for 15'-20' covered with a kitchen towel, so that the yeast will be activated.
3. When ready, place bowl under the mixer and beat for 5'-10' (using hook attachment). Begin by beating on low speed and gradually turn up the speed.
4. Add gradually the flour spoon by spoon, rest of sugar, anise powder, salt and tahini paste.
5. The more you beat the flour, the softer and more elastic the dough will become.
6. Tip: If the dough mixture is too wet or dry, add more flour or water accordingly.
7. When you notice that the dough becomes one mass (lump) around the hook and has detached from the bowl, then it's ready. Stop the mixer!
8. The dough should be elastic, soft but not sticky!
9. It now needs time to rest, but also for the yeast to activate and to help it rise.
10. Remove bowl with dough from mixer, cover it with kitchen towel or plastic wrap and set aside, until it quadruples in size.
11. You could either place the covered dough near a warm source (like by a window near the sun or a radiator) or put it in the oven setting: “Dough Proving” like I did.
12. The dough needs 1h 30' - 2 h to rise.
B. Shape and coat the Lagana breads:
13. In a small bowl with the warm water, add the sugar and stir until it is completely dissolved.
14. When dough has risen, remove the towel.
15. Lay out a sheet of parchment paper on to a large oven tray.
16. Punch down the dough and then divide it in to 4 equal loaves, placing them on the tray with ample space between them (if you prefer, you could shape only 2 large lagana breads).
17. Gently stretch each loaf out and then flatten out the 4 loaves with your wet palm, like a pizza.
18. Shape them round or oval (try to have all about same shape and size).
19. Take a thick toothpick and make holes all around the breads.
20. Next, press your fingertips down all over the loaves to create small pockets. This gives laganas their special appearance.
21. Brush the water and sugar mix all around the top of each loaf (flatbread).
22. Finish by sprinkling lots of sesame seeds on top of the loaves.
23. Set lagana breads aside or in the oven again for "Dough Proving" for around 30', so they can rise once more.
C. Baking instructions:
24. Bake all breads together in a preheated oven FAN @ 200°C/400℉ for 25' (depends on the oven).
25. When golden and crunchy, remove from oven. Ahhh these earthy smells of freshly baked bread!!
26. Leave Lagana breads on the kitchen bench to cool down completely (that actually makes them crunchier).
D. Serving suggestions:
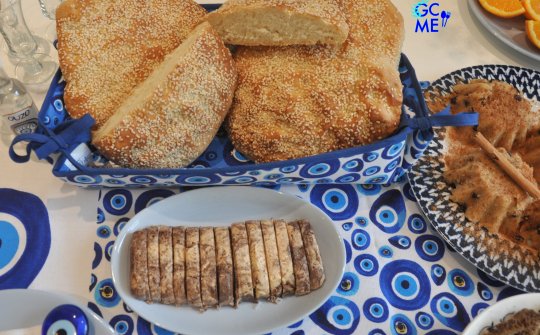
Serve Lagana Breads whole or sliced.

Perfect combos are:
* Lagana to dip in plain Fish Roe Salad/Dip aka Taramosalata!
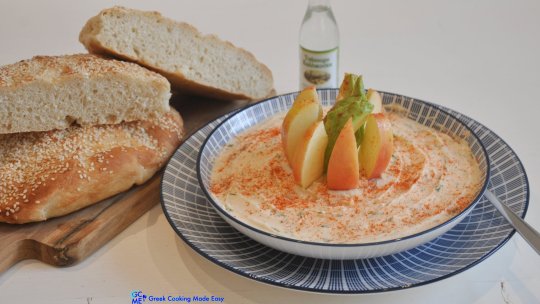
* Lagana with Taramosalata with Black Ink and Stir-Fried Prawns

* Lagana sandwich with tahini Halva with chocolate!

A real crispy flatbread to be enjoyed on Clean Monday and all Great Lent days. So simple to make and yet so amazing; because nothing beats homemade bread!!
E. Storage Info:
Like all breads, you can prepare and bake Lagana ahead of time, place in a plastic bag and store in the freezer for up to 1 month. Same goes for leftovers.
F. Info and History of Lagana Bread:
Lagana has been a well known bread in Greece even in antiquity, as part of their everyday nutrition, however its exact origin is still vague.
Its first written reference dates back to 5th century BC when in a poem written by the Greek poet Aristophanes in "Ecclesiazusae" it is mentioned that "Laganas are made" and he meant bread with oil. We also find it written on ancient pots with same name offered to the Gods.
The etymology of the word lagana, comes either from the ancient word lagos, meaning loose or/and from the ancient Greco-Roman term laganon that denoted a similar thin flatbread. Remarkably this is also the origin of the word lasagna!
Traditionally, in antiquity Lagana was prepared unleavened (i.e. without yeast) and was the Greek equivalent to the Jewish unleavened bread called "matzo".
Nowadays, you will be able to taste Lagana anywhere in Greece on Clean Monday but leavened lagana is much more common!
Don't miss all the traditions of this special day like the flying of kites and of course the traditional Clean Monday table!!


Check my YouTube Video: HERE

Πώς να φτιάξετε Λαγάνα με Ταχίνι Νηστίσιμη (αλάδωτη)
BY: Greek Cooking Made Easy
SUBSCRIBE TO MY YOUTUBE CHANNEL: https://www.youtube.com/greekcookingmadeeasy
ΜΕΡΙΔΕΣ🍴⃒ ΠΡΟΕΤΟΙΜΑΣΙΑ 🕔⃒
4 μεσαίες 25 min + 2 ώρες αναμονή
αρκετές για 8 άτ.
ΜΑΓΕΙΡΕΜΑ ♨ ΒΑΘΜ. ΔΥΣΚΟΛΙΑΣ 👩🍳⃒
25 min. Εύκολη
Η Λαγάνα είναι ένα πολύ ιδιαίτερο Ελληνικό ψωμί, που παραδοσιακά ψήνεται μόνο μια φορά το χρόνο για την Καθαρά Δευτέρα, δηλ. την 1η ημέρα της Μ. Σαρακοστής που διαρκεί 40 ημέρες και κορυφώνεται με το Ελληνορθόδοξο Πάσχα.
Είναι σχετικά επίπεδη, οβάλ ή στρογγυλή, με επιφάνεια συνήθως διακοσμημένη με μικρές τρύπες και βαθουλώματα από δάχτυλα, χρησιμοποιώντας σαν επικάλυψη σουσάμι.
Η συνταγή που σας δείχνω αυτή τη φορά είναι με χρήση ταχινιού σαν υποκατάστατο του λαδιού. Αυτό είναι ιδανικό για όσους ακολουθούν αυστηρότερους κανόνες νηστείας όπου δεν επιτρέπεται το λάδι.
Αν και η υφή και το πόσο αφράτη είναι θυμίζει την Ιταλική Focaccia, η Λαγάνα δεν έχει λάδι ούτε λαχανικά όπως η Focaccia και έχει πολύ πιο τραγανή κρούστα.
Ας δούμε μαζί πώς να την ετοιμάσουμε!
Κατάλληλη για Βίγκαν και νηστεία χωρίς λάδι.
ΥΛΙΚΑ
Υλικά για τη ζύμη:
• 4 φλ. / 500 γρ. / 1 lb 2 oz Αλεύρι σκληρό ή για ψωμί
• 1,2 φλ. / 300 ml. Νερό, χλιαρό
• 25 γρ. / 1 oz φρέσκια Μαγιά
• 1 κ.σ. Ζάχαρη
• 2 κ.σ. / περίπου 34 γρ. / 1,2 oz Ταχίνι
• 1/2 κ.σ. Αλάτι
• 1/2 κ.γ. Γλυκάνισο σκόνη
Υλικά για την επικάλυψη:
• 1 κ.σ. Ζάχαρη
• 2 κ.σ. Νερό, ζεστό
• 4,5-5,5 κ.σ. / 40-50 γρ. / 1,4-1,8 oz Σουσάμι
• Ένα πινελάκι και μια χοντρή οδοντογλυφίδα
ΜΕΘΟΔΟΣ:
Α. Ετοιμάστε τη ζύμη:
1. Ανακατέψτε με το σύρμα στον κάδο του μίξερ το χλιαρό νερό, τη μαγιά και τη μισή ζάχαρη. Χτυπήστε τα να ανακατευτούν καλά.
2. Αφήστε το μπολ στην άκρη για 15'-20' σκεπασμένο με πετσέτα κουζίνας, ώστε να ενεργοποιηθεί η μαγιά.
3. Μόλις είναι έτοιμη, βάλτε το κάδο κάτω από το μίξερ και χτυπήστε για 5'-10' (χρησιμοποιώντας το εξάρτημα γάντζο). Ξεκινήστε χτυπώντας με χαμηλή ταχύτητα και σταδιακά αυξήστε την ταχύτητα.
4. Προσθέστε κατόπιν σιγά σιγά το αλεύρι κουταλιά-κουταλιά, την υπόλοιπη ζάχαρη, το γλυκάνισο, το αλάτι και το ταχίνι.
5. Όσο περισσότερο χτυπάτε το αλεύρι, τόσο πιο μαλακή και ελαστική θα γίνει η ζύμη.
6. Συμβουλή: Αν η ζύμη είναι πολύ υγρή ή στεγνή, προσθέστε αντίστοιχα περισσότερο αλεύρι ή νερό.
7. Μόλις παρατηρήσετε ότι η ζύμη γίνεται μια μάζα (σβόλος) γύρω από το γάντζο και έχει αποκολλήσει από τα τοιχώματα του κάδου, τότε είναι έτοιμη. Σταματήστε το μίξερ!
8. Η ζύμη πρέπει να είναι ελαστική, αφράτη αλλά να μην κολλάει.
9. Τώρα χρειάζεται χρόνο για ξεκούραση, αλλά και για να ενεργοποιηθεί η μαγιά ώστε να τη βοηθήσει να φουσκώσει.
10. Βγάλτε το κάδο με τη ζύμη από το μίξερ, σκεπάστε με πετσέτα κουζίνας ή πλαστική μεμβράνη και αφήστε στην άκρη, μέχρι να τετραπλασιαστεί σε μέγεθος.
11. Μπορείτε είτε να βάλετε τη σκεπασμένη ζύμη κοντά σε μια ζεστή πηγή (όπως δίπλα σε ένα παράθυρο κοντά στον ήλιο ή σε καλοριφέρ) ή να τη βάλετε στο φούρνο με τη σπέσιαλ ρύθμιση: “Φούσκωμα ζύμης” όπως έκανα εγώ.
12. Η ζύμη χρειάζεται 1h 30' - 2 h για να φουσκώσει.
Β. Πλάστε και επικαλύψτε τις Λαγάνες:
13. Σε ένα μικρό μπολ με το ζεστό νερό, προσθέστε τη ζάχαρη και ανακατέψτε μέχρι να διαλυθεί τελείως.
14. Μόλις η ζύμη έχει φουσκώσει, αφαιρέστε την ��ετσέτα.
15. Απλώστε ένα φύλλο λαδόκολλας σε ένα μεγάλο ταψί φούρνου-λαμαρίνα.
16. Χτυπήστε τη ζύμη να κάτσει και στη συνέχεια χωρίστε τη σε 4 ίσα καρβέλια, τοποθετώντας τα στο ταψί με άφθονο χώρο μεταξύ τους (αν θέλετε μπορείτε να φτιάξετε 2 μεγάλες λαγάνες).
17. Απλώστε κάθε καρβέλι και μετά πατήστε απαλά και τα τέσσερα με βρεγμένη παλάμη, σαν να ήταν ζύμη για πίτσα.
18. Δώστε τους στρογγυλό ή οβάλ σχήμα (προσπαθήστε να έχουν όλα περίπου το ίδιο σχήμα και μέγεθος).
19. Πάρτε μια χοντρή οδοντογλυφίδα και κάντε τρύπες γύρω-γύρω πάνω από τα ψωμιά.
20. Στη συνέχεια, πιέστε τα δάχτυλά σας προς τα κάτω σε κάθε καρβέλι για να κάνετε μικρές τσέπες. Αυτό δίνει στις λαγάνες την ιδιαίτερη εμφάνισή τους.
21. Αλείψτε με πινέλο το μείγμα νερού και ζάχαρης πάνω από κάθε καρβέλι.
22. Τελειώστε πασπαλίζοντας πολύ σουσάμι πάνω από τα καρβέλια.
23. Αφήστε τα τώρα στην άκρη ή ξανά μέσα στο φούρνο για «Φούσκωμα ζύμης» για περίπου 30', ώστε να φουσκώσουν για ακόμα μια φορά.
Γ. Οδηγίες ψησίματος:
24. Ψήστε το ταψί με όλες τις λαγάνες σε προθερμασμένο φούρνο στον αέρα @ 200°C/ 400℉ για 25' (εξαρτάται από το φούρνο).
25. Μόλις χρυσίσουν και γίνουν τραγανές, βγάλτε το ταψί από το φούρνο. Αχχχ αυτές οι γήινες μυρωδιές από φρεσκοψημένο ψωμί, μου σπάσανε τη μύτη!!
26. Αφήστε τις Λαγάνες στον πάγκο της κουζίνας να κρυώσουν εντελώς (να ξέρετε ότι αυτό τις κάνει ακόμα πιο τραγανές).
Δ. Προτάσεις σερβιρίσματος:
Σερβίρετε τις Λαγάνες ολόκληρες ή κομμένες σε φέτες.
Οι τέλειοι συνδυασμοί είναι:
* Λαγάνα για βουτηχτές μέσα σε απλή Ταραμοσαλάτα!
* Λαγάνα με Ταραμοσαλάτα με μελάνι σουπιάς και τηγανιτές γαρίδες
* Σάντουιτς Λαγάνα με Χαλβά με σοκολάτα (εμπορίου με ταχίνι)!
Ένα πραγματικά τραγανό ψωμί για να το απολαύσετε την Καθαρά Δευτέρα και όλες τις μέρες της Μεγάλης Σαρακοστής. Τόσο απλό στην παρασκευή και όμως τόσο εκπληκτικό. Επειδή τίποτα δεν ξεπερνά το σπιτικό ψωμί!!
Ε. Πληροφορίες φύλαξης:
Όπως όλα τα ψωμιά, μπορείτε να ετοιμάσετε και να ψήσετε τις Λαγάνες νωρίτερα, να τις τοποθετήσετε σε πλαστικές σακούλες και να τις φυλάξετε στην κατάψυξη για έως και 1 μήνα. Το ίδιο ισχύει και για τα υπολείμματα.
Ζ. Πληροφορίες και Ιστορία του Ψωμιού Λαγάνα:
Η Λαγάνα ήταν ένα πολύ γνωστό ψωμί στην Ελλάδα ακόμη και στην αρχαιότητα, ως μέρος της καθημερινής διατροφής, ωστόσο η ακριβής προέλευσή της είναι ακόμα ασαφής.
Η πρώτη γραπτή αναφορά της χρονολογείται στον 5ο αιώνα π.Χ. όταν σε ποίημα που έγραψε ο Έλληνας ποιητής Αριστοφάνης στις «Εκκλησιάζουσες» αναφέρει ότι «φτιάχνονται Λαγάνες» εννοώντας ψωμί με λάδι. Τις βρίσκουμε επίσης γραμμένες σε αρχαία αγγεία με το ίδιο όνομα, που προσφέρονταν στους Θεούς.

Η ετυμολογία της λέξης λαγάνα, προέρχεται από την αρχαία λέξη λάγος, που σημαίνει χαλαρός ή/και από τον αρχαίο Ελληνορωμαϊκό όρο λάγανον που δήλωνε ένα παρόμοιο λεπτό ψωμί/πίτα. Αξιοσημείωτο είναι ότι αυτή είναι και η προέλευση της λέξης λαζάνια!
Παραδοσιακά, στην αρχαιότητα η Λαγάνα παρασκευαζόταν άζυμη (δηλαδή χωρίς μαγιά) και ήταν το Ελληνικό αντίστοιχο του εβραϊκού άζυμου ψωμιού "matzo".».

Σήμερα, μπορείτε να γευτείτε λαγάνα οπουδήποτε στην Ελλάδα την Καθαρά Δευτέρα, αλλά η λαγάνα με μαγιά είναι πολύ πιο συνηθισμένη!
Μην χάσετε όλες τις παραδόσεις αυτής της ξεχωριστής ημέρας όπως το πέταγμα των χαρταετών μαζί με το παραδοσιακό Καθαροδευτεριάτικο Τραπέζι!!
Κοιτάξτε επίσης την συνταγή μου σε YouTube βίντεο, το λίν�� είναι: ΕΔΩ
#breakfast#meze#lunch#dinner#sandwich#pastry#lowcost#party#cleanmonday#fasting#vegetarian#vegan#diet#children#lactose#no oil#region#ancient#lagana flatbread#λαγανα με ταχινι#λαγανα με ταχινι αλαδωτη#λαγανα με ταχινι νηστισιμη
0 notes
Text
Epirus Crustless Cheese Pie Aka Zymaropita
🥧

Epirus Crustless Cheese Pie aka Zymaropita - Zymaropita Epirou (Alevropita) i Eykoli Tyropita hwris Fillo me Yiaourti
BY: Greek Cooking Made Easy
SUBSCRIBE TO MY YOUTUBE CHANNEL: https://www.youtube.com/greekcookingmadeeasy
Check My YouTube Video: HERE
Κοιτάξτε Επίσης Την Συνταγή Μου Σε YouTube Βίντεο, Το Λίνκ Είναι: ΕΔΩ
youtube
SERVES 🍴⃒ PREP. TIME 🕔⃒
8 persons 10 min.
COOK. TIME ♨ DIFFIC. LEVEL 👩🍳⃒
35 min. Very Easy
Zymaropita is a renowned crustless pie, from the Epirus prefecture. In the older days, there was not ready made Phyllo or other pastry available. Due to lack of time, house wives in Epirus made this pie without crust (pastry).
A Pie similar to Batsaria (hortopita i.e. made with wild greens) but prepared only with various cheeses (like tyropita), it is quick and easy to prepare, inexpensive and with humble ingredients that you usually have at home, but soooo delicious!
Let's prepare it together.
Suitable for lacto-ovo vegetarians.
Find a selection of all my Cheese Pies-Tyropita by clicking HERE
INGREDIENTS:
Fluid Ingredients:
• 2 large Eggs
• 0.4 cup / 100 gr. / 3.5 oz Greek, strained Yoghurt, 5% fat
• 2/3 cup / 160 ml Fresh Milk, full fat
• 3.3 tbsp. / 50 ml Olive Oil, light
Solid (dry) ingredients:
• 2 cups / 250 gr. / 9 oz Self-rising Flour, sifted
• 125 gr. / 4.4 oz Feta cheese, crumbled
• 125 gr. / 4.4 oz Grated Cheeses, half Kefalotyri cheese (altern: Peccorino), half Gouda cheese
• A pinch of Salt
• Ground Pepper
• Optional: 1 tsp. dried Mint
• To garnish: About 3 tbsp. / 30 gr. / 1 oz Sesame Seeds

METHOD:
A. Mix the fluid (liquid) ingredients for the Zymaropita-crustless pie:
1. Break the 2 eggs in a large bowl.
2. Pour the milk and yoghurt in the bowl as well.
3. Whisk to blend them very well. Reserve the liquid mix.
B. Mix the dry (solid) ingredients for the Zymaropita-crustless pie:
4. In another large bowl, place the sifted flour.
5. Season with a pinch of ground salt and ground pepper, to taste.
6. Optionally, add the dry mint, pressed between your palms to release its aromas.
7. Next add the grated cheeses and most of the crumbled feta cheese on top.
8. Suggestion: Reserve about 25 gr. / 1 oz feta to sprinkle on top of the pie, before baking.
9. With a large spoon mix all dry ingredients very well.
C. Assemble the pie:
10. Pour the olive oil in the liquid mix and whisk to blend it in.
11. Then start by folding gradually, spoon by spoon, the dry mix into the liquid mix.
12. Whisk constantly while you add the dry mix, until you get a thick mush, making sure all ingredients are very well incorporated.
13. Spray or brush with some oil the bottom and sides of a Pyrex tray of 22 x 30 cm / 8.7 x 12 in.
14. Note: You can even use a larger tray to get a thinner pie, if you prefer.
15. Tip the pie mix in to the tray, and level its surface.
16. Sprinkle the rest of crumbled feta cheese all around the top of the pie and then the sesame seeds (optionally, you could add some black sesame seeds too).
17. Ready for baking, as I promised, so easy!
D. Baking instructions:
18. Bake the pie on the bottom shelf of a preheated oven, FAN @ 180 ℃/ 350 ℉ for about 35' or until it turns golden all around (depends on the oven).
19. When ready, remove from the oven.
20. Place the tray with baked pie on the kitchen bench and let it cool down a bit.
E. Serving suggestions:
21. When it cools down a bit, cut the pie in large pieces.

Zymaropita can be served very hot, warm, lukewarm or at room temp. and that makes it the perfect pie to serve practically all day and anywhere!
A great meze (appetizer), snack, lunch, school/work lunch, even a great finger food-cut in small squares-for a party buffet!
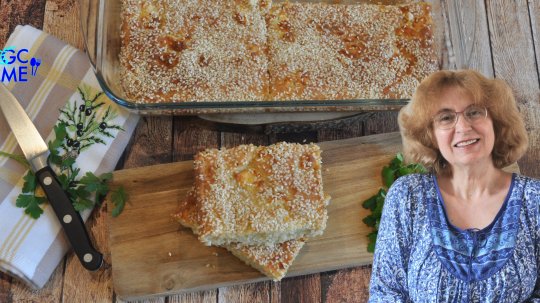
Golden and crispy on the surface while fluffy and succulent inside with the tangy flavors from the yoghurt and various cheeses!
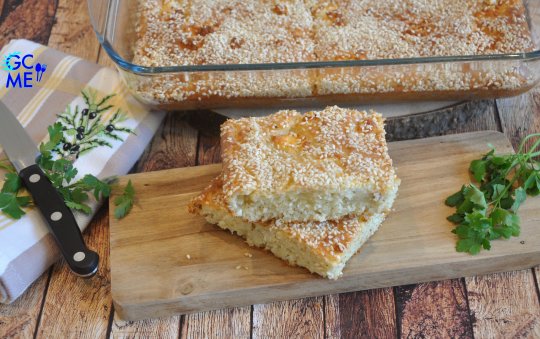
Ideal for busy parents, it certainly is an easy yet scrumptious Pie, to be enjoyed by the whole family!!
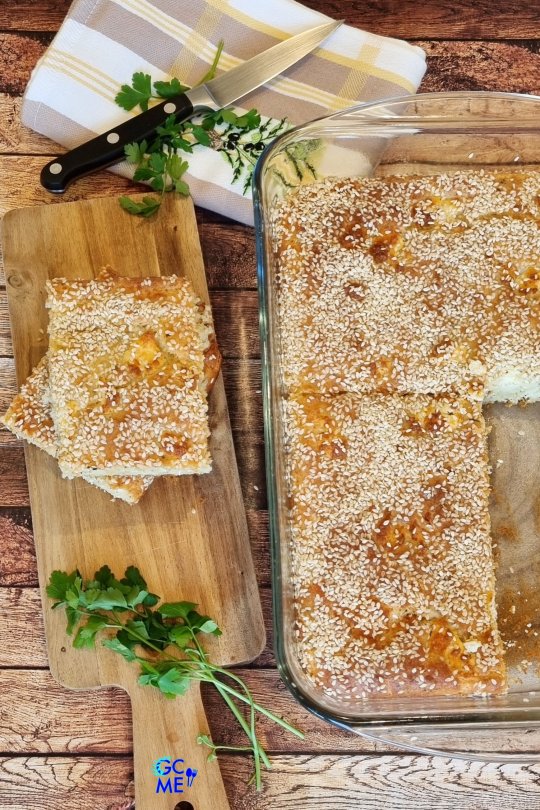
F. Storage Info:
After it cools down, this Pie can be stored, in individual squares, wrapped in aluminum foil, in the fridge for 1 week, or in the freezer for 1 month.
G. Info about Epirus Zymaropita:
Epirus is intertwined with the most delicious and famous pies, an integral part of the local gastronomic experience. This is because pies are based on natural ingredients.
Historically, Epirus used to be poor with scarce materials. The women went out to work in the fields with very limited time to cook. They usually had chicken and sheep in their farm, and added a few things available in their pantry to feed their family.

Hence, the simple Zymaropita was created, which is also found in other Greek regions like in Messinia and Aitoloakarnania. It is also known with many other names: Zarkopita (zarkos which in Epirotic means naked i.e. crustless), Kourkoutopita (from kourkouti meaning batter), Alevropita (i.e. made with flour), Kasiopita (Kasiou in Vlach means cheese) or even i Tiropita tis Tebelas "Lazy cheese pie".

Zymaropita was traditionally baked in wood-burning ovens either in large, shallow tins (‘sinia’, traditional round hammered copper baking trays) or in a yastra i.e. clay pot.
Check my YouTube Video: HERE
Ζυμαρόπιτα Ηπείρου (Αλευρόπιτα) ή Εύκολη Τυρόπιτα χωρίς Φύλλο με Γιαούρτι
BY: Greek Cooking Made Easy
SUBSCRIBE TO MY YOUTUBE CHANNEL: https://www.youtube.com/greekcookingmadeeasy
ΜΕΡΙΔΕΣ🍴⃒ ΠΡΟΕΤΟΙΜΑΣΙΑ 🕔⃒
8 10 min.
ΜΑΓΕΙΡΕΜΑ ♨ ΒΑΘΜ. ΔΥΣΚΟΛΙΑΣ 👩🍳⃒
35 min. Πολύ Εύκολη
Η Ζυμαρόπιτα είναι η φημισμένη πίτα χωρίς φύλλο, από την Ήπειρο. Παλιότερα δεν υπήρχε έτοιμο Φύλλο κρούστας ή άλλη ζύμη. Λόγω έλλειψης χρόνου, οι νοικοκυρές της Ηπείρου έφτιαχναν αυτή την πίτα χωρίς φ��λλο.
Παρόμοια με την Μπατσαριά (χορτόπιτα) αλλά παρασκευασμένη μόνο με διάφορα τυριά σα τυρόπιτα, ετοιμάζεται γρήγορα και εύκολα, είναι μια οικονομική πίτα με ταπεινά υλικά που συνήθως έχετε στο σπίτι, αλλά τόοοσο νόστιμη!
Πάμε να την ετοιμάσουμε μαζί.
Κατάλληλη για χορτοφάγους.
Δείτε τη συλλογή από όλες μου τις συνταγές για Τυρόπιτα ΕΔΩ
ΥΛΙΚΑ:
Υγρά Υλικά:
• 2 μεγάλα Αυγά
• 0,4 φλ. / 100 γρ. / 3,5 oz στραγγιστό Γιαούρτι, 5% λιπαρά
• 2/3 φλ. / 160 ml Φρέσκο Γάλα, πλήρες
• 3,3 κ.σ. / 50 ml Ελαιόλαδο, ελαφρύ
Ξερά Υλικά:
• 2 φλ. / 250 γρ. / 9 oz Αλεύρι που φουσκώνει μόνο του, κοσκινισμένο
• 125 γρ. / 4,4 oz τυρί Φέτα, θρυμματισμένη
• 125 γρ. / 4,4 oz τριμμένα Τυριά, μισό Κεφαλοτύρι (εναλ: Πεκορίνο), μισό Γκούντα
• Μια πρέζα Αλάτι
• Φρεσκοτριμμένο Πιπέρι
• Προαιρετικά: 1 κ.γ. ξερός Δυόσμος
• Για γαρνίρισμα: Περίπου 3 κ.σ. / 30 γρ. / 1 oz Σουσάμι
ΜΕΘΟΔΟΣ:
Α. Ανακατέψτε τα υγρά υλικά για τη ζυμαρόπιτα:
1. Σπάστε τα 2 αυγά σε ένα μεγάλο μπολ.
2. Ρίξτε και το γάλα και το γιαούρτι μέσα στο μπολ.
3. Χτυπήστε με το σύρμα να ενωθούν πολύ καλά. Κρατήστε στην άκρη το υγρό μείγμα.
Β. Ανακατέψτε τα ξερά υλικά για τη ζυμαρόπιτα:
4. Σε ένα άλλο μεγάλο μπολ βάλτε το κοσκινισμένο αλεύρι.
5. Καρυκέψτε με μια πρέζα αλάτι και φρεσκοαλεσμένο πιπέρι, κατά βούληση.
6. Προαιρετικά προσθέστε τον ξερό δυόσμο, πιεσμένο ανάμεσα στις παλάμες σας για να απελευθερωθούν τα αρώματά του.
7. Στη συνέχεια προσθέστε τα 2 τριμμένα τυριά και από πάνω την περισσότερη από τη θρυμματισμένη φέτα.
8. Πρόταση: Κρατήστε στην άκρη περίπου 25 γρ. / 1 oz φέτα για να πασπαλίσετε πάνω από την πίτα, πριν την ψήσετε.
9. Με ένα μεγάλο κουτάλι ανακατέψτε πολύ καλά όλα τα ξερά υλικά.
Γ. Συναρμολογήστε την πίτα:
10. Ρίξτε το ελαιόλαδο στο υγρό μείγμα και χτυπήστε με το σύρμα να ομογενοποιηθεί.
11. Στη συνέχεια ξεκινήστε διπλώνοντας σταδιακά, κουταλιά κουταλιά, το ξερό μείγμα μέσα στο υγρό μείγμα.
12. Χτυπάτε με το σύρμα συνεχώς, ενώ προσθέτετε το στεγνό μείγμα, μέχρι να γίνει ένας πηχτός χυλός, φροντίζοντας να έχουν ενσωματωθεί πολύ καλά όλα τα υλικά.
13. Ψεκάστε ή αλείψτε λίγο λάδι στο κάτω μέρος και τα πλαϊνά ενός ταψιού Pyrex 22 x 30 cm / 8,7 x 12 in.
14. Σημείωση: Μπορείτε να χρησιμοποιήσετε και μεγαλύτερο ταψί αν προτιμάτε πιο λεπτή πίτα.
15. Χύστε το μείγμα της πίτας μέσα στο ταψί και ισιώστε την επιφάνειά της.
16. Πασπαλίστε την υπόλοιπη θρυμματισμένη φέτα πάνω από τη πίτα και μετά το σουσάμι (προαιρετικά, μπορείτε να προσθέσετε και λίγο μαύρο σουσάμι).
17. Έτοιμη η πίτα για ψήσιμο, όπως υποσχέθηκα, τόσο εύκολη!
Δ. Οδηγίες ψησίματος:
18. Ψήστε την πίτα στη κάτω σχάρα ενός προθερμασμένου φούρνου, στον αέρα @ 180 ℃/ 350 ℉ για 35' περίπου ή μέχρι να ροδίσει παντού (εξαρτάται από τον φούρνο).
19. Μόλις είναι έτοιμη, βγάλτε τη από το φούρνο.
20. Βάλτε το ταψί με την ψημένη πίτα στον πάγκο της κουζίνας και αφήστε να κρυώσει λίγο.
Ε. Προτάσεις σερβιρίσματος:
21. Μόλις κρυώσει λίγο, κόψτε την πίτα σε μεγάλα κομμάτια.
Η Ζυμαρόπιτα μπορεί να σερβιριστεί πολύ καυτή, ζεστή, χλιαρή ή σε θερμοκρασία δωματίου. Αυτό την κάνει μια τέλεια πίτα για να την σερβίρετε σχεδόν όλη μέρα και οπουδήποτε!
Ένας υπέροχος μεζές (ορεκτικό), σνακ, μεσημεριανό, γεύμα για το σχολείο/εργασία, ακόμα και ένα φανταστικό finger food-κομμένη σε κυβάκια-για μπουφέ πάρτι!
Χρυσή και τραγανή απέξω ενώ αφράτη και ζουμερή εσωτερικά με τις πικάντικες γεύσεις από το γιαούρτι και τα διάφορα τυριά!
Ιδανική για πολυάσχολους γονείς, είναι σίγουρα μια πανεύκολη αλλά τόσο λαχταριστή πίτα, για να την απολαύσει όλη η οικογένεια!!
Ζ. Πληροφορίες φύλαξης:
Αφού κρυώσει, αυτή η πίτα μπορεί να φυλαχτεί, σε ατομικά κομμάτια τυλιγμένα σε αλουμινόχαρτο, στο ψυγείο για 1 εβδομάδα ή στην κατάψυξη για 1 μήνα.
Η. Πληροφορίες για την Ζυμαρόπιτα Ηπείρου:
Η Ήπειρος είναι συνυφασμένη με τις πιο νόστιμες και διάσημες πίτες, αναπόσπαστο κομμάτι της τοπικής γαστρονομικής εμπειρίας. Αυτό συμβαίνει επειδή οι πίτες βασίζονται σε φυσικά συστατικά.
Ιστορικά, η Ήπειρος ήταν παλιά φτωχή με λιγοστά υλικά. Οι γυναίκες έβγαιναν να δουλέψουν στα χωράφια με πολύ περιορισμένο χρόνο για να μαγειρέψουν. Συνήθως είχαν κότες και πρόβατα στο χωράφι τους και πρόσθεταν λίγα επιπλέον υλικά διαθέσιμα στο ντουλάπι τους για να ταΐσουν την οικογένειά τους.
Έτσι δημιουργήθηκε η απλή Ζυμαρόπιτα, η οποία συναντάται και σε άλλες περιοχές όπως στη Μεσσηνία και την Αιτωλοακαρνανία. Είναι επίσης γνωστή με πολλές άλλες ονομασίες: Ζαρκόπιτα (ζάρκος που στα Ηπειρώτικα σημαίνει γυμνός, χωρίς φύλλο), Κουρκούτοπιτα (από το κουρκούτι), Αλευρόπιτα (δηλαδή φτιαγμένη με αλεύρι), Κασιόπιτα (Κασίου στα βλάχικα σημαίνει τυρί) ή ακόμα και η Τυρόπιτα της Τεμπέλας.
Η ζυμαρόπιτα παραδοσιακά ψήνονταν σε ξυλόφουρνο είτε σε μεγάλα, ρηχά ταψιά («σινιά», παραδοσιακά στρογγυλά σφυρήλατα χάλκινα ταψιά) ή σε γάστρα, δηλαδή πήλινο σκεύος.
Κοιτάξτε επίσης την συνταγή μου σε YouTube βίντεο, το λίνκ είναι: ΕΔΩ
#meze#lunch#dinner#snacks#fingerfood#pie#pastry#cheese#yoghurt#lowcost#leftovers#party#kids#mother#carnival#vegetarian#region#north#mainland#peloponnese#zymaropita#crustless cheese pie#ζυμαροπιτα#αλευροπιτα#ζυμαρόπιτα#αλευρόπιτα#τυρόπιτα εύκολη
0 notes
Text
Greek Spetsofai Pie With Homemade Short Crust Pastry
🥧
Greek Spetsofai Pie with homemade short crust Pastry - Pita Spetzofai me spitiki trifti zymi
BY: Greek Cooking Made Easy
SUBSCRIBE TO MY YOUTUBE CHANNEL: https://www.youtube.com/greekcookingmadeeasy
Check My YouTube Video: HERE
Κοιτάξτε Επίσης Την Συνταγή Μου Σε YouTube Βίντεο, Το Λίνκ Είναι: ΕΔΩ
youtube
SERVES 🍴⃒ PREP. TIME 🕔⃒
8 pers. 40 min. + 1 h wait
COOK. TIME ♨ DIFFIC. LEVEL 👩🍳⃒
Filling: 15 min.
Pie: 45 min. Easy-Moderate
This recipe is dedicated to those who love Greek Spetzofai.
For those who don't know, Spetzofai or Spetsofai is a rustic spicy Greek dish made with country sausages & peppers in a thick tomato sauce. A specialty of Pelion (region of Thessaly) and a very hearty and nourishing dish for the cold winter.
In this recipe, Spetzofai is beautifully wrapped in short crust pastry, creating a pie that can stand as a whole meal by itself or as your centerpiece at any special celebration, all year round!
Time to show you how to prepare this extraordinary pie, where I am redefining a classic Greek dish to new levels of palatal delightfulness!
Check also my unique recipe for Spinach and cheese Lattice Pie with short crust pastry HERE
INGREDIENTS
Ingredients for the homemade short crust Pastry:
· 400 gr. / 14 oz / 3.2 cups All-purpose Flour
· 250 gr. / 9 oz Butter (or Margarine) soft, at room temp.
· 1 tsp. Baking powder
· 1 large Egg at room temp.
· 1 small Egg for glazing
· A bit of extra flour for rolling the dough
· ½ tsp. Ground Salt and Ground Pepper

Ingredients for the sausage filling:
· About 250 gr. / 9 oz / 1 large Greek, country Sausage, finely sliced
· 250 gr. / 9 oz Pork Pancetta, finely chopped
· 125 gr. / 4.4 oz Mushrooms, finely chopped
· 2 large Onions, finely chopped
· 1 green Pepper (capsicum), cubed
· 1 Florina Pepper, cut in strips (sweet smoked red pepper)
· 1 Garlic clove, minced
· 1 pinch Boukovo i.e. chili flakes
· 1 tsp. ground All-spice (bahari)
· 1 tbsp. / 15 ml Balsamic Vinegar
· 3 tbsp. / 45 ml Olive oil
· 1.5 tbsp. / 20 ml Tomato Paste (puree)
· 1/2 bunch fresh Parsley, finely chopped
· Ground Salt and pepper
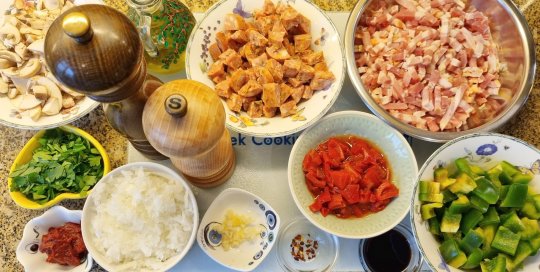
METHOD:
A. Prepare the short crust pastry:
1. Using a strong electric mixer, cream together the (soft) butter with the large egg, for 3'-4' on high speed, or until the mix turns white and fluffy.
2. Reduce speed and fold in the flour, spoon by spoon, blending it evenly into the mix.
3. Season with ½ tsp. ground Salt and some Pepper.
4. Lastly, add the baking powder and beat just enough to incorporate it. Stop the mixer.
5. You will see that the dough has become a bit hard!
6. Test to see if the dough is ready to be worked with: If it is smooth and elastic, a bit crumbly and doesn’t stick to your fingers, then it is ready. If it is too hard, add a bit of milk. If it is too soft and sticky, add a bit of flour.
7. Then let the dough rest for 1 hour before proceeding with the recipe.
B. Prepare the sausage filling:
8. Pour the Olive oil into a wide pot over high heat.
9. When it heats up, sauté the chopped onion first for 2', stirring regularly.
10. Next add the minced garlic and sauté it together with the onion for 1' more.
11. Add the tomato puree, scraping the bottom of the pot to release its aromas. Stir to blend it in, adding also the all-spice.
12. Lower the heat and add the green pepper cubes, followed by the pancetta and mushroom slices. Stir to sauté them.
13. Season with ground salt and pepper, to taste.
14. Now add the chili flakes and chopped sausage, blending them in. Pour in the balsamic vinegar.
15. Place the lid on top of the pot and cook the filling for about 5', so that most of its water will evaporate.
16. Remove lid, add the florina pepper strips and cook (uncovered) for 10' more.
17. Turn off the heat.
18. Finish by adding the chopped parsley into the filling.
19. Let it cool down completely before assembling the pie.
C. Assembly of the pie:
20. Spray or brush some oil on the bottom and sides of a round spring form of 26 cm / 10 in (with side opening). This form helps to take out and serve the pie easily after baking.
21. Line 2/3 of the dough evenly into the bottom of the tin, raising it with your fingers around the edges.
22. Pour the sausage filling on top of the crust. Level it with your spoon.
23. Next cover the pie with the remaining of the short crust pastry.
24. IMPORTANT NOTE: Since you are working with short crust pastry which crumbles more easily, the easiest way to roll out the rest of dough is on a floured parchment paper. That makes it easier to lift and transfer the dough on top of the pie.
25. I made a mistake here and rolled it out on a flat, floured surface instead, which made it harder for me to transfer as one layer, to cover the pie (sometimes I forget while making a video, but we are only human 🤷♀️).
26. In any case, it worked at the end, by sticking together smaller pieces of dough to cover the pie, as during baking dough sticks together again.
27. With a brush, glaze the pie's surface using 1 small egg (whisked in a small bowl with 1 tbsp. water). That will give the pie its golden color at the end of baking. In my case, the egg mix also "covered" my mistake by connecting the pastry pieces at the top!
28. Scar the pie in the middle, like a star, to let steam out during baking. The Spetzofai Pie is now ready for the oven.
29. Tip: If preparing ahead, you can, at this point, freeze the pie covered with plastic wrap, for up to 1 month.
D. Baking instructions:
30. Bake Spetzofai Pie in a preheated oven FAN @ 180 ℃ / 350 ℉ for around 45' or until the crust becomes golden brown (depends on the oven).
31. Then remove from the oven, and leave it on the kitchen bench for 10' to set.
E. Serving suggestion:
When Spetzofai Pie has cooled down a bit, open the spring form and take it out easily on a nice round platter. To serve, cut large triangular pieces.
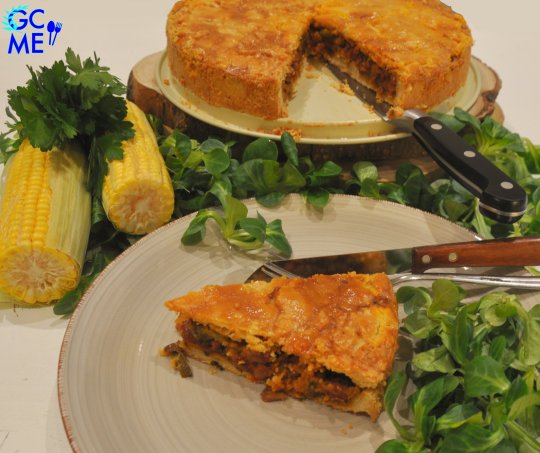
The amazing Spetzofai Pie can be served very hot or at room temperature with some seasonal salad. It can be eaten as main course or as 1st course in smaller portions.
Look at this gorgeous, umami pie! Simply wow 😮!!
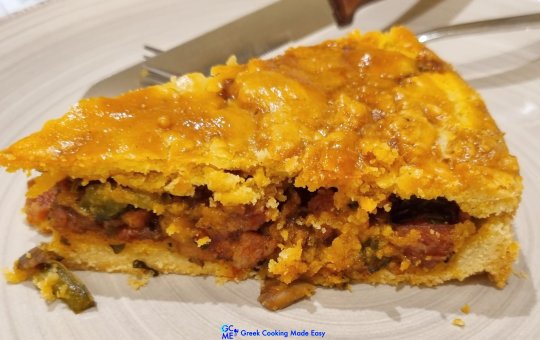
Crispy and filled with so many tangy, sharp and piquant tastes and scents!

Guaranteed that it will be devoured in minutes and an umami, impressive centerpiece at any special celebration.
Good luck with recreating my recipe.

F. Storage info:
After it has cooled down, the pie could be stored, covered, in the fridge for up to 1 week or in the freezer for 1 month.
Check my YouTube Video: HERE

Πίτα Σπετσοφάϊ με σπιτική τριφτή Ζύμη
BY: Greek Cooking Made Easy
SUBSCRIBE TO MY YOUTUBE CHANNEL: https://www.youtube.com/greekcookingmadeeasy
ΜΕΡΙΔΕΣ🍴⃒ ΠΡΟΕΤΟΙΜΑΣΙΑ 🕔⃒
8 40 min. + 1 ώρα αναμονή
ΜΑΓΕΙΡΕΜΑ ♨ ΒΑΘΜ. ΔΥΣΚΟΛΙΑΣ 👩🍳⃒
Γέμιση: 15 min.
Πίτα: 45 min. Εύκολο-Μέτριο
Αυτή η συνταγή είναι αφιερωμένη σε όσους αγαπούν το Σπετσοφάϊ.
Για όσους δεν γνωρίζουν, το Σπετσοφάϊ ή Σπετζοφάϊ είναι ένα χω��ιάτικο πικάντικο πιάτο που φτιάχνεται με χωριάτικα λουκάνικα & πιπεριές σε πηχτή σάλτσα ντομάτας. Μια σπεσιαλιτέ του Πηλίου (Θεσσαλία) και ένα πολύ χορταστικό και θρεπτικό πιάτο για τον κρύο χειμώνα.
Σε αυτή τη συνταγή, το Σπετσοφάϊ τυλίγεται υπέροχα σε τριφτή ζύμη, δημιουργώντας μια πίτα που μπορεί να σταθεί σαν ολόκληρο γεύμα από μόνη της ή ως επίκεντρο σε οποιαδήποτε σπέσιαλ περίσταση, όλο το χρόνο!
Ήρθε η ώρα να σας δείξω πώς να ετοιμάσετε αυτήν την εξαιρετική πίτα, όπου επαναπροσδιορίζω ένα κλασικό Ελληνικό πιάτο σε νέα επίπεδα απόλαυσης που θα ικανοποιήσουν και τους πιο απαιτητικούς ουρανίσκους!
Δείτε επίσης τη διαφορετική συνταγή μου για Σπανακοτυρόπιτα με τριφτή Ζύμη ΕΔΩ
ΥΛΙΚΑ
Υλικά για τη σπιτική τριφτή ζύμη:
• 400 γρ. / 14 oz / 3,2 φλ. Αλεύρι για όλες τις χρήσεις
• 250 γρ. / 9 oz Βούτυρο (ή Μαργαρίνη) μαλακό, σε θερμοκρασία δωματίου
• 1 κ.γ. Μπέικιν πάουντερ
• 1 μεγάλο Αυγό σε θερμοκρασία δωματίου
• 1 μικρό Αυγό για το γλασάρισμα
• Λίγο επιπλέον αλεύρι για να απλώσετε τη ζύμη
• ½ κ.γ. Φρεσκοαλεσμένο αλάτι και αλεσμένο πιπέρι
Υλικά για τη γέμιση με λουκάνικα:
• Περίπου 250 γρ. / 9 oz / 1 μεγάλο Χωριάτικο λουκάνικο, σε φετούλες
• 250 γρ. / 9 oz χοιρινή Πανσέτα, ψιλοκομμένη
• 125 γρ. / 4,4 oz Μανιτάρια, ψιλοκομμένα
• 2 μεγάλα, ξερά Κρεμμύδια, ψιλοκομμένα
• 1 πράσινη Πιπεριά σε καρεδάκια
• 1 καπνιστή πιπεριά Φλωρίνης, κομμένη σε λωρίδες
• 1 σκελίδα Σκόρδο, λιωμένη
• 1 πρέζα Μπούκοβο
• 1 κ.γ. Μπαχάρι σκόνη
• 1 κ.σ. / 15 ml Βαλσάμικο Ξύδι
• 3 κ.σ. / 45 ml Ελαιόλαδο
• 1,5 κ.σ. / 20 ml Ντοματοπελτές
• 1/2 ματσάκι φρέσκος Μαϊντανός, ψιλοκομμένος
• Φρεσκοαλεσμένο αλάτι και πιπέρι
ΜΕΘΟΔΟΣ:
Α. Ετοιμάστε τη τριφτή ζύμη:
1. Χρησιμοποιώντας ένα δυνατό ηλεκτρικό μίξερ, χτυπήστε μαζί το (μαλακό) βούτυρο με το μεγάλο αυγό, για 3'-4' σε δυνατή ταχύτητα ή μέχρι το μείγμα να γίνει σα κρέμα, να ασπρίσει και να αφρατέψει.
2. Χαμηλώστε τη ταχύτητα και διπλώστε μέσα το αλεύρι, κουταλιά κουταλιά, ανακατεύοντάς το ομοιόμορφα στο μείγμα.
3. Καρυκέψτε με ½ κ.γ. φρεσκοαλεσμένο Αλάτι και λίγο πιπέρι.
4. Τέλος προσθέστε το μπέικιν πάουντερ και χτυπήστε μόνο όσο χρειάζεται να ενσωματωθεί. Σταματήστε το μίξερ.
5. Θα δείτε ότι η ζύμη έχει γίνει κάπως σφιχτή!
6. Τεστάρετε τη ζύμη για να δείτε αν είναι έτοιμη να τη δουλέψετε: Αν είναι λεία και ελαστική, θρύβεται λίγο και δεν κολλάει στα δάχτυλά σας, τότε είναι έτοιμη. Αν είναι πολύ σκληρή προσθέστε λίγο γάλα. Αν είναι πολύ μαλακή που κολλάει, προσθέστε λίγο αλεύρι.
7. Στη συνέχεια αφήστε τη ζύμη να ξεκουραστεί για 1 ώρα πριν προχωρήσετε με τη συνταγή.
Β. Ετοιμάστε τη γέμιση με το λουκάνικο:
8. Ρίξτε το Ελαιόλαδο σε μια πλασοτέ κατσαρόλα πάνω από δυνατή φωτιά.
9. Μόλις ζεσταθεί, σοτάρετε πρώτα το ψιλοκομμένο κρεμμύδι για 2', ανακατεύοντας τακτικά.
10. Στη συνέχεια προσθέστε το λιωμένο σκόρδο και σοτάρετε μαζί με το κρεμμύδι για 1' ακόμα.
11. Προσθέστε τον πελτέ ντομάτας, ξύνοντας τον πάτο της κατσαρόλας για να απελευθερωθούν τα αρώματά του. Ανακατέψτε να ομογενοποιηθεί, προσθέτοντας και το μπαχάρι.
12. Χαμηλώστε τη φωτιά και προσθέστε τα καρεδάκια πράσινης πιπεριάς και μετά την πανσέτα και τα μανιτάρια σε φετούλες. Ανακατέψτε να σοταριστούν.
13. Αλατοπιπερώστε, κατά βούληση.
14. Τώρα προσθέστε το μπούκοβο και το ψιλοκομμένο λουκάνικο, ανακατεύοντάς τα. Ρίξτε και το βαλσάμικο ξύδι.
15. Τοποθετήστε το καπάκι πάνω από την κατσαρόλα και ψήστε τη γέμιση για περίπου 5', ώστε να εξατμιστεί το μεγαλύτερο μέρος του νερού της.
16. Αφαιρέστε το καπάκι, προσθέστε τις λωρίδες καπνιστής πιπεριάς Φλωρίνης και μαγειρέψτε τη γέμιση (ακάλυπτη) για 10' ακόμη.
17. Σβήστε τη φωτιά.
18. Τελειώστε προσθέτοντας στη γέμιση τον ψιλοκομμένο μαϊντανό.
19. Αφήστε τη γέμιση να κρυώσει εντελώς πριν συναρμολογήσετε την πίτα.
Γ. Συναρμολόγηση της πίτας:
20. Ψεκάστε ή βουρτσίστε λίγο λάδι στο κάτω μέρος και τα πλαϊνά μιας στρογγυλής φόρμας με ελατήριο 26 cm / 10 in (με τσέρκι-άνοιγμα στο πλάι). Αυτή η φόρμα βοηθά στο να βγάλετε και να σερβίρετε την πίτα εύκολα μετά το ψήσιμο.
21. Στρώστε τα 2/3 της ζύμης ομοιόμορφα στον πάτο της φόρμας, ανασηκώνοντάς την στις άκρες με τα δάχτυλά σας.
22. Ρίξτε μέσα τη γέμιση λουκάνικου. Ισιώστε τη με το κουτάλι σας.
23. Στη συνέχεια σκεπάστε την πίτα με την υπόλοιπη ζύμη.
24. ΣΗΜΑΝΤΙΚΗ ΣΗΜΕΙΩΣΗ: Εφόσον εργάζεστε με τριφτή ζύμη που θρυμματίζεται εύκολα, ο ευκολότερος τρόπος είναι να απλώσετε την υπόλοιπη ζύμη σε αλευρωμένη λαδόκολλα. Αυτό διευκολύνει στο να την ανασηκώσετε και να τη μεταφέρετε για να καλύψει τη πίτα.
25. Εγώ έκανα λάθος και την άνοιξα πάνω σε επίπεδη, αλευρωμένη επιφάνεια, κάτι που μου δυσκόλεψε τη μεταφορά της σαν μια στρώση, για να καλύψει την πίτα (μερικές φορές μπορεί να ξεχνάω κάτι όταν φτιάχνω ένα βίντεο, αλλά τι να κάνουμε, άνθρωποι είμαστε 🤷♀️).
26. Σε κάθε περίπτωση, στο τέλος τα κατάφερα, κολλώντας μεταξύ τους μικρότερα κομμάτια ζύμης για να καλυφθεί η πίτα, καθώς κατά το ψήσιμο τα κομμάτια ζύμης ξανακολλάνε μεταξύ τους.
27. Με ένα πινέλο γλασάρετε την επιφάνεια της πίτας χρησιμοποιώντας 1 μικρό αυγό (χτυπημένο σε ένα μπολάκι με 1 κ.σ. νερό). Αυτό θα δώσει στην πίτα το χρυσαφί της χρώμα στο τέλος του ψησίματος. Στην περίπτωσή μου το μείγμα αυγών «κάλυψε» και το λάθος μου συνδέοντας τα κομμάτια ζύμης στο κάλυμμα της πίτας!
28. Χαράξτε την πίτα στη μέση της, σαν αστέρι, για να φεύγει ο ατμός κατά το ψήσιμο. Η πίτα Σπετσοφάϊ είναι πλέον έτοιμη για το φούρνο.
29. Συμβουλή: Αν την ετοιμάσετε εκ των προτέρων, μπορείτε, σε αυτό το σημείο, να βάλετε την πίτα στη κατάψυξη, καλυμμένη με πλαστική μεμβράνη, για έως και 1 μήνα.
Δ. Οδηγίες ψησίματος:
30. Ψήστε τη Πίτα Σπετσοφάϊ σε προθερμασμένο φούρνο στον αέρα @ 180 ℃ / 350 ℉ για 45' περίπου ή μέχρι να ροδίσει (εξαρτάται από τον φούρνο).
31. Στη συνέχεια βγάλτε την από το φούρνο, και αφήστε τη στον πάγκο της κουζίνας για 10' να δέσει.
Ε. Πρόταση σερβιρίσματος:
Μόλις κρυώσει λίγο η Πίτα Σπετσοφάϊ, ανοίξτε την φόρμα και βγάλτε την πίτα εύκολα σε μια ωραία στρογγυλή πιατέλα. Για το σερβίρισμα κόψτε τη σε μεγάλα τριγωνικά κομμάτια.
Η καταπληκτική πίτα Σπετσοφάϊ μπορεί να σερβιριστεί πολύ ζεστή ή σε θερμοκρασία δωματίου με σαλάτα εποχής. Μπορεί να καταναλωθεί ως κυρίως πιάτο ή σαν 1ο πιάτο σε μικρότερες μερίδες.
Δείτε αυτή την υπέροχη ουμάμι πίτα! Απλά ουάου 😮!!

Τραγανή και γεμισμένη με τόσες πικάντικες, έντονες γεύσεις και αρώματα!
Εγγυημένη ότι θα καταβροχθιστεί μέσα σε λίγα λεπτά και ένα εντυπωσιακό κεντρικό πιάτο σε οποιαδήποτε σπέσιαλ περίσταση.
Καλή επιτυχία.
Ζ. Πληροφορίες φύλαξης:
Αφού κρυώσει, η πίτα μπορεί να διατηρηθεί, σκεπασμένη, στο ψυγείο για έως και 1 εβδομάδα ή στην κατάψυξη για 1 μήνα.
Κοιτάξτε επίσης την συνταγή μου σε YouTube βίντεο, το λίνκ είναι: ΕΔΩ
#Youtube#maincourse#dinner#meat#sausages#pie#pastry#easter#easterfood#carnival#tsiknopempti#region#mainland#pelion#spetsofai#spetzofai#spetsofai pie#πιτα σπετσοφαι#σπετσοφάι#πίτα σπετζοφάι#σπετζοφάι#σπετζοφαι
1 note
·
View note
Text
Fried Spicy Crayfish Meat With Thousand Island Sauce Seaside Meze
🦞

Fried Spicy Crayfish Meat with Thousand Island Sauce Seaside meze - Thalassomezes apo Tiganiti Pikantiki Karavidopsiha me Sauce Thousand Island
BY: Greek Cooking Made Easy
SUBSCRIBE TO MY YOUTUBE CHANNEL: https://www.youtube.com/greekcookingmadeeasy
Check My YouTube Video: HERE
Κοιτάξτε Επίσης Την Συνταγή Μου Σε YouTube Βίντεο, Το Λίνκ Είναι: ΕΔΩ
youtube
SERVES 🍴⃒ PREP. TIME 🕔⃒
4 pers. as meze 10 min.
COOK. TIME ♨ DIFFIC. LEVEL 👩🍳⃒
6 min. Easy
There are some fish restaurants in Greece that I can't wait to visit again and again, as they serve this amazing meze.
In my own kitchen, I always wondered how they manage to fry crayfish and make it so crispy and appetizing. After some experimentation and adapting my recipe for fried crispy small calamari, I was able to succeed and share this recipe with you.
Of course, preparing them at home doesn't compare with savoring them a romantic summer evening by the Aegean Sea, accompanied with cold beer or ouzo.
Transport yourself mentally there by trying my crispy beauties, with those small tips to make them deliciously crunchy!
Suitable for fasting.
INGREDIENTS
Ingredients for the Thousand Island Sauce:
· 2/5 cup / 100 ml Mayonnaise light (or vegan/fasting substitute)
· 1/5 cup / 50 ml Ketchup
· 1 tbsp. / 15 ml Mustard, mild, yellow
· 1 tsp. red wine Vinegar
· A bit of Ground Salt and Pepper
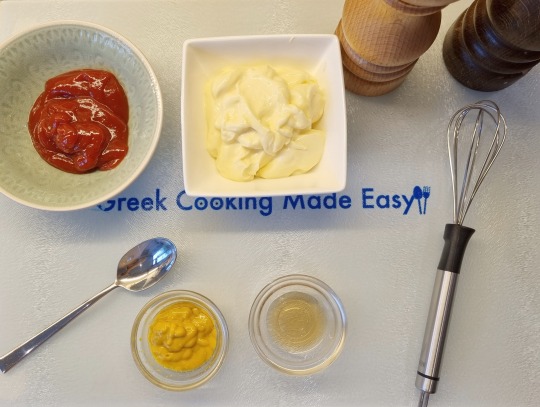
Ingredients for the Crayfish and coating:
· 200 gr. / 7 oz Small Crayfish meat, already cooked (cleaned)
· 0.45 cup / 110 ml Pilsner (Lager) Beer (and a bit of water-50 ml, if needed)
· 2/3 cup / 80 gr. / 2.8 oz All-purpose Flour
· Ground Salt and Pepper
· 1 tbsp. / 15 ml Olive Oil
· 1/2 tsp. Paprika powder
· 2 cups / 500 ml Vegetable Oil for frying

METHOD:
A. Prepare the Thousand Island Sauce:
1. Prepare the sauce earlier in the day and chill it, covered, in the fridge.
2. In a small bowl with the mayonnaise, add the vinegar.
3. Season with a bit of ground salt and pepper, to taste.
4. Next add the ketchup and mustard.
5. Whisk them well to make the sauce really smooth and shiny.
B. Prepare crayfish and batter for coating (kourkouti in Greek):
6. If crayfish are still a bit damp from boiling, pat dry them very well with plenty of absorbent kitchen paper. Place them in a deep bowl.
7. Sprinkle 1 generous tbsp. of the flour on top of crayfish and coat them with a spoon.
8. Place the rest of your flour in another bowl, adding: the beer, olive oil and paprika to make the batter.
9. Season with ground salt and pepper, to taste.
10. Whisk the batter very well until no lumps are left in it.
11. Tip: Add a bit of water (about 50 ml) if the batter is still thick and dense.
12. Now place crayfish into the batter and mix them well until they are completely covered with it.
C. Frying the crayfish:
13. Place a frying pan filled with oil over high heat. Let the oil heat up really well (very important)!
14. When oil is very hot, reduce heat to medium-high, throw in 1/3 of the battered crayfish and fry them for 1' on one side.
15. Flip them and fry for 1' more or until golden! For bigger or uncooked crayfish, double the frying time.
16. Tip: Don't fry all crayfish together. The oil temperature will lower and crayfish will be cooked instead of fried and won't turn crispy!
17. When fried, take them out with a pierced ladle, onto a tray covered with kitchen paper to absorb the excess oil.
18. Continue with frying all crayfish, in 3 batches, in total. If they stick together, separate them with your ladle.
19. When all crayfish are fried, remove the kitchen paper and place them in a new platter to serve. Turn off the heat.
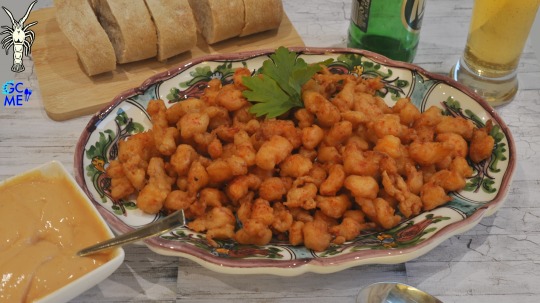
D. Serving suggestion:
Fried Crayfish must be served immediately while still very hot with the Thousand Island sauce to dip them in.
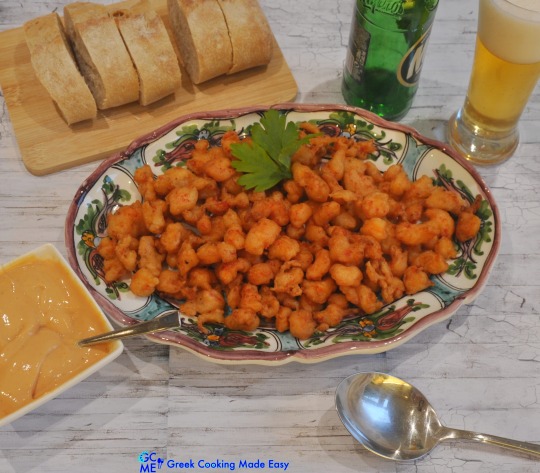
Optionally to make the crayfish even spicier, just before serving, sprinkle some extra paprika on top.
As a meze, they can just be served with slices of bread and of course plenty of cold Greek Beer.
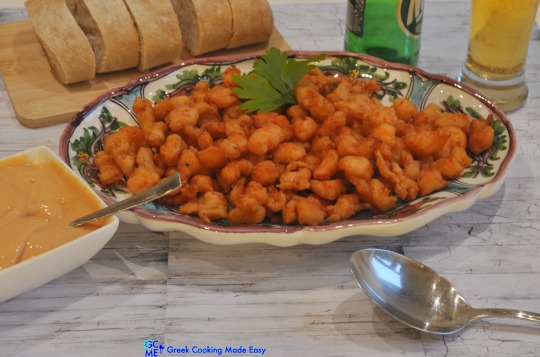
The beer batter is the real secret here, as it helps during frying, to fluff up crayfish, turning them very crispy and scrumptious while still tender inside!
Yummylicious! Cheers, Enjoy!!

E. Info about Crayfish:
Greek Karavida i.e. Crayfish, crawfish, craydids or crawdaddies, all names characterise this special species.
They belong to the family of crustaceans (order Decapoda-meaning 10 legs, phylum Arthropoda), and are closely related to lobster. They are widely considered a real treat and a luxurious seafood in Greece.
Karavida-Crayfish can be found in both freshwater and saltwater (more rare) environments throughout the country.
Freshwater crayfish are found in 20 out of 53 Prefectures of Greece (38%) and they form isolated populations in relatively pristine water bodies (lakes) especially in the North of Greece.
Three indigenous crayfish species (ICS) occur in Greek waters: Astacus astacus, Astacus leptodactylus and Austropotamobius torrentium, as well as one non-indigenous crayfish species (NICS) Pacifastacus leniusculus.
Chefs love to use saltwater or freshwater Karavida either whole or only its flesh (karavidopsiha) on a variety of dishes.
Freshwater crayfish has a natural flavour, ideal for lovers of fresh water fish. Try it either whole with pasta, risotto, salted, grilled or fry its meat like I show you here.
With excerpts from Knowledge and Management of Aquatic Ecosystems.

Check my YouTube Video: HERE
Θαλασσομεζές από Τηγανιτή Πικάντικη Καραβιδόψιχα με σως Thousand Island
BY: Greek Cooking Made Easy
SUBSCRIBE TO MY YOUTUBE CHANNEL: https://www.youtube.com/greekcookingmadeeasy
ΜΕΡΙΔΕΣ🍴⃒ ΠΡΟΕΤΟΙΜΑΣΙΑ 🕔⃒
4 σα μεζές 10 min.
ΜΑΓΕΙΡΕΜΑ ♨ ΒΑΘΜ. ΔΥΣΚΟΛΙΑΣ 👩🍳⃒
6 min. Εύκολο
Υπάρχουν μερικές ψαροταβέρνες στην Ελλάδα που ανυπομονώ να επισκεφτώ ξανά και ξανά, μόνο και μόνο επειδή σερβίρουν αυτόν τον εκπληκτικό θαλασσομεζέ.
Στη δική μου κουζίνα, πάντα αναρωτιόμουν πώς καταφέρνουν να τηγανίζουν καραβιδόψιχα και να τη κάνουν τόσο τραγανή και ορεκτική. Μετά από κάποιους πειραματισμούς και προσαρμόζοντας τη συνταγή μου για τηγανητά τραγανά μικρά καλαμάρια, τα κατάφερα και μοιράζομαι μαζί σας αυτή τη νέα συνταγή.
Φυσικά, η ετοιμασία αυτού του μεζέ στο σπίτι δεν συγκρίνεται με την απόλαυση του μια ρομαντική καλοκαιρινή βραδιά δίπλα στη θαλασσινή αύρα του Αιγαίου με τη συνοδεία παγωμένης μπύρας ή ούζου.
Μεταφερθείτε νοερά εκεί δοκιμάζοντας τις τραγανές καραβιδούλες μου, με μικρές συμβουλές για να σας γίνουν λαχταριστά κριτσανιστές!
Κατάλληλη για νηστεία.
ΥΛΙΚΑ
Υλικά για την σως Thousand Island:
• 2/5 φλ. / 100 ml Μαγιονέζα light (ή βίγκαν/νηστίσιμο υποκατάστατο)
• 1/5 φλ. / 50 ml Κέτσαπ
• 1 κ.σ. / 15 ml Μουστάρδα, ήπια, κίτρινη
• 1 κ.γ. Ξύδι από κόκκινο κρασί
• Λίγο φρεσκοαλεσμένο αλάτι και πιπέρι
Υλικά για την καραβίδα και την επικάλυψη:
• 200 γρ. / 7 oz Καραβιδόψιχα από μικρές καραβίδες, ήδη βρασμένη (καθαρισμένη)
• 0,45 φλ. / 110 ml Μπύρα Pilsner ξανθιά (Lager) (και λίγο νερό-50 ml, αν χρειάζεται)
• 2/3 φλ. / 80 γρ. / 2,8 oz Αλεύρι για όλες τις χρήσεις
• Φρεσκοαλεσμένο αλάτι και πιπέρι
• 1 κ.σ. / 15 ml Ελαιόλαδο
• 1/2 κ.γ. Πάπρικα σκόνη
• 2 φλ. / 500 ml Φυτικό Λάδι για το τηγάνισμα
ΜΕΘΟΔΟΣ:
Α. Ετοιμάστε τη σως Thousand Island:
1. Ετοιμάστε τη σάλτσα νωρίτερα μέσα στη μέρα και αφήστε τη να κρυώσει σκεπασμένη στο ψυγείο.
2. Σε ένα μικρό μπολ με τη μαγιονέζα ρίξτε το ξύδι.
3. Αλατοπιπερώστε λίγο, κατά βούληση.
4. Στη συνέχεια προσθέστε το κέτσαπ και τη μουστάρδα.
5. Χτυπήστε τα καλά ώστε να γίνει η σάλτσα πραγματικά λεία και γυαλιστερή.
Β. Ετοιμάστε τις καραβίδες και το κουρκούτι για επικάλυψη:
6. Αν οι καραβίδες (ψίχα) είναι ακόμα λίγο υγρές από το βράσιμο, στεγνώστε τις πολύ καλά με μπόλικο απορροφητικό χαρτί κουζίνας. Τοποθετήστε τις σε ένα βαθύ μπολ.
7. Πασπαλίστε 1 γενναιόδωρη κ.σ. από το αλεύρι πάνω από τη καραβιδόψιχα και αλείψτε με ένα κουτάλι.
8. Βάλτε το υπόλοιπο αλεύρι σας σε ένα άλλο μπολ, προσθέτοντας: τη μπύρα, το ελαιόλαδο και την πάπρικα για να φτιάξετε το κουρκούτι.
9. Αλατοπιπερώστε, κατά βούληση.
10. Ανακατέψτε πολύ καλά το κουρκούτι με το σύρμα μέχρι να μην έχει καθόλου σβώλους μέσα.
11. Συμβουλή: Προσθέστε λίγο νερό (περίπου 50 ml) αν το κουρκούτι είναι ακόμα πολύ πηχτό και πυκνό.
12. Τώρα ρίξτε τη καραβιδόψιχα στο κουρκούτι και ανακατέψτε καλά μέχρι να καλυφθεί εντελώς με αυτό.
Γ. Τηγάνισμα της καραβιδόψιχας:
13. Βάλτε ένα τηγάνι γεμάτο λάδι πάνω από δυνατή φωτιά. Αφήστε το λάδι να ζεσταθεί πολύ καλά (πολύ σημαντικό)!
14. Μόλις το λάδι κάψει, χαμηλώστε τη φωτιά σε μέτρια προς δυνατή, ρίξτε μέσα το 1/3 από τη καραβιδόψιχα στο κουρκούτι και τηγανίστε για 1' από τη μία πλευρά.
15. Αναποδογυρίστε και τηγανίστε για 1' ακόμα ή μέχρι να ροδίσει! Για μεγαλύτερες ή άψητες καραβίδες, διπλασιάστε το χρόνο τηγανίσματος.
16. Συμβουλή: Μην τηγανίσετε όλη τη καραβιδόψιχα μαζί. Η θερμοκρασία του λαδιού θα πέσει και η καραβιδόψιχα θα ψηθεί αντί για να τηγανιστεί και δεν θα γίνει τραγανή!
17. Μόλις τηγανιστεί, βγάλτε τη με μια τρυπητή κουτάλα, σε ένα ταψί καλυμμένο με χοντρό χαρτί κουζίνας για να απορροφηθεί το περίσσιο λάδι.
18. Συνεχίστε με το τηγάνισμα όλης της καραβιδόψιχας, σε 3 παρτίδες συνολικά. Αν κολλήσουν μεταξύ τους, ξεχωρίστε τις με την κουτάλα σας.
19. Μόλις τελειώσει το τηγάνισμα, αφαιρέστε το χαρτί κουζίνας και βάλτε τη καραβιδόψιχα σε νέα πιατέλα για σερβίρισμα. Σβήστε τη φωτιά.
Δ. Πρόταση σερβιρίσματος:
Η τηγανιτή καραβιδόψιχα πρέπει να σερβίρεται αμέσως όσο είναι ακόμα πολύ ζεστή με τη σως Thousand Island δίπλα για να τη βουτήξετε μέσα.
Προαιρετικά για να γίνει ακόμα πιο πικάντικη, λίγο πριν σερβίρετε, πασπαλίστε από πάνω λίγη επιπλέον πάπρικα.
Σα θαλασσομεζές, μπορεί απλά να σερβιριστεί με φέτες ψωμί και φυσικά άφθονη κρύα μπύρα.
Το κουρκούτι που περιέχει μπύρα είναι το πραγματικό μυστικό εδώ, καθώς βοηθάει κατά το τηγάνισμα, να αφρατέψουν οι καραβίδες, κάνοντας τις πολύ κριτσανιστές και πεντανόστιμες ενώ είναι ακόμα τρυφερές μέσα!
Λαχταριστές! Στην υγειά σας και καλή απόλαυση!!
Ε. Πληροφορίες για τις Καραβίδες:
Η Καραβίδα ανήκει στην οικογένεια των καρκινοειδών (τάξη δεκάποδα, οικογένεια Αστακίδες), και σχετίζεται στενά με τον αστακό. Θεωρείται ευρέως ως ντελικατέσεν και πολυτελές θαλασσινό ��την Ελλάδα.
Η Καραβίδα μπορεί να βρεθεί τόσο σε γλυκό νερό όσο και σε θαλασσινό (αλλά πιο σπάνια) σε όλη τη χώρα.
Οι καραβίδες του γλυκού νερού απαντώνται σε 20 από τους 53 Νομούς της Ελλάδας (38%) και σχηματίζουν απομονωμένους πληθυσμούς σε σχετικά παρθένα υδάτινα σώματα (λίμνες) ιδιαίτερα στη Βόρεια Ελλάδα.
Τρία αυτόχθονα είδη καραβίδας (ICS) απαντώνται στα ελληνικά ύδατα: Astacus astacus, Astacus leptodactylus και Austropotamobius torrentium, καθώς και ένα μη αυτόχθονο είδος καραβίδας (NICS) Pacifastacus leniusculus.
Οι σεφ λατρεύουν να χρησιμοποιούν Καραβίδα του γλυκού ή αλμυρού νερού είτε ολόκληρη ή μόνο τη σάρκα της (καραβιδόψιχα) σε διάφορα πιάτα.
Η καραβίδα του γλυκού νερού έχει φυσική γεύση, ιδανική για τους λάτρεις των ψαριών γλυκού νερού. Δοκιμάστε τη είτε ολόκληρη με ζυμαρικά, ριζότο, αλατισμένη, ψητή ή τηγανίστε τη ψίχα της όπως σας δείχνω εδώ.
Με αποσπάσματα από τη Γνώση και Διαχείριση Υδάτινων Οικοσυστημάτων.
Κοιτάξτε επίσης την συνταγή μου σε YouTube βίντεο, το λίνκ είναι: ΕΔΩ
#lunch#lactose#meze#fingerfood#fish#seafood#pastry#drinks#dips#fasting#cleanmonday#region#aegean#fried crayfish meat#fried crayfish#thousand island sauce#fried spicy crayfish#καραβιδόψιχα#καραβιδόψιχα τηγανιτή#party
0 notes
Text
Oven Baked Greek Orzo Aka Kritharaki With Prawns
🦐

Oven Baked Greek Orzo aka Kritharaki with Prawns - Kritharaki me Garides sto Fourno
BY: Greek Cooking Made Easy
SUBSCRIBE TO MY YOUTUBE CHANNEL: https://www.youtube.com/greekcookingmadeeasy
Check My Short YouTube Video: HERE
Κοιτάξτε Επίσης Την Συνταγή Μου Σε Short YouTube Βίντεο, Το Λίνκ Είναι: ΕΔΩ
youtube
SERVES 🍴⃒ PREP. TIME 🕔⃒
6 persons 10 min.
COOK. TIME ♨ DIFFIC. LEVEL 👩🍳⃒
50 min. Easy
A few months ago, I posted the recipe for oven baked orzo pasta i.e. Kritharaki (in a clay pot) with vegetables. It's always a staple in my home, thus I decided to try it with prawns.
It's a surprisingly easy one-tray dish, prepared in 10', before it goes into the oven, that does all the work.
So now you have a new Greek dish with Orzo and the timeless, perfect combo with prawns and melted cheese, which I am certain you will enjoy.
Let’s find out together how to prepare it, shall we?!
INGREDIENTS:
Almost 1.5 cups / 250 gr. / 9 oz Village Orzo Pasta (kritharaki)
800 gr. / 1 lb 11.75 oz Large Prawns (fresh or frozen)
60 ml / 4 tbsp. Olive Oil
350 gr. / 12 oz / 330 ml Tomato Sauce (passata)
1 large Onion or 2 medium ones, finely chopped
1-2 Garlic Cloves, finely chopped
3/4 tsp. All-Spice (bahari in Greek)
680 ml / 2.7 cups Water
About 1/2 cup / 60 gr. / 2.1 oz Kefalotyri or Parmesan Cheese, grated
Ground Salt and Pepper
Optional for garnishing: 1 tbsp. Parsley, finely chopped
METHOD:
A. Prepare the Prawns:
1. I used frozen and thawed, raw prawns with shell on (no heads).
2. To peel the prawns, remove the legs first. Then peel easily the shells from the prawns.
3. Squeeze the tail to remove it from the body.
4. Next devein the prawns, by using a small sharp knife to make a slit along the middle of the back to expose the dark vein. Then pull out the vein gently.
5. When all prawns are cleaned, place them in a colander.
6. Wash them thoroughly under cold, running water and let them strain for a while.
B. Assemble the dish for baking:
7. Spray or brush some oil on a large Pyrex dish of 25 x 35 cm / 10 x 14 in.
8. Spread the orzo in the pot.
9. Pour the Olive oil on top and toss orzo around to oil it very well. That helps it stay grainy, “al dente” and not mushy when baked in the oven!
10. Add the chopped onion and garlic. Blend them in.
11. Next scatter the cleaned prawns all around the dish.
12. Pour the tomato sauce in the pot and mix.
13. Add about 680 ml water in the sauce. Water needs to be about 2 cm / 0.8 in. on top of Orzo. Stir to blend all ingredients.
14. Season with the All-spice and ground Salt and Pepper, to taste, blending them in.
15. Ready for the oven, wasn't it easy?!
C. Baking instructions:
16. Place dish on the bottom shelf of a preheated Oven, top and bottom heating Elements on = @170℃ / 340℉ and bake for about 50' (depends on the oven).
17. TIP-1: DO NOT USE FAN, because it results on Orzo drying out!
18. TIP-2: Don't overcook Orzo! Keep in mind that it continues getting cooked even after you remove the dish from the oven!
19. After 30', open the oven and stir orzo and prawns. Return in the oven.
20. The last 10' before food is ready, open the oven and sprinkle the grated cheese on top.
21. After a total of 50', it should be ready. Turn off the oven.
22. Remove pot from the oven and place it on a rack or the kitchen bench for 10' to set, before serving.
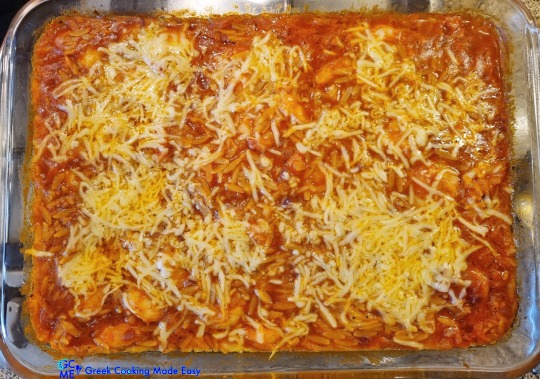
D. Serving Suggestion:
23. Serve baked Orzo and Prawns while still very warm. Optionally, at the last minute, you can sprinkle some chopped parsley on top of each individual plate.

This beyond delicious oven baked Orzo with Prawns is truly a whole meal.
Here I have it served with steamed vegetables and freshly cut bread.
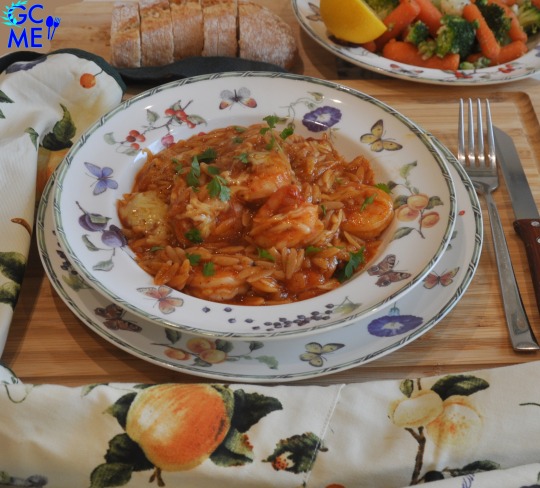
Quite nutritious and healthy, it can be served for lunch or dinner. You could even place it in a small container for work lunch.
Have a look at this beautiful, grainy Orzo! Its taste is so good, as it has absorbed the sea flavors of the prawns.

A real treat for the whole family to enjoy!!
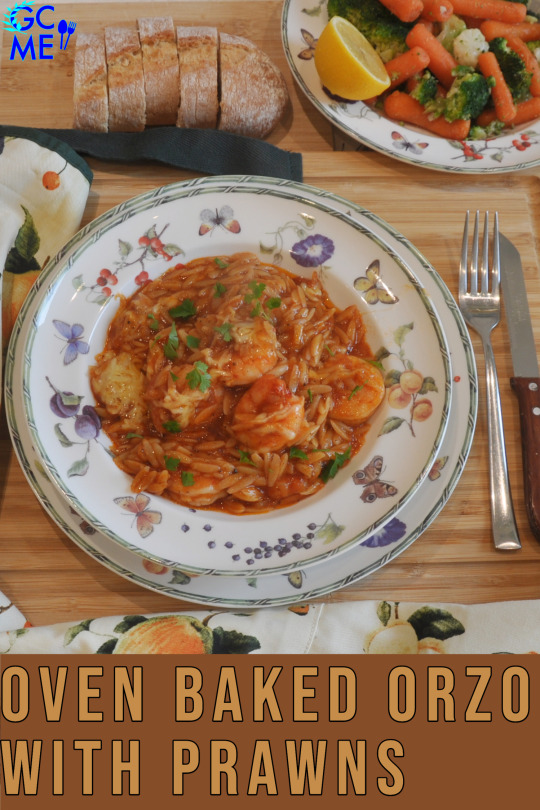
E. Storage info:
Baked Orzo with Prawns can be stored (when cool) in an airtight container, in the fridge, for up to 1 week or in the freezer for 1 month.
Check my short YouTube Video: HERE
Κριθαράκι με Γαρίδες στο Φούρνο
BY: Greek Cooking Made Easy
SUBSCRIBE TO MY YOUTUBE CHANNEL: https://www.youtube.com/greekcookingmadeeasy
ΜΕΡΙΔΕΣ🍴⃒ ΠΡΟΕΤΟΙΜΑΣΙΑ 🕔⃒
6 άτομα 10 min.
ΜΑΓΕΙΡΕΜΑ ♨ ΒΑΘΜ. ΔΥΣΚΟΛΙΑΣ 👩🍳⃒
50 min. Εύκολο
Πριν λίγους μήνες δημοσίευσα τη συνταγή για Κριθαράκι φούρνου (στη γάστρα) με λαχανικά. Είναι από τα βασικά πιάτα στο σπίτι μου, γι' αυτό αποφάσισα να το δοκιμάσω με γαρίδες.
Ένα εκπληκτικά εύκολο φαγητό ενός ταψιού, που ετοιμάζεται σε 10', πριν μπει στο φούρνο, που κάνει όλη τη δουλειά.
Τώρα λοιπόν έχετε ένα νέο πιάτο με Κριθαράκι και τον διαχρονικό, τέλειο συνδυασμό του με γαρίδες και λιωμένο τυρί, που είμαι σίγουρη ότι θα απολαύσετε.
Τι λέτε, να δούμε μαζί πώς να το ετοιμάσουμε;!
ΥΛΙΚΑ:
• Σχεδόν 1,5 φλ. / 250 γρ. / 9 oz Χωριάτικο Κριθαράκι
• 800 γρ. / 1lb 11,75 oz Μεγάλες Γαρίδες (φρέσκες ή κατεψυγμένες)
• 60 ml / 4 κ.σ. Ελαιόλαδο
• 350 γρ. / 12 oz / 330 ml έτοιμη σάλτσα Nτομάτα (πασάτα)
• 1 μεγάλο ξερό Κρεμμύδι ή 2 μέτρια, ψιλοκομμένα
• 1-2 Σκελίδες Σκόρδο, ψιλοκομμένες
• 3/4 κ.γ. Μπαχάρι
• 680 ml / 2,7 φλιτζάνια Νερό
• Περίπου 1/2 φλ. / 60 γρ. / 2,1 oz Κεφαλοτύρι ή παρμεζάνα, τριμμένο
• Φρεσκοαλεσμένο αλάτι και πιπέρι
• Προαιρετικά για γαρνίρισμα: 1 κ.σ. Μαϊντανός, ψιλοκομμένος
ΜΕΘΟΔΟΣ:
Α. Ετοιμάστε τις γαρίδες:
1. Χρησιμοποίησα κατεψυγμένες και αποψυγμένες, ωμές γαρίδες με κέλυφος (χωρίς κεφάλι).
2. Για να ξεφλουδίσετε τις γαρίδες, αφαιρέστε πρώτα τα πόδια. Ξεφλουδίστε κατόπιν εύκολα τα κελύφη από τις γαρίδες.
3. Πιέστε την ουρά για να την τραβήξετε και αφαιρέσετε από το σώμα.
4. Στη συνέχεια, καθαρίστε το εντεράκι στις γαρίδες, χρησιμοποιώντας ένα μικρό κοφτερό μαχαίρι για να κάνετε μια σχισμή κατά μήκος στη μέση της πλάτης ώστε να αποκαλύψετε το σκούρο έντερο. Τραβήξτε το απαλά.
5. Μόλις καθαριστούν όλες οι γαρίδες, τοποθετήστε τις σε ένα τρυπητό.
6. Πλύντε τις καλά με κρύο, τρεχούμενο νερό και αφήστε να στραγγίσουν για λίγο.
Β. Συναρμολογήστε το φαγητό για ψήσιμο:
7. Ψεκάστε ή αλείψτε λίγο λάδι σε ένα μεγάλο ταψί Pyrex 25 x 35 εκ. / 10 x 14 ίντσες.
8. Απλώστε το κριθαράκι στο ταψί.
9. Ρίξτε από πάνω το ελαιόλαδο και ανακατέψτε το με το κριθαράκι μέχρι να λαδωθεί πολύ καλά. Αυτό το βοηθάει να παραμένει σπυρωτό ή "al dente", να μη παραμαλακώσει και να μη λασπώσει όταν ψηθεί στο φούρνο!
10. Προσθέστε το ψιλοκομμένο κρεμμύδι και το σκόρδο. Ανακατέψτε τα.
11. Στη συνέχεια σκορπίστε τις καθαρισμένες γαρίδες παντού στο ταψί.
12. Ρίξτε τη σάλτσα ντομάτας και ανακατέψτε.
13. Προσθέστε περίπου 680 ml νερό στη σάλτσα. Το νερό πρέπει να είναι περίπου 2 cm / 0,8 in. πάνω από το κριθαράκι. Ανακατέψτε να ενωθούν όλα τα υλικά.
14. Αλατοπιπερώστε κατά βούληση και προσθέστε και το μπαχάρι, ανακατεύοντάς τα.
15 Έτοιμο για το φούρνο, δεν ήταν πανεύκολο;
Γ. Οδηγίες ψησίματος:
16. Βάλτε το ταψί στη κάτω σχάρα ενός προθερμασμένου φούρνου, στις πάνω και κάτω αντιστάσεις = @170℃ / 340℉ και ψήστε το φαΐ για περίπου 50' (εξαρτάται από τον φούρνο).
17. ΣΥΜΒΟΥΛΗ-1: ΜΗ ΧΡΗΣΙΜΟΠΟΙΗΣΕΤΕ ΤΟΝ ΑΕΡΑ, γιατί έχει ως αποτέλεσμα το κριθαράκι να στεγνώσει και να ξεραθεί!
18. ΣΥΜΒΟΥΛΗ-2: Μην παραψήσετε το κριθαράκι! Λάβετε υπόψη ότι συνεχίζει να ψήνεται ακόμα και αφού βγάλετε το ταψί από το φούρνο!
19. Μετά από 30' ανοίξτε το φούρνο και ανακατέψτε το κριθαράκι και τις γαρίδες. Επιστρέψτε στο φούρνο.
20. Τα τελευταία 10' πριν να είναι έτοιμο το φαγητό, ανοίξτε το φούρνο και πασπαλίστε από πάνω το τριμμένο τυρί.
21. Μετά από συνολικά 50' θα πρέπει να είναι έτοιμο. Σβήστε το φούρνο.
22. Βγάλτε το ταψί από το φούρνο και βάλτε το σε μια σχάρα ή στον πάγκο της κουζίνας για 10' να δέσει το φαγητό, πριν το σερβίρετε.
Δ. Πρόταση σερβιρίσματος:
23. Σερβίρετε το ψητό Κριθαράκι με Γαρίδες όσο είναι ακόμα πολύ ζεστά. Προαιρετικά, την τελευταία στιγμή, μπορείτε να πασπαλίσετε λίγο ψιλοκομμένο μαϊντανό ξεχωριστά πάνω από κάθε πιάτο.
Αυτό το πεντανόστιμο Κριθαράκι με γαρίδες στο φούρνο είναι πραγματικά ένα πλήρες γεύμα.
Εδώ το σερβίρω με λαχανικά στον ατμό και φρεσκοκομμένο ψωμί.
Πολύ θρεπτικό και υγιεινό, μπορεί να σερβιριστεί για μεσημεριανό ή βραδινό. Θα μπορούσατε ακόμη και να το τοποθετήσετε σε ταπεράκι για μεσημεριανό γεύμα στη δουλειά.
Ρίξτε μια ματιά σε αυτό το πανέμορφο, σπυρωτό Κριθαράκι! Η γεύση του είναι τόσο καλή, καθώς έχει απορροφήσει τη θαλασσινή γεύση από τις γαρίδες.
Ένα πραγματικά απολαυστικό πιάτο για όλη την οικογένεια!!
Ε. Πληροφορίες φύλαξης:
Το ψητό Κριθαράκι με Γαρίδες μπορεί να φυλαχτεί (αφού κρυώσει) σε αεροστεγές δοχείο, στο ψυγείο για έως και 1 εβδομάδα ή στην κατάψυξη για 1 μήνα.
Κοιτάξτε επίσης την συνταγή μου σε short YouTube βίντεο, το λίνκ είναι: ΕΔΩ
#Youtube#lunch#dinner#maincourse#fish#pasta#mother#children#fasting#lactose#orzo with prawns#baked orzo with prawns#κριθαρακι με γαριδες#κριθαράκι με γαρίδες#κριθαρακι#γαριδες#κριθαρακι με γαριδες στο φουρνο#kritharaki#greek kritharaki#oven baked greek kritharaki with prawns
0 notes
Text
Easy, Fragrant Apple Cake Without Mixer And Butter
🍎

Easy, Fragrant Apple Cake without Mixer and Butter - Paneykolo, Myrwdato Cake me Mila hwris Mixer kai Vouturo
BY: Greek Cooking Made Easy
SUBSCRIBE TO MY YOUTUBE CHANNEL: https://www.youtube.com/greekcookingmadeeasy
Check My YouTube Video: HERE
Κοιτάξτε Επίσης Την Συνταγή Μου Σε YouTube Βίντεο, Το Λίνκ Είναι: ΕΔΩ
youtube
SERVES 🍴⃒ PREP. TIME 🕔⃒
16-18 pers. 20 min.
COOK. TIME ♨ DIFFIC. LEVEL 👩🍳⃒
65-75 min. Easy
I rarely prepare a Cake without mixer or butter. However, I did try this recipe, as I wanted to see if it would succeed without the usual lots of mixer beating and butter fluffing.
I can honestly say that this cake was very easy to prepare, fragrant from the apples and spices, moist and very fluffy with a crispy crust that I didn't expect.
All in all, a really easy Autumnal and Winter dessert.
Wouldn't you like to know how to prepare it as well?
Suitable for lacto-ovo vegetarians.
Find all my Recipes that include Apples HERE
INGREDIENTS
Ingredients for the apple filling:
· 1 kg. / 2.25 lb / 5 red, sweet Apples (e.g. Pink Lady, Fiji or other), washed
· 0.3 cup / 60 gr. / 2.1 oz Light Brown Sugar
· 1 tbsp. ground Cinnamon
· 1/3 tsp. ground Cloves
· About 2/3 cup / 80 gr. / 2.8 oz Walnuts, finely chopped
· Optional: 50 gr. / 1.75 oz Raisins

Ingredients for the Cake batter:
· 3.2 cups / 400 gr. / 14 oz Self-rising Flour, sifted
· 3 large or 4 medium Eggs @room temp.
· 1.75 cups / 400 gr. / 14 oz Sugar, white
· 0.7 cup / 180 ml Olive Oil, light
· 1/3 cup / 60 ml fresh Orange Juice
· 1.4 tbsp. / 20 ml Brandy (or extra orange juice)
· 1 tsp. Salt
· Optional Decoration: Icing (powder) Sugar
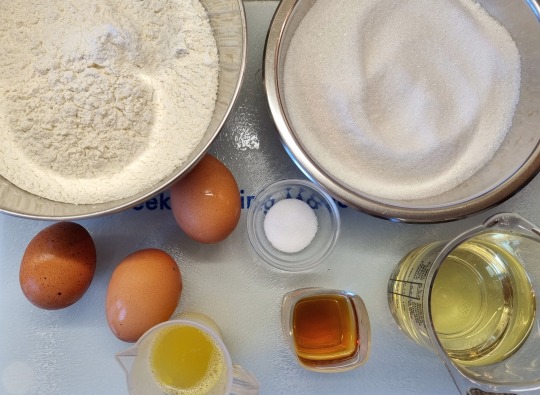
METHOD:
A. Prepare the apples and filling:
1. Peel the apples and cut them in 8 wedges each.
2. Cut each wedge in small cubes.
3. Place all cubed apples in a large bowl.
4. Add on top the brown sugar, ground cinnamon and cloves, chopped walnuts and raisins (if using).
5. With a large spoon, stir to mix all ingredients very well and to coat the apples.
6. Reserve.
B. Prepare the cake batter:
7. Crack the eggs in a large bowl. Add the sugar and salt and whisk them together until sugar is incorporated in the eggs.
8. Pour in the oil, Brandy and orange juice and whisk to blend them in.
9. Gradually add the flour in the batter, spoon by spoon, folding it in.
10. Batter is now ready for baking.
11. Spray or brush some oil (or butter) on a Bundt Cake tin of 26 cm / 10 in. (bottom and sides).
12. First pour half of the batter into the Bundt tin.
13. Cover it by spreading half of the apple mixture on top.
14. Next, pour 1/4 of the batter to cover the apples, spreading the other half of the apple mixture on top of it. Level the apple mixture surface.
15. Finish by pouring the rest (1/4) of the batter to cover the cake.
16. With a spoon level its surface.
17. Before baking, beat the Bundt tin against your surface to help release the air trapped inside the cake layers.
C. Baking instructions:
18. Place the Bundt tin with the Apple Cake on the middle shelf of a preheated oven-top and bottom heating elements on-@ 180 ℃/ 350 ℉ and bake for 65'-75' (depends on the oven).
19. Tip: Don't open the oven before 30' of baking, as this will result your cake to deflate.
20. Check if cake is ready by inserting a knife in the middle. It should come out almost clean (there is some dampness from the apples).
21. Look how beautifully my Apple Cake has risen!
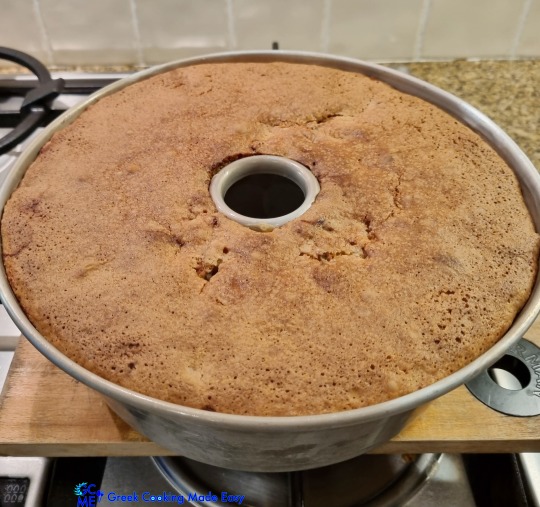
22. Remove cake from the oven, and leave it on the kitchen bench to cool.
D. Presentation and serving suggestion:
23. When it cools down completely, invert to place the Apple Cake on a nice serving platter.

24. Optionally, you could sprinkle some icing sugar on top to decorate it.
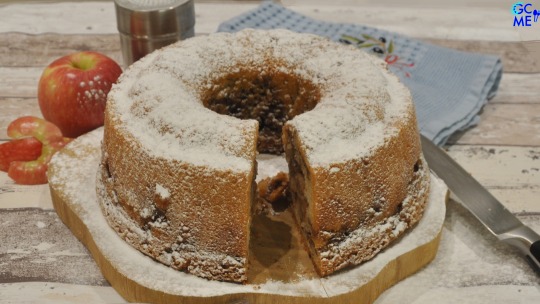
The easiest, marvelous, light cake, moist on the inside with the undeniable sweetness of apples and with a crispy crust! All the winter aromas in one cake!
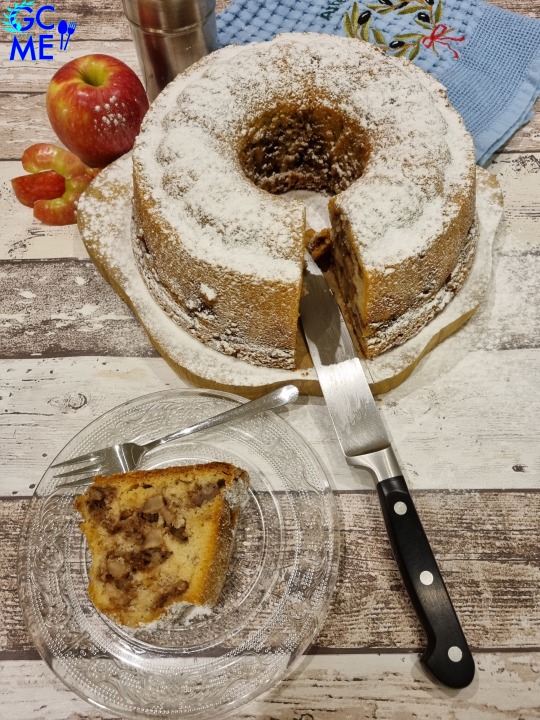
Apple Cake can be served in the Autumn or Winter months with coffee or tea as a great breakfast or afternoon treat for guests!


Beautifully easy Apple Cake.

Looking for a gluten Free Apple Cake? Check HERE
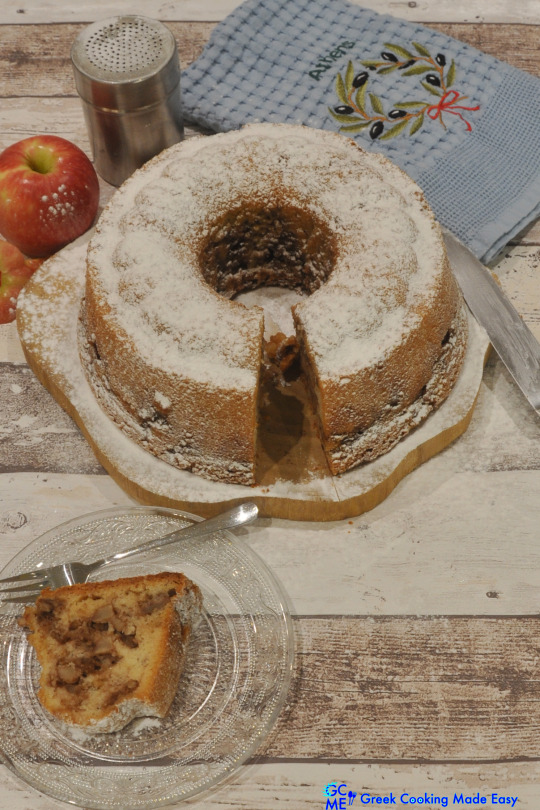
E. Storage Info:
Apple Cake can be stored, at room temp., covered, for up to 3 days.
In the freezer, you can store it for up to 1 month.
Check my YouTube Video: HERE
Πανεύκολο, Μυρωδάτο Κέικ Μήλου χωρίς Μίξερ και Βούτυρο
BY: Greek Cooking Made Easy
SUBSCRIBE TO MY YOUTUBE CHANNEL: https://www.youtube.com/greekcookingmadeeasy
ΜΕΡΙΔΕΣ🍴⃒ ΠΡΟΕΤΟΙΜΑΣΙΑ 🕔⃒
16-18 20 min.
ΜΑΓΕΙΡΕΜΑ ♨ ΒΑΘΜ. ΔΥΣΚΟΛΙΑΣ 👩🍳⃒
65-75 min. Εύκολο
Σπάνια ετοιμάζω Κέικ χωρίς μίξερ ή βούτυρο. Ωστόσο, δοκίμασα αυτή τη συνταγή, καθώς ήθελα να δω αν θα πετύχει χωρίς το συνηθισμένο δυνατό χτύπημα του μίξερ και το αφράτεμα του βουτύρου.
Μπορώ να πω ειλικρινά ότι αυτό το κέικ ήταν πολύ εύκολο στην παρασκευή του, μυρωδάτο από τα μήλα και τα μπαχαρικά, ζουμερό και πολύ αφράτο με τραγανή κρούστα που δεν περίμενα.
Στο σύνολο, ένα πραγματικά εύκολο φθινοπωρινό και χειμωνιάτικο γλύκισμα. Πάμε να σας δείξω πώς να το ετοιμάσετε κι εσείς;
Κατάλληλο για χορτοφάγους.
Δείτε όλες τις Συνταγές μου με Μήλα ΕΔΩ
ΥΛΙΚΑ
Υλικά για τη γέμιση με μήλα:
• 1 kg. / 2,25 lb / 5 κόκκινα, γλυκά Μήλα (π.χ. Pink Lady, Fiji ή άλλα), πλυμένα
• 0,3 φλ. / 60 γρ. / 2,1 oz Καστανή Ζάχαρη
• 1 κ.σ. Κανέλα σκόνη
• 1/3 κ.γ. Γαρίφαλο σκόνη
• Περίπου 2/3 φλ. / 80 γρ. / 2,8 oz Καρύδια, ψιλοκομμένα
• Προαιρετικά: 50 γρ. / 1,75 oz Σταφίδες
Υλικά για τη ζύμη του κέικ:
• 3,2 φλ. / 400 γρ. / 14 oz Αλεύρι που φουσκώνει μόνο του, κοσκινισμένο
• 3 μεγάλα ή 4 μεσαία Αυγά σε θερμοκρασία δωματίου
• 1,75 φλ. / 400 γρ. / 14 oz Ζάχαρη, λευκή
• 0,7 φλ. / 180 ml Ελαιόλαδο, ελαφρύ
• 1/3 φλ. / 60 ml φρέσκος χυμός Πορτοκαλιού
• 1,4 κ.σ. / 20 ml Κονιάκ (ή επιπλέον χυμός πορτοκαλιού)
• 1 κ.γ. Αλάτι
• Προαιρετική Διακόσμηση: Ζάχαρη άχνη
ΜΕΘΟΔΟΣ:
Α. Ετοιμάστε τα μήλα και τη γέμιση:
1. Καθαρίστε τα μήλα και κόψτε τα σε 8 φέτες το καθένα.
2. Κόψτε κάθε φέτα σε κυβάκια.
3. Βάλτε όλα τα κυβάκια σε ένα μεγάλο μπολ.
4. Προσθέστε από πάνω την καστανή ζάχαρη, την σκόνη κανέλας και το γαρύφαλλο, τα ψιλοκομμένα καρύδια και τις σταφίδες (αν χρησιμοποιείτε).
5. Με ένα μεγάλο κουτάλι ανακατέψτε να αναμειχθούν πολύ καλά όλα τα υλικά και να καλύψουν καλά τα μήλα.
6. Βάλτε στην άκρη.
Β. Ετοιμάστε τη ζύμη για το κέικ:
7. Σπάστε τα αυγά σε ένα μεγάλο μπολ. Προσθέστε τη ζάχαρη και το αλάτι και χτυπήστε μαζί με το σύρμα μέχρι να ενσωματωθεί η ζάχαρη μέσα στα αυγά.
8. Ρίξτε το λάδι, το κονιάκ και τον χυμό πορτοκαλιού και ανακατέψτε να ενωθούν.
9. Διπλώστε σταδιακά το αλεύρι, κουταλιά κουταλιά, μέσα στη ζύμη.
10. Η ζύμη είναι τώρα έτοιμη για ψήσιμο.
11. Ψεκάστε ή αλείψτε λίγο λάδι (ή βούτυρο) σε μια φόρμα για Κέικ στρογγυλή με τρύπα των 26 cm / 10 in. (στο κάτω μέρος και τα πλαϊνά της).
12. Ρίξτε τη μισή ζύμη αρχικά μέσα στη φόρμα.
13. Καλύψτε τη απλώνοντας από πάνω τη μισή γέμιση με μήλα.
14. Στη συνέχεια, ρίξτε από πάνω το 1/4 της ζύμης να καλύψει τα μήλα, και κατόπιν απλώστε από πάνω την άλλη μισή γέμιση με μήλα. Ισιώστε την επιφάνεια των μήλων.
15. Τελειώστε ρίχνοντας το υπόλοιπο (1/4) της ζύμης να καλύψει τα μήλα.
16. Με ένα κουτάλι ισιώστε την επιφάνεια του κέικ.
17. Πριν το ψήσιμο, χτυπήστε τη φόρμα πάνω στην επιφάνειά σας για να φύγει ο αέρας που έχει παγιδευτεί μέσα στις στρώσεις του κέικ.
Γ. Οδηγίες ψησίματος:
18. Τοποθετήστε τη φόρμα με το Κέικ στη μεσαία σχάρα ενός προθερμασμένου φούρνου, στις πάνω και κάτω αντιστάσεις στους @ 180 ℃ / 350 ℉ και ψήστε για 65'-75' (εξαρτάται από τον φούρνο).
19. Συμβουλή: Μην ανοίξετε τον φούρνο πριν τα 30' ψησίματος, γιατί θα ξεφουσκώσει το κέικ σας.
20. Ελέγξτε αν το κέικ είναι έτοιμο βάζοντας ένα μαχαίρι στη καρδιά του. Πρέπει να βγαίνει σχεδόν καθαρό (υπάρχει λίγη υγρασία από τα μήλα).
21. Για κοιτάξτε πόσο όμορφα έχει φουσκώσει το Κέικ μου!
22. Βγάλτε το κέικ από το φούρνο, και αφήστε το στον πάγκο της κουζίνας να κρυώσει.
Δ. Παρουσίαση και πρόταση σερβιρίσματος:
23. Μόλις το Κέικ κρυώσει εντελώς, αναποδογυρίστε το για να το βάλετε σε μια ωραία πιατέλα σερβιρίσματος.
24. Προαιρετικά, μπορείτε να πασπαλίσετε από πάνω λίγη ζάχαρη άχνη για να το διακοσμήσετε.
Το πιο εύκολο, λαχταριστό, ελαφρύ και ζουμερό κέικ εσωτερικά με την αδιαμφισβήτητη γλύκα των μήλων και με τραγανή κρούστα! Όλες οι χειμωνιάτικες μυρωδιές σε ένα Κέικ!
Το Κέικ Μήλου μπορεί να σερβιριστεί τους φθινοπωρινούς ή χειμερινούς μήνες με καφέ ή τσάι σαν υπέροχο πρωινό ή απογευματινό κέρασμα για επισκέπτες!
Πανέμορφα εύκολο Κέικ Μήλου.
Ψάχνετε για Συνταγή για Κέικ Μήλου χωρίς Γλουτένη? Δείτε ΕΔΩ
E. Πληροφορίες φύλαξης:
Το Κέικ Μήλου μπορεί να φυλαχτεί, σε θερμοκρασία δωματίου, σκεπασμένο, για έως και 3 ημέρες.
Στην κατάψυξη, μπορείτε να το φυλάξετε για έως και 1 μήνα.
Κοιτάξτε επίσης την συνταγή μου σε YouTube βίντεο, το λίνκ είναι: ΕΔΩ
#apple cake#easy apple cake#apple cake without mixer#breakfast#desserts#cake#fruit#apples#pastry#lowcost#vegetarian#children#lactose#fruitcake#κεικ μηλου#κεικ μηλου ευκολο#ευκολο κεικ μηλου χωρις μιξερ#κέικ μήλου
0 notes
Text
Beef Fricassee with Egg Lemon (avgolemono) sauce in pressure Cooker
🥘

Beef Fricassee with Egg Lemon (avgolemono) sauce in pressure Cooker - Moscharaki Fricassee me saltsa Avgolemono sti Hytra Tahititas
BY: Greek Cooking Made Easy
SUBSCRIBE TO MY YOUTUBE CHANNEL: https://www.youtube.com/greekcookingmadeeasy
Check my YouTube Video: HERE
Κοιτάξτε επίσης την συνταγή μου σε YouTube βίντεο, το λίνκ είναι: ΕΔΩ
youtube
SERVES 🍴⃒ PREP. TIME 🕔⃒
3-4 pers. 25 min.
COOK. TIME ♨ DIFFIC. LEVEL 👩🍳⃒
Total: 1 hour Easy
Fricassee is a French word used also in Greek cuisine, describing a stew of meat slices with green vegetables, served in a white lemon sauce. Traditionally, the most common Greek fricassee recipe is with lamb.
This one is a fairly easy one-pot dish using beef (lighter in taste), prepared quickly in a pressure cooker and served with the famous Greek Avgolemono sauce (egg-lemon sauce).
Although you may argue that it is not the prettiest looking dish, you will definitely agree that it’s a wonderful "marriage" of tastes.
A wintery, moreish dish indeed!
See all my Recipes with Avgolemono HERE
INGREDIENTS:
Ingredients for the meat and greens:
· 650 gr. / 1 lb 7 oz Beef-Shoulder steaks, deboned, cut in large slices
· 400 gr. / 14 oz Lettuce, washed, coarsely chopped
· 400 gr. / 14 oz fresh Spinach, washed
· 1 medium Onion, finely chopped
· 3-4 Fresh Spring Onions, chopped in thin rounds
· 1 bunch fresh Dill, finely chopped
· Ground Salt and Pepper
· 1/3 cup / 80 ml Olive Oil
· 500 ml /2 cups warm Water with 1 dissolved Beef Stock Cube

Ingredients for the Avgolemono (egg-lemon) Sauce:
· 1 large Egg
· Juice from 1 & 1/2 Lemon, about 60 ml
· ½ Lemon for garnishing

METHOD:
A. �� Cook the meat first:
1. Turn on the heat to high and pour the Olive oil into a large, deep pressure cooker.
2. When oil heats up, first sauté half of the beef slicesuntil they become a bit brown all around and their juices are sealed.
3. TIP: Don't try to sauté all meat slices together; they will be boiled instead!
4. After 2', flip them.
5. After 5', remove from heat and place them into a plate.
6. Continue by sautéing the other half of the beef slices.
7. When 2nd batch is ready, add the chopped onion and spring onions and sauté them together for 2' more, stirring regularly.
8. Return the 1st batch of meat into the pot and lower the heat.
9. Pour the warm water with the dissolved stock cube and mix all ingredients.
10. Cover the pressure cooker with its lid and increase the heat. When whistle starts turning and making the hissing sound, lower heat again and let meat simmer for 45'.
11. Note: You can also cook the meat in a regular pot. You then need about twice the boiling time i.e. 1h 30' and more water!
12. After 45', turn off the heat and open the lid.
13. Some of the water has evaporated and the meat is almost tender. Stir gently to mix all ingredients and season with Ground Salt and Pepper, to taste.
B. Make the Fricassee:
14. Turn on the heat again, adding the chopped lettuce and spinach on top of the meat with some extra seasoning. Press them to fit in the pot.
15. Note: You may have to cram the greens to fit into the pot but they will be reduced substantially when cooked!
16. Place the lid again on top and increase the heat. When whistle starts turning again and making the hissing sound, lower heat and let meat together with greens simmer together for 15'.
17. After 15', pierce a couple of greens. If they are pierced through, turn off the heat.
18. Let the dish cool down a bit.
C. Prepare the Avgolemono (Egg-Lemon) Sauce:
19. Crack the egg into a bowl. Whisk it well.
20. Add the lemon juice into the whisked egg. Beat to blend them well together.
21. Add a spoonful of the warm sauce from the cooked dish in the egg-lemon mixture to help raise its temperature. Whisk well to incorporate.
22. Repeat pouring spoonful after spoonful of sauce into the egg-lemon mixture until it gradually warms up! Be patient with this process!
23. Tip: Failing to bring the temperature of the egg up will result in it curdling when putting back in the warm dish.
24. Now pour the Avgolemono sauce into the pot, making the "kissing sound" for 100% success 😅 and stir gently to allow the sauce to go everywhere.
25. Warm up your dish gradually in very low heat before serving! Turn off the heat.
26. To finish, sprinkle the finely chopped dill on top and blend it in.
27. Beef Fricassee in Avgolemono sauce is ready to be devoured! WOW!
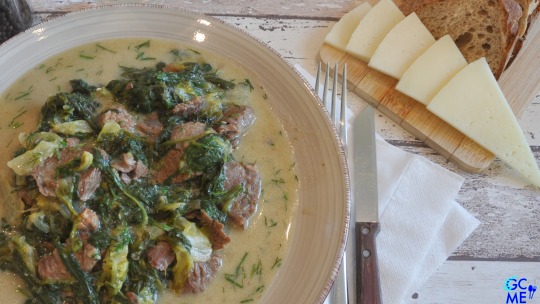
D. Serving suggestions:
Serve this moreish dish immediately while still hot, in soup plates with plenty of the amazing Avgolemono sauce!

My whole kitchen smells divine! Beef is so tender that literally falls off the fork!
Serve this mouthwatering dish with Greek Kaseri cheese, Melitzanosalata and a lemon wedge for those who prefer it a bit more sour. Don’t forget a lot of hot crusty brown bread to sop up the yummy avgolemono sauce.

Isn't there a saying: "The way to a man's heart is through his stomach?" Try to serve this dish, hear his awe sounds and you can thank me later!
Enjoy it!!

E. Storage Info:
After the dish cools down, you can store it in an airtight container in the fridge for 1 week or in the freezer for 1 month.
Reheat either in low temp in the microwave or on the stove in very low heat.
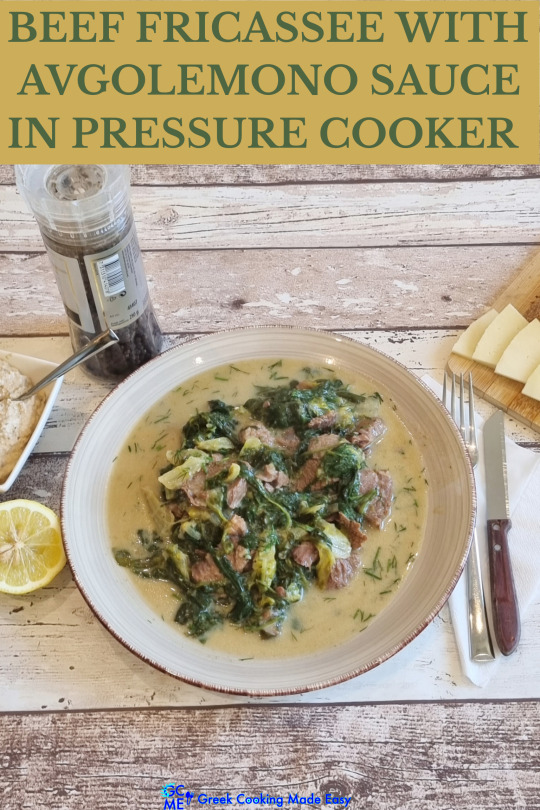
F. Childhood memory:
When I was a child, I didn't like cooked vegetables at all.
My Mom would try everything to make me eat them. Once in a while, she would prepare Beef fricassee because it was my Dad's favorite meal. The moment I was back from school and would smell the cooked vegetables I would complain that this food is not for me and I refuse to eat it.
She ended up serving me mainly the beef with just a spoonful of greens while she ate only the greens; such sacrifices she made to keep us happy. When I would ask her, she always said that this is not a sacrifice, as the greens have absorbed all the flavors in this dish!
As I grew up, I changed my mind, and now I eat everything in a fricassee, realizing that my Mom was right all along. It is always a fun conversation between us when we meet and a cute reminiscing of my childhood.
Check my YouTube Video: HERE
Μοσχαράκι Φρικασέ με σάλτσα Αυγολέμονο στη Χύτρα Ταχύτητας
BY: Greek Cooking Made Easy
SUBSCRIBE TO MY YOUTUBE CHANNEL: https://www.youtube.com/greekcookingmadeeasy
ΜΕΡΙΔΕΣ🍴⃒ ΠΡΟΕΤΟΙΜΑΣΙΑ 🕔⃒
3-4 25 min.
ΜΑΓΕΙΡΕΜΑ ♨ ΒΑΘΜ. ΔΥΣΚΟΛΙΑΣ 👩🍳⃒
Συνολ: 1 ώρα Εύκολο
Το φρικασέ είναι γαλλική λέξη που χρησιμοποιείται και στην Ελληνική κουζίνα, περιγράφοντας ένα φαγητό μιας κατσαρόλας από φέτες κρέας με φρέσκα χόρτα, σερβιρισμένο με λευκή σάλτσα λεμονιού. Παραδοσιακά, η πιο διαδεδομένη Ελληνική συνταγή για φρικασέ είναι με αρνί.
Αυτό που σας δείχνω είναι ένα αρκετά εύκολο φαγητό μιας κατσαρόλας με μοσχαρίσιο κρέας (πιο ελαφρύ στη γεύση), που ετοιμάζεται γρήγορα στη χύτρα ταχύτητας και σερβίρεται με την περίφημη σάλτσα Αυγολέμονο.
Αν και μπορεί να υποστηρίξετε ότι δεν είναι το πιο όμορφο πιάτο στην όψη, σίγουρα θα συμφωνήσετε ότι είναι ένα τέλειο «πάντρεμα» γεύσεων.
Ένα πραγματικά χειμωνιάτικο, εύγευστο εκλεκτό έδεσμα!
Δείτε όλες τις Συνταγές μου με την αγαπημένη σάλτσα Αυγολέμονο ΕΔΩ
ΥΛΙΚΑ:
Υλικά για το κρέας και τα χόρτα:
• 650 γρ. / 1 lb 7 oz Μοσχαρίσιο κρέας, Σπάλα, χωρίς κόκαλα, κομμένο σε μεγάλες φέτες
• 400 γρ. / 14 oz Μαρούλι, πλυμένο, χοντροκομμένο
• 400 γρ. / 14 oz φρέσκο Σπανάκι, πλυμένο
• 1 μέτριο ξερό Κρεμμύδι, ψιλοκομμένο
• 3-4 φρέσκα Κρεμμυδάκια, ψιλοκομμένα σε ροδέλες
• 1 ματσάκι φρέσκος Άνηθος, ψιλοκομμένος
• Φρεσκοαλεσμένο αλάτι και πιπέρι
• 1/3 φλ. / 80 ml Ελαιόλαδο
• 500 ml / 2 φλ. ΖΕΣΤΟ Νερό με 1 διαλυμένο κύβο βοδινού κρέατος
Υλικά για τη σάλτσα Αυγολέμονο:
• 1 μεγάλο Αυγό
• Χυμός από 1 & 1/2 Λεμόνι, περίπου 60 ml
• ½ Λεμόνι για γαρνίρισμα
ΜΕΘΟΔΟΣ:
Α. Μαγειρέψτε πρώτα το κρέας:
1. Ανάψτε τη φωτιά στο δυνατό και ρίξτε το Ελαιόλαδο σε μια μεγάλη, βαθιά χύτρα ταχύτητας.
2. Μόλις κάψει το λάδι, σοτάρετε πρώτα τις μισές φέτες μοσχάρι μέχρι να ροδίσουν λίγο γύρω γύρω και να σφραγιστούν οι χυμοί τους.
3. ΣΥΜΒΟΥΛΗ: Μην προσπαθήσετε να σοτάρετε όλες τις φέτες κρέατος μαζί. Αντί να τσιγαριστούν, θα βράσουν!
4. Μετά από 2' αναποδογυρίστε τις.
5. Μετά από 5', αποσύρετε από τη φωτιά και βάλτε τις σε μια πιατέλα.
6. Συνεχίστε σοτάροντας τις άλλες μισές μοσχαρίσιες φέτες.
7. Μόλις είναι έτοιμη και η 2η παρτίδα, προσθέστε το ψιλοκομμένο κρεμμύδι και τα φρέσκα κρεμμυδάκια και τσιγαρίστε τα μαζί για 2' ακόμα, ανακατεύοντας τακτικά.
8. Επιστρέψτε και την 1η παρτίδα κρέατος στην κατσαρόλα και χαμηλώστε τη φωτιά.
9. Ρίξτε στη κατσαρόλα το ζεστό νερό με τον διαλυμένο κύβο και ανακατέψτε όλα τα υλικά.
10. Σκεπάστε τη χύτρα ταχύτητας με το καπάκι της και δυναμώστε τη φωτιά. Μόλις η σφυρίχτρα αρχίσει να γυρίζει και να σιγοσφυρίζει, χαμηλώστε ξανά τη φωτιά και αφήστε το κρέας να σιγοβράσει για 45'.
11. Σημείωση: Μπορείτε να ψήσετε το κρέας και σε κανονική κατσαρόλα. Τότε χρειάζεστε περίπου διπλάσιο χρόνο βρασίματος, δηλαδή 1 ώρα και 30' και περισσότερο νερό!
12. Μετά από 45' σβήστε τη φωτιά και ανοίξτε το καπάκι.
13. Λίγο από το νερό έχει εξατμιστεί και το κρέας είναι σχεδόν τρυφερό. Ανακατέψτε απαλά να αναμειχθούν όλα τα υλικά και αλατοπιπερώστε, κατά βούληση.
Β. Φτιάξτε το φρικασέ:
14. Ανάψτε ξανά τη φωτιά, προσθέτοντας πάνω από το κρέας το ψιλοκομμένο μαρούλι και το σπανάκι με λίγο επιπλέον αλατοπίπερο. Πιέστε τα χόρτα να χωρέσουν στην κατσαρόλα.
15. Σημείωση: Ίσως χρειαστεί να τα στριμώξετε για να χωρέσουν στην κατσαρόλα αλλά θα μειωθούν σημαντικά μόλις ψηθούν!
16. Τοποθετήστε ξανά το καπάκι από πάνω και δυναμώστε τη φωτιά. Μόλις αρχίσει πάλι το σφύριγμα, χαμηλώστε τη φωτιά και αφήστε το κρέας και τα χόρτα να σιγοβράσουν μαζί για 15'.
17. Μετά από 15' τρυπήστε ένα-δυο χόρτα. Αν τρυπιούνται εύκολα, σβήστε τη φωτιά.
18. Αφήστε το φαγητό να κρυώσει για λίγο.
Γ. Ετοιμάστε τη σάλτσα Αυγολέμονο:
19. Σπάστε το αυγό σε ένα μπολ. Χτυπήστε το καλά με το σύρμα.
20. Προσθέστε το χυμό λεμονιού στο χτυπημένο αυγό. Χτυπήστε να ενωθούν καλά μεταξύ τους.
21. Προσθέστε μια κουταλιά από τη ζεστή σάλτσα του μαγειρεμένου φαγητού στο αυγολέμονο για να αυξήσετε τη θερμοκρασία του. Χτυπήστε καλά να ενσωματωθούν.
22. Επαναλάβετε ρίχνοντας κουταλιά-κουταλιά από τη σάλτσα μέσα στο αυγολέμονο μέχρι να ζεσταθεί σταδιακά! Να είστε υπομονετικοί με αυτή τη διαδικασία!
23. Συμβουλή: Αν δεν αυξηθεί η θερμοκρασία του αυγού, τότε θα κόψει μόλις το βάλετε μέσα στο ζεστό φαγητό.
24. Ρίξτε τώρα τη σάλτσα Αυγολέμονο μέσα στην κατσαρόλα, κάνοντας και τον «ρουφηχτό ήχο φιλιού» για 100% επιτυχία 😅 και ανακατέψτε απαλά να πάει η σάλτσα παντού.
25. Ζεστάνετε το φαγητό σας σταδιακά σε πολύ χαμηλή φωτιά πριν το σερβίρετε! Σβήστε τη φωτιά.
26. Για να τελειώσετε, πασπαλίστε από πάνω τον ψιλοκομμένο άνηθο και ανακατέψτε.
27. Το Μοσχαράκι φρικασέ με σάλτσα Αυγολέμονο είναι έτοιμο να καταβροχθιστεί! ΟΥΑΟΥ!
Δ. Προτάσεις σερβιρίσματος:
Σερβίρετε αυτό το πεντανόστιμο πιάτο αμέσως όσο είναι ακόμα ζεστό, σε πιάτα βαθιά σούπας με άφθονη από την καταπληκτική σάλτσα Αυγολέμονο!
Όλη μου η κουζίνα μυρίζει θεϊκά! Το μοσχαρίσιο κρέας είναι τόσο μαλακό που κυριολεκτικά πέφτει από το πιρούνι μου!
Σερβίρετε αυτό το λαχταριστό πιάτο με Κασέρι, Μελιτζανοσαλάτα και έξτρα λεμόνι για όσους το προτιμούν λίγο πιο ξινό. Μην ξεχάσετε πολύ ζεστό μαύρο ψωμί για να βουτήξετε στο λαχταριστό αβγολέμονο.
Δεν υπάρχει ένα ρητό: "Ο δρόμος για την καρδιά του άντρα περνάει από το στομάχι του;" Σερβίρετε αυτό το πιάτο, ακούστε τους ήχους δέους και με ευχαριστείτε αργότερα!
Απολαύστε το!!
Ε. Πληροφορίες φύλαξης:
Αφού κρυώσει το φαγητό, μπορείτε να το φυλάξετε σε αεροστεγές δοχείο στο ψυγείο για 1 εβδομάδα ή στην κατάψυξη για 1 μήνα.
Ξαναζεστάνετε είτε σε χαμηλή θερμοκρασία στο φούρνο μικροκυμάτων ή στο μάτι της κουζίνας σε πολύ χαμηλή φωτιά.
Ζ. Παιδική ανάμνηση:
Όταν ήμουν παιδί, δεν μου άρεσαν καθόλου τα μαγειρεμένα χόρτα.
Η μαμά μου δοκίμαζε τα πάντα για να με κάνει να τα φάω. Μια στο τόσο ετοίμαζε μοσχαράκι φρικασέ γιατί ήταν το αγαπημένο γεύμα του μπαμπά μου. Τη στιγμή που επέστρεφα από το σχολείο και μύριζα τα μαγειρεμένα χόρτα παραπονιόμουν ότι αυτό το φαγητό δεν είναι για μένα και αρνιόμουν να το φάω.
Κατέληγε να μου σερβίρει κυρίως το μοσχάρι με μια κουταλιά χόρτα ενώ εκείνη έτρωγε μόνο τα χόρτα. Τέτοιες θυσίες έκανε για να είμαι χαρούμενη. Όταν τη ρωτούσα, πάντα έλεγε ότι δεν πρόκειται για θυσία, μιας και τα χόρτα έχουν απορροφήσει όλες τις φανταστικές γεύσεις σε αυτό το φαγητό!
Όπως μεγάλωσα, άλλαξα γνώμη και τώρα τρώω τα πάντα στο φρικασέ, συνειδητοποιώντας ότι η μαμά μου είχε δίκιο τότε. Είναι πάντα μια χαρούμενη συζήτηση μεταξύ μας όταν συναντιόμαστε και μια γλυκιά ανάμνηση των παιδικών μου χρόνων.
Κοιτάξτε επίσης την συνταγή μου σε YouTube βίντεο, το λίνκ είναι: ΕΔΩ
#Youtube#dinner#maincourse#meat#beef#beef fricassee#vegetables#easter#easterfood#children#gluten#lactose#keto#winter#beef fricassee with avgolemono sauce#Μοσχαράκι Φρικασέ με σάλτσα Αυγολέμονο#Μοσχαράκι Φρικασέ στη Χύτρα Ταχύτητας#Μοσχαράκι Φρικασέ με σάλτσα Αυγολέμονο στη Χύτρα Ταχύτητας#μοσχαρακι φρικασε#μοσχαρακι φρικασε με σαλτσα αυγολεμονο
0 notes
Text
Galaktoboureko i.e. Greek Custard Dessert Individual Rolls
🗞

Galaktoboureko i.e. Greek Custard Dessert Individual Rolls - Galaktobourekakia Atomika se Rola
BY: Greek Cooking Made Easy
SUBSCRIBE TO MY YOUTUBE CHANNEL: https://www.youtube.com/greekcookingmadeeasy
Check My YouTube Video: HERE
Κοιτάξτε Επίσης Την Συνταγή Μου Σε YouTube Βίντεο, Το Λίνκ Είναι: ΕΔΩ
youtube
SERVES 🍴⃒ PREP. TIME 🕔⃒
7-14 persons 50 min + 1 h wait
COOK. TIME ♨ DIFFIC. LEVEL 👩🍳⃒
1 hour Easy-Medium
Galaktoboureko is THE epitome of divine Greek desserts, made with semolina custard covered all around with phyllo pastry and baked in the oven. It is served with a clear, sweet lemony syrup. Galaktoboureko dessert is a golden-crispy perfection.
This easy to follow step-by-step recipe is one that some of you asked me: to shape Galaktoboureko into individual rolls which means equal portions and no more fighting who gets a bigger slice 😅!
Suitable for lacto-ovo vegetarians.
INGREDIENTS:
Ingredients for the Custard Filling:
· 500 ml / 2 cups fresh Milk, half-full (2% fat)
· 75 gr. / 2.65 oz / about 0.5 cup fine Semolina
· 100 gr. / 3.5 oz / 0.45 cup Sugar
· 2 large Eggs at room temp.
· 25 gr. / 1 oz Butter
· 8 gr. / 0.5 tbsp. Vanilla sugar/essence
· Pinch of Salt
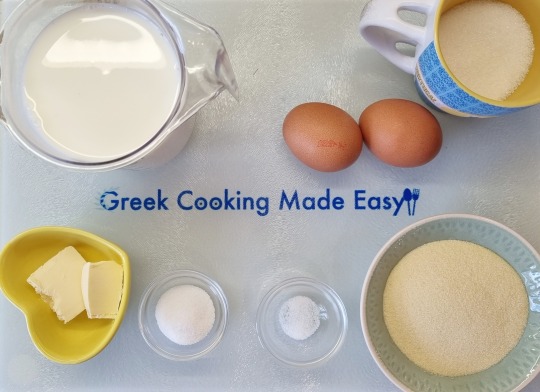
Ingredients for the Phyllo Rolls:
· 250 gr. / 9 oz Phyllo Pastry (half package)
· 1/3 cup / 80 gr. / 2.8 oz Butter, melted
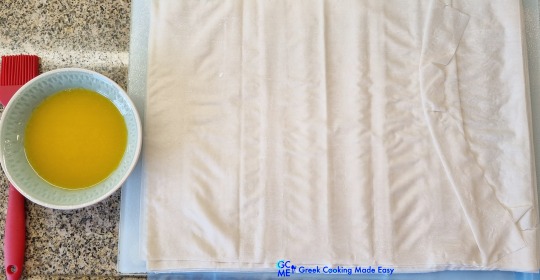
Ingredients for the Syrup:
· 350 gr. / 12 oz / 1.6 cups Sugar
· 250 ml. / 1 cup Water
· 1 Cinnamon stick
· 1/2 tsp. Lemon juice
· 1 pc. lemon rind
· To sprinkle on top: Lemon Zest from 1 Lemon and optional: Cinnamon powder

METHOD:
A. Make the Custard first:
1. Start by pouring the milk in a saucepan over low heat. Slowly boil the milk adding sugar and vanilla Sugar.
2. Whisk regularly to prevent milk from sticking to the bottom of the pan.
3. After about 10' the milk starts to boil.
4. Add the semolina and salt, whisking continuously for 3'-4' until mix turns thick and creamy! You'll know custard filling is ready when it bubbles & the whisk leaves streaks on the surface.
5. Turn off the heat, throw in butter and let it slowly melt, whisking to blend with milk mixture.
6. Let custard cool down.
7. TIP: To keep custard from forming a crust (skin) on top, either whisk occasionally or cover it with plastic wrap, attached to the surface, without gaps! Reserve.
B. Make the rolls:
8. With a brush spread some of the melted butter on a Pyrex baking tray 23 x 35 cm / 9 x 14 in.
9. Open the package with phyllo sheets. Small Phyllo pack usually contains 14 sheets.
10. TIP: Phyllo pastry tends to dry easily. Cover the phyllo sheets you are not using with a damp tea towel, while you work.
11. When custard has cooled down completely and just before you pour it in the individual rolls, whisk 2 eggs and fold them in. Blend them very well! Bring custard next to the phyllo sheets.
12. Open one phyllo sheet vertically on a clean, flat surface and brush or better drizzle a bit of butter all around it (we will roll starting from the narrow side).
13. Attach precisely a 2nd phyllo sheet (layer) on top, drizzling a bit of butter as well.
14. Place 2-3 generous spoonfuls of custard along the narrow side, flatten its surface a bit, leaving gaps on both side ends (calculate that you should divide the custard-filling equally in the 7 rolls).
15. Now fold the excess phyllo from the left and right over the filling to cover its sides, and to keep the filling inside the roll.
16. Fold the top edge of the phyllo sheets over the filling to cover it and roll it up. The butter helps the phyllo edges stick together.
17. Once the roll is ready, place it on the tray with its joint facing down.
18. Repeat the procedure for the rest of rolls.
19. When all rolls are in the tray, brush any leftover butter on top to give them a nice shine during baking.
20. Place some aluminum foil on top of the tray and place in the fridge for 1 hour.
21. TIP: At this point if you want to prepare ahead, Galaktoboureko Rolls can be stored in the freezer, covered, for up to 1 month. Defrost for at least 6 hours before baking.
C. Prepare the Syrup:
22. While waiting for Galaktoboureko to cool in the fridge, make the syrup.
23. In a saucepan over low heat, combine sugar and water.
24. Add lemon rind and cinnamon stick. Bring to a boil, constantly stirring gently until syrup becomes translucent.
25. Let the syrup simmer for 5' more, gently stirring it every minute.
26. Then turn off the heat, pour in the lemon juice and let syrup cool down.
27. TIP: Syrup must be cool when you pour it over the HOT Galaktoboureko rolls!!
D. Baking Instructions:
28. After 1 h, bring the tray from the fridge and remove the foil. Place it on the middle shelf of a preheated oven-both heating elements on-and bake Galaktoboureko Rolls @180℃/350℉ for 50'-1 hour or until they turn golden brown all around and crunchy (depends on the oven).
29. When Galaktoboureko rolls are ready, remove from the oven.
30. Set them on the kitchen bench and immediately pour gradually the cool syrup over them, so that the syrup is being absorbed slowly into the custard. You can hear the phyllo sheets sizzle!
31. Let them stand uncovered for some time to cool down before serving.
E. Serving instructions:
32. Sprinkle the lemon zest (and optionally ground cinnamon) on top of the rolls and serve them at room temperature.

If you are expecting more guests or need smaller size desserts, at this point you can cut the rolls in half.

What a divine dessert! When you have a bite on that super crunchy roll and let its juicy, lush custard fill your mouth, you'll never forget its delicate taste!

Just follow my steps and tips and you will succeed 100%!
Enjoy 💖!!

Info: Galaktoboureko Rolls are traditionally served on Greek Easter Sunday but could be prepared any time of the year for any special occasion, like birthday, nameday, Valentine's day etc!

F. Storage Info:
Galaktoboureko Rolls can be stored in the fridge, uncovered, 8 hours after you apply the syrup.
They need to be consumed in 2 days, otherwise phyllo tends to dampen and rolls are not crunchy anymore. But I don't expect them to last that long, am I right??
Check my YouTube Video: HERE

Γαλακτομπουρεκάκια Ατομικά σε Ρολά
BY: Greek Cooking Made Easy
SUBSCRIBE TO MY YOUTUBE CHANNEL: https://www.youtube.com/greekcookingmadeeasy
ΜΕΡΙΔΕΣ🍴⃒ ΠΡΟΕΤΟΙΜΑΣΙΑ 🕔⃒
7-14 50 min + 1 h αναμονή
ΜΑΓΕΙΡΕΜΑ ♨ ΒΑΘΜ. ΔΥΣΚΟΛΙΑΣ 👩🍳⃒
1 ώρα Εύκολο-Μέτριο
Το Γαλακτομπούρεκο είναι η επιτομή των θεσπέσιων Ελληνικών γλυκών, φτιαγμένο με υπέροχη κρέμα σιμιγδαλιού, τυλιγμένο γύρω γύρω με τραγανό φύλλο, ψημένο στο φούρνο και σιροπιασμένο με ένα γλυκό, λεμονιαστό σιρόπι. Το επιδόρπιο αυτό είναι μια χρυσαφένια-τραγανή τελειότητα.
Αυτή είναι η εύκολη στην ετοιμασία, βήμα προς βήμα συνταγή, που μερικοί ζητήσατε: να φτιάξω το γαλακτομπούρεκο σε ατομικά ρολά που σημαίνει ίσες μερίδες και τέλος οι τσακωμοί για το ποιος θα πάρει μεγαλύτερο κομμάτι 😅!
Κατάλληλο για χορτοφάγους.
ΥΛΙΚΑ:
Υλικά τη τη κρέ��α-γέμιση:
• 500 ml / 2 φλ. φρέσκο Γάλα, ημίπαχο (2% λιπαρά)
• 75 γρ. / 2,65 oz / περίπου 0,5 φλ. Σιμιγδάλι ψιλό
• 100 γρ. / 3,5 oz / 0,45 φλ. Ζάχαρη
• 2 μεγάλα Αυγά σε θερμοκρασία δωματίου
• 25 γρ. / 1 oz Βούτυρο
• 8 γρ. / 0,3 oz / 0,5 κ.σ. Βανίλια σκόνη (βανιλίνη)
• Πρέζα Αλάτι
Υλικά για τα Ρολά:
• 250 γρ. / 9 oz Φύλλο Κρούστας (μικρή συσκευασία)
• 1/3 φλ. / 80 γρ. / 2,8 oz Βούτυρο, λιωμένο
Υλικά για το σιρόπι:
• 350 γρ. / 12 oz / 1,6 φλ. Ζάχαρη
• 250 ml. / 1 φλιτζάνι Νερό
• 1 ξυλάκι Κανέλας
• 1/2 κ.γ. χυμός Λεμονιού
• 1 φλούδα Λεμονιού
• Για να πασπαλίσετε από πάνω: • Ξύσμα λεμονιού από 1 Λεμόνι και προαιρετικά Κανέλα Σκόνη
ΜΕΘΟΔΟΣ:
Α. Φτιάξτε πρώτα την κρέμα-γέμιση:
1. Ξεκινήστε ρίχνοντας το γάλα σε μια κατσαρόλα πάνω από χαμηλή φωτιά. Βράστε το σιγά σιγά προσθέτοντας τη ζάχαρη και τη βανίλια.
2. Ανακατεύετε με το σύρμα τακτικά για να μην κολλήσει το γάλα στον πάτο της κατσαρόλας.
3. Μετά από 10' περίπου το γάλα αρχίζει να βράζει.
4. Προσθέστε το σιμιγδάλι και το αλάτι, ανακατεύοντας συνεχώς για 3'-4' μέχρι το μείγμα να γίνει παχύ και κρεμώδες! Θα καταλάβετε ότι η γέμιση είναι έτοιμη όταν αρχίσει να πήζει, να βγάζει φουσκάλες και ο αναδευτήρας να αφήνει χαραγματιές (ραβδώσεις) στην επιφάνεια.
5. Σβήστε τη φωτιά, ρίξτε το βούτυρο και αφήστε να λιώσει σιγά σιγά, ανακατεύοντας να ομογενοποιηθεί με το μείγμα γάλακτος.
6. Αφήστε τη κρέμα να κρυώσει.
7. ΣΥΜΒΟΥΛΗ: Για να μην σχηματίσει η κρέμα κρούστα από πάνω, είτε ανακατεύετε περιστασιακά με το σύρμα ή εφάπτετε πλαστική μεμβράνη στην επιφάνεια χωρίς κενά! Βάλτε στην άκρη.
Β. Φτιάξτε τα ρολά:
8. Με ένα πινέλο αλείψτε λίγο από το λιωμένο βούτυρο σε ταψί Pyrex 23 x 35 εκ. / 9 x 14 in.
9. Ανοίξτε τη συσκευασία με τα φύλλα. Η μικρή συσκευασία περιέχει συνήθως 14 φύλλα.
10. ΣΥΜΒΟΥΛΗ: Το φύλλο κρούστας τείνει να ξεραίνεται γρήγορα. Καλύψτε τα φύλλα που δεν χρησιμοποιείτε με μια υγρή πετσέτα, ενόσω εργάζεστε.
11. Μόλις η κρέμα κρυώσει και λίγο πριν τη ρίξετε μέσα στα ατομικά ρολά, χτυπήστε ελαφρά 2 αυγά και διπλώστε τα μέσα. Ανακατέψτε τα πολύ καλά! Φέρτε τη κρέμα δίπλα στα φύλλα.
12. Ανοίξτε ένα φύλλο κάθετα πάνω σε μια καθαρή, επίπεδη επιφάνεια και αλείψτε ή καλύτερα ραντίστε το με λίγο βούτυρο (θα τυλίξουμε ξεκινώντας από τη στενή πλευρά).
13. Απλώστε ακριβώς από πάνω του ένα 2ο φύλλο (στρώμα) ραντίζοντας και αυτό με λίγο βούτυρο.
14. Βάλτε 2-3 γενναίες κουταλιές κρέμα-γέμιση κατά μήκος της στενής πλευράς, ισιώστε λίγο την επιφάνειά της αφήνοντας κενά και στις δύο πλευρές-άκρες (υπολογίστε ότι πρέπει να μοιράσετε τη γέμιση ισόποσα στα 7 ρολά).
15. Τώρα διπλώστε τις δύο πλευρές δεξιά κι αριστερά (δηλ. αυτό που περισσεύει) πάνω από τη γέμιση για να καλύψει τα πλαϊνά της, ώστε να κρατηθεί η κρέμα μέσα στο ρολό.
16. Διπλώστε την επάνω άκρη των φύλλων πάνω από την γέμιση για να την καλύψετε καλά και τυλίξτε σε ρολό. Το βούτυρο βοηθά τις άκρες του φύλλου να κολλήσουν μεταξύ τους.
17. Μόλις το ρολό είναι έτοιμο, τοποθετήστε το στο ταψί με την ένωση προς τα κάτω.
18. Φτιάξτε όμοια και τα υπόλοιπα ρολά.
19. Μόλις όλα τα ρολά μπουν στο ταψί, αλείψτε από πάνω ό,τι βούτυρο έχει περισσέψει για να κάνουν ωραίο γυάλισμα κατά το ψήσιμο.
20. Καλύψτε το ταψί με αλουμινόχαρτο και βάλτε το στο ψυγείο για 1 ώρα.
21. ΣΥΜΒΟΥΛΗ: Σε αυτό το σημείο αν θέλετε να τα ετοιμάσετε από πριν, τα Γαλακτομπουρεκάκια Ρολά μπορούν να διατηρηθούν στην κατάψυξη, σκεπασμένα, έως και 1 μήνα. Ξεπαγώστε τα για τουλάχιστον 6 ώρες πριν το ψήσιμο.
Γ. Ετοιμάστε το σιρόπι:
22. Περιμένοντας να κρυώσουν τα ρολά στο ψυγείο, φτιάξτε το σιρόπι.
23. Σε ένα κατσαρόλι πάνω από χαμηλή φωτιά ανακατέψτε τη ζάχαρη με το νερό.
24. Προσθέστε τη φλούδα λεμονιού και το ξυλάκι κανέλας. Αφήστε να πάρει μια βράση, ανακατεύοντας συνεχώς απαλά μέχρι το σιρόπι να γίνει διαυγές.
25. Αφήστε το σιρόπι να σιγοβράσει για 5' ακόμα, ανακατεύοντάς το απαλά κάθε λεπτό.
26. Στη συνέχεια σβήστε τη φωτιά, ρίξτε μέσα το χυμό λεμονιού και αφήστε το σιρόπι να κρυώσει.
27. ΣΥΜΒΟΥΛΗ: Το σιρόπι πρέπει να είναι δροσερό όταν το περιχύσετε πάνω από τα ΚΑΥΤΑ ρολά γαλακτομπούρεκου!!
Δ. Οδηγίες ψησίματος:
28. Μετά από 1 ώρα, βγάλτε το ταψί από το ψυγείο και αφαιρέστε το αλουμινόχαρτο. Βάλτε το στη μεσαία σχάρα ενός προθερμασμένου φούρνου-στις κάτω και πάνω αντιστάσεις-και ψήστε τα ρολά Γαλακτομπούρεκου @180℃/ 350℉ για 50'-1 ώρα ή μέχρι να ροδίσουν τριγύρω και να γίνουν τραγανά (εξαρτάται από το φούρνο).
29. Μόλις είναι έτοιμα βγάλτε τα από το φούρνο.
30. Βάλτε το ταψί στο πάγκο της κουζίνας και περιχύστε τα ρολά αμέσως με το δροσερό σιρόπι, ώστε το σιρόπι να απορροφηθεί σιγά σιγά μέσα στην κρέμα. Μπορείτε να ακούσετε τα φύλλα να τσιτσιρίζουν!
31. Αφήστε να σταθούν ακάλυπτα για λίγη ώρα ώστε να κρυώσουν πριν τα σερβίρετε.
Ε. Οδηγίες σερβιρίσματος:
32. Πάνω από τα ρολά πασπαλίστε το ξύσμα λεμονιού (και προαιρετικά την κανέλα σκόνη) και σερβίρετε τα σε θερμοκρασία δωματίου.
Αν περιμένετε περισσότερους καλεσμένους ή χρειάζεστε γλυκίσματα μικρότερου μεγέθους, σε αυτό το σημείο μπορείτε να κόψετε τα ρολά στη μέση.
Τι θεϊκό γλύκισμα! Μόλις δαγκώσετε το κριτσανιστό ρολό και αφήσετε τη ζουμερή, πλούσια κρέμα του να γεμίσει το στόμα σας, δεν θα ξεχάσετε ποτέ την ντελικάτη γεύση του!
Απλά ακολουθήστε τα βήματα και τις συμβουλές μου και θα πετύχετε 100%!
Απολαύστε τα 💖!!
Πληροφορία: Τα γαλακτομπουρεκάκια ρολά σερβίρονται παραδοσιακά την Κυριακή του Πάσχα, αλλά μπορούν να ετοιμαστούν οποιαδήποτε εποχή του χρόνου για οποιαδήποτε σπέσιαλ περίσταση, γενέθλια, γιορτή, Αγ. Βαλεντίνου κλπ.!
Ζ. Πληροφορίες φύλαξης:
Τα γαλακτομπουρεκάκια ρολά διατηρούνται στο ψυγείο, ακάλυπτα, 8 ώρες αφού τα ποτίσετε με σιρόπι.
Πρέπει να καταναλωθούν σε 2 ημέρες, διαφορετικά το φύλλο τείνει να υγραίνει και να πανιάζει και τα ρολά δεν είναι πια τραγανά. Αλλά δεν περιμένω να κρατήσουν τόσο πολύ, δίκιο δεν έχω;;!
Κοιτάξτε επίσης την συνταγή μου σε YouTube βίντεο, το λίνκ είναι: ΕΔΩ
#vegetarian#children#party#desserts#syrupy#pie#pastry#pudding#lowcost#christmas#christmassweets#easter#eastersweets#carnival#valentine#galaktoboureko rolls#galaktoboureko recipe#greek custard dessert galaktoboureko#γαλακτομπούρεκο#γαλακτομπουρεκο ρολακια
0 notes
Text
Greek Velvety Vegetable Soup with Trahana
🍲

Greek Velvety Vegetable Soup with Trahana - Velouté Hortosoupa me Trahana
BY: Greek Cooking Made Easy
SUBSCRIBE TO MY YOUTUBE CHANNEL: https://www.youtube.com/greekcookingmadeeasy
Check My YouTube Video: HERE
Κοιτάξτε Επίσης Την Συνταγή Μου Σε YouTube Βίντεο, Το Λίνκ Είναι: ΕΔΩ
youtube
SERVES 🍴⃒ PREP. TIME 🕔⃒
7-8 pers. 15 min.
COOK. TIME ♨ DIFFIC. LEVEL 👩🍳⃒
Total: 23 min. Easy
Welcome back to my kitchen. Today is a very cold winter's day, so I have decided to show you one of my most beloved soups. It's the Velvety Vegetable Soup with Trahana.
This soup is really fantastic, super easy, very nutritious with a wonderful combo of a variety of vegetables.
That's why I am certain you will adore it too. It's like a hug filled with comfort in one bowl.
Come and let me show you how to prepare it at home as well.
Suitable for lacto-vegetarians.
INGREDIENTS:
Ingredients for making the Soup:
· 500 gr. / 1 lb 2 oz / 3 medium Potatoes, cut in chunks
· 2 Celery stalks with their leaves
· 2 tbsp. Celery leaves, finely chopped
· 200 gr. / 7 oz / 2 large Carrots, cut in rounds
· 2 medium Onions (sweet variety), cut in fourths
· 200 gr. / 7 oz white Mushrooms, cleaned
· 1/3 cup / 70 gr. / 2.5 oz Trahanas, sour or sweet
· Pinch of Paprika
· Pinch of ground Cumin
· 2 lt. / 8 cups HOT Water
· 60 ml / 4 tbsp. Olive Oil
· Juice from one Lemon
· Ground Salt and Pepper

Ingredients for garnishing:
· Some heavy cream
· A pinch of Fleur de sel ("flower of salt")
· 1 tbsp. fresh Parsley, finely chopped
· Some paprika
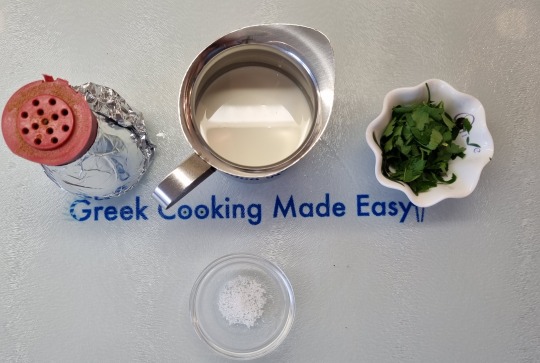
METHOD:
A. Make the Soup:
1. In the large pot with hot water (almost boiling), place carefully the potato chunks, carrot rounds, celery stalks, mushrooms, onion slices and the finely chopped celery leaves.
2. Add a pinch of paprika plus the ground cumin.
3. Place the pot over high heat, Stir to blend the ingredients and bring to the boil.
4. Reduce heat to very low and place the lid on top of the pot to semi cover it. Simmer the soup for about 15' or until vegetables are very soft.
5. Then open the lid, add trahana in the soup, stirring to blend it in. Continue by simmering the soup for about 8' or until trahana is soft.
6. Turn off the heat.
7. Season with ground salt and pepper, to taste.
8. Now pour the lemon juice and Olive oil in the soup. Leave soup to cool down for 5'.
9. Then purée with a (hand) blender for that amazing extra-velvety texture. Make sure there are no lumps in the soup.
B. Finish by garnishing the soup:
10. Serve the soup into nice soup bowls.
11. Pour on top a swirl of heavy cream, sprinkle some fresh parsley and fleur de sel and for the finishing touch, add just a dash of paprika.
C. Serving suggestions:
Serve with 2 slices freshly baked wholemeal bread.

A special advantage is that children will love eating this velvety soup without actually tasting vegetables!
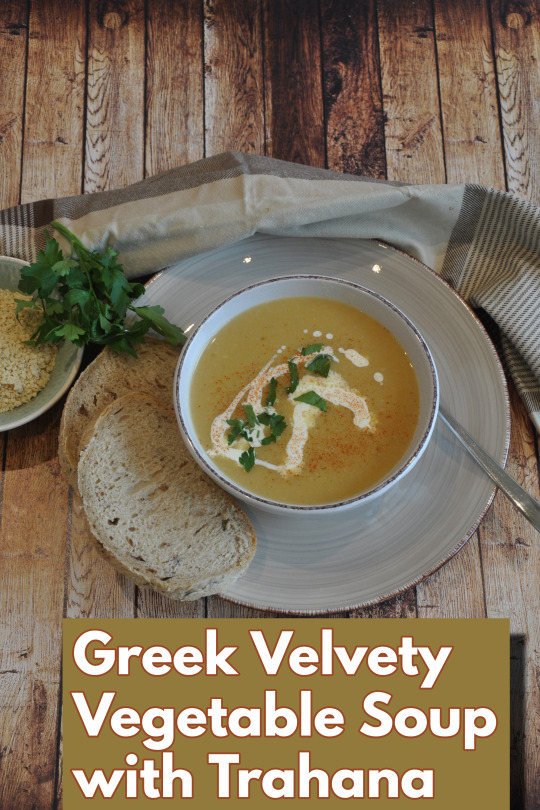
Enjoy this beautiful, healthy, nutritious soup and its benefits! A balm for the soul with all the beautiful comfort tastes in your bowl to defy the cold winter!

Are you looking for more of my Ideas-Recipes for a hot Soup? Check them all HERE

D. Storage Info:
Vegetable Soup can be stored in an airtight container, after it has cooled down, in the fridge for up to 1 week. Also in the freezer for up to 1 month.
Check my YouTube Video: HERE
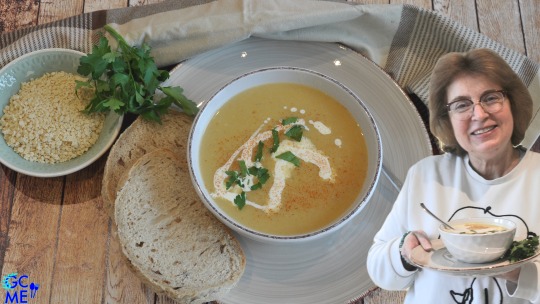
Βελουτέ Χορτόσουπα με Τραχανά
BY: Greek Cooking Made Easy
SUBSCRIBE TO MY YOUTUBE CHANNEL: https://www.youtube.com/greekcookingmadeeasy
ΜΕΡΙΔΕΣ🍴⃒ ΠΡΟΕΤΟΙΜΑΣΙΑ 🕔⃒
7-8 15 min.
ΜΑΓΕΙΡΕΜΑ ♨ ΒΑΘΜ. ΔΥΣΚΟΛΙΑΣ 👩🍳⃒
Συνολ: 23 min. Εύκολη
Σήμερα είναι μια πολύ κρύα χειμωνιάτικη μέρα, γι' αυτό αποφάσισα να σας δείξω μια από τις πιο αγαπημένες μου σούπες. Είναι η Βελουτέ Χορτόσουπα με Τραχανά.
Αυτή η σούπα είναι πραγματικά φανταστική, πανεύκολη, βελούδινη και πολύ θρεπτική με έναν υπέροχο συνδυασμό από ποικιλία χορταρικών.
Γι' αυτό είμαι σίγουρη ότι θα τη λατρέψετε κι εσείς. Είναι μια αγκαλιά γεμάτη θαλπωρή σε ένα μπολ.
Ελάτε να σας δείξω πώς να την ετοιμάσετε και εσείς.
Κατάλληλη για χορτοφάγους.
ΥΛΙΚΑ:
Υλικά για την παρασκευή της σούπας:
• 500 γρ. / 1 lb 2 oz / 3 μέτριες Πατάτες, κομμένες σε χοντρά κομμάτια
• 2 Σέλερυ με τα φύλλα τους
• 2 κ.σ. Φύλλα Σέλινο, ψιλοκομμένα
• 200 γρ. / 7 oz / 2 μεγάλα Καρότα, κομμένα σε ροδέλες
• 2 μέτρια Κρεμμύδια (γλυκιά ποικιλία), κομμένα στα τέσσερα
• 200 γρ. / 7 oz λευκά Μανιτάρια, καθαρισμένα
• 1/3 φλ. / 70 γρ. / 2,5 oz Τραχανάς, ξινός ή γλυκός
• Πρέζα Πάπρικα
• Πρέζα Κύμινο σκόνη
• 2 lt. / 8 φλ. ΖΕΣΤΟ Νερό
• 60 ml / 4 κ.σ. Ελαιόλαδο
• Χυμός από ένα Λεμόνι
• Φρεσκοαλεσμένο αλάτι και πιπέρι
Υλικά για το γαρνίρισμα:
• Λίγη Κρέμα γάλακτος
• Μια πρέζα Άνθος Αλατιού
• 1 κ.σ. φρέσκος Μαϊντανός, ψιλοκομμένος
• Λίγη πάπρικα
ΜΕΘΟΔΟΣ:
Α. Φτιάξτε τη σούπα:
1. Στη μεγάλη κατσαρόλα με το ζεστό νερό (σχεδόν βραστό), τοποθετήστε προσεκτικά τα κομμάτια πατάτας, τα καρότα, τα σέλερι, τα μανιτάρια, τις φέτες κρεμμυδιού και τα ψιλοκομμένα φύλλα σέλινο.
2. Προσθέστε τη πρέζα πάπρικα συν το κύμινο.
3. Βάλτε την κατσαρόλα πάνω από δυνατή φωτιά, ανακατέψτε να ενωθούν τα υλικά και να αρχίσουν να βράζουν.
4. Ρυθμίστε κατόπιν τη φωτιά στο πολύ χαμηλό και βάλτε το καπάκι να μισοσκεπάσει τη κατσαρόλα. Σιγοβράστε τη σούπα για περίπου 15' ή μέχρι να μαλακώσουν καλά τα χορταρικά.
5. Στη συνέχεια ανοίξτε το καπάκι, προσθέστε τον τραχανά στη σούπα, ανακατεύοντας να ενωθεί. Συνεχίστε σιγοβράζοντας τη σούπα για περίπου 8' ή μέχρι να μαλακώσει ο τραχανάς.
6. Σβήστε τη φωτιά.
7. Αλατοπιπερώστε, κατά βούληση.
8. Ρίξτε τώρα το χυμό λεμονιού και το ελαιόλαδο μέσα στη σούπα. Αφήστε τη σούπα να κρυώσει λίγο για 5'.
9. Στη συνέχεια, πολτοποιήστε με ένα ραβδομπλέντερ για να έχει αυτή την εκπληκτική βελούδινη υφή. Βεβαιωθείτε ότι δεν υπάρχουν ακόμα σβώλοι στη σούπα.
Β. Τελειώστε γαρνίροντας τη σούπα:
10. Σερβίρετε τη σούπα σε όμορφα βαθιά μπολ σούπας.
11. Περιχύστε από πάνω ένα στρόβιλο κρέμα γάλακτος, πασπαλίστε λίγο φρέσκο μαϊντανό και λίγο ανθό αλατιού και για τελευταία πινελιά, προσθέστε λίγη πάπρικα.
Γ. Προτάσεις σερβιρίσματος:
Σερβίρεται με 2 φέτες φρεσκοψημένο ψωμί ολικής αλέσεως.
Ένα έξτρα πλεονέκτημα είναι ότι τα παιδιά θα λατρέψουν αυτή τη βελούδινη σούπα χωρίς να καταλάβουν ότι τρώνε χορταρικά!
Απολαύστε αυτή την πανέμορφη, υγιεινή, θρεπτική σούπα και τα οφέλη της! Ένα βάλσαμο ψυχής με όλες τις γεύσεις θαλπωρής στο μπολ σας για να αψηφήσετε το κρύο χειμώνα!
Ψάχνετε και άλλες ιδέες-Συνταγές μου για Σούπα? Δείτε τις όλες ΕΔΩ
Δ. Πληροφορίες φύλαξης:
Η Χορτόσουπα μπορεί να διατηρηθεί σε αεροστεγές δοχείο, αφού κρυώσει, στο ψυγείο για έως και 1 εβδομάδα. Επίσης στην κατάψυξη για έως και 1 μήνα.
Κοιτάξτε επίσης την συνταγή μου σε YouTube βίντεο, το λίνκ είναι: ΕΔΩ
#Youtube#lunch#dinner#maincourse#soup#potatoes#vegetables#lowcost#winter#children#vegetarian#Βελουτέ Χορτόσουπα με Τραχανά#velvety vegetable soup with trahana#trahana#vegetable soup with trahana#βελουτέ χορτόσουπα με τραχανά#βελουτέ χορτόσουπα#χορτόσουπα με τραχανά#χορτοσουπα με τραχανα
0 notes
Text
Stuffed Tomatoes With Egg And Cheeses
🍅

Stuffed tomatoes with Egg and Cheeses - Ntomates Gemistes me Aygo, Feta kai Ladotyri
BY: Greek Cooking Made Easy
SUBSCRIBE TO MY YOUTUBE CHANNEL: https://www.youtube.com/greekcookingmadeeasy
Check My YouTube Video: HERE
Κοιτάξτε Επίσης Την Συνταγή Μου Σε YouTube Βίντεο, Το Λίνκ Είναι: ΕΔΩ
youtube
SERVES 🍴⃒ PREP. TIME 🕔⃒
3-4 pers. 15 min.
COOK. TIME ♨ DIFFIC. LEVEL 👩🍳⃒
About 35 min. Easy
I have posted several recipes for stuffed tomatoes/vegetables, as they are the most beloved and iconic Greek Summer dishes. This recipe is different because the tomatoes are stuffed with egg and cheeses instead of the usual rice and/or minced meat.
And do you know how, sometimes you start preparing a dish and then it turns into something else? What we call a "happy accident"?
The preparation of this dish is exactly that. Continue watching to find out why!
Suitable for lacto-ovo vegetarians.
INGREDIENTS:
· 6 fresh Tomatoes, medium sized, semi-ripe, washed
· 6 large Eggs
· 60-70 gr. / 2.1-2.5 oz Greek Feta cheese, crumbled
· 60-70 gr. / 2.1-2.5 oz Greek Ladotyri cheese, grated (altern: Gruyère)
· 3-4 tbsp. / 60 ml Olive Oil
· 1 tsp. dry Mint
· Ground Salt and Pepper
· Optional to garnish: Lamb's lettuce or Lettuce leaves, Small Rusks (dakos), Green Olives
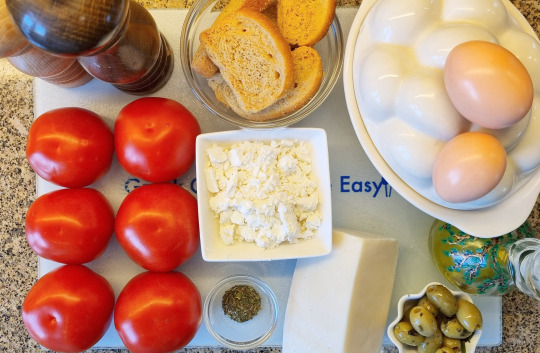
METHOD:
A. Prepare the tomatoes:
1. Tip: Try to have all tomatoes about the same size.
2. Remove the stem from the tomatoes and cut open their bottoms.
3. With a sharp knife curve the inside. Then using a spoon, hollow out the insides, placing them in a separate bowl (Tip: Use that to make homemade Tomato sauce).
4. Repeat for all tomatoes.
5. Use some very absorbent kitchen paper and dry the tomatoes inside and out very well.
6. Spray or brush some oil at the bottom and sides of a Pyrex dish of 25 x 35 cm / 10 x 14 in.
7. Place the empty, clean tomatoes in it leaving some space between them.
8. Because tomatoes need more time to be baked than the eggs, place the dish at the bottom shelf of a preheated oven, FAN @ 180℃ / 350℉, and bake them for about 20' (depends on the oven).
9. Then remove the tray from the oven, but don't turn it off.
B. Stuff the tomatoes:
10. Break each egg into each empty tomato.
11. And here is the happy accident: Normally this recipe is done with small size eggs, but I only had large ones at home. As they were quite large, they overflowed and some of the egg white was spilled in the tray. Although this is not the right way, I recommend that you do it, and you'll see why.
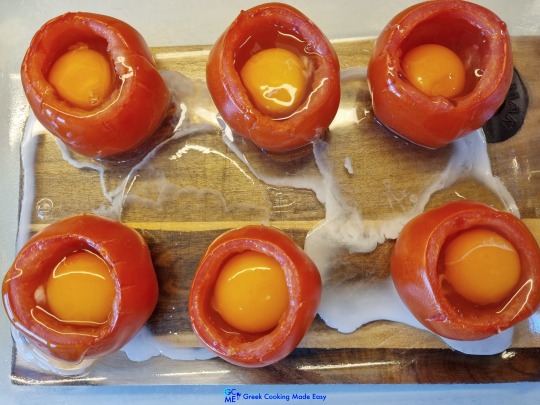
12. Now season the eggs and spilled egg white with ground salt and pepper, to taste.
13. Pour the olive oil in the tomatoes and all around inside the tray.
14. Continue by adding on top of the eggs the crumbled feta, dividing it equally.
15. Sprinkle the dry mint all around, rubbing it between your palms to release its aromas.
16. To finish, scatter a generous portion of the grated Ladotyri cheese on top of the tomatoes, dividing it equally and if you have any leftovers, sprinkle in the tray on top of the spilled egg whites.
17. Ready for baking.
C. Baking instructions:
18. Place the dish at the bottom shelf of the already heated oven, FAN @ 180℃ / 350℉, and bake the stuffed tomatoes for about 10' for runny eggs (depends on the oven).
19. If you want your eggs more solid (like me), then bake them for about 13'-15'.
20. Then place the tray on the shelf under the Grill @ 190℃ / 375℉ and grill stuffed tomatoes for 5' more, for the cheese to melt and get that special golden glaze crust.
21. Remove from the oven and serve immediately while still hot.
22. Because of the happy accident, baked egg white is now created around the tomatoes, which has become crunchy and with the melted cheese, it has turned into Saganaki!
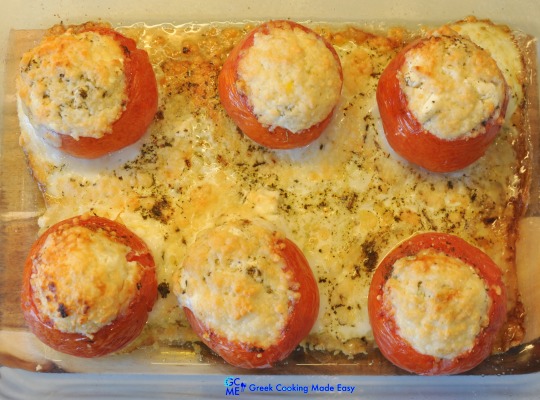
D. Serving instructions:
23. Place some fresh greens on a serving plate and around it place the green olives and 2-3 small dakos (rusks).
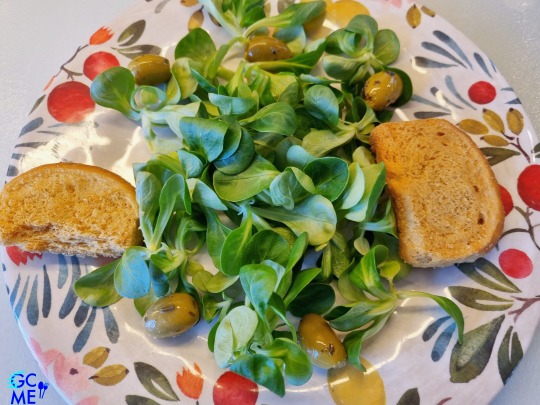
24. With a spatula, take 2 very warm stuffed tomatoes with their crunchy egg white around, place them on top of the greens and serve.

Your palate will be surrounded with the sweet tomato taste, making a wonderful combination with the cooked egg and salty, tangy cheeses.

This is a whole meal all by itself, quite nutritious and could be served for brunch, lunch or dinner.

Simply yummilicious! Have success preparing it.
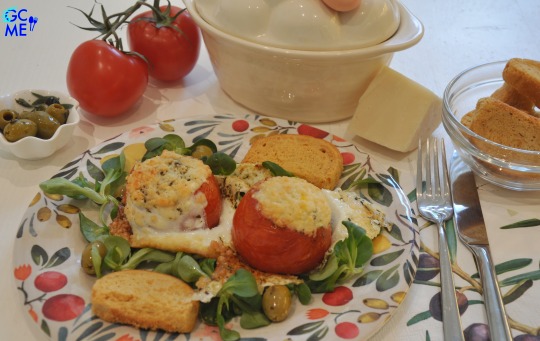
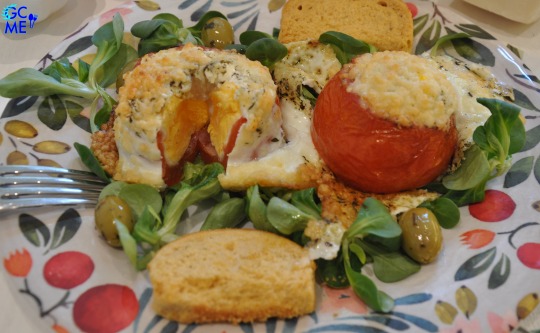
E. Info about Ladotyri from Mytilini:
Ladotyri is a PDO, special, rare, hard cheese made from sheep's milk or sheep's and goat's milk, the amount of which should not exceed 30%.
The history of this special cheese goes back over a thousand years. It has been produced exclusively on the island of Lesvos, in the Prefecture of Northern Aegean Islands, from breeds of sheep and goats that are traditionally reared there and feed on the local vegetation.

Its unique name Ladotyri translates in Greek to 'the cheese preserved in oil', because after it is shaped into special cylindrical moulds, it is usually preserved in olive oil.
In the older times when households didn’t have refrigerators, they needed to preserve their cheese, so they used to store it in traditional clay containers with olive oil (pitharia). In these containers, cheese was becoming more mature and gained its distinguished spicy flavour.

It is a quite hard cheese, very salty and has a slightly piquant taste exuding a distinctive fragrant aroma of sheep milk.
More recently, ladotyri cheese production can also be found in the Cyclades, Kythira, Zakynthos and Crete.

Check my YouTube Video: HERE
Ντομάτες Γεμιστές με Αυγό, Φέτα και Λαδοτύρι
BY: Greek Cooking Made Easy
SUBSCRIBE TO MY YOUTUBE CHANNEL: https://www.youtube.com/greekcookingmadeeasy
ΜΕΡΙΔΕΣ🍴⃒ ΠΡΟΕΤΟΙΜΑΣΙΑ 🕔⃒
3-4 15 min.
ΜΑΓΕΙΡΕΜΑ ♨ ΒΑΘΜ. ΔΥΣΚΟΛΙΑΣ 👩🍳⃒
Περίπου 35 min. Εύκολο
Έχω αναρτήσει αρκετές συνταγές για γεμιστές ντομάτες/λαχανικά, καθώς είναι από τα πιο αγαπημένα και εμβληματικά πιάτα του καλοκαιριού. Αυτή η συνταγή είναι διαφορετική γιατί οι ντομάτες είναι γεμισμένες με αυγά και τυριά αντί για το συνηθισμένο ρύζι ή/και κιμά.
Και ξέρετε πώς, μερικές φορές ξεκινάτε να ετοιμάζετε ένα φαγητό και μετά μετατρέπεται σε κάτι άλλο; Αυτό που λέμε «ευτυχής συγκυρία»;
Η ετοιμασία αυτού του πιάτου είναι ακριβώς αυτό. Συνεχίστε να παρακολουθείτε για να μάθετε γιατί!
Κατάλληλο για χορτοφάγους.
ΥΛΙΚΑ:
• 6 φρέσκες Ντομάτες, μεσαίου μεγέθους, ημιώριμες, πλυμένες
• 6 μεγάλα Αυγά
• 60-70 γρ. / 2,1-2,5 oz Φέτα, θρυμματισμένη
• 60-70 γρ. / 2,1-2,5 oz Λαδοτύρι Μυτιλήνης, τριμμένο (εναλλακτικά: Γραβιέρα)
• 3-4 κ.σ. / 60 ml Ελαιόλαδο
• 1 κ.γ. ξερός Δυόσμος
• Φρεσκοαλεσμένο αλάτι και πιπέρι
• Προαιρετικά για γαρνίρισμα: Φύλλα μαρουλιού ή βαλεριάνας, Ντακάκια, Πράσινες ελιές
ΜΕΘΟΔΟΣ:
Α. Ετοιμάστε τις ντομάτες:
1. Συμβουλή: Προσπαθήστε να είναι όλες οι ντομάτες περίπου το ίδιο μέγεθος.
2. Αφαιρέστε το κοτσάνι από τις ντομάτες και κόψτε τον πάτο τους.
3. Με ένα κοφτερό μαχαίρι χαράξτε το εσωτερικό. Στη συνέχεια, χρησιμοποιώντας ένα κουτάλι, σκάψτε και αφαιρέστε το εσωτερικό, τοποθετώντας το σε ένα ξεχωριστό μπολ (Συμβουλή: Χρησιμοποιήστε το για να φτιάξετε σπιτική σάλτσα ντομάτας).
4. Επαναλάβετε για όλες τις ντομάτες.
5. Χρησιμοποιήστε καλό απορροφητικό χαρτί κουζίνας και στεγνώστε τις ντομάτες μέσα και έξω πολύ καλά.
6. Ψεκάστε ή αλείψτε λίγο λάδι στο κάτω μέρος και στις πλευρές ενός ταψιού Pyrex 25 x 35 cm / 10 x 14 in.
7. Βάλτε κατόπιν τις άδειες, στεγνές ντομάτες σε αυτό αφήνοντας λίγο χώρο μεταξύ τους.
8. Επειδή οι ντομάτες χρειάζονται περισσότερο χρόνο για να ψηθούν από τα αυγά, βάλτε το ταψί στη κάτω σχάρα ενός προθερμασμένου φούρνου, στον αέρα @ 180℃ / 350℉, και ψήστε τις για περίπου 20' (εξαρτάται από τον φούρνο).
9. Στη συνέχεια, αφαιρέστε το ταψί από το φούρνο, αλλά μην τον σβήσετε.
Β. Γεμίστε τις ντομάτες:
10. Σπάστε κάθε αυγό μέσα σε κάθε άδεια ντομάτα.
11. Και εδώ είναι η ευτυχής συγκυρία: Κανονικά αυτή η συνταγή γίνεται με αυγά μικρού μεγέθους, αλλά εγώ είχα μόνο μεγάλα στο σπίτι. Καθώς ήταν αρκετά μεγάλα, ξεχείλισαν και λίγο από το ασπράδι χύθηκε μέσα στο ταψί. Αν και αυτός δεν είναι ο σωστός τρόπος, σας συνιστώ να το κάνετε και θα δείτε γιατί.
12. Τώρα καρυκεύστε τα αυγά και το χυμένο ασπράδι με φρεσκοαλεσμένο αλάτι και πιπέρι, κατά βούληση.
13. Περιχύστε το ελαιόλαδο πάνω από τις ντομάτες και γύρω γύρω μέσα στο ταψί.
14. Συνεχίστε προσθέτοντας πάνω από τα αβγά την θρυμματισμένη φέτα, μοιράζοντάς την εξίσου.
15. Πασπαλίστε παντού τον ξερό δυόσμο, τρίβοντάς τον ανάμεσα στις παλάμες σας για να απελευθερωθούν τα αρώματά του.
16. Για να τελειώσετε, σκορπίστε μια γενναιόδωρη ποσότητα από το τριμμένο λαδοτύρι πάνω από τις ντομάτες, μοιράζοντάς το εξίσου και αν περισσέψει, πασπαλίστε το υπόλοιπο μέσα στο ταψί πάνω από τα χυμένα ασπράδια.
17. Έτοιμες για ψήσιμο.
Γ. Οδηγίες ψησίματος:
18. Τοποθετήστε το ταψί στη κάτω σχάρα του ήδη ζεστού φούρνου, στον αέρα @ 180℃ / 350℉, και ψήστε τις γεμιστές ντομάτες για περίπου 10' για αυγά μελάτα (εξαρτάται από το φούρνο).
19. Αν θέλετε τα αυγά σας πιο σφιχτά (όπως εγώ), τότε ψήστε τα για περίπου 13'-15'.
20. Στη συνέχεια, αλλάξτε βάζοντας το ταψί στο ράφι κάτω από το Γκρίλ @ 190℃ / 375℉ και ψήστε τις γεμιστές ντομάτες για 5' ακόμη, ώστε να λιώσει το λαδοτύρι και να φτιάξει σπέσιαλ χρυσή κρούστα.
21. Βγάλτε το ταψί από το φούρνο και σερβίρετε αμέσως όσο είναι ακόμα ζεστές.
22. Από την ευτυχή συγκυρία έχει πλέον δημιουργηθεί ψημένο ασπράδι γύρω από τις ντομάτες που είναι τραγανό και με το λιωμένο τυρί έχει γίνει σα Σαγανάκι!
Δ. Οδηγίες σερβιρίσματος:
23. Σε πιάτο σερβιρίσματος βάλτε μερικά φρέσκα κομμένα φύλλα μαρουλιού ή βαλεριάνας και γύρω γύρω πράσινες ελιές και 2-3 ντακάκια.
24. Με μια σπάτουλα πάρτε 2 πολύ ζεστές γεμιστές ντομάτες μαζί με τραγανό ασπράδι τριγύρω, βάλτε τις πάνω από τη πρασινάδα και σερβίρετε.
Πλημμυρίζει ο ουρανίσκος από τη γεύση της γλυκιάς ντομάτας που κάνει έναν υπέροχο συνδυασμό με το μαγειρεμένο αυγό και τα αλμυρά, πικάντικα τυριά. Αχ αυτό το λαδοτύρι!
Ένα πλήρες γεύμα από μόνο του, πολύ θρεπτικό που θα μπορούσε να σερβιριστεί για brunch, μεσημεριανό ή βραδινό.
Απλά πεντανόστιμο! Καλή επιτυχία στην ετοιμασία του.
Ε. Πληροφορίες για το Λαδοτύρι Μυτιλήνης:
Το Λαδοτύρι είναι ένα Π.Ο.Π, σπάνιο, σκληρό τυρί από πρόβειο ή αιγοπρόβειο γάλα, η περιεκτικότητα του οποίου δεν πρέπει να υπερβαίνει το 30%.
Η ιστορία αυτού του τυριού ξεκινάει πριν από τουλάχιστον χίλια χρόνια. Παράγεται αποκλειστικά στο νησί της Λέσβου, στο Βόρειο Αιγαίο, από φυλές αιγοπροβάτων οι οποίες εκτρέφονται παραδοσιακά εκεί και τρέφονται από την τοπική βλάστηση.
Το όνομα Λαδοτύρι σημαίνει «το τυρί που διατηρείται σε λάδι», γιατί αφού διαμορφωθεί σε ειδικά κυλινδρικά καλούπια, συνήθως συντηρείται σε ελαιόλαδο.
Τα παλαιότερα χρόνια που τα νοικοκυριά δεν είχαν ψυγεία, χρειαζόταν να συντηρούν το τυρί τους, γι' αυτό το φύλαγαν σε παραδοσιακά πιθάρια με ελαιόλαδο. Εκεί το τυρί γινόταν πιο ώριμο και αποκτούσε την ιδιαίτερη πικάντικη γεύση του.
Είναι ένα αρκετά σκληρό τυρί, πολύ αλμυρό και έχει ελαφρώς πικάντικη γεύση που αποπνέει ένα χαρακτηριστικό άρωμα πρόβειου γάλακτος.
Πιο πρόσφατα συναντάται παραγωγή λαδοτυριού και στις Κυκλάδες, Κύθηρα, Ζάκυνθο και Κρήτη.
Κοιτάξτε επίσης την συνταγή μου σε YouTube βίντεο, το λίνκ είναι: ΕΔΩ
#ντοματες γεμιστες με αυγο φετα και λαδοτυρι#ντομάτες γεμιστές με αυγό φέτα και λαδοτύρι#γεμιστα#stuffed tomatoes#gemista#stuffed tomatoes with egg and cheeses#lunch#dinner#maincourse#egg#poultry#vegetables#vegetarian#lowcost#cheese#keto#children#gluten#region#aegean
0 notes