hongchamp
in the aeroplane over the sea
about ▪︎ gifs ▪︎ nav
18920 posts
Don't wanna be here? Send us removal request.
Last Seen Blogs

midwestdashcam-blog
Untitled
onlyhotgirls
Only Hot Girls
all-hail-the-witcher
yeah right, picture that with a kodak

roseyoori
無標題
falling-on-their-faces
trash
Text
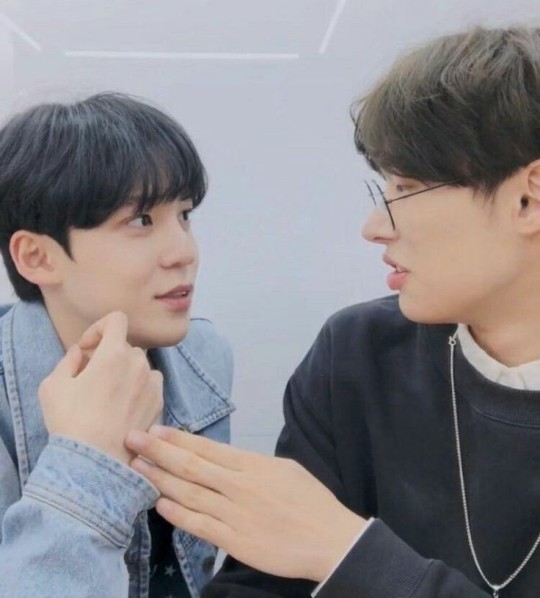
ayo quick question why do the same jongho/yeosang/hongjoong gifs i made kept being used in fanfics💀💀💀💀💀
36 notes
·
View notes


Text
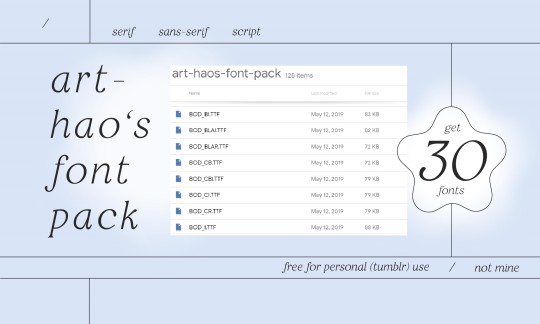
Hello! It has (again) been a while since I have posted anything useful, so this time I put together a pack of 30 of my favourite fonts. This pack contains serif, sans-serif and script fonts that are free for personal (this includes Tumblr grfx) use. Hope you enjoy it!
DOWNLOAD THE PACK HERE
(In case of any trouble, please contact me :))
92 notes
·
View notes
Text
0 notes
Text
0 notes
Note
Hi! I saw the icon tutorial and I was wondering if you knew how to do it with Picsart app?
Hi I can try my best for a tutorial! I rarely use it because the app confuses me a little but here is what I would do.
My icons masterlist here.
ICON TUTORIAL USING PICSART
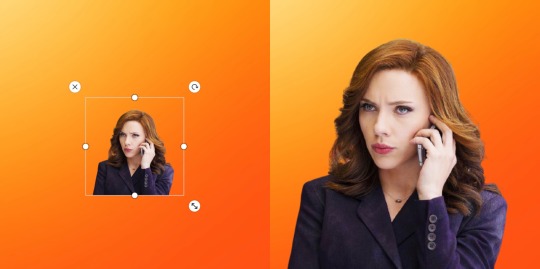
How I went from this picture to these icons:

For ref: ICON TUTORIAL USING PROCREATE
Please read the original tutorial before reading this.
Everything up until the step where we open procreate will be the exact same (find pic, adjust pic to your preference, use remove.bg).
Finding a gradient/texture background
For textures and gradients you can search on the website: pixabay or unsplash. These are copyright free images that you can use in your edits in general.
You can also search on tumblr. #icon resources #ps textures etc probably has stuff otherwise also check out these great source blogs @allresources @completeresources @chaoticresources there’s way more there but these are some I love to use. Definitely checkout the blogs who post the resources too. My textures are linked in the original post.
I have made a gradient for this which you’re free to use. I can make a texture pack with lots of different gradients that you can use but I cannot add more than 10 photos here.
When I searched gradient on unsplash a lot of different gradient images came up but just for ease I’m using my own gradient (the principal is the same).


PicsArt
Open PicsArt. Open your background image (in this case the gradient). If it isn’t already a square crop to a square.
Important to note with PicsArt: DO NOT CLICK APPLY until you are happy with everything. I’ve made this mistake many times and I’m either not finished or I wanted to adjust something.
Click add photo, add the picture of your character with the background removed. Now stretch the image to the size you want for the icon.
Here you can adjust the brightness and contrast of the image again (click adjust and play with the settings to your preference)
Textures on PicsArt
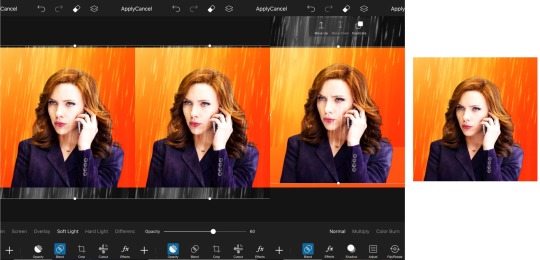
Add image of texture. Click blend> soft light. Click opacity> adjust to preference. Click the double square button> click move down.
At this point your icon is done
How to colour on PicsArt
Things to bear in mind: your colouring will not be perfect. I am using the brush setting on PicsArt and there’s no way to soften it or the eraser at the time I am making this tutorial. Since there is not an option to adjust the blend I have adapted so again it won’t look exactly like my procreate tutorial. It will take patience.
All edits have imperfections and that is okay, since it’s your icon the image won’t be massive and for the most part you can only see it when you zoom in.
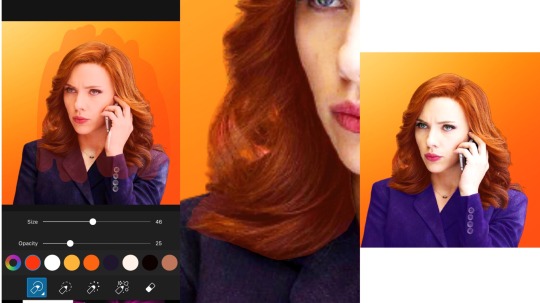
Click brushes > click first brush> click colour wheel and select colour (e.g. orange). Adjust opacity of brush (since there’s no blend option we have to lower the opacity I suggest anywhere between 5-30 but any more and it won’t look good.)
You can test out the opacity/colour first to see if it’s what you like once it’s the way you want it to be then move on to the next step.
Important: Draw over the section you want to colour, DO NOT lift your finger. It doesn’t matter if it goes over the border of what you want to colour. If you draw a little then lift then draw again the overlaps will have different opacities.
Now you’ve got an even layer of the brush, click the eraser button. Adjust size of the brush and zoom in and start erasing where the colour is not needed. If you make an error just click the back button and try again. Just try to go for the general shape of whatever you’re colouring.
Once you’re happy click apply. If you want to colour more things, just repeat these steps (e.g. on the eyes and lips, and outfit- each may require the brush to be different opacities: the eyes I used 15 opacity)
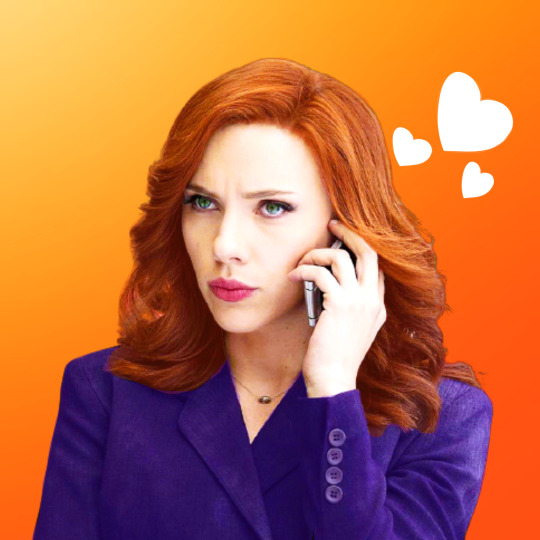
Now you’re done. At this point you can also add textures or stickers such as the hearts I added there and adjust according to preference.
I hope you found this useful and use these steps to make amazing icons of your own!! If there’s any questions please let me know. I really appreciate if you could reblog this tutorial if you found it useful so more people can see!
Since I have space for a few more images here are some more gradients I created that you can use.


89 notes
·
View notes
Text
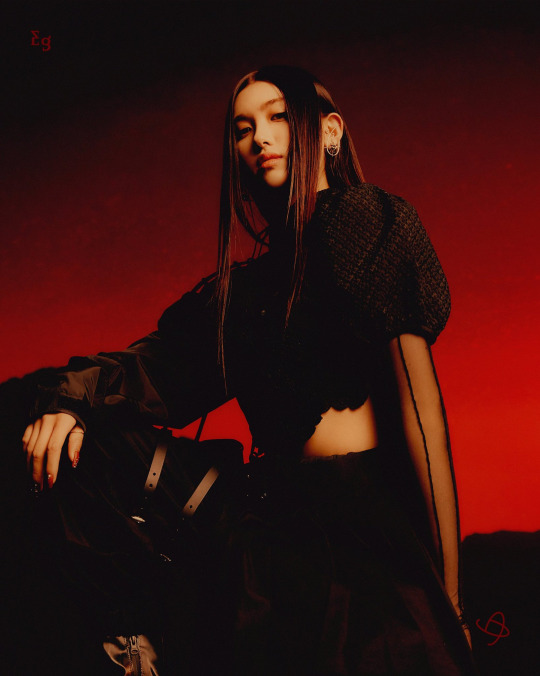
Aisha (Everglow) - "Last Melody" Concept Pics
47 notes
·
View notes
Photo
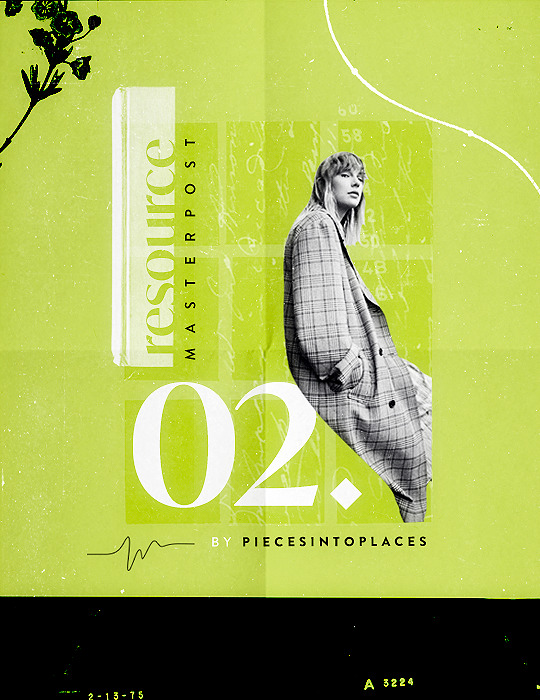
PIECESINTOPLACES RESOURCE MASTERPOST #2:
Following the popularity of my first resource masterpost, I’ve decided to release a second one with even more resources and tutorials. Like or reblog this post if you found it helpful, and please make sure you like or reblog the posts below if they’re from blogs to support their creators!
Textures & Things:
Unblast Free Mockups
Cole Poska Mockups
Andrey Azizov Free Texture Assets & Layer Styles
King’s Studio Free Texture Pack
Adobe Stock Royalty-Free Photoshop Templates (free with trial or subscription!)
Pixelbuddha Free Textures, Mock-Ups, Brushes, Fonts, Etc.
Creative Veila Free Mock-Ups
IndieGround Free Textures, Fonts, Mock-Ups, Etc.
Graphicsfuel Free Textures, Fonts, Mock-Ups, Etc.
Watercolor Textures & Brushes Masterpost by @asheathes
GIF Overlays (1, 2, 3, 4, 5, 6, 7, 8)
Frames (1, 2, 3, 4, 5, 6)
Misc. Texture Packs (1, 2, 3, 4, 5, 6, 7, 8, 9, 10, 11, 12, 13, 14)
Fonts:
Unblast Free Fonts
Fontshare Free Fonts
Pangram Pangram Foundry: Free Fonts for Non-Commercial Use
Use + Modify Free Fonts
Andrey Azizov Free Font Pack for Personal Use
Velvetyne Free Fonts
FontFabric Free Fonts
Collletttivo Free Open-Source Typefaces
How to Find Fonts With Photoshop
Tutorials:
Make Simple GIFs in Photoshop
How to use mock-up templates in Photoshop (1, 2)
Color Grading in Photoshop
Clipping Mask Tutorial
Gradient Map Tutorial
Icon Tutorial
Vibrant Coloring Tutorial
How to Fix Orange-Washed Characters by @aubrey-plaza
Mega Coloring Tutorial by @inejz-ghafa
GIF Blending Tutorial by @morningstr
Rainbow GIF Coloring Tutorial by @favreaus
Gradient Text Tutorial by @anya-chalotra
GIF Tutorial Masterpost
Misc. Photoshop Tutorials (1, 2, 3, 4, 5)
Misc. Resources:
Google’s Library of Hundreds of Free Icons
Anti-Whitewashing Adjustment PSD by @evansyhelp
Material.io Color Palette Generator
0to255 Color Tool to Find Adjacent Colors
1K notes
·
View notes
Text
how do you do fellow kpoppers
0 notes
Text
thinking of changing my online name🤔🤔🤔
0 notes
Audio
this song sounds like my first gay kiss
148 notes
·
View notes
Audio
andromeda | weyes blood
andromeda’s a big, wide open galaxy
nothing in it for me except a heart that’s lazy
3K notes
·
View notes