
janinacutie
Beauty Blog
Hello! Welcome to my blog about life style. Here you can find some beauty tips & so much lifehucks . I hope you'll enjoy it , guys! Love you , xoxo
18 posts
Don't wanna be here? Send us removal request.
Last Seen Blogs

goldengreenleaf
greenleaf

sjaia33-blog
سجاياالرووح

dolly-woods
Starlet

xxonster
Sure, whatever.

artistic-astral-antics
✨SIDE🌟BLOG✨
Text
FLOWS FROM BRITTLE NAILS:
1) Natural mask for the treatment of brittle nails.
Take a few tablespoons of olive oil, a few drops of lemon juice and just a couple of drops of iodine, all the mix. Lower nails into the mixture and soak for 5-10 minutes. Wash off with water without soap.
2) Lodine bundle of nails.
For the treatment of brittle nails and bundles at night need to smear fingernails iodine. It is quickly absorbed and if it is done in the evening, morning, yellow nails would no longer be.
3) Lemon to treat brittle nails.
Lemon - a good remedy for brittle nails. Cut the slices of lemon 2, a thickness of 1 cm slices simultaneously thrust in all the nails in one -. The right hand, the other - the left. Keep as 5 min., Then rinse with water.
4) Sour berries to strengthen nails.
For the treatment of brittle nails are useful such as cranberries, currants, cranberries. Grease juice berries nails and skin around the nails.
5) Vegetable oil with lemon juice treatment of brittle nails.
Apply the mixture on your nails from vegetable oil with the addition of drops of essential oil of lemon or squeezed lemon juice. Apply every day for 10 days.
6) Salt and Iodine to strengthen nails.
Salt has long been used as a remedy for brittle nails. In a glass of water put 1 tbsp. table spoon of coarse salt and a few drops of iodine. Moisten a cotton wool in the solution and rub into the nails. After relaxing by the sea is often observed the same effect.
7) Red pepper and cream for strengthening layer and brittle nails.
Superimposed on the nails mask of 1 tsp red pepper and 1 tsp of cream every 5 min., Can be and more. Very effective in the layer and brittle nails.
8) Ointment to harden nails.
Take cool boiled egg yolk and 4 grams of beeswax melted in a water bath, adding a little peach oil until a ointment. This ointment to rub every night marigolds.
9) Natural wax for the treatment of brittle nails.
Against nail brittleness help beeswax. The fingertips dipped in melted on a steam bath pure wax and immediately dipped in cold water. On the fingers after such a procedure are formed, how-to "thimbles", then put x / cotton gloves and go to bed. Keep all night. Doing the procedure twice a week. A total of six treatments. Nails are perfectly strengthened. One course is enough to get rid of brittle nails for life.
#nails#manicure#cat#hands#hand#brittle#brittle nails#salt#lodine#natural#mask#naturak mask#lemon#vegetables#red#red pepper#pepper#ointment#wax#bee#bea miller#style#fashion#beauty#tips#beauty tips#justin bieber#selena gomez#demi lovato#jelena
2 notes
·
View notes
Text
Ways to relieve fatigue from his eyes:
1. Strong welding damp cotton pad of black tea and are putting to the eyes for 10 minutes.
2. Wipe eyelids with ice cubes of green tea.
3. Slices of raw potato to attach for 15 minutes,on your eyelids.
4. Slices of cucumber for about 20 minutes, on your eyelids.
5. Lotions from chamomile or cornflower, just 10 minutes
6. Well, of therapeutic agents - Vizin;)

#eyelids#eyes#relieve#fatigue#ways#way#strong#stay strong#tea#cubes#minutes#minute#cucumber#chamomile#style#tips#beauty tips#beauty#justin bieber#sport#fitness#selena gomez#jelena#teen wolf#dylan obrien
0 notes
Text
20 Pantone-Approved Ways to Revamp Your Office + Improve Your Work Day. (Part 1.)
If it wasn’t glaringly clear already, we are absolutely in love with this year’s choices for the 2015 Spring Pantone colors. We’ve already brought the colors into our bedrooms, styled them for our wardrobes and even tried them in our favorite foods. The broad spectrum of soft, nature-like colors is the perfect way to update your home office for the spring. Whether you use them on your walls or furniture, we’re sharing 20 gorgeous home offices that feature Pantone’s 2015 spring colors for the ultimate design inspo.
SCUBA BLUE
1. Blue Crush: If you want to go for a daring change, then consider painting this vibrant blue all over your walls to make a bold statement in your home office. (via ELLE Decor)
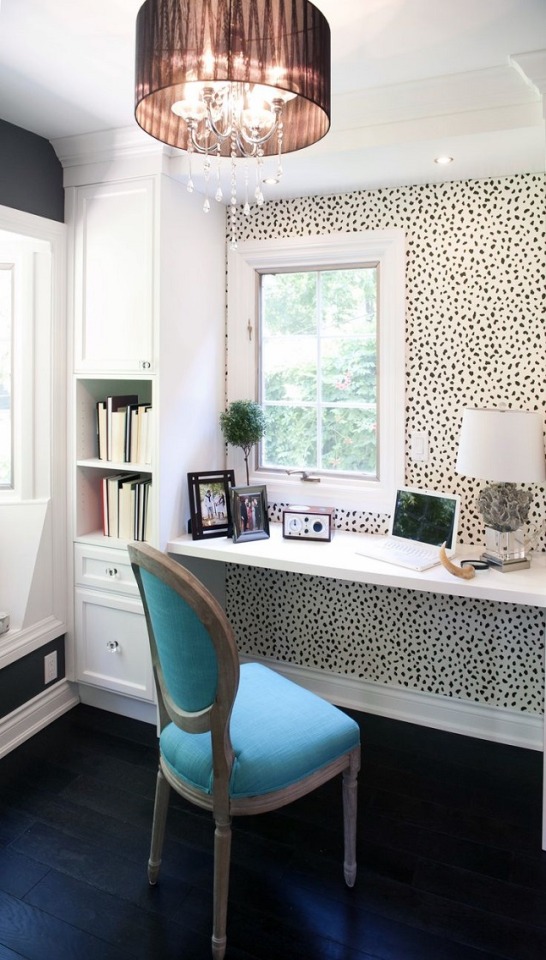
2. Sitting Pretty: A pop of turquoise on an upholstered chair is the perfect complement to a black and white patterned wall. (via HGTV)
LUCITE GREEN

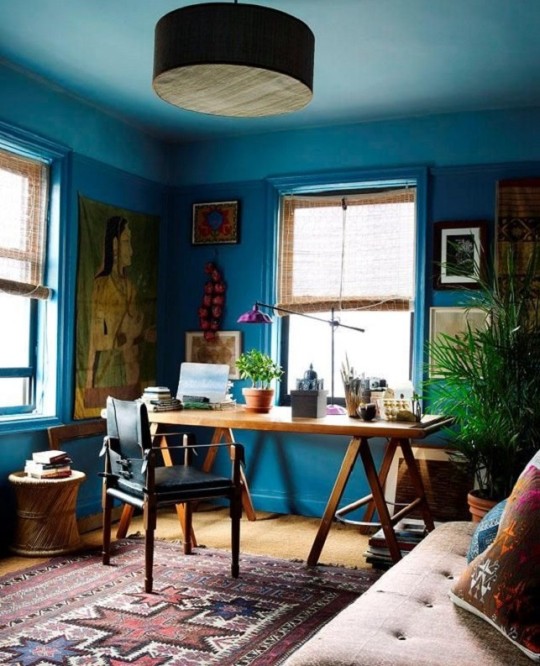
3. Nature: For a space that doesn’t have any windows, bring in fresh plants, wood accents and a structured desk chair in a refreshing green shade. (via Facilismo)
CLASSIC BLUE
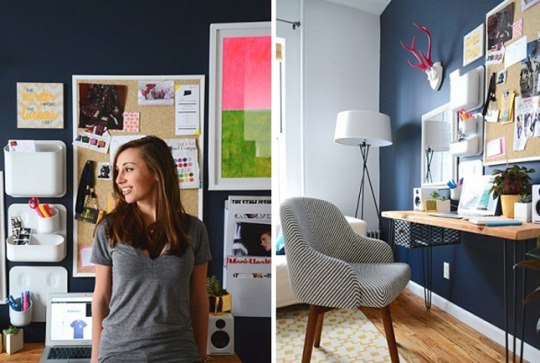
4. Make A Statement: When you’re working with a small space, painting the entire room a darker shade can get overwhelming. By sticking to one wall, you will draw all the attention to your chic office. (via Homepolish)
STRAWBERRY ICE

5. Pale Pink: The palest shade of strawberry pink makes a modern office with structured white furniture feel warm and feminine. (via Cupcakes and Cashmere)

6. Pretty Panels: Mix a strawberry pink paneled wall, a light wood desk and a pop of green on your desk chair, and you get an office that’s as fun and playful as you are. (via The Design Files)

7. Graphic Art: Looking to add some pink to your office without making a major commitment? Wall art like a typography print can liven up any minimalist decor. (via Made by Girl)
TANGERINE
8. Color Explosion: If you can’t decide between colors, then embrace them all and energize your office with this bold combination of tangerine, pink and blue. (via House to Home)
CUSTARD

9. Velvet Revamp: Give your office a luxe upgrade with velvet, and you’ll get some instant glam. Channel your inner diva without going overboard by incorporating a subtle color like custard. (via Carla Aston)

10. Desk Drawers: Tackle an easy DIY by painting this mellow yellow on the drawers for the perfect complement to a light wood desk. (via Est Magazine)
GLACIER GRAY

I hope you enjoy it! So follow me on Instagram & @janinabrinley is my 2nd blog. Love youuu
And yep, I get 2nd part, after 50-70 reblog or favs. <3
#diy#room#room decor#decor#cool#youtube#youtuber#laurdiy#laurdecor#art#tumblr#yellow#colors#office#tumblr room#justin bieber#sport#fitness#outfits#spring#2016#fashion#style#selena gomez#adele#jelena#demi lovato#ariana grande#rihanna#miley cyrus
21 notes
·
View notes
Text
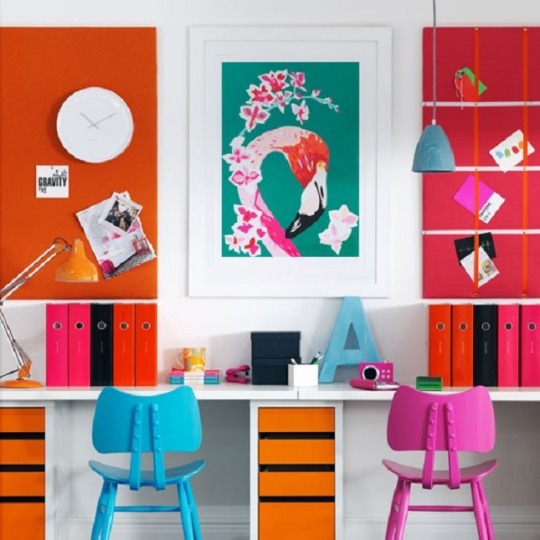
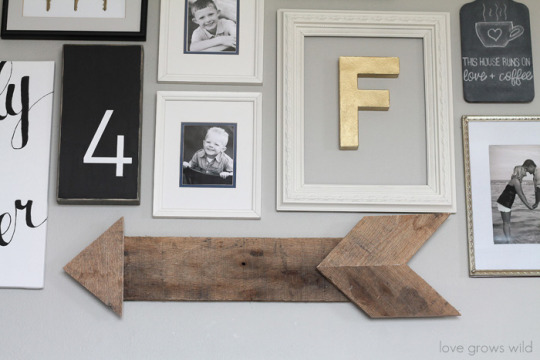
LIVING ROOM GALLERY WALL
It feels like forever that I’ve been dreaming of a big, pretty gallery wall in my living room. I must have pinned a thousand inspiration ideas before deciding to tackle this big project! And to be honest, I was a little intimidated at the idea of putting together and entire collection of beautifully random, yet artfully cohesive pieces to fill the large wall above our couch. I wanted it to feel just right. The perfect display of our family all wrapped up in wall of frames…
Well guess what ya’ll, I did it!
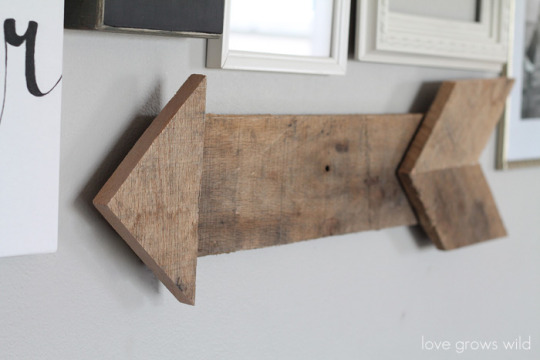
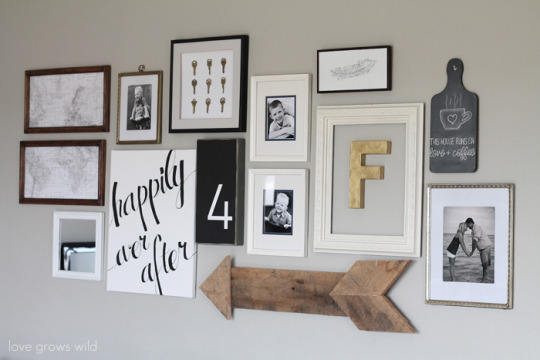
A large, 14-piece gallery wall complete with cherished family photos, unique thrifted finds, DIY artwork, and a pallet wood arrow that I’m BEYOND smitten with… all for UNDER $20!! Yes, I said $20! You definitely don’t want to miss these gallery wall ideas PLUS my easy hanging trick!
Words cannot express how happy I am to finally share this post with you. If you follow me on Instagram (what up Insta-peeps!), you’ve gotten some sneak peeks at a few of the projects I’ve been working on for the gallery wall, and I know you’ve been patiently waiting to see the finished product! So without further adieu, here’s how the gallery wall came to be:
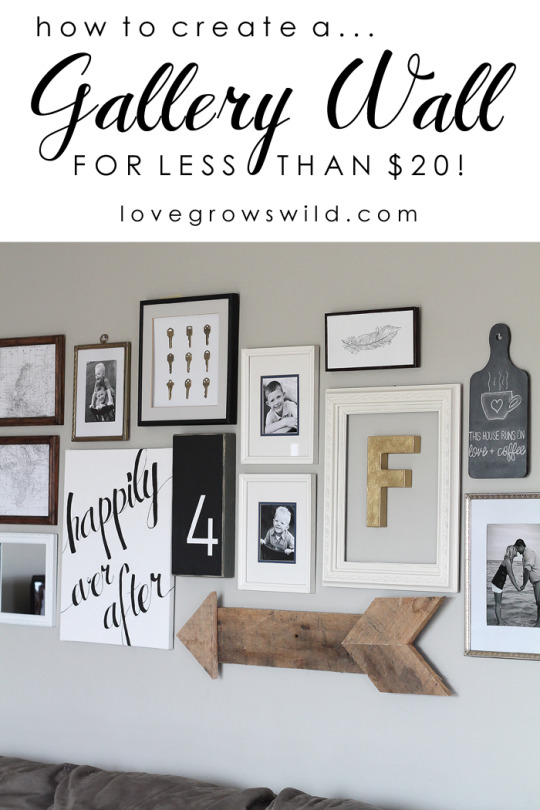
STEP 1: SHOP, THRIFT, RE-USE, AND UPCYCLE!
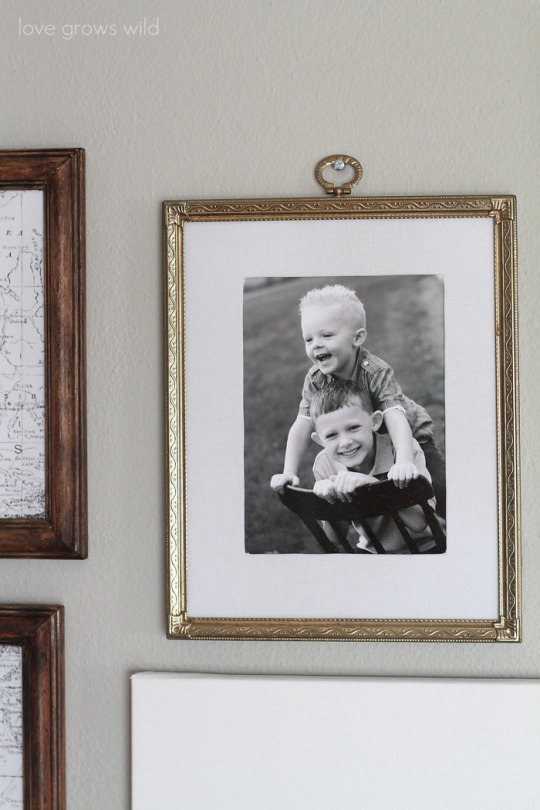
My first task was to shop around at thrift stores for old frames. I hit up Goodwill and scored probably 6 or 7 good size frames for around $20. I made sure to pick a variety of sizes and materials, such as metal and wood, that I knew I would create interest on the wall. When you’re looking for frames, don’t forget that you can easily spray paint them to whatever color you desire!
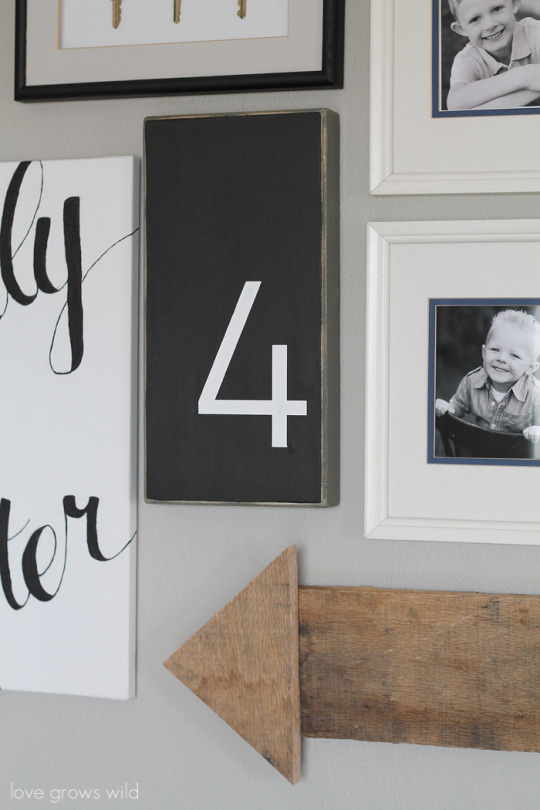
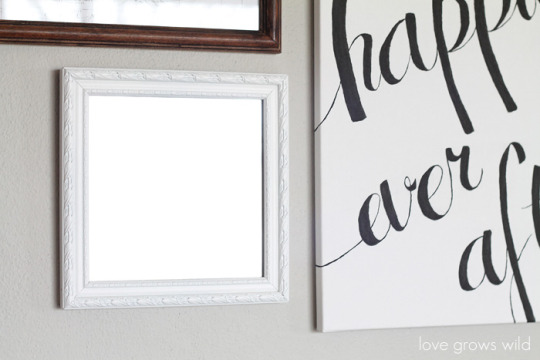
I brought everything home and laid them out on the floor, adding a few pieces I already owned… a blank canvas, my framed key specimen art, a small chalkboard, and a few small signs that needed a makeover. This was a great chance to clean out my closet and use up some of the items that I’ve had sitting around for awhile! I measured the wall above my couch and arranged the frames on the floor to those dimensions. Then I grabbed a piece of notebook paper and sketched out what I wanted to do with each frame. I sprayed a lot of them white to keep the wall light and spread a mixture of black, gold metal, and wood tones throughout the remaining pieces.
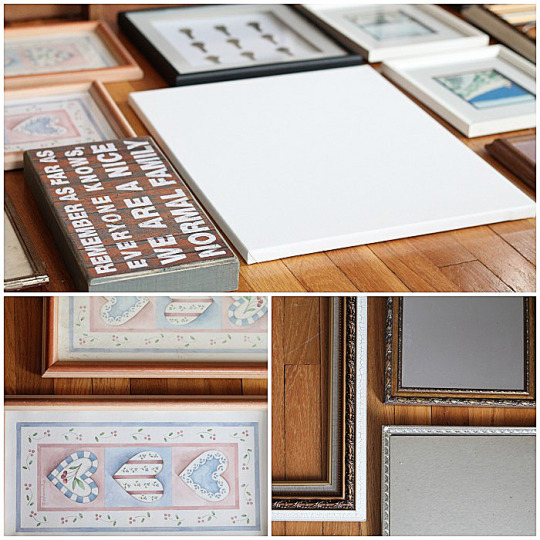
STEP 2: HANG IT UP!
(Are you ready for my awesome hanging trick? Seriously, write this one down!)
Once I was ready to hang everything on the wall, I used this simple trick:
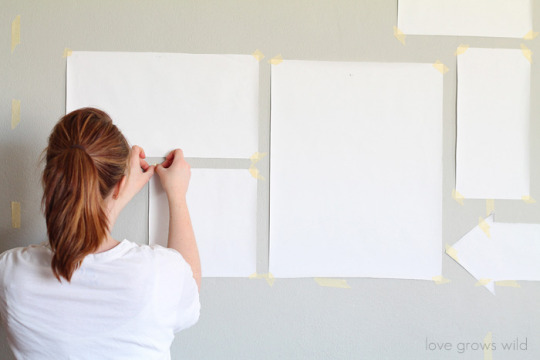
1) First, I traced each frame on paper and cut the shape out. Any scrap paper will do… newspaper, brown paper bags, or even wax paper. I had a roll of white drawing paper, so I went with that.
2) Then I placed the paper on the back of the frame and made a hole where the nail should go.

3) Then came the fun part… arranging everything on the wall! The easiest way I’ve found to do this was to first mark off the area where you want your frames to go. My frames took up about a 7′ x 3′ space, so I found the center of the wall and how far above my couch I wanted the frames to start and used masking tape to create a 7′ x 3′ box on the wall. I didn’t have any exact measurements on the spacing of each frame, so I just eyeballed where I wanted each paper to go. I started with a paper from the center and worked my way out from there.
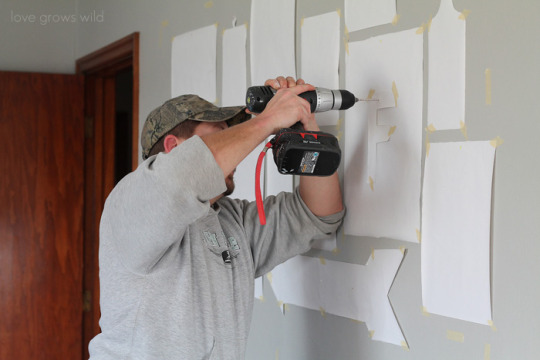
4) Once I had all the papers in place, we drilled through the hole in each paper to add an anchor and screw in the wall. Our house is on the older side, and these walls are TOUGH to drill through. Simple nails either bend or just tear up the wall, so my husband used a masonry bit and wall anchors to make sure everything stays where it’s supposed to. Even though our walls are a pain to drill through, it was SUPER easy to find each screw placement because of the handy templates I made! No guess work, and no 1,000 holes in the wall!
I tore all the tape and paper down and hung my frames on the wall. Now every time I walk into my living room, I get to swoon over this gorgeous gallery wall!

It’s the perfect mix of black and white with just the right amount of rustic wood tones and a bit of gold glam. I love it! Seriously, I cannot stop smiling! Instead of giving you a play by play on each individual piece, I’ll just let the photos do the talking and hopefully spark some inspiration…


So what do you think? I’m dying to know… what’s your favorite piece?? Is there a certain one you’d love to see a tutorial on? I have step-by-step tutorials lined up for a few of the pieces in the next couple weeks, so leave me a comment and let me know which individual projects you’d like to see!
IDEA: http://lovegrowswild.com/2014/04/living-room-gallery-wall/
#diy#room decor#room#decor#photos#wall#photo wall#polaroid#picture#pinterest#instagram#inspiration#inspiring quotes#map#children#family#girl#boy#teenegers#tumblr#tumblr room#f#for#justin bieber#jelena#dylan obrien#teen wolf#selena gomez#demi lovato#acacia brinley
4 notes
·
View notes
Text
5 Moves for Getting the Best Ass Ever
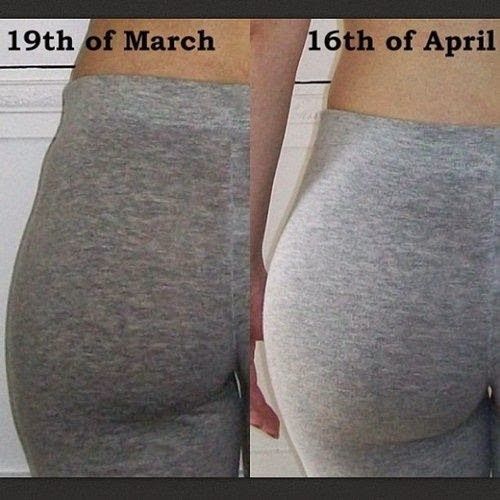
Jen Selter has a butt that defies all logic and physics. She arguably has the most famous butt since Kim Kardashian became a celebrity, accruing a following of 2 million on Instagram alone, and launching the hashtag #seltering, which refers to her signature move: Popping her butt while using various props to put her feet and hands on. Here, she demonstrates five moves that will help you get an ass like hers.
Please continue reading!
1. Donkey Kicks

Start on all fours, hands shoulder-width and knees hip-width apart. Keeping your right foot flexed and leg bent, raise your right leg and press your heel toward the ceiling until your foot is directly above your butt. Squeeze your glutes and slowly return to starting position but keep your knee off the ground. Repeat this 15 times and then switch legs.
Please continue reading!
2. Doggy Hydrant
Start on all fours, hands shoulder-width and knees hip-width apart. Keeping your feet flexed and knee bent, open your left leg out to the side until your inner thigh is parallel with with the floor. Squeeze your glutes and your abs and return to the starting position with your knee only slightly off the floor. Repeat this 15 times and then switch legs.
Please continue reading!
3. Chair Kicks

Grab a chair (preferably a tall chair) and face it away from you. Stand an arms-length behind the chair with your feet together and grab the back of the seat with both hands for balance. Lean forward slightly and lift your right leg directly behind you, keeping your knee straight but not locked. Squeeze your glutes and make sure to square your hips with the chair; don’t open your hip out to the side when you kick behind. Raise your leg as high as you can and then lower your leg with control and return to the starting position. Repeat this move 10 times and switch legs. Do two sets of these.
Please continue reading!
4. Squat Pulse

Begin standing with your legs wider than shoulder width apart, toes turned out, and your arms straight out in front of you. Squat down and keep your knees in line with your toes, squeeze your abs tight, and keep your back straight. Stay in squat position and pulse up and down, raising and lowering your butt six inches or so each time. Pulse 10 times before relaxing and standing. The trick is to stay in squat position until the end; don’t stand up until you’re finished. Repeat 15 times and do three sets of these.
Please continue reading!
5. Squat Kick
Start standing with your legs wider than hip-width apart and your toes slighty turned out. With your arms straight in front of you, lower yourself into a squat until your butt is just below the height of your knees. Make sure your knees stay behind your toes when you squat. If your knees reach past your toes, widen your stance a little bit. Next, stand back up and when you reach starting position, lift your left leg as high as you can directly to the side of you. Lower your leg back to the ground with control. Repeat 10 times and switch legs. Do three sets of these.
For more please follow: @janinacutie & @janinabrinley
#ass#sport#fitness#жопа#качаем жопу#задница#motivation#motivating quotes#girl#tips#kick#booty#twerk#JLO#iggy azalea#beyonce#rihanna#justin bieber#demi lovato#adele#selena gomez
425 notes
·
View notes
Photo
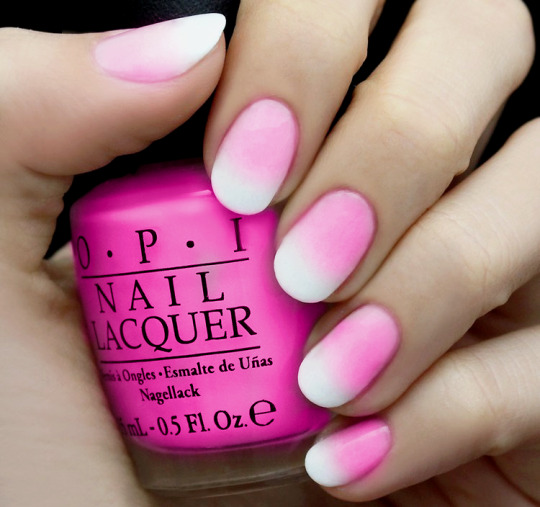
#NailART: Classic Ombre. 🎏
If you do not follow the fashion, and you do not want to spend extra money on a manicure at the salon, then this design is completely right for you!
✊ Tools:
🍏 Lac (Pink);
🍏 Lac (White);
🍏 tool to remove the varnish;
🍏 sponge or a piece of foam rubber;
🍏 Cotton swab.
✊ Preparation:
Before starting manicure, remove paint residues and undermine your nails to the desired shape. If you wish to have your nails looking neater, you can make up their transparent varnish or white to make the foundation to see if all of a sudden, you're somewhere not to paint over the nail, was not empty.
✊ Manicure:
Take your device to which you'll apply the varnish. Start with white. Visually divide your sponzhik into two halves, the middle will be a gradient. On the left side, apply a white lacquer, and on the right pink. Then take a little white lacquer on a brush and start to carry out in the middle of the line to pink, thus you get a gradient. After you take a sponge with nail and apply it on the nail adjusts the movement, just as the foundation on your face. (!) It is best to do everything in one layer, or else everything will pupyrkami and air. (!) Then, paint residues beyond the removal of the nail with a cotton swab and a means for removing the varnish.
If you liked our article, and you have done a nail design, throw the pictures in comments ❤
#nail art#art#lac#desigh#design#nail#manicure#girl#hands#hand#love#selena gomez#demi lovato#ariana grande#justin bieber#iggy azalea#rita ora#sia#lana del ray#rihanna#style#zoe sugg#zoella#fashion#youtube#blog
11 notes
·
View notes
Photo


Last one today.
#spring#outfit#outfits#girl#nyc#fashion#style#beauty#ariana grande#jelena#teen wolf#sterek#dylan obrien#selena gomez#demi lovato#adele#sia#zoe sugg#zoella
7 notes
·
View notes
Photo


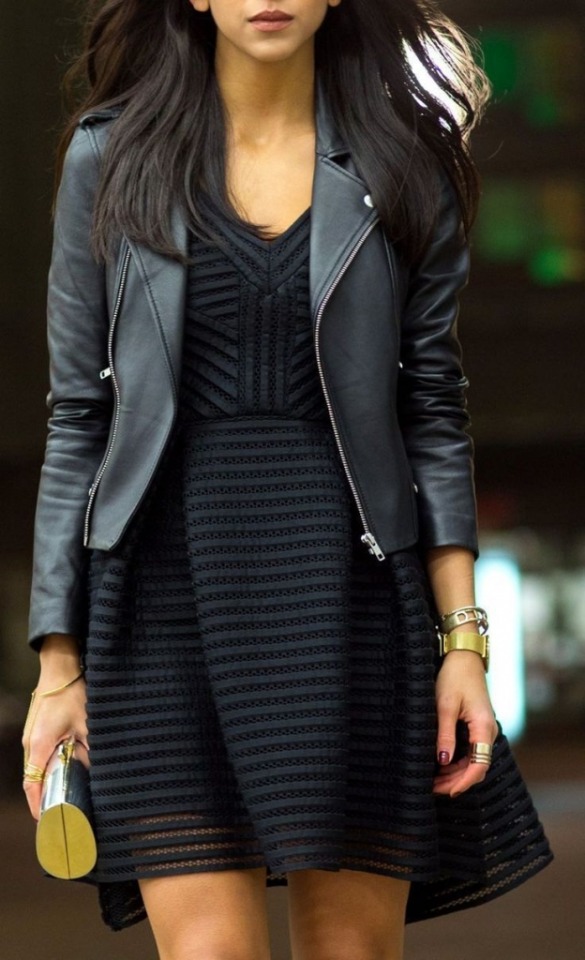
Spring outfits 3.
#spring#outfit#outfits#spring 2016#fashion#style#beauty#youtube#justin bieber#selena gomez#jelena#ariana grande#snl#purpose#purpose tour#teen wolf#dylan obrien#sterek#acacia brinley#zoe sugg#zoella#zalfie#jaspar#troyler
3 notes
·
View notes
Photo


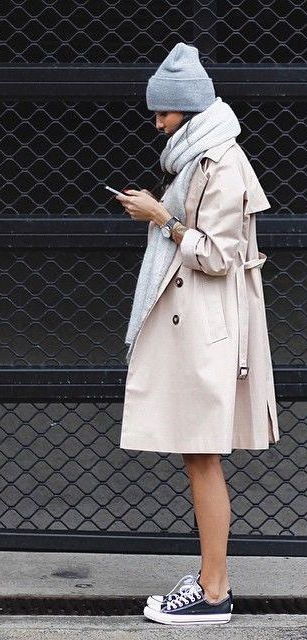
Some spring outfits for you.
#весна#spring#spring 2016#look#outfit#dress#jeans#summer#adele#selena gomez#justin bieber#live style#style#lifestyle#beauty#fashion#show#jelena#demi lovato#teen wolf#dylan obrien#sterek
23 notes
·
View notes
Photo


I thought long and decided to bring order to your blog and make it exclusively a blog about lifestyle, I hope you enjoy it!
And to mark the coming of spring, a pair of outfitsfrom me :)
If you like at least one of the ideas do reblogged thanks
#spring#spring 2016#look#outfits#outfit#glases#hat#jeans#chanel#summer#justin bieber#adele#demi lovato#selena gomez#jelena#alirgent#movie#dylan obrien#teen wolf#sterek#holland roden
18 notes
·
View notes
Photo
look fucking cutie


— Ralph & Russo COUTURE 2016
1 note
·
View note
Photo


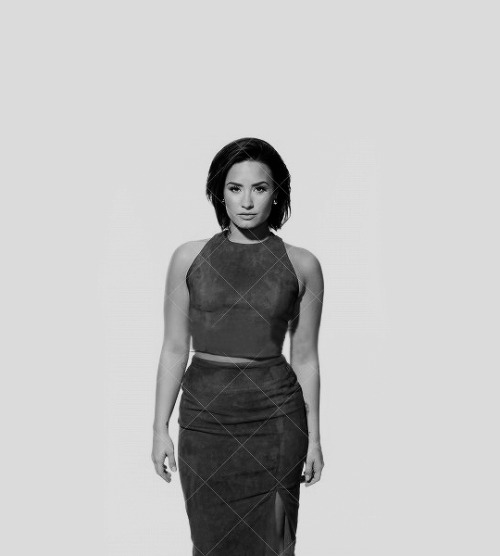
— Demi Lovato in NYC promo.
#demi lovato#nyc#makeup#gifs#selena gomez#dilmer#delena#semi#wilmer valderrama#ddlovato#lovatics#youtube#blogger#smile#kiss
19 notes
·
View notes
Text
#Tips: (The eyelids).
Timely and correct care for centuries, healthy lifestyle, you can prevent premature wilting, save theirattractiveness. Watch out for the purity of the century,obmyvajte them during the washing, especiallycarefully wash the eye corners, where the accumulatedsecretions, dust.
The main reason for the rapid education of wrinkles-dry eyelid skin. Therefore, emphasis must be placed on a care moisturizing.
Aloe VeraThis true "healer" skin and moisture source can apply to such stubborn areas such as corners of the eyes(Crow's feet) or cheeks and lips just before bedtime.Use actually clear juice of the Aloe Vera leaf, or buy a stabilizing gel with 98%-99% Aloe Vera juice contentfor maximum efficiency.
A very useful oil for eyelid skin
The best way to hydrate the century-natural oils. Easy,anonymous type into the skin with your fingers a small amount of apricot or peach, almond oil. Handyalso good-old grandma's advice is to lubricate your lashes at night Castor or burdock oil. And eyelasheswill strengthen, and eyelids will become impregnated100% beneficial substances.
Nourishing mask against "adults" wrinkles.1 art. l. oil solution of vitamin E mixed with 1 tbsp. l.cocoa butter and Sea buckthorn oil. To cause intense enough layer onto the upper and lower eyelids and record in the area of education, "Crow's feet" suitableto fit pieces of parchment or wax paper.
Through 10-15 min to get wet cloth. Wrinkles are smoothed outconsiderably. It is possible to use up to 3 times a week. Apply at least 1.5-2:00 before you sleep.
Use to moistening 21 jojoba oil (jojoba oils), Castor or olive oil. Apply around the eyes in a clockwise direction.
A poultice of olive oil combined with massage will help to avoid premature wrinkles.Massage of eyelids after the compress can make icecube, made of a decoction of parsley. However the massage should be done very carefully!
Apricot oil 100% apricot seed oil is produced by coldpressing. Includes triglycerides, natural wax, stearin,vitamin F. possesses high biological activity and slows down the aging processes, prevents the appearance of wrinkles. Well absorbed and digested by the skindeeply penetrating and nourishing the skin of the eyelid to the deepest layers. Peach oil 100% peachseed oil is obtained by cold pressing. Containsglycerides Palmitic, oleic and linoleic acids. Thanks to vitamin B15, with high biological activity, stimulatesand prevents the appearance of wrinkles.
Natural mask of wrinkles under eyes: 50 ml olive oilmixed with 10 ml oil solution of vitamin e and every evening drive using your fingertips, blend into the skinaround the eyes for 5 min then carefully removeexcess oil with a paper towel.
Herbal oil for wrinkles: take on 1:00 spoon dried herbs:burdock, calendula, mint. A mixture of herbs pour 50-100 gr. extra virgin olive oil. Insist on oil 7 days in a dark place. Strain the finished herbal oil. Lubricate theoil for 2 eyelids-3 hours before bedtime. Hold 5-10mins, then drain the excess oil with a cloth.
Means for preventing wrinkles around the eyes: olive oil and a few drops of lemon-gently rub into the skin of the eyelid. Through 5-10 min. remove excess with a cloth.
Mask of wrinkles under eyes: 50 ml olive oil mixed with 10 ml oil solution of vitamin e and every eveningdrive using your fingertips, blend into the skin around the eyes for 5 min then carefully remove excess oilwith a paper towel
Recipes homemade anti-wrinkle masks for facial skinand eyelids.
Lotion with active cooling effect.In 100 g of boiling water to BREW herbs (Mint, lemon balm, Sage and dill in equal proportions)-2 tbsp. l.mixture. Add 2 chopped standard glucose tablets.After cooling, add 1 tablet of activated charcoal and5-7 drops of Glycerin. Thoroughly drain. Use up to 3times within 24 hours for processing zone 21.Refrigerate 7-10 days.
#demi lovato#ddlovato#dilmer#makeup#tips#blogger#youtube#blog#wilmer valderrama#5yearofstaystrong#january#selena gomez#zoella#eeoneguy#justin bieber#iggy azalea#ariana grande#acacia brinley#maryana ro#amanda steele#bea miller
5 notes
·
View notes
Quote
The body is intended to be watched, but not concealed.
Merylin Monroe.
#Merylin Monroe#Demi lovato#dimer#beauty#makeup#blogger#youtube#quote#beautiful#dilmer#confident#selena gomez#acacia brinley
17 notes
·
View notes
Quote
It is difficult to become irresistible if you're lazy.
Sophia Loren.
#demi lovato#sophia loren#lazy#beautiful#irresistible#skycraper#lovatics#confident#ddlovato#happy new year#2016#merry christmas#tumblr post#quotes
6 notes
·
View notes
Text
#Tips: (ACNE)
Get rid of acne marks would help Green Clay mask. Polstolovoj clay spoons need to dilute with cold water until the consistency of sour cream. Add to the mass 2-3drops of Rosemary essential oil. Apply to places where there were spots from acne, at 10 minutes. Rinse with warm water, apply moisturizer. Do such masksneed four, through 3-4 days.

#acne#face#smile#demi lovato#ddlovato#selena gomez#justin bieber#dilmer#Wilmer Valderrama#demi and wilmer#devonne by demi#acacia brinley#jacacia#merry christmas#happy new year#2016#tumblr#tumlr girl#cat
1 note
·
View note
Text
#Tips: (HAIR)
For fast hair growth is not enough to make masks and use special shampoos.Hair must be fed and properly!
• In the diet must be proteins, especially in the morning. Meat, fish, eggs, milkand legumes are the main suppliers of nutrients for hair.
• Between meals eat dried fruits and Greens. They contain iron, vital to hair.
• Hair growth also contributes beta-carotene, which many in theGreen and yellow vegetables and fruits.
• Drink 6-7 glasses of pure water a day. This is useful not only to the hair, but also all over the body.
• Useful every day drink a teaspoon of cod liver oil. Your hair will be stronger to stop falling out.
• Do not abuse the carbohydrates (sugar, bread, potatoes). From them the scalp becomes oily.
• Do not expect instant results. Changes you will notice only through -2 1.5months of proper diet.

#hair#demi lovato#demi and wilmer#devonne by demi#Wilmer Valderrama#Dilmer#lovatics#ddlovato#confident#jingle ball#merry christmas#happy new year#2016#for you#justin bieber#semi#selena gomez
7 notes
·
View notes