jonokafo
JON OKAFO PHOTOGRAPHY
Photographer | (All images created by me) | IG: @oka.pho | Feel free to share anything you see!
362 posts
Don't wanna be here? Send us removal request.
Last Seen Blogs

prdctnew
Art Morocco (PRDCTnew)

milli-string
The Puppet with Abyssal Strings
swmst
Без названия

darkstarfusion
Darkstarfusion
a4ic6n-atlas
Atlas
Text
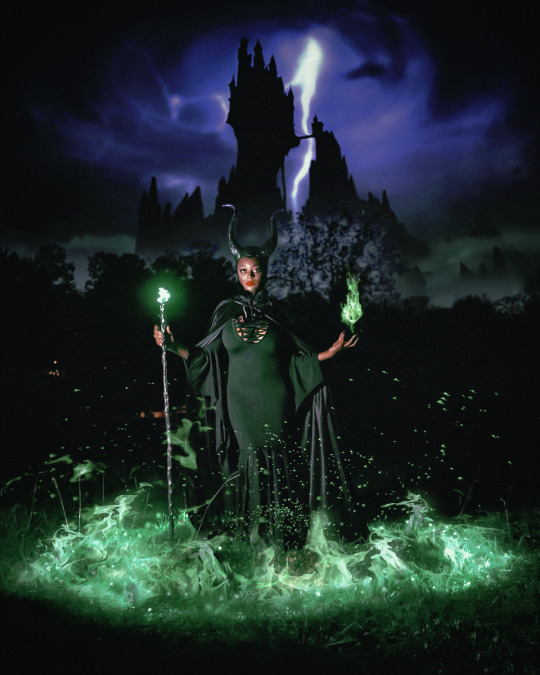

@Brittbrattism as Maleficent & Cruella for Halloween 2023
Images by me
4 notes
·
View notes
Text
@Brittbrattism as Maleficent & Cruella for Halloween 2023
Images by me
#halloween#cosplay#black cosplayer#black women#black models#fashion#digital art#graphic art#photographers
4 notes
·
View notes
Text
Photography Basics: Camera Aperture, Shutter Speed, and ISO
To understand photography, you have to start with the basic principles. These include camera work, lighting, and composition. The most important thing to learn is how to operate your camera. No matter what brand or model you use, every camera uses the same three mechanisms to create images. Shutter speed, aperture, and ISO. These three components make up what’s known as the “exposure triangle.”
Shutter Speed
Shutter Speed is the speed at which the shutter on your camera opens and closes when you take a photo. The shutter is like the "eyelid" of the camera. It allows light into the "eye" of your camera, the sensor. The measurements of your shutter speed are how long it stays open per second. Say for example when you shoot at a shutter speed of 400, this means that the shutter is actually open for 1/400 of a second.
Now what happens when the shutter opens? The shutter captures both light and movement in an image. When capturing a photo at a long shutter speed, it records a ton of light and movement in the frame. A photo like this would result in a very bright and blurry photo if something is moving in the frame. Compared to the same photo taken at a much faster shutter speed it should appear to be much darker and sharper.
Mastering shutter speed requires knowing when it's best to use it to your advantage. Imagine you're in a scenario where there are a ton of fast-moving subjects like a sports event or a racetrack. You'll need to use a fast shutter speed to freeze the subjects in the frame. Something like 1/1000 works best for these kinds of photos.
If you're in a low-lit area or shooting night sky photography, you want to use a longer shutter speed. This is an example of long-exposure photography. This type of photography can create powerful images of things you don't usually see. Make sure use some sort of stabilizer like a tripod to avoid light streaks and blurry photos.
Aperture
The aperture is the size of the hole in the lens of your camera. It controls how much light enters through the lens no matter how long the shutter is open. You can think of aperture like the pupil of your eye. You can pull in more light with a wider aperture no matter how long the shutter is. This allows you to take brighter photos in scenarios where you need a quick shutter speed to capture fast moving subjects.
How cameras measure aperture is a bit counterintuitive. This can be confusing for beginners if you don’t understand what’s happening when changing your settings. A larger number indicates a narrower aperture. This means less light will enter the camera. A smaller number indicates a wider aperture, but it also means a smaller depth of field. The depth of field is how much of the frame is in full focus.
Setting your camera to an aperture of something like f/2.8 will create bright images with a smaller depth of field. This would be most appropriate for portrait photography or macro photography. It’s also how you create those soft bubbles of light (“bokeh”) in your background. Using a narrow aperture like f/11 would create a darker image with a wider depth of field. You'd want to use this kind of aperture for something like landscape photography or for capturing starry skies at night.
If you want to isolate the focus your subject and blur the background, you want a wider aperture. If you want to capture everything in the frame with a sharp focus, you'll need a narrower aperture. You want to keep this in mind when choosing the subjects of your photos. There’s nothing wrong with taking a close-up image of your subject with a wide depth of field. Just know that everything will share the same amount of focus which can be distracting for some images.
ISO
Last but not least, we have the ISO. This function indicates how sensitive your camera's sensor is to the light. If I had to use the eyeball analogy, the ISO is like the optic nerve that sends visual information to your brain. The sensor is a smaller device made up of millions of light-sensitive receptors. This is what digitizes the image you can see through your lens. When you press the button to open your shutter, it exposes the sensor to save your image onto the memory card.
Unlike aperture, this function isn't counterintuitive. A lower ISO means that your camera is less sensitive to light which means darker images. A higher ISO will make for brighter images if all other settings remain the same. Knowing the limits of your sensor will let you know how powerful it is in extremely bright or dark environments. If you’re looking for a powerful camera to handle extreme scenarios, you’ll need to use one with a wide ISO range. Something like ISO 100-6400 is a common range you’ll find on most professional full-frame cameras.
Like the other settings, ISO also comes with a second functionality. It affects how noisy or how clear an image appears. This is because ISO acts as an amplifier. Just like the noise you hear when you turn a speaker up way too loud, the same thing happens with visual noise from your ISO. The higher your ISO, the more noise and static you will introduce in the frame. It stands out even more in dark areas and becomes less of an issue in brighter areas. The lower your ISO, the smoother everything looks which usually equates to better image quality. When in doubt, you want to use the lowest ISO possible in any given scenario to maintain the quality of your images.
Bring It All Together
If you want to better understand these different mechanisms, you have to experiment. You can start by changing the shooting mode of your camera to something other than automatic. Your camera should have different shooting modes that focus on one of these mechanics at a time. These modes allow you to change one setting while automatically adjusting the others for the best exposure.
“Tv” mode lets you change shutter speed and “Av” mode changes aperture. “Program” mode automatically adjusts both of these settings while leaving things like ISO completely manual. Shooting in these modes will allow you to observe how each setting responds to your scene. It’s important to take your time observing the changes while shooting with different subjects and qualities of light.
It may feel tempting to set your camera to auto to avoid going through all the trouble. There are plenty of scenarios that won't allow you to trust your automatic camera settings. When capturing a scene that has rapid changes in light, the auto function can't adapt fast enough. You'll have to use at least one of these aspects to capture dynamic scenes like a concert or sports event. Learning how to use different shooting modes will allow you to better control the results of your photos.
Once you get a good grasp of how to use them, you can move on to using manual mode. This is where you can experiment the most. Try taking photos with a wide aperture and fast shutter speed. Mix and match these settings with ISO to create different looking shots. Eventually, you’ll memorize what settings you need for any given scenario you come across. This is your first step towards becoming a master!
Thanks for reading! If you have any photography related questions, please drop a comment down below! I’m always looking for new topics to write about. I hope this article helps you gain a better understanding of how to use your camera. I can’t wait to see your photos!
6 notes
·
View notes
Text
Art Fundamentals: The 5 Basic Elements
Art is an incredibly diverse and captivating form of expression that allows us to communicate our thoughts, feelings, and ideas through visual means. It encompasses everything from photography, painting, and sculpture to graphic design and fashion. It’s a medium that can be used to create anything imaginable. Whether you're a seasoned artist or someone who has never picked up a paintbrush, there are five essential elements of art that are important to understand and master: line, shape, form, texture, and color.
If you’re just starting out as an artist, it's important to understand the foundations before you jump into your first major project. There are basic elements of art, design principles, artistic techniques, and creative dynamics that you must learn to grow as an artist. Art also follows specific rules and guidelines depending on the medium you choose. These guidelines were developed throughout the course of history to help people better understand the experience of creating and consuming art.
While it can seem a bit overwhelming, all of these foundations are important to study and eventually master as an artist. These skills will help you create amazing art faster than if you were to try it without practice. The first thing you want to have a good grasp on is understanding the five basic elements of art. These are your building blocks for creating compelling images.
Lines
Line is the most basic element of art and is simply a mark that spans a distance between two points. It can be thick or thin, straight or curved, and used to create everything from simple outlines to complex patterns. Lines can be used to suggest movement, express emotion, or create a sense of depth and perspective in a composition. There are many different types of lines that you can use to create interesting art pieces.
Lines that define shapes are called contour lines. These are the lines that can create the illusion of shapes and forms without the use of shading. They’re mostly used in sketches to draft out a plan for a final image. Implied lines are lines that aren’t actually drawn but are created by connecting two points of a composition with our minds. Sight lines are a good example of this. The direction in which subjects are looking or pointing towards creates lines when they connect with another point in an image.
Leading lines in photography are lines from objects and backgrounds in the frame that lead the viewers eyes to different parts of the image. These lines can also create a sense of depth or perspective by separating the foreground from the background. The horizon line is the line that separates the sky from the land or water, and it’s also the height of the viewer's eyes when looking at a scene or object.
Lines can appear as organic or geometric. Organic lines are loose, curvy, and winding. These are usually found in nature and organic bodies like vines in a forest, waves in the ocean, or the hair of a horse's mane. Using these lines effectively can create a sense of visual flow. Geometric lines are perfectly straight or curved and are commonly found in manmade objects like technology or architecture. Symmetrical or parallel lines can create a sense of balance and harmony, while perpendicular lines can create a sense of stability or organization.
It's important to understand how to use lines when creating an immersive composition. You want to pull the viewer into the frame and draw their eyes to points of interest. If done incorrectly, it can break the viewer's immersion and create a sense of confusion which can be a bit off-putting. To avoid this issue, start with the end in mind. Where do you want the viewers to go? How will you lead them there? Lines allow you to become a tour guide for your viewer as you lead them through your composition.
Shape
Shape is another essential element of art and refers to the two-dimensional area that is defined by a boundary, such as a line or contrasts between values or colors. You can think of shapes as the marriage between lines and space. Like lines, shapes can also be organic or geometric. And like space, it can be positive or negative. Some objects have shapes that are positive, which is the inherent shape you can clearly see. When other objects or elements form a boundary around empty space, that space is considered to be a negative shape.
Functionally, shapes can be used to create the foundation of a composition. This element makes images recognizable and readable. Shapes help create dynamic relationships between elements in an image like perspective, scale, symmetry, and balance. You can use shapes to organize and separate elements or emphasize areas within the frame. As lines guide your viewer through a composition, shapes can cause viewers take a pause and analyze the image.
Intuitively, shapes can evoke a certain mood or emotion in your images. Organic rounder shapes create a sense of movement, calmness, and harmony. These types of shapes resemble shapes in nature. Geometric shapes with straight lines can create a sense of stability, rigidity, and strength. These kinds of shapes are mostly found in manmade infrastructure. Pointed angles create a sense of direction or urgency and irregular shapes can create feelings of uneasiness or chaos. Using shapes effectively helps create a foundational ambience for the atmosphere.
Shapes can also be representational, meaning they can be used as a reference to conceptual ideas or real-world objects. Consider how the shape of a heart isn’t the shape of an actual heart but is more of a symbol for love and passion. In this way, shapes are much more useful as conceptual devices like symbolism or storytelling.
Form
Forms are 3-Dimensional figures. They're essentially shapes that have an appearance of depth in an image. Unlike their 2-Dimensional counterparts that are formed from boundary lines or color, forms are built from light and shadow. Forms are described as being more "life-like" compared to flat figures. Like lines and shapes they can also be geometric or organic, but regardless of either quality, forms still appear as an object that can exist in reality.
In visual art however, what we actually see is a flat surface of a canvas or a digital screen. This means form isn’t created in the same way a sculptor would in comparison to a painter or photographer. 2-D Artists need to use value, light and shadow, in order to create the illusion of depth and form. When using value to create forms, there are three aspects of light you need to understand.
There are highlights, the light that directly hits the object and usually the brightest parts of the subject. There are midtones which are the blend of light and shadows, usually just the natural color and value of the object itself. And there are the shadows, the darkest parts of the object. As an artist, considering how light hits an object in the real world will help you create a convincing sense of depth and form.
Changes in perspective reveal the various angles of a form which can all give off 2-D different shapes depending on the lighting on value of the surfaces. Think of how a coffee cup is a circle from the top perspective while shaped like a cylinder from the side. Experimenting with the use of form in relation to perspective and lighting is a great way to generate interest and immersion. Artists that have mastered the use of form can create objects in their images that appear as if you can reach out and grab them.
Texture
Texture refers to the surface quality of an object and can be created through the use of different materials or techniques. It can be real based on form or implied based on lines and color. It can be smooth or rough, shiny or dull. Texture adds depth, detail, tonal variance, and a sense of tactile realism in a composition.
Consider an object and how it’s perceived when it has different qualities of texture. A rock that’s smooth and round like a pebble versus a stone with harsh jagged edges. What’s the difference in mood between these different qualities? One may make you think of serenity in a beach setting and the other a treacherous area like a cliff. Texture helps set the tone for the atmosphere you create.
Combined with other basic elements, it adds an entirely new dimension to your work. It also strongly affects the emotion and mood depending on the quality of texture you capture. It helps create a deeper feeling of immersion by allowing the viewer to imagine how the surfaces in your photos feel. Textures in your composition also interact with the lighting and colors used to define them. Harsh lighting and contrasting colors bring out more details while softer tones smooth things out.
Understanding the dynamics of texture helps to capture the viewer's attention. Like with shapes and forms, textured areas cause the viewers to analyze the image. The more texture an area has, the more the viewer's eyes will move toward it, so choose your composition wisely in that regard. Texture in areas that don't hold significance can be considered distracting. Naturally, the human mind is wired to find patterns in the world around us. Textures that stand out the most usually contain repeated lines and shapes. The denser the textures, the more it pulls the eye to it.
Color
Color is perhaps the most complex element of art and refers to the hues and tones that are used in a composition. Like any other element, color can be used to create contrast and balance in a composition. Color can also be applied to every element in a composition. Color is a special element in a sense because it can have an immense effect on creating emotion, mood, or atmosphere. This is because color follows a certain psychology and can even affect people in a physiological way like inducing hunger or relaxation.
When light bounces off of objects, the light that's reflected back into human eyes has a perceived color. This means we can use color in our art to showcase different depictions of the world as we see it. We can use connotations of color to communicate how environments and objects make us feel. Artists have to keep this in mind when choosing colors to compose an image.
There are three properties a color can have: hue, value, and saturation. Hue refers to the color itself which is distinct from any other color. It's essentially the "name" of the color. Value is how light or dark the hue is. You can achieve this by adding or subtracting light from the hue which will give it different tints of shades. Saturation is the intensity or purity of the hue. High saturation appears brighter and high and in contrast to other colors. Low saturation appears dull and blends in easier with other colors.
Color is divided into various different categories, but a major way we define color is by its temperature and tone. Cool colors are blues and greens and can invoke a calming serene effect, much like the colors in nature. It may even reduce blood pressure and appetite. Warmer colors are reds and yellows. These colors can be associated with emotions ranging from happiness and passion to danger and violence. These colors stimulate the appetite and excite the mind.
Each individual color has its own psychological effects on the viewer and can be combined with other colors to create a unique atmosphere or mood. Through mixing and combining colors, we can even portray various dynamics in art like volume, depth, and perspective. This is called “color harmony.” It's based on a set of guidelines for effectively using the color spectrum called “color theory.” As an element of art, color is extremely significant to the overall impact of visual art. Mastering color theory takes time. Practice with patience.
Applying Artistic Elements
As an artist, applying the five elements of art is essential in creating works that are truly impactful and visually stunning. Take your time exploring different ways to intentionally use these elements to communicate emotions, create visual narratives, and interact with the viewer’s mind. By studying and eventually mastering these elements, you'll be able to communicate your creative vision more effectively and create art that truly resonates with your audience.
For those who are self-taught or have never studied the basics of art, it's never too late to start. Understanding the elements of art can open up a whole new world of creative expression and provide the tools you need to create works that you never thought possible. It can be a challenging journey, but it's one that's well worth the effort. You may be surprised at what you're capable of once you've mastered the basics.
If you don't consider yourself to be an artist but have a strong interest in creative works, learning about the fundamentals of art can help you explore your own imagination. Not only will it deepen your appreciation for the art that you enjoy, but it will also unlock new ways to view the world around you. You may start to notice the way lines intersect, the shapes of everyday objects, and the textures of the environment around you in a whole new way.
Whether you're new to the creative world or an experienced artist looking to refine your skills, the five elements are a critical aspect of creating impactful and visually stunning works. Studying these fundamentals will unlock your creative potential. Over time, you’ll quickly understand why they’re the key to your success and longevity as an artist. Don't be afraid to dive into the world of art and explore the possibilities of what you can create. The journey may be challenging, but the rewards are priceless.
3 notes
·
View notes
Text
How To Feel Confident In Front Of The Camera
The most common problem I hear from my photography clients is not knowing how to model in front of the camera. It’s a bit intimidating if you’re not used to it and it’s a big reason why you may be hesitant to take portraits of yourself. Here are a couple of tips to help you pose better in front of the camera.
Learn The Basics
Understanding the basics will help you create stronger confident poses that will make for great images. You can get a headstart by remembering some easy tips like using good posture, pulling your chin towards the camera, pushing your shoulders back, and using your arms to draw the viewer’s interest. When you research modeling basics, you’ll also start to understand the basics of photography like angles and lighting. You’ll develop some awareness of what the photographer is seeing on their camera while you pose. Take some time to learn these fundamentals before your next shoot and apply them as soon as you can. You’ll see a difference right away!
Practice, Practice, Practice…
Modeling and posing is an art form just like any other creative skill. If you want to improve you have to practice. If you don’t feel ready to work with a photographer, practice in front of a mirror at home or with the camera on your phone. Take some time posing and taking photos of yourself at different angles to learn what looks best for your features. This will help you develop more awareness of your face and body while in front of the camera. Remember to keep track of which poses YOU like the best. Creating some go-to poses that you enjoy will give you that extra boost of confidence before you step in front of the camera.
Study The Pros
Grab a magazine or log on to pinterest.com. Take a look at some pictures of professional models and practice their poses, even the weird-looking ones. Pay close attention to the details of how they pose. Study their body language and the way they use their hands, head, eyes, lips, and posture to create different moods and emotions. The more you try to emulate different poses, the more confident you’ll be in trying out new poses.
There’s no shame in copying models’ poses during your photoshoots but just remember, “good artists copy, great artists steal.” Or whatever Picasso said. Try your best to add your own personal touch to each new pose you learn. This isn’t a huge deal to remember unless you’re trying to become a pro yourself. Maintaining a portfolio that is uniquely yours with poses that are as original as possible helps you stand out from the crowd. It also helps alleviate drama once you become the next big model on the scene!
Communicate With Your Photographer
Before the shoot, have a conversation with the photographer about what’s best for you in terms of poses and mood. The photographer will be able to guide you and give you feedback on your poses. Be willing to take direction from your photographer. If they’re an expert, they’ll be able to help you create poses that work best for you. They’ll be able to see things that you might not, especially while working behind the camera.
You should be open to the photographer's direction but remember your own boundaries. If there are positions or looks you’re not comfortable with, be sure to communicate this with your photographer before, during, and even after the shoot if you made some poses you’re not absolutely comfortable with. Healthy communication about posing will help prevent any problems you may run into during your shoot. The goal is for you to be as comfortable as possible with any poses you’ll make. This brings me to my next tip.
Comfort Equals Confidence
I believe this is the most important tip of all. Learning the basics, practicing your poses, studying other models for inspiration, and communicating with the photographer will all help you in becoming more comfortable with posing, and therefore, more confident in yourself. Remember that the camera captures your energy, so if you're tense and uncomfortable, it will show in the final image.
If you have anxiety before your shoot, take some deep breaths. Do all you can to relax and remember that you’re ready for it! At the end of the day, you should be able to present yourself on camera in a way that makes you feel the best. Comfort = confidence in front of the camera. The more you develop your skills and the more comfortable you are with different kinds of poses, the easier it will be to step in front of a camera.
Experiment On Your Own
The more photoshoots you do, you may begin to realize that all your photos start to look the same because you’re going back to the same poses every time. This is why we need to try out those “weird and wacky” poses. Try to be as creative as you can. This will help you discover poses you never even thought to try and help you break out of your comfort zone. You may not always come up with the best poses for the camera, but keep exploring and you’ll find stuff that works. Don’t let the discomfort discourage you from experimenting.
And I know what you’re thinking, but Jon, didn’t you say comfort equals confidence? Absolutely! However, growth and comfort don’t often tend to get along. It’s like going to the gym. It sucks but you have to put in the reps to build muscle. This is why I recommend experimenting as much as you can to improve your ability to pose and have more variety in your photos. Now you may not always have time to experiment during a shoot. Photographers usually know what they want going into a shoot, so try to experiment on your own time.
Similar to the first tip, try some new poses in front of your phone camera or a mirror at home, but try to surprise yourself. Bend your elbows, twist your hips, scrunch your brow, and point your toes. Try things that feel foreign to your body and see what emotions arise when you see yourself do them. If you’re taken aback a bit, that’s when you know you’re really experimenting. Doing this will keep your poses looking fresh and unique! This is a great piece of advice that connects with my secret tip for becoming a better model!
Secret Tip: Dance!
This is a game-changer. I always say, the best models I ever get a chance to work with are dancers. Dancing creates fluidity, softness, and grace in your movements. It’s pretty hard to look rigid and stiff when you’re in constant motion. If you want to implement this tip during your next shoot, slowly dance through your poses and hold each one for about 3 seconds at a time or longer if your photographer likes a pose you make. Sometimes the in-between poses look nice too. Dancing out your poses creates a wider variety of poses without having to think too hard about the next one. It’s a constant flow of inspiration moving through you!
Now, keep in mind that this is a more advanced tip. It takes a little more practice to master and execute in a way that can work for any shoot. This is why I recommend dance classes to anyone interested in modeling. You’re going to be taught potentially hundreds of different poses in just under a few hours. Practicing the steps will incorporate all these new poses into your body and give you a new vocabulary of moves you can try in a shoot. Dancing will improve your modeling tremendously if you apply it correctly.
Remember that posing is an art form just like any other creative skill. It will take time and practice to master, so be patient with yourself as you learn and grow. I promise, the more you practice, the more comfortable and confident you'll become in front of the camera. Thanks for reading and make sure to subscribe for new posts! :)
2 notes
·
View notes
Text

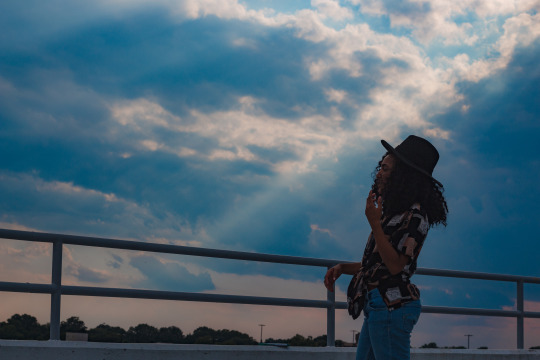
Through Yin & Yang, we find balance.
#photography#portraits#skylovers#black women#black models#photographer#photography art#vintage fashion#curly hair#denim#clouds#dark skies
1 note
·
View note
Text


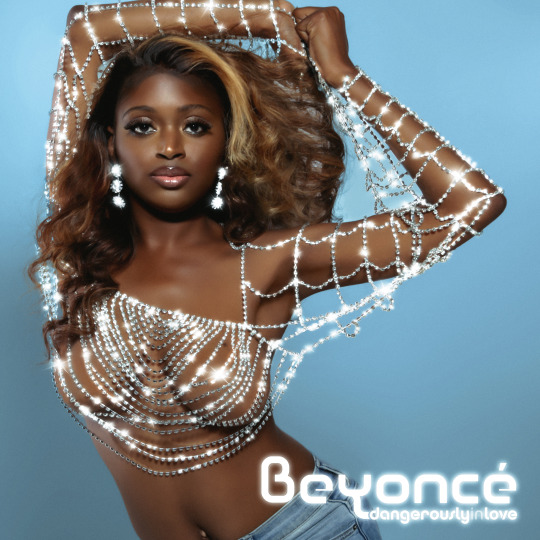
Recreated 3 Iconic Album Covers throughout the decades with Brittney
36 notes
·
View notes
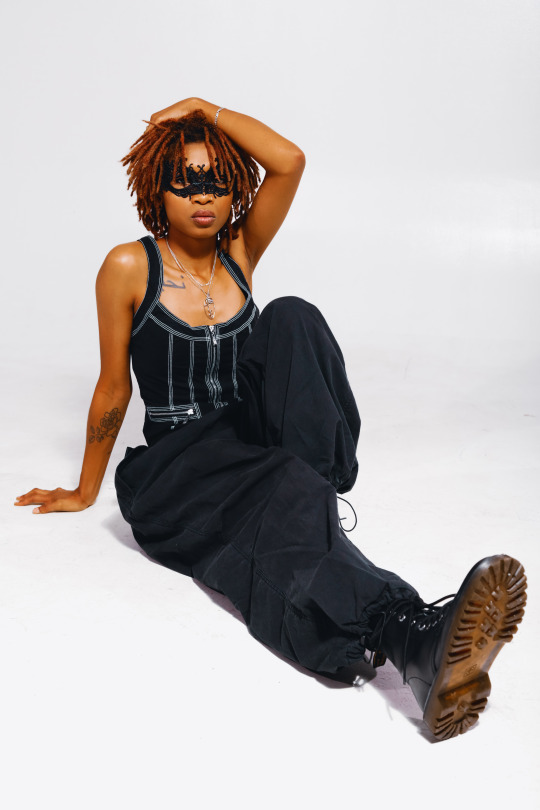
Text

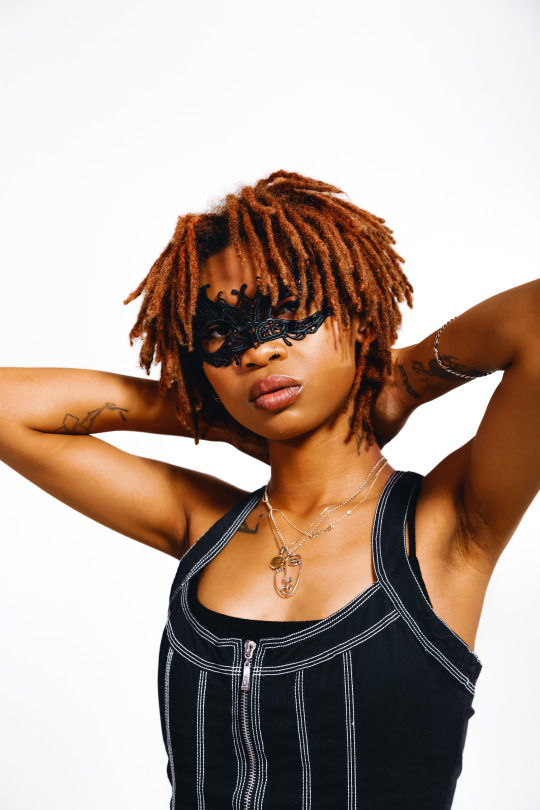
ebztheartist
#black women#black models#women with locs#emo girl#gothcore#alternative goth#beauty#masquerade aesthetic#masquerade mask#red lips#redhead#streetwear fashion
11 notes
·
View notes
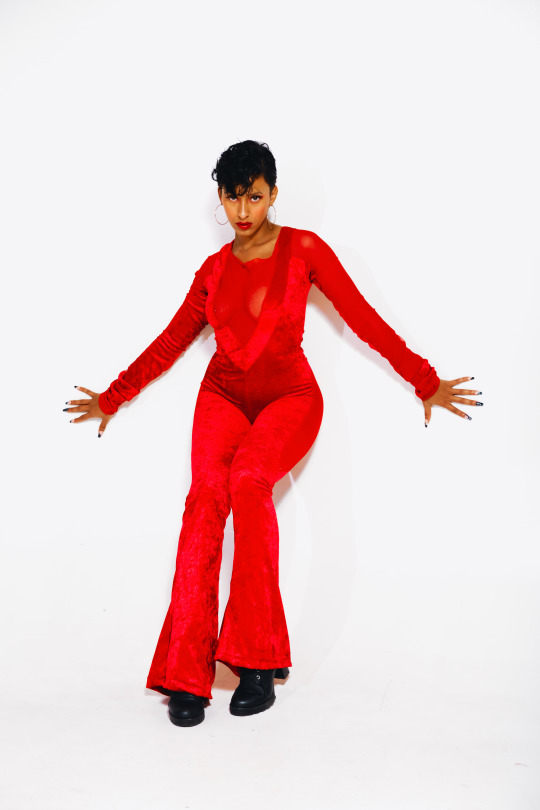
Text
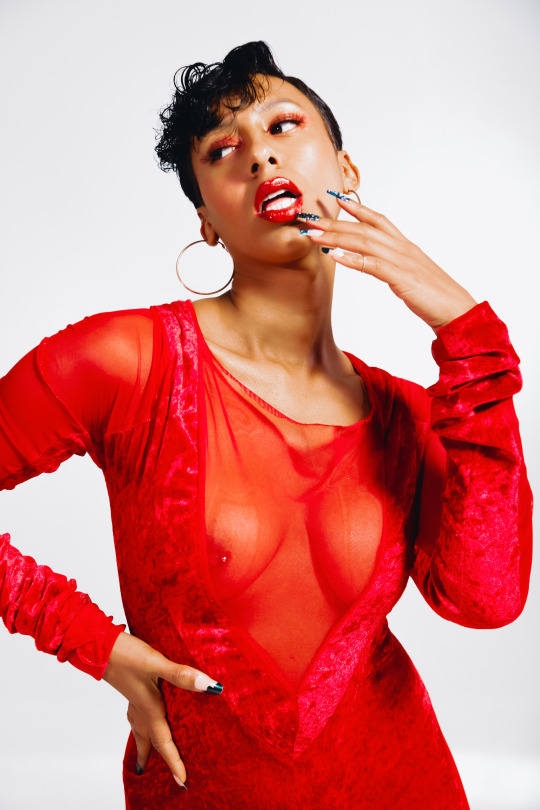
Speed
#black women#black models#red aesthetic#gothcore#alternative goth#red lips#fashion#nail art#short hair#alternative style#boudouir#beauty#makeup#piercings
1 note
·
View note
Text
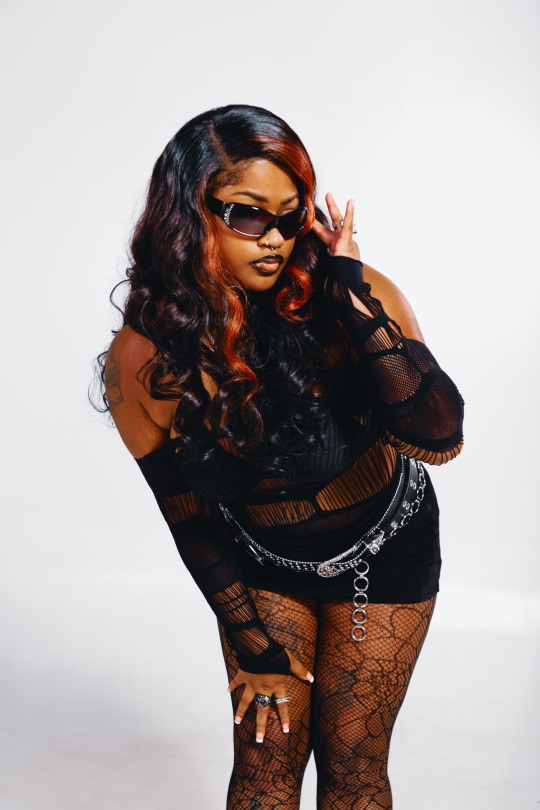
brittbrattism
#black models#black women#alternative goth#emo aesthetic#gothcore#women's fashion#alternative style#alt girl#fashion accesories
8 notes
·
View notes
Text

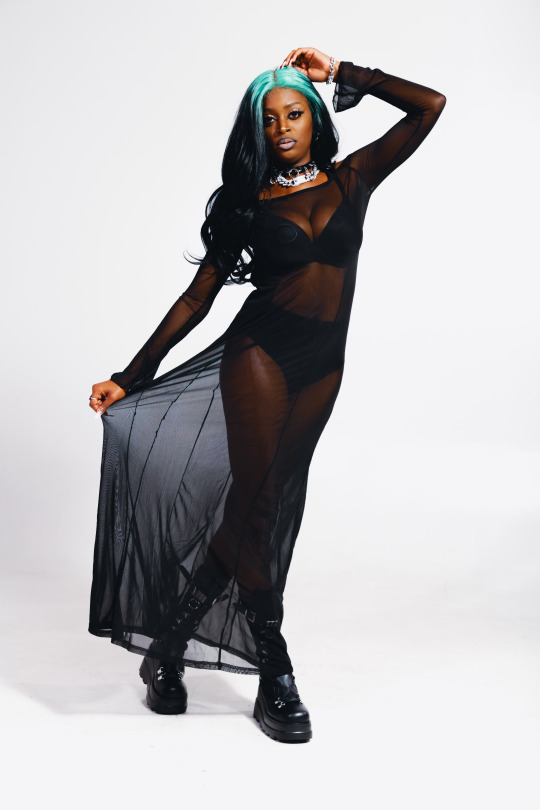
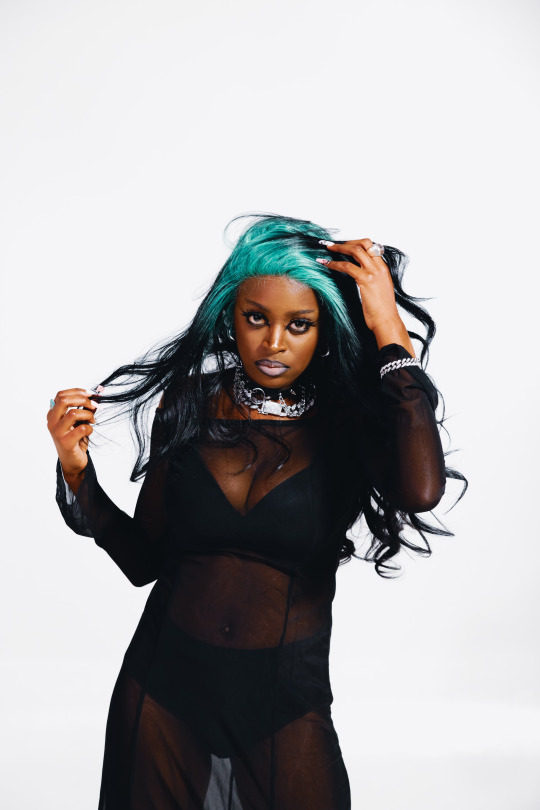
wolfvaeh
#black models#black women#alternative goth#street fashion#emo aesthetic#gothic#natural beauty#blackout#women's style#accessories#alt girl
10 notes
·
View notes
Text


GOTHTOBER 2022
#alternative goth#aesthetic#fashion#black models#black women#photography#emo girl#gothcore#punk girl#alternative style#black girls rock
5 notes
·
View notes
Text
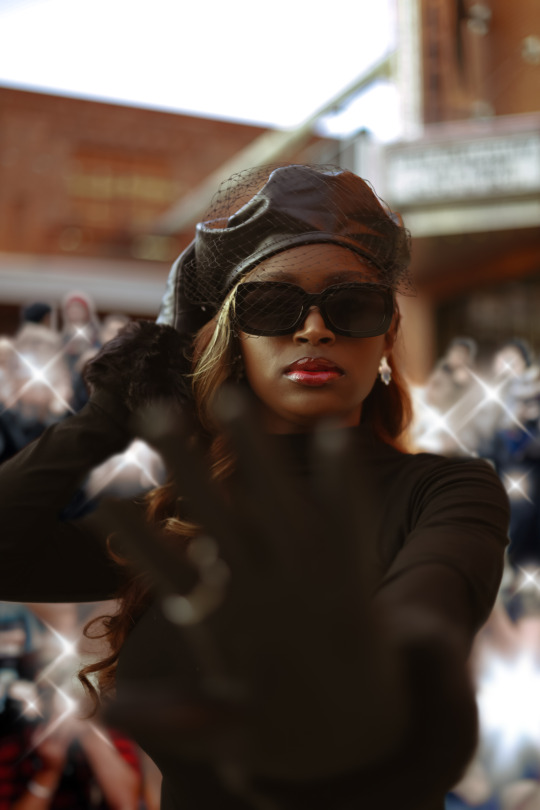

Paparazzi
#black women#black models#photography#portraits#fashion#vintage#red lips#black aesthetic#minimal aesthetic#minimal fashion
3 notes
·
View notes

Text
Recreated 3 Iconic Album Covers throughout the decades with Brittney
#photography#fashion#album cover#beyonce#sza ctrl#toni braxton#artists on tumblr#artwork#black models#black women#melanin art#photographers on tumblr
36 notes
·
View notes