
Last Seen Blogs

malzagator
malzagator

pizzalover84
Randommidnightthinking
yukuoo
Yukuo
dream-xv-eater
Dream XV Eater
jae-lens
EVERYWHERE
Link
This, is my final piece for my sound animation. I think this turned out well because I managed to time my animation to the music. In order to improve this I could have timed some of the changes better to look more smooth, but overall I’m happy with the result.
0 notes
Photo
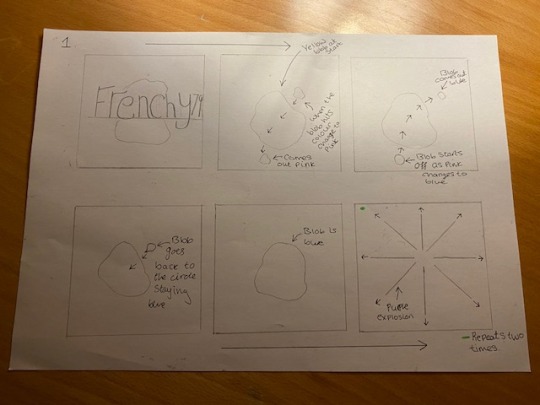
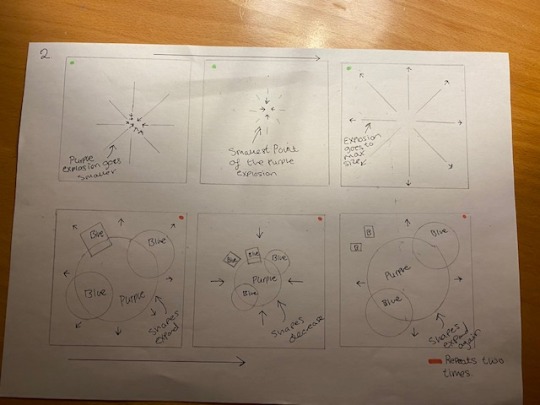

These, are my animation sketches, before I started editing my animation together on Adobe After Effects I decided to draw it out frame by frame and label the colour changes and size changes. This helped me stay on track when I started editing my animation together. I think I’ll use this planning process again in the future.
0 notes
Link
To create my line explosion for my animation, I used this tutorial. I think it explained using expressions and using the pen tool to create shapes and animate them together really well.
0 notes
Photo
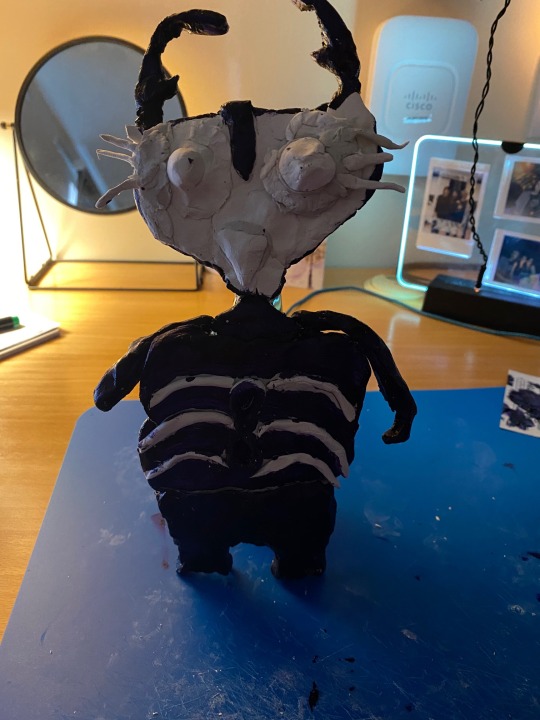
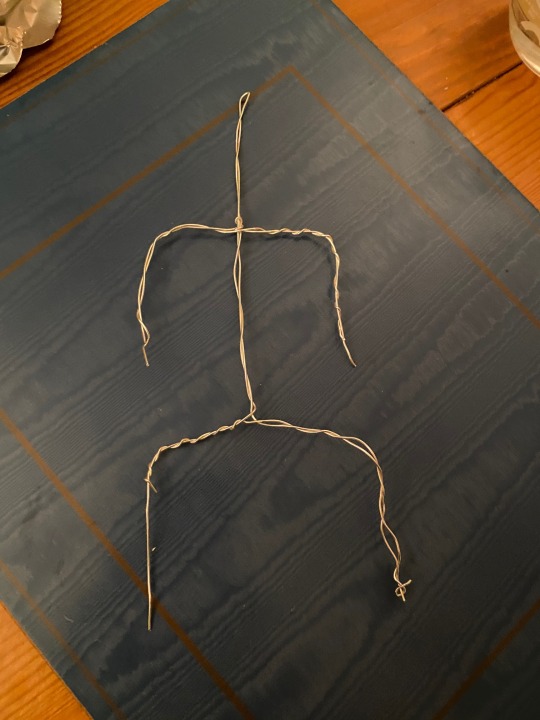

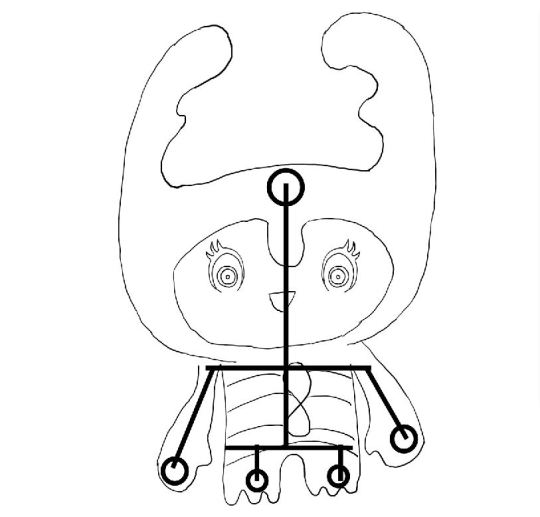
Here’s my experimentation trying to make a stop motion puppet. I drew some designs a couple weeks ago and decided to try and make it. I made it using air dry clay, wire and purple acrylic paint. I think it turned out okay because I got it to stand up which was hard because the head was bigger than the body. However, to improve this I could’ve made it look a little more like my original design. But overall I’m happy with how it’s turned out.
0 notes
Video
This, is an experiment for my sound animation. I created the zoom in tv idea I came up with, which I spoke about at the end of my last post. I think it turned out well because it engages the viewer and makes them feel almost apart of the animation.
0 notes
Video
Here, is another experiment I created for my sound animation. I created a tv design on illustrator and added it into after effects, I liked the idea of the animation being on the tv almost. So I might try changing the camera movement for it and zoom into the tv to add the effect that the viewer is going into the tv. Lastly, I’m not sure If I want to keep the waveform idea so I might adjust that to make the animation look better too.
0 notes
Video
Here, is my 2nd liquid circle experiment. I think it turned out well because I managed to get the colour change and set the small circles up so they moved and changed at the same time. To improve it more I could put it on a loop or add more circles to it and change more colours to make it more interesting.
0 notes
Video
This, is the liquid shape experiment I tried for my sound animation. I think this turned out well because I got the blend and colour change I was going for. However, to improve this I could’ve made it loop or added more shapes to it to make the animation look more interesting but overall I’m happy with how it’s turned out. I followed a tutorial for this that I found early on in my research and I think it turned out to be a helpful simple tutorial to follow. (See tutorial I followed below)
https://youtu.be/vj6hrNK4Lk4
0 notes
Photo
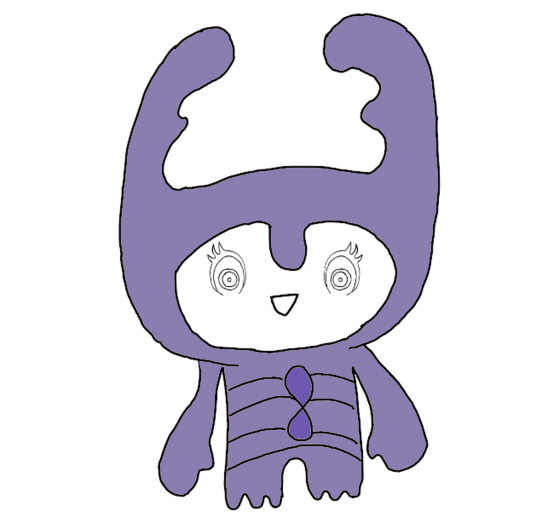
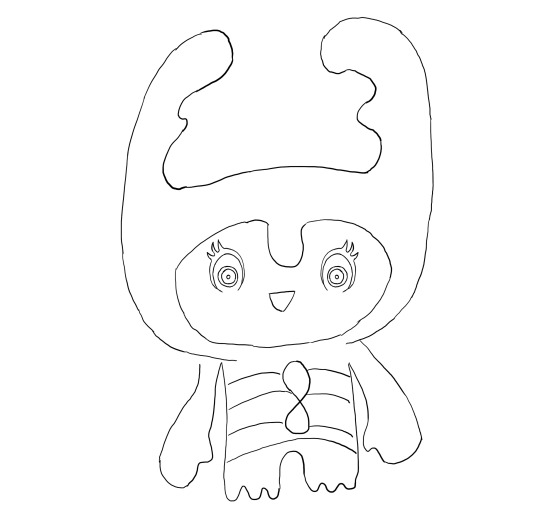
Here is my puppet drawing I came up with. The bottom image shows my original sketch up to the coloured vector vesion. I think it turned out well because I kept it small and simple. To improve this I could’ve added a bit more detail to the puppet to make it look better but overall I’m happy with how it turned out. I got inspiration from the instagram account below. I like their cartoony pastel style of art but also their style of drawing.
https://www.instagram.com/snickersnee.three/
0 notes
Photo

This is my second attempt at a walk cycle, I improved it by making the character walk on the spot instead of across the screen. I think this ended up looking better. Also, I saved it as a gif on photoshop so the walk cycle would keep repeating.
0 notes
Link
Here, is my experiment with trying a walk cycle. I think it turned out well because I got the right walking rhythm. However, to improve this I could’ve added extra frames to make the walk look smoother but overall I’m happy with how it turned out.
0 notes
Video
Here, is my experiment with a walk cycle. I think it turned out well because I got the right walk flow I was going for. To improve this I could have added more frames to make the animation less jumpy but overall I’m happy with how it turned out.
0 notes
Photo

Edited 30 second clip for the sound animation. I think it went well because I started to learn how to use audition. To improve this I could add markers for when I start to make my sound animation but overall, I think it’s turned out well so far.
0 notes
Video
This is a after effects experimentation I’ve done. To create this I used the liquid text tutorial I found previously in my research. Doing this has allowed me to learn more about after effects and also it has helped me to put ideas together more for my animation.
0 notes
Video
youtube
This video I found was super useful it’s a tutorial on how to edit text or shapes to a soundtrack. I’m going to use this in my own work for getting my shapes and morphing to match the beats to my music.
0 notes
Video
youtube
For the start or end of my animation I want to use shapes to morph into text to spell out the name of the music and melt away. Here, I found a tutorial that shows you how to create liquid text on after effects. I think that it explained it really well and I’m going to use this tutorial when creating my own work.
0 notes
Video
youtube
I had an idea that I could use the liquid drip effect to blend shapes in after effects, so I found this tutorial in order to give me an idea on how I could create this and it also helped me see what it would visually look like and also helped me for ideas for when I do my idea drawings later on in my research process.
0 notes