
Last Seen Blogs

tubbzso
Sin título

huhiiiih
Untitled
ed-throwaway
Max
matryoshka-me
bibouroku
mare-cal
lightning fire
Text
unkei2 theme by snake | code (raw)
my windows 98 theme, remastered with actual buttons and a few other things. no rights reserved. features under the cut.
Keep reading
860 notes
·
View notes


Text
my favorite clip studio assets!
since i’ve been using csp a lot more now i thought i’d make a post of the assets i use the most for ppl looking for good stuff!
general brushes:
Pen + Caspar Pen (かしペン+カスレかしペン) (my fav pen for sure)
Erase Along Edge (YOU NEEED THIS ERASER YOU NEED IT!!!)
Freehand Style Brush Set (フリーハンド風ブラシセット) (cant recommend this one highly enough, i use it for all my backgrounds)
Bong pen
OBONGBONG’S PEN
Halftones (スルスル塗れる5線刻みトーンブラシ)
A non-shin pen (しんでないペン)
SU-Cream Pencil
Noisy Ink Brush v2
Simple Retro Halftone Brushes
Smeared Paintbrush (べっとり絵筆)
A breather pen (一息ペン)
Aj’s Pencil Set
Watercolor set (수채화 세트)
T-marker Wind Brush Set (Tマーカー風ブラシセット)
Watercolor marker ▲ ■ and texture set (水彩マーカー●▲■とテクスチャーセット)
special effect and decorative brushes:
Tights Pen (タイツペン)
Glitch Brushes 2
(彩塵ブラシ(Prism Dust)
Hand-painted effect set No. 2 (手描き効果セットNo.2)
Oriental Emblem 11-20 (동양 문양 11-20) (this creator has so many amazing assets ive downloaded them all)
Ribon brushes (りぼんブラシ)
Lace Set レース セット
Ornate lace
Bramble
(rose-玫瑰叢)
Loose hand-painted sprinkle brush (ゆるゆる手描きのふりかけブラシ)
Bush pen (수풀 펜)
Fantasy Papers
Pearl Brush (真珠ブラシ)
gradient maps:
Gradient map set for hologram (홀로그램용 그라데이션 맵 세트)
Yunywave★ Gradient Set
cb gradients 3
ONG SET
3D:
The Only Perspective Grid You Need!
3d sketch head
Movable horse 1.8 A (可動のお馬 1.8a)
Sitting poses collection (便利かもしれない座りポーズ集)
misc:
Raiku RGB Shift
Hand-drawn Rags tool Set (手描きのボロ線ツールセット)
VHS action set
39K notes
·
View notes
Photo


5 min tutorial for trcelyne, hope it helps!
436K notes
·
View notes
Text
people on this website be like “it’s actually school’s fault that i don’t know how to read because i wanted to write my essay on the divergent trilogy and that BITCH mrs. clarkson made us study 1984 instead. anyway here’s a 10 tweet thread of easily disproven misinformation about a 3 year old news story and btw, who is toni morrison?”
164K notes
·
View notes
Note
How did you do the background texture and text on your Jersey Devil drawing? That shits gorgeous man I love your art
AHH thank you! The background is just a paper texture from google with a yellow overlay on it, and the font is called Charcuterie Block.
Here is the method i use for putting graphics on paper and other textures without diluting the color of the art:

lets start with this little man. for the record he is made up of two color layers on multiply mode:
i want to put him on some paper. I just found this one by googling “white construction paper texture,” here’s what happens when we put it behind our little man (still on multiply):
it looks okay, but if you want the texture to feel a little more realistic you can select and copy the texture, then make a layer mask on your artwork layer, alt+click on the mask to display it on the canvas and then paste the texture into the mask.
you can use “paste in place” (cmd+shift+v on mac) to make sure the texture doesn’t move from where you copied it.
Then invert the colors (cmd+i) and click on your main layer again
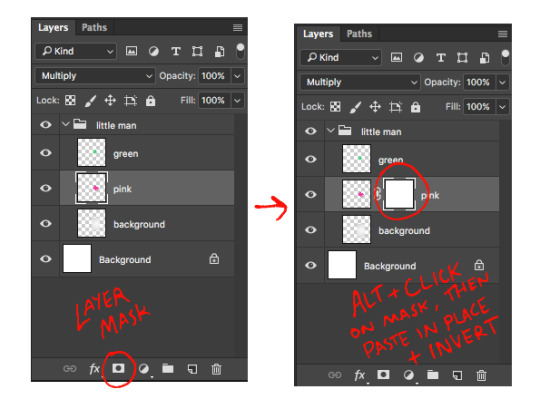
after inverting it should look like this, with the mask blocking out most of your layer:
with the mask selected (not the layer itself), go to image>adjustments>levels, or cmd+L, and move the sliders until it looks right:

usually it’ll involve moving the middle and right sliders really far to the left. you can isolate the mask again and brighten/darken different areas if you want to fine tune it.
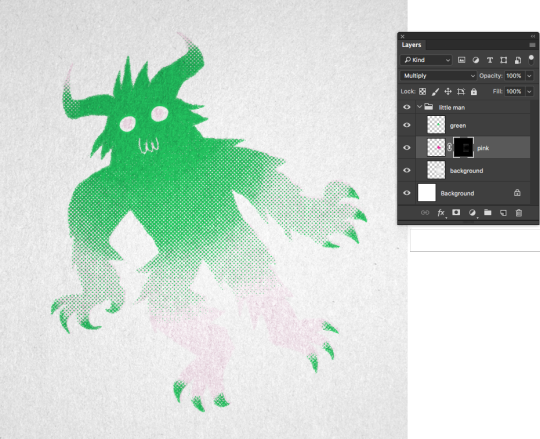
Here’s what it looks like once i’ve adjusted the mask levels and then copy/pasted it onto the green layer as well:

and a black version where you can see the texture a little better:
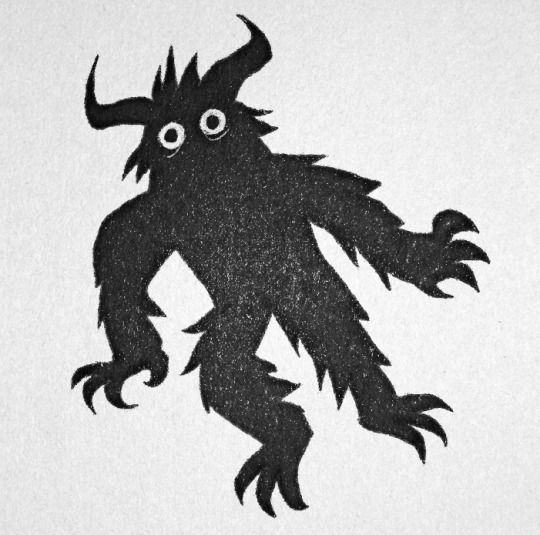
It’s more useful if you’re doing simple/bold art rather than rendered stuff, but hopefully this is helpful to anyone!
603 notes
·
View notes
Note
hey!!!! That piece you did of party and cobra,,, I love it,, could you tell me what that pattern is you used on it? I love how it looks like... old comic book colors
Thanks! I used the Debaser kit from true grit texture supply with a couple of color adjustments after the fact in photoshop
35 notes
·
View notes
Note
How do you add so much texture to your art? When I tried to once, I just clipped a textured layer onto my drawing. It looks good but the color is kinda ruined.
when i use a found texture/something from google I usually have to do a lot of messing around with it to get it to look decent. like here is a dog

here he is with a texture i found on google, clipped onto a layer on overlay mode, which is what I used to do a lot when i was first starting digital art:

looks kinda flat and boring. here he is after lowering the opacity & saturation of the texture and erasing parts of it:
still kinda boring imo. if you want to do textures this way, you can still play around with layer modes and get something cool, it’ll just vary a lot depending on your art and on the texture you’re using.
ANYWAY so what I do most of the time, rather than this, is just create my own texture using photoshop brushes. this way you have total control of what goes where, AND it won’t mess with your colors since you’re just.. making your own
123 notes
·
View notes
Text
i’m gonna make a midnight treat does anyone want my recipe for warm milk & honey while I’m at it lol
it usually zonks me out but I’m not very sugar sensitive so ymmv
13K notes
·
View notes
Text
I dont really like making rebloggable posts but I haven’t seen anyone mention them yet: terracotta heaters are really easy and effective DYI heaters for cold emergencies and I think it might be helpful considering, you know
TDLR, place a candle of any size down, and put a terracotta pot (as large as possible preferably) over it, with something non-flammable and balanced to keep the bottom an inch or two off the ground, like bricks.
The candle will heat the terracotta, which will put off heat, while the space underneath lets smoke out and oxygen in. I’ve used these all 3 times we had outages here in Maine during blizzards to keep my aquariums warm, the weather outside had been easily -20 F with high winds, and not only was I cozy, that shit kept the water 10 degrees above room temperature. If it can heat the aquariums, it’ll heat a small room.
They work so much better than you’d think, the heat they put off is insane. Obviously be careful because smoke and open flame, but they’re very easy to make and just need an eye kept on them on all times.
Don’t touch the heated pot bare-handed, it’ll burn like a motherfucker, they get VERY hot. Use thick oven mitts or layered rags to remove pot, put the candle out first if you can manage. Don’t do more than one or two in a non-ventilated or closed room, it’s still making smoke and that can make it harder to breathe.

[ID: Two bricks are laid flat, two bricks are stacked on top on their sides. A candle is in a jar inbetween and is lit. A large terracotta pot is balanced on the second, higher set of bricks so it is above the candle and off the ground. End Id]
45K notes
·
View notes

Note
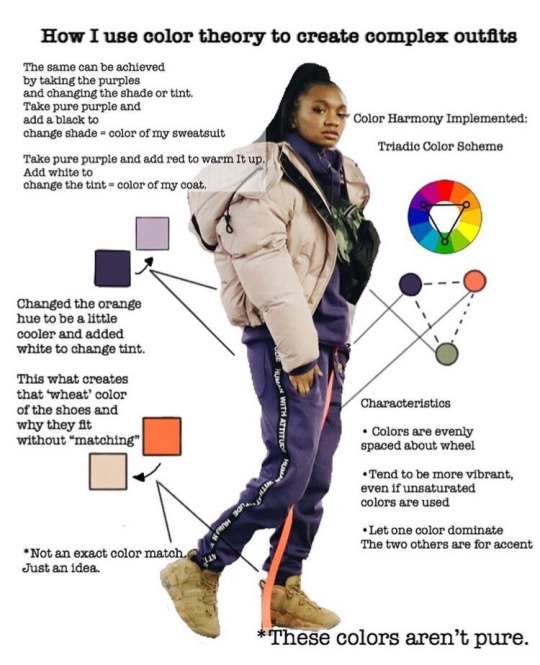
how do you pick your colours? your art in general is very beautiful but the colouring always pops out at me
Hm… It’s pretty interesting to analyse.
It looks like that in general.

Most of the times I use greyish colors as a base, and then I can add a “BOOM-effect” with one or two saturated and bright colors (lighting, clothes, background or some other details). It gives me a contrast and I like contrasts with all my heart.
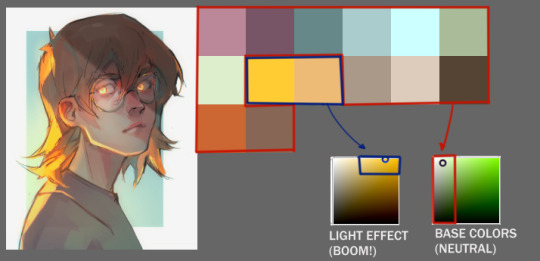
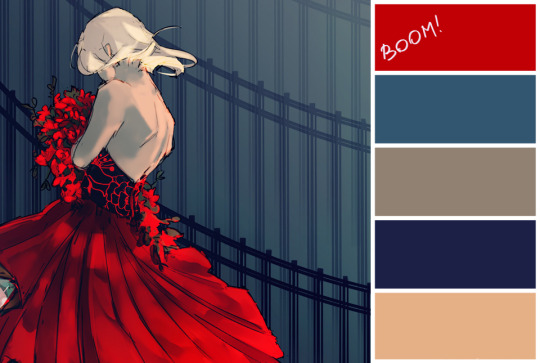
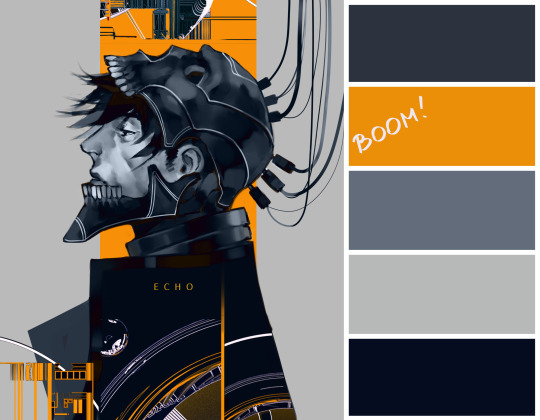
Actually I recommend to read a few articles or watch a video about color theory. It will really help you to understand how it works. With time passing you’ll just learn to do all of it instinctively.

Thanks for the question :)
12K notes
·
View notes

Photo

step-by-step intestines :-D
80 notes
·
View notes
Text
I think it’s time to make a tutorial
Many people were asking me to make a tutorial of how I approach my drawings. Today I finally decided to do a little guide
Bare in mind that this is not the only way to do things, neither the best, it is just MY way to do it, and I wanted to share it with y’all. Besides, not all my drawings follow this set of steps, I tend to switch styles very often and try new things, but this is the one that I always come back to
OKAY, first step: sketch and lineart
For the sketch I use the Tapered Pencil, it’s in CSP by default.
For the lineart I use a custom brush which I called BEST BOI, because he is wonderful, you can download him from here
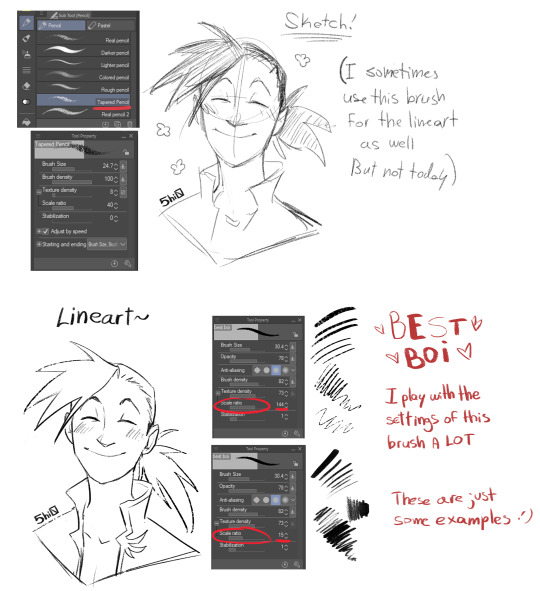
Keep reading
486 notes
·
View notes
Photo
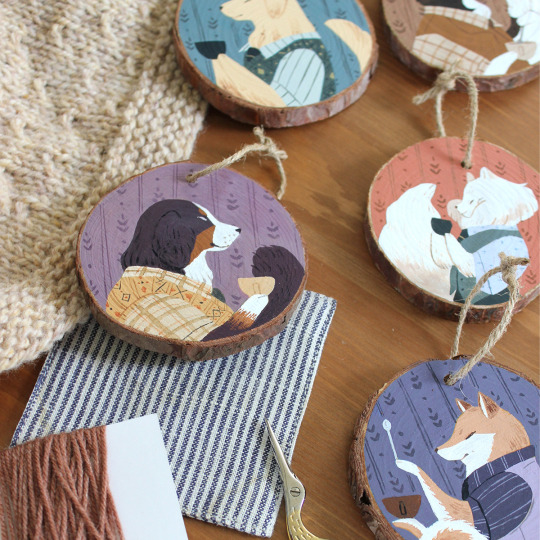
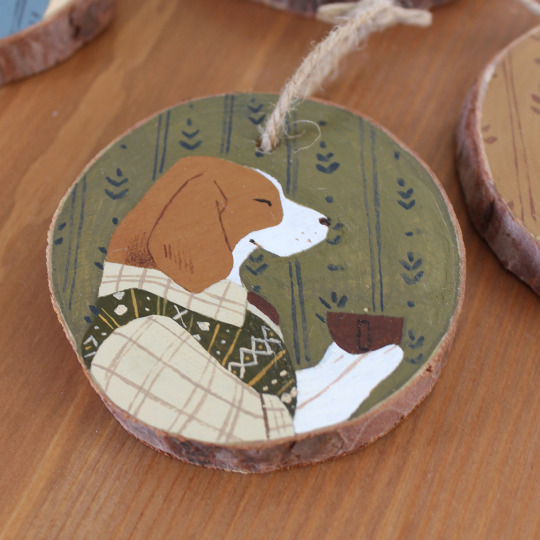
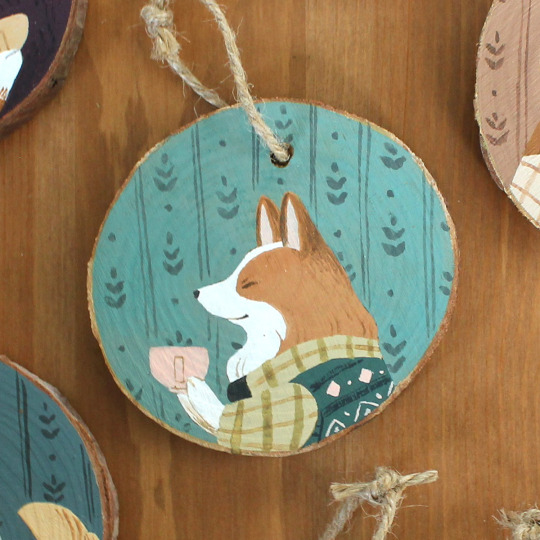
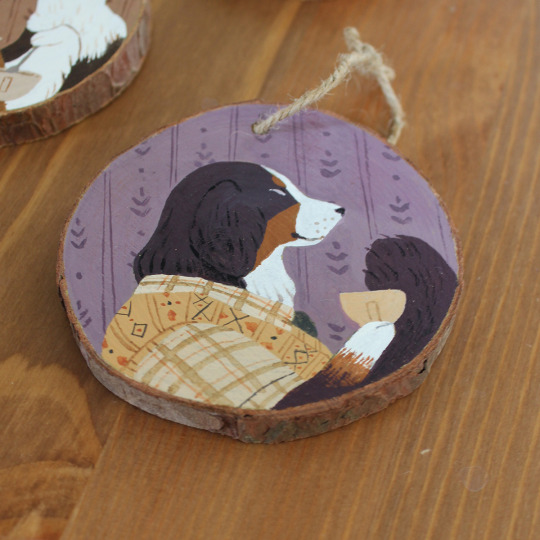
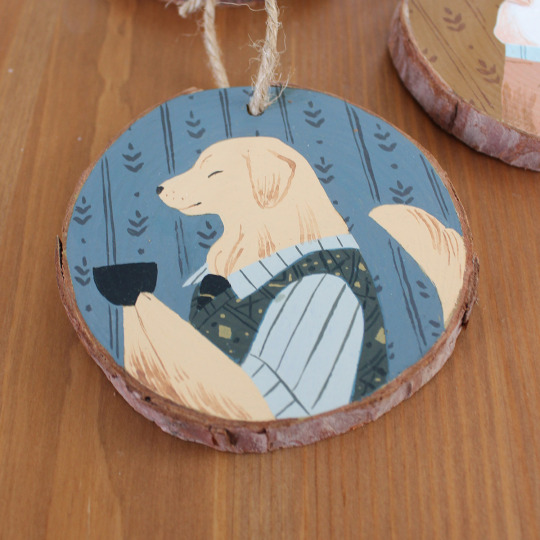

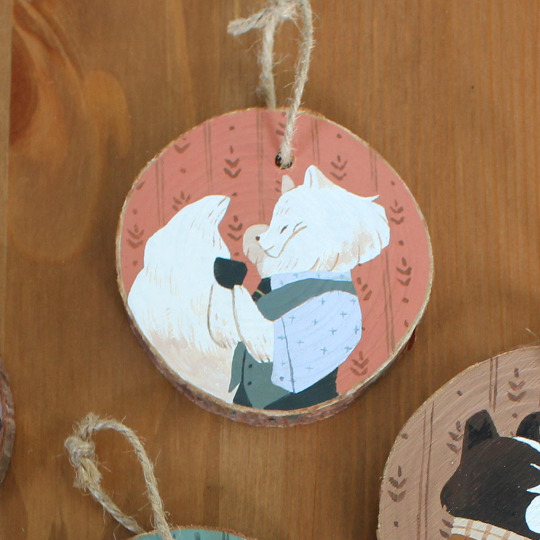
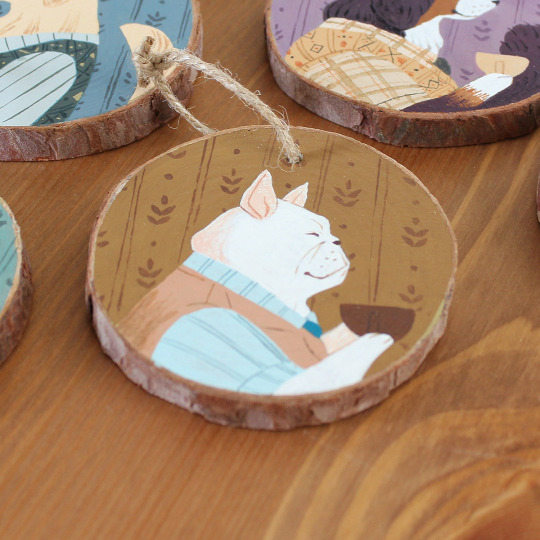
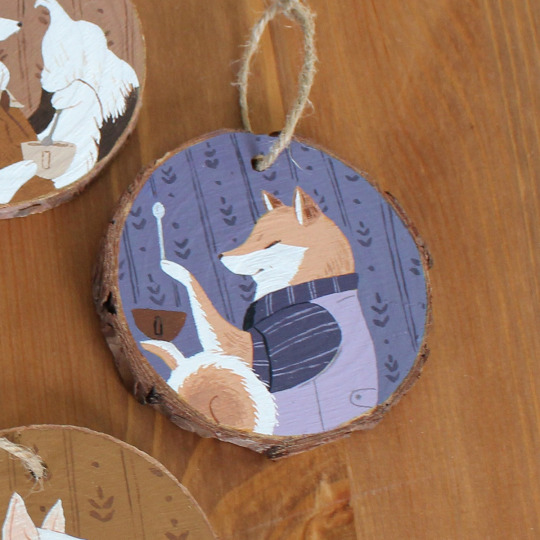
I hope you had a great weekend – I know I did! Here’s a little something fun for today ~ 8 little doggos with tea I painted for Gallery Nucleus Portland’s Microdose show that opened on Sunday. There’s still two available for sale here if you’re interested!
2K notes
·
View notes
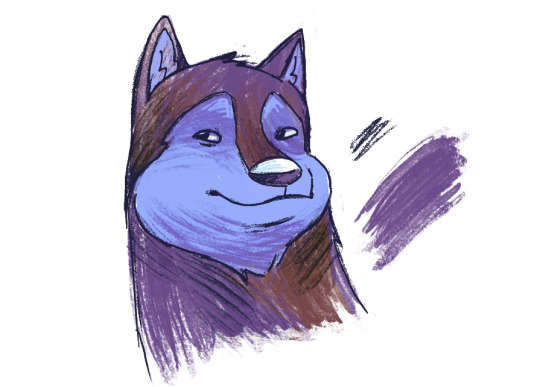
Photo

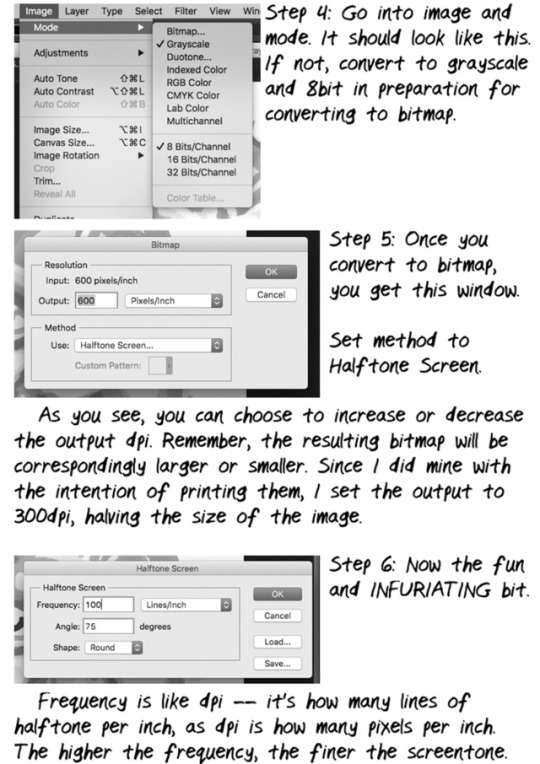

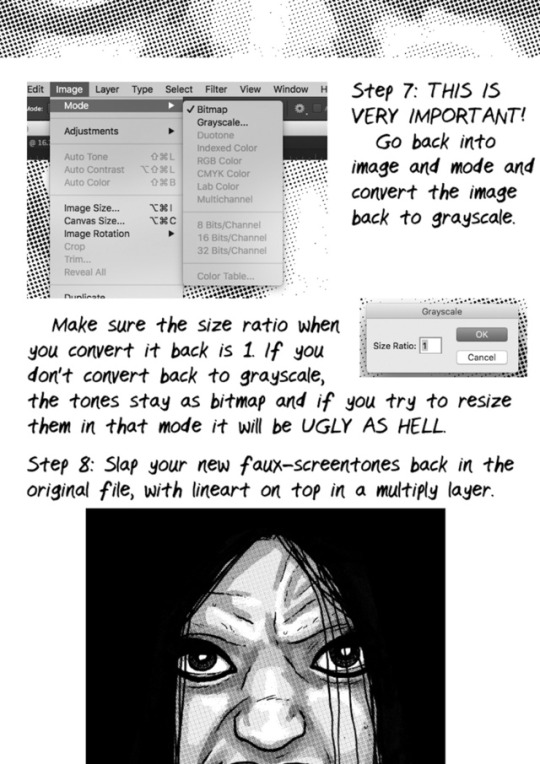
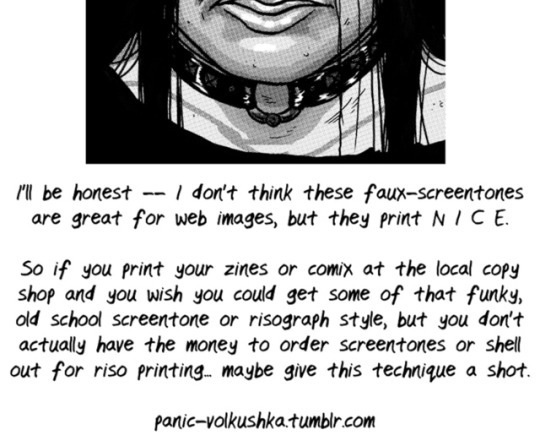
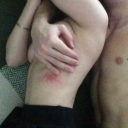
to celebrate 3 years on testosterone, here’s a tutorial on how I do my quick and dirty screentones
112 notes
·
View notes