seamstressing
Watever. (slows ur fashion)
Kay - 20 - she/her (tme) - white - LesbianLOVING AND CELEBRATING TRANS WOMEN. LOVING AND CELEBRATING TRANS LESBIANS. LOVING AND CELEBRATING TRANS FEMS.
64 posts
Last active 2 hours ago
Don't wanna be here? Send us removal request.
Last Seen Blogs

lowkeeycee
Lowkey

mortallyspookyfun
Untitled

oldbluehoodie
The Old Blue Hoodie Site

masterycomic
Flamebreak Confessional

shakespearereincarnation
yourdadsfavouritesitcom.
Text
Hello, friends. Some of you who have been following my work or know me personally probably recognize my friend, Lily. She’s modeled a lot of my stuff over the years, and when they weren’t modeling for me they’re often the one behind the camera.


They’re my best friend. I taught her to sew and she taught me to make jewelry. They played piano and loved card games. My brand is called Love Letter because of the letters we’ve sent back and forth since high school.
Last month, my cherished friend passed away. I miss her desperately. I am posting about this here because of how often she appears wearing my work, behind the camera, or as the inspiration for what I make.
4 notes
·
View notes
Text
Thanks to the stupid tumblr update even clean links without the tracking stuff come up with a “please sign in” alert once you’ve looked at it for a bit. Ugh!!
I use this blog to link tutorials to friends across social medias. That’s why it’s separate from my personal blog. I’m not very technologically advanced so it’s a pain to make a new site. Wordpress made me want to cry it was not intuitive for me. I’ve been trying to force Carrd to let me make blog posts but it won’t because it’s not a blog platform. SO. I’m going to beg someone from school to help me with Wordpress. I’ll still crosspost here but I want to have somewhere nice and compact to put my tasty tasty Posts
0 notes
Text


I posted this TWICE to the wrong account oops. Some things I’ve been making : )
4 notes
·
View notes
Text
I have to edit all my old tutorials because I realized I’ve been saying “taught” instead of “taut”. Sorry for my epic woman fail
1 note
·
View note
Text


Decided to play with some visible mending and darning on my girlfriend’s shirt that was badly torn. The long blue and white darning was all freehand but the solid blue was with a loom
40 notes
·
View notes
Text

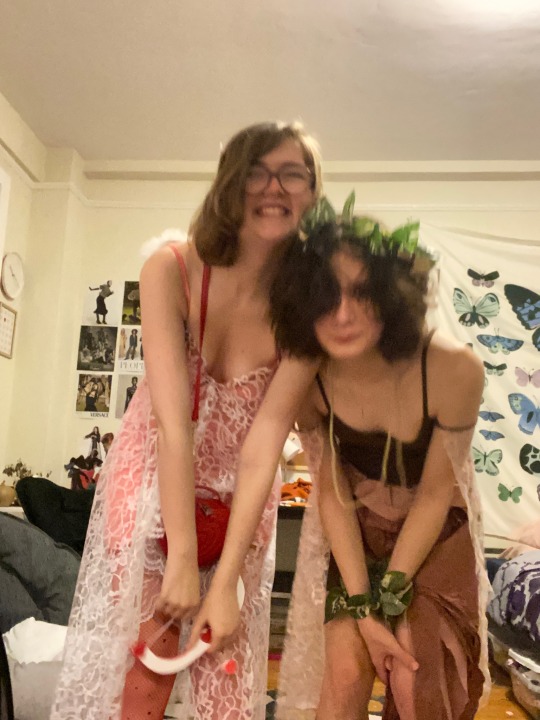
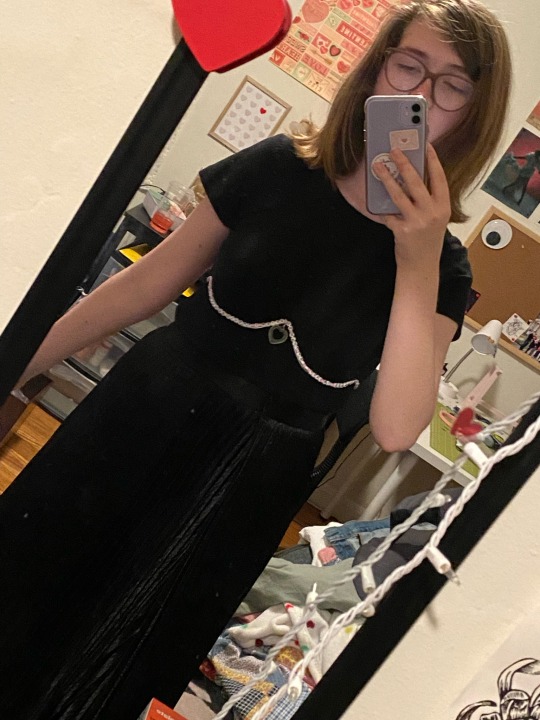
I made costumes for my girlfriend and I. I’m Cupid and she’s a wood nymph.
(She/her for both of us)
10 notes
·
View notes
Text
I want to start trading and bartering my work with other artists.
It’s like how people talk about “little treats” to get through the day. Rather than getting my kitsch and odds and ends from Target or something I want to get that from other creators.
So anyway. Art trades. Especially with other people in fashion.
2 notes
·
View notes
Text
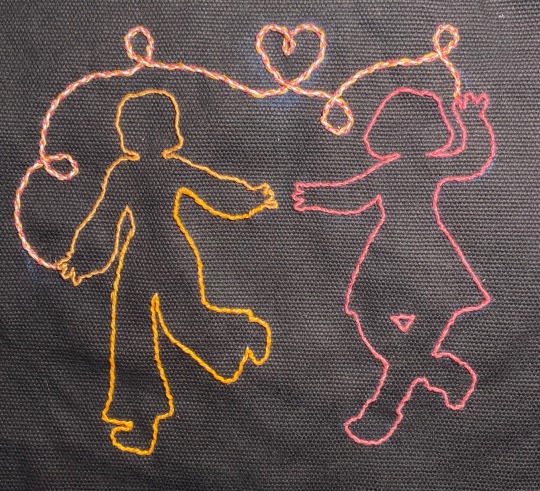
Lovergirls - embroidery of my partner and I
EDIT: I wish y’all would stop reblogging this with cute tags we broke up lol
#techniques used are:#whipped backstitch on the silhouettes#double woven backstitch on the heart#sewing#handmade#art#fashion#my art#hand embroidery#embroidery
213 notes
·
View notes
Text
Okay so! Tutorials! My plan is to finish the croquis tutorials (probably? There wasn’t a lot of engagement so I might abandon that effort for now lol) and then do a few actually-helpful things.
I want to create a sort of repository of things I’ve learned. So like. Some repair stuff like darning and patching, maybe some “thrift upcycle” type things?
I worked in gender-affirming seamstressing (turning gendered clothing into genderless or opposite gender pieces) for a while before I went into luxury, so I might post some tutorials on that, too.
Right now I’m teaching myself some design stuff and some stuff about sensory-conscious styling (yes there are tricks to figuring out what clothes are overstimulating for you! ESPECIALLY if you’re super temperature conscious. Plus when you know what exact fabrics fuck you up it’s WAY easier to avoid them)
So I guess like… if any of you are down to comment or DM me what sorts of things would help you specifically? I know what’s helpful for me but I have no idea what others want to know
2 notes
·
View notes
Text
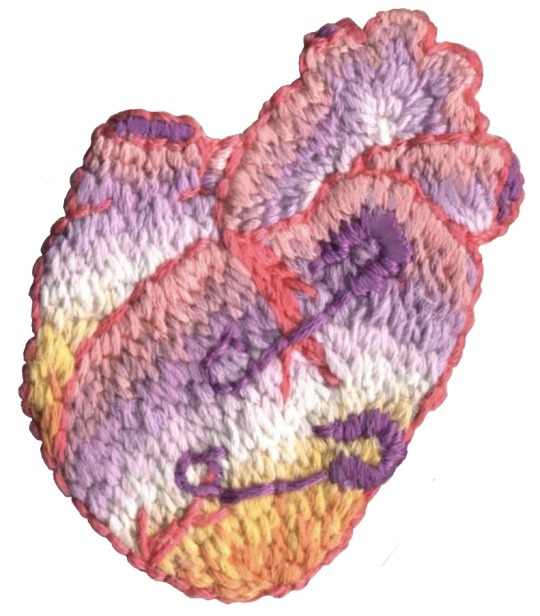

Lesbian heart - holding it together
(hand embroidered brooch)
#sewing#handmade#art#fashion#my art#cute#clothes#embroidery#heart#lesbian#Lovecore#pride#wlw#anatomical heart
52 notes
·
View notes
Text
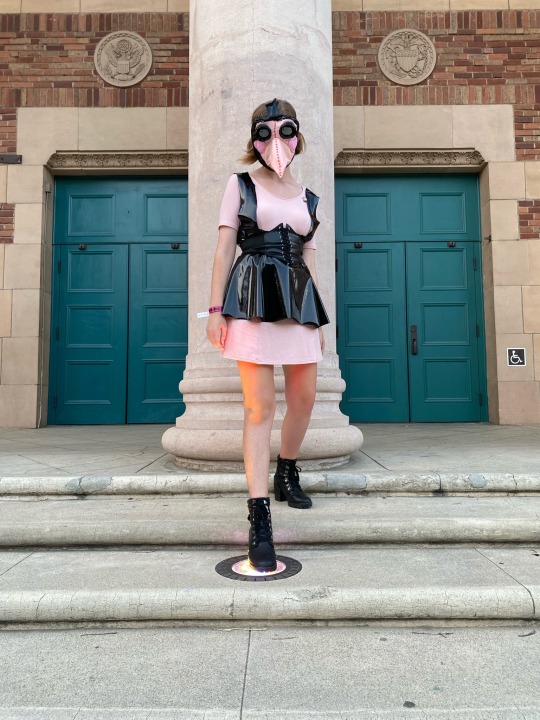
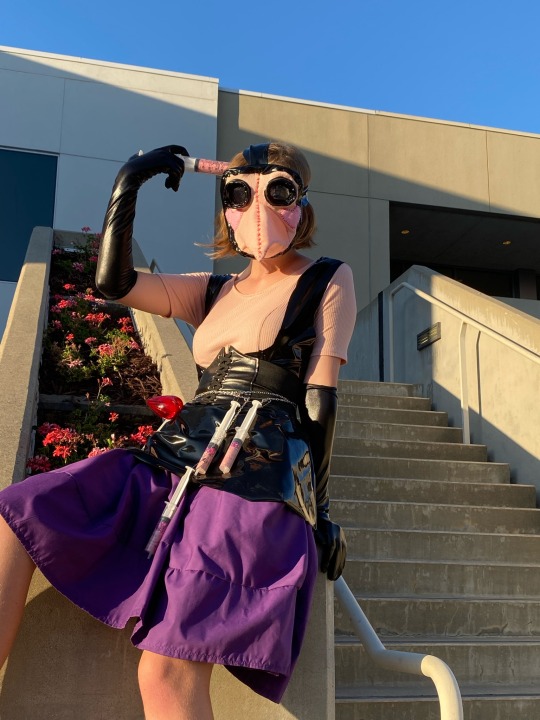
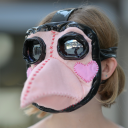
💕💉Love Doctor💉💕
Sewn and modeled by me
#gonna use my love doc pics as my icon I think#sewing#handmade#art#fashion#my art#fashion design#clothes#plague doctor#plaguecore#lovecore#pink
82 notes
·
View notes
Text


Hand embroidery: my clown named sleepyhead!
(Not based on a show/comic/etc, I just like clowns)
8 notes
·
View notes
Text
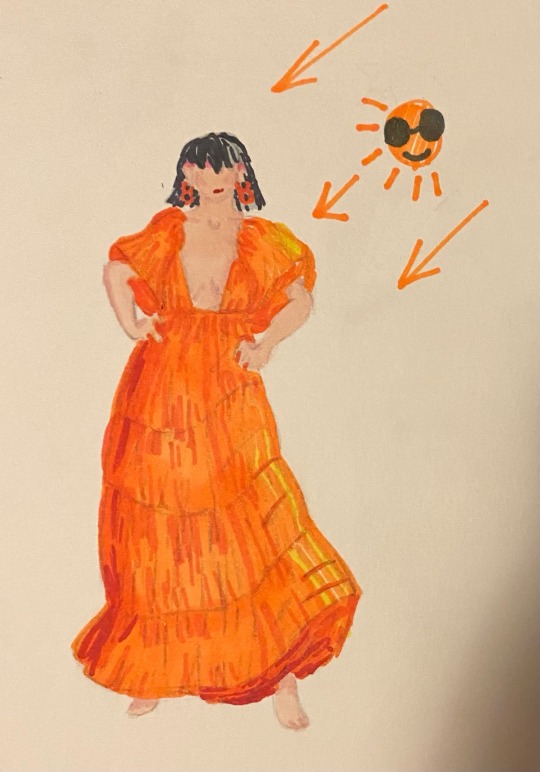

Redraw for my fashion class
#I usually use watercolors but this class requires alcohol markers#which I’ve never used#I made mistakes but overall I’m pleased
0 notes
Text


Heart embroidery
#by me : )#gonna make this a sticker once I’ve posted all the pieces in this series#sewing#handmade#art#heart#anatomy#anatomical heart#love#embroidery#hand embroidery#handmade patch#my art
355 notes
·
View notes
Text
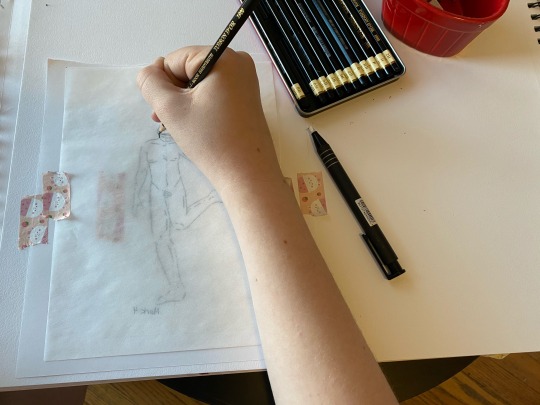
Croquis tutorial: part 1

How to use a croquis for fashion design
Howdy! Been a while. Today I thought I’d share a tutorial about using a croquis for fashion design. This is one of three croquis-based tutorials I’m working on, which I hope to publish this week.
So: what is a croquis? Sometimes it’s called a fashion template, but the word “croquis” comes from the french word “croquer” meaning “to sketch”. It’s basically a fancy way of saying a sketch of a person. In fashion design, a croquis is a template we draw clothes on top of.
Drawing a whole person every time you get a spark of an idea would be time consuming. So instead, we use Croquis: templates to trace and draw over.
You can find them online, or just use any drawing of a person. I’ll be sharing an easy method of making croquis in my next tutorial.
How to use a croquis
Here’s where I run into problems. I use multimedia paper to draw fashion models, and the ye-olden method of tracing croquis onto your paper, holding it up to a window and tracing lightly, just doesn’t work when your paper’s that thick. Not even my lightboard gets all the way through. So I came up with my own method, which is way easy and can be done on any paper (or even wood or canvas if you’re fancy)
Here’s what you’re gonna need:

-your croquis
-your drawing paper
-a piece of scrap paper — larger than the croquis
-a pencil with an eraser
-pencil sharpener
-Optional: painter’s tape/washi tape, tracing paper, a dead ballpoint pen
So let’s get started!
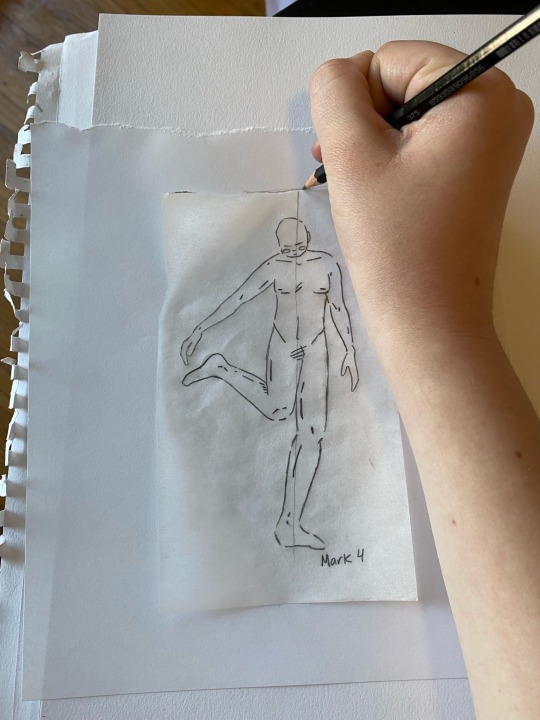
The first thing you’re going to do is trace the top and bottom of your croquis onto your scrap paper
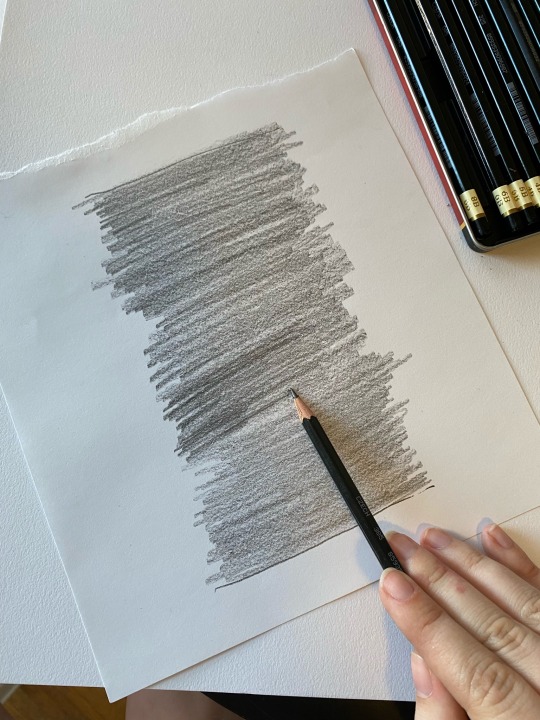
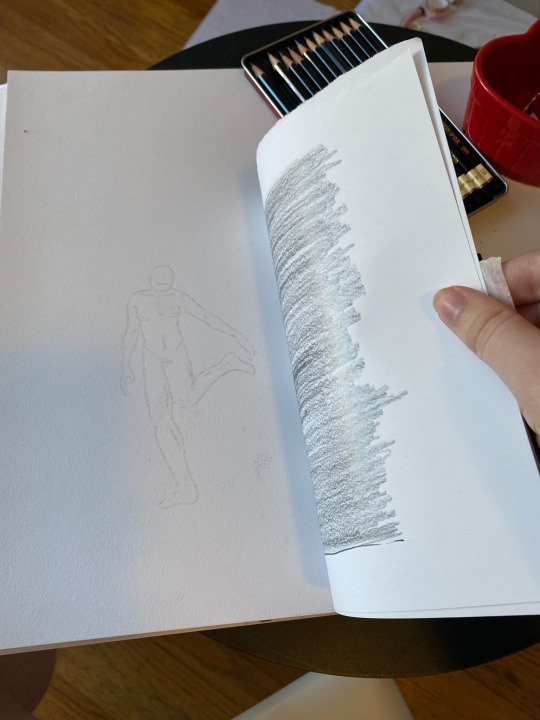
The next step is my favorite. Just. Scribble it all in. Go ham. You want to fill this in with as much lead as you can. This step takes a while the first time you use this croquis method, but you can re-use this scrap paper to make dozens of croquis.
Once it’s filled in, place the scrap paper face down, with your croquis face-up on top. Tape down if necessary.

I usually place a piece of tracing paper on top but that’s optional, I just like to keep my croquis clean. You could also use a dead ballpoint pen to trace, which keeps it totally clean and works really well.
With a sharpened pencil, trace the croquis. Apply quite a bit of pressure. You want the graphite from the scrap paper to transfer onto the final paper.
When you’re done, lift the paper. You should have a pencil outline of your croquis left behind. Save the scrap paper to be used next time. If you want, you can gently trace the print left behind so you can see it better.
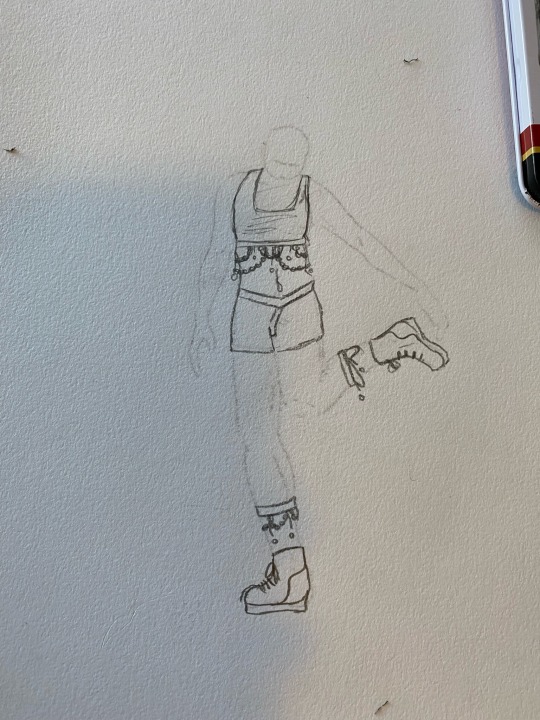
Using the croquis as a guide, draw some clothes. Erase the parts of the body that the clothes cover up.
Finally, trace the rest of the body. Ta-da! Easy peasy.

Now you can ink it, trace it, appreciate it, love it. I won’t judge.
Tag me if you end up using this tutorial, I’d love to see it!! And reminder that if you find this helpful I have a Ko-fi in my pinned.
Have a nice day!!!
❤️Kay
#sewing#fashion#art#fashion design#tutorial#croquis#croquis tutorial#drawing#drawing tutorials#art tutorial
23 notes
·
View notes
Text

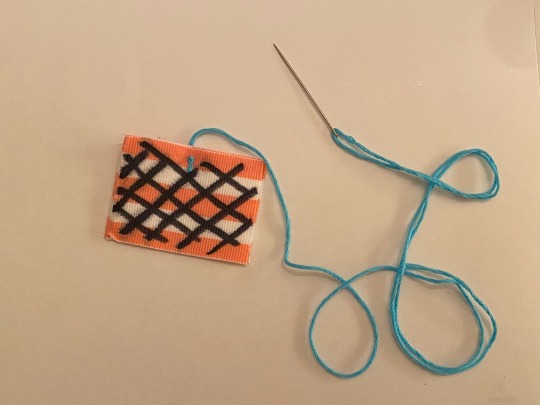
Tutorial for a simple straight stitch, specifically for sewing on patches!
MATERIALS
❥ Needle, threaded and knotted at one end
❥ Scissors
❥ Patch (shown here as striped ribbon)
❥ Item you’re sewing your patch onto (shown here as purple fabric)
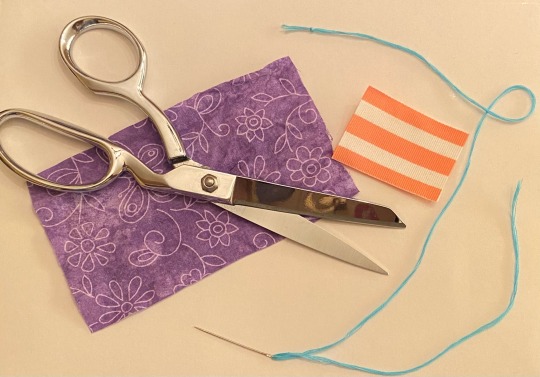
Start with just your patch. Pull the thread through so that the knot lies on the BACK of your patch.
Pin your patch face-up to whatever you’re sewing it onto.
Then, moving your needle over (about 0.5 to 1cm from your starting place), push it through BOTH the patch and the fabric. Pull it taut.

Flip your piece over to the back. Again, move the needle over slightly then push it through, making sure to catch the fabric AND the patch. Pull it taut.
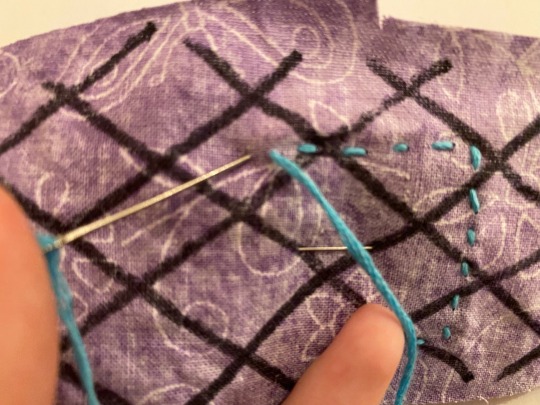
(TIP: make the stitches on the backside as small as you’re comfortable with if you’re sewing your patch onto a bag or piece of clothing. You don’t want the things in your bag or parts of your body catching on and tearing your stitches! I haven’t had a stitch break because it snagged from the outside, but I often snag them from the inside!)
Flip it back over and repeat, moving the needle over and then pulling it taut, flipping the piece over, and repeating.
Once your piece is sewn all the way around, make sure your needle is on the backside of your fabric, like shown:
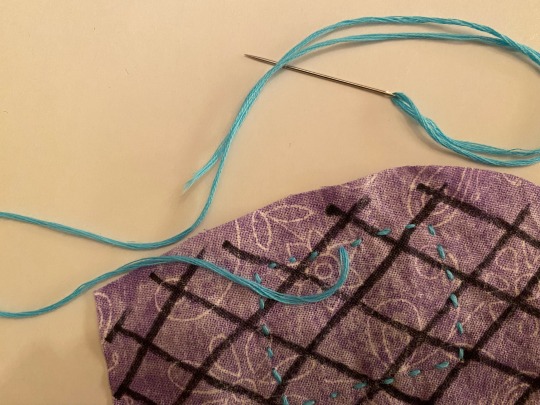
Push your needle through a neighboring stitch

Pull that until there’s a slight loop, wind your needle into that loop, and pull it taut.

Repeat if you want it extra secure.
You can cut the tail there! If you’d rather hide the thread tail, here’s how I do it.
1 Push the needle through the fabric but NOT the patch
2 Feed the needle through the patch so it comes out somewhere in the middle.
3 Pull it so taut that it wrinkles
4 While it’s wrinkled, cut the tail as close to the patch as you can. You might have to wiggle the patch back and forth, but the tail should end up hidden behind the patch

And that’s it! Here’s how it’ll look:

COMMON PROBLEMS:
-Stitches don’t hold/cause the fabric to fray: You’re stitching too small or too close to the edge! Make your stitch wider and move away from the edge of your fabric!
-Needle refuses to go through patch: either your needle is dull or your patch is too thick!
First, try sharpening your needle: If you have a pincushion, it should have a little emery strawberry! Push the needle tip into the strawberry and twist! If you don’t have a pincushion, get a nail file and twist the needle tip carefully on the filing edge.
If sharpening the needle doesn’t work, then your patch might be too thick! If you try to force a long needle (like the No.5 DMC I’m using) into too-thick fabric, it might bend and break. I recommend getting a short, thin, sharp needle and a thimble. If you don’t have a thimble, my method when I was younger was to duct tape a soda cap to my thumb and use that as a thimble. If your needle still won’t go through even when it’s small, thin, sharp, and you’re pushing it through with a needle, then try superglue. That’s honestly my best advice.
-stitches are messy/different sizes: this one honestly just takes practice! if it REALLY bothers you, get a ruler and a pen and mark dots along where you’re going to sew, 0.5cm apart from one another. It’ll take some trial and error getting the needle on the dots from the back, but from the front it’ll be a breeze.
-Thread keeps knotting/breaking: Another problem solved by practice, try using a shorter piece of thread or pulling it through more gently.
-Patches end up “bubbled” instead of laying flat: First, try adding more pins to hold it on. If that doesn’t work, take an Elmer’s washable glue stick and glue the patch on before you pin it down. You’ll have to use an emery strawberry or an emery board to clean your needle every once in a while, but the glue washes right out when you’re done.
DM me, send an ask, or leave a reply if you need any extra help, I’m finishing up a big commission right now but I should answer within a day or two.
Hope your creating goes well! If you wanna support my work, check my pinned for some ways to do that. I send my love!
❤️Kay
70 notes
·
View notes