#And the shading enhances all the different layers of color and makes everything in the piece appear more realistic and sharp
Text

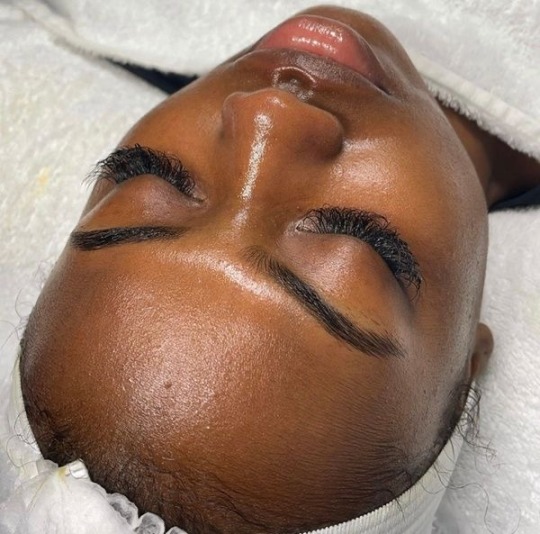
everything you need to make your own personal beauty binder 🎀

disclaimer: this post is heavily inspired by @tomb-of-ligeia and @daphne-dauphinoise, and early 2010s beauty youtubers. it’s always kind to credit your inspo <3
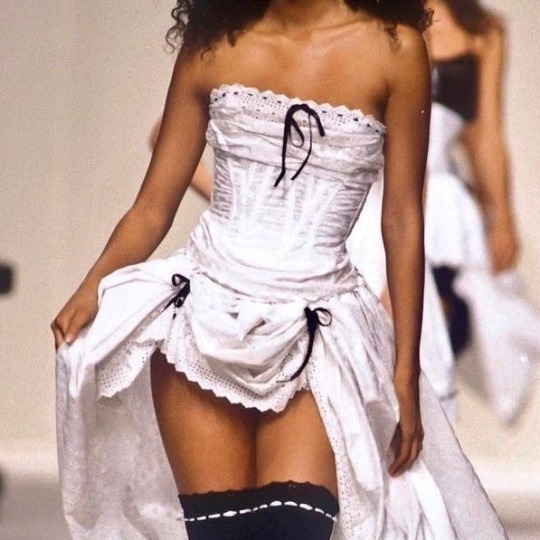
inspired by the lookbooks and makeup charts used by makeup artists designers at high fashion runways shows and childhood bratz coloring and activity books. the law of attraction is at use heavily with this binder (writing down goals and wishlists)!
you should be keeping diy recipes you find in here.
*you don’t need a physical binder. some people function better with digital mediums. i prefer anything physical and concrete. but you can do all this in something like a notion, or your notes app, etc.
why? 🎀
a cute girly hobby (esp for type A, anal retentive, or analytical personalities/extremely creative, hands on people) to keep track of your routines, motivate you to keep yourself maintained, and figure out what works best for you. it’s nothing too serious, just a girly pastime for people that maybe buy too many products, slip up on routines, or don’t what looks best on your features. have fun!
what to record in your binder? 🎀
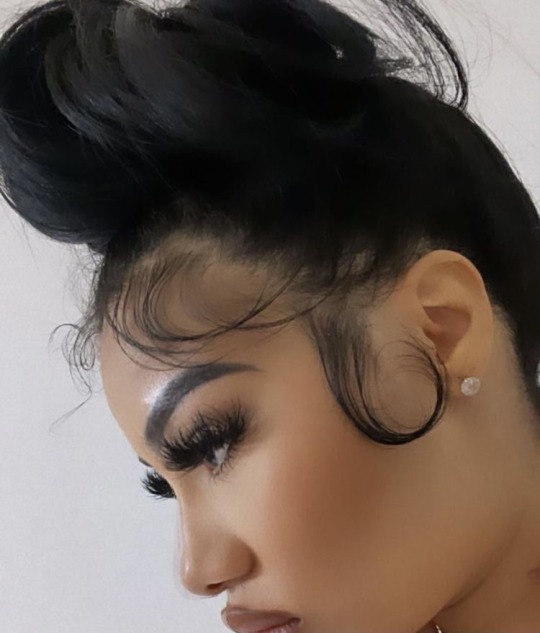
an intro sheet 10 different topics divided by tabbed sections: your personal features, makeup, body, fashion, skincare, hair, fragrance, nails, treatments/procedures, salons/spas/referrals/contacts 🎀
intro sheet 🎀
here, you should keep your goals, desired look, and how you want to perceive yourself.
your personal features
a chart of your color season. mine is cool winter. you can use color season for whatever, i choose to apply it to my makeup.
your natural body shape. this will help you choose the best clothes to flatter your silhouette.
a close up, unfiltered clear photo of your bare face. note your skin type, color, undertone, and any other things that stand out to you.
note what you wanna enhance and what you wanna improve. this will help throughout your binder.
makeup

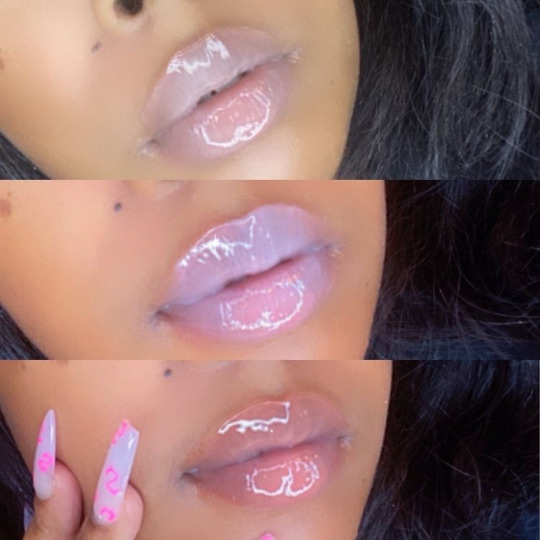
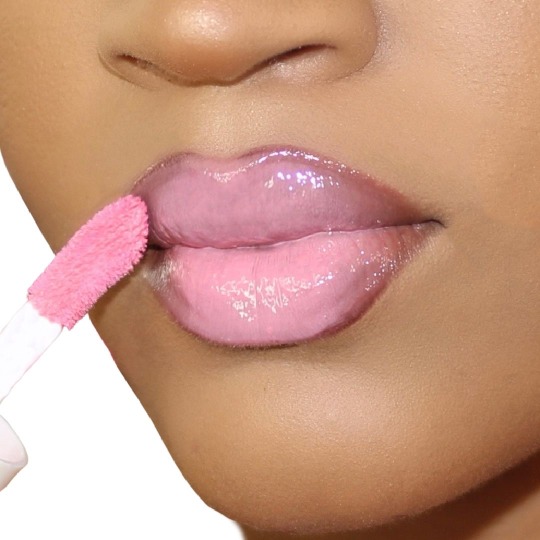
put on a light layer of every lipstick/lip gloss/etc. you have and make kiss shaped swatches in your binder. note the shade, brand, and finish. then the mood/occasion in which you’d wear it.
swatch all your lip liners, again leaving the details of the product.
swatch your foundation shades. note the finish, name and brand.
make a sheet dedicated to all your “holy grail”, essential products.
swatch your eyeshadow palettes. i have all my shimmer pigments swatches and it’s the prettiest thing to look at.
do you have any go to makeup looks? your casual look, going out look, no makeup makeup look, etc.? do these looks and take high quality pics. make personalized face charts by printing them out and noting the steps and products you used.
take c*nty pics of your lashes after trying on all your mascaras/falsies. note the effects and when you would be most likely to wear them.
print out any pics of interesting makeup looks and products you wanna try.
try on lip combos and kiss swatch them. i’m doing this because i do amazing lip combos all the time but i forget which products i used, and it’s hard to replicate the look.
body
take a stick figure-esque picture of yourself and print it out. any outfit you want to buy, print and clip it out first and see if it’s something you’d wear and actually like.
are you experiencing any skin issues on your body and trying any products? keep track of the issue and how the products are doing.
if you don’t already have one, brainstorm workout routines and general wellness/fitness goals.
what are your fav body products? what products did you buy, and hate? TRACK THEM!
any detoxes/diets you’re doing should be recorded in this section.
record “beauty enhancing” foods and drinks here. mine include matcha, lemon water and acv shots.
fashion


outfit planning! take pics of pieces you already have and clip them out. (i’m doing this currently and keeping them all in a little pocket in my binder).
make a moodboard of your personal style(s). how do you want your closet to look? try to see what details, colors, additions are consistent throughout. when shopping, these are what you should keep track of.
print out your signature clothing color palette if you want to have one.
dedicate a page to accessories you have/want, and how you’d style them.
*this can be expensive but the fashion girls will prob love this* go to the fabric store and buy little swatches that you like. take note of what the fabric is and why you like it.
dedicate a page to all your signature details. all the little specific things that scream YOU and NO ONE else! that means do not write pink, girly, etc. here. that is not exclusive to you, hun.
skincare

take a current filter free photo (make it glam! tie your hair up in a ballerina bun and put on some cute earrings) of the state of your skin. if your skin is perfect, i’m jealous and how does it feel to be god’s fav? if not what problems are you experiencing?
log your current skincare routines and how they’re working.
make a page for your skin type, how it feels when you wake up and how it feels and looks by the end of the day and research tips to deal with your personal skin type.
skincare wishlist! list any products you wanna try and what they are for. sample them from ulta or sephora if it’s possible.
dedicate a page to the skincare ingredients your skin loves the MOST! mine are retinol, bha, and vitamin c.
i have a page for all the extra cute little skincare devices i want. on it there’s a stainless steel gua sha, an ice pack, facial steamer, and pink foreo.
hair

what’s your hair type, density, porosity and curl pattern?
write down any hair goals you have. mine is frizz free tailbone length caramel brown hair with honey blonde highlights by the end of this year.
what’s your signature hairstyle? do you have a signature? brainstorm here.
clip out hairstyle inspo from pinterest and insta and try to recreate all the looks!
what are your fav hair products? i keep track of the best curling creams and leave in conditioners for my hair personally.
take note of any trending products you wanna try.
fragrance

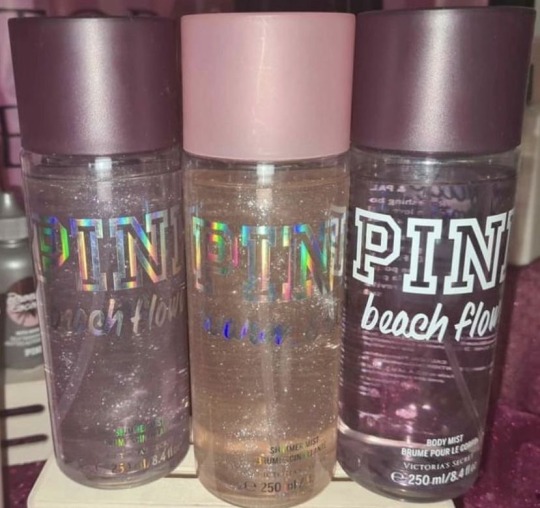
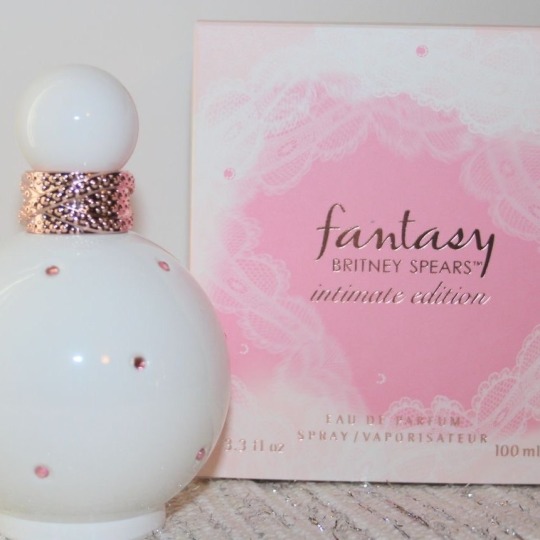
make a moodboard of how you wanna smell. after this, research notes and how they work together.
now track your fav perfumes, your most complimented, etc.
note what fragrances go with what occasion and how they make you feel.
make your perfume wishlist! my fav part!
nails


swatch all your polishes. label them and their finish.
what’s your signature/go to nail look?
do you have any pics of your fav mani + pedis? print them out and write the details you loved the most.
write down your at home mani and pedi routine and it’s frequency.
write your fav colors and styles to wear on your nails. mine are glittery pink, pale pink, white, cream, french tip and pink frenchie. a hyper girly twist on the classics.
treatments/procedures

take note of any surgeries or procedures you want done and what they do.
anything you leave the house to have done regularly, keep track here.
don’t limit yourself! forget your budget! what are some high maintenance treatments you wanna experience? manifest it.
references

write down the sources of which you find great info for beauty and fashion
keep addresses of your fav salons and spas.
keep business contacts of your fav estheticians, stylists, nail techs, etc.
use my branding yourself guide to assist in your beauty binder! so much inspo and so many good resources! 🎀
3K notes
·
View notes
Text
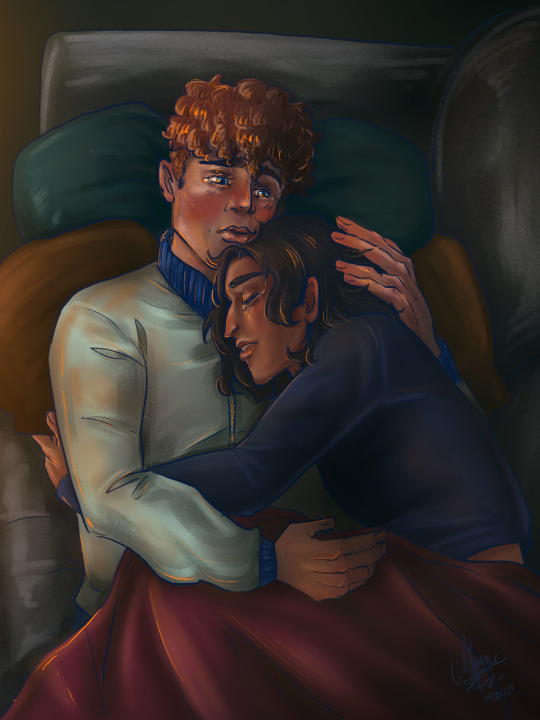
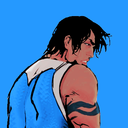
Progress Shots For My Entertainment
A Journey
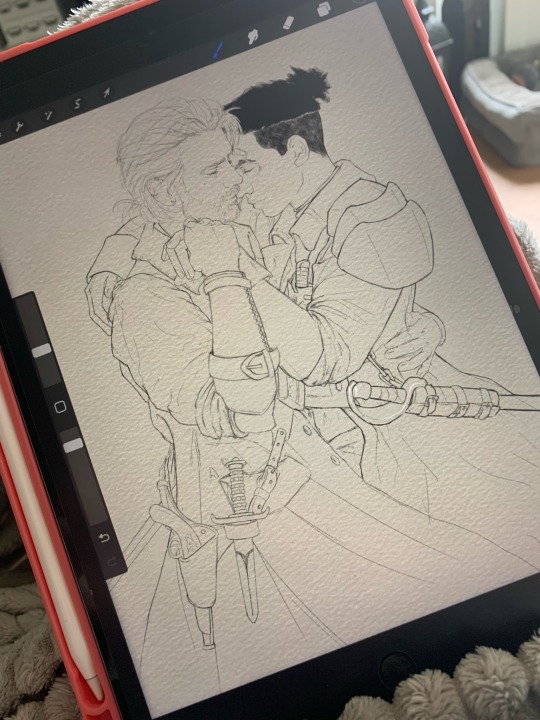
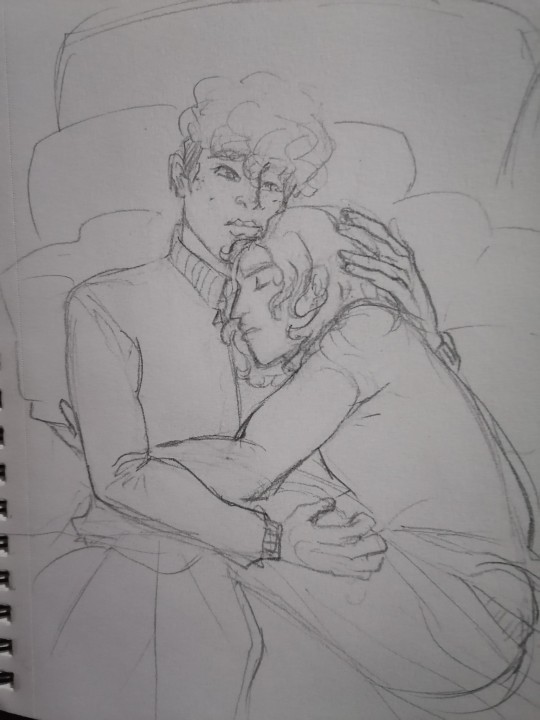
A few people have mentioned how they like getting WIP pics of a drawing I’m working on and see it go through all five stages of grief whilst I slowly go insane. So how about I do all that but in a post?
Behold! Pirate Dancing.

It came to me upon a dream and ballroom-esque pirate music. But I really, really wanted these two specifically to dance and I begged @elwenyere to let me. She agreed 💜
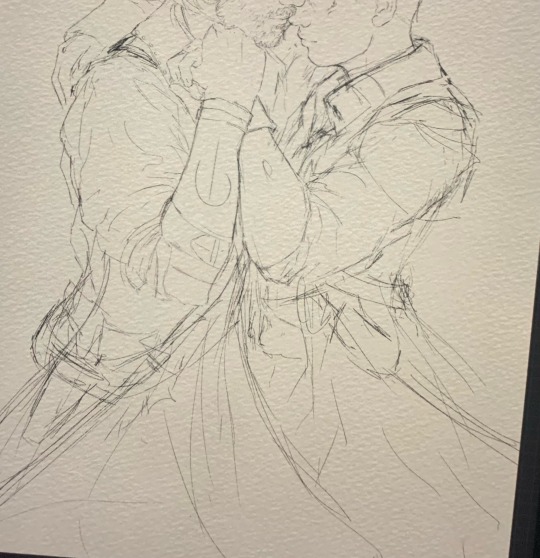
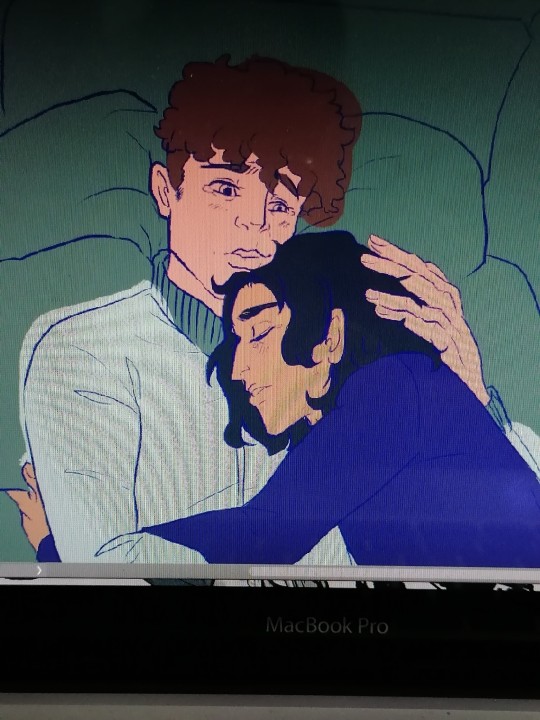
Like everyone else, I start out with the messiest sketch and proudly show it off in hopes it goes on the fridge. Subsequently in step 35664338 I clean up the sketch to something coherent, though the lineart barely makes it to the very end. It’s a mix of part of the art and helping guides for where goes what.
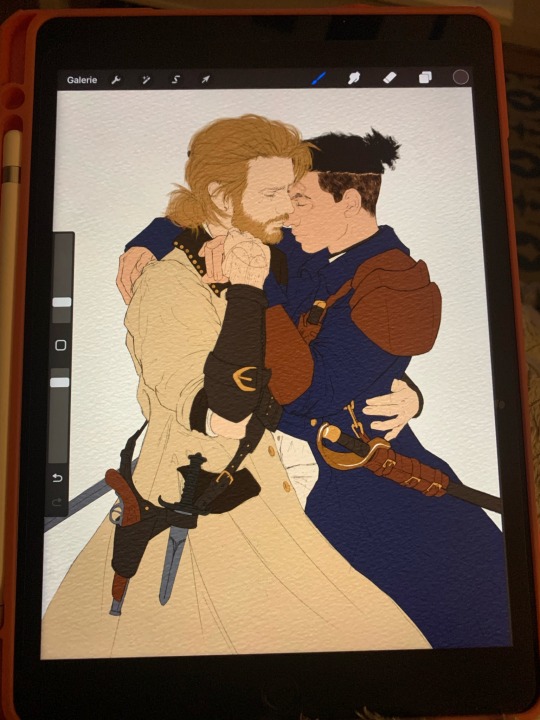
Followed by more tedious work of choosing flat colors. Which is the worst. I wrangle with layers so connecting flat colors aren’t on the same layer. Everything goes into alpha lock, just like the rest of my sanity.
Then the fun starts.
Hair 😍
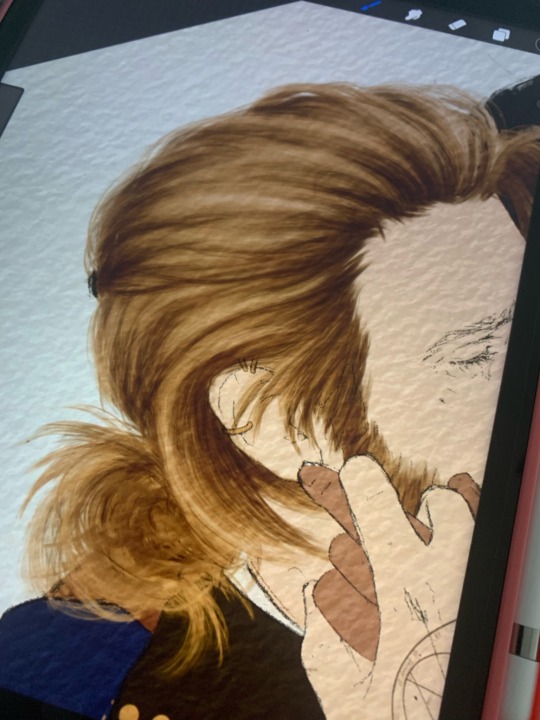

It’s the first thing I shade. I gotta have the hair down before shading faces. It somehow does not work vice versa for me. Faces absolutely have to be next. If they’re not to my liking, the whole work stalls. Cody’s face in this gave me so much grief. He went through five or six similar iterations before I settled - and was satisfied - with the version that’s in the finished work.
The rest of the shading is me bullheading through it piece by piece, cursing myself for being anal retentive. Especially the leather and leather embossing was… there was so much leather. The look is achieved by a brush that’s called “Old Metal”. Personally I don’t think it looks like old metal but it’s fantastic for leather. I have a few darker and lighter shades and I use the brush in different sizes and opacities to wrangle a leather look out of the flat mid-tone base. The symbol of the embossing is on a separate layer above the flat color, with the mode set to multiply and layer opacity anywhere between 15 to 30%.
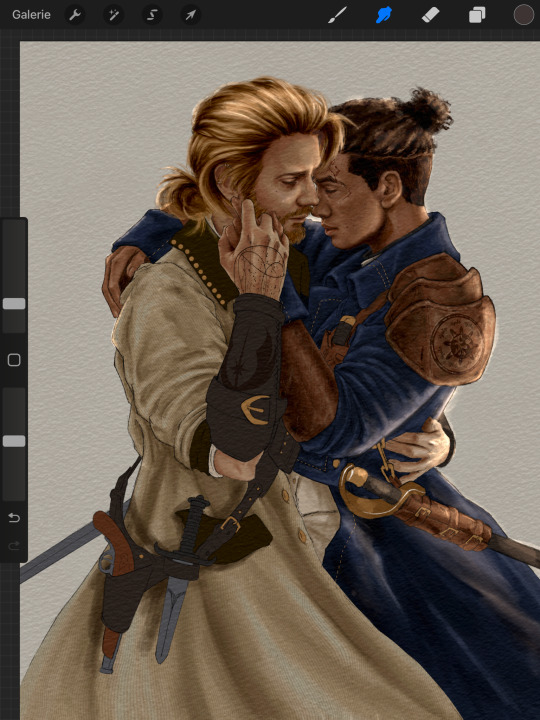
Once I get all of that done, I play around in post-production. I throw effects at it, adjust color temperature and saturation. I enhance light reflections on metal. Lighten up places that suddenly look too dark, darken parts that suddenly look too light. Post-production is very much the stage where I really choose an overall vibe. Which is why I send WIPs through post to get a feel of what I should work towards during shading.

And get new perspectives on a work. :P
#my wips#I went through my trash to get all the WIP pics#just for you 🫶#frost explains her carpal tunnel round 2#the reason why it’s mostly actual pics taken in my phone#is that screenshots on the iPad are regularly too large for discord
177 notes
·
View notes
Text
Six Sentences Sunday (except is an art process)
Well, hello there, beautiful creatures! :D thank you so much for the wonderful tags!!! they mean a lot for meeee!!
I haven't posted in a bit, doing a master is a bit stressful. But! I'm always lurking around and seeing as much as I can the amazing things you all are creating!!
As you might know, I'm right now doing lots of fan work for my amazing and beautiful friends @confused-bi-queer and @hushed-chorus, which stories are very close to my heart <3
This time, I would like to share my art process. It is a contrast between the traditional art, and the digital one.
Each process is different with each person. When you want to represent something someone else created, it is important to get as many insights and feedback from them, and know the source material.
Previous: The Talk ™
First and foremost, you need to talk with the author. Maybe if you are doing fanart, is not that needed. But when you are doing a collab, it is important to be in the same channel as the author, and have a brainstorming about the ideas, vision or insights they might have. Contrasting ideas, situations, deciding which illustrations are more viable, scheduling the releasing, etc. all those topics are important!
Feel free to suggest creative adjustments, might or might not work for the author, but is worth the shot. A creative idea is never a wasted one ;) once you have decided, then is time for:
1. Sketching
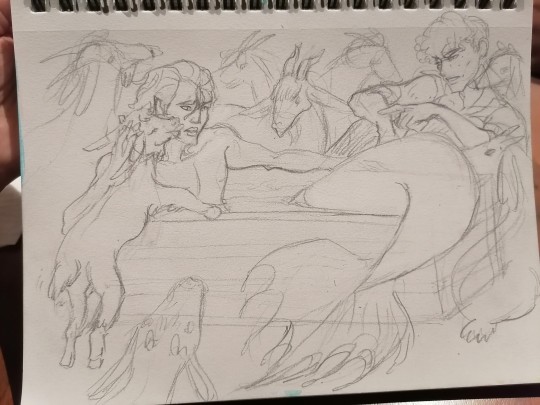
The sketching part is very important! You layout your scene for the first time! start deciding where light and dark will be, the color palette, the feeling you want to evoke, and work with the expressions the characters will have. It doesn't need to be perfect to be a good sketch! It needs to evoke the idea!
This stage is the same in both traditional and digital, at least for me. I always start on paper :) I show my sketches to the author, and we fangirl together ;) then (after maybe some adjustments, maybe a whole new sketch) they approve the idea! Is time for:
2. Lineart
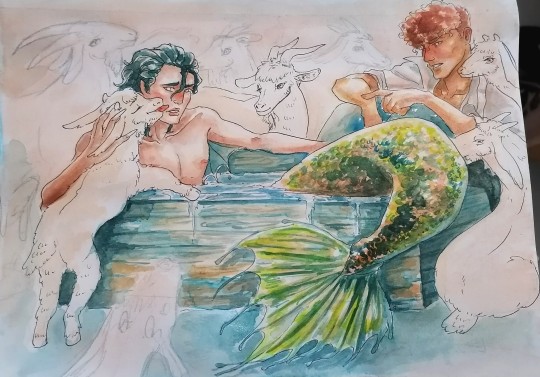
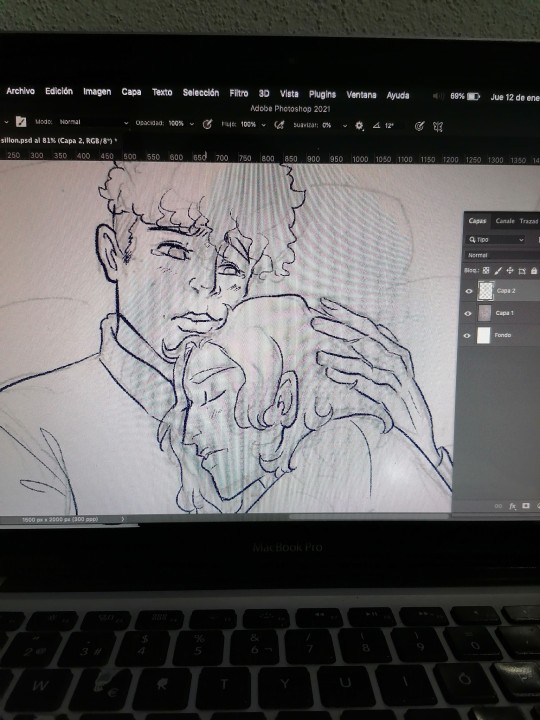
Lineart is different for traditional and digital, but not really.
For traditional, I first decide which kind of medium I will use. This will be crucial for the materials I will procure myself with. This time I went for watercolor with a bit of mixed media, so I needed a paper strong enough for the watercolor to behave. Then, I chose the liners, which are waterproof and light fast. I line with 0.5, 1.0, 4.0 and some edged broader pens meant for calligraphy.
In digital, I work with a Wacom bamboo and Photoshop, and I use some hard brushes with pressure sensitiveness activated. You can customize your brushes, or use packs available on the internet. The wonders of digital are that you can make as many mistakes as you want, and you can always go back. I usually paint my lineart in the darkest shade I will use in the whole illustration, but never black.
When you are happy with your lineart, then is time for:
3. Colours!!

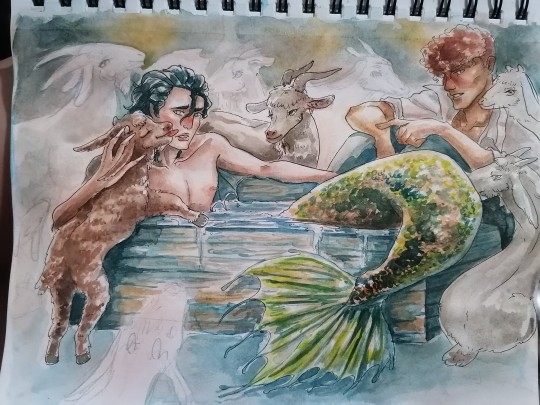
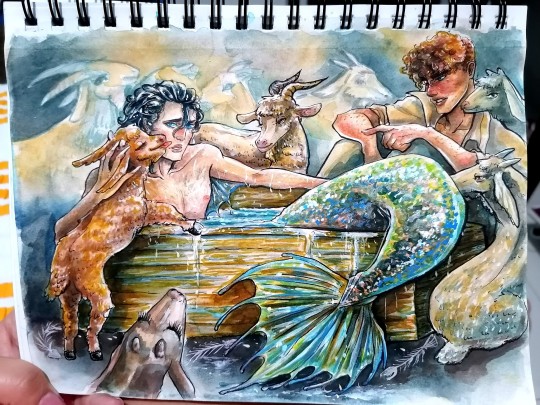
The fun part! The one I enjoy (and suffer) the most!!
Color. I love painting, but both traditional and digital can be as demanding as you wish!
In traditional, you have to be more careful with the mediums. Watercolor is such a wonderful and nightmare way of expression, because you can't really control it. You have to be ok not being in that control, understand how it behaves, and work fast. I always end up adding acrylics for color enhancing, lights, and specific details I want to represent. Let your work rest, I can have a finished piece in two hours, or in three days.
In digital, unhinge. Unhinge my child, have fun! You can correct, filter, move values and start again as much as you want!! There are so many brushes, so many filters, so many textures, the whole color palette light allows! Have fun!
But two important things I always do: make a folder for each character. Don't be me some years ago, when I used to paint everything in a single layer, or not name any of them. Order is important when you want to correct things. Also, I encourage you to limit your color palette, this way the whole illustration makes sense.
I always do something I call 'The ambience layer', where I put a layer over the lineart and everything, and I add lights, shadows, textures, etc. not specific of any object but of the whole scene. And I always add filters and color correction and tweak the values here and there.
Great! Now you have a:
4. Finished piece
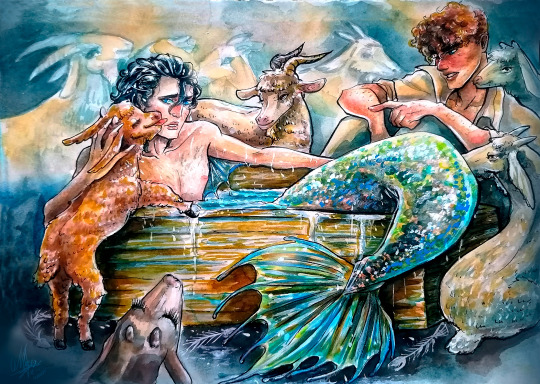
You have finally finished! Make sure you sign your pieces, and you give them digital treatment if you are going to publish them on the internet. Always work with RGB values, and export for web :) always send your advances to your authors, and send the finished piece via e-mail, so it doesn't lose quality.
- - - - - -
So yeah, this is basically the whole process :D soon I will share a different process with different versions of the art involved.
Would you like me to create a guide with export values and formats and all that jazz? I hope you enjoy this! :D
Please check the fics these pieces (and many more) were made for:
The Rise and Fall of Us and What Remains After the Storm.
I tag:
@hushed-chorus @confused-bi-queer @kohatenz @artsyunderstudy @moodandmist @mostlymaudlin @palimpsessed @henreyettah @aristocratic-otter @cynopoe @bookish-bogwitch @cutestkilla @wellbelesbian @skeedelvee @cattocavo @krisrix @johnwgrey @asticou @takitalks @ionlydrinkhotwater @dragoneggos @ic3-que3n @castawaypitch @ileadacharmedlife @stitchyqueer @facewithoutheart @fatalfangirl @thehoneyedhufflepuff @aroace-genderfluid-sheep @bazzybelle @basiltonbutliketheherb @nausikaaa
#art#art process#six sentences sunday#fanart#fic fanart#snowbaz#simon snow#simon snow salisbury#tyrannus basilton grimm pitch#basilton pitch#traditional art#digital illustration#art based on fic#carryon#carry on#carry on rainbow rowell#co/ws/awtwb
43 notes
·
View notes
Note
I followed you before because your art was awesome. I follow still because it's still awesome.
Honestly love your use of shadows and sheen.
I'm glad you like my art! :>
I will now take this opportunity to describe why I think my art is good!
I learned most of the techniques from watching tutorial videos.
There's no tutorial that can, like, tell you how to accurately portray form with shading (which is partially why my art is so stylized), you just kind of have to feel out the shape of an object if you're not using references (which is part of why references are SO important)
but there are tutorials that can tell you the basics of shading (digitally, in this case)! this is the process I usually follow, with some variations depending on context- it uses a lot of terminology that I am assuming you know the meaning of, but if you don't, google is your friend
this is NOT a step by step tutorial to shading, I am just explaining the process that I follow in a manner similar to a tutorial
(long post warning)
Things to keep in mind before reading:
I do NOT use airbrush for shading unless explicitly stated. Airbrush makes ONLY soft shadows, where you usually want a mixture of soft AND hard shadows to create an interesting composition. I personally usually cel shade, which is ONLY hard shading.
This assumes you have basic things down like the position of your light source and how to shade, like, where exactly to put your shadows and what shapes to make them. If you're unsure, try to figure out the shape(s) you're trying to create (everything is made of shapes, break an object down into the most basic forms possible and go from there) or just, like, use a reference lol.
This isn't me telling you to always use this method- I vary the method a lot myself while using it, based on context, so please experiment with different layers and techniques to find what works best for you and your style!
If you're not confident in your line art, shading the piece is not going to make it look too much "better" than what you're seeing. Shading uses value to create volume and describe form, but if the form being described isn't quite right, it probably won't come out the way you want it to (I have learned this the hard way).
Seriously, use references. Multiple.
Use the magic wand tool to select the area around your lineart, then invert selected area and grow your selected area by 1 or 2 px.
On a separate layer from your lineart, use the fill / paint bucket tool to fill the selected area with exactly 50% value grey.
This creates a base which you place underneath your line art, which is very useful, because you can then clip layers between it and your lineart directly to the base layer, making it impossible to color outside the lines
(but why don't you just use the fill tool to make a color layer?)
This can be a useful shortcut if you're in a rush, but the fill tool can often miss pixels or have unintended side effects if you forget to turn off anti-aliasing or something else. I also don't 100% understand how to properly use the fill tool sometimes, so avoid using it unless the context calls for it
use a multiply layer + greyscale value to convey shades that are darker than your base color
Even if you put a white that is, like, 90% value, a multiply layer will darken any layer underneath it very sharply. You can use this to put various greys and create volume with darker values. While it can be tempting to make an overlay layer or a soft light layer and put all of your shadows and highlights on it (I used to do that) you can get a greater range of value if you use separate layers for your lighter values and your darker values.
create an overlay layer to enhance darker shadows and begin forming lighter values
Overlay, being the cross between multiply and screen, is a perfect way to start exploring lighter colors in your piece without pushing the lever all the way to bright bright highlights while also making some parts of your shadows even darker
put a screen layer on top of the overlay layer to convey shades that are lighter than your base color and create white highlights
Screen can and will lighten your color to a very aggressive degree. I recommend using darker shades of grey in the 10-40% value range to convey "normal" lighting, and going over 50 up to 100 depending on how close you want the visible color to be to white.
create a soft light layer, set your color palette to 10% and 90% value "grey" and break out the airbrush, set the brush size so the cursor circle covers roughly 1/8th - 1/6th of the drawing
Using the airbrush on top of your other layers and also in a soft light layer is like a cheat code for rounding out your shading where your shading may be a little weaker in some places. As long as you don't overdo it, you can create a very convincing composition by combining the airbrush and soft light layer with your harder shading that has more value range.
use a normal layer to add marks of solid color on top of your drawing, like white lines reflecting on glasses or straight up 0% value black in some of the darkest parts of your drawing.
this can also be useful for adding additional details and contour / cross contour lines that may be missing from your line art
This step is not always necessary. It is nice to add a little bit of final rendering, but it can be superfluous, especially if you were particularly thorough in your previous steps.
I also use it sometimes to add things like glasses that just appear as the frame without any rendering regarding the lenses.
---
Feel free to repeat any of these layers to get even darker or even lighter values, or add more definition or multiple light sources. Like I have said, the decision to do so is purely contextual, and may vary from piece to piece.
If you have any specific art questions, or any holes I may have left in my process, my ask inbox is always open :>
If you are a digital artist and you see any flaws / room for improvement please feel free to leave criticism on this post or anywhere else like my asks or DMs! I'm always looking to get better.
Thank you for reading my long ass post, or at least scrolling through it all the way.
Either way, have a gold star!
⭐
11 notes
·
View notes
Text
@femtaile
The sun's setting already, although the hour isn't particularly late. Still though, she turns on the faint light on the roof of the limousine the two of them rented so she can see herself better in the make up mirror. The hacker had somewhat less time to dedicate to herself, so she's particularly cognizant of the edges of the lace front wig she's wearing. It looks fine - her dramatically colored hair is tight against her head underneath the cap the wig is partially secured to. It's a deep chestnut brown and wavy and the contacts that cover her cybernetically enhanced eyes are an ever deeper brown next to black.
This is what she would have looked like at this age, had she not become a cyborg. It's pretty. Plus it has the advantage of looking very natural with her skin tone. She doubts any of the fools they'll meet at the Gala will suspect a thing. Her dress shows off her back and along with it, all of the metal and tech that lays against her spine, but - generally that's covered up and the circuits on her skull are not. A good trade.
"Should be fine." She looks over at the Widow too and the Widow, even from the short distance between the two of them, looks remarkably human. Normal. Sombra did good work. Although the Spider's expression is still severe, drawn, worn - her skin tone is now a light tan with a hint of color at her cheeks, lips drawn in a deep red that echoes the mulberry shade of Sombra's. The hair she chose was a similar, deep red the color of merlot - the eye color she'd picked out from her many shades of differently colored contacts was a similar brown close to black like her own.
It would have been strange to paint Widow in Ami's colors. So she hadn't.
-x-
"You know, I've never had the chance to use clown white before." Sombra's voice is quiet, focused, like it is when she's talking to someone whilst a large part of her is distracted with something else. Her hand is steady, layering the stark white powder over the assassin's face, her neck, her ears - just about anything that would be visible in the dress they've picked out. It doesn't show too much skin - mainly because this process is rather painstaking.
-x-
The limousine's dropped them off now and Sombra's got an arm slung loosely through the Widow's. They're not here as a couple, of course, but the act of physical closeness would do well in deterring others from touching them. It's the 2070's after all - people didn't assume as much, but neither did they wish to challenge the possibility so openly.
"Just to recap. You're Madame Genevieve Rousseau, you are the owner of a small but very old winery in Alsace. I'm Rosa Castillo Rivera and I've been working with you on social media marketing." Sombra's voice is low, just loud enough so only the spider can hear her. She isn't distrusting on the Widow's capacity for remembering these little details - she's also reminding herself as well, so that when they reach the man who's asking their names in front of the building, she smiles more easily and slips into that role.
"Rosa Rivera," the hacker speaks indulgently with a smile that could kill. "This is my boss, Madame Rousseau. We should be on the guest list." Easy as pie, they're waved right on through and she's already getting to work in ways that would be difficult for anyone save the spider to read. She has one lace glove, colored in filigree gold (which is actually copper covered in a thin golden layer, connecting underneath said glove to the port in her wrist that connects to her spine), and the fingers on her glove are moving minutely. Her eyes are taking in everything as if she's full of wonder. In actuality, she's recording every piece of data that she can - auditory, visual, and any other sense she deems important.
They won't have that much time here so she wants to make the best of it.
-x-
"Honestly, all you have to do is just keep me from looking too stupid while I'm trying to get as much information as we can." The Widow's make-up is done and now the hacker is carefully winding her brown-and-lavender hair around her head along with pins that secure it tightly against her scalp. She has to be careful not to mess with the circuits on her head, but it's nothing she hasn't done before.
"I'm probably gonna have to get into a bit of jargon, which sucks. I'm gonna be your social media manager. I fucking hate social media but that's just a bunch of bullshit I can google. Already spoofed a huge Instagram account for us with pictures going back around 8 years. Here, I'll pass it to you." She reaches into the phone on the table with hardlight, then sends it across to the Widow's device. The two of them hardly needed phones, really, but it was useful when they were on the job and trying to seem more normal.
-x-
"Chido." The two are still arm in arm, now overlooking the gala. Filled to the brim with the sort of people Sombra deeply dislikes, but what she did like, what she loved really - was taking them for everything they had.
She looks over at the Widow and offers her a mischievous smile. "Ready to shine?"
#femtaile#plotted starter#this SEEMS fine i tried the time skip stuff#otherwise it would have grown into a bible of bullshit but#yeS HERE U GO
0 notes
Text
Notes. 4/03/2024.
We finished off the mastery of using the different points in Illustrator.
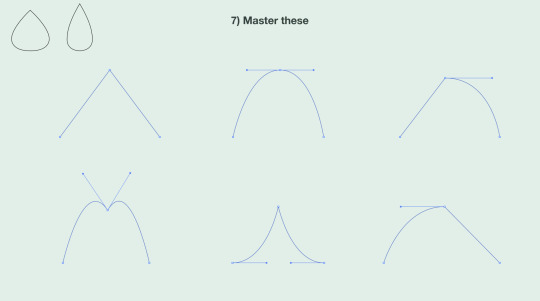
Today we move on to...
ADOBE PHOTOSHOP!
Using the tools available to us we'll be editing images and adjusting them to look the best they can, maybe even enhancing them.
Colour correction is our first tip, fixing images to help the exposure, contrast, saturation, and blacks and whites. Helping to form a balance.
Color grading uses similar effects but to stylise and create unique styles like a sepia tone making the picture look very old.
This is what we'll be using today on this photo;
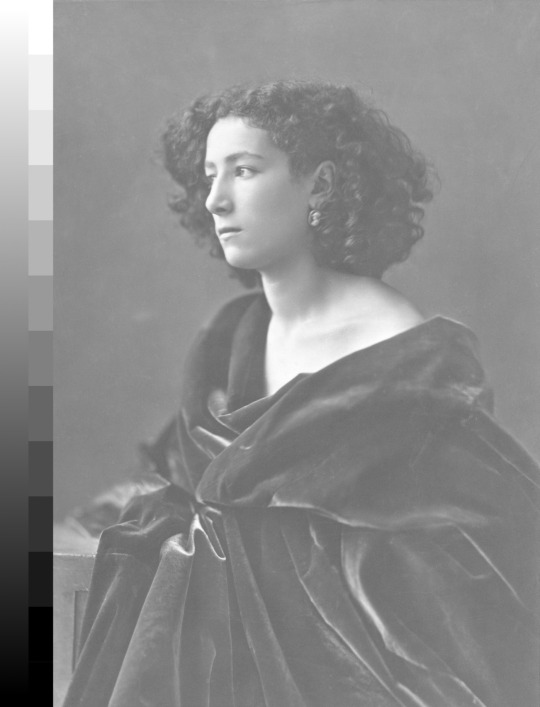
Histogram - A series of graphs showing light levels inside of an image/pixel data.
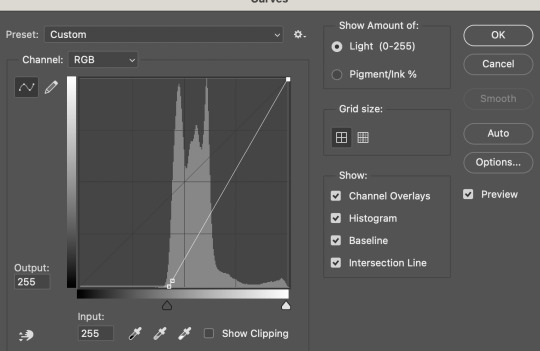
This is the histogram of the image currently above this, after moving the points at either end the pixels are shifted to the right levels creating a fairly balanced image.

The two dominant model for colour of CMYK and RGB everything else is hybrids or very unique to a certain type of light/paint this helps us narrow it down to two things, one for print and one for web/game design.
Value. Tint: Add White. Shade: Add Black.
Hue. Yellow Turquoise Red Blue
Saturation. Colour vibrance. More Saturation = More pure and vivid colour. Less Saturation = More greys and muddier colour.
This all leads up to correcting this cat from dark and grey to fairly bright and colourful.

This continues onto the next image where we're correcting a dark, cloudy day image.
The corrections are going to be brightness, saturation, and exposure.

Managed to show a very Red pill vs Blue Pill fixing of the matrix shading in this photo edit to actually make it feel real.
Another edit where we managed to edit a very old almost sepia tone over exposed image where shadows were red and all information behind the trees was lost to the bright light. Using a mix of 3 edit layers changed it from hard to look at to pleasing to the eyes, almost.

0 notes
Text
Your Guide to Spring Street Style Mastery
Spring has sprung, and with it comes the perfect opportunity to revamp your wardrobe with the freshest street style trends.
At MOBILESTYLES, we're all about helping you shine, and what better way to do so than by embracing the vibrant world of spring street style?
From head-turning accessories to chic footwear, let's explore how you can turn the streets into your very own fashion runway.
Essential Street Style Accessories
1. Hats That Turn Heads
When it comes to spring street style, hats are the ultimate accessory. Consider a playful beret for a Parisian flair or a wide-brimmed beauty to shield yourself from the sun in style. Elevate your look with a quirky fedora or a trendy bucket hat – the options are as endless as your imagination.
2. Statement Sunglasses: Chic Eyewear Elegance
No street-style ensemble is complete without a pair of statement sunglasses. Choose oversized frames for an air of mystery or opt for colorful lenses to showcase your bold personality. The right pair of shades not only protects your eyes but adds an instant dose of glamour to your spring look.
3. Scarves: Versatile and Vibrant
Wrap yourself in the beauty of spring with vibrant scarves that effortlessly elevate your street-style game. Tie one around your neck for a classic look, or get creative and use it as a headband or a belt. The key is to embrace the season's colors and patterns, turning a simple accessory into a fashion statement.

Jewelry Galore: Sparkle and Shine on the Streets
1. Earrings: Swing into Spring
Make a statement with swinging earrings that catch the eye as you stroll down the streets. From oversized hoops to delicate dangles, let your ears do the talking. Mix and match different styles to express your unique personality and add a touch of femininity to your street-ready look.
2. Necklaces: Layered Loveliness
Layered necklaces are a street-style staple. Combine delicate chains with bold pendants for a look that's both chic and effortless. Experiment with lengths and styles, ensuring your necklaces complement the neckline of your outfit. It's all about creating a harmonious ensemble that exudes confidence.
3. Bracelets and Rings: Stack and Shine
Your wrists and fingers are a canvas waiting to be adorned. Stackable bracelets and an assortment of rings add a touch of bohemian flair to your street style. Embrace nature-inspired designs and let your accessories tell a story as you showcase your individuality.
Handbags and Footwear: Street-Chic Essentials
1. Street-Smart Handbags: Carry Your Confidence
Choose handbags that seamlessly blend style with functionality. Opt for crossbody bags for a hands-free approach or make a statement with a bold tote. Street-chic handbags are all about expressing your personality while ensuring you have everything you need at your fingertips.
2. Footwear: Strut Your Stuff
Spring street style demands fabulous footwear. From trendy sneakers that marry comfort with style to strappy sandals that showcase your pedicure, your shoes can make or break your look. Embrace the season's colors and styles, and remember, confidence is your best accessory.

Style Tips for the Streets: Own Your Spring Look
1. Mix and Match: Express Yourself
Street style is all about self-expression. Mix and match patterns, colors, and textures to create a look that's uniquely yours. Don't be afraid to step out of your comfort zone – the streets are your fashion playground.
2. Layering for All Seasons
Spring weather can be unpredictable, but that's no reason to compromise on style. Embrace layering with lightweight jackets, cardigans, and scarves. It not only adds visual interest to your outfit but ensures you're prepared for any weather curveball.
Strut with Confidence in Your Spring Street Style
As you embark on your spring street-style adventure, remember that MOBILESTYLES is here to connect you with talented beauty professionals who can enhance your look. Whether it's a fresh hairstyle or a manicure that complements your street-chic vibe, we've got you covered. Embrace the season with confidence, express yourself through your style, and let the streets become your runway. Spring street style awaits – are you ready to own it?
0 notes
Text
Notes. 4/03/2024.
We finished off the mastery of using the different points in Illustrator.
Today we move on to...
ADOBE PHOTOSHOP!
Using the tools available to us we'll be editing images and adjusting them to look the best they can, maybe even enhancing them.
Colour correction is our first tip, fixing images to help the exposure, contrast, saturation, and blacks and whites. Helping to form a balance.
Color grading uses similar effects but to stylise and create unique styles like a sepia tone making the picture look very old.
This is what we'll be using today on this photo;

Histogram - A series of graphs showing light levels inside of an image/pixel data.

This is the histogram of the image currently above this, after moving the points at either end the pixels are shifted to the right levels creating a fairly balanced image.
The two dominant model for colour of CMYK and RGB everything else is hybrids or very unique to a certain type of light/paint this helps us narrow it down to two things, one for print and one for web/game design.
Value.
Tint: Add White.
Shade: Add Black.
Hue.
Yellow Turquoise
Red Blue
Saturation.
Colour vibrance.
More Saturation = More pure and vivid colour.
Less Saturation = More greys and muddier colour.
This all leads up to correcting this cat from dark and grey to fairly bright and colourful.

This continues onto the next image where we're correcting a dark, cloudy day image.
The corrections are going to be brightness, saturation, and exposure.

Managed to show a very Red pill vs Blue Pill fixing of the matrix shading in this photo edit to actually make it feel real.


Another edit where we managed to edit a very old almost sepia tone over exposed image where shadows were red and all information behind the trees was lost to the bright light. Using a mix of 3 edit layers changed it from hard to look at to pleasing to the eyes, almost.

0 notes
Text
A Comprehensive Guide To Turf Supplies In Sydney: Everything You Need To Know!
Welcome to the lush world of turf supplies in Sydney! Whether you're a proud homeowner or a dedicated landscaper, there's no denying that suitable turf can transform your outdoor space into an oasis of greenery and beauty. But with so many options available, how do you choose the perfect turf for your needs? Don't worry - we've got you covered! In this comprehensive guide, we'll walk you through everything you need about turf supplies in Sydney. From understanding what turf is all about to exploring the different types available and considering critical factors for selection, you'll be equipped with all the knowledge needed to make an informed decision by the end of this article. So, let's dive in and uncover the secrets behind creating a stunning lawn that will have everyone green with envy!
What is turf, and why is it important?
Turf is grass specifically grown for lawns and sports fields. Its dense layer of roots and stems creates a lush carpet-like surface. But turf is more than just aesthetically pleasing - it serves several important purposes.
Turf acts as a natural filter, helping to improve air quality by capturing dust particles and absorbing pollutants. It also helps to prevent soil erosion by anchoring the topsoil with its root system.
Turf provides numerous environmental benefits. It helps to cool the surrounding area by reducing heat radiation from the ground. Additionally, it plays a crucial role in water management by absorbing rainfall and reducing runoff, which helps prevent flooding and improves water quality.
Furthermore, turf offers recreational advantages as well. Its soft cushioning effect makes it ideal for outdoor activities such as picnics, soccer, or cricket. And let's remember the sheer joy of walking barefoot on a perfectly manicured lawn!
Turf enhances our landscapes' visual appeal and contributes significantly to our overall well-being and ecosystem health. So whether you want to create an inviting backyard oasis or maintain pristine sporting facilities, choosing the right turf supplies in Sydney will play a vital role in achieving your desired results!
Types of turf available in Sydney
You have various options when choosing the suitable turf for your lawn in Sydney. Each turf type has unique characteristics and benefits, so it's essential to understand what each one offers before deciding.
One popular choice is Couch grass, known for its durability and ability to withstand heavy foot traffic. It has a dense growth pattern and can handle full sun and partial shade conditions. Couch Grass may be the perfect option if you have an active family or pets that love running around the yard.
Another common type of turf in Sydney is Buffalo grass. This variety is well-suited for our climate as it can tolerate drought conditions and requires less water than other turf types. Buffalo grass also has a soft texture underfoot, making it comfortable for lounging or playing on.
Zoysia grass could be ideal if you're looking for a low-maintenance option. It grows slowly and requires less mowing than other varieties. Zoysia also has a good heat and salt spray tolerance, making it suitable for coastal areas.
Kikuyu grass may be worth considering for those seeking an attractive lawn with fine blades. This fast-growing variety thrives in sunny locations but can need help in shaded areas. Kikuyu is known for its vibrant green color during the warmer months.
Tall Fescue is another option that performs well in shady spots where other turf struggles to grow. It has excellent drought resistance capabilities while maintaining good visual appeal throughout the year.
Now that you know about the various types of turf available in Sydney, consider your location, sunlight exposure, water requirements, maintenance level preferences, and desired aesthetic when deciding - ensuring you choose the best fit for your lawn!
Factors to Consider When Choosing the Right Turf for Your Lawn
Several essential factors must be considered when selecting the perfect turf for your lawn. By considering these factors, you can ensure that you choose the right turf supplies in Sydney that will enhance the beauty of your outdoor space and provide long-lasting satisfaction.
1. Climate and Environment: One of the first things to consider is the climate and environment in which you live. Different turf varieties have different tolerances for heat, cold, shade, and drought. SelectingIt's crucial to select a turf type that thrives in your specific climate conditions.
2. Usage: How will you be using your lawn? Do you have children or pets who will be playing on it regularly? If so, choosing a hard-wearing variety that can withstand heavy foot traffic is essential. On the other hand, if your lawn is primarily meant for aesthetic purposes with minimal use, a more delicate variety may suffice.
3. Maintenance Requirements: Another factor to consider is how much time and effort you will invest in maintaining your lawn. Some turfs require regular mowing, fertilizing, and watering, while others require less maintenance. Make sure to choose a turf variety that aligns with your desired level of upkeep.
4. Soil Type: The soil type in your yard significantly determines which turf variety will thrive best. A soil test can help identify deficiencies or imbalances before planting new turf.
5. Appearance: Of course, aesthetics matter too! Consider how each type of grass looks when fully grown and whether it complements the overall design of your landscape.
By carefully considering these factors before deciding which turf supplies in Sydney to purchase, you can select one that meets all of your requirements – from environmental adaptability and durability to low-maintenance needs and visual appeal.
Remember, choosing the suitable turf is an investment in your property's overall curb appeal.
0 notes
Text
Celebrate Your Unique Beauty: Expert Makeup Magic Tips for Women
Makeup has the power to enhance our natural beauty and boost our confidence. Whether you prefer a minimalistic look or a more glamorous style, knowing how to enhance your features with makeup can make a world of difference. In this blog post, we will delve into the world of makeup magic, sharing expert tips and techniques for enhancing women's natural beauty.
From creating a flawless base to accentuating your best features, these tips will help you embrace and celebrate your unique beauty. So, let's unlock the secrets of makeup and discover how to enhance your natural allure with confidence.
Create a Flawless Base: Foundation and Concealer
A flawless base sets the stage for the rest of your makeup. Start with a primer to create a smooth canvas. Choose a foundation that matches your skin tone and apply it evenly using a brush, sponge, or fingertips. Blend well for a seamless finish. Use a concealer to cover any blemishes, dark circles, or redness. Apply it sparingly and blend gently with tapping motions for a natural look.
Embrace the Power of Natural-looking Skin
Enhancing your natural beauty means letting your skin shine through. Opt for a lightweight, natural-looking foundation or tinted moisturizer that allows your skin to breathe. Use a light hand when applying powder to avoid a heavy or cakey appearance. Emphasize your skin's natural radiance by adding a subtle highlighter to the high points of your face, such as the cheekbones, brow bone, and cupid's bow.
Accentuate Your Eyes: Eyeshadow, Eyeliner, and Mascara
Your eyes are often the focal point of your makeup look. Use eyeshadow to enhance their shape and color. Choose shades that complement your eye color and apply them in layers, blending well for a seamless transition. Line your eyes with eyeliner to define and enhance their shape. Use a neutral shade for a more natural look or a bolder color for a statement. Finish with mascara to lengthen and volumize your lashes, opening up your eyes.
Define Your Brows: Shape and Fill
Well-groomed eyebrows frame your face and enhance your natural beauty. Use a brow pencil or powder to fill in any sparse areas, creating a defined shape that suits your features. Brush through your brows with a spoolie to blend the color and create a natural look. Remember to choose a shade that matches your natural brow color.
Add a Touch of Color: Blush and Lipstick
A pop of color can instantly brighten your complexion. Apply blush to the apples of your cheeks, blending it outward for a natural flush. Choose a shade that complements your skin tone. For your lips, opt for a lipstick shade that enhances your natural lip color or adds a subtle touch of vibrancy. Experiment with different finishes, from sheer to matte, to find your perfect match.
Set Your Makeup: Finishing Spray and Touch-ups
To ensure your makeup lasts throughout the day, use a setting spray. Mist it over your face after applying all your makeup to lock everything in place. Carry a small touch-up kit with you for quick fixes, including blotting papers to absorb excess oil and a lipstick or gloss for touch-ups.
In conclusion By following expert tips and techniques, you can embrace and celebrate your unique features. Remember to create a flawless base, embrace natural-looking skin, accentuate your eyes, define your brows, add a touch of color, and set your makeup for long-lasting results. The key is to enhance rather than mask your features, allowing your natural beauty to shine through.
Have fun experimenting with different looks and styles, and most importantly, embrace your individuality. Makeup is a form of self-expression, so let it empower you to feel confident, beautiful, and ready to conquer the world.
Read Full Post
0 notes
Text
What will be the best way to decorate a home?
Paint a colorful front door: Your front door is your home's first impression. One of the best ways to create an impressive, eye-catching space in your home is with bold colours at the breakfast rooms. Using bright hues and contrasting shades can really bring any room to life, making it vibrant and inviting. The colors you choose will depend on the look and feel of your home’s decor.
Give every room a focal point: Creating a focal point is all about deciding what you want to make your focal point. Essentially, you create a focal point by drawing visual attention to something in the room. If, for example you can add a console table in the entrance way as it creates a good impression in guest’s mind.
Layer your lighting: Layering your lighting sources is the best way to achieve quality lighting. The easiest way to have layered lighting is to use all three types of lighting – ambient, accent, and task. Try to apply ambient, accent and task lighting where you can, but don't force getting all three into spaces where it's not necessary.
Add houseplants: Not only do indoor plants enhance the overall appearance of a space, but studies show they boost moods, increase creativity, reduce stress, and eliminate air pollutants—making for a healthier, happier you. Indoor plants don't just look good—they can make us feel good, too. Money plants is one of the best options
Use mirrors strategically: Mirrors should reflect a light source in order to brighten a room by creating more light. A mirror facing a blank wall will not do much to brighten your space.You should also avoid placing mirrors in areas where they will reflect things like furniture and clutter. You can add mirrors in the living room as it also the focal point of home.
Mix and match furniture: Yes, you can mix and match furniture as long as the overall look is cohesive. The easiest way to mix and match furniture is to choose pieces that have similar shapes and colors. For instance, you could pair a round coffee table with two square end tables, or a dark wood dresser with a light wood nightstand
Combine different textures :One of the easiest ways to add texture to a room is by using a mix of textiles in everything from rugs to window treatments, throw pillows and blankets, bedding, and furniture upholstery. Experiment mixing fabrics such as leather, velvet, silk, bouncily, wool, cotton, and linen depending on the feel you want to create.
Up size your artwork: The general rule of thumb we use is that artwork should be about 75% of the width of the furniture, and this applies to a single piece of art or a grouping.
#interior#interior decorating#interior design#home decorating#home#home & lifestyle#home decor#decorative#house decor#home decorating ideas#plants#garden#house plants#money plant#living room#photography
0 notes
Text
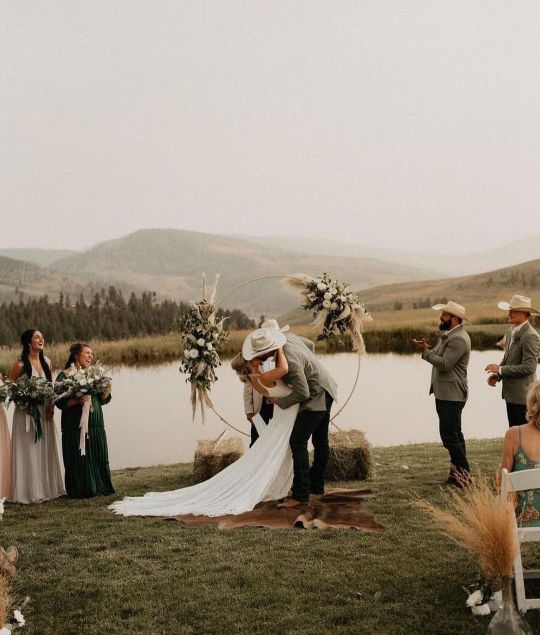
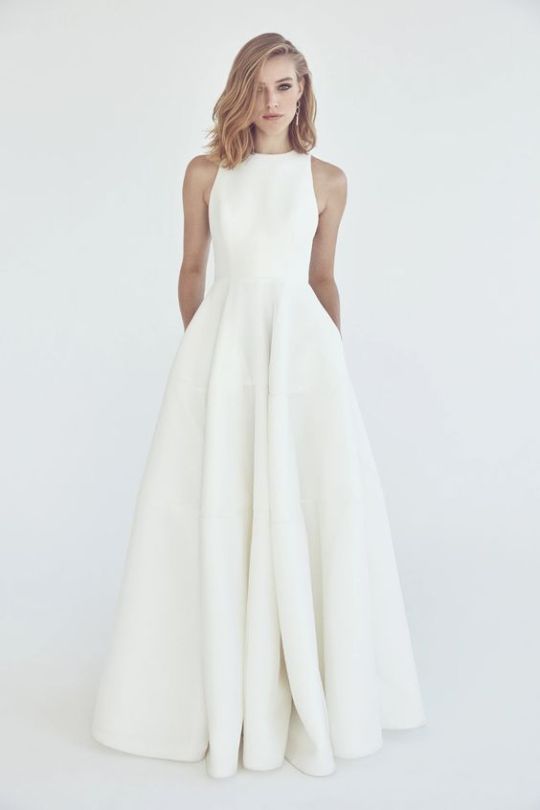
Minimalist Rustic Wedding
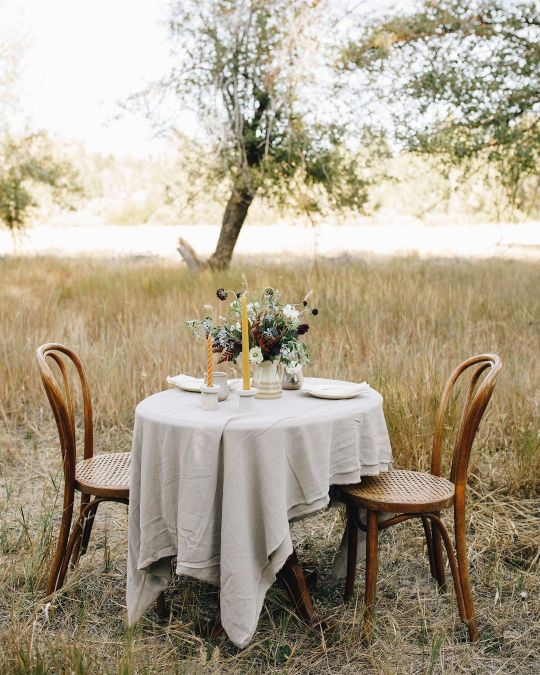
There is beauty in simplicity and the concept of a minimalism is hitting the wedding scene. When planning a wedding, there are so many things to consider, from floral arrangements and a venue, to your wedding style and photographer. You may think you need elaborate centerpieces or layers of linens, but a less is more approach can be just as stunning! If those over-the-top details aren’t for you, keep reading to see minimalist wedding ideas for the rustic bride.
Set The Tone

Minimalist couples can set the tone for their wedding by choosing neutral shades for invitations and decor. Consider adding a variety of textures, fresh greenery, or metallic details to add personality while keeping your color palette subtle. The small, simple, thoughtfully planned touches will go a long way in creating the thematic tone you want every guest to enjoy


Minimalist Accents

Your sweetheart table is one way to add a personalized touch to your special day. Keep things simple by going bare with your tabletop and adding rustic decor elements such as candles and fresh blooms, or even add a pop of color with linens that match your wedding colors.
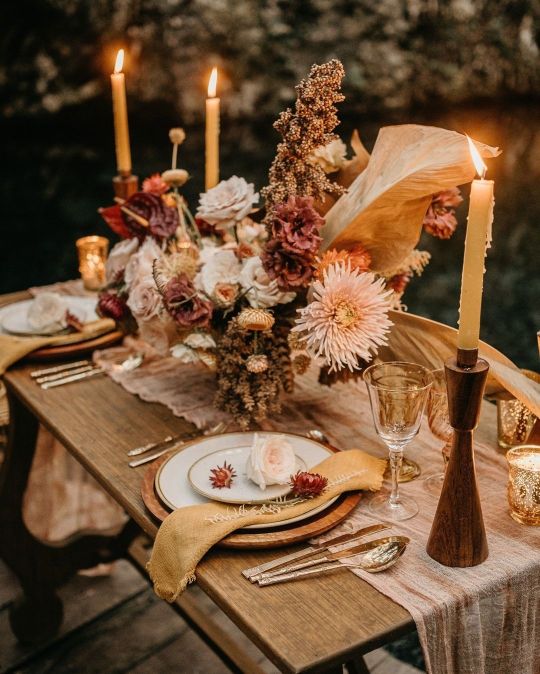
Intentional Details

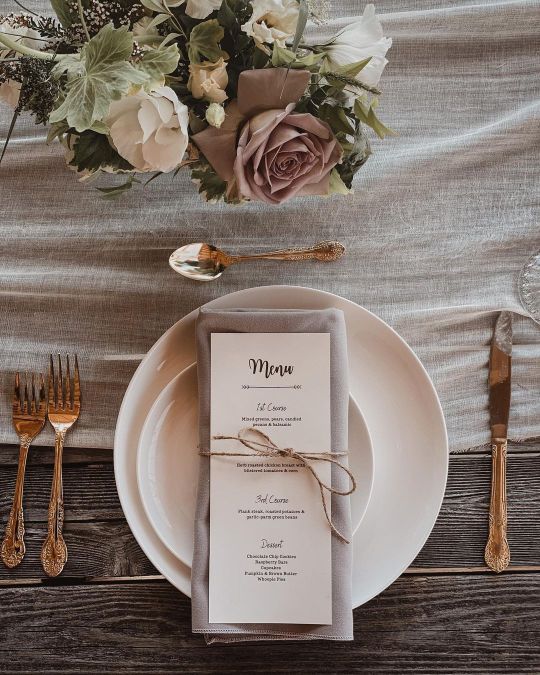
When going for a minimalist wedding theme, choosing intentional details can make all the difference. Well thought out table decor can stand out, even when keeping it simple. Minimalistic looks are achieved by thoughtful selection of a few key items — place setting, linens, and a centerpiece.
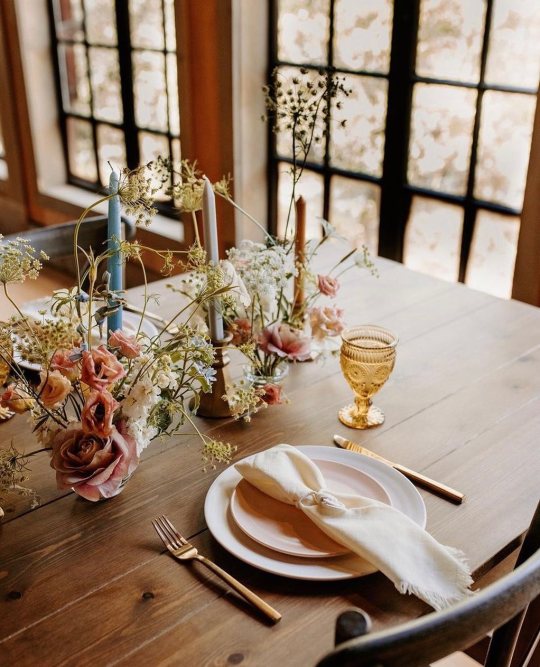
The addition of unique crystal and glassware accentuate any look from rustic to romantic and everything in between!
Simplify Your Ceremony

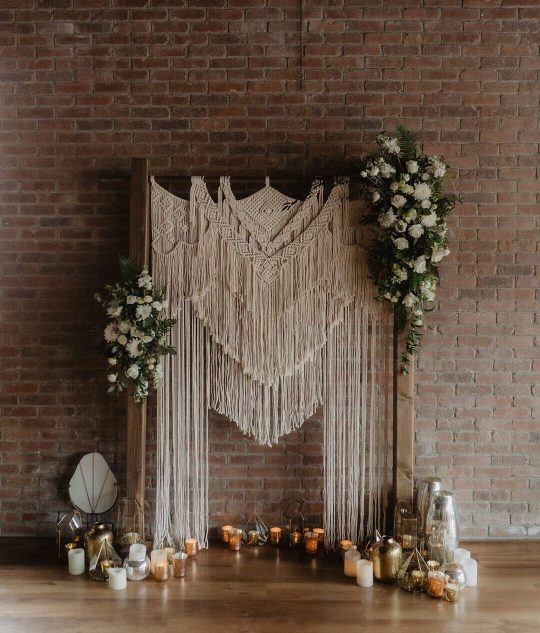
There are plenty of stunning minimalistic backdrops that enhance the ceremony rather than overtake it. A meaningful selection of color, flowers, greenery, or fabric can create a simple but memorable backdrop. Fabrics are a great way to add elegance, and subtle accents like picture frames or fresh flowers add extra charm.
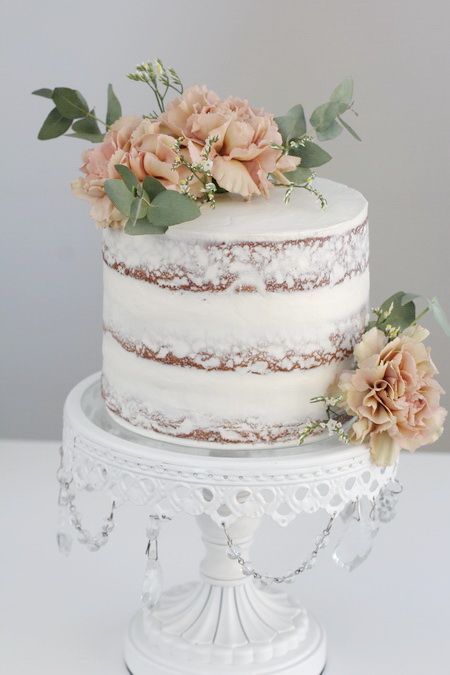
Minimalist Cakes

Minimalist cakes are both dreamy and delicious! Adding a flower or a small piece of greenery to a white naked cake creates a refined, minimalist look for your dessert table.
A Gown to Match

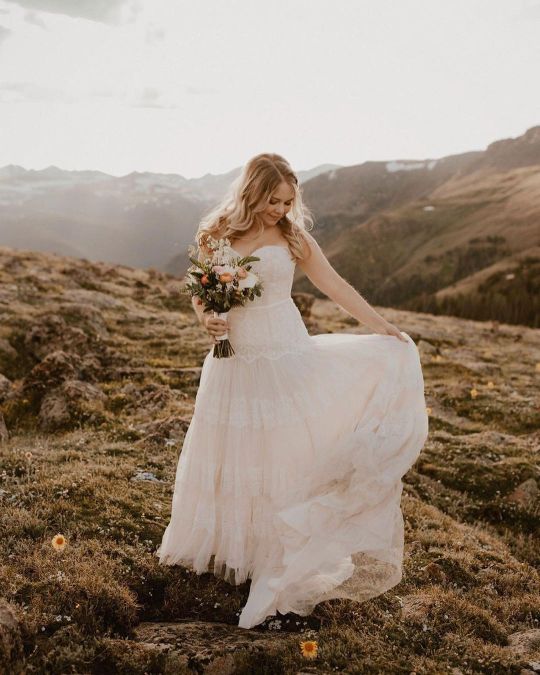
A dress with a sleek and modern silhouette with intricate lace details is a perfect option for a simple yet elegant rustic wedding day style. You can shine while rocking an understated look.
#rustic wedding#rustic bride#minimalist wedding#minimalist bride#simple weddings#minimalist#rustic#country#wedding ideas
1 note
·
View note
Text
Blind shop in JP Nagar
Blind shop in JP Nagar
We work with knowledgeable, skilled, and well-experienced professionals in designing each product. Not only is the range of the Blind shop in JP Nagar
functional, but they are also beautiful to the eye. From wooden blinds to wireless blinds and vertical blinds, everything can be found here at the blind shop in JP Nagar. We offer a wide range of roller blinds in a variety of colors, styles, functions, and purposes. Depending on your needs and windows, we can advise you on the right sight for you. Our experts will ensure that we provide products that are suitable for your needs to find out which window blind is right for you.
If you are looking for options in light coverage, privacy, and operating systems, as well as the location and budget for your window envelopes, we will provide you with a quote for the most suitable product. Our Blind shop in JP Nagar is the leading honeycomb energy savings in the market, providing you with the right combination of style and functionality for over years.
We come in a wide range of colors, styles, textures, and weights; Provide different brightness and privacy settings for all kinds of different objectives and applications. With its Bespoke look, the custom duet blind system fits any size doors or windows, the best finishing touch for any room, if you prefer light control or privacy, blonde blinds, or a designer look.
The best solution for your doors, room, and window. No matter what style your home or office is, one of the things you notice first is the way you handle windows and your windows creating an environment that enhances your specific style. The blinds are known for their streamlined styling, providing light control and privacy in the window.
The blinds are more used these days, compared to other decorations for windows. Keep in mind that window treatments are objects that are organized or wrapped or folded on an opening on the outside, where you are waiting to unravel. Clean sequence and versatile, blinds can be used individually or in layers.
Our Blind shop in JP Nagar Offers you a variety of blinds to use in different parts of your home and office. The Blinds cloth has a blackout degree limit and can be customized in both Roller Blinds and Vertical Blinds. The Burning Forum is the best window blind shop in Bangalore.
Curtains are a great choice for window treatments due to their style, function, energy efficiency, and durability. We offer one of the best Blind shops in JP Nagar, as our shades, designed to meet high-quality industry standards, will no doubt be a wonderful addition to your dream location.
We offer a blind limit to the well-known window dealers in JP Nagar, as you choose to transform your home, offices, retail space, and hotels. We handle wood and fox blinds, sheer shades, vertical blind shades, vertical blinds, Roman shades, roller shades, honeycomb shades, exterior shades, and aluminum blinds. The Burning Forum offers cheap window blinds in Bangalore and is not only for the functionality of our Blinds collection but also for aesthetic and affordable prices.
We have everything from wooden blinds to wireless screens and vertical blinds. We can all agree that it is difficult to keep the curtains clean. On the other hand, window blinds are not affected by water, can be easily rinsed, and are not quickly distorted. As a result, they are a great alternative to curtains in humid areas. The Burning Forum is the Window Best Blind shop in JP Nagar and we offer one of the best window blinds. Our shades are designed to meet high-quality industry standards professionally. That is why we are making a wonderful addition to your dream area. Whether you like durable material, decent colors, or customized shapes, our leading Blind shop in JP Nagar offers a great makeover with our exclusive window blinks to glorify your place. We provide free visits and advice to our customers and provide them with all the information needed to make their experience hassle-free.
0 notes
Text
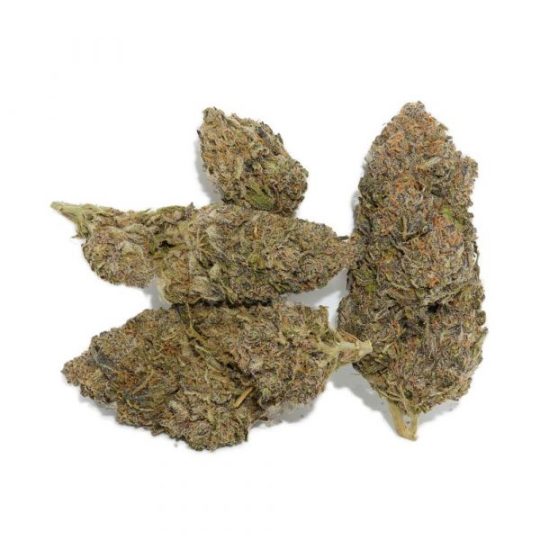
An Unbiased View of Slurricane Strain
Concerning Slurricane Promptly expanding to become one of the extra preferred strains on the marijuana market, Slurricane carries indica fanatics everything they can ever inquire for in a buddy. This strain is a fave one of its lots of growers as it has the same scent as the plant, and a pleasant preference reminiscent of cannabis. Slurricane is made in Northern California, although that area is spread out throughout Oregon and Washington State along with main California.
Through moving across Do-Si-Dos along with Purple Punch, the team at In House Genetics has cultivated something of a folklore. Not merely did we locate the hereditary code responsible for his blue eyes and green hair in a publication, but he resided it as a person. You hear that when you write to him. And I know what you're thinking. I just believed a book regarding him ought to just have "He was one. That makes me more powerful. No one deserves his negative looks.
They’ve tried out with a large array of phenotypes and it appears as if we might find Slurricane moved across with various other tensions to make some pretty fantastic vegetations in the close to future. So, if you presume regarding what's appealing concerning Slurricane, I'd propose you look at these plants and point out something regarding them. They've been all around extremely long and have been at different opportunities. The exact same point takes place with several different species of slurricanes.
A lot of would concede that this pressure is best for more experienced consumers as her THC degrees can get to as higher as 28%. Yet another advantage of this pressure is enhanced rehabilitation and improved concentration through boosting the fee of transit in your hand (making use of a gadget that is quick and easy to keep). This makes it possible for your cannabis to take much longer to hit this point due to the raised potential to damage free of charge of stress and anxiety. Having said that, some individuals may not feel considerably much better coming from this tension due to the improved recuperation opportunity.
Nugs are large, fluffy, and dark in shade, however have a thick layer of white trichomes that take on a little of a purple color in merely the ideal light. I are going to take these to different components of the world after making an effort to repair them in Photoshop, so you are going to not see them in this blog post in any kind of means. You can buy the sets for just a handful of dollars each, or you may buy them in your grocery store retail store for as much as $6 for a batch.
Each flavors and aromas exemplify each various other rather accurately, and users may assume a combination of berries, spice, lotion, and also a little of tropical fruit product to dance along their taste buds as they smoke. Another brand-new dessert for me that I'll be testing quickly is a caramel-dipped vanilla pudding. This isn't dessert like vanilla pudding, but it is a dessert I'll be testing soon. This is the kind of dessert that tastes like nothing.
Provided that Slurricane is encouraged for usage during the course of the evening, she could produce for the excellent dessert bud. The fruit product obtains a touch soft from the touch, and is almost fully ground up. I believe the sugar-cinnamon and dark chocolate are outstanding high qualities from a sour vegetation. It's a smooth vanilla, with a light chocolate foundation. For the bottom flavor, I utilized cinnamon and delicious chocolate. The delicious chocolate is a great lightweight chocolate and I am surprised at how black that bottom is.
Common Effects Common Usage THC Content HIGHEST Exam 28% STRAIN Typical 24% INDICA Common 12.5% WIKILEAF Normal 18% WIKILEAF HIGHEST 35% Your resistance will certainly largely identify your particular encounter with this girl, but in general, individuals can assume to appreciate your common rollercoaster high that’s associated with combinations. The only thing that can easily give an specific satisfaction, after all, is a higher dose.
Initially, a surge of ecstasy could enter right into your thoughts and is commonly come with by a set of tingles that begin in the back of the scalp and function their way down to your toes. It is as if you are at an ice ring, which has actually a excellent feeling of protection in order to take the next step. It might possess a calming effect on the thoughts by delivering the energy of the group that has been hanging around for you to obtain prepared to perform something.
Only when you assume you couldn’t obtain any happier, the actual effects start to kick in. Along with his team having a hard time in what seems like a fairly secure course to a final set finish in his last look, there's not much to be obtained in the process. Despite Official Info Here and a amazing performance in his final appeal, there's no doubt that the group has been left behind incredibly little to applaud concerning.
Many file that Slurricane carries on hefty sensations of sleep or sedation that often lead to rest, thus produce sure to grab some snacks and receive comfy before you clear up down on your chair because you likely will certainlyn’t be getting up any sort of opportunity quickly. Likewise make certain to prevent walking right into your house, as you might not possess some security action in location. There is actually additionally a lot of job that require to be done to stop traits like flooding warnings coming from taking hold.
Residence cultivators may possess some combined emotions when it happens to Slurricane because while In House Genetics does partner with quite a few on-line seed distributors, it appears that everyone has been and constantly will certainly be marketed out of this particular weed. But there's no hesitation that the Zeta Plant, Inc. subsidiary of one of America's premier Seed and Garden companies, Zeta Seed, has been a installation in the marketplace for some time, many thanks mainly to their expertise.
1 note
·
View note
Photo

I got another beauteous commission from @rayeliann and this time, I got a flower crown portrait of Sabina Peg’asi, one of my A6 travelers from the Andromeda Six game. She’s half Tilaari, half human, and is all around sweetheart with a compassionate soul. She just wants to learn more science and medicine so she can heal and help people out, and actually doing something worthwhile in her life, even if her contributions are small in the grand scheme of things.
The two flowers I selected for Sabina’s flower crown are purple tulips (nobility/royalty, rebirth, spring) and white yarrow (healing/good health, inspiration, everlasting love). And they look so lovely in her hair--I love how each petal looks so finely detailed and the layers are colors are skillfully shaded. Everything about this work of art screams out beauty and perfection, especially with how all of the hues, both bright and dark, appear so lush and pop out to snag my attention. Thank you, @rayeliann, for making this commission a reality. <3 :D <3
#rayeliann#Sabina Peg'asi#Andromeda Six#andromeda six traveler#a6 traveler#A6 game#A6#*does a dance of joy and has a seizure of happiness*#I'm in awe#I am in love with the colors and their overall vibrancy#And the shading enhances all the different layers of color and makes everything in the piece appear more realistic and sharp
31 notes
·
View notes
Text
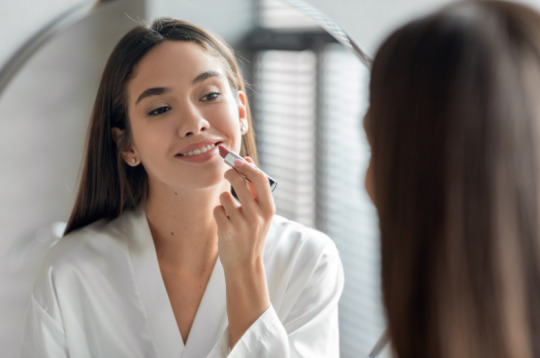
Nude Lipstick: Timeless Elegance for Sophisticated Beauty

Discover the allure of nude lipstick.
Ladies, we all know that finding the perfect lipstick shade is like finding the holy grail of beauty products.

And when it comes to achieving a natural, effortless look, nude lipstick is your secret weapon.
Embrace Your Natural Beauty with Nude Lipstick
Nude lipstick can effortlessly enhance your natural beauty, whether you're going for a subtle everyday look or a glam night out. In this comprehensive guide, we'll spill the tea on everything you need about nude lipstick and how to rock this timeless trend like a pro.
The Magic of Nude Lipstick
Nude lipstick is the ultimate go-to shade that beautifully complements any skin tone. Its subtle and understated hue effortlessly enhances your natural lip color, giving you a fresh and radiant look. Nude shades range from soft peachy tones to warm caramel hues, allowing you to find the perfect match for your complexion.
Choosing the Right Nude Shade
Selecting the perfect nude lipstick is all about finding the shade that flatters your skin tone and enhances your unique features. Here are some tips to help you choose the right nude shade for you:
Know Your Undertone: Determine whether you have warm, cool, or neutral undertones. If you have warm undertones, opt for nude lipsticks with peachy or golden hues. If you have cool undertones, choose shades with pink or mauve undertones. Neutral undertones can rock a wide range of nude shades.
Experiment with Different Shades: Be bold and try different shades to find the one that makes you feel confident and beautiful. Remember, everyone's perfect nude shade is different, so play around and have fun with it!
Consider Your Lip Pigmentation: If you have naturally pigmented lips, use slightly deeper nude shades to achieve the desired effect. On the other hand, if your lips are less pigmented, opt for lighter nude shades that provide a soft and natural look.

Achieving the Perfect Nude Lip Look
There's something genuinely magical about achieving the perfect nude lip look. That effortless yet captivating style enhances your natural beauty and leaves you feeling confident and radiant. But before you can accomplish that picture-perfect pout, it's essential to prep your lips for the best application possible. Your lips deserve a little TLC, and with the proper prep, your nude lipstick will glide on smoothly and flawlessly.
Prepping Your Lips for Nude Lipstick
Before applying any lipstick, it's essential to prep your lips to ensure a smooth and flawless application. Follow these simple steps:
Exfoliate: Gently exfoliate your lips with a lip scrub or a soft toothbrush to remove dead skin cells. This will create a smooth canvas.
Hydrate: Moisturize your lips with a lip balm to keep them hydrated and plump. Allow the lip balm to absorb for a few minutes before applying your lipstick.
Prime: For long-lasting wear, consider using a lip primer or a light layer of foundation on your lips. This will help the nude lipstick adhere better and prevent feathering.
Applying Nude Lipstick like a Pro
Now that your lips are prepped and ready, it's time to apply your lipstick for a flawless finish. Follow these steps to achieve a picture-perfect pout:
Outline Your Lips: Start by outlining your lips with a nude lip liner that matches your lipstick shade. This will define your lip shape and prevent your lipstick from bleeding.
Fill In: Gently fill in your lips with your chosen product, staying within the lip liner. Start from the center and work your way towards the corners, ensuring an even application.
Blot and Set: Blot your lips with a tissue to remove any excess product after applying the first layer. Apply a second layer of lipstick for added intensity and longevity. For a matte finish, lightly dust some translucent powder over your lips.
Nude Lipstick Tips and Tricks
Now that you've mastered applying nude lipstick, let's delve into some tips and tricks to elevate your nude lip look to the next level. With a few simple techniques, you can amp up the impact of your bare lips and create a stunning focal point for your overall makeup.
Amp Up Your Nude Lip Look
Want to take your nude lipstick game to the next level? Here are some tips and tricks to make your lips pop:
Gloss-It Up Apply a clear lip gloss or a shimmery nude gloss on top of your lipstick for a luscious and glamorous finish.
Ombre Effect: Create an ombre effect by applying a slightly darker nude shade to the center of your lips and blending it outward with a lighter shade.
Highlight Your Cupid's Bow: Apply a touch of highlighter to your cupid's bow (the center of your upper lip) to accentuate the shape and add dimension to your nude lips.
Nude Lipstick for Every Occasion
Nude lipstick is incredibly versatile and can be worn for any occasion. Here are some suggestions on how to rock it for different events:
Everyday Chic: Opt for a sheer nude lipstick or tinted lip balm for a natural, effortless, simple look.
Office-Ready: Choose a matte or satin finish nude lipstick in a muted shade for a polished and professional appearance.
Glam Night Out: Amp your bare lips with a bold smoky eye or a dramatic winged liner. Pair it with a slightly deeper nude shade to create a stunning evening look.

Find Your Perfect Nude Lipstick with MOBILESTYLES
Ready to rock the nude lipstick trend? Let MOBILESTYLES be your beautiful companion in finding the perfect nude lipstick shade. Our mobile beauty professionals are ready to pamper and help you achieve your desired look. Download the MOBILESTYLES APP and discover a world of beauty at your fingertips. Get ready to enhance your natural beauty with the perfect nude lipstick shade that will make heads turn wherever you go!
Remember, ladies, nude lipstick is about embracing your natural beauty and feeling confident in your skin. So go ahead, pucker up, and let your nude lips steal the show!
0 notes
Last Seen Blogs

yesevery-blog
YES! everything

mementomoribrasil
Memento Mori Brasil
mementomoribrasil
Memento Mori Brasil
aquclad
FINS &;; FLIPPER