#FINALLY 2D PIECE TO BE PROUD OF
Text
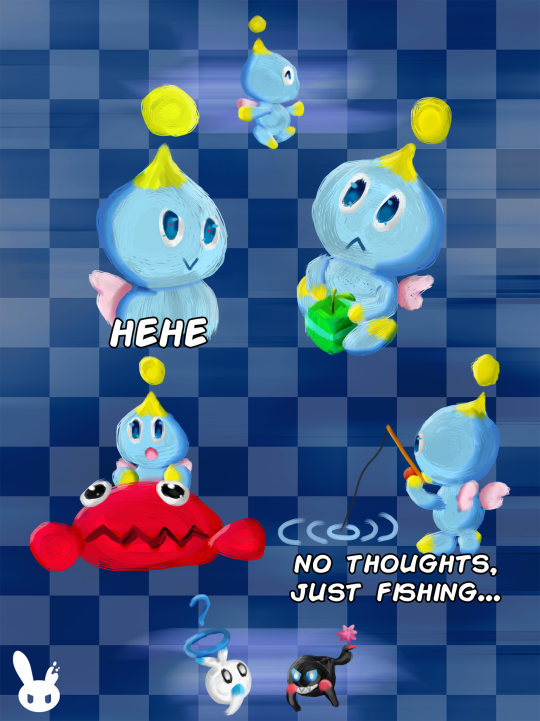
Chao doodles, that took too much timeto be regarded as doodles.
35 notes
·
View notes
Text
so here’s side quest no 1: 2d simple animation!
I am quite proud of this since it was my first attempt at any type of animation , I kid you not this thing took me 8 hours to do but I am in love with the final product. It has 101 frames and is probably my most exhausting piece of art.
#ballet#the nutcracker#2d animation#animation#traditional animation#digital art#artists on tumblr#art#ballet dancer#ballerina#dancer
60 notes
·
View notes
Text
Gravity Circuit, one of the big projects I have been working for a while is finally OUT!!
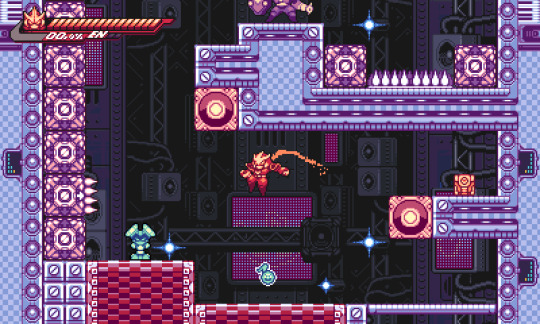
A flashy action packed 2D platformer in the spirit of console classics. Follow Kai, a lone operative war hero who harnesses the mysterious powers of the Gravity Circuit, on an adventure in a futuristic world inhabited by sentient robots.
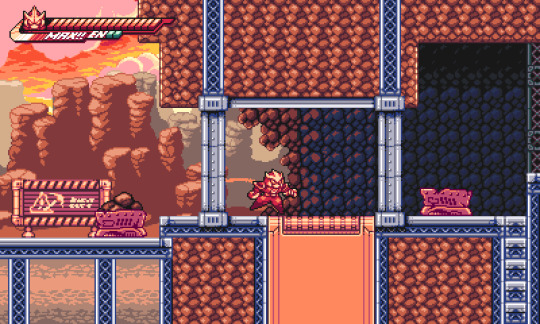
I did several background pixel art pieces for this game (some of which you can see in these screenshots and on the launch trailer trailer) that I'll slowly post and talk more about here.
youtube
I'm extremely proud to have been part of this project and to get a chance to work together with a team full of amazing and super talented people.
The game is OUT NOW on PC (Windows/Linux/macOS),
Nintendo Switch, PlayStation 4 and PlayStation 5
So don't forget to check it!!
Gravity Circuit on Steam
Gravity Circuit on Epic Games Store
Gravity Circuit on GOG
For future updates, you can follow the game's development on Twitter or the community Discord!
25 notes
·
View notes
Text
First Post
12/9/2023
Hi, I'm Finian, and this is my first blogpost! I'm really into like every single artform, and my main passion is gamedev! I learned it in highschool, I'm working on it in college, and I hope to make it a career someday.
I'm very critical on myself, and I am very embarrassed to share any art I make, but I've wanted to make a blog for a little while. I think personal writing is fun. I recently received some advice that making a blog might strengthen my portfolio, so I was like "what the heck" and now here I am.
With that out of the way, this post will be about what I consider my first finished game. I did some stuff in highschool, but that was all in a website called code.org. I worked in Unity in my final year, but I served the role of mentor more than developer.
This game was created for my final project in my ENC1143 class, and shall be called my Multimodal Artifact. The assignment was to share what we'd learned over the year in any form of medium we wished, so I made a game. I've only previously done 2D games and I consider myself acceptable at pixel art, so I made a simple 2D platformer. All of my artwork was done in Aseprite and all code was written in Unity, with Visual Studio.
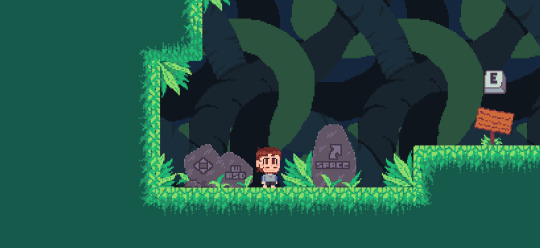
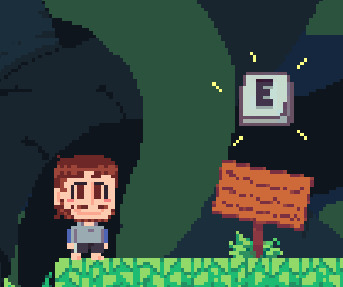
My intentions going into the game were mainly to let the player interact with the sign pictured above, which is something I've never done before. I also wanted the text on the sign to have a scrollbar. I started with an unanimated player sprite, and I made an incredibly simple ground texture, which I stretched to represent a wall. I coded the player's movement and interaction with the terrain. Once I was satisfied with the player's movement, I created some simple animations for idling, running, and jumping.

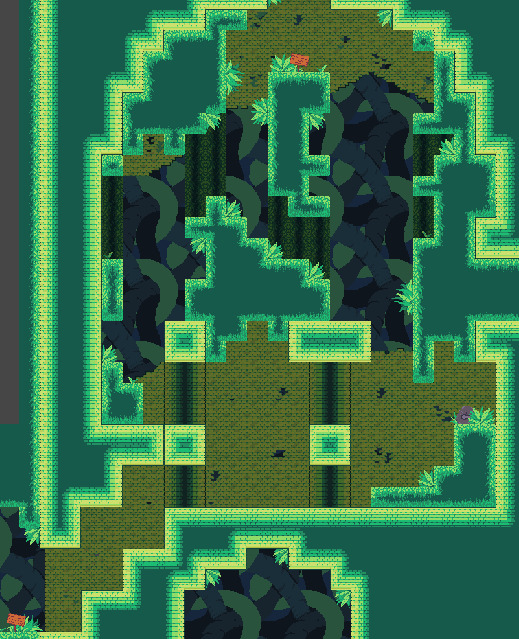
I then created a tileset of which I am extremely proud, as I've been struggling with grassy and leafy terrain for years. This is the second tileset I've ever made, and the first to perfectly link with itself.

Once I had my tiles in order, I replaced my gaudy primitive, and created the first area of the game as seen in the first image, albeit with significantly less foliage. I created enough level to comfortably house five signs; about half of the game. Finally I began work on the sign itself. The sign was probably the most important part of the game, as its writing is what I was mainly being graded on. There are nine signs in the game, each containing small pieces of the whole final assignment. I created a sprite for the sign in about 20 minutes, and tackled the text with a scroll view. I watched a very helpful video on how it worked, added my TextMeshPro font asset, and made a sign visual behind it all.

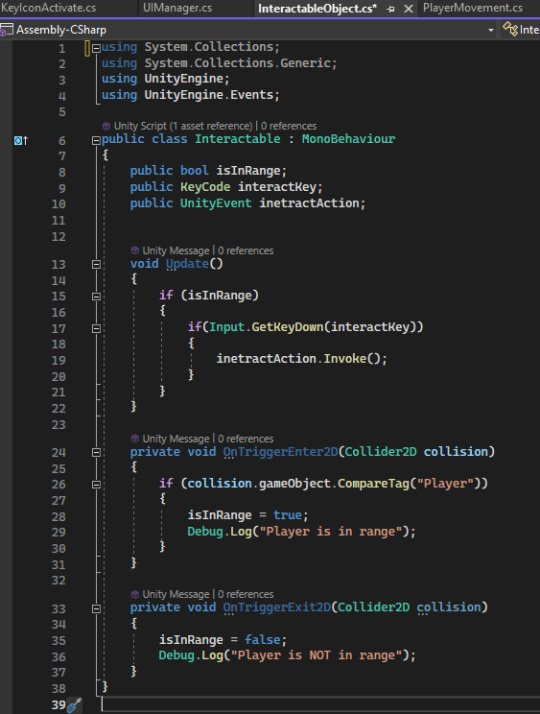
My sign was done, from a visual standpoint. I could finally tackle the code, which I did within two scripts. The first script, "Interactable" would be attached to the sign sprite via a child. The script was actually pretty simple, using OnTriggerEnter and OnTriggerExit in tandem with a circle collider 2D to detect if the player was near enough, and an if statement featuring the UnityEvent Invoke in its body. Invoke calls a function from another script, established in the inspector. In this case, I attached a script to the Canvas which disabled and enabled the sign GameObjects.
I also added to the sign sprite a key icon, again of my own making, to make sure the player definitely knows what to press. It has an animation which activates when the player walks near the sign.
Both the coding and the visuals for the sign are finally finished! My final steps for this game were:
1) finish designing the level
2) add some scenery
3) if I had time, a pause screen and maybe even a start screen
This was a single-level game, and since it was an english assignment that needs to be graded, I figured it ought to be very linear and very non-punishing. There are no enemies and no dying, so the difficulty had to come from platforming. The player can jump exactly three tiles high and seven tiles far. The game features one six tile wide jump and no necessary three tile high jumps. The first area, already completed features very easy one to three tile wide gaps.
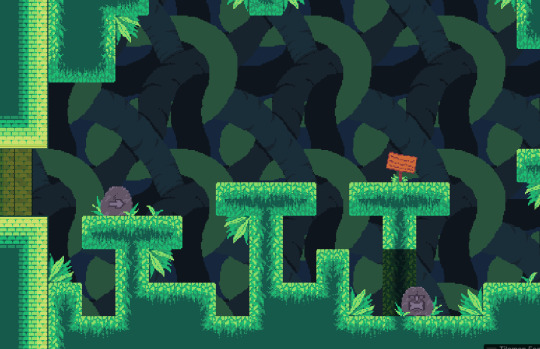
The area has the player go from the left of the level to the right, and eventually upwards and back to the left. Within the first zone, it is possible to fall After every new challenge there will be a sign as the player's reward: after the first jump, , two-tile wide jump, series of one-tile wide jumps (pictured above), series of two-tile vertical jumps, and finally after the first four-tile wide jump. There are some punishing jumps in the upper layer of this zone, which cause the player to lose some progress if missed.
Before making any level past the first sign, I added a second tileset. I took my preciously mentioned first ever tileset, which was a greyish castle brick, and changed it to match my current palette. It's not perfect, but any imperfections are so slight nobody would notice unless they were specifically seeking them out. I added this tileset because I felt continuous jungle would start to get bland, and because I really wanted to get some use out of it. I think it fits in really well.
The second area of my game is a platforming section based off of the loss comic, a suggestion provided to my by my wonderful girlfriend. I think it's a lot of fun to involve others in the gamemaking process, and I think it's fun to work with a specific challenge in mind. I thought of something really fun to do with that idea almost instantly, and got to work.
For those who are unaware, the loss comic is a meme from 2002, which features this character format: I II
II I_
I tried loosely to stay within that format, I don't think it tracks very well, but the intention and setup is there.

I wanted my third and final segment to be the most challenging, and I wanted it to be inside of the castle/temple setting, in hopes of making the play subconsciously go "oh, this area is different." Each area of the game has its subtle distinctions, but the distinction here is the least subtle.
The final area features a great deal of wide and high jumps, as well as the first and only head-hitter in the game. In the final set of jumps it is possible to fall back down to the start of the section, and the very last jump isn't very difficult. I think it sucks when you think you're almost done with everything in a game, and you mess up at the very end and have to start all over. I didn't want the player to feel that way, hence the easier last jump.
The level was done! My signs (the part I get graded on) were done! I could have some fun with the rest of the game, not that I didn't have fun with the entire previous process, this final bit was just leisure. I love programming.
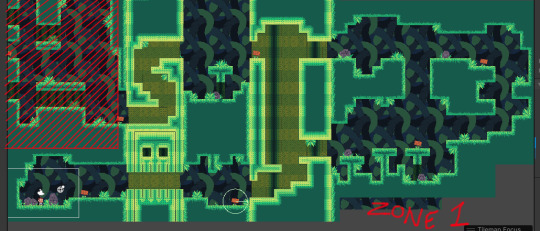
I started with controls. I put the controls of the game as well as some arrows to point you the right way on rocks, which would not only fit well in the game's environment, but also served well to fill up empty-feeling areas.

After the rocks, I created some bushes. I considered making hanging vines, but I forgot about it somewhere in the creative process. There's obviously not as many of them as the rocks, but trust me when I say these suckers get some crazy mileage. They're everywhere, rotated for the walls and ceiling, flipped, darkened to appear more in the background, placed somewhat behind rocks. These four bushes were super important to the decoration of this game.

After the bushes, I adjusted the hue, saturation, and light of the tilesets to make them appear as background elements. I created the background of the game as a repeating tile. I am not confident in my ability to create a full artpiece, rather than smaller assets, and my wonderful girlfriend added some pixels which I feel made it look significantly better than my rendition. I hue shifted it, and it works excellently as the game's background.
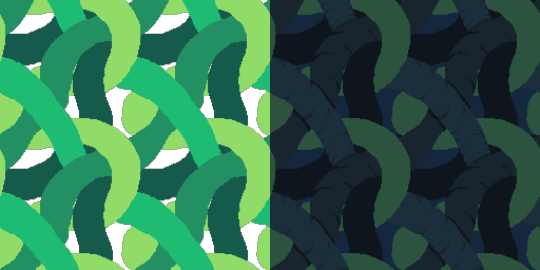
My initial rendition (black was empty) and the final rendition
The final thing to do was to add a pause menu, which is also something I had extremely limited experience with, but found to be super easy. The code is just about the same as making the signs appear and disappear.

The game was not without its bugs, however. There were two that I wanted to fix:
1) sometimes while walking, the player would randomly get snagged and stop. I believed this to be an issue with the ground's collision
2) sometimes upon landing, the player would fly straight through the floor! I also believed this to be an issue with the ground's collision
I had the ground's collider set to a Tilemap Collider 2D, which is a collider designed specifically for tiles. The way a tilemap collider works is that it assigns a square shaped colllider to every individual tile, and would combine all of those collider together in order to save space if it were more efficient on the system. In my game's case it was not more efficient to combine them. However, combining them is exactly what would fix the first issue, the player snagging on the ground. I added a Composite Collider 2D to the tilemap, and viola! No more snagging. The player would still fall through the ground on occasion, but it happened to me so rarely I figured it would be a nonissue. I added a line of code that would set the player's position to the initial spawn if they went too far beneath the map, as well as the reset button in the pause menu which would do the same.
After these fixes I had my incredibly generous roommate playtest for me. He probably played for about thirty minutes, and he relentlessly fell through the map. It was amazing to me how often he just perfectly fell through the ground. Clearly, this was a bigger issue than I anticipated. Thank goodness for playtesters!
After some research, I realized the composite collider actually created an outline of the tiles, rather than completely filling them with collision. The player would fall through the ground because while falling, their velocity would continually increase. Since the collision of the ground was so slim, the player's high velocity would sometimes cause their collider to be on one side of the ground on one frame, and the other side of the ground on the next, not allowing for any collision to happen. The slim outline of the composite collider was not cutting it. There is a setting on the component labeled "Use Delaunay Mesh" which, when clicked, converts the collider from an outline to a full mesh.

The orange lines represent the collider
A Delaunay Mesh is a mesh based on Delaunay Triangulation, which is a complicated math term which can be simplified to mean the mesh has the least amount of big system-taxing triangles possible.
My roommate once again playtested for me, this time with no bugs at all. His thirty minute experience turned into a three minute experience. Magical!
There's more I would have liked to do, but my time ran out and I needed to turn the assignment in. I think I would have liked to make a starting screen, and maybe some hanging vines. If I had as much time as I pleased, I would've added walljumping and maybe some destructible decorations to make the player feel more involved.
I think the game was a success. This is my first game I can say I've actually completed, and I feel proud of how far I've come. If I were to do this again, I'd probably study the games "Getting Over It" and "Jump King," as in hindsight these games were fundamentally very similar.
The end! Thank you for reading my silly blogpost! This took way longer than I thought.
9 notes
·
View notes
Note
Hello my beautiful sonnshine!! 🔆🔆 I'd love to know what have been your favourite mediums to work in lately and why! Are there any of your recent works you've been especially proud of? What was your process when making them??
HI!! <3

i would definitely say sumi ink has been the most used in my traditional work lately! i love the smell... the thickness and the way it absorbs into different types of paper in different ways! An ink i never used much beforehand but now its the only ink i want to use. I also tend to use pretty lightweight uncoated papers. Usually no more than 65-70lb weight.
and id say the most recent stuff i am proud of would include all of my recent 3D works!! There's a couple I haven't been able to fully share yet, but once i can i will be gushing abt them all daaaay. My process for 3D stuff isn't as fun to explain as traditional works but i will try my best!
all my 3D work basically involve 2D traditional concepting for a bit, then digital transfer, mockup & finalized design in Sai. and then i move into Blender to start either low-poly blocking the forms to sculpt ( this was my old method which is a little more time consuming and has more issues) or straight up going in with high-poly mesh and manipulating it to match the reference and then sculpting ontop! (im still learning this workflow w my most recent piece) I have a few process videos to edit of my sculpting work eventually.. so it'll make more sense then >_<
i luv u sm xzoni and i appreciate u sending this!!!

3 notes
·
View notes
Text
Week 10 - Completing the Loop
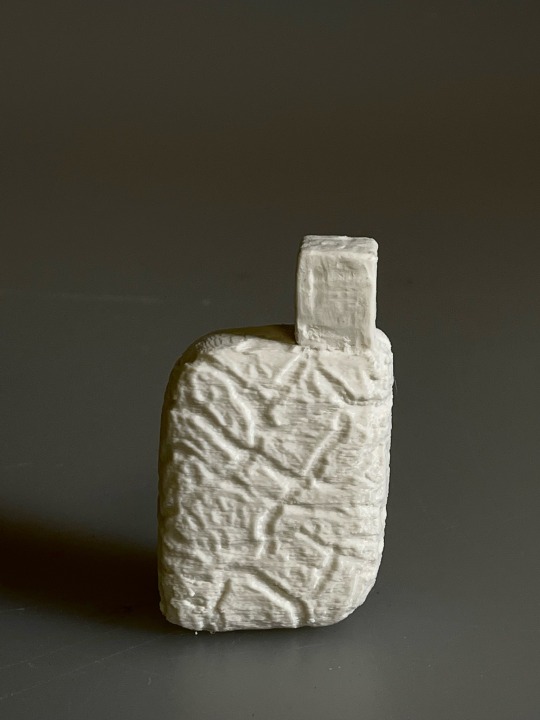
Continuing from last week, I picked up my 3d print from the fabrication lab.
Step 5: 3d printing - dealing with imperfections (sanding)
The printing took some time and did not produce the smooth surfaces I was expecting. To fix this, I used sand paper and a Dremel with a sanding attachment to smooth out the cap.


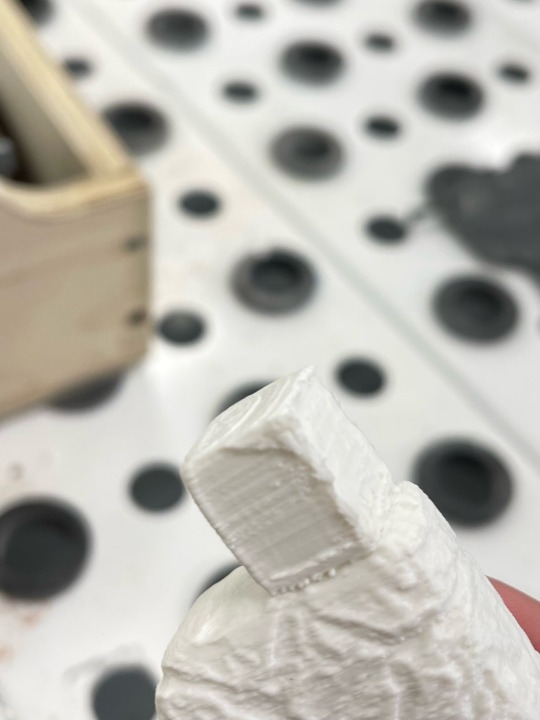
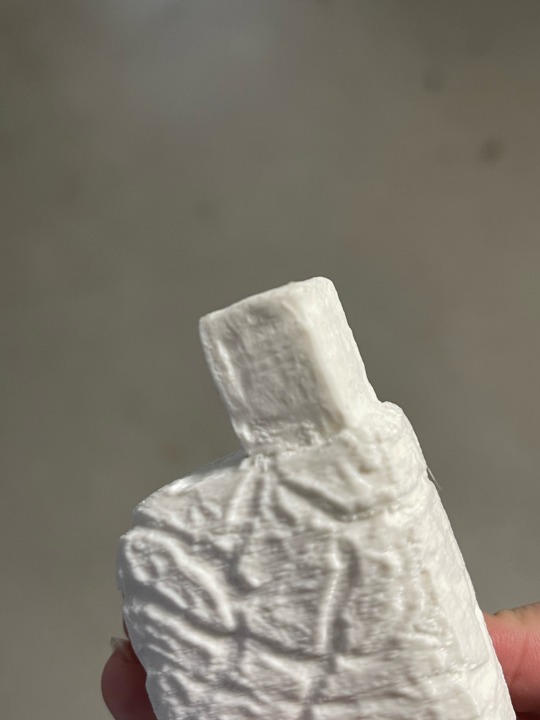
I accidentally over sanding some surfaces as seen in the images above, I believe that this could have been avoided if I just decreased the speed of Dremel and worked the sanding attachment slowly to produce a smoother look.
Final Images of 3d printed prototype.


The Final Reflection :'(
I am sad that this week will be the last week of this class, it was overall a more hands-on subject which I typically prefer. The subject has given me an insight into many things about the design process designers in the industry have to go through when a new product is being developed.
Taking design ideas from initial sketches to more technical engineering drawings, translating them into a physical foam prototype to produce both digital and 3d printed prototypes. This process seems incredibly innovative and makes so much sense, giving so many insights the world of product design.
Completing this subject has given me a sense of achievement, even if it was very hard keeping up with the pre-class and post-class activities on top of the tutorials and lectures. Through this struggle, i found that I create some friendships through the collective confusion during lectures. I felt very proud of myself when someone asked for my help or advice and felt proud for others when they answered my question with confidence.
I have learned the import of practice with both hand drawing, and digital drawing and know the right tools to use. Subtle elements like line thicknesses have such a great impact on an overall hand sketch and communicate a specific meaning to clients and other fellow designers.
Softwares like Photoshop, Rhino, 3dsmax, Solidworks etc. are also such vital tools for product design but never replace good old paper and pencil. Hand sketches are equally important as digital drawings and vice versa, even if Citrix was quite tempramental.
This class has taught me to never discredit the amount of creative freedom hand sketching can bring me. I was always so eager to jump into CAD software with an idea in mine without any existing sketches. The model would come out alright but I would not have extra length and the right fillet radius without mapping it out first on a piece of paper with a simple or comprehensive sketch.
I believe that throughout the duration of the course there has been an improvement in drawing skills in both technical drawing and free-hand sketching. The week 5 drawing exercises were probably my favourite tutorial, it created such a fun atmosphere in the classroom and also greatly improved my idea of 3D forms on a 2D page.
I am very thankful for this class, and for Gonz, Rob, and Sarah for helping us along the way and teaching us very valuable lessons. I could see the amount of effort they have put the whole term into creating an environment that was welcoming and a safe space to ask questions even if they were simple ones. They even went through the trouble of inviting second and third-year students to the classroom to give incredibly valuable advice and shared their experiences with internships and jobs in the in industry.
See you guys next term!!!!
8 notes
·
View notes
Text


I wanted to share my final pieces from my AP 2d art portfolio because I'm really proud of what I got :D
#king-kwazy#original art#oc art#ap 2d visual design#digital art#it was really fun to work on#i was a little worried about the sustained investigation tho#digital illustration
6 notes
·
View notes
Text
Writing Initiative #8
What have you learned about yourself doing this self-directed assignment?
I have learned what it is like to work on one concept for an extended period of time. I have also learned about the importance of not limiting myself once I have chosen a concept. When it evolved, I had an even stronger idea of healing through time, rather than just healing through nature, which felt very restricting.
What did you find to be the most difficult aspect of your chosen assignment? Creativity? Research? Connecting design to research? Craft? Organizational skills? Time management? Something else entirely?
What I found most difficult was connecting my ideas to design. I really enjoy making crafts, so things like the toys that I made felt really disconnected from traditional design. Also, something that surprised me with this is how important it was to connect projects to each other, as it ended up feeling like a cohesive body of work. This was a struggle early on that was really difficult to overcome, but I ended up solving pretty early on with feedback from my classmates.
What did you enjoy about this opportunity?
I enjoyed the flexibility in being supported when making what I wanted. I also enjoyed the flexibility with time. Rather than staying for a 6-hour class, I was able to engage in shorter discussions and then work on my projects at home or at my own pace, which was good because a lot of my supplies were already at home, so it was easier to do it that way.
How would you rate your performance over the course of the semester?
I'm proud of the quality of work and craft that I produced and my concept and research, which connects everything together, so I would rate that highly. I was also engaged in discussions, but I did miss a few classes, so that could have been better. I had also updated my Tumblr a lot to show my process work and thoughts, which is something that I want to continue to do for future projects, just maybe not on Tumblr, but collecting everything I do, which I found is helpful to look back on. Overall though, I was very engaged which I think is seen in my posts and in my final pieces.
Hindsight is 20/20. What would you do differently, now that you've had this opportunity to work this way?
I think that it would have been good to think about all of my projects from the beginning of the class. From the first class, I was only focused on the 2D project for a while and didn't even consider the other ones. I think if I had brainstormed for the next ones, the 2D could have felt more connected to the other ones aesthetically, as its cool colors don't really match my next projects, which are primarily warmer. I know this isn't that big of a problem, but thinking ahead to the other projects as well could have saved me some stress later on as I tried to come up with a concept that would allow me to keep my 2D project and be connected to the other ones also.
0 notes
Text
art journeys are so strange. the fuckers in my head don't make it any less strange. I've been drawing since i was a kid, just never stopped and now that's what I'm in college for. I'm cleaning my room. I found all my old sketchbooks, i don't remember half any of it nor the order they go in. only some pages have dates. my headmate could ID some late highschool stuff, mainly because that's when we got into a game that genuinely improved our life. our mom (genuinely a shit mom) banned us from fanart back in middle school i think.
but then there's fanart of beloved characters that i still hold dear, yet there's some downright primal fear around those drawings. and it makes me wonder how much did our mom fuck up our art journey. i wonder who remembers how our mom reacted to the fanart of two guys holding hands, the drawing of a demon guy in a dress. there's no more fashion drawings after that.
i graduated highschool the same year i found my favorite video game, a game my mom never knew i adored, i also got into zelda at that time, but my mom knew of that. i was also in ap 2d art at that time. my art teacher said to hide my art style, it was "too anime" in her words. my art looks so stagnant until i started sketching my favorite game's antagonist.
my childhood friend entered my life again after graduating highschool. they got to be the first one to hear about my favorite game and the first to see the first fanart i did of it.
college started and i was in art appreciation, the teacher encumbered me to go into the art department. I'm glad i listened to her.
but before that i had winter break. some traumatic shit happened during it so I'll spare the details, but i used my favorite game as a coping mechanism and drew it to stay calm. even with the bad memories connected to the drawings from then, i still actually like them.
school started back and i entered drawing 1, the teacher is a kind lady, she's from Ukraine, she also teaches printmaking. entering her class was a weird time. my mom got sick, no longer fully controlling me, i just discovered my system (or well, the words for it), the main fucker who deals with school now showed up (I'll call them 'C', they are here alot), and an abusive friendship ended. it was alot.
my time in drawing class had me draw a portrait of soneone by memory, i had chosen that childhood friend. it was the first time in our memories that there was a sense of pride in a portrait. god it was awful looking, but it was them, C was proud of it. i don't they ever showed our friend, oh well.
drawing class was amazing. the teacher still is amazing, we're taking printmaking 2 next semester with her. she encouraged trying new things, framed as "seeing new horizons" rather than "leaving your comfort zone" but she also wanted everyone to do things they liked. we did character illustration, C designed a group of characters for one class and decided to use those characters in our drawing final, a large 3 piece series.
those drawings look almost 3d, the characters were cut out and taped onto a drawn background, layered to have deep shadows. it doesn't look that good, but it's interesting, it even had the teacher encourage us to try making pop ups. C indeed tried that suggestion. and they liked it, the mix of art and engineering made C find it enjoyable.
i wonder why no other teacher before was as encouraging as her. why was it always to hide, not embrace.
now i sew. cosplay was something we've loved for years, but now we see how much our mom controlled us with it. i finally sewn a part of a cosplay from scratch. why was i not allowed to do that before is something C and I wonder now. C wore that costume to a convention, it was of the antagonist for our favorite game. it's weird, it feels like we're reclaiming what was stolen from us by an abusive peice of shit mother.
we've sewn a plush, it actually was the critter that went to C's costume. it's in an artshow now. something most people think to submit master studies, still lifes, and sculpture or abstract art to. now a pokemon from a fangame is in it, I'm told it's always the artwork you're not proud of that gets into shows, but now the plushy C is so proud of is on display. it's weird.
i know if our mom was alive, she's tell us what to submit, i doubt it would have been the plushy, she probably wouldn't have let us make it.
it's still weird. sometimes i wonder how our art would look if our mom just let us do our thing. or if we never got into that game. i know our art would be very different (or more consistent lol) if we weren't a system, but that one i can answer, the others will be mysteries as long as we're on our art journey
idk, moral of the story, it gets better even if it's weird as fuck. i went from not being allowed to do anything to making a giant staff out of wood at school (with the teacher's help because my disability said no saws for me) for a cosplay. I went from not knowing anything going on and being scared to jokingly arguing with my headmates about zelda lore while doing art homework. it's weird, it's unwell, but it's better than it was and it'll keep getting better
#tw parent death#tw parental issues#tw parental control#did system#actually did#endos dni#ramblings#personal rant#idk if this counts as a rant but there just in case
0 notes
Text


Critical Appraisal
What is my final outcome?
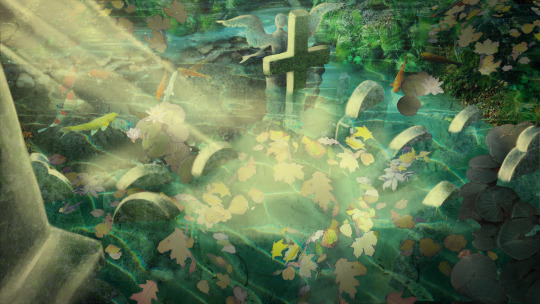
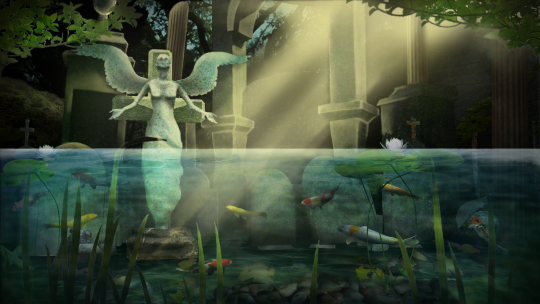
My final outcome is a 2D paint-over of a 3D model made in Maya, depicting my scene with the theme “Forgotten Utopia”. I have made a half-sunken graveyard shrine area, situated in a lush, thriving forest, nestled, and shrouded by the surrounding trees. In the middle of the scene is a large baroque style angel statue, which appears to be praying over the graves. The area is serene, placid, and ethereal – fish swim in the waters and lilies bloom across the water’s surface. This composition of objects has been untouched for thousands of years, allowing moss and algae to cultivate and cover the graves. Though eroded over time, the area is teeming with life, spirit and an unwavering holiness – rich sunlight cascades between the trees, illuminating the shrine and giving warmth to this uninhabited location.
What went well?
I feel that I was able to overcome some skill-based issues over the course of this project, especially when it came to, not only making them, but composing the 3D assets into an arrangement I was happy with. When starting this brief, I found it easier to get into the flow of using 3D software than I have in previous projects, which shows that I am always learning things through practice. After some initial hurdles, I was able to get started on the 2D side of the project which is where I came into my own and produced a scene that I am proud of. I am happy to have captured the overall luminous, spiritual tone that I was going for with this piece and can say that I would follow the same processes in future projects.
What did I struggle with?
I undoubtedly struggled with the 3D tasks involved in this project, as well as time management and maintaining documentation throughout. I fought my way through the modelling stage, often experiencing topology issues with a, frankly simple set of assets. I struggled with being able to embed my angel sculpture into my 3D design and trying to conceive the best way to highlight this as the focal point in my chosen angles. Modelling, lighting and rendering a 3D diorama is not a set of skills that come naturally to me, however I did my utmost best to use what I could do to my advantage. Keeping up with the blogging proved difficult, however I was grateful to have done this when it came to putting my PDF journal together.
What would I do differently next time?
If I were to complete this project again, I would attempt to texture my scene prior to moving my rendered images to Photoshop. Within the time frame I had, I decided to leave all of my coloring/texturing up to photo-bashing, which arguably interfered with the contrast and figure of the objects I had created in 3D. This would have involved proper UV’s and the use of Substance Painter, which I’m sure I would have learnt a lot from using for this brief. Further, I would consider producing a 3D environment for Unreal Engine, as well as possibly animating this. It’s good to step out of your comfort zone, especially in creative industries – this could’ve shown further determination and willingness to learn.
What did I learn from this project?
Over the course of this project, I learnt many valuable practical skills, as well as moralistic lessons for my future endeavors. I have become fully confident in the use of Photoshop as a tool, which previous to year 1 of my BA, I had never used – I find this to be a huge personal achievement. I have also learnt to open myself up to the use of 3D practices to compose an image – this can be extremely useful when I am unsure as to where things should be placed in a scene. I am not massively confident doing environmental studies, so this has been a fundamental aid for me when it came to composition. I have learnt not to abandon work halfway through and keep working at it, as the result could be exactly what I had envisioned.
0 notes
Text

Final outcome
3D and 2D process
For the 3D outcome -
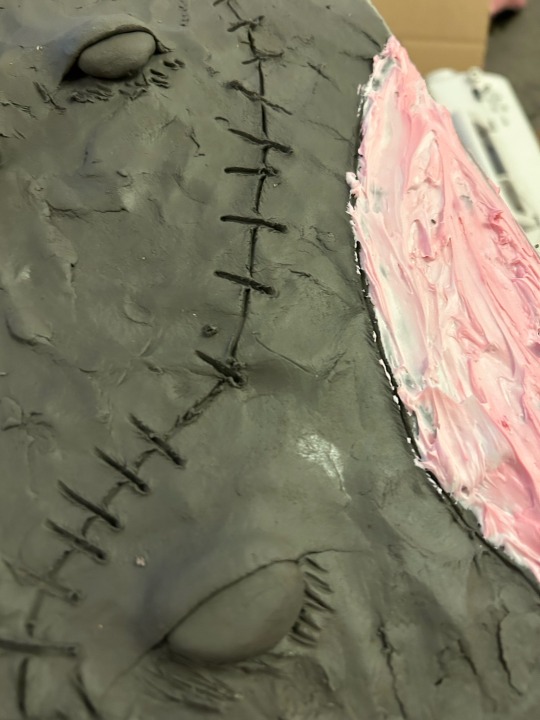
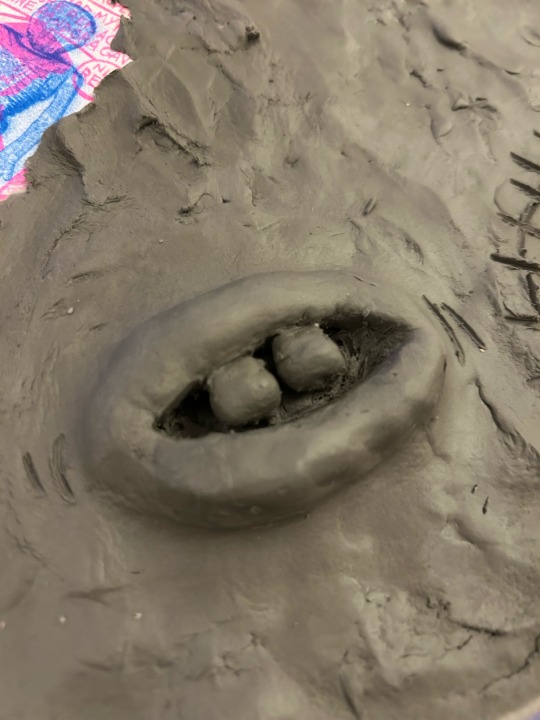
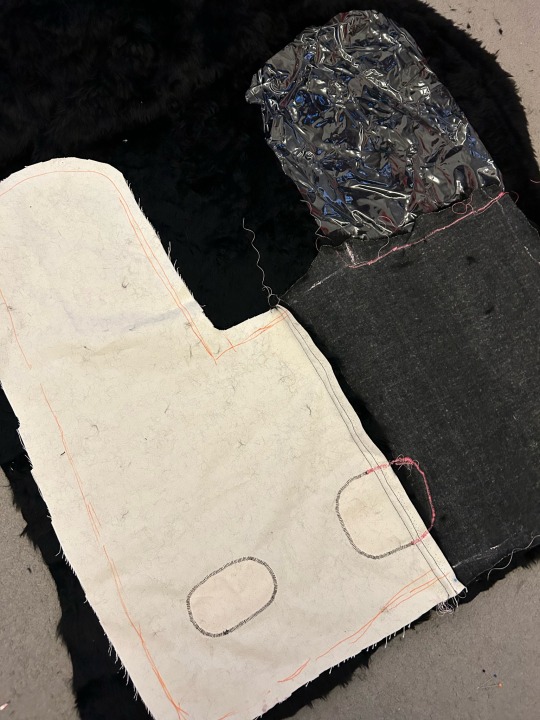
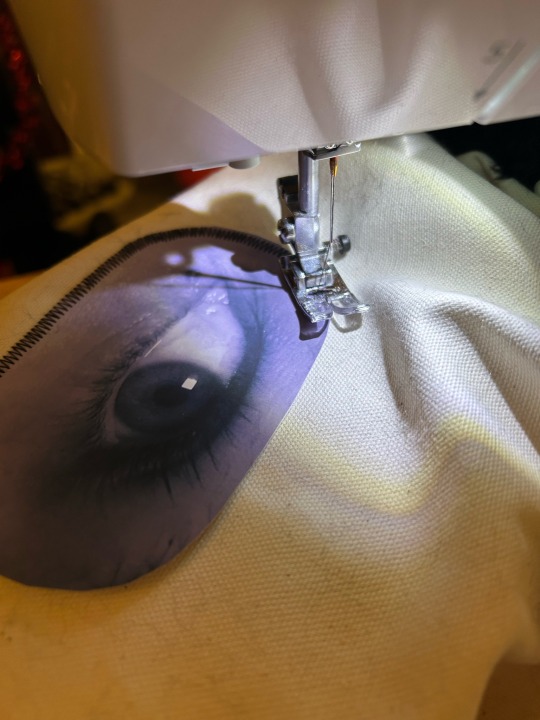
I decided I wanted to create a large scale piece. I learned I wasn’t able to make it massive as I didn’t have enough things to stuff inside so I made it a size I thought was possible to stuff. I thought it was very interesting having a see through transparent window part as I enjoyed doing that in my development. Inside this piece there is trash, scrap fabrics and flowers. I chose to stuff most of the flowers into the ear with the transparent window so that over time we will be able to see how they evolve too. This will also change how we see the piece. I chose to create the piece in parts , 3 parts - 1 plastic ear 1 furry side and 1 canvas side. The fur side represents my comfort zone and the canvas side covered in silicone represents trying new things and embracing change. My favourite part of the piece is the eyes and mouth. I would usually sculpt some sort of mouth but I really liked when I sewed the risograph prints onto fabric, I wanted to try something similar so I took pictures of my own eyes and mouth and sewed them on with contrasting stitching. I think it’s really cool cause it just makes the piece even more personal to me and I am proud of how much I was able to experiment.
2D outcome -
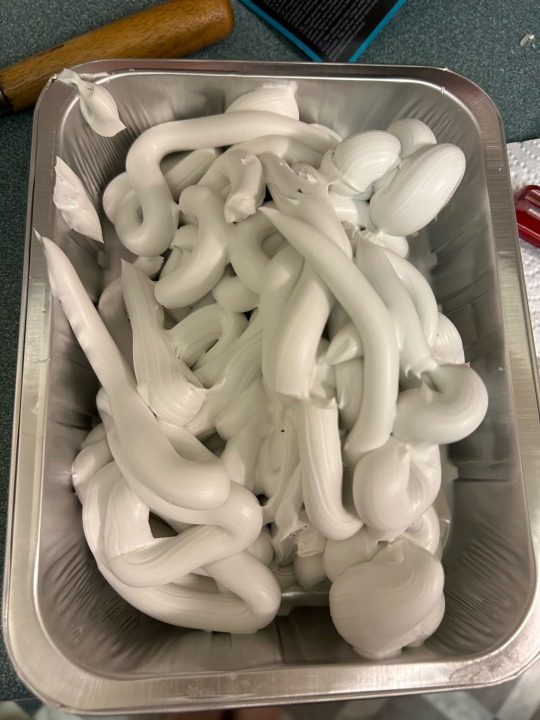
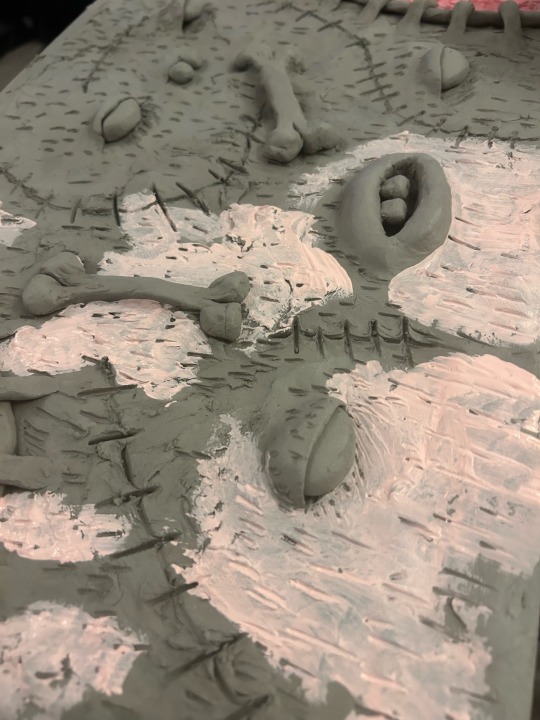
My work was throwing away some shelves so I took one home and cut it to a smaller size. I then did the clay board technique I had learned from the online workshop. For this I really didn’t want to plan anything I just wanted to allow the piece to form itself. I wanted to represent my character’s evolution and metamorphosis that it’s going through as I learn new things and improve as an artist. It started to form and look as though my character was being mashed up and changing which I really liked. This method for me was very unpredictable I was unsure of how the silicone would hold on the clay and if the clay would crumble off the board. I really like how it turned out though and I think it visualises my experiments well.
Time based outcome -
Organic unplanned video , I used the audio i previously created and wanted to show unpredictably while filming. I didn’t know how the piece would hold up while being stabbed and ripped but I think it was a very cathartic experience of destroying something that I really liked. It felt very experimental and fun. I felt free to create something and it wasn’t perfect and that’s absolutely fine.
0 notes
Text
Drawing Class Contour Drawing Project

It is my freshman year in college at Savannah College of Art and Design, and this post accounts for my second project in Drawing 100. In my class, my peers and I were prompted to create a modulated contour line drawing of our own composition of still life objects on 18x24" drawing paper. Before completing the 18x24" drawing, we completed two 9x12" compositions of two still lifes, and we were also required to create 5 other contour drawings of our choice, for a total of 8 drawings altogether. We practiced using contour lines to convey the 3D aspect of a shape, moving away from our previous project on 2D shapes. By observing the changes in the elements of art in still life drawings (such as shape, form, value, texture, color), I was able to successfully create 8 contour drawings in the end!
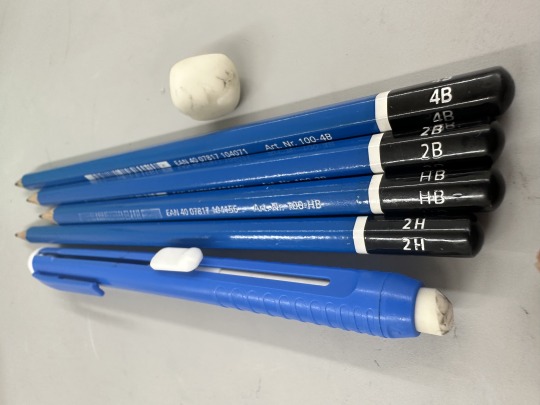
As for the media of this project, I used only Staedtler graphite pencils, ranging from 2H, HB, 2B, and 4B, keeping my materials as economic as possible while still achieving a suitable range of gradients. For erasers, I used a Staedtler Mars plastic mechanical eraser along with a small bit of a gum eraser. The first seven contour drawings, being the five contour drawings of my choice and the two 9x12" modulated line contour drawings, were all drawn in my Canson Mixed Media 11x14" sketchbook.

I began tackling my project by completing the five contour drawings with subject matters of my choice. For my first drawing, I chose the fountain in the Turner courtyard, outside my dorm room, as the subject matter. Because I wanted to add an element of variety into my project, I decided to use a Copic sketch marker in 110 Special Black, even though I used graphite pencil for the rest of my drawings. Contrasting from the delicate nature of most of my other contour drawings, I wanted to include a quickly-sketched piece with bold, irregular strokes. In the end, I was not super pleased with my final sketch of the Turner courtyard and fountain, but because this piece was meant for practice, I felt okay to move on to my next contour drawing.
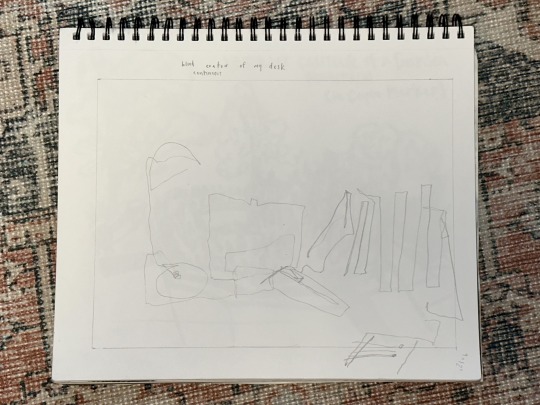
Next, I chose to complete a continuous blind contour drawing of the objects on my desk in my dorm room. A continuous contour drawing is a sketch that is composed of a singular line stroke, connecting the contour of the objects in the composition. A blind contour drawing is one which the artist cannot look at their paper, or is blind to their art as they make it, hinting the name. I did not feel very proud of the way this piece turned out because it is not very realistic. Granted, the nature of blind contour drawings, especially continuous blind contour drawings, are very interpretative and stylistic.
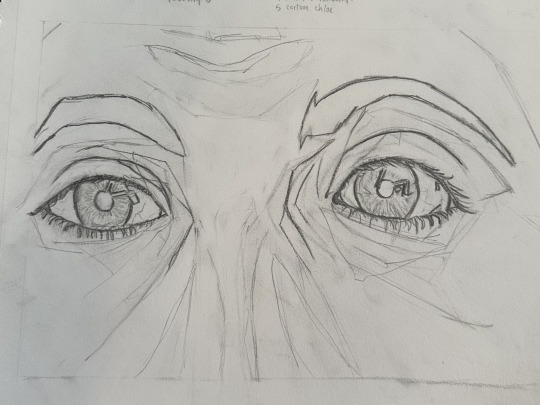
For my third drawing, I chose to draw my eyes as a modulated line contour drawing, meaning I emboldened features of the face that stood out most clearly. Even though faces are generally symmetrical, I tried to implement as much detail as possible, emphasizing changes in shape, form, value, texture, or color that could have otherwise been overlooked for contour with different pressure of gradients. For example, I emphasized the eyebrows in their unique shapes and the various reflections in the pupils of my eyes. In reflection, I feel confident in this piece, and I definitely grew as an artist in my awareness and depictions of contour.
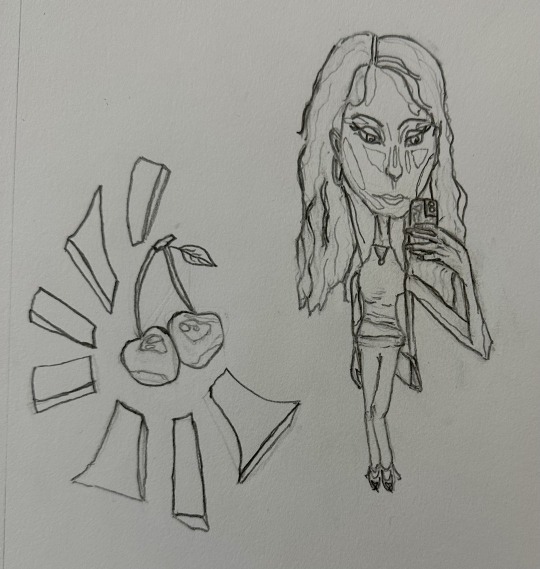
In my fourth drawing, I wanted to build upon my drawing skills across not only different subjects, but also different styles. So, I decided to draw my friend Sara Emma as a cartoon character/caricature, including her cherry-inspired aesthetic by drawing a couple cherries with pop-art block lines. In this piece, I grew in my contour drawing abilities because this piece used a more abstract, stylistic approach, in contrast to traditional contour drawings, which subsequently gave me a bit more experience in cartooning contour.

In my final drawing in the set of five, I drew figures of my friends in the hallway. I depicted a contour drawing of their bodies (besides the faces) and clothing. This is almost an outline drawing because it mostly is composed of outlines, but I have also added some detail in the basic sub-shapes of the people and their clothing. This contour drawing pushed me to use proportion appropriately, and I am happy with the way it turned out.
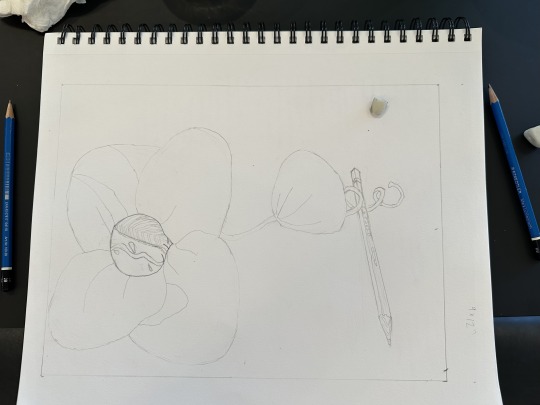
Using my still life reference images from my first project on shape and gestalt, I began drawing a faux fabric flower next to one of my drawing pencils for one of the two 9x12" still life modulated contour drawings. In these still life drawings, I really honed in on my slow contour skills, picking up on the smallest details of change in shape, form, value, texture, and color.

One of the most difficult parts of this still life was accounting for the fabric's pattern and the angle at which the fabric warped and folded itself with the shape of the flower's structure.

After drawing this piece, I felt like I was able to show my growth in contour drawing between the amount of detail in the patterns and textures of the still life, but also in depicting highlight and shadow areas. I used my 2H pencil for the understated contour lines, as well as the flower's intricate pattern. The thick lines, drawn with my 2B and 4B pencil (sparingly), accentuate depth and form, giving the piece a sense of 3 dimensions. Because of these reasons, I feel like this was my strongest drawing in the project.
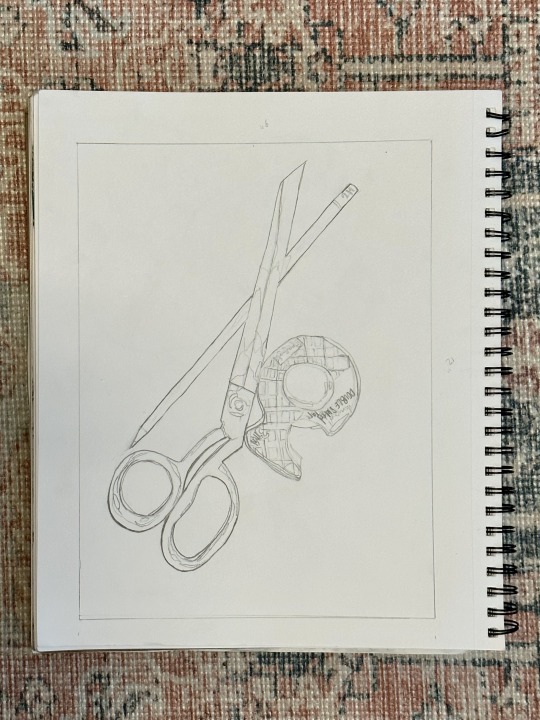
For my other 9x12" still life drawing, I used my composition from my last project, which consisted of my craft scissors, a tape dispenser, and again, one of my drawing pencils, all overlapping one another. Because I used this exact composition for my shape project a week or two before drawing this, I felt very comfortable drawing this composition, so it hardly took me any time at all! Because of this, I do not have any in-progress shots of my work, but I used the same contour principles as my other 9x12" still life drawing. This is also a modulated line contour drawing, so I emphasized the more apparent edges with thicker lines (a little bit of HB, mostly 2B, and sometimes 4B gradients) and the more minuscule changes in contour with my thinner 2H pencil.
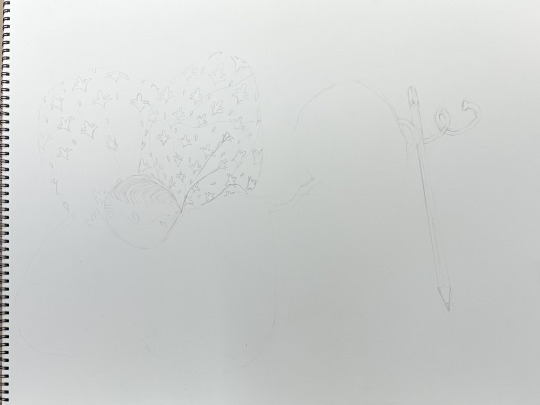
After completing the five contour drawings of my choice and the two 9x12" still life modulated contour drawings, I began sketching the final modulated contour drawing on an 18x24" Strathmore drawing paper pad. I chose the flower and the pencil for my subject matter because this composition seemed more interesting than the scissors, and I already did a final piece on the scissors still life for my previous project. I began by lightly sketching the general shape of the composition with my 2H pencil.

Because I was working with such large drawing paper, it was harder for me to keep the correct proportions for the flower's center in comparison to its petals. However, I am pleased with the amount of detail I put into this slow contour drawing. At this point in my progress, I had not yet emboldened any edges, as I was outlining all of the contour lines with my 2H pencil.

After a lot of meticulous drawing, I had finally outlined the contour lines of the entire composition, which was a relief! Now, I needed to use different gradients of my graphite pencils to turn this into a modulated contour drawing that conveyed both form and 3-Dimensional depth.
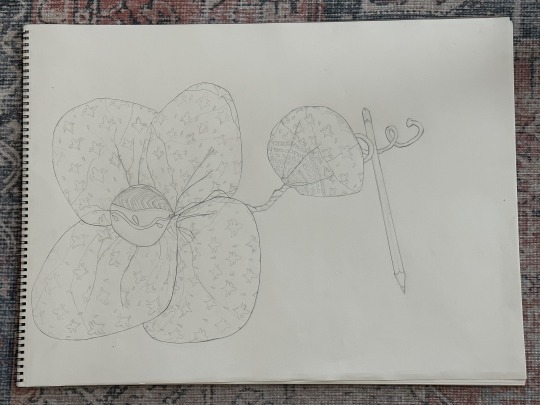
Finally, I completed my final 18x24" drawing! This modulated contour drawing turned out well with precise, clean lines. Although, I believe the 9x12" version of this composition is stronger because of the proportion and the edges are more pronounced, really giving it a modulated contour drawing feel. Nevertheless, I am pleased and proud of my final drawing.
1 note
·
View note
Text
INTRODUCTION TO CREATIVE PLAY: EVALUATION
For my class ‘Introduction to Creative Play, I was asked to create small, animated projects, with each lesson focusing on a different medium and time constraint whilst giving our imaginations free reign in terms of subject matter. The aim is to play with the idea of what animation can be and learn to play with different ideas, techniques and materials. Much as a child will use their imagination whilst playing with different toys and environments. The purpose of this project is to give us young adult animators that same sense of imaginative play and widen our horizons in terms of the possibilities within our work. The freedom to play can often be lost over time as children move through life into adulthood.
For the first lesson, I worked with a group to come up with, draw concept art, and pitch an idea for an animated short film. Being given a choice of six conflicts to choose from. These were: conflict & resolution, tension & release, mystery & revelation, losses & gains, setbacks & comebacks and peaks & troughs. My group chose the conflict of tension & release. We brainstormed a scenario where a character is hunted down by a monster in a spaceship. With this, we started sketching out Ideas for the characters. To make our hypothetical audience get invested in our main protagonists, a cat and a dog. One person did the concept art for the cat and dog, and I did the monster’s design, drawing a robotic being with a white mask like face and a body of wire arms. I was proud of my work here overall. Not only for my artistic contributions to story and character concepts but also for my ability to bounce off and work with a team.
The next lesson, we were given the activity to drawing a person or animal in the style of iconic pieces of animation by selecting a style and a subject via a spinning wheel website. Drawing the pieces within a time limit of a few minutes. The two style studies I created in the time were a T-Rex drawn in the style of the film Akira (1988) and a Skunk drawn in the art style of Spirited Away (2001). I'm proud of both. I'm especially proud of the Akira style T-Rex for the shading and detail I drew. This was a useful exercise as it encourages you to look more closely and analyse the work of different artists working in different genres. To break down the elements that make up the whole and to understand/appreciate those parts.
The lesson after that, we were given the task to rig and animate a 2d puppet character. We used the pre-made assets based on the character Finn from Adventure Time. On Adobe Premiere Pro, we separated each piece of Finn’s body into layers, connected or ‘parented’ those parts into a puppet rigg and animated it using a walk cycle chart as reference.
The process of learning was complicated at first due to the pace of the lesson and not having used After Effects in a while - so I wasn't able to make an entire animation in the lesson. I am happy I was able to gain an understanding of how to rig and animate a puppet in After Effects. I really do want to experiment with this method of animation more in the future so I can become more fluent using After Effects.
For my final project, I was tasked with a brief to make a short animation that was under a minute in length. After brainstorming a few ideas for stories, I decided on the story of a toy falling off a bed of a child who would then encounter a monster under the bed. I made concept art and a bullet point synopsis. I was proud of the story idea I was able to come up with. It is simple for a film that could fit into a minute, yet still has substance to it such as its creepier style/tone and its intriguing twist on the “monster under the bed” trope. Unfortunately, due to being busy with other artistic projects, I was unable to complete the short in the intended time. However, on a second attempt once I had this synopsis, I drew two pages of storyboards for the film. I originally had an idea for an opening establishing shot of the entire bedroom, but I eventually scrapped this idea to make the story more streamlined. Ultimately, I knew, due to the limited deadline I had, I would simply make a short animation test for the toy doll character.
With the storyboards done, I set about making a puppet for my character, the doll. First, creating several prototypes from black card paper. I first drew blueprints of the doll and its proportions, broke those down into individual body parts and cut those parts out of white card paper to use as a guide to cut out Individual parts for each puppet. I ultimately created two prototypes with articulated points on their middle, legs, arms and neck. Using black split pins to attach each limb to the body. I also briefly experimented with making the puppet black in colour and having the details of it such as the outline and face painted in white. Ultimately though, I opted to have the final puppet be made of greyish periwinkle card paper, as it would stand out better against a black background.
After the puppet was done, I made a background using a sheet of black card. Shading it and giving it texture with a BH pencil. I wanted to use charcoal to add further texture to the piece. However, I discovered I didn’t have any drawing charcoal in my home. If I had more time and known where to find it, I would’ve bought more charcoal before starting the background. Also, when I went to film my piece, I realised the details I had drawn onto the background elements like the teddy bear head didn't show up on the screen, even in the somewhat bright film lighting I was working with. If I Were to do this again, I would perhaps cut the background pieces out of a card paper that was a different colour, such as dark grey.
After this, I then went into the stop motion studio at my campus and animated the animation test with one of the tripod cameras and shot the film using the program Dragon Frame. I then exported the film as an mp4, saved the film on a USB and added titles and credits using Adobe Premiere Pro. Overall, I am proud of how the test came out. I think I managed to breathe a lot of life and character into the doll puppet and the movements conveyed the doll's personality well.
Overall, while I did have some setbacks, this was a rewarding and fun project for me. Working with a diverse range of materials, formats and art styles was not only engaging but helped me gain a better understanding of what materials I was most comfortable with using for animation, which turned out to be stop motion. I particularly enjoyed animating with the Lego and vinyl minifigures and with paper cut outs. These mediums I felt were the most intuitive for me to use and play around with.
Along with this, I found it surprisingly easy to work with a group. It was rewarding to come up with ideas to bounce off others whilst in turn, taking on board other people’s vision and ideas. I felt working with others in this way only strengthened my creative process and the projects we were working on.
Also, through the various timed exercises, such as the Lego minifigure animation in particular, this project helped me relearn and remember that sense of play and the joy and freedom there was to be found when working with different artistic mediums - without the constraints of adult sensibilities such as the fixation on making the piece perfect or high quality.
And along with all this, I was able to brush up on my skills with not just traditional mediums such as pencil on paper and stop motion animation, but also digital programmes such as Stop-Motion for iPhone, Adobe After Effects, Dragon Frame, and Adobe Premiere Pro.
1 note
·
View note
Text
Writing Initiative #3
I am writing these writing initiatives in hindsight because I confused a directive which stated that the writing initiatives did not need to be added to the process document with the fact that they are mandatory.
Writing Initiative #3
Make a list of items you’d like to discuss with the group, possibly including:
Which deliverable (3D, 4D, Reflective Piece) you are focussed on for next week’s presentation concepts to date / Given your topic, which of the four assignments you fear/anticipate the most difficult
After finishing my 2D project, I knew that I needed to tackle the creation of my 4D (mitten project) because it would take me many tries and some time to finalize a glove that I would be proud of since I had never sown anything before. The crewneck idea takes some preparation but it’s a one shot idea that would be filmed and would take some time to edit but not as much as crafting a mitten.
Materials and potential media labs to visit and connect with
I did not have to visit any media labs since I had my own sowing machine that I brought back from Montreal during reading week but I went to a fabric store a few times to get material and experience the materiality of fabrics. This was intentional because although I had hypotheses about what could be used I wanted to experience and be surprised by the materials through analog tactile experiences. This direct way of exploring has been too often ignored or dismissed since I went trough the first two years of art school online.
My foundation and reflexes when it comes to going about process are often rooted in digital research and ideation. I think that this project and this class has shown me the value of analog explorations and how it improves the craft of my final outcomes.
1 note
·
View note
Text
Writing Initiative #7
What have you learned about yourself doing this self-directed assignment?
I've learned so much from these courses! Going through all the assignments really put me through a rollercoaster of emotions, but it's helped me level up my creativity. I gotta say, I enjoyed documenting my progress on Tumblr - it made the whole process more fun. One thing I learned is how to research my topics better and ask myself the right questions. Like, what's the end goal here, and how do I get there? It's been super helpful in making my work more effective.
What did you find to be the most difficult aspect of your chosen assignment? Creativity? Research? Connecting design to research? Craft? Organizational skills? Time management? Something else entirely?
Out of all the challenges I faced during my assignment, the biggest obstacle was the word itself - farrago. It means a confused mixture, which can be interpreted in so many different ways without any specific rules or guidelines. Personally, I find it difficult to create something without a clear goal or direction. I prefer assignments that involve researching and creating something based on a specific vision. But I suppose that's just part of the learning process, right? Learning to create something out of a seemingly disorganized mess is a valuable skill in and of itself. It just took a bit of extra effort on my part to overcome this particular hurdle.
What did you enjoy about this opportunity?
There were so many aspects of this opportunity that I truly enjoyed. First and foremost, seeing the final outcome of the assignment was incredibly satisfying. It's always a great feeling to see your hard work pay off in such a tangible way. Additionally, I really enjoyed the presentation aspect of the opportunity. Being able to share my ideas and showcase what I had accomplished was a great experience. All in all, I'm extremely happy that I had the chance to be a part of this class. It was an amazing opportunity that I will always cherish.
How would you rate your performance over the course of the semester?
Looking back on my projects, I'm really proud of the work I accomplished. I was able to explore so many different ways of creating confusion through various mediums, including 3D, 2D, and even 4D. It was an incredible learning experience to be able to experiment with so many different techniques and see how they can be used to convey a certain message or feeling. Additionally, I'm very happy with the reflective piece I created. It's always rewarding to see your personal growth and progress reflected in your work.
Overall I would give myself an 18/20 rating.
What would you do differently now that you've had this opportunity to work this way?
I really like the idea of collaborating with AI to work on the reflective piece, but If I had more time, I would like to make a book filled with process work done in such a confusing way.
A word from me
Hi Paul! I just wanted to express my gratitude for the unique and interesting way that you structure your assignments. In the past, I've had professors assign work that didn't really resonate with me or that I didn't find particularly engaging, but your approach was refreshing and inspiring. Additionally, I really appreciated your cool attitude toward each student in the class. It helped to alleviate some of the stress and allowed me to fully enjoy the learning experience.
I always like to reflect on what I've learned and how it has impacted my creative process and designs as a whole. I have to admit that I lost the "have fun" aspect of creating posters or any 3D piece a while ago, but you reignited that passion in me. Your critiques, ideas, and stories were so helpful and inspiring, and I am deeply thankful for your guidance throughout the class. You are definitely going down as one of my favourite professors at OCAD.
I wish you a great summer, and I hope our paths cross again soon!
1 note
·
View note
Text
2D Assignment Update
Although I am a week behind, I have completed my project for 2D! I am quite proud of my outcome, especially considering that I was not feeling very confident in my ideas.
I started by creating the following stencils so I knew what my canvas needed to look like in order to come together into that final crescent moon shape.


Once I had my stencils created, I drew three designs (one for each definition of lunette). My main idea for this project was to have each "postcard" design be a part of one bigger whole that represents "lunette". This is why they come together into that final shape. The crescent moon shape is because of the most modern meaning of the word.
I will include images of each digital design as well as the final printed outcome below.

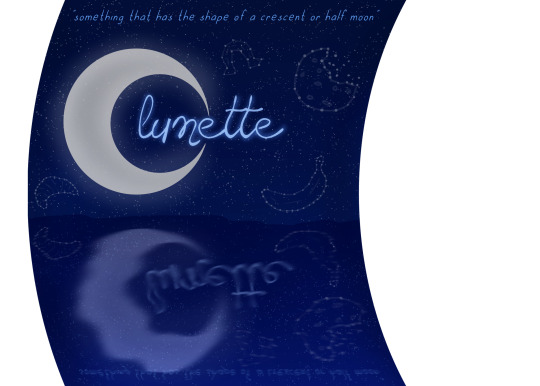
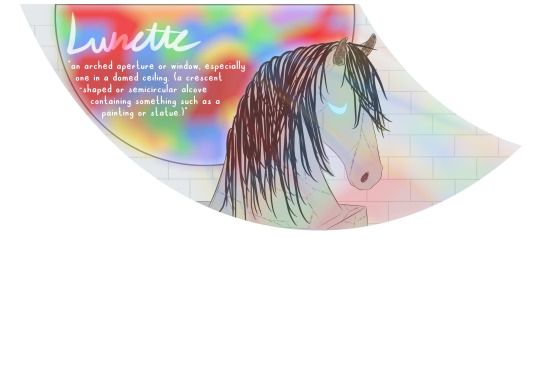
FINAL PRODUCT:

Each piece was made and cut separately, so they come apart and stand on their own as well.
1 note
·
View note
Last Seen Blogs

wellsunmedicityhospital
WELLSUN MEDICITY HOSPITAL

orchestrationofcarbon
THIS BLOG VIOLATED THE COMMUNITY GUIDELINES.

coachpurseprices-blog
coachpurseprices

kodaksnimau-blog
Untitled

bleachrpfamily-blog
Bleach RP Fam[ily]