#Filmora Go
Text
Pack de Transiciones
Éste increíble pack contiene muchas transiciones las cuales vas a poder usar en tus editores de videos favoritos, tantos en ANDROID, IOS y PC, todas las transiciones que vas a encontrar aquí totalmente gratis, las podrás usar en editores como KINEMASTER, POWERDIRECTOR, CAPCUT, FILMORAGO, PREMIER, entre otros.
Espero puedas sacarle todo el provecho del mundo a estas transiciones, también espero…
View On WordPress
#ADOBE#ADOBE PREMIER#CAPCUT#CAPCUT PREMIUM#FILMORA#FILMORA GO#KINEMASTER#KINEMASTER PREMIUM#PACK DE TRANSICIONES#POWERDIRECTOR#POWERDIRECTOR PREMIUM#PREMIER#TRANSICIONES#TRANSICIONES GRATIS
1 note
·
View note
Text
#Im so so angry and sad#Ive deleted my premier pro and wanted to find a new video Editing software#I made this absolute masterpiece😩👌🏻#i had to pay for a subscription to download the video without a watermark#💀 No#Enjoy it anyway ❤️#imma go stomp on Grass#Fuc u filmora#cedric the sorcerer#sofia the first#Stf
45 notes
·
View notes
Text
to be fair tho making a video is a lot less stressful when adobe rush isn't making my computer take 30 seconds to perform any function outside of it...
#that shit frustrated me to the point of tears i swear#i was like oooh i have planny of time left#but just having rush open made my computer slow to an absolute crawl#i was trying to download files i had emailed to myself and it took soooo fucking long lmao#logging into my youtube account took like 30 minutes...#and then when i was uploading it to youtube it stayed at 0% for an hour#until i remembered to close the damn program#and go into task manager and exorcise creative cloud#turned it in at 11:59#but filmora doesn't seem to impact my computer much at all thank god#i think rush and premiere are like constantly saving to the cloud#like there's no way to just save your project onto your computer it just lives on the cloud
2 notes
·
View notes

Note
If i may ask, what do you use to animate? I love your art so much ^^
I draw frames individually in photoshop and then place them together in a video editing software called Wondershare filmora. It's not built for animation but it does have tweening stuff.
TBH, I don't recommend it. I now have difficulty learning any actual animation software because my brain only wants to do it the way I've learned😭 I would probably have to go to art school or smth if I wanted to learn how to animate properly.
211 notes
·
View notes
Note
Imagine an ex assassin listener feeling worthless till Haytham starts lecturing them on how much he values their work and service
(also what are you using to make the audio?)

A/n: Heya anon, I used Wondershare Filmora but I'm trying to find a better program because the latest versions are just shit. Maybe I'll go back to Audacity.

Haytham has never been one to sugar-coat or sweeten his words with false lies. And he's certainly not going to start now when you, one of his best Templars have begun to doubt yourself. You're no longer an Assassin, you tell yourself, and you shouldn't be feeling like you're not good enough in the Order. The past is the past, but the leery eyes of others have started to eat at you.
'Assassin', they whisper, the older Templars usually.
You can't take it anymore and you decide to tell Haytham about it.
It creates a feeling of unease with the way he stares, two sharp eyes of unrelenting intensity drilling into your skull as you pour out your worries to him.
He stops you when he notices your struggle in producing a full sentence, your words beginning to come out all stammered and incomplete, and you dread how much you sound like an utter fool.
"That's enough of your self-deprecation. Your services has been of great value to the Order, and to me." He says, and the way he says it sounds harsh like a lecture but you understand that Haytham always tells things how they are.
"I just," You start again, your fingers fiddling nervously as you try to maintain eye contact. "I feel like if I was doing more to prove to the others-"
A swift reply cuts you off, his hand raising to stop you.
"You are doing more than enough."
It's the way he asserts his statement, like it's a fact, like he would leave no more room left for your protests - and he doesn't.
Your head hangs between your shoulders, like a wilted rose or a dejected lover, your mind still swimming in doubt but even less so than before. When he pats your shoulder, you offer him your attention.
"If you truly feel as though your efforts aren't meeting up to the standard, you can at least cease your whining. I require your assistance shortly soon. Perhaps you can prove yourself even further then."
You sprout with relief, grateful that you have a mentor as abundant in sense and reason as him.
48 notes
·
View notes
Text
how i make gifs using filmora x
(for anon ❤️)
read under the cut!
hey!! thanks for reading this! just a few notes before i explain about my editing process:
filmora x works very differently from photoshop. it's a video-editing software anyways, so treat it like that!
always use high-quality sources!! most of my issues with grainy gifs come from using low-quality sources. so, i always ensure to use sources at 1080p, at least!
if i'm creating multiple gifs from one match, i usually download the entire match (which is a hugeeee file 😵💫 but it's so worth it!!). but if it's only a scene or two, i screen record them! i have an astro supersport subscription and a beinsports account, so i don't have an issue screen recording clips, as their content are always in high-quality! but if you're using other sources or streams, then do ensure the quality is good!!
if the only available source is of low-quality, my trick is to make smaller gifs! for smaller gifs, i usually keep a 1:1 or 4:3 size ratio, and post them side-by-side in a single post - usually two in a row!
general colouring stuff applies here as well, you can check out the photoshop guide i've linked in the ask!
remember, there isn't one "correct" way to gif, you can gif however you like!
and now without further ado:-
step one: adjust video settings, speed and length
after importing the clip into filmora, setting the aspect ratio, resolution and frame rate according to preference, the first thing i'd do is to adjust the speed of the clip. i like to slow them down, so i usually go for a 0.5x speed. you can always adjust the speed to your preference!
i like to keep my gifs within a 3 to 5-second length, depending on the content, so i'll trim the clip or adjust the speed as desired. if the clip is shaky, i usually add stabilization at about 10%, but you can adjust as you like! here's an example of a clip before and after speed reduction:

step two: auto-enhance
once the clip is at your preferred length, size and speed, now it's time to make it look pretty! in filmora, there's an 'auto-enhance' feature, so i usually begin with that, setting it somewhere between 50% to 100%. here's an example of how it looks like before and after auto-enhancing at 100%:

step three: colour correction
head over to 'advanced colour correction', where you can use either the given presets, or manually adjust to your liking. i always manually adjust them!! you can also start off with a preset and make additional manual adjustments as I did below! what i did here was to darken it, then adjust the colour enhancement, white balance (hue and tint), colour (exposure, brightness, contrast, vibrance, saturation), lighting (highlight, shadow, black, white), and hsl (for this example, i adjusted only the red).
you can also save your adjustments as custom presets so that you can use them again in the future!
here's a quick look at how i do the colouring! from the before and after colour correction examples, you can see that this is the important part of the whole process!!

step four: sharpen
once i'm satisfied with my colouring, i sharpen them by adding the 'luma sharp' effect (usually at 50% or 70% alpha and 50% intensity)
here's how it looks like before and after sharpening:
step five: final touches and exporting
before i export, i make some final tweaks to the brightness, contrast and saturation, etc., ... and voila!! there also many other effects available for you to add (grainy effect, blur effect, etc.) so feel free to play around!

once you're satisfied with your result, it's time to export! now, video-editing softwares HATE gifs. you can always just export as gif from filmora directly, but i don't really like the way it turns out 😭 so, i export them as video (.mp4) and use external gifmakers (like ezgif!) to convert them from video to gif!
aaaand that's all!! here's a comparison of the original clip vs the end result!
final note: remember to size your gifs correctly for tumblr (540px for full width, and 268px for half), and keep each gif within the size limit of 10mb!! if you find that your gifs exceed the size limit, try reducing the number of frames or removing duplicate frames, increasing the contrast, or you may also crop the height if necessary.
if you have any questions about making gifs using filmora, feel free to reach out! thank you for reading, mwah mwah!! 💞
11 notes
·
View notes
Text
Hey hey! I have put all the questions I answered during the Q&A here (plus a few extra)! If you still have some questions you like to ask me, feel free to comment!
Q: Are you gonna make more R18 translated content?
A: YES! I have another game already in the works and will be released a little after Chou no Doku is finished!
Q: Where will Iba’s route be done?
A: Soon I hope… It should be done before the end of April, so I’ll do my very best!
Q: Are you going to translate the other chapters of Hukuoki Tenun?
A: I plan to! They are fun to make and to play through. I will however not be translating Saito’s route since that one has already been translated by someone else!
Q: Will you be translating other Hakuoki games?
A: Yes! I have some short translations planned but I won’t translate an entire game since I’m still focused on working on Tenun.
Q: Do you know any Japanese?
A: I know very little Japanese, But I am currently following Japanese classes!
Q: What progremess do you use?
A: I use 3 programs for translating. EasyScreenOCR: to capture the Japanese text, Google translate and Yandex translate for wel... translating. For video's I use Wondershare Filmora.
7 notes
·
View notes
Note
Hihi
Can I ask you what program do you use for the animatic? And can you recommend any good program for practice? (I never used any of these programs, and they look pretty hard, so I don't want to pay yet for one, but I want to make something :c)
Hello! This might be a bit long but I hope I can help you with this (I'm holding your hand because this is also my first time doing an animatic so I have no idea on what kind of good pipeline there is to follow...) I apologize in advance if this won't be the most helpful answer :,))
okay so for the software. I use the ipad for most of my work nowadays... unfortunately, both apps that I use are paid—RoughAnimator and Procreate. I'll walk you down with how I do it. It is not the most efficient way but here's how it goes for me... :,))
Storyboard
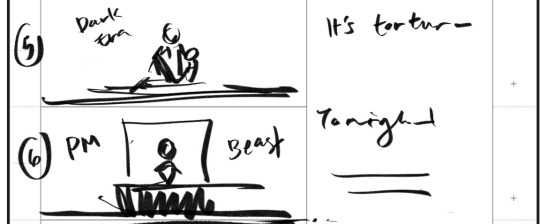
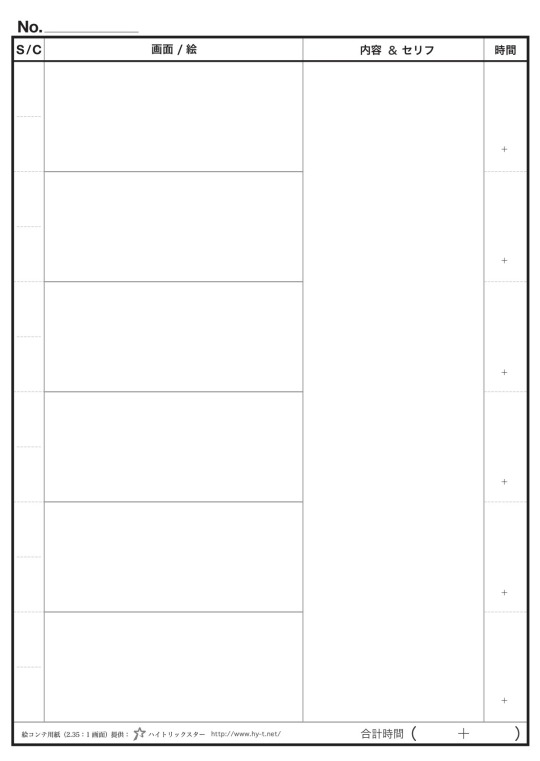
I think the most important thing for planning something like this is having a clear vision of what you want to see. I started this animatic by brainstorming in my storyboards what I want to see in timing with the song and its lyrics. Here's an example of what I previously shared... [disclaimer: I did not follow the template so yeah, feel free to ignore the kanji characters]
you can see the outline I roughly made to tell myself what scene I want to show to what lyrics (I got lazy to write the whole lyrics down lol) and also added some notes like the movement of the character and camera pans etc.

here are the corresponding drawings to it (sorry if the quality is bad, I just screenshotted this from my gallery ><;;)
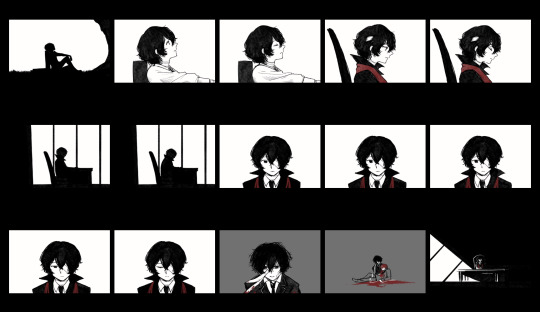
Drawing the Cuts
All of the drawings are done on Procreate. I use this software for most of my drawings now, mostly because I like the texture of the brushes there. At this point, I am not worrying about timing these drawings to the music yet but I am reassured since I already made my guide of that in the storyboards. Procreate also has an animation feature that helped me draw the breathing sequence.
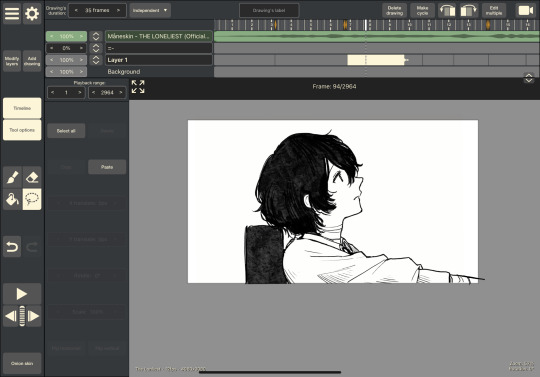
Compiling and Timing the Drawings
Once I've saved my drawings to my photos, I move them to RoughAnimator. Here is where I time the drawings with the song. What I like about RoughAnimator is that it has its own drawing tools (I don't really like the brushes tho... hence, me using Procreate instead), it has a camera tool that allows me to pan across my drawings and also shows the sound wave thingy of the song that helps me with timing. It also allows me to easily adjust the exposure or how long a drawing flashes on the screen at my chosen framerate.
I would sometimes be unsatisfied with my initial drawings, leading to me going back and forth between Procreate and RoughAnimator to revise stuff. (which in my opinion is not efficient but I can't really think of any other way to do this...)
So yes. That's pretty much how I'm working with it so far. I am currently stuck because both Procreate and RoughAnimator have very limited features when it comes to panning images... I'm still figuring out how to do that but I'm thinking of moving to video editors for these kinds of stuff instead of relying on RoughAnimator...
I hope you aren't discouraged by this,, I know it isn't the best solution... If you are to follow this kind of workflow, I think a good combination of any drawing software (hopefully with an animation feature) and a reliable video editor to time it to the music (I recommend finding ones with camera pan and motion tween features) is sufficient enough for this.
If you're using an ipad like me, iArtbook is a good free alternative to Procreate with a good animation feature. I have yet to check it out properly but Filmora or Capcut might be a good video editor... If you're using a desktop, I think Krita is good for drawing and animating!
I'm so sorry again if this wasn't really helpful. I will definitely share it if I were to find a better workflow for this. If you'd like to have some storyboard templates, here are some I found on the internet!

I wish you all the best in your plans and practices!
(feel free to ask again if you have any questions, I hope this helps somehow :,))
#pls dont be like me and I hope you do your best making cleaner storyboards aksjdhfalskjdf#my workflow is a mess i am so sorry#i genuinely hope this helped more than discourage#inbox#art progress#wip jail
27 notes
·
View notes
Note
hi, hope you don't mind me asking but how do you make gifs? what apps/programs do you use and what's the process like? i'm considering trying out gif making as a hobby but it seems so complicated. do you know any tutorials that are simple and easy to follow? your gifs are really good, i like your coloring. thank you very much in advance. ♡
Hi! Ofc I'll be happy to share 🫶✨
I'm not too familiar with photoshop so I use phone apps instead. But before that I go through the clips on my laptop. I trim the movie clips I want the gifs of to maximum 5 seconds long on filmora (i have the paid one), I export them as videos high quality as possible. The shorter the clip is, the more high quality I've noticed them to be. Move them to my phone, then I choose some app to edit the clips with, my current go to is Ton:

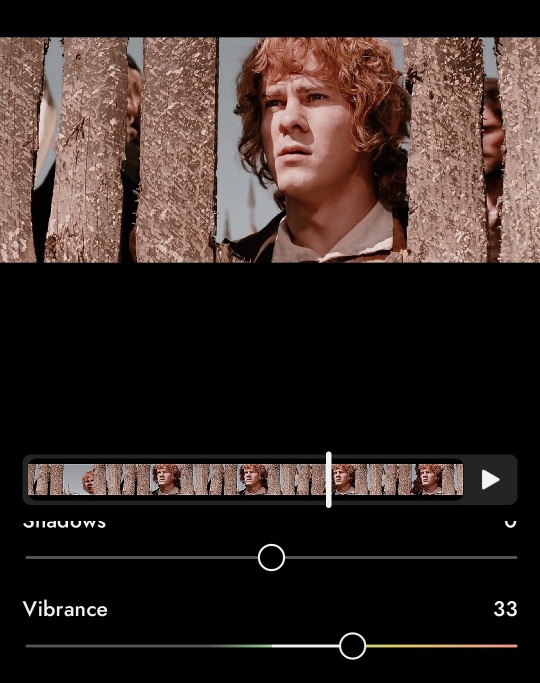
I just fiddle with the filters there, saving the ones that I manage to make look how I want the coloring to be and then just use that on all the clips. Then I make the clips to gifs on this app:
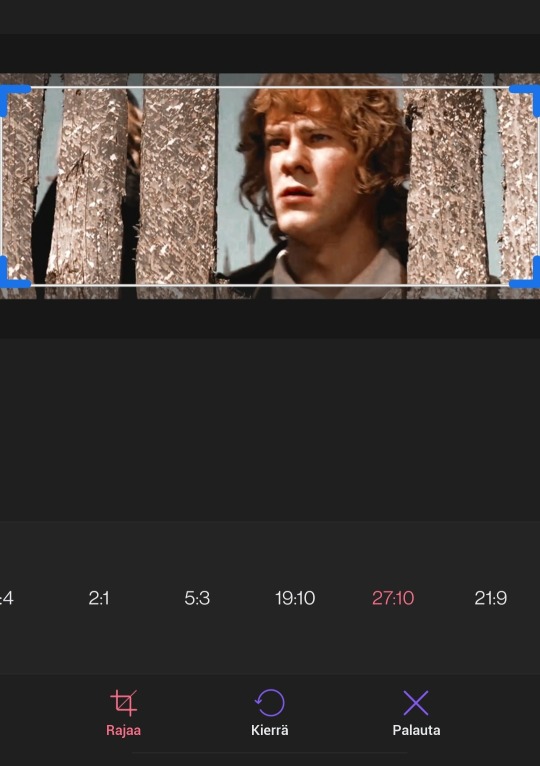
I just then change the speed to what I want it to be, usually to 20fps, crop it to how I want, etcetc. This time I went with 16.67fps.
I save it as a gif, as high quality as possible, but because Tumblr thinks some gifs are too big, I make sure it's not more than 10MB. I just lower the quality or compress the gifs until it fits that criteria. Tumblr compresses gifs so the quality drops a bit when I upload them, which is why I think editing on photoshop makes better quality gifs than what I do, but I like my method because it's insanely easy and let's me do it on my bathroom breaks at work, lol.
And ta-da. A Merry.
If u have any more questions feel free to ask 🫶
4 notes
·
View notes
Text
Hi, before I explain my post, I want to say something important.
• What you see my blog has become a major overhaul. And despite the changes, I decided that my 2nd account will be now my artwork blog with a secret twist.
⚠️NEW RULE! (W/ BIGGER TEXT!)⚠️
⚠️ SO PLEASE DO NOT SHARE MY 2nd ACCOUNT TO EVERYONE! THIS SECRECY BLOG OF MINE IS FOR CLOSES FRIENDS ONLY!⚠️
• AND FOR MY CLOSES FRIENDS, DON’T REBLOG IT. INSTEAD, JUST COPY MY LINK AND PASTE IT ON YOUR TUMBLR POST! JUST BE SURE THE IMAGE WILL BE REMOVED AND THE ONLY LEFT WAS THE TEXT.
⚠️ SHARING LINKS, LIKE POSTS, REBLOG POSTS, STEALING MY SNAPSHOT PHOTOS/RECORDED VIDEOS/ARTWORKS (a.k.a. ART THIEVES) OR PLAGIARIZING FROM UNKNOWN TUMBLR STRANGERS WILL IMMEDIATELY BE BLOCKED, RIGHT AWAY!⚠️
😡 WHATEVER YOU DO, DO NOT EVER LIKED & REBLOG MY SECRET POST! THIS IS FOR MY SECRET FRIENDS ONLY, NOT YOU! 😡

Okay? Capiche? Make sense? Good, now back to the post…↓
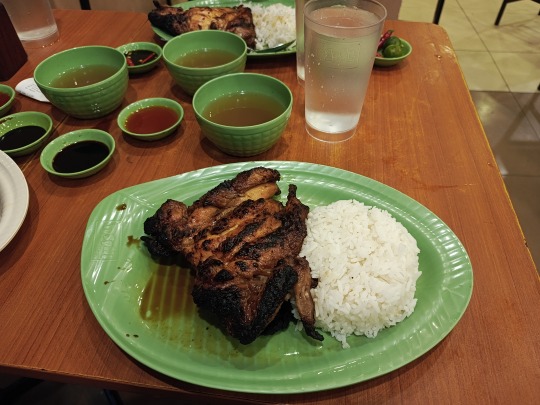
Take a Taste: with Mang Inasal's Chicken Inasal - Pecho (Chicken Breast) [Recorded: Mar 26th, 2024]
Hello! It’s time for another “Take a Taste”! The series is about delicious food with my two paper dolls.
Aww yeah, another round of going "Mang Inasal" restaurant? Yes, please! 😋 This Time, I'm invited with my parents at the different Mang Inasal branch, on Mar 26th, 2024. 🏢🍴 However, once again, I broke the rules for not eating meat this year's "Holy Week", so please forgive me. 😔 Nevertheless, here's my review of Mang Inasal's famous dish, the "Chicken Inasal", particularly the "Breast" part (in Tagalog we called it "Pecho" [pi-cho]) I ordered 🍴🍗. And let's not forget, the "Unlimited Rice" (or "Unli Rice" for short)! ➕🍚🤤 So will I satisfied with my order as my previous one? 🤔 Let's find out, right now! 😀
If you haven’t seen my previous episode, then please [CLICK ME!].
IMPORTANT NOTE: No #OnThisDay throwback post for this date.
AND ANOTHER NOTE: These photos and videos are my first time using my brand new smartphone from Tecno! 🆕📲😁
Want it more? Please → [CLICK ME!].
So, without further ado, let’s get started:
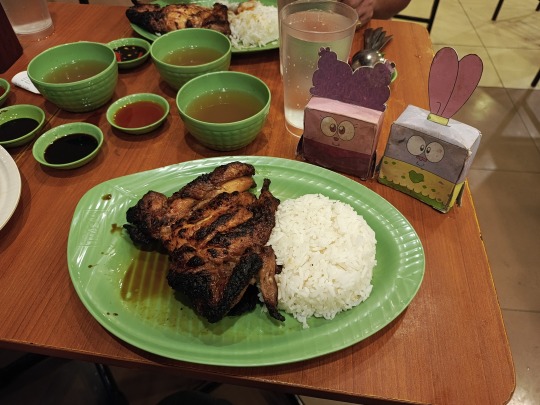
1st & 2nd Image(s) 📷📲: ↑
• Here's what "Chicken Inasal" looks like in all of its perfect serving 🇵🇭🍗; let alone the slightly mess on my "Unli Rice" green plate. Plus, let's not forget the free warm 'Tamarind Soup' 🇵🇭 🫘 🥣, as well as the condiments that we mentioned in my previous topic, in Jan 2024. *Sniff* (2x) Can you smell the burning charcoal goodness, you two? I bet you are! 🍴🍗🍚🤤 Unfortunately, I didn't get the "Unlimited Java Rice" (over the owing to a different menu. That's all right, I should make another plan, someday. 🤷♀️
BTW: We decided to drink water over soda for budget reason. 🥛��

3rd Image 📷📲: ↑
• Anyway, normally I used cutlery as my main purpose for three meal servings (Breakfast, Lunch, and Dinner), both at home and at food-related establishments. Just like you're doing it daily. 🍴 However, for this day, it's time to get my hands on the traditional "Filipino Way"! 😁 That's right! We Filipino blood (like myself) use our human hand/hands as our traditional cutlery, whether there's a meal on the plate or a meal on the large banana leaf. The latter was another traditional "Filipino Way" called the "Boodle Fight". 🇵🇭🤲🍚🍗🐟😋 "It's a meal that dispenses with cutlery and dishes. Diners instead practice kamayan and eat straight off the table unlike typical instances of eating with the hands of individual plates", according to my rapid research. 🔍🌐
My Recorded Video 🎦🎞️: ↑
• Thankfully, I have my recorded video shot at 60fps for the FIRST TIME! 🎦⏺️📱😃 Also, my first muted video sound because it is super noisy inside, even in ✝️ "Holy Week" ⛪. Okay, it's actually two videos I recorded, so I combined them into one (using Filmora 9). 🙂
• All video aside, here's me using my single right hand as my cutlery after I washed my hands (before recording). You can see, I'm picking a small amount of grilled chicken with my bare fingers before I dip in some chicken oil I put some small amount of rice, and shove it through my mouth. It is super DELICIOUS! 🍗🍚🤤 I also doing it again, this time I'm dipping a fuse of chicken oil and some soy sauce! Yum-yum! 😋 Yeah, it could be messy and I should request plastic gloves, but I simply can't help myself without wearing plastic gloves. As for the "Unli Rice", I requested two rounds of steamy rice from the food server before I was done eating and sipping a little tamarind soup, and then I coughed. 😫 I'll be fine, though. 😅
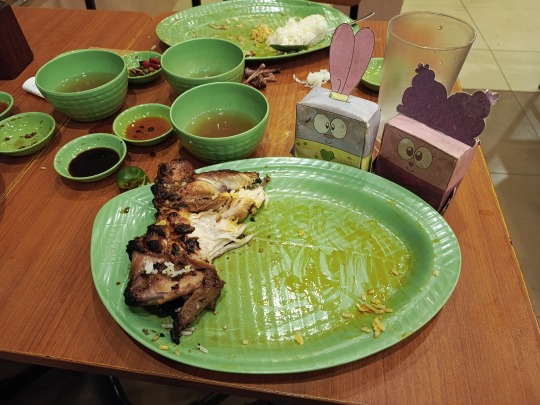
4th Image & Overall 📷📲: ↑
• Overall? Just like before, it was satisfied our taste buds from eating a Chicken Inasal Pecho with Unlimited Rice! Which, by the way, I decided to take home my leftover grilled chicken for any day meal. 🍗😊 And, what can I say? Chicken Inasal did everything right for the past decades, and they never stopped serving the Philippine people (like us)! 🇵🇭🍗😋
• As for the asking price? It cost ₱199 ($3.49) 💵 w/ "Unlimited Rice" included. However, if you want a single shot of steamy rice and not a "Unlimited Rice", then it cost ₱164 ($2.87) 💵 for Solo choice. To me "Rice is Life", so I'm definitely gonna order a meal with "Unlimited Rice". 🍗🍚➕😋
Well, that's all for now. 😊
If you haven’t seen my previous episodes, then I’ll provide some links down below.↓😉
Take a Taste:
○ 2021 Food Reviews: ○
• Popeyes U.S. Spicy Chicken Sandwich [Dec 6, 2021]
• Jollibee Chick'nwich & Crisscut Fries [Dec 21, 2021]: Part 1 [CLICK ME! #1], Part 2 [CLICK ME! #2]
○ 2022 Food Reviews: ○
• Mini Stop Chicken Fillet XL Sandwich [Feb 7, 2022]
• Minute Burger Cheese Burger(s) [Mar 1, 2022]
• Pepper Lunch Teriyaki Beef Pepper Rice w/ Egg (& Honey Brown Sauce) [Mar 5, 2022]
• Bacsilog’s Sulit Combo Bacon-Tocino & Samgyup Day’s Pork Herbs [Mar 12, 2022]
• Burger King Whopper w/ Sides & Drink [May 6, 2022]
• Marshmello’s Limited Edition Coca-Cola Zero [Aug 26, 2022]
• Cheesy Burger McDo with Lettuce & Tomatoes Meal [Recorded: Sept 16, 2022]
• Mcdonald’s PH McSpicy & Apple Pie (featuring their World Famous Fries) [Nov 14, 2022]
• Mcdonald’s McCrispy Hamonado Sandwich [Dec 31st, 2022]
○ 2023 Food Reviews: ○
• Foods from Delicious Restaurant & 1919 Grand Cafe [Jan 8th, 2023]
• Homemade Churros by my lil’ bro [Feb 12th, 2023]
• Lugaw Sisig from Mang Boy Alfredo Lugawan Restaurant [Recorded: Feb 18th, 2023]
• La Prato Stakehouse [Recorded: Apr 10th, 2023]
• Salt ‘n Light Snack Shack’s Cheesy Bacon Burger & Fries [Recorded: Apr 14th, 2023] (Published on May 5th, 2023)
• Delicious burger meal at Tokyo Tokyo Restaurant [Recorded: May 6th, 2023]
• Delicious meals at the Valenzuela Food Fiesta Christmas Bazaar 2023 [Recorded: Dec. 10th, 2023]
○ 2024 Food Reviews: ○
• Mang Inasal Pork Sisig [Recorded: Jan 10th, 2024]
• Mang Inasal's Chicken Inasal - Pecho (Chicken Breast) [Recorded: Mar 26th, 2024]
2 notes
·
View notes
Text
Some theories from the trailer:
Y'ALL DUCK'S NAME IS DAVID!!! ( VERY PROBABLY)
AND HES ON THE GRAVE PROBABLY SOME REFERENCE FROM THE LAST EPISODE WHEN HE DIED????? (did he come back to life or something)

Are they on some kind of lab or garage

AND WHY IS HE GETTING ELETROCUTED (OR SCANNED????)
WE GOT A HIGH QUALITY OF HIM PLAYING THE BANJO YIPPEE
Annabelle in dhmis /jjjjj

I think these Red Guys might be his other versions and the failling one might be the real one? idk-
ALSO WHO IS THIS?????????
(THEY APPEARS IN LIKE 2 FRAMES SO U HAVE TO PAUSE QUICK)

THERE YOU GO Y'ALL I CUTTED IT TO SHOW HIM (yes i used filmora 😔)
#I LIKE DAVID#i think it fits#DHMIS#don't hug me im scared#dont hug me im scared#dhmis trailer#yellow guy#red guy#duck
57 notes
·
View notes
Text
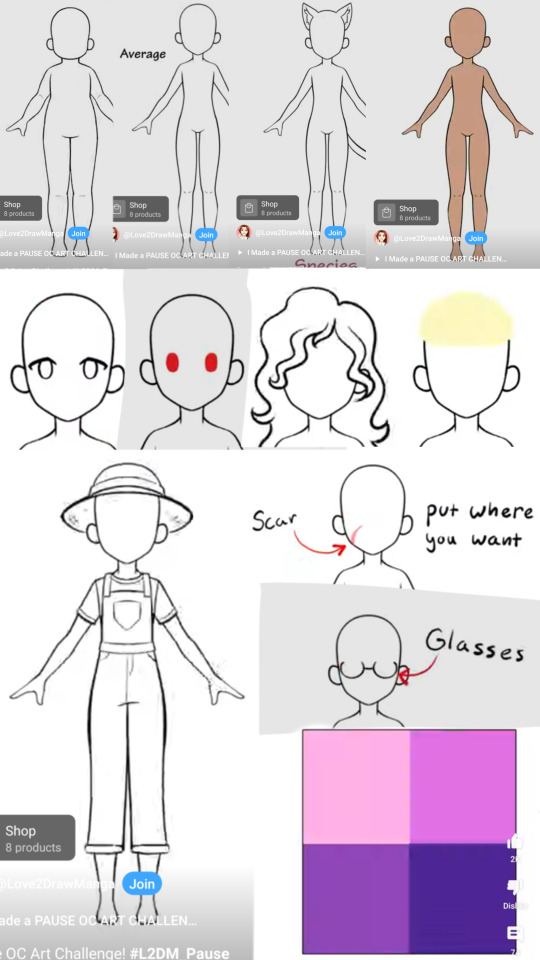
Did Love2DrawMaga's Pause OC Challenge! Usually I pause on them and then don't go through with drawing, but I really liked what I ended up with!

FJDKSLF:DSJ this was supposed to come last week but uh uhhh I HAD FUN DRAWING THIS!! I barely have any excuse to draw characters with more animal like features- LIke I'm not gonna settle for just catgirls and catboys, it said the species is CAT. I tried for a hybrid, but it kept choosing Human the other two times and.. oh I guess I could just draw a cat boy. oh well.
He was kinda tricky to really express masculinity to. Soft eyes and long majestic hair, how was I supposed to work with that qwq


Anyway- Special announcement, I got my website set up! I'm gonna put up digital prints of old illustrations I like too, but while waiting for that, what scenes from my video would you want available in my store? Someone said they were willing to buy a high quality print of a scene in my Meteor Shower amv, and I happened to be working on selling my art.
$1 - Original(Not fully rendered)(all 10 scenes)
$2 - Fully Rendered(1kp)(1 scene)
$5 - Remastered and Fully Rendered(4kp)
$10 - Frame Animated(Looped vid, 1kp)
$15 - Tween Animated(Looped vid, 4kp)
$20 - Bundle of all 5(of the scene of your choosing)
I'll only choose around like, 10 scenes to sell? I don't want to milk this too much, I know I've said I spent half a year, but in the end, this video was free for all to see and I'm gonna upload content(albeit slowly) that could satisfy you just as much as the people paying. Also, Cavetown's song carried half of the video, i don't wanna get in trouble 😭
If you're really serious about supporting me though, I'm free to sell scenes that aren't in store! Adjustments will cost similarly to commissions since they're personal,(except org, the prices are 2x the list above)
As per the OMORI fan-work policy, I'll only be selling the raw projects to 10 buyers, not by demand.
Now for the most expensive thing to mention on this post. How much do you think the raw files of my Meteor Shower video are worth? I set the ceiling price of the whole thing as $1k, but would you want the raw files of separate sections?
Ibis Paint X - (654 files + raw files(haven't counted them yet)
Krita - (41 files)
Filmora - (26 files)
Bundle - (725 files)
#digital art#digital illustration#oc#original character#original art#furry#anthropomorphic#new website#digital print#art business#small business#small artist
2 notes
·
View notes
Text

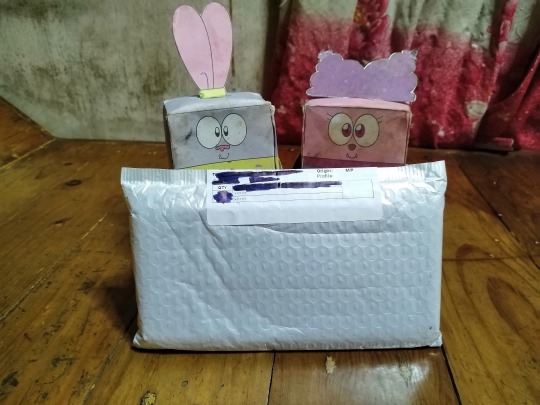
1st & 2nd Image(s) [Prologue] 📷📲: ↑
Hello, March! ☀️ If one parcel wasn't enough, how about another one? This time I ordered it from Lazada 🇵🇭🛒🌐! 📦😁 So, are you ready to reveal it, you two? Yeah, I bet! Let's go with this recorded video! 😊
My Recorded Video [edited by: Filmora 9] 🎦🎞️: ↓
My Brand New Phone case for my Tecno Spark 20 Pro - Part 1 (w/ my paper dolls) [Recorded: Feb 4th, 2024)
Okay, now that you watch the video, here's my spanking brand new phone case for my precious Tecno Spark 20 Pro! 📱🙂 So, let's review with, shall we?
And in case you've missed out on my new phone, then please → [CLICK ME!]. 😉
So, without further ado, let's get started!
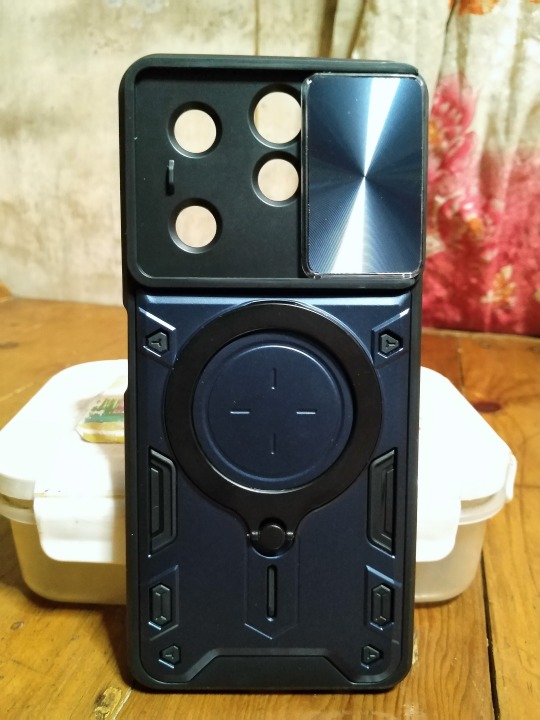


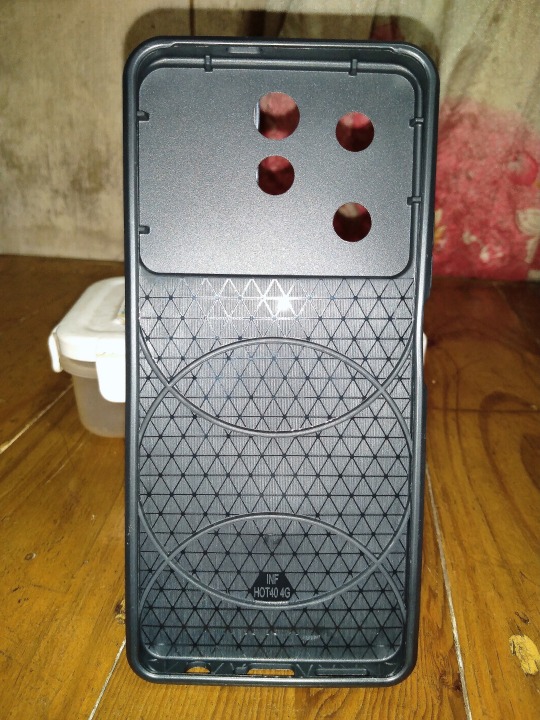


3rd to 11th Image(s) 📷📲: ↑
• Once again, let's transition to the photo section, shall we? Here's what it looks like after unwrapping it. It is a thick phone that will snug my Tecno smart, much like the slim counterpart (which came from the box). Unlike the latter, my new phone case had unique tricks on its sleeve (no pun intended), like a swivel metal ring that acts as a stand for portrait and landscape mode, a thin metal inside for placing the magnetic car holder (with the extra support from the aforementioned metal ring), and my favorite is this sliding piece to cover the camera lens from unwanted dust. One thing I noticed was this phone is only suited for "INF Hot 40 4G", meaning its "Infinix Hot 40 4G" smartphone. But as I said in the video, it can also fitted on my Tecno phone, as well. And for those who unaware, both Tecno Mobile and Infinix Mobile companies (as well as Itel Mobile, Carlcare, and Oraimo) were the same roof from the parent company, "Transsion Holdings" [CLICK ME!]. 📱📱😊


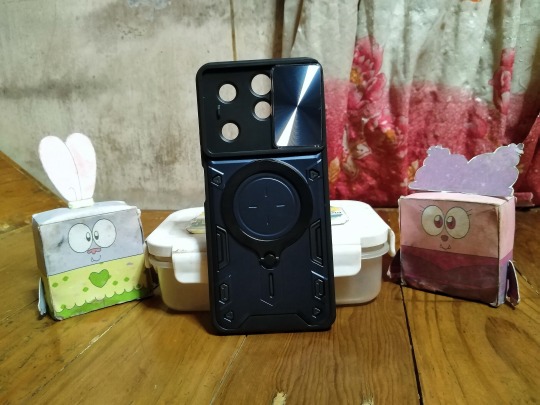
12th to 15th Image(s) 📷📲: ↑
• And here's side-by-side with my recent Tecno Spark 20 Pro smartphone, who still wearing the slim phone case from the box's accessories. 🙂 What do you think, you two? Are you gonna miss the gorgeous "Frosty Ivory" color? Well, I've already recorded it, though, so feel free to watch it again. Or go watch on YouTube to see that particular phone for more, with different color variants. 😊


16th to 22nd Image(s) 📷📲: ↑
• Anyway, here's what it looks like after replacing the slim case. And man, it looks dope, in a good way! 😄 The holes for the speakers, ports, and fingerprint scan we're a perfect fit. Meanwhile, the back of the phone was pretty darn good, especially with that sliding piece. However, I shedding light from the LED flash while it was covered doesn't fit the bill for me. However, nobody is going to do that, right? 🤷♀️
Unfortunately, I have to stop here because I've got so many snapshots that won't fit than just 30 photos. But fear not, I have "Part 2", right here → [CLICK ME!].
Tagged: @lordromulus90, @bryan360, @carmenramcat, @leapant, @rafacaz4lisam2k4, @paektu, @alexander1301
#My Video#MyVideo#Video#My Photos#My Photo#MyPhotos#MyPhoto#Photos#Photo#Chowder#Chowder Panini#Paper Dolls#Phone Case#Tecno#Tecno Mobile#Tecno Spark 20 Pro#Android Smartphone#Smartphone#Android#Photography
3 notes
·
View notes
Text
NO ONE HAS DONE YOURE GONNA GO FAR KID FOR NAI???? *runs to filmora*
#YALL NEED TO WAKE UP WDYM NO ONE HAS DONE THAT AMV YET#trigun stampede#trigun#ARE YALL INSANE#YALL ARE LETTING ME FALL DEEPER IN THE AMV HOLE
13 notes
·
View notes
Note
Hi!
Do you have any advice for someone looking to get into video editing or just try and figure it out? It’s always seemed kinda fun to me, and I want to know if there’s any beginners resources you have :3
Heya!
In terms of beginner's software, I'm not sure what's out there now. I got my start on Windows Movie Maker, which is now, unfortunately, discontinued, with a much shittier version available to Windows users.
I do know there are a lot of free apps on Mobile, and a quick YouTube or engine search (Google or Firefox) for free software should get you some options.
From there, clear editing advice is all gonna come down to which software you choose to go with, but I do have a few pointers that apply to most, if not all editing to get you started!
1) Audio levels, if you can view them, should stay in the green and yellow zones. Not all software has this option, but some will show you how loud a particular bit of audio is at any given time, represented with several green rectangles, one or two yellow, and a red. If the audio is in the red, that means it's "peaking" and will be too loud.
The reason you wanna look at the visual rather than listen by ear is so that it sounds the same on any device. If you set it depending on how loud you laptop/phone is, then it might be too loud or too soft when you export the final video.
2) If you can, use multiple tracks to edit! Tracks are the lines you drag and drop videos/pictures and audio in. Unless the software only supports one track for each (or even a combined track for both), you can stack clips on top of each other to make timing cuts easier, help with synchronizing with audio, and so much more.
3) If you have the audio and the visuals separated onto two tracks, see if you can't find some kind of tell to make sure they are synced. In films, this is what the clapper is for, the clapper being the board with the striped design on top that they let fall, which makes that loud SMACK! sound before the action starts. It's to help with editing! 🎬
You don't necessarily need a clapper, as something like a snap of the fingers, clap, hit, ect, ANYTHING that makes a loud, definitive noise will suit this purpose. As long as the noise lines up with the frame where contact is made, it'll be synced.
4) Have all your shots laid out in front of you. This is for films moreso than YouTube videos, but if you need to cut between multiple shots, knowing what each of them are beforehand (and which takes you're keeping) is essential to making editing go a lot smoother. I've seen editors who will print out each scene and each shot WITHIN that scene, paste that on their wall, and reference that while editing. That was back in the '70s though, so you may not need to go THAT far, but it never hurts either.
5) If you can, have someone taking notes as you film. This is especially useful for filmmaking. For each shot, have someone sit with the director and write down how each take went-what lines got fumbled, when cut was called early, when takes are good, ECT. This helps GREATLY in editing and will make life SO much easier.
6) Just edit, edit, edit. Doing lots of projects is the one sure-fire way to get good at it. Any software will work to start, but once you know you wanna take it up a notch, already having prior experience will help you get settled in with all the new, flashy features a lot easier.
7) DONT USE ADOBE PRODUCTS. I DONT CARE IF THEYRE "INDUSTRY STANDARD," THEYRE EXPENSIVE AND BAD AND NOT WORTH IT. I personally use Filmora 9, but I've also used Sony Vegas, which is also good. There are other options, don't be fooled.
It's 3:30 AM so I'm sure there's more I could say but my brain is an egg at the moment, lol. But if you have any specific questions, feel free to DM me or comment or something. I love talking about this stuff, as filmmaking is one of my passions.
Good luck to you, and happy editing!
#dimond speaks#you know its funny i always wanted to teach and make tutorials as a kid?#maybe one day i'll do that too who knows
2 notes
·
View notes
Last Seen Blogs

mom-son-forever
Untitled

karminfans
All About Karmin

leghosht-blog
Sans titre

ranuns-blog
Ranun's Blog

smoothmascfaggot3
Untitled