#How to make videos more cinematic for beginners
Note
ignoring the hot boy, how would you rate genshin? I’ve been thinking of playing it but I have no idea what the gameplay actually looks like. I just like some of the character designs I’ve seen but also I don’t wanna get into something that just isn’t that good yk? should I download it?
okay!! so i think im qualified to answer this because im not like. a super hardcore player and i play relatively casually. i think overall genshin is like.. 7 or 8/10.
the main story is absolutely excellent. 10/10 on that end. i think the lore is well thought out and structured in a way that makes you want to keep playing it. all the cinematic cutscenes are very quality and you can play it completely f2p i.e. free to play and still experience that.
none of the gameplay itself is barred behind pay. if you just want to consume something lore heavy its good.
now the gameplay i made a very long post about talking about some of the critiques i have with it!! the basic premises is an online rpg that can mostly be played solo.
you play with a team of four characters (you are given several free characters as you progress through the game) and you can level them up and develop them to fight against stronger enemies.
the thing about genshin that im not especially fond of is that the gameplay isn't very intuitive for a beginner. there's a lot of things i think you should know that effect your play style that you might not realize at first.
my biggest advice is to play as casually as possible and take your time. take breaks occasionally but try not to miss out on the events because those are some of the best parts of the game. also watch a youtube video or two before going in to get a basic feel
one of the main reasons i stopped playing is because i ran out of stuff to do that wasn't just grinding a lot. i think its a game you want to barrel through to progress in but for me personally playing it that way was exhausting.
the gameplay is pretty typical for any open world game. you collect stuff, you go on missions, you fight bosses. it is a gacha game so pulling for items is a big part of it and the gambling gets addicting fast.
i have more to say dknskj like im opinionated but i do genuinely enjoy the game despite the plethora of critiques i have. if you focus on the lore then its a good time
#return to sender#the grinding is normal for this kind of game tho so im not like upset about it lol
9 notes
·
View notes
Text
Exploring Vector Graphics: Versatile Tools for Graphic Designers

Introduction
Welcome to the world of vector graphics, where creativity knows no bounds and design possibilities are endless! As a graphic designer, understanding and harnessing the power of vector graphic design tools can elevate your work to new heights. In this blog, we'll dive deep into the realm of vector graphics, exploring the tools that empower designers like you to create stunning visuals.
Why Vector Graphics?
Vector graphics offer unparalleled flexibility and scalability, making them ideal for a wide range of design projects. Unlike raster images, which are pixel-based and can lose quality when resized, vector graphics retain their crispness and clarity at any scale. This inherent advantage makes vector graphics essential for everything from logos and illustrations to complex artworks and print designs.
Essential Vector Graphic Design Tools
Adobe Illustrator: A powerhouse in the world of vector design, Illustrator offers a comprehensive suite of tools for creating, editing, and manipulating vector graphics. From precise drawing tools to advanced color controls and seamless integration with other Adobe products, Illustrator is a must-have for serious designers.
CorelDRAW: Another industry favorite, CorelDRAW provides a user-friendly interface coupled with powerful vector editing capabilities. Its intuitive features make it a go-to choice for both beginners and experienced designers looking to unleash their creativity.
Inkscape: As an open-source alternative, Inkscape packs a punch with its robust set of vector drawing tools. Ideal for budget-conscious designers, Inkscape offers a range of features comparable to premium software, including bezier curves, text manipulation, and SVG support.
Affinity Designer: Known for its lightning-fast performance and modern interface, Affinity Designer is gaining popularity among designers seeking a fresh perspective. With features like non-destructive editing and seamless compatibility with other Affinity products, it's a worthy contender in the vector graphics arena.
Vector Graphic Design Tips
Start with Sketches: Before diving into digital tools, sketch out your ideas on paper. This initial brainstorming phase helps clarify concepts and leads to more refined designs.
Master Bezier Curves: Understanding how to manipulate bezier curves is key to creating smooth, precise shapes in vector graphics. Practice using anchor points and handles to achieve the desired curves and angles.
Use Layers Wisely: Organize your design elements into layers for better control and organization. This allows you to easily adjust individual components without affecting the entire design.
Experiment with Color: Don't be afraid to explore different color palettes and combinations. Use gradients, patterns, and opacity effects to add depth and visual interest to your designs.
Optimize for Scalability: When saving your vector graphics, choose formats like SVG (Scalable Vector Graphics) that maintain quality across various devices and screen sizes.
Conclusion
In the dynamic world of graphic design, mastering vector graphic design tips and techniques is essential for creating impactful visuals. By harnessing the versatility of vector graphics and following best practices, you can unleash your creativity and bring your design visions to life. Start exploring these powerful tools today and elevate your graphic design game to new heights!
Suggested Link: -
Cinematic video editing
Graphic Design Innovation
Font pairing techniques
0 notes
Text

Capturing Stunning Aerial Photography and Videography with Drones
Delving deeper into the roadmap for integrating drone technology into your creative projects, we can explore each aspect with greater detail to ensure you're well-equipped for success. Drones not only enhance the capabilities of photographers and videographers but also open new horizons in how we perceive and document the world. Here's a more detailed guide to get you started on your drone journey:
1. Gear Up
Choosing the Right Drone
The selection of a drone is pivotal. It's not just about the price tag; it's about finding the right balance between functionality and your specific needs. For beginners, a drone with automated flight modes, such as the DJI Mini series, can be a great start. Professionals might look towards the DJI Inspire series or the Autel Robotics EVO II for their advanced camera systems and superior flight capabilities.
When evaluating drones, consider:
Flight Time: Longer flight times mean more time to capture the perfect shot.
Camera Quality: Look for 4K or higher resolution cameras with good dynamic range and low-light capabilities.
Payload Capacity: Important if you plan to attach additional equipment.
Portability: Drones like the Mavic Air are designed for easy travel.
Ease of Use: User-friendly interfaces and automated flight modes can be very helpful.
Camera Considerations
While many drones come with built-in cameras, enthusiasts seeking the highest quality images might opt for drones that allow for camera attachments. This flexibility can be particularly appealing to professionals who may wish to use specific cameras or lenses for their projects.
2. Master the Art of Flight
Practice Makes Perfect
Utilizing flight simulators can drastically reduce the learning curve and improve your piloting skills without the risk of damaging your drone. Look for simulators that offer realistic flight physics.
Safety and Regulations
Understanding and adhering to local regulations is crucial. This includes knowing where you can fly, height restrictions, and privacy laws. Always keep your drone within your line of sight and avoid flying in adverse weather conditions to prevent accidents.
3. Capture Compelling Compositions
Utilizing Light
Natural light plays a significant role in aerial photography and videography. Early morning and late afternoon provide softer light, reducing harsh shadows and enriching your subject matter with a warm glow.
Composition Techniques
Employing principles such as the rule of thirds, leading lines, and framing can greatly enhance the visual appeal of your drone shots. Always be on the lookout for unique patterns, textures, and contrasts.
Dynamic Movements
Incorporating motion into your videos — such as rising shots that reveal landscapes or tracking shots that follow a subject — can add a cinematic quality. Experiment with different speeds and directions to discover what works best for your narrative.
4. Editing Essentials
Post-processing is where your footage truly comes to life. Tools like Adobe Lightroom for photos and Premiere Pro for videos are industry standards that offer powerful editing features to refine your images and footage. Key adjustments include color grading, cropping for composition, and applying effects to enhance the final product.
5. Beyond the Basics
Hyperlapse and Time-Lapse
Hyperlapse photography with drones creates an impressive effect, showing movement over time from a unique aerial perspective. Planning and patience are key, as is stabilizing and aligning your footage in post-production.
Panoramic Shots
Creating panoramas involves taking multiple photographs and stitching them together in post-processing software for breathtaking wide-angle views. Some drones offer automated panorama modes, making this easier to achieve.
Always Prioritize Safety and Regulations
It's worth reiterating the importance of flying safely and legally. Responsible drone use ensures the safety of others, protects privacy, and preserves the reputation of the drone community.
By following this roadmap, you're well on your way to mastering drone technology for creative projects. The journey from choosing the right gear to capturing and editing stunning aerial footage is a rewarding one, filled with learning and discovery. Stay curious, practice regularly, and always push the boundaries of your creativity. Happy flying!
0 notes
Text
Introduction to Video Editing Magic Software
In today’s digital age, video content has become an integral part of our lives, whether it’s for social media, marketing, or personal projects. With the increasing demand for high-quality videos, the need for efficient and powerful video editing software has also risen. Enter “video editing magic software” — a term used to describe advanced editing tools that offer a seamless editing experience with stunning results.
Benefits of Using Video Editing Magic Software
VideoStudio Review
Ease of Use
Video editing magic software is designed to be user-friendly, even for beginners. With intuitive interfaces and drag-and-drop functionality, anyone can create professional-looking videos without extensive training.
Professional-Looking Results
One of the primary benefits of using video editing magic software is the ability to achieve professional-quality results. These tools offer advanced editing features such as color grading, special effects, and transitions, allowing users to elevate their videos to the next level.
Time Efficiency
Video editing magic software streamlines the editing process, making it faster and more efficient. Features like auto-syncing, batch editing, and keyboard shortcuts help users save time and complete projects more quickly.
Creative Freedom
With video editing magic software, the possibilities are endless. Users have access to a wide range of editing tools and effects, allowing them to unleash their creativity and bring their vision to life.
VideoStudio Review
Key Features of Video Editing Magic Software
Intuitive User Interface
Most video editing magic software comes with a user-friendly interface that makes navigation easy and intuitive. Users can quickly learn how to use the software and start editing their videos without any hassle.
Advanced Editing Tools
From basic editing functions like trimming and cropping to more advanced features like chroma keying and 3D animation, video editing magic software offers a comprehensive set of tools for all editing needs.
Special Effects and Filters
One of the hallmarks of video editing magic software is its extensive library of special effects and filters. Users can add cinematic effects, enhance colors, and apply artistic filters to give their videos a unique look.
Audio Editing Capabilities
In addition to video editing, many magic software also offer robust audio editing capabilities. Users can adjust volume levels, add sound effects, and even create custom soundtracks to complement their videos.
Compatibility with Various Formats
Video editing magic software supports a wide range of video formats, making it easy to import and export files without any compatibility issues. Whether you’re working with HD footage or 4K resolution, these tools can handle it all.
VideoStudio Review
How to Choose the Right Video Editing Magic Software
When considering video editing software, several key factors come into play:
Budget: This is a crucial aspect to consider as video editing software comes in a wide range of prices, from free options to premium suites. Determining your budget beforehand helps narrow down your options and ensures you find software that meets your financial constraints.
Skill Level: Another important factor is your skill level in video editing. Some software is designed for beginners and offers simplified interfaces and basic editing tools, while others cater to more advanced users with a plethora of features and customization options. Assessing your skill level helps you choose software that matches your expertise and allows for growth.
Required Features: Consider the specific features you need for your projects. Are you looking for basic editing capabilities like trimming and cropping, or do you require advanced features such as color grading, motion tracking, and 3D animation? Make a list of the features essential to your workflow to ensure the software you choose can meet your requirements.
Compatibility: Compatibility with your operating system and hardware is crucial to ensure smooth performance. Check the system requirements of the software to ensure it is compatible with your computer or device. Additionally, consider compatibility with other software and file formats you commonly work with to avoid any compatibility issues during editing.
VideoStudio Review
Tips for Getting Started with Video Editing Magic Software

To become proficient in using video editing magic software, it’s crucial to follow these steps:
Watch Tutorials: Begin by watching tutorials that provide step-by-step guidance on how to use the software. These tutorials cover various aspects of the software, from basic functions to advanced techniques, helping users familiarize themselves with its features and capabilities.
Experiment with Different Features: After gaining some knowledge through tutorials, it’s essential to experiment with different features of the software. This hands-on approach allows users to explore the software’s capabilities firsthand and discover new ways to enhance their editing skills.
VideoStudio Review
Start with Simple Projects: When starting out, it’s advisable to begin with simple projects to build confidence and proficiency. By tackling straightforward tasks such as basic video edits or adding simple effects, users can gradually increase their skill level and take on more complex projects.
Save Regularly: Lastly, it’s vital to save work regularly to avoid losing progress. Video editing can be time-consuming, and unexpected computer crashes or power outages can result in lost work. By saving frequently, users can safeguard their projects and ensure that they don’t have to start from scratch.
Advanced Techniques with Video Editing Magic Software
Color Grading:
Adjusting the colors and tones of a video to achieve a desired aesthetic or mood.
Enhancing or correcting the colors to make the video more visually appealing.
Manipulating contrast, brightness, saturation, and hue to create a consistent look throughout the video.
Utilizing grading tools such as curves, color wheels, and histograms to fine-tune the color balance.
Motion Tracking:
Tracking the movement of objects or elements within a video.
Automatically following the motion of a selected object or point in the video.
Applying effects, text, or graphics to the tracked motion to integrate seamlessly with the video.
Useful for adding visual enhancements, like motion blur or 3D effects, to moving objects.
Green Screen Editing:
Removing the background from a video shot against a green or blue screen.
Replacing the green or blue background with a different image or video footage.
Creating composite shots by combining the subject filmed on the green screen with other backgrounds or elements.
Fine-tuning the edges of the subject to ensure a seamless blend with the new background.
Audio Mixing:
Balancing and adjusting the levels of different audio tracks within a video.
Enhancing the clarity and quality of the audio by adjusting volume, equalization, and effects.
Mixing multiple audio sources, such as dialogue, music, and sound effects, to create a cohesive audio experience.
Adding transitions and fades between audio clips to smooth out abrupt changes in volume or tone.
The Future of Video Editing Magic Software
AI Integration: AI integration in video editing magic software involves the use of artificial intelligence algorithms to automate and enhance various aspects of the editing process. This includes tasks such as scene recognition, automatic color correction, facial recognition for tagging and organizing footage, and even suggesting edits based on patterns and trends. AI integration aims to streamline the editing workflow, saving time and improving efficiency, while also providing users with advanced editing capabilities.
Cloud-Based Editing: Cloud-based editing refers to the practice of storing, accessing, and editing video files using online cloud storage services. With cloud-based editing, users can upload their video footage to the cloud and access it from any internet-connected device, eliminating the need for large local storage space and enabling collaboration with team members in real-time. Additionally, cloud-based editing platforms often offer advanced features such as version control, automatic backups, and seamless integration with other cloud-based tools and services.
Virtual Reality Editing: Virtual reality (VR) editing involves the creation and manipulation of immersive 360-degree video content using specialized software tools. With virtual reality editing, users can edit and enhance VR footage, add interactive elements, and create immersive experiences for viewers. This includes tasks such as stitching together multiple camera angles, adjusting perspective and field of view, and integrating spatial audio for a fully immersive experience. Virtual reality editing opens up new possibilities for storytelling and engagement in the world of video production.
VideoStudio Review
Conclusion
In conclusion, video editing magic software offers a plethora of benefits for both beginners and professionals alike. With its intuitive interfaces, advanced features, and creative tools, anyone can create stunning videos that captivate audiences. As technology continues to evolve, we can expect video editing magic software to push the boundaries of what’s possible in the world of video editing.
#magic video software#magic video editing#magic video apps#magic video maker#video editting ai tool#video editting new tool
0 notes
Text
15 Best Cameras for Vlogging in 2024

The way to find the perfect Camera is to ask yourself first. What kind of video vlog would you like to shoot? Daily trips, adventure trips, or travel tips? What vlogging Camera features are essential to you? Are you a smartphone vlogger and want to improve your vlog quality?
Depending on your needs, here is the list of the 10+ best budget cameras for Vlogging and making YouTube videos in 2024.
Best Budget Cameras for Vlogging 2024 (updated list)
Want to try a video vlog but don't want to invest a lot of money yet? We understand. Finding a budgeted video vlogging camera in 2024 is essential if you're on a tight budget. Unfortunately, at this price point, some vlogging cameras are slightly more expensive; if 720p, 1080p, 2K, and 4K are enough, the following cameras are recommended.
Here are ten plus of the most popular budget vlogging cameras on the market and the ones YouTubers use to shoot their videos!
1. GoPro Hero 12-Best vlogging Camera of 2024 at an affordable price
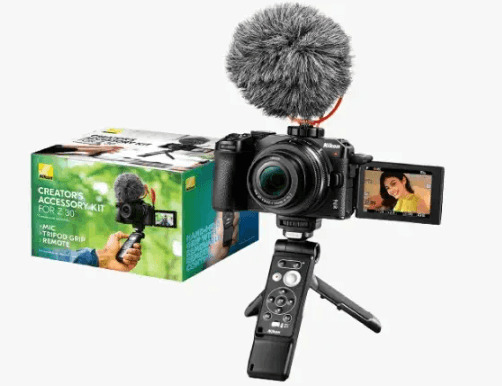
The newly budget-launched GoPro Hero 12 camera is the first and foremost action cam that offers many features for vloggers, including a front-color LCD, 10-bit HDR video, a tripod mount, and support for high-quality audio with Media Mode.
Add-ons. The 8:7 aspect ratio sensor is ideal for taking out widescreen or vertical clips and is perfect for social posts. It is also suitable as a secondary camera to capture scenes that cannot be achieved with a large ILC. Think extreme slow-motion, underwater, and mounted point-of-view footage.
Your vlog will benefit from the creative photography the compact, mountable Hero 12 can deliver. Its waterproof construction and slow-motion recording options are also worthwhile for outdoor and nature work.
With this budget vlogging camera, you can save money and enjoy a similar experience to GoPro Hero 12 black, and you'll love HDR video. This feature makes vlogs look better, especially in mixed lighting.
Pros:
Best-in-class video stabilization
Record up to 5.3K60, 4K120 or 2.7K240
Front and rear displays
Pro Controls and Timecode Sync
10-bit HDR, GP-Log, and SDR video profiles
Cons:
Battery life could be better
Check Price
2. Sony ZV-E1-Professional level
The Sony ZV-E1 is the best vlogging camera ever released. Record full-frame 4K video with a background blur option. It supports a digital additional microphone to record clear audio internally. Unlocks access to a wide range of Sony lens systems.
The Sony ZV-E1 includes features built for content creators, including a widescreen CineVlog look, autofocus mode for product reviews, and AI-powered camera assistance that adds production value to your self-recorded footage.
The ZV-E1 has various features to help solo creators achieve more engaging videos. For example, it can automatically punch in for a tighter frame while still tracking your movement, and it includes several stabilization modes beyond the basics.
Sony also does its best to make the Camera's functions easy to understand, which is helpful even for beginners. But its price and professional-level features make it an equally attractive choice for creators with existing know-how.
Pros:
Compact full-frame Camera with stabilized sensor
Stunning 10-bit 4K60 video
High-quality recording
S-Cinetone and S-Log3 video profiles
Widescreen cinematic vlog mode
Cons:
Expensive than other cameras listed here
Check Price
3. Sony ZV-1 II
A small and lightweight budget vlogging camera of 2024 capable of recording stable 4K video, this vlogging Camera represents a huge step forward for beginners. If you're new to vlogging and ready to improve your video quality, we recommend the Sony ZV-1 II.
It's explicitly designed to act as a vlogging camera, with the ability to record 4K video at 30 frames per second and 1080p video at up to 120fps.
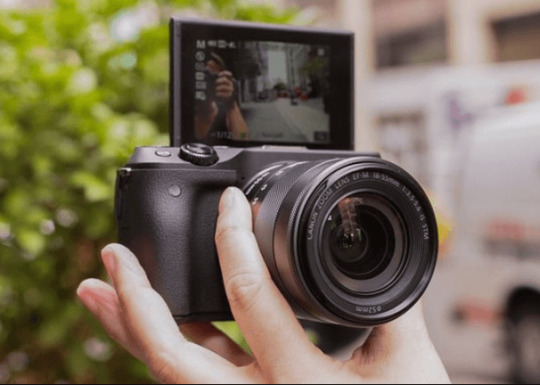
The new Sony ZV-1 II also records stereo audio using an innovative, top-mounted directional microphone. The foldable screen makes it easy to frame selfies, and built-in optical image stabilization helps smooth out movements.
The ZV-1 II can record better video than your phone for two reasons. The first is a 1-inch stacked sensor, much larger than the image sensors used in most mainstream phones. The second reason is that the ZV-1 II combines its sensor with an f/1.8-4 Zeiss lens, which means a lot of light falls on the sensor despite its compact size. It also offers a smooth 2.8x zoom, providing a wide-angle equivalent to 18mm and a telephoto equivalent to a reasonable 50mm.
This lens isn't as comprehensive as what you'd get on a typical phone camera, but it should allow you to frame your face and shoulders at arm's length, especially if you're using a selfie stick or handle. The ZV-1 II's flip screen is easy to use and makes framing selfie videos simple. The touchscreen lets you select a focus point, start or stop recording, and access commonly used settings, including shutter speed and ISO.
Aside from the touchscreen, the ZV-1 II's menu system and button layout aren't intuitive. Vloggers will find that Sony's phone apps (iOS, Android) offer a better way to adjust settings on the fly. The many software features built into the Camera make it suitable for vlogging.
For starters, you can activate a soft bokeh blur effect at the touch of a button to separate yourself or your subject from the background. Additionally, the fast autofocus feature can quickly focus on you as a separate subject and then return to you. It can also identify faces and maintain focus as they move within the frame.
Although we still recommend a separate microphone, the ZV-1 II's internal microphone works very well, and it even comes with a furry windshield "tribble" to keep wind noise to a minimum. A 3.5mm microphone input and a Sony MI shoe mount on top allow you to add an external microphone.
Pros:
Small and lightweight
Can record 4K video at 30 frames per second
Foldable screen
Cons:
A bit expensive
Check Price
4. GoPro Hero 10
The GoPro Hero 10 is an action camera with image quality and stabilization. These two factors make it an excellent vlogging camera if it involves active outdoor activities.
Boasting up to 5.3K resolution, Hero10 Black delivers much more detail than any other action camera. This resolution allows you to crop and enlarge the video. With ultra-smooth stabilization, you won't need a gimbal for steady shots, even if the Camera bounces around during recording. It's also water resistant to 10 meters (33 feet).
Audio performance is good, thanks to the built-in microphone, but you should consider an external microphone in most cases. The image quality is nothing compared to what you can get with a large sensor camera. However, the Hero10 Black produces vibrant, detailed images in bright light and performs exceptionally well in dim light.
No action camera can handle real low-light situations. If you typically go caving in dark caves or crawling through poorly lit abandoned buildings, consider a larger camera with a larger sensor and lens if you can afford to support its weight.
Its front-facing screen and multiple viewing angle options are two features that help make the Hero10 Black a tremendous vlogging camera. The color front screen is small but easy to set up for selfies. Regarding "lens" options, you can choose between wide, linear, and narrow, allowing you to frame yourself and your adventures in more ways than you can with most action cameras.
The GoPro app, called Quik (iOS, Android), offers a variety of editing options so you can cut and create videos without needing third-party editing software. Of course, you can get better results with a more sophisticated video editor.
One essential GoPro accessory worth investing in for any vlogger is Media Mode. It includes a plastic frame surrounding the Camera and two mounts for the built-in microphone, wireless microphone, or small LED light. The rear features a 3.5mm audio input, a micro HDMI port, and a USB-C port (since the frame covers the Camera's USB-C port).
The Hero10 Black is a great action camera, but it's still an action camera. It doesn't offer optical zoom, and the digital lens mode only crops from the image, so you'll have to use a wide-angle lens for all your shots.
Pros:
Great action camera
Water resistance of up to 10 meters
Features Media Mode
Cons:
Old design
Check Price
5. Canon PowerShot SX620
With a small and compact design, this Camera lets you shoot in HD without worrying about the space it takes up. If you are looking for the best-budgeted vlogging Camera that can record in 1080p (Full HD), I recommend the Canon PowerShot SX620.
The Camera features a 20.2 megapixel CMOS sensor and records 1080p Full HD video at 30 frames per second. It also records in a convenient MP4 format, which is easier to export, edit, and upload. This is very important for video vloggers who want to edit and upload their new videos to YouTube quickly. The SX620 has four optical image stabilization modes to compensate for hand movement, unwanted camera shake, and motion blur.
The mode also automatically analyzes camera movement and applies the best correction method. You can focus on recording while the Camera does the rest. A 3-inch high-resolution (922k dot) LCD screen is on the back, making it easy to review video vlog footage. Unfortunately, it's a fixed-position LCD screen that doesn't flip over to the front.
The camera camera wrist strap, battery pack, and charger. The only thing you need to add to your cart is an SD card. SanDisk Ultra Class 10 (32GB) is recommended. If you need more (or less) storage space, you can use it with 16GB up to 128 GB storage capacities.
Pros:
A great 1080p vlogging camera for your budget
High-resolution LCD screen
Intelligent optical image stabilization
Cons:
The LCD screen doesn't flip to the front
Check Price
6. Fujifilm X-S10
Fujifilm's X Series mirrorless cameras have always been our favorite mirrorless cameras. After testing various cameras to find the best vlogging Camera in 2024, we found that the Fujifilm X-S10 is the value vlogging because it has many vlogger-friendly features.
The Camera features an articulating touch screen, built-in image stabilization, and an external microphone input for better audio. This is what bloggers need. It also comes with 26.10MP resolution and 4K video recording. The X-S10 is known for its minimalist design and fantastic performance when shooting video.
This mirrorless vlogging Camera is small, lightweight, and easy to use. Even non-professional users can record stunning 4K videos and capture high-quality images. It delivers great still photos and excellent video footage, making it one of the most potent cameras a vlogger can use.
It also has fantastic manual features like color science to enhance the colors and tones of your subject, all controlled via the touchscreen. It provides true-to-life colors in images through a film simulation mode and some automatic settings updates, making the post-capture process very easy for vloggers.
Additionally, the Camera has 5-axis built-in image stabilization to provide clear and stable videos for vlogging. You can also shoot 4K videos at 30fps or record smooth slow-motion videos in 240p FHD mode. The face and eye detection system can be activated/deactivated via custom buttons.
Battery life is also good; you can take 325 shots on a single charge. Vloggers will find a perfect vari-angle screen, image stabilization, Face AF, and support for an external microphone for audio. The good news is that the X-S10 has it all.
Pros:
Sports external microphone for audio
4K video recording
Amazing image stabilization
Compact size and ease of handling
Cons:
No waterproofing
Check Price
7. Sony DSCW830 20.1 MP
In terms of design, this Camera is small and compact; it takes up additional space and is easy to carry if you're okay with shooting at 720p. This option is excellent and budget-friendly, making it one of the best cameras for Vlogging.
The Sony DSCW830 is a 20.1-megapixel camera with 8x zoom, shooting 720p HD footage in MP4 format for easy editing. Optical SteadyShot stabilization with two-way active mode lets you freely enjoy video vlogging while walking or running. Intelligent Auto mode automatically adjusts according to lighting conditions.
Facial recognition technology helps with focus, exposure, and white balance. So, you can start a video vlog while the Camera does all the hard work.
Pros:
Great budget camera
Bi-directional optical image stabilization
20-megapixel resolution
Cons:
Shot only at 720p
Check Price
8. Canon EOS M50
Canon's EOS M50 is the latest budget mirrorless camera in 2024 with 24.1MP CMOS sensor features, a DIGIC 8 processor, 4K video up to 24 fps, and 1080p Full HD video up to 60 fps. It also features a 3.0-inch variable-angle touchscreen, time-lapse, digital stabilization, microphone input, and wireless connectivity.
The Camera uses a 99-point AF system with Canon's DuCamerael CMOS AF to deliver performance similar to the famous 80D. However, to increase shooting accuracy, I got Eye Detect AF, and it was the first Canon camera to receive this feature. It also offers a high-speed movie mode that records at 120 fps for super slow-motion video.
Overall, Canon's EOS M50 is essentially a smaller mirrorless version of the 80D. It's a more straightforward camera, but it's the most capable option in the EOS M lineup other than the M6. It's an excellent budget-friendly option that matches your comprehensive feature set.
Pros:
DIGIC 8 processor
3.0-inch variable angle touchscreen
Wireless connectivity
4K video up to 24 fps
Cons:
Only a 24.1MP CMOS sensor
Check Price
9. Panasonic LUMIX G85 4K Digital Camera
Panasonic's G85 is the successor to the G7 and is the latest mid-range Camera under the flagship GH4. Launched iCamera features a 16MP Live MOS sensor, Venus Engine processor, 4K video up to 30 fps, and 1080p Full HD video up to 60 fps. It also features a 3.0-inch variable angle touch screen, 5-axis stabilization, weather seal, HDR, Zebra, Time Lapse, mic input, and wireless connectivity.
This Camera uses a 49-point contrast-detection AF systemCameraface/eye detection and tracking. But unlike its rivals, it offers a perfect weather seal to capture even the most dangerous scenes, like action scenes. It also provides a built-in sensor-shift stabilization function to stabilize the attached lens to give a smooth image.
And when combined with Panasonic's Dual IS II, you can easily capture sharp images in your hand with a 1-second shutter speed. Panasonic's G85 is an excellent option for those seeking a budget-friendly alternative to the GH5. As the successor to the G7, it offers a notable upgrade for a more powerful all-around and excellent entry into the micro 4/3 realm.
Pros:
16MP Live MOS sensor
Wireless connectivity
4K video up to 30 fps
Cons:
Only 16MP Live MOS sensor
Check Price
10. Panasonic Lumix G100 Lightweight Vlogging Camera
Panasonic's G100 is one of the latest mirrorless budget cameras for vloggers, designed with vloggers in mind. It features a 20.3MP CMOS sensor, Venus Engine processor, 4K cameras to 30fps, and 1080p Full HD video up to 120fps.
It also features a 3-inch variable-angle touch screen, hybrid stabilization, time-lapse, USB charging, mic input, and wireless connectivity. This Camera uses a 49-point contrast-detection AF system with face recognition. New in this releaCameraOZO Audio, a groundbreaking directional microphone system that improves audio quality without an external microphone.
Instead, it uses multiple microphones pointing in different directions and works with autofocus to optimize audio recording. The Camera has a new video selfie mode automatically adjusts face/eye detection and audio tracking settings. The Camera can start recording immediately.
Overall, Panasonic's G100 is the ideal vlogging Camera in Panasonic's current lineup. It is a camera designed and developed to create this type of content that is surprisingly light and compact. Still, you get features similar to the price model without the burden of functionality.
Pros:
4K video up to 30fps
3-inch variable angle touchscreen
Automatically video selfie mode
Wireless connectivity
Cons:
A bit expensive
Check Price
11. Panasonic HC-V770 Camcorder Camera with Wi-Fi connection
Access to IA mode (intelligent automatic mode) and manual mode gives you complete creative control. You can set the shutter speed, white balance, and brightness (aperture/gain). You can adjust the focus with the thumbwheel control next to the lens. But if you keep iA mode, the camcorder uses face detection tracking with autofocus, which works well when moving around the scene.
The V770 also features 5-axis hybrid optical image stabilization, so handheld shooting is possible without shaking. It combines visual and digital IS, a very effective vlogging camera stabilizer. The 3-inch flip-out touchscreen gives you access to the camcorder menu, but you can also rotate it 180 degrees to point in front, such as the cheap vlogging Camera with a flip screen in 2024.
Now, this is a prominent feature for video vloggers. Another gift for non-consumer producers of this camcorder is that it has both an external microphone input and a headphone socket. A clear HDMI output and Wi-Fi connection are also provided. You can also use your smartphone to check what's displayed on your camcorder and control your camcorder remotely.
Even better, the smartphone can be a sub-camera that appears as a picture-in-picture on your camcorder. This is a handy feature if you want to show the topic you are vlogging and display it in the box at the bottom of the frame.
Pros:
Access to IA mode
HDMI output and Wi-Fi connection
Microphone and headphone socket
3-inch reversible touchscreen
5-axis Hybrid IS
Cons:
Manual control
Check Price
The Best Vlogging Camera Under $150
What? Vlogging cameras under $150 in 2024? Yes. It seems accurate, but cameras are viable at this price point. In this list, some cameras offer various features based on your video vlogging needs. The good thing is that these cameras usually have a bit of zoom to save some money for the buyer. Zoom isn't helpful for video vloggers, so buying an inexpensive camera won't lose much value.
There are no significant differences in image quality and low-light performance between the cameras listed here. After all, all of these cameras are budget price points for vlogging, and there is not much that companies can do to improve their cameras. Still, it's a good choice if you're starting to record your video blog.
After much research, I found this to be the best Camera for under $150 in 2024. Let's have a look.
12. Canon PowerShot ELPH 180
This Canon Camera always floats around $150 and is probably the first choice to consider. It comes with Cameraust, which you need to start recording your video blog. 720p HD quality, fast autofocus, and, most importantly, imageCameralization. This model only offers an 8x zoom suitable for video vlogs.
After all, I'm not going to use Zoom for video vlogs. Zoom is more useful if you want to record sports or take travel photos. If you want a compact point-and-shoot with good autofocus, stable images, and natural colors, and if you want it to be tight and slim and not look like a '90s camera, we recommend the Canon PowerShot ELPH 180.
Pros:
20.0 Megapixel CCD sensor combines with the DIGIC 4+ Image Processor
8x Optical Zoom with Optical Image Stabilizer
Cons:
Only 720p HD quality
Check Price
The Best Vlogging Camera Under 100 Dollars
As we considered budget, some of you may not be able to afford 150 dollars, so we listed some cameras that are under $100 to help you find the best vlogging Camera.
13. Sony DSCW800 B 20.1 MP
The Sony W800 is the perfect vlogging Camera for anyone who wants to test the water with a cheap camera and explore the wonderful world.
This is a lightweCameraideo vlogging camera with a 26mm wide-angle lens. It is small and has a camera. This Camera is one of Amazon's best-selling cameras in its price range, and for good reason! If you don't have a budget for a Full HD 1080p camera, it's one of the best vlogging cameras in 2024, so it's an excellent camera. It shoots at 720p, is easy to charge, and comes with SteadyShot image stabilization.
Pros:
26mm wide-angle lens
SteadyShot image stabilization
20-megapixel resolution
Cons:
Shot 720p HD quality
Check Price
14. Nikon Coolpix L32
If optical image stabilization weren't lacking, the Nikon Coolpix L32 would kick all the other recorders. Nonetheless, this is a cheap camera with above-average performance (for video recording) in its price range. The most important things about this Camera are it's the only Camera under $100, and the screen is fully connected, so it's the only Camera that tells you if you're in the scene while recording.
Battery life is much higher than the average of all cameras, including expensive cameras like the Canon PowerShot G7 X. It lasts for three cameras (243 on average). The screen is larger than the other small-sensor compact cameras listed here. It's the cheapest Camera that vloggers are familiar with, as it can even rotate so you can see yourself while recording.
The maximum ISO is 1600, and the Sony Sony DSCW830 allows 3600, so it's still not the best option for night recorCameraNonetheless, if you have to do a lot of recording at night, you shouldn't consider buying a camera this cheap. It can still record video in 720p and is a very high-quality camera for the price. This will be your best option if you don't plan to walk or move too much with this Camera while recording.
Pros:
Large 3.0-inch LCD
5x wide-angle NIKKOR zoom lens
Higher Battery life
Cons:
Only 720p HD quality
Check Price
Cheap Vlogging Camera Under $50
A digital camera means an investment of at least $300 to $3000. But how cool is it that you can own a camera for under $50? It's real. I have found such a treasure, and here I am presenting you with the cheapest group of digital cameras under 50 dollars.
Ideally, the perfect use of these gadgets is for vloggers, beginners, kids, travelers, and families who want to click on casual photos of parties and gatherings and who shoot vlogs. You can also find a lot of point-and-shoot, retro, kids, and best action cameras for under $50
But what is best for your needs? By listing the companies that perform best with this small budget, we can provide optimal performance for most purposes. So, let's dive into the real story.
15. CEDITA 30 MP Mini 1080P
For those looking for the best digital Camera under 50$ with decent picture quality, CEDITA is undoubtedly a great choice. The most straightforward function controls and the lightest weight allow you to carry this gadget in almost any situation.
So, when you're on Camera about the most entry-level photographic devices, CEDITA is a name you'll often find. This compact pocket-size Camera is specially made for beginners and kids who want to dive into photography and cameras. It is one of the best vlogging cameras for beginners in 2k21.
With 1080P mode, an exciting 30MP resolution (if pixel peeping), and Camerafacial recognition, this is one of the ultra-low-cost digital cameras available on the market. Generally, the picture quality is provided in 1080P mode. However, a built-in flash supports ISO from auto-up to 400 when the scene is mostly dark.
Nevertheless, as an entry-level camera, you can expect a much greener effect in dark frames. However, it works well in broad daylight in 1080P and 720P modes. The Camera introduces both optical and digital zoom. The 1x optical zoom of up to 8x digital zoom does the right thing to bring the subject into the frame without distorting many image details.
The 2.7-inch IPS display camera cannot reproduce the sound of the Camera. You can record the playback sound and noise, but you must transfer the video clip to your PC to hear what you recorded. CEDITA provides a 750mAh battery that can be charged via a USB cable. This USB cable also transfers media from the Camera to a PC.
Pros:
1080P mode features
Face detection and anti-shake function
750mAh battery
Cons:
Only for Beginners
Check Price
How to choose the best budget vlogging camera in 2024?
1. Video features
Cameras today are starting to come to the market as the resolution continues to increase. And we're seeing 8K consumer cameras slowly becoming the norm. But for now, 4K remains the gold standard for video. Most creators upload their content at 1080p, but it lags a bit if the Camera records strictly at 1080p. In a short time, 4K uploads will become the norm. So it's a good idea to get a future-proof setting.
2. Recording time limit
You won't be recording long clips, but maybe your type of video involves setting up the Camera and rolling it for a long time. In this case, you should know that most DSLRs and mirrorless cameras have a 30-minute recording limit for video files. You can choose the Sony Alpha a6400 if you need to record longer.
3. Autofocus
During video recording, the Camera's continuous autofocus system is a must. Even more so for beginners. So, most existing SLR cameras are unsuitable for video vlogs, except for some of the latest Canon models. You want a camera that can focus on confidence and rarely hunts or loses focus. If so, you'll need to regain focus smoothly and confidently so your viewers won't be distracted. With this, look for features like face or eye-detection AF.
4. Display
Ideally, it would be best to have a camera with a fully refractive (variable angle) screen that flips to the side. It offers the most versatile features when shooting from high or low angles. Of course, you can see what the Camera is recording and yourself. The next option is a 180º flip-up screen, the same as the Panasonic LUMIX DC-ZS70K, the cheap vlogging Camera with a flip screen. The flip-up articulation works well too. This is because the video vlog looks more natural when you look up.
5. Selfie and touchscreen flip
You'll need a flip-type selfie screen to get your composition right. While many YouTubers don't care about the only aim at the lens, the selfie screen gives you more control over what's displayed in your video. There is a workaround, but having a built-in flip-out selfie screen is much better. You will appreciate a proper touch screen. Just tap the screen to control your camera settings and focus, making your life much faster and easier.
6. Audio input
In most cases, video vloggers use a short shotgun mic mounted on top of the Camera or a small pin mic tucked into clothes or attached under a fold of clothes. It can save you time if you can record sound as a video from outside, but you need to have a microphone input socket on your Camera.
It's better to have a socket as well. This way, you can monitor the audio being recorded or at least check it at the beginning of the recording. A microphone input and headphone output socket is ideal, but if you're starting and on a budget, that's not always necessary.
For example, you can record audio using a lavender microphone connected to your smartphone. Then, sync the video with the smartphone audio on your PC or Mac.
7. Stabilize
What kind of image stabilization is required, whether the Camera is mechanical or digital? Any form of stabilization is essential to get a smooth, shake-free image. It's even more critical if you're walking or moving during your video vlog. If your Camera has no stabilization, you'll want an optically stabilized lens. But in the end, you'll want to consider buying a gimbal to get a smooth and professional look.
8. Camera size, weight, and build quality
The smaller and lighter the Camera, the easier it is to use whenever you want to shoot, whether you are shooting an action shoot or not. However, larger cameras will probably produce more beautiful pictures. The downside is that you'll need steel arm muscles if you shoot long shots.
Another consideration is to build quality and wearability. If you hike a lot, go through rugged terrain, and shoot in humid conditions, you need a camera built for these conditions. The plastic body of the Canon SL2 can fit well in a studio, but the Panasonic GH5 handles these outdoor conditions quickly.
9. Point-and-shoot Camera
These cameras are the lightest, most compact, and not the most demanding, making them easy to use and quick to learn.
How do YouTubers choose the best Camera for their Videos?

Excellent Video Resolution: Filming a video suitable for YouTube (or potentially millions of views) is a science. The science begins with how sharp and clear the video is! 4k video footage is a big hit among vloggers right now, so having a camera capable of recording such footage is already a big plus.
Of course, this is just a bonus, and 4k video cameras tend to cost more. Beginner vloggers love to start with 1080p footage and slowly move up to 4K as their subscriber base grows.
Video and Image Stabilization: Most video vlogs require a lot of people to move. So, you need a vlogging camera that provides good optical image stabilization. This built-in software prevents your videos from becoming too shaky or blurry on the go.
Wi-Fi Connection: Modern vlogging cameras no longer require external cables or plugs to transfer files, videos, and images. This is only possible through the Camera's Wi-Fi function. Some cameras have a Bluetooth option for their Wi-Fi connection, which is essential for a rugged camera.
Best recommended vlogging camera accessories to use in 2024
Using a few essential accessories will improve your video and sound quality and how professional your vlog looks and sounds.
1. Sturdy and Adjustable Tripod
The Vanguard Alta Pro 2+ 263AB100 is perfect for many vloggers because it can be extended horizontally to better position the Camera on a desk or counter. The legs can also swivel wider than most tripods, allowing you to lower the Camera to the ground. You can also use this tripod for vlogging with your phone.
2. Portable lights
When you start vlogging, you will quickly realize that there are a lot of situations where lighting isn't the best. Even with a camera with good low-light performance, it's challenging to keep the ISO low enough to keep the footage from looking too grainy.
I've tried a dozen inexpensive lights from Amazon, and the best compact light for the price is the Neewer Dimmable 176 LED Video. These lights are very affordable but are well made and very bright. They are often so bright that you must utilize the built-in dimming feature.
3. Good Microphone
If you plan on staying in one place for your vlogs, such as at your desk or talking to the Camera, the MAYBESTA is an excellent USB microphone and one of the longest-standing choices.
4. Additional lenses
The first lens every vlogger starts with is wide-angle, but wide focal lengths can leave much to be desired. Don't misunderstand. If I had to choose just one lens for vlogging, it would be wide-angle. However, there are certain situations where a little more is required.
It's good to have two or more lenses. I recommend a simple telephoto lens like the Canon RF100-400mm that can cover a wide range of focal lengths in any situation. I also like to carry one large-aperture prime lens when I have a blurry background or need better low-light performance.
5. Camera gimbal
Running and gunning for vlogs can often lead to unsettling results. Usually, you think you've taken a great photo, but then you look down the viewfinder, and the image is too shaky to be usable.
The DJI Ronin-SC works excellently. It's also more reliable, and its simple construction makes it virtually indestructible and requires no batteries or charging. The weight may make your arms a little sore, but you can use it all day without a problem.
Conclusion-Best Budget Cameras for Vlogging 2024
As mentioned at the beginning of the article, consider the three main factors before making a decision. As we thought through everything, we listed varieties of cameras and the best budget cameras for those with an affordable budget. The best vlogging cameras are under $150, 100 Dollars, and one of the cheap Vlogging cameras is under $50 for beginners and adults.
Once you get the simple answers to all these questions, it's up to you to narrow down and decide which Camera suits your style for vlogging in 2024. You don't have to choose the most brilliant and feature-rich vlogging Camera when you first buy!
Even beginners can benefit from an easily accessible price tag, convenient portability, and an entry-point camera with adequate recording capabilities. Please choose the best one and let us know in the comment section below.
Please note: As An Amazon Associate, We Earn Affiliate Commissions From Qualifying Purchases.
#vlogging camera for youtube#action camera#camera for vlogging#best camera for vlogging#vlogging cameras for beginners#Best cameras for vlogging and photography#sony vlogging camera#canon vlogging camera
0 notes
Text
9 TED Talks That Anyone Working in vision porn Should Watch
Absolutely free 360° Digital Fact Porno Movies
Stunning visuals, subtle audio and interactive gadget features Provide you extra approaches to delight in your preferred virtual porn. Pornhub gives you limitless free of charge porn video clips with the most well liked adult performers. Appreciate the most important beginner porn Group on the web and entire-length scenes from the top rated XXX studios. We update our porn films daily to make sure you usually get the best quality intercourse videos. VRLatina is thoroughly suitable Together with the marketplace-main Meta Quest two and Meta Quest three VR headsets.
Additionally they are about the forefront of innovation in terms of teledildonics, in order to appreciate virtually two hundred scenes synced up to your desired sex toy. There aren’t a ton of gay-only VR web sites, so VRB Gay wins details for that by itself. It’s also a sister internet site to VR Bangers, so it is smart that the manufacturing quality is in the same way elite. In addition, their scenes—of which you will find at the very least two new kinds a week—are usually filmed with the greatest names in porn, like Aidra Fox and Adriana Chechik.

You may additionally be disappointed that there’s no video preview because you could wind up downloading a video clip that you simply wouldn’t have if you had gotten a preview first. To the moreover facet, their obtain speeds are typically excellent providing your Net is. Sad to say, you are able to’t get yourself a package for both of those VR Gay and VR Bangers, as you may anticipate, which could disappoint some bisexuals in existence. One more downside is that the catalog is fairly modest, with less than a hundred films. A single downside, Along with their somewhat small library, is The reality that StasyQ prices about the same as common hardcore VR web sites.
A pleasant characteristic that fairly offsets this situation could be the inclusion of substantial-res photographs. When VR was previously an special attribute in their quality offer, PornHub has due to the fact started out presenting cost-free VR content. A single drawback with these is you’ll have advertisements unless you pony up the money to the quality membership (the adverts aren’t all of that undesirable, nevertheless). SexLikeReal also scores significant details for its bevy of Tremendous-higher-top quality things, even approximately 6K. For porn connoisseurs soon after much more of the cinematic practical experience, they even https://vrpornwiki.com/how-to-watch/apple-vision-porn/ have hour-lengthy video clips.
1 note
·
View note
Text
Unleashing the Power of Filmora 13 AI: Text-Based Editing Tips and Tricks Revealed!
Unleashing the Power of Filmora 13 AI: Text-Based Editing Tips and Tricks Revealed!
https://funwithfilmora.wordpress.com/2023/11/28/unleashing-the-power-of-filmora-13-ai-text-based-editing-tips-and-tricks-revealed/
Unlock the Power of Filmora 13 AI Text Based Editing! | Easy Tutorial for Beginners.
Ready to make your videos more captivating? Discover the ease and power of Filmora 13’s NEW AI text based editing !
We check out the latest features of Filmora 13 as we explore the world of AI text based editing.
Learn how to use AI-driven text editing to add flair and professionalism to your content effortlessly.
Subscribe To The Channel Fun with Filmora To Create Amazing Videos With Wondershare Filmora Video Editing Software: https://www.youtube.com/@funwithfilmora
Important Links To Follow:
Wondershare Filmora links:
Download and try Filmora 13:
https://filmora.wondershare.com/topic/sign-up-get-free-export.html
Learn more in the Creator Hub: https://bit.ly/3ssiU9V
Explore Filmora 13 Feature Map to Unlock More AI Access: https://bit.ly/3tZyBpv
– Get a FREE 30 Day Trial with a TubeBuddy Paid Plan to optimise and grow your channel https://www.tubebuddy.com/freetrial?a=FunWithFilmora
– Looking for unlimited downloads of stock videos, royalty-free music, photos, graphics, graphic templates & more then why not get a paid subscription to Envato Elements https://1.envato.market/0JaNME
Stay Connected With Me.
Website: https://funwithfilmora.co.uk/
Instagram: https://www.instagram.com/funwithfilmora/
Facebook: https://web.facebook.com/funwithfilmora1/?_rdc=1&_rdr
Twitter: https://twitter.com/FilmoraFun
TikTok: https://www.tiktok.com/@funwithfilmora?lang=en
For Business Inquiries: [email protected]
=============================
Recommended Playlists:
Shorts:
https://www.youtube.com/@funwithfilmora/shorts
Tutorials:
Other Videos You Might Be Interested In Watching:
FILMORA 13 – Incredible AI VOICE REMOVAL FEATURE – Tutorial
How to Use Filmora 13’s FREE AI Music Generator for Your Videos
Create Cinematic Slow Motion Magic with FILMORA 13
Filmora 13 Compound Clips Tutorial: Edit Faster and Easier
Filmora 12 Tutorial: Creating YouTube Shorts From Widescreen Video Made Easy
=============================
About Fun with Filmora.
Fun with Filmora is about creating videos with the easy-to-use yet powerful Wondershare Filmora video editing software and having fun at the same time.
I will show creative videos edited with Filmora and tutorials on how to use this amazing piece of software.
For Collaboration and Business inquiries, please use the contact information below:
Email: [email protected]
Subscribe To The Channel Fun with Filmora To Create Amazing Videos With Wondershare Filmora Video Editing Software: https://www.youtube.com/@funwithfilmora
=================================
#Filmora13AI #FilmoraCertifiedCreative #madewithFilmora #WondershareFilmora #Filmora #Filmora13 #Filmora12
Disclaimer: We do not accept any liability for any loss or damage which is incurred by you acting or not acting as a result of listening to any of our publications. For all videos on my channel: This information is for general & educational purposes only. Always consult with an attorney, CPA, or financial professional for advice based on your specific situation
Copyright Disclaimer: Under Section 107 of the Copyright Act 1976, allowance is made for “fair use” for purposes such as criticism, comment, news reporting, teaching, scholarship, and research. Fair use is a use permitted by copyright statute that might otherwise be infringing. Non-profit, educational, or personal use tips the balance in favour of fair use
Affiliate Links: This page contains affiliate links. If you choose to purchase after clicking a link, I may receive a commission at no extra cost to you.
© Fun with Filmora.
from Fun with Filmora https://www.youtube.com/watch?v=7I9BRTDHpAc
via Fun With Filmora https://funwithfilmora.wordpress.com
November 28, 2023 at 02:11AM
#SchoolDirector#ExecutiveProducer#PorthouseTheatre#AssociateProfessor#TheatreandDance#movement#musicaltheatre#acting#YorkMusical#TheatreShowcase
0 notes
Text
Filmmaker’s Guide to Sound Design Information
Everything you need to know to become a PRO Sound Designer
WHAT'S INCLUDED?
I've been working professionally as a sound designer for more than 10 years now. I'll show you EVERYTHING I know. Nothing held back. Whether you're a beginner looking to dabble, or a seasoned veteran, the principles in this course are guaranteed to improve your sound design skills.
40+ videos amounting to over 9 hours of content
Learn everything you need to know to get Hollywood-level sound design in your films and projects
In-depth walkthroughs on several projects we’ve worked on including commercials, short films, and features
What You’ll Learn In This Course?
THE CORE
Welcome to the Filmmaker’s Guide to Sound Design (7:10)
Sound Design Overview – Red Flags, Subtles, Abstract & Realistic (13:45)
Where Do I Get SFX? (4:09)
Focus VS Peripheral (9:46)
Proximity and Space (30:04)
Layering and Imperfections (19:53)
Our Workflow With Sound Design (12:32)
What Software Do We Use? (1:39)
References Are Important (5:01)
How Loud Should You Be? (3:42)
The Big Takeaway (4:05)
ESSENCE: FILM BREAKDOWN
Importing the Project from Premiere AAF Into Logic (4:27)
Cleaning and Editing the VO (6:48)
VO Mixing Tips (14:31)
Dialogue Prep for RX (6:11)
Cleaning the Truck Scene (53:57)
Cleaning the Rest of the Movie in RX (1:14:40)
Combing Through the Dialogue Once Again at the Mixing Stage (6:48)
Foley Step 1: Brainstorming (16:09)
Foley Step 2: Recording The Foley (17:52)
Foley Step 3: Lining, Timing, and Placing Foley (12:09)
High Cuts All Around! (7:11)
Building the Radio (10:14)
Making the Fire Interesting (5:59)
The Abstract Sound Design (6:02)
The Score and Dynamic Range (9:36)
Automating Radio (4:05)
Listening Back at Different Volumes and With Different Devices (6:07)
How Loud Am I Going to Make This Dern Thing? (10:06)
Jake’s Version VS Our Version (40:07)
FRIEND: FILM BREAKDOWN
Friend: Full Walkthrough (38:03)
Cleaning Gabe’s Lav (6:44)
How to Make a Phone Call Voice (1:42)
Make Stock Music Into a Custom Score with Reverb! (2:58)
Music Coming From Inside a “Club” (1:50)
Help Gunshots Feel More Realistic (6:00)
COOKIE: FILM BREAKDOWN
Doug’s Sound Design (17:41)
Brendo’s Sound Design (17:36)
Livestream of Brendo’s Sound Design UNCUT (1:30:31)
KEPLER 138: FILM BREAKDOWN
Kepler 138: Full Walkthrough (52:45)
Kepler 138: The Dialogue, Recording to Tape, a HUGE Tangent Into “Abstract” Thinking and What does “Pure” Mean? (17:58)
Making a “Radio” Voice (2:36)
Blending Foley to Fit in Your Scene (3:38)
Making a Realistic Landline Phone Ring (4:39)
Making Nature Sound “Otherworldly” (5:58)
CONVERGENCE: FILM BREAKDOWN
Convergence Full Walkthrough (40:08)
Making Underwater Sounds Interesting (6:09)
Help Your Car Sounds Come to Life (10:12)
FIRE & ICE: FILM BREAKDOWN
Fire & Ice Sound Design Breakdown (19:09)
BULLIED: FILM WALKTHROUGH
Making Your Film Sound 80’s (11:21)
Creatively Thinking About Sound Design (10:31)
TIPS & TRICKS
Recording Foley With Practical House Items (6:10)
Cool Sword Hit (10:29)
Creating Film Trailer Swells by Stacking SFX (7:36)
About Author
Hey guys, Brenden Bytheway, That Audio Guy. You may know me as Brendo from the band Scott & Brendo. Or the cinematic duo Bytheway-May.
I’m a songwriter, producer, mixer, engineer, and a husband and father of two beautiful boys.
I’ve been lucky to have my music featured on some of the most viral YouTube videos in the world. My mixes and songs have been heard by over 1 billion people.
My whole life, making music for a living was an unreachable fantasy. In fact, right before I started making money with music, I was working a $10 an hour job cleaning asbestos out of old buildings.
I used to struggle so much trying to learn how to mix music. I didn’t even know there WAS such thing as “mixing”. I just knew my songs didn’t sound professional or good.
I spent thousands of hours watching tutorial videos online, purchasing and consuming courses, and engaging with online communities to try and learn how to make my songs SOUND AS GOOD AS THEY DID IN MY HEAD.
As I was going through the process, I searched high and low for some sort of direction. A path. A guide. Someone to say, “Here’s what I wish I’d have known when I started.” I often stared at my computer screen and asked, “What should I do next? What the heck is a compressor?”
For the past few years, friends have been asking me to help them record and mix. After creating custom videos and sharing my secrets with a select few, I was encouraged by everyone who watched the videos to share them with a larger audience.
My goal is to help YOU become That Audio Guy. The guy that people call up when they have audio needs. The guy that people can trust and rely on because they know without a doubt, that you know what you’re doing and will consistently deliver. I’ve designed That Audio Guy to be a site that you can come to for the best, most informative knowledge how to get your music to that pro level so you can have the confidence to work with big brands.
More courses from the same author: Brenden Bytheway
0 notes
Text
Revolutionizing Video Editing with PixBim Colorize: The Power of AI in Adding Vibrance to Your Footage
Video editing has come a long way from the days of splicing filmstrips and manually adjusting color and brightness. Today, it's all about harnessing the power of artificial intelligence to enhance the visual appeal of your videos. PixBim Colorize is at the forefront of this revolution, bringing a new level of vibrance and color enhancement to your footage, thanks to the remarkable capabilities of AI. For more info about ai video colorization click here.
In the past, achieving the perfect color balance and vibrance in videos required hours of manual labor and a keen eye for detail. Color grading was a painstaking process, and even the most skilled video editors had their limitations. However, with the advent of AI technology, video editing has been transformed into a more accessible and efficient endeavor.
PixBim Colorize leverages the power of AI to analyze your footage and make intelligent adjustments, automatically enhancing the colors and vibrance to create visually stunning videos. Whether you're a professional videographer or a beginner looking to spruce up your home videos, PixBim Colorize is a game-changer.
So, how exactly does PixBim Colorize work its magic? It all begins with its advanced AI algorithms, which are trained on a vast dataset of images and videos. This training equips the software with an understanding of color theory, lighting, and visual aesthetics. When you feed your video into PixBim Colorize, it carefully analyzes each frame, identifying areas that can benefit from color correction and vibrance enhancement.
One of the standout features of PixBim Colorize is its ability to recognize skin tones, ensuring that human subjects in your videos always look their best. Whether you're filming a documentary, a wedding video, or a vlog, your subjects will appear natural and radiant, thanks to the AI's attention to detail.
Another notable feature is PixBim Colorize's capacity to adjust colors in a way that complements the mood and tone of your video. Whether you want to achieve a warm, sunny look or a cool, cinematic atmosphere, the software can adapt to your creative vision. It allows you to maintain the original essence of your video while enhancing its overall impact.
In addition to its color correction capabilities, PixBim Colorize offers tools for noise reduction and image stabilization. These features are invaluable for transforming shaky or grainy footage into smooth, professional-quality videos. The AI is quick to recognize and rectify any imperfections, so your audience can focus on your content without being distracted by technical glitches.
For many content creators, time is of the essence. With deadlines looming and a constant need for fresh content, video editing can be a time-consuming process. PixBim Colorize is designed with efficiency in mind, enabling you to save time and produce high-quality videos more rapidly. The AI-powered enhancements are applied swiftly, leaving you with more time to focus on your creative storytelling.
PixBim Colorize is also user-friendly, making it accessible to a wide range of video editors, from beginners to experts. Its intuitive interface and easy-to-use controls ensure that you can quickly learn and implement the software into your workflow.
In conclusion, PixBim Colorize is a game-changer in the world of video editing. It harnesses the incredible power of AI to revolutionize the way we approach color correction, vibrance enhancement, and overall video quality. Whether you're a professional videographer or a hobbyist, this software empowers you to create stunning videos with ease and efficiency. With PixBim Colorize, your videos will truly come to life, captivating your audience with vibrant colors and impeccable visual quality. Say goodbye to the days of laborious color grading and hello to the future of video editing.
0 notes
Text
Places of Mind: Final Piece
Once I'd imported everything into UE5 I arranged it to be similar to the mock-up I made in Blender. I then used what I'd learnt from the tutorial I spoke about in my previous post to add in the sky and lighting.
For the water effects I followed an excellent set of tutorials by NumenBrothers on YouTube. I also followed their tips for incorporating water that interacts with the player and some splash sound effects. This didn't make it into the final piece but was more just for fun to see if I could manage it, and it makes it more interesting to run around the viewport!
In order to learn how to render the video I followed another great tutorial by pinkpocketTV. Once all of my frames were rendered I used Blender's video editing workspace to compile them into a video. I used Filmora10 to edit the video, adding the title and birds. I edited the music in Mixcraft10.
Overall I'm happy with the amount I've learned this week and I was pleased to still have a final product that fits the assignment. I'm a lot more confident with UE5 now and will definitely take what I've learned and improve upon it for the next project.
I could see myself building upon this work to create a series of liminal spaces based around water, similar to the work of Jared Pike that I referenced for this piece, although that will depend on how the rest of the assignments go and if there's anything more suitable to progress further.
Here is the final work. I'll do another brief post showing the character moving around in the space to showcase the sound and water effects I implemented, but that's as an extra rather than part of the official submission for this assignment. I'd recommend turning the sound on for this: enjoy!
References:
NumenBrothers. (2022). Let's Build the RPG. YouTube.
pinkpocketTV. (2021). Unreal Engine 5 Beginner Tutorial | Cinematic Renders in UE5. YouTube.
youtube
vagon. (Date Unknown). Black crows fly into the clear sky from right to left then disappear Smooth unhurried flight of black birds over the horizon Chromakey footge Clear in and out of Black birds appearing. Adobe.
0 notes
Text
Unleash Your Video Editing Potential with Wondershare Filmora: A Comprehensive Review
In the fast-paced digital age, video content is king, and creating captivating videos is crucial for personal and professional success. Whether you're a budding content creator, a marketer, or just someone who enjoys sharing moments through videos, you need a robust video editing tool in your arsenal. One such tool that has gained significant attention in recent years is Wondershare Filmora. In this comprehensive Wondershare review, we'll delve into what makes Filmora a popular choice for video enthusiasts worldwide.

Wondershare Filmora: An Overview
Wondershare Filmora is an all-in-one video editing software designed to simplify the video editing process while providing a plethora of creative options. With its user-friendly interface and powerful features, it caters to both beginners and experienced video editors.
Key Features
Intuitive Interface: Filmora boasts an easy-to-navigate interface, ensuring that even beginners can start editing without a steep learning curve.
Advanced Editing Tools: From basic trimming and cutting to advanced color correction and audio editing, Filmora offers a wide range of editing tools to enhance your videos.
Built-in Effects: Access a vast library of pre-built filters, transitions, text effects, and animations to add flair to your videos.
4K Editing Support: Edit high-resolution videos with ease, making your content look professional and crisp.
Audio Editing: Perfect your videos' sound quality with Filmora's audio editing tools, including noise removal and audio equalization.
Green Screen: Explore the world of chroma keying with Filmora's green screen feature, enabling you to create impressive visual effects.
Why Choose Wondershare Filmora?
Now, let's delve into the reasons why Wondershare Filmora has garnered rave reviews from users worldwide.
User-Friendly Interface
Wondershare Filmora's intuitive interface makes it accessible to anyone, even those with no prior video editing experience. The drag-and-drop functionality simplifies the editing process, while its clear layout ensures that you can quickly find the tools you need.
Powerful Editing Tools
Despite its user-friendly facade, Filmora packs a punch with its editing capabilities. You can perform basic tasks like cutting and trimming, but also dive into more advanced features such as color grading, motion tracking, and keyframing. This versatility means that whether you're creating a simple vlog or a cinematic masterpiece, Filmora has you covered.
Stunning Visual Effects
Filmora's extensive library of visual effects is a game-changer for video creators. With a wide selection of filters, transitions, and overlays, you can transform your raw footage into a visually captivating story. The drag-and-drop feature allows you to experiment with different effects effortlessly.
Audio Enhancement
Good audio is as important as good visuals in videos. Filmora offers tools for noise reduction, audio equalization, and even a royalty-free music library. This means you can ensure your viewers have a pleasant auditory experience, even if you didn't record in a perfect environment.
4K Editing Support
In an era where high-resolution content is the norm, Filmora supports 4K editing. This means your videos will look sharp and professional, whether you're uploading them to YouTube, Vimeo, or your personal blog.
Wondershare Review: What Users Are Saying
To provide a well-rounded Wondershare review, let's hear what users have to say about their experiences with Filmora.
User 1: "As a beginner in video editing, Filmora was a lifesaver. It's so easy to use, and the results are amazing. I can't believe how professional my videos look now!"
User 2: "I've been using Filmora for years, and it continues to impress me. The regular updates keep adding new features, making it a tool I can rely on for all my video projects."
User 3: "I tried several video editing software options, but Filmora stands out. The vast library of effects and its speed in rendering videos make it a winner for me."
Pricing
Wondershare Filmora offers a range of pricing plans, including a free trial version with limited features. Paid plans start at a reasonable rate, making it accessible to a wide audience. The pricing flexibility ensures you can choose the plan that best suits your needs.
Final Thoughts
In conclusion, Wondershare Filmora is a versatile and user-friendly video editing software that deserves the accolades it receives. Whether you're a beginner or a seasoned editor, Filmora empowers you to create stunning videos with ease. This Wondershare review has highlighted its key features, user-friendliness, and the positive experiences of its users, making it a strong contender in the world of video editing software. If you're looking to unlock your video editing potential, Filmora is an excellent choice to consider. Try it today and take your video creations to the next level.
1 note
·
View note
Text
Best Video Editing Course in Yamuna Vihar And Uttam Nagar

Are you looking for a place to learn Video Editing? Then look no further than Attitude Academy! Located in Yamuna Vihar and Uttam Nagar, Attitude Academy is Best Academy of Video Editing Training Institute in Yamuna Vihar and Uttam Nagar, that can help you become a professional Video Editor.
Introduction of Video Editing Course?
A video editing course is a learning program that teaches you how to edit videos using different software tools and techniques. The course will teach you how to import video footage, add effects, transitions, and music, adjust the colour, and export the final product. Video editing courses can be found online or in-person, and they can range from beginner-level courses to advanced courses for professionals. These courses can teach you video editing skills for various types of videos, including films, documentaries, commercials, social media content, and more. That’s why Attitude Academy is best place to learn video editing Course in Yamuna Vihar and Uttam Nagar Delhi.
Course Highlights
Certified faculty
Job oriented, industry-specific curriculum
Hands-on practical training
Exposure to industry interaction
Workshop
Placement assistance
Showcasing your portfolio
Learning enhanced by virtual and augmented reality course
What You will learn
As the leading institute for video editing course in Uttam Nagar and Yamuna Vihar, Delhi, we offer a comprehensive curriculum that covers the following topics:
Efficient use of editing tools in Premiere Pro CC: Learn to use the right tools with the right techniques at the right time and place.
Creating graphics using the latest features in Premiere Pro CC: Design titles, lower thirds, and other graphics for your videos.
Professional color correction: Follow a step-by-step approach to color correction, including how to use all Lumetri Scopes and the Lumera Color Panel.
Color grading: Understand the concept of color grading and learn how to apply it professionally to create different moods and emotions in your videos.
Complete video editing process: Learn the entire video editing process while creating your demo reel with professionally shot footage provided by us.
Exporting and saving videos in HD: Master the process of exporting and saving videos for high-definition playback.
Designing clean and professional titles: Create titles that are visually appealing and professional-looking.
Applying visual effects: Add visual effects to your videos such as stabilizing shaky footage, removing grain, and creating a cinematic look with overlays.
Editing an entire video: Learn to edit a complete video from start to finish using professional and efficient techniques.
Starting a project with the right settings: Understand how to set up a project with the appropriate settings for any type of video, from any camera.
Adding dynamism to videos: Use cutaway footage and photos to make your videos more dynamic and engaging.
Adding motion to titles, photos, and videos: Create motion graphics that add visual interest to your videos.
Editing green screen footage: Learn how to edit green screen footage and add backgrounds that look realistic and professional.
By the end of our video editing course, you will have the skills and knowledge to create high-quality, professional videos that stand out from the crowd.
Conclusion
Attitude Academy is an educational institute that specializes in providing extensive knowledge and exhaustive understanding in the areas of Graphic Design, Web Design, Digital marketing, Web Development etc. We Offering the best Video Editing Course in Uttam Nagar and Yamuna Vihar Delhi, their goal is to make their courses accessible to everyone, regardless of financial background.
With the video industry rapidly expanding, Attitude Academy believes that pursuing their certificate course can lead to alluring, high-paid jobs. Their cost-effective pricing is one of their major USPs, with a reasonable course fee that doesn't break the bank.
Joining the best Video Editing Training Institute in Uttam Nagar and Yamuna Vihar Delhi. Can take you one step closer to your dream’s job. Their certified expert trainers will provide you with practical lessons and equip you with advanced technologies to ensure you step into the job market with full confidence.
Their hands-on training approach, along with valuable insights, will benefit your future career prospects. Additionally, their trainers offer complete placement assistance to help you crack any interview. Attitude Academy also offers online training facilities so that you can learn from the comfort of your own home.
If you're interested, don't hesitate to register today and gain unlimited access to their course material.
0 notes
Text
3D Animation Software For Your Professional Growth
3D modeling and animation programs enable designers and artists to bring their wildest imagination to life. Animation production may seem to be a challenging process requiring technical expertise, creative talent, and even some coding. However, we can assure you that creating professional-standard animations is now simpler than ever, thanks to user-friendly platforms and instructional videos. Some animation software is more suitable for creating cartoons, while other animation software is better suited for creating video games. As a result, choosing among all the features and tools will be simpler if you keep in mind what you're most likely to use the software for.
Numerous possibilities are offered by specialized software for character illustration, visual effects production, and texture development. With the help of 3D modeling, you can even see how a construction site will look in the future and how its interior will be laid out. Characters for advertisements, cartoons, video games, and other media can be created using software for 3D modeling of people. You can create photorealistic models of any living or non-living thing using these tools. There are many creative agencies in Delhi and Mumbai that can help you create your first animation project.
Today, we'll explore some of the top 3D animation software on the market.
Autodesk Maya
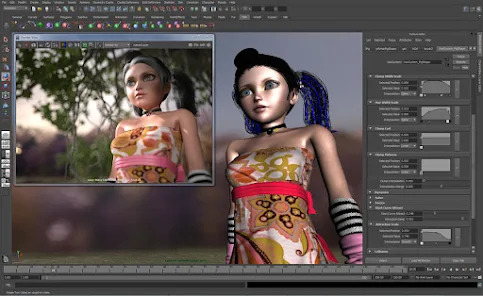
The 3D animation, modeling, rendering, and simulation program Autodesk Maya is best known for its capacity to produce realistic characters, compelling environments, and stunning special effects. Autodesk Maya is notable for its top-notch 3D modeling capabilities. This 3D software helps film studios and artists increase the quality and efficiency of their cinematic films. From the initial visualization of feature films to the creation of impressive, ready-made Oscar-winning effects, you can create everything with this software.
Cinema 4D

Cinema 4D is a premium cross-platform 3D motion graphics tool designed by MAXON Computer in Friedrichsdorf, Germany. It is a three-dimensional application that is well-liked by graphic artists because of its capability to use BodyPaint 3D. The ease of modification and its seamless interaction with composing programs make it a favorite among visual designers.
Blender

Blender is a free and open-source 3D animation program for 3D modeling and creating diverse three-dimensional objects. Filmmaking, animation, and game design have all made use of Blender. Some of the top animation studios have switched to using Blender as their main tool over the past few years.
Adobe Animate
If you're familiar with other Adobe applications, you'll have no trouble navigating the software's user-friendly and logically designed interface. For beginners, it is the ideal animation tool. To make your job easier, the asset panel offers ready-made motion assets, audio setups, backgrounds, and characters. If you're just getting started, the software's hands-on tutorial is ideal because it walks you through the fundamentals of creating your first animation.
Crello

Crello can be the ideal animation tool for you if producing motion graphics for appealing or engaging social media posts and stories is your primary objective. It works best for designing animated advertisements, logos, and Facebook banners. Because of its main focus on social media, Crello is perfect for freelancers, solopreneurs, and marketers looking to give their social media posts some interesting direction.
Moreover, if you wish to assign this creative task to any 3D animation company, you can always opt for companies like Griffin Pictures. It is an ad film production house that can help your project soar high with its creative wings.
0 notes
Text
The Ultimate Guide to Game Development with Unity (Official)
** This course has been updated as of October 10, 2022! **
*** Now includes the ENTIRE ultimate guide series! 20+ hours of new content added!
This course is authorized by and made in partnership with Unity Technologies.
If you are interested in developing amazing, commercial-quality games that are playable on a variety of platforms, then you've come to the right place. This Unity course is the only one of its kind that is approved by Unity Technologies on Udemy. What better way to learn how to develop games in Unity than with their authorized course? The Ultimate Guide to Game Development with Unity introduces you to the Unity Engine and to the fundamentals of C# programming. The course then dives into developing your first 2D and 3D games. You will discover how to set your games apart from the crowd by polishing them with Unity’s latest features, including post-processing effects and the animation system.
In this Unity course, you will:
- Master C# concepts such as variables and if statements
- Detect collisions, receive user input, and create player movements
- Create power-ups including triple shots, laser beams, speed boosts, and shields
- Apply shaders that transform your game backgrounds
- Create enemies with basic AI behavior
- Collect and destroy game objects
- Implement sound effects, background music, and particle effects
- Activate and use Unity’s Team Collaboration service
- Navigate the Unity Engine and discover unique features such as the Asset Store
- Deploy your game to over 20 web or mobile platforms using Unity
- And more!
This Unity course also includes over 200 interactive challenges (New Content Added Weekly!) where you can test your knowledge with concepts you've just learned. These challenges will help you build three commercial-quality games: a 2D Galaxy Shooter Game with polished sprites and cinematic effects, a 3D Click to Move Stealth Game, and a 2D Dungeon Crawler Mobile Game. Get access to the unique artwork provided by this Unity course and add sophisticated features to your games that make you look like you’ve been programming for years.
Why Learn Game Development with Unity?
The gaming industry is a $200 billion industry worldwide. By 2025, that number is expected to be near $300 billion. With Unity being the most widely used engine to develop games across multiple platforms, there has never been a better time to get into the field. As you will learn, the types of games you can create with Unity and C# are limitless. Game development makes a great hobby, allowing you to learn a new skill and play your game with family and friends. It is also an exciting and rewarding career, where plenty of successful developers, including myself, have learned the fundamentals of game development through courses like this, and not in the traditional classroom setting. Every great game starts somewhere, so why not make it yours? While people often find coding or making games intimidating, this Unity course utilizes a unique teaching method that will allow you to gain a thorough understanding of concepts while you develop your own games. Thanks to the Unity community, you’ll be able to connect with other developers, work together on new projects, and make some incredible games!
Why Learn From Me
This is the first and only Unity game development course that has been co-created with Unity Technologies on Udemy. Because learning to code can be daunting, Unity Technologies wanted to create a course that helps new developers feel comfortable exploring the engine and developing games. I believe that the best way to learn how to code is by doing. Therefore, this is a highly interactive series that does not spoon-feed you the answers. The unique challenges integrated throughout this Unity course will ensure you not only know how to code something, but also understand the logic behind it. As a self-taught software engineer, I found that there simply weren’t any high-quality video tutorials that allowed beginners to truly grasp concepts essential to game development. To remedy this, I created my own YouTube video series focused on Unity game development, where I’ve had the privilege of helping thousands of other people grow their passion for game development.
I’ve been working in Unity since the initial public release of version 2.6, and I’ve authored a book on Unity 3.X. Since beginning my career in software development, I’ve been fortunate enough to develop games for Cartoon Network, Adult Swim, and several indie game companies. I’ve also developed enterprise augmented reality applications for Fortune 500 companies like Coca-Cola, GE, and Thyssenkrupp. Teaching has always been a passion of mine, and I hope you will see that throughout this course.
Upon completing this Unity course, you will understand the concepts of C# programming and be able to continue developing your own 2D and 3D games. You will also feel confident knowing that you have mastered the latest and greatest game development techniques that will propel you to success in your professional or personal aspirations.
Join me on this adventure today! I’ll see you inside the course.
Read the full article
0 notes
Video
vimeo
How to Create and Old Film Look Fast in Adobe Premiere using Premiere Pro FX from CINEPUNCH on Vimeo.
Premiere Pro FX:
➜ NEW RELEASE! Get Premiere Pro FX Plugin Extension Here: 1.envato.market/b3dBPg
Premiere Pro FX is a revolutionary plugin extension add-on for Adobe Premiere Pro. Whether you are a beginner or professional, this revolutionary plug-in extension will save you incredible amounts of time and money. With almost 4 years in development, Premiere Pro FX brings you over 10 Thousand Ready-Made FX, Transitions, Colors, Looks& FX Builders, Text & Motion Animations, Screen FX, Camera Moves, Credits Builder, Sounds, Music Elements packed inside. All built into one simplified plugin extension for Adobe Premiere Pro.
Blaze through your editing using video effects with pro sound mixes attached that you can extend. Cinematic transitions you can quickly drop in between cuts. Pro color grading studio to make your footage pop. Looks & effects builders that gives you the power to design your own visual effects and looks. Motion FX to quickly animate your titles, text or videos. Camera animations to add realistic camera movement and depth to images. A vast library of cinematic sounds built directly inside that you can use or re-mix with a click of a mouse. Royalty-free music scores along with all the stems, allowing you to re-score the music instrumentally how you see fit.
All the work has been done for you, giving you more time to create. If you edit with Adobe Premiere Pro, Premiere Pro FX is a Must-Have!
Premiere Pro FX Includes:
10K+ Visual Effects - Sounds - Music - Music Elements
For Adobe Premiere Pro 2021 & Above
Just double click or drag and drop.
Auto-Scale to Any Resolution.
Categories inside Premiere Pro FX are:
FX MASTER STUDIO - Visual Effects with full Sound Design Mix attached
TRANSITIONMASTER STUDIO - Cinematic seamless Transitions with full Sound Design Mix attached
COLORMASTER STUDIO - Pro Color Grades to enhance the look of your video
LOOKS & EFFECTS STUDIO - FX Builders allowing you to create and design your own look and effects
MOTIONMASTER STUDIO - Motion Effects to animate your videos or text
TEXT ANIMATION STUDIO - Text Animations to animate your titles and text
CAMERAMASTER STUDIO - Camera Effects and Moves to add depth and realistic movement
SCREENMASTER FX STUDIO - Slide FX and Multi-Screen Kits to spice up your editorials
CREDITMASTER STUDIO - Title and Rolling Credit Builds of all types to add to your project
SOUNDMASTER STUDIO - 4000+ Cinematic Sound Designs to add or mix
MUSIC STUDIO - Royalty-Free Music Scores
MUSIC CREATOR STUDIO - Music Stems and Elements that allow you to re-mix and design your own music scores
Free Updates, Add Ons & New Tools
By PHANTAZMA, The Creator of CINEPUNCH, comes Premiere Pro FX - A Revolutionary Plugin Extension for Adobe Premiere
Premiere Pro FX Extension Code developed by NT Productions
youtube.com/c/NTProductions @NT Productions
For CINEPUNCH visit cinepunch.store
#adobepremierepro #premierepro #premiereprofx
0 notes
Text
Cyberlink powerdirector 16 tutorial pdf

#Cyberlink powerdirector 16 tutorial pdf how to#
#Cyberlink powerdirector 16 tutorial pdf pdf#
#Cyberlink powerdirector 16 tutorial pdf manual#
#Cyberlink powerdirector 16 tutorial pdf full#
#Cyberlink powerdirector 16 tutorial pdf software#
Screen RecordingCapture, edit, and share video demos and tutorials to become the next YouTube star. LUTs & Color MatchMatch color to quickly balance or change the aesthetic of your videos.
#Cyberlink powerdirector 16 tutorial pdf software#
Exclusive 40 OFF Creative editing software for students & teachers. Video EffectsTransform and modify the look of your video with magical effects. 25 OFF PowerDirector 365 Unlock 8,000,000+ videos, images & music with award winning video editor. TransitionsChoose from a variety of styles to seamlessly connect your shots. Limitless Possibilities, Right at Your FingertipsBring your imagination to life with our wide array of tools to help customize your projects.Ĭustomizable TitlesEasily create titles with unique customization tools and animated templates. Motion TrackingAdd text and graphics that follow the motion of objects to elevate your footage. This document contains all the information you need to get the latest version of CyberLink PowerDirector up and running on your computer, and provides some common trouble-shooting tips if you ever get stuck. Green ScreenRemove backgrounds and create Hollywood-style special effects. Welcome to the CyberLink PowerDirector 10 Quick Start Guide. Mask & BlendLayer, shape, and blend to create artistic scenes. Latest.FeaturesĭirectorZone.About This Software Create Professional Level Edits EffortlesslyIntuitive editing tools that help you set objects in motion, completely transform a scene's location, and create cinematic effects.
#Cyberlink powerdirector 16 tutorial pdf how to#
100, Minquan Rd., Xindian Dist.Ĭopyright © 2015 CyberLink Corporation. Fastest and Most Capable Video Editing Software CyberLink PowerDirector 16 makes your home movies more engaging A range of quick-to-learn and easy-to-use. In this video this beginners basic editing tutorial for CyberLink PowerDirector15 and 16 Ultimate gives you instructions on how to edit videos using PowerDir. DTS, the Symbol, & DTS and the Symbol together are registered trademarks, and DTS 5.1 Producer is a trademark of DTS, Inc. PowerDirector 16), the screenshots below may look different than the version you’re using.How Quickly and Easily Can You Create MoviesTo illustrate just how fast, clean, and simple PowerDirector’s Easy Editor tool is.
#Cyberlink powerdirector 16 tutorial pdf pdf#
Manufactured under license from DTS Licensing Limited. Cyberlink powerdirector 15 tutorial pdf file download windows 10 full. All rights reserved.įor DTS patents, see. Dolby and the double-D symbol are registered trademarks of Dolby Laboratories. Manufactured under license from Dolby Laboratories. The following demonstrates how to draw a map path. PowerDirector is a registered trademark along with other company and product names mentioned in this publication, used for identification purposes and remain the exclusive property of their respective owners. CyberLink PowerDirector 10 now includes the Paint Designer, which lets you create hand drawn animation objects, such as map paths, your written signature, or hand drawn images that you can use in your video production.
#Cyberlink powerdirector 16 tutorial pdf manual#
This manual comes under the category Photo/video software and has been rated by 1. The terms and conditions here under shall be governed and construed in accordance with the laws of Taiwan. View the manual for the Cyberlink PowerDirector 8 Ultra here, for free. To the extent allowed by law, PowerDirector IS PROVIDED “AS IS”, WITHOUT WARRANTY OF ANY KIND, EITHER EXPRESS OR IMPLIED, INCLUDING WITHOUT LIMITATION ANY WARRANTY FOR INFORMATION, SERVICES, OR PRODUCTS PROVIDED THROUGH OR IN CONNECTION WITH PowerDirector AND ANY IMPLIED WARRANTIES OF MERCHANTABILITY, FITNESS FOR A PARTICULAR PURPOSE, EXPECTATION OF PRIVACY, OR NON-INFRINGEMENT.īY USING THIS SOFTWARE, YOU AGREE THAT CYBERLINK WILL NOT BE LIABLE FOR ANY DIRECT, INDIRECT, OR CONSEQUENTIAL LOSS ARISING FROM THE USE OF THIS SOFTWARE OR MATERIALS CONTAINED EITHER IN THIS PACKAGE. Adding and Editing Disc Menu Title Text.
#Cyberlink powerdirector 16 tutorial pdf full#
Subscribe Full linked Tutorial Catalog - PDtoots happily supports fellow PowerDirector. PowerDirector Tutorials, tips, free resources & more.
Applying Animation Effects to Title Text Director Suite 6: PowerDirector 16 Live, PhotoDirector 9, ColorDirector 6, AudioDirector 8 Cameras: Sony(s) HXR-NX5P, HXR-NX70P, NEX-VG10E, a6300 4k, HDR TG5E, GoPro 4 Black, Canon 6D DSLR Visit PDtoots. Wikipedia is a multilingual free online encyclopedia written and maintained by a community of volunteers through open collaboration and a wiki-based editing.
Tracking the Motion of Objects in Videos.
Configuring the Screen Recorder Settings.
0 notes
Last Seen Blogs

janathansilva
Sem título

cc--jjj
C〰J💗

wednesdayday
i’m a raspberry bitch

taiyou-to-chikyuu
Otoroki & Terranica!

radiojacktrafficblr
RadioJack Trafficblr