#I really like the layout of this one
Text


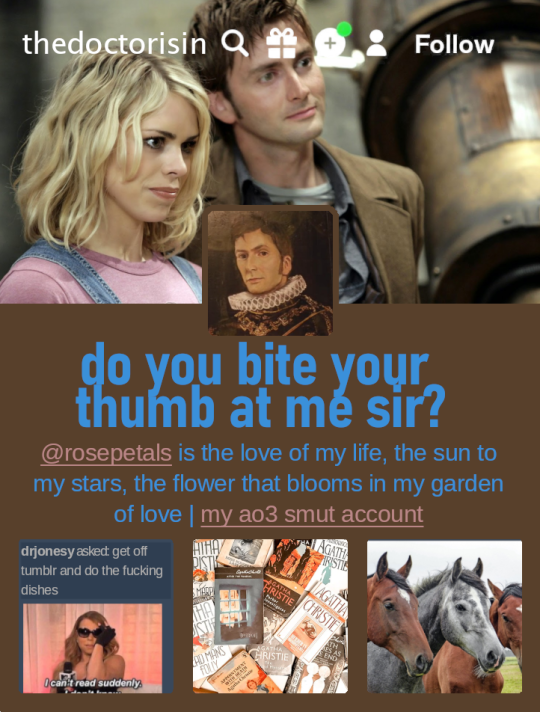
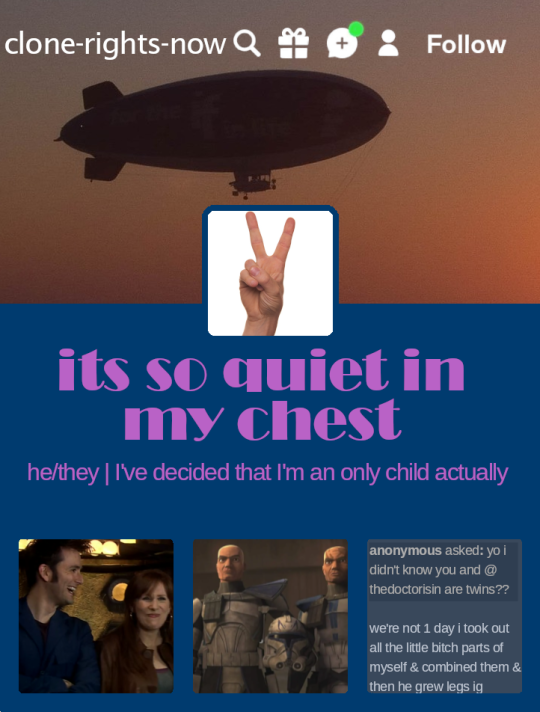

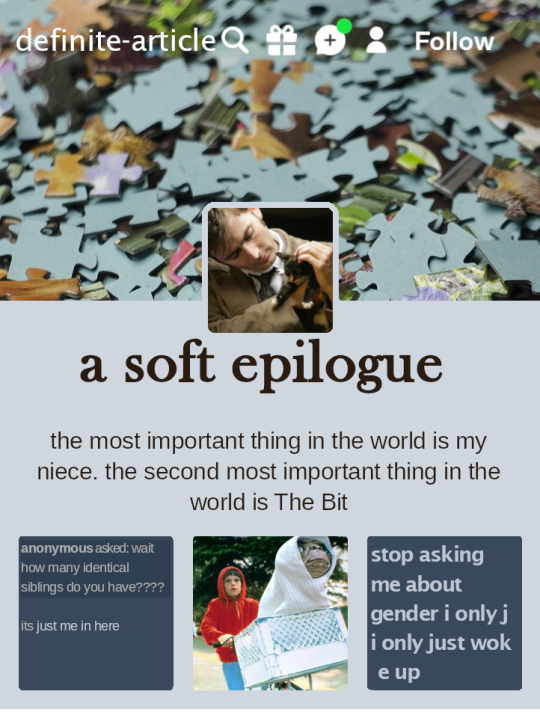
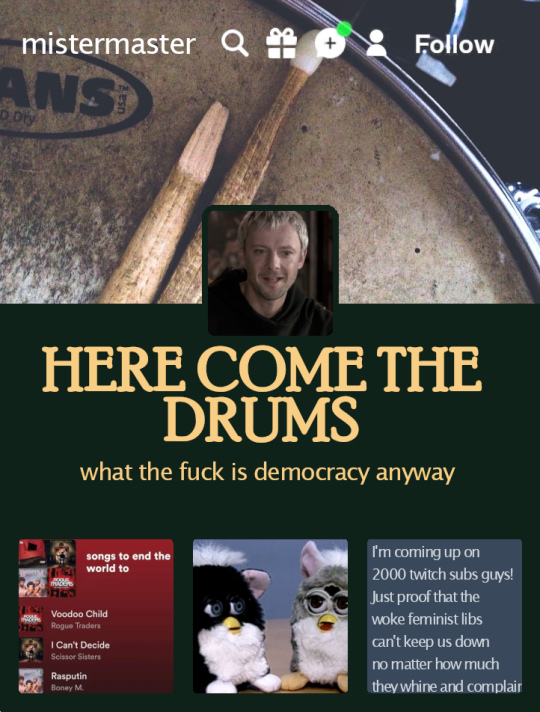

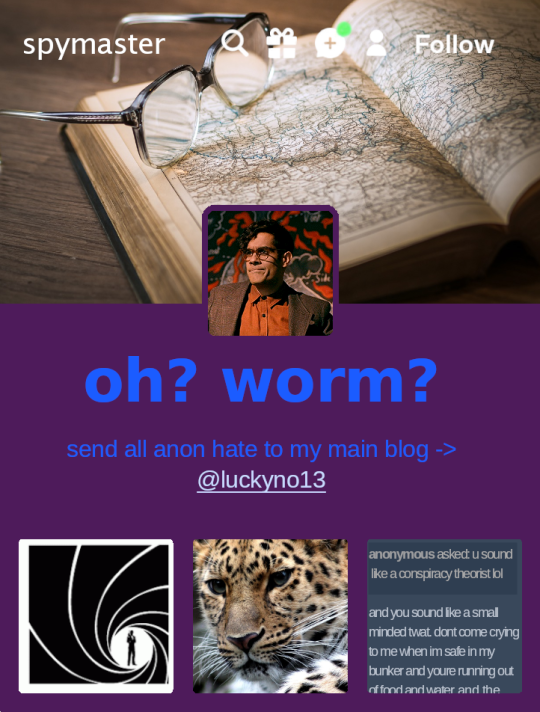
human au. some of these guys spend too much time on here and it shows
#don't ask how long this took#doctor who#the doctor#the master#i'm not tagging them all. god#nu who doctors & masters & also 8 is there bc he's just a lil guy (and tbf no one can agree which era he belongs to anyway)#fun fact i started making these so long ago that i had to redo the ones i'd done bc tumblr had changed its layout in the intervening time#i don't know 15 well enough yet to make him one but also he's exclusively an insta girlie lbr#or war and fugitive. but i think war doesn't have social media and fugitive's starting stan wars on twitter#jacobi!master is exclusively linkedin#also 10's a horsegirl argue with the wall. he saw barbie twelve times and came away with the wrong message#is there a bg for this au? not really. in my main human au everyone is pretty wild whereas here they're more normal#they're just hangin out here ig. 9-11+14 are siblings. 12+13 are siblings. the two groups + 8 are cousins#saxon & missy are cousins and missy & spymaster are foster siblings#if anyone likes this i'll make one for the companions too. actually i probably still will bc honestly this was really fun & relaxing to mak#but if you see an error in one of these no you didn't. don't point it out to me i'll scream
243 notes
·
View notes
Note
I LOVE U REDVELVETBUNNY... could u draw lou with a ponytail or a silly hairstyle .. grhthdhh
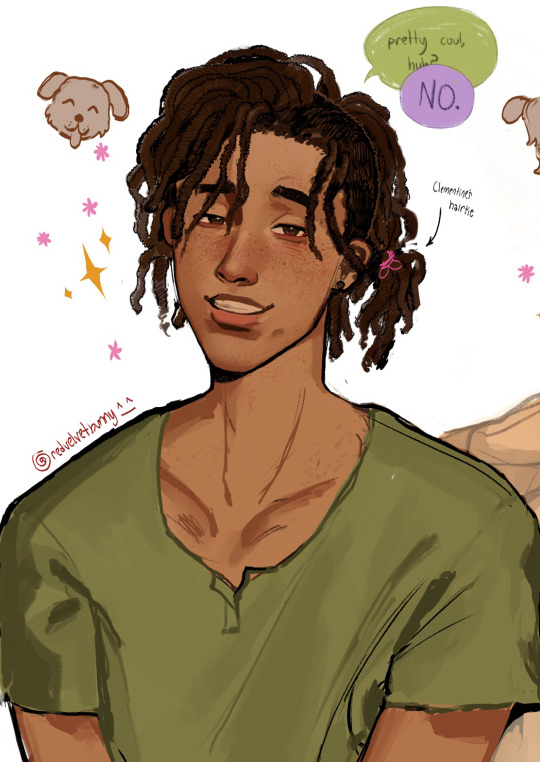
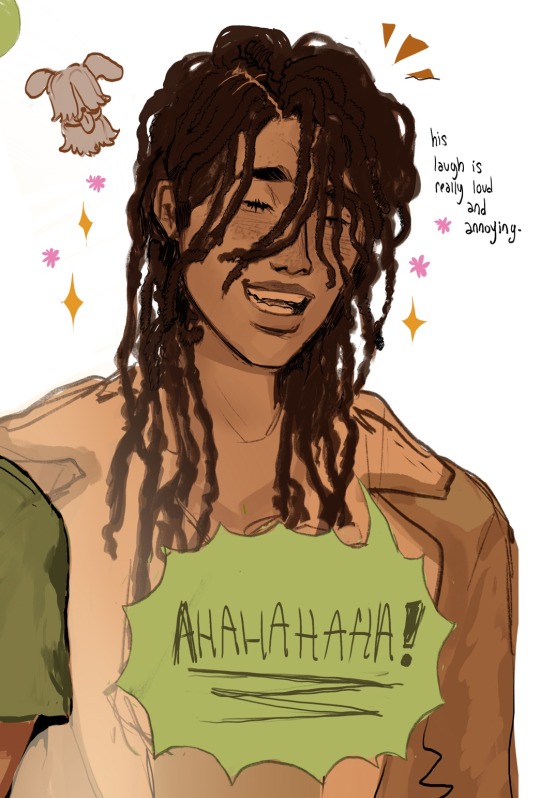
okay louis we get it you whip your hair back and forth
#twdg#the walking dead game#twdg fanart#louis twdg#hi ozonegrrrl#this was fun… Hehe#is it just me or it really annoying to post here cause all of my drawings are in#hamburger style and but tumblrs layout wants you to make it hotdog style#so you have to awkwardly cut shit and staple it together#but the hamburger one seems more of a coherent piece#i like my men beautiful like women#Hello Ozonegrrl you’re very cool#twdg louis fanart#im really bad at tagging things#sorry for not posting#i have not been able to draw anything decent in five years#Hello bourbonificould#berleezy reference#please watch his gameplay he’s so fuckig funny playing twdg#i’ve been down in the dumps#please save me lesbians
141 notes
·
View notes
Note
If Seven have water bending powers, Six soul eating powers and Mono space-time powers what would Raincoat Girl powers would be

oOOOO see, I thought about this quite a bit for the past week. I don't think Raincoat girl's powers will come up in Channel Change, so I'll share my headcanon here.
Raincoat girl I've always called "Five" though I've considered calling her "Quinn" (or even "Cinc") sometimes to not be so obviously a number, kind of like Mono's naming scheme. But I don't think the name Quinn would stick with the fandom as well as "Five" would...
To me, Five would have the ability to change her size at will. (Typically shrink, but only when she gets more powerful later she will learn how to enlarge herself.) She may also have the ability the manipulate the sizes of objects, people, or animals around her.
My evidence:
1. "VERY LITTLE Nightmares" game title
2. The Nest is more like a giant doll house, and she's surrounded by children turned into dolls
3. Each collectible has something to do with the children's powers. She collects Jack-in-the-boxes; children's toys that had been made in France as little "Demon-in-the-boxes". A tiny puppet pops out to surprise/scare the person playing its music because typically, no one would expect a creature to be compressed in something so small.
Six is a soul eater. She can suck the souls out of adults for sustenance. She can suck the youth out of children, turning them into nomes so that she may remain immortal. She may have the ability to teleport through shadows. She may or may not also have the ability to create shadow proxy children?
Mono is a space-time manipulator. He can travel through time and teleport elsewhere through TVs. He can leave behind imprints of children and also reabsorb them? He has minor to major telekinesis and draws in the attention of those around him.
Seven has hydrokinesis. He can physically manipulate water. He can create air pockets to breathe underwater. If he concentrates, he can also control the water inside someone's body including his own. This proves difficult when trying to lift others, but his body is the easiest to control, giving the illusion that he's floating on air.
Five/Quinn is a size shifter. She can shrink at will to crawl through small spaces like a mouse; to get into hidden rooms or to avoid being caught. She can also enlarge herself at will and has the ability the manipulate thse sizes of objects, people, or animals around her. But this requires heavy concentration to do so.
#very little nightmares have some inconsistencies with its plot layout and canon#but u cant blame them because it was made by a different company#and Tarsier got too big for its britches when it started out#resulting in the cancelled tv show and comics quite early on#so theres a lot of confusion on the canon and what is actually going on in the series#especially with the intro of LN2 and the issue surrounding TVs#the inconsistency i noticed was that Five's nightmare is about locking out Six and Six is banging on the door to be let in#but Five doesn't fear Six#Six is not the one to cause Five's death its the pretender#I mean i guess you could look at it like Five locked herself in a room- aka a box? like the jack in the boxes?#thus???? a hint to her power? but its a stretch#thats why its not a fourth reason in my evidence list#anyway- I still think a size shifter is very fitting for Five- I really wish we knew more about her#Little nightmares#little nightmares 2#very little nightmares#LN six#LN mono#LN seven#LN five#the runaway kid#the raincoat girl#text post
227 notes
·
View notes
Text
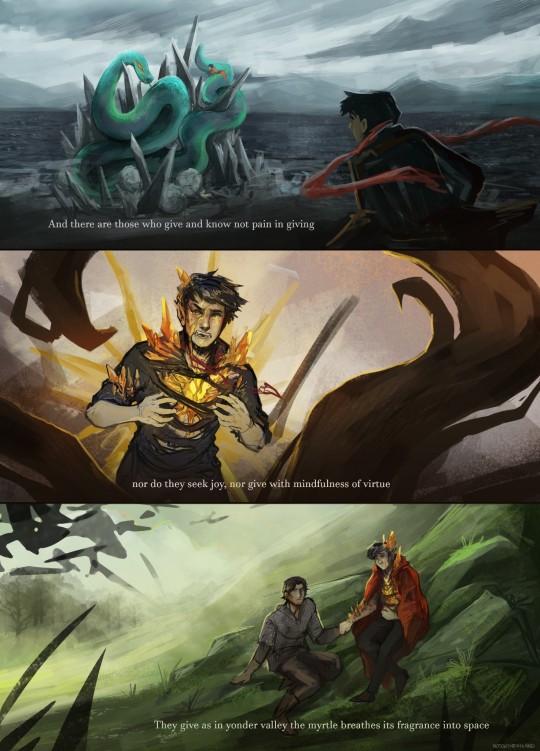
Merlin fantasy creature AU part 3
The poem in the picture is a part of "Giving" by Khalil Gibran
The first time Merlin has to use so much magical energy, he's not ready for the consequences. He used to feel exhausted after using too much at once, that's a fact. But he didn't know the chaotic force would literally rip his human body apart.
The pain doesn't matter though. If he doesn't do anything he'll die here right after Lancelot and then the serpents will invade Camelot. Even if he did survive there would be nothing to come back to. So he braces himself. Ready for any outcome.
He blacks out. Wakes up with Lance tending to his wounds and regrets not dying because it hurts even more.
They have to spend a few days away from Camelot so Merlin's power stabilizes again and he can regenerate his body at least to the point of getting rid of the very visible and unnatural crystals and holes pulsing with yellow energy.
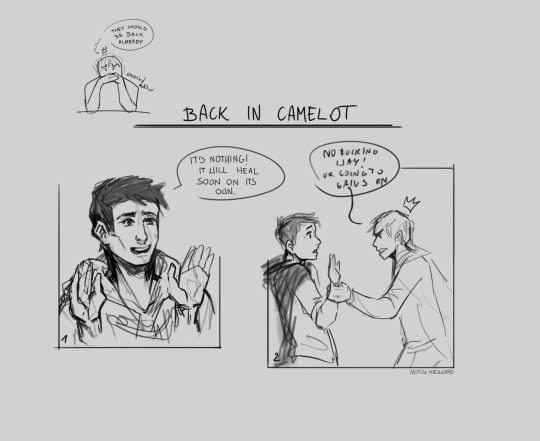
Arthur is kinda annoyed at first. They were supposed to be back ages ago and it wasn't even that hard of a mission. He knows very well how close Merlin and Lancelot are. He's seen them whispering in the castle's corridors to each other countless times. Maybe that was their whole plan, to get a week or two off work.
Few more days pass by and he's pretty sure that's not it. He starts worrying and honestly hoping. Maybe they did run away together. Good for them. At least they're alive. Somewhere. Ugh.
He finally gets some free time and almost decides to go on a search when finally he's informed that Merlin and Lancelot came back. He doesn't think. Just wants to finally see them again. See Merlin again and make sure he's okay.
He's far from it but he's breathing. And that's something. Arthur gets angry at Merlin for neglecting his wounds and takes him to Gaius. He gets a few days off after that.
Part 2
#WHOOP WHOOP#look what it is!! I haven't forgotten!!#im so excited#my boy merlin really came back to camelot half of his body scarred and he's like i'm fine i'm fine sorry for being late#this one doesn't have much merthur but I really wanted to draw that scene in the middle and thats why I started with this lancelot adventur#sorry for any mistakes. again im not a writer. this is just context so you know what's happening in the pictures#bbc merlin#merlin emrys#merlin#merlin au#merlin fanart#bbc lancelot#bbc arthur#arthur pendragon#implied#merthur#merlin x arthur#i changed the overall layout of these pieces like 5 times#they were supposed to be just sketches randomly thrown on a blank page at first#and now we're here
189 notes
·
View notes
Text
smiling serenely as i plan the design and UI elements of a personal interactive website while only thinking of how it operates and looks when navigated and presented on a PC/laptop browsers, and if how i like it on PC/laptop browsers manifests as a total mess on mobile, then it's a total mess on mobile and i do not care, for so many reasons,
the spectrum of which ranges from "4D chess moves in my mind, don't ask, we'll get there, in the meantime, i'm an enigma" to "abstract principles about the nature of medium, and navigation both mechanical and psychological in mediums, especially in this hyperconsumptive Content™ *gag noise* Era" to
" s p i t e "
with oh so many secret spicy skittles in between
#sporadic warbling#something something mmmm nice big chonky Buttons that open a menu when you click and close it when you click it again#not one fuckin vague nebulous hovery drop down that blinks out of existence if mouse doesnt stay in a narrow invisible boundary in sight#like its a game of Operation just to use the fucking thing; the nemesis of my hand tremors#if i get really spicy i want multiple skins for the layout reflecting characters or environments in-universe#fun shit like that#i have to take us back this internet is a disaster#[to the tune of Wannabe] if you wanna get with my wo-ork; ya gotta (literally) sit your ass doooown~
45 notes
·
View notes
Text
so you want to use OBS
hello! i’ve decided to compile information on my OBS setup and some resources that have helped me along the way. this is mostly for personal reference, but maybe others can make use of this information!
some notes before i get into it:
i use OBS for both offline recording and (twitch) streaming. any footage i record is edited using DaVinci Resolve 18, which is free.
most of my OBS captures are of video games (through a USB capture card, specifically elgato), and the occasional screen/application capture (like clip studio paint, and sometimes PC games).
as such, the information here is reflective of these experiences. this post is not comprehensive to all of OBS’s features- this is just an overview of the settings and configurations that are most relevant to me.
with that out of the way, all the information will be under the cut!
Basic Setup
file format:
how to change: settings -> output -> recording -> recording format -> press “apply” once finished!
I save most of my recordings as .mkv files- it supports multi-track audio! i prefer .mkv over .mp4 because if your power goes out, you still have a recording to work with.
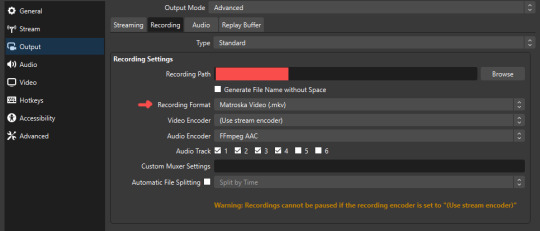
.mkv files can be read by DaVinci Resolve without an issue- but for Adobe software, they'll need to be remuxed to .mp4 within OBS! (file -> remux recordings -> press the … to select a file -> press the “remux” button)
video resolution and framerate:
how to change: settings -> video -> output (scaled) resolution
my obs canvas is @ 1920 x 1080p (16:9)
i switch between 720p and 1080p as needed! if you're concerned about space, you can probably just go for 720p. i also record at 30 fps, simply because that’s what my capture card supports.
video bitrate:
how to change: settings -> output -> encoder settings (located in both the streaming and recording tab) -> press “apply” once finished!
bitrate is a bit of a doozy to explain, but the most important thing to know is that bitrate affects your video’s quality. lower numbers = lower quality, while higher numbers = higher quality.
generally speaking, you'll want higher bitrate when you're recording things with high depth of information (e.g. you’d want a higher bitrate for something fast-paced like splatoon, compared to a slower-paced game like animal crossing).
my video bitrate is either set to 3000 or 4000 kbps! and here's some of my other (related) settings while i'm at it:
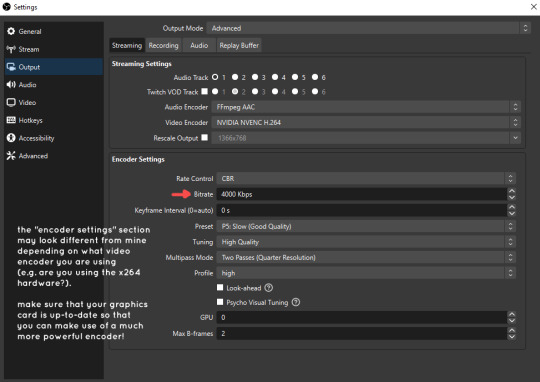
you can put your bitrate at much higher values than me if you're a stickler for quality- but keep in mind that a higher bitrate means:
bigger file size
more information to upload (when streaming)
your computer will need to encode more
i’d recommend reading twitch’s guidelines on encoding, bitrate, resolution, and framerate to get an idea of what values to pick. for people who are doing offline recording or streaming on a different platform, i suggest googling the appropriate resources!
multi-track audio:
this is mostly applicable to anyone looking to do video editing!
multi-track audio basically allows you to separate your audio sources (e.g. discord, game audio, and your own microphone) into different tracks.
this is an immensely helpful tool because it lets you adjust audio levels in post-production (editing). some examples of how this can be used:
increasing someones microphone volume if they speak too softly
increasing/decreasing game audio
muting swear words/sensitive information
completely muting voice call + microphone if you want to upload a no commentary video
and more!
to set this up, take a look at your audio mixer panel, and press the ⚙ icon. this will bring up advanced audio properties.
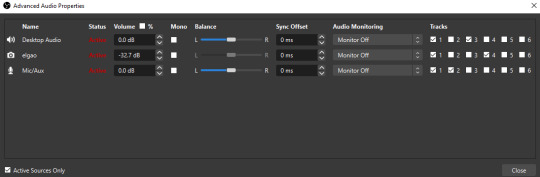
by checkmarking a track box, it puts the audio on that track. to make the above screenshot easier to digest:
track 1 consists of ALL three audio sources- desktop, elgato, and microphone.
track 2 only has the microphone audio.
track 3 only has desktop audio (i use this for voice calls)
track 4 only has the elgato capture card audio (game audio). the volume has also been lowered so that any speaking voices can be heard clearly.
tracks 5 and 6 are unused.
you might be wondering, “why do all three of these have 1 checked off?” this is what i call the universal audio track. i recommend having a universal audio track for a few reasons:
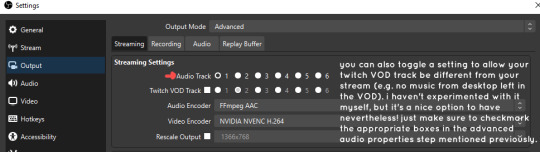
when you stream from OBS onto twitch/youtube- you have to select ONE audio track.
it’s also a nice backup in case you didn’t separate your audio correctly.
if for whatever reason you need to move around your individual audio tracks in editing, the universal track acts as a nice reference point.
mark off your audio tracks for each audio source as you see fit! once you’re finished with the advanced audio properties, go to settings > output.
for the streaming tab, you’ll want to have the number of your universal audio track selected. in my case, that will be audio track 1.
for the recording tab, checkmark all the audio tracks that are applicable to you (in my case, audio tracks 1, 2, 3, and 4). by default, only audio track 1 is selected.
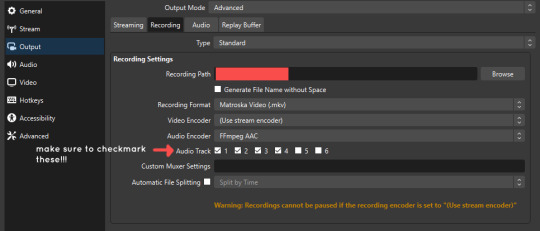
if you don’t check off the additional audio tracks in the output > recordings section, you will not have access to those audio tracks in editing, and you won’t be able to edit your audio tracks independently of each other. so don’t forget to do this! 👍
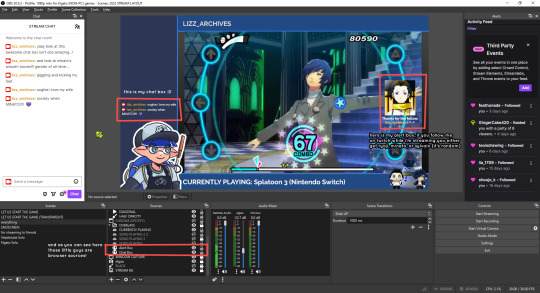
custom browser docks
custom browser docks are a great tool for when you’re streaming and want to have access to your twitch chat and/or activity feed! (or if you wanted to have some other web browser on OBS).
to create one, go to docks -> custom browser docks.
you’ll be given a table interface that asks you to put the dock name and URL. for streamers who want to have chat and alerts available, do the following:
on twitch’s homepage, go to the upper right and click your icon
then, click creator dashboard
once you’re on your dashboard, go to stream manager
click the vertical “...” on my chat OR activity feed.
press “pop-out chat” OR “pop-out activity feed”
copy and paste the link into the table back into OBS
press apply once you’re done
click and drag the docks around at your leisure to put them where you like!
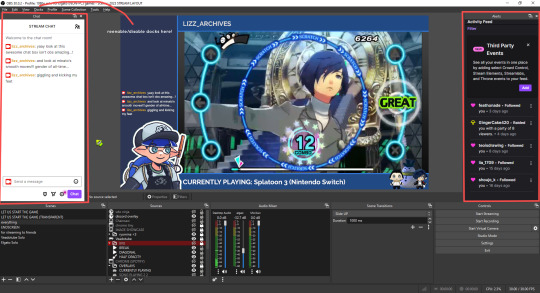
if you ever decide you don’t want to have something on your OBS dock (or want to bring something back), go to the toolbar, click “docks,” and click the appropriate dock!
third party things
a section of optional things that you may enjoy having.
streamlabs alerts
this is basically for anyone who streams and wants to have their chat and/or follower notifications visualized on screen!
streamlab alerts can be added to OBS by adding a browser source into your scene, and the specifics can be customized on streamlabs itself. it’s pretty self-explanatory, so i’ll just leave a link to streamlabs website, where you can log in using the streaming platform of your choice: https://streamlabs.com/
discord overlay
this is a browser source that can be set up to show people who are in a server's voice chat and who speaks. i recommend this to people who make multiplayer content- it can help viewers distinguish who is who but also it can be helpful in editing.
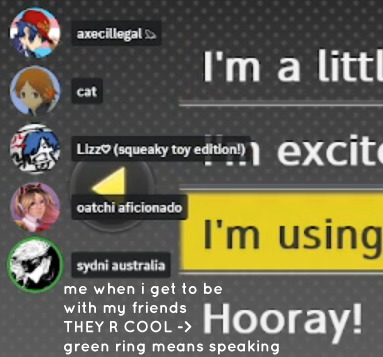
to set this up, go to https://streamkit.discord.com/overlay, click “install for OBS,” and after logging in with discord, go to “voice widget” and click the server and voice channel you want.
you are able to apply CSS if you'd like more control over the visuals, but the standard layout tends to work fine for me! a search of “discord overlay css” on youtube can help you get more information.
veadotube mini
this is a pngtuber software that a friend recommended to me! no webcam is required- mouth opening and closing is based on your microphone input!
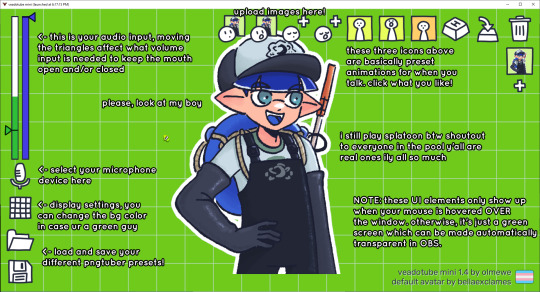
you can download it here (it’s pay what you want!): https://olmewe.itch.io/veadotube-mini
for a proper tutorial on how to use it, i recommend checking out the app's documentation, which you can read here: https://veado.tube/help/
source record
have you ever wanted to stream something with a chat overlay/layout, but wanted your recording to ONLY be the gameplay? or maybe you wanted to record BOTH your gameplay AND your webcam so that you can have a crisp zoom-in on your webcam!
source record is a third party plugin that can help you with that!
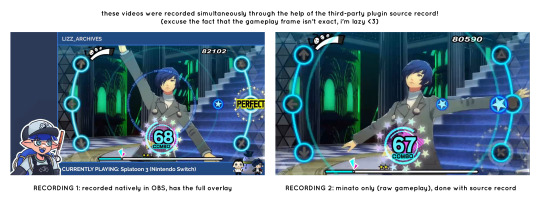
the general gist of source record involves applying the “source record” filter on either a scene or source, and customizing the encoding settings accordingly. the exact details of how to set it up is beyond the scope of this post, so I'll just direct people to this video instead (it was very helpful to me):
youtube
⚠ a quick note about source record: this plugin can be intense for your computer. be sure to do test recordings and the like to see what your computer can handle (and see if the recordings come out the way you like). it took me a few tests before i settled onto something i liked!
you can download and install source record here: https://obsproject.com/forum/resources/source-record.1285/
vdo.ninja
have you ever wanted to do a collaborative video or stream where you feature someone else’s video on your stream? or maybe you’re doing a multi-person streaming event! vdo.ninja is the perfect tool for you!
vdo.ninja turns your OBS virtual camera into a browser source link- which your collaborator can add on their stream! this is a new tool that i’ve added to my arsenal recently- since my friend and i are planning to stream a side order challenge together! i’ve still got to iron it out a bit more, but i like what i’ve used of it so far.
try it out for yourself at their website here (with documentation and demos available on the homepage!): https://vdo.ninja/ (no downloads required!)
ok! i’m set up! what now?
and with that, that’s all of the settings and tools that i thought would be worth mentioning! while most of my setup was written with video games in mind, some of these plugins and setups may be applicable to other types of videos (e.g. tabletop gaming with a physical camera)!
now that i’ve outlined all these settings, i have one more thing i have to say: regardless of what you're using OBS for, do a test recording before doing anything “official” with it. this recording can be as short as 30 seconds. it’s a good habit to develop that can make sure your streams/recordings turn out the way you want them to!
here are the kinds of things i like to check! it’s not an exhaustive list, but this can be a starting point:
video:
does my video look the way i want it to (and can my computer handle that)?
can my computer handle the load of encoding? - OBS will note in the bottom if the encoding is overloaded. if it can’t handle it, turn down your bitrate or adjust other encoding settings (e.g. i had to toggle psycho visual tuning OFF because it was causing lag)
this is especially the case if you're recording PC games- you don’t want to have slowdown on either your game or the recording!
audio:
are my audio sources (e.g. desktop audio and microphone) correct? - if you plug/unplug devices a lot, be sure to check this (settings -> audio).
are any of my audio sources muted? - make sure you don’t have anything on 🔇 if you don’t want it to be muted! otherwise the audio will be lost forever… (i lost my friend’s VC audio once… it was sad)
are my audio tracks separated properly? - requires you to boot up your editing software, but it's worth doing! for the test recording, just have something from all your sources playing at once, and see if your editor has things separated into tracks.
can i hear the voices clearly? or does the music and/or game overpower them?
if for whatever reason your OBS crashes, or you want more information on anything “critical” or “warning” worthy in your set-up, you can go to help > log files > upload current log file > analyze. crash logs currently can’t be analyzed by the log analyzer- but they’re a valuable tool when asking for help on the OBS forums!
and that’s all! for real, this time. i hope that some of these tools and settings can help anyone wanting to get more out of OBS. there’s definitely other things i didn’t touch upon (e.g. audio filters for noise compression, suppression, etc.), so i suggest doing your own research and trying things out!
happy recording/streaming, and thanks for reading! ✨
#lizzy speaks#this was a fun little write up!! i've been slowly getting some of my friends into video making teehee and its SO FUN!!!#(digital) video is like one of my other passions next to art. everyone say thank you splatoon for getting me back into it again <3#i've been using obs since like 2018 so i wanted to share some of the things i learned for funsies... i really love video...#but also i like having reference posts like this in the case people have questions they want to ask me...#because i don't always remember what video tutorials i watched and it's nice to document that somewhere...#warning to anyone who reads it this is like 2.1k words. i do want to stress that this isn't comprehensive but there's still a lot of info#that i wanted to put for this post...! that said topics like designing your own stream layout + assets for it are NOT in the scope of this#post and nor is this a beginner's guide to obs (i wrote this with the assumption that you know how to record and/or stream and that-#people already have an idea of how to use scenes and the different types of sources obs can use).#i hope everyone's had a lovely march 5th! i would love to look at the fanart but im still not done with reload...#but im hoping to finish it by the end of the month!!! yipee!!!#Youtube
44 notes
·
View notes
Text

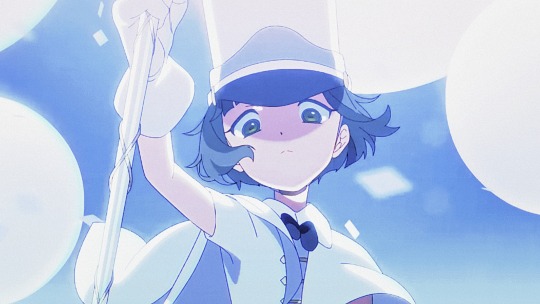

amane momose the purge march mv layouts!
(credit is not needed, but appreciated)
#not really proud of these..#idk why the icons look like this. i swear the noise effect wasn't even supposed to be that strong#also this mv was so painful to edit. not bc it's bad but bc CAN I GET AT LEAST ONE SHOT OF AMANE NOT BEING IN PAIN#💖self indulgent 💖#milgram#milgram icons#milgram layouts#amane momose
80 notes
·
View notes
Note
Just so you know, tumblr is currently using art for AI training and the only way to stop them is to go into your settings and turn it off 'third party sharing' manually (on each of your blogs)
tyty! i've already turned it off for all my blogs, but i do appreciate the ask to let me know!
we are in hell, but i aint gettin out of this chair. the only other places to sit are stools with 3 legs or molding plastic lawn chairs and i'm sick of moving
#tumblr is. sighs. i hate whats been happening to every social site lately#enshittification#but like specifically rapant transphobia from every ceo is . frying my brain. can we go back to forums pls#like not really. i enjoy tumblr's layout and tagging systems. but#help! my job is on internet and internet is on fire!#nnnnnnnnnnnnnnnnnnnnnn#onnnn that note. i do have a cohost but its for my saucier account. maybe i'll make one for my sfw stuff if shit rllr RLLY hits the fan here#ask#anon
35 notes
·
View notes
Text
Nami WIP + some chibi doodles heheeee
#chia draws#one piece#nami one piece#cat burglar nami#Nami#i love women#this piece is kicking my ass tho#like I’m trying to find my style but it’s all#confusing#like what do I want to achieve with my drawings? what do I want to focus on?#in other news I am now cooking as a way to procrastinate#thank you dunmeshi and the bear#I made bread and fresh pasta and carbonara and lemon curd#I love cooking man#idk why but my butter cookies always end up too hard#I’m gonna make some tangerine dishes so I can pretend I’m cooking for Nami#that way I trick myself into self care#anywayyyys#I love Nami so muchhhh#and idk how people have such cute tumblr layouts I don’t really get httml#I’m a STEM girlie but coding? not my forte#lately I’ve been thinking about one piece from a biotech standpoint#like tf do you mean nobody knows what DNA is besides judge and Vegapunk#they know some diseases are congenital but don’t know about DNA#huuuuuhhhh?#anyways I’m writing a fic about an OC funding a science journal in OP#it’s a lot of fun#art wip#unfinished
22 notes
·
View notes
Text

「これ大柑子十五あるベし」
"There are 15 oranges inside"
#fgo#fate grand order#Ashiya Douman#another little thing while i work on the big piece#i really like rats as a symbol of his inability to surpass Seimei its a pretty famous story i think?#the one where Douman (correctly) divines that there are 15 oranges in a box but Seimei changes them into rats and wins the contest#ive been reading abe no seimei monogatari its great douman is soooo arrogant and petty and i love him#(a modern jp translation since its from 1662 its really nice it has og text on top and modern jp on the bottom and a ton of annotations)#which get me sidetracked into things like heian court rankings and the palace layout and the shishinden#anyway the whole reason the contest was held is cause douman hears about seimei#and is soooo upset at the possibility of someone possibly being better than him so he goes to the capital and shows up at seimei's house#to challenge him and prove himself better and its huge event the emperor and all the nobles are there#first part is flashy magic displays but douman (who is losing) basically goes uhh that didn't count divination is the proper way to decide!
41 notes
·
View notes
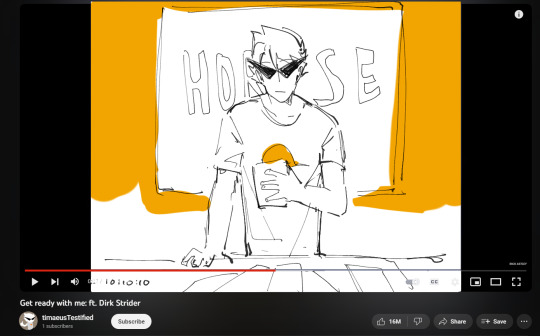
Text

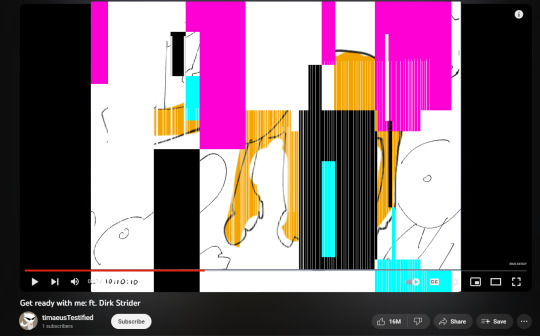


We're on air.
More precisely, I was on air when I recorded this, but the details are largely irrelevant. Because I don't really feel like covering fuckin' introductory quantum mechanics and telling you exactly how the influence of the Skaian universe, when applied at the quark level and taken alongside the probabilistic effect of quantum behavior, superposes via particle states and results in the formation of what you might refer to as "overlapping timelines". And that's already getting real abecedarian about this shit.
Yeah, sue me. Try boning up on basic physics while you're at it.
So. I'm sure you'd love to hear about how I managed to rig this sick as hell channel-cum-blog up and get it to straddle the space-time continuum like an antediluvian Olympic gymnast doing mad splits over baby's first toy pony, but that ain't the point of this little exercise. Posting what's effectively a vlog is enough of an onanistic venture without adding Skaian Principles For Dummies: Electric Boogaloo to the schedule.
Where was I?
(Rhetorical question. Don't answer, if it needed to be said.)
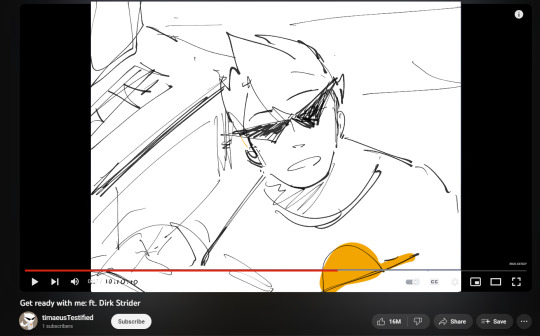
The name's Dirk.
Strider. Yeah, that Strider.
I'd be more worried about internet safety, but seeing as there are only up to two people alive around here no matter how far you pull my timeline back, and I'm one of 'em, it doesn't exactly compute. Face it, brosephine: you aren't getting to year 24xx post-hilarocaust, and you sure aren't getting past that. Wasn't shat out of a lab yet when you were committing identity theft and scamming doddering old ladies out of their sadsack pensions.
(If you manage to get pizza delivered out here, I'll tip extra.)
Besides, you already knew my name, didn't you?
Maybe your next question's going to be:
"Why are you calling this a vlog when it's obviously just a blog?"
Or maybe,
"Why is your URL poorlydrawndirk when it's totally malapropos?"
Buckle in, kids. Strap yourself into that convertible toddler-safe harness and keep your ass glued tight to all the prime polyester-lined foam, because this ride's about to pull into the station and vehicular standards are some passé 21st century horseshit.
The first thing you have to understand is that even peering upon the brink of these echelons of irony is a skill that you'll never grasp in your life. But that's fine. I'm around. And if it puts your mind at ease,
I'll be the one pulling the strings here.
(There's the tired callback. It's not wrong, but it's tired. Worn out enough for it to be begging you to take it out back behind the shed and put it out of its misery.)
(I'll leave it at that for now, because self-referencing is one thing, but if I get any more meta, I'll have to start narrating in twelve-point Times New Roman.)
Anyway, I'll be breaking it down, just this once. Magnanimous as hell, I know. I could wax poetic and in doing so obfuscate the actual meaning once more from obtuse minds, thereby adding another strata to irony so layered that it's settled past sedimentary and is ready to unearth some fossil formations, but let's be real. That shit would fly over your head so far it'd be trying to dial ground control at Houston.
Here we go.
Vlogs aren't cool; making one ironically is.
Putting in this much effort into making a multiversal vlog makes it cooler, ironically.
Putting in this much effort to make a multiversal vlog when the doomed timelines are all inherently fuckin' doomed, as the name implies, and therefore functionally useless to communicate with, makes it more ironic.
I have Heart powers and am able to achieve my ultimate self through my alpha timeline. Therefore, not only is this pimped-out vlog functionally useless, but I actually don't need it at all.
Which means this wasn't too hard to set up to begin with. Ironic, considering the complex presupposed conditions necessary for bridging that 'verse gap.
And despite framing this as a vlog, this is obviously a blog.
Even though it's just a blog, all these drawings I've made had you convinced that I really thought I was posting a vlog.
And in a way, I'm still making one. It ain't the traditional format, but the almost videographic mannerisms I've been laying on you more than compensate for the fact that the video part of "vlog" doesn't exist.
Except it does, for me.
And because it does, none of these pictures are drawn to begin with. They're all film stills. Screenshots, if you prefer.
Which makes the qualifier of "poorly drawn" untrue.
But it's also almost true, because you can call them poorly drawn by virtue of them not even being drawn. Ride that definition of "poorly" down the one-way rail and you're here, selfie central, population two, me and you.
Of course, that means we have to cover the quandary of truth itself. What constitutes the truth? Titillate that thought for a second.
If I consider the attached files to be selfies, but you consider them to be illustrations, which is it actually?
An analysis of the "truth" means that we have to start delineating how much of this is subjective, tying us in bed with the concept of knowledge. The Socratic take calls for dialectical conversation and inquiry via questioning; therefore, if I just bequeath my knowledge to you on a pretty little metaphorical platter, it won't mean fuckall. So we have to keep digging. Get your pickaxe ready, 'cause we ain't hitting any diamonds of wisdom any time soon.
In fact, maybe that ain't the right direction. Flip it turnways. We gotta climb a li'l higher for what we need.
Maybe we gotta head to the roof.

now. brought cal.
where making this HAPEN.

Haha.
Just fuckin' with you.

Welcome to my blog, dude.
Want water? Imagine I got you a nice, chilled glass.
Let's get this parasocial relationship pumping.
Questions? Concerns? Misguided pseudo-parental queries about whether or not it's safe for your pipsqueak to be exposed to a full dose of radically Stridered bullshit?
Cool.
Make it all three and drop it in the asks, yeah?
#Dirk Strider#Homestuck#Homestuck Fanart#Bro Strider#Ask Blog#((#No set timeline! primarily dirk but occasionally other splinters. yeah that includes scratch because why not. it sounds funny.#not a kinnie not a fictive! just a guy with a little bit of time and some bad ideas.#please note that it took dirk approximately five hours in the video to get ready. thank you.#yes the intro is one very lengthy quasi-shitpost. I was going to cover sincerity and the socratic dialogues even more#except it was already really long. lol. anyway I don't have 3 hours to write a more detailed explanation of all the layers of irony but#'trust me bro'#this is a regular askblog despite being named like one of the 'badlydrawn' ones.#im not gonna write long ass monologues at everything i just thought it'd be funny here#i'll spice up the actual blog layout later. for now - hope you enjoyed!#Also - runs not daily prob closer to weekly))
54 notes
·
View notes
Text

ㅤㅤㅤㅤㅤㅤglobal it boy Park Jimin © rkivenjoy
#i really want to do this one but i dont know if i liked it at the end#jimin bts#bts#bts army#bangtan#bts icons#jimin#park jimin#bts jimin#jiminie#jimin layouts#jimin poster#jimin posters#jimin edit#jimin edits#jimin cover#jimin covers#jimin art#jimin arts#jimin design#jimin designer#jimin designs#jimin wallpapaer#jimin wallpapers#jimin it boy#itboy#bts design#bts edits#bts art#bts poster
22 notes
·
View notes
Text
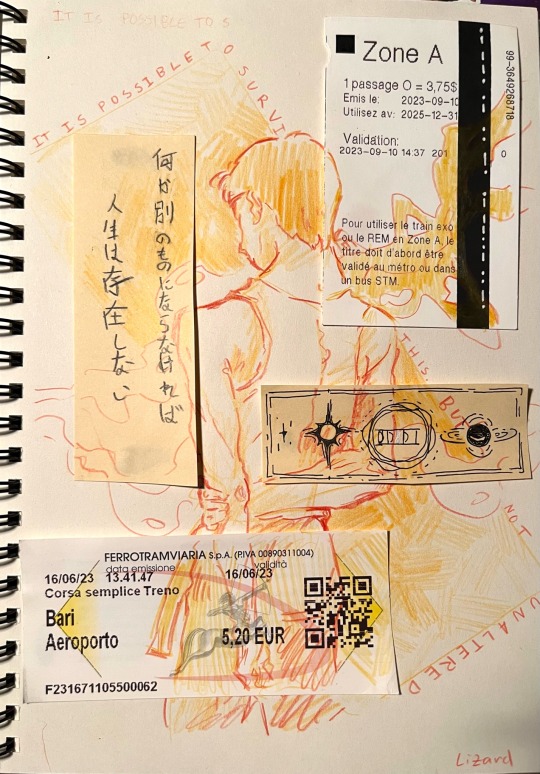
Saw this goddamn lathe picture and now I have a sketchbook page
#started as a drawing about leaving home and friends (featuring a couple of the train tickets I collected this summer)#and ended up having more trans feels than I expected#ignore the shitty Japanese as always#excavatinglizardsart#art#there are Easter eggs in this. except one of them is a reference to both astrophysics and a video game from the 90s#I don’t really do sketchbooks like this so the layout is a bit dubious#anyway
44 notes
·
View notes
Text
I CANT USE CSS ON ARTFIGHT...............
#I WAS REALLY HOPING TO FIX THE FUCKING. PARAGRAPH WIDTH. SIGH#idk why but it stretches across the ENTIRE page like. it takes up the full width of the browser and it BOTHERS ME. ON ALL THE PAGES#i could try manually putting shift breaks but im worried it might not look so good on mobile. ugghh... auyggghhh.....#im already learning CSS and API so i thought i could put it to good use but. AUGH#this whole time ive had to go into the inspect panel myself and change the padding so i dont have to read the length of the screen#like a fucking typewriter... i would have also loved to use custom fonts and animations......#i did find a guide for BBCode which the site uses on default and it covers basic styling but its not the same. sniffle#you CAN unlock CSS if you donate $25 to the page which seems fair. and if i could do it i would but. i do not have any way of#sending or receiving money online </3 i really need to figure out how to do that so i can set up comms like i said i would last summer#but it intimidates me.... and im already kept on a short leash when it comes to that so it feels like a lot of things could go wrong#i think toyhouse allows CSS or some sort of code...?? i remember seeing some oc pages with custom layouts#if thats the case i'll try fiddling with it but im not very familiar with using toyhouse so thatll take a while#(thanks again for the code sal ^_^ ill put it on my pin once its ready but im trying to learn my way around the site heh ;;)#at least i can use my pixel dividers.. ive been digging around for pixels to use and found some really cute ones#yapping
40 notes
·
View notes
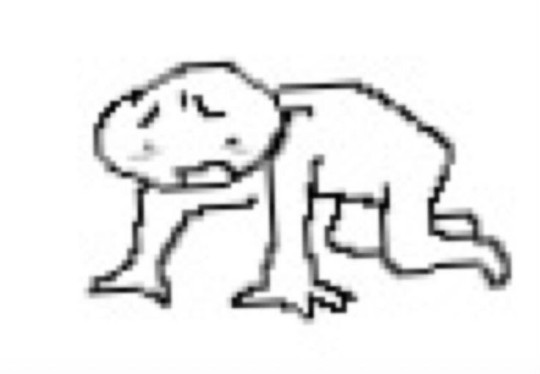
Photo

@otomerson hi quick apologies bc. 1. i can’t draw people 2. this is extremely rushed because i read endless dreaming on a thursday night in one sitting adn missed my alarm and was nearly late to class and i’m still not over that so. i had the vision of sunny waking up to all his friends collapsed over the floor and i needed to share.
endless dreaming is a post good end omori fanfic that i cannot recommend enough i’ve known it for less than 48 hours it has made me feel emotions i canont comprehend
#omori#i have no idea how to tag this sorry#read endless dreaming it's making me insane#unless you haven't played omori in which case please pplay it i need people to experience this video game#revek's art#i don't think sunny has his eyepatch in this one but ah well#i know the other bed is like really far away in the canon layout of the room but maybe they shoved it over here idk. i'm trying my best#i know i am rambling so much please forgive me#endless dreaming#i also realize kel and basil have ponytails whoops
218 notes
·
View notes
Text
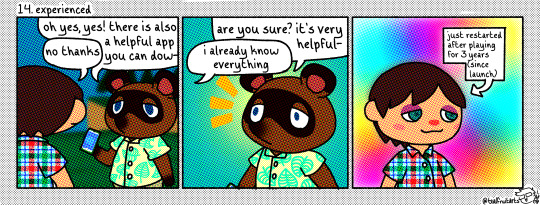
guess what I've been fixating on
#animal crossing#animal crossing new horizons#acnh#tom nook#smth smth#yeah ive just been playing acnh again. sorry#i just unlocked terraforming this morning (as of when im creating the post on monday not when its posted on thursday)#so hopefully by the time this is posted ill have gotten some rly nice street patterns made up#i found some pretty good ones but the way they were set up was like. not exactly what i need? so im trying to like#rip them off ig??? is that bad? idk. im gonna put my own spin on em ig#im just not super good at making convincing like...sidewalks w depth to them and such#anyway hopefully this time around i can really get my island looking as baller as i want#the reason i restarted was bc id fucked my island up so thoroughly that i wasnt even sure what to do w it anymore#or where to start w it#also my plaza was SUPER close to the airport.#so i chose a different layout this time where the plaza is like in the middle right area of it#more room for an entrance and such#i even have made up a Future Map including new landscaping and zones#so ill get to that over the next few days since i have time off work#also! this is the first entry ive made using my new smth smth tools#namely the automatic halftone-ify-er and a custom hand-drawn font#it took a bit less time to make this one since i didnt have to 1. hand write the dialogue and 2. think about the specific halftone colors#im still sticking to a limited palette (specifically 256 web safe colors) just cuz#but yeah. if you have actually read all of this and you have thoughts on the look of this one vs the previous ones lmk 🩵 thanks#also have a good day and drink some water :)
48 notes
·
View notes
Last Seen Blogs

51stillgood
Sexx At 51 Stll Good

kurrusu
k

rina-jerjay
Bees

thelittlemadame
THE LITTLE MADAME

artoka315
A blog that I made, that is sometimes dead.