#Mending
Text
#mending#Ruins#jerma#achievement hunter#dungeon meshi#tgcf#konig x reader#charlotte sartre#darshelle stevens#kurt cobain
135 notes
·
View notes
Text
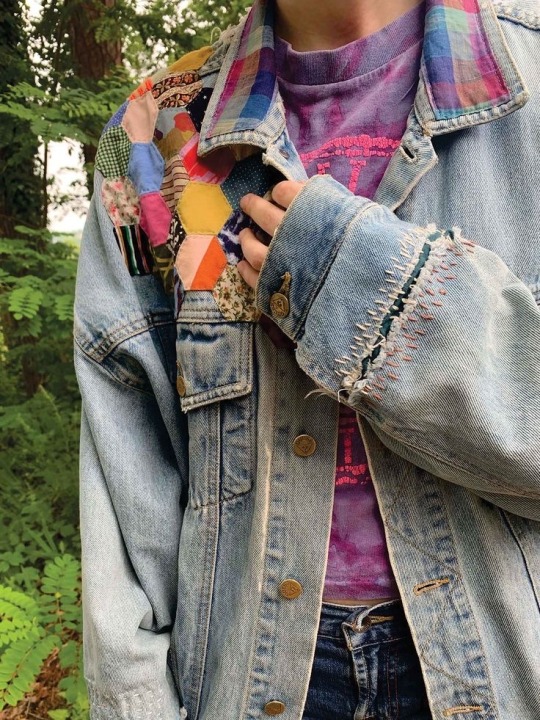
My fall jacket needs two fixes before it's put up until autumn again.

Here's the first tear
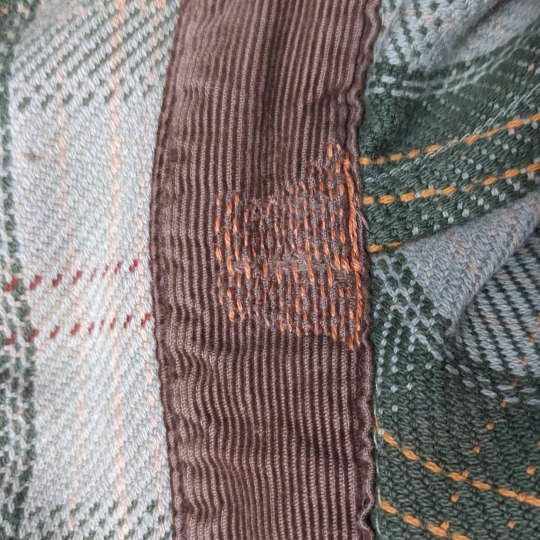
And it's fixed.
I'll try to finish the other tear in-between planting in the afternoon.
#hand stitching#sewing#mending#visible mending#repair#wip#ecofriendly#green#jacket#plaid#its very comfy
51 notes
·
View notes
Text

#crafts#crafting#mending#diy#sewing#embroidery#sashiko#visible mending#coworkers misunderstand and try to chastise me for being too humble when i argue with them for saying the top thing#so i made a meme about it#inspiration#?
19K notes
·
View notes
Text
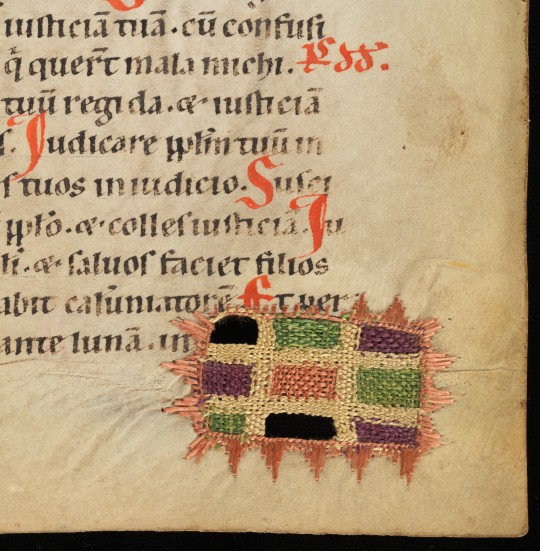
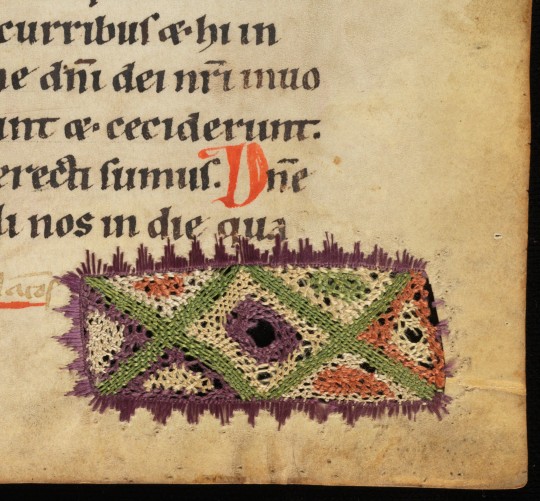
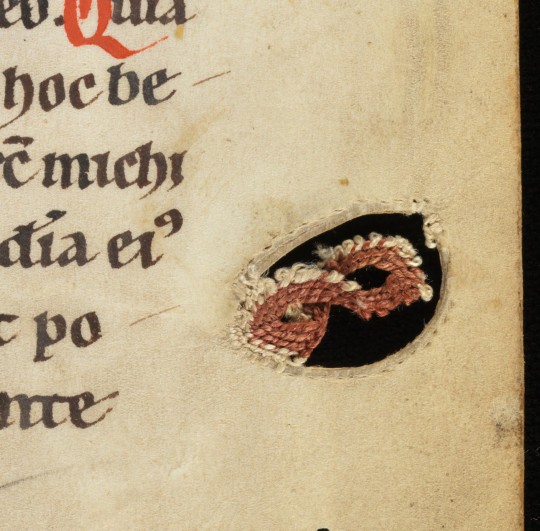
medieval parchment repairs
in a psalter, south-western germany, late 12th/early 13th c.
source: Hermetschwil, Benediktinerinnenkloster, Cod. membr. 37, fol. 19r, 53r, and 110r
#12th century#13th century#repairs#mending#medieval manuscript repairs#sewing#book history#medieval studies#medieval art#psalter
7K notes
·
View notes
Text


10K notes
·
View notes
Text
#circular fashion#upcycling#ecopunk#embroidery#environment#grunge#aesthetic#hopepunk#fiber arts#visible mending#mending#solarpunk#creative
1K notes
·
View notes
Text

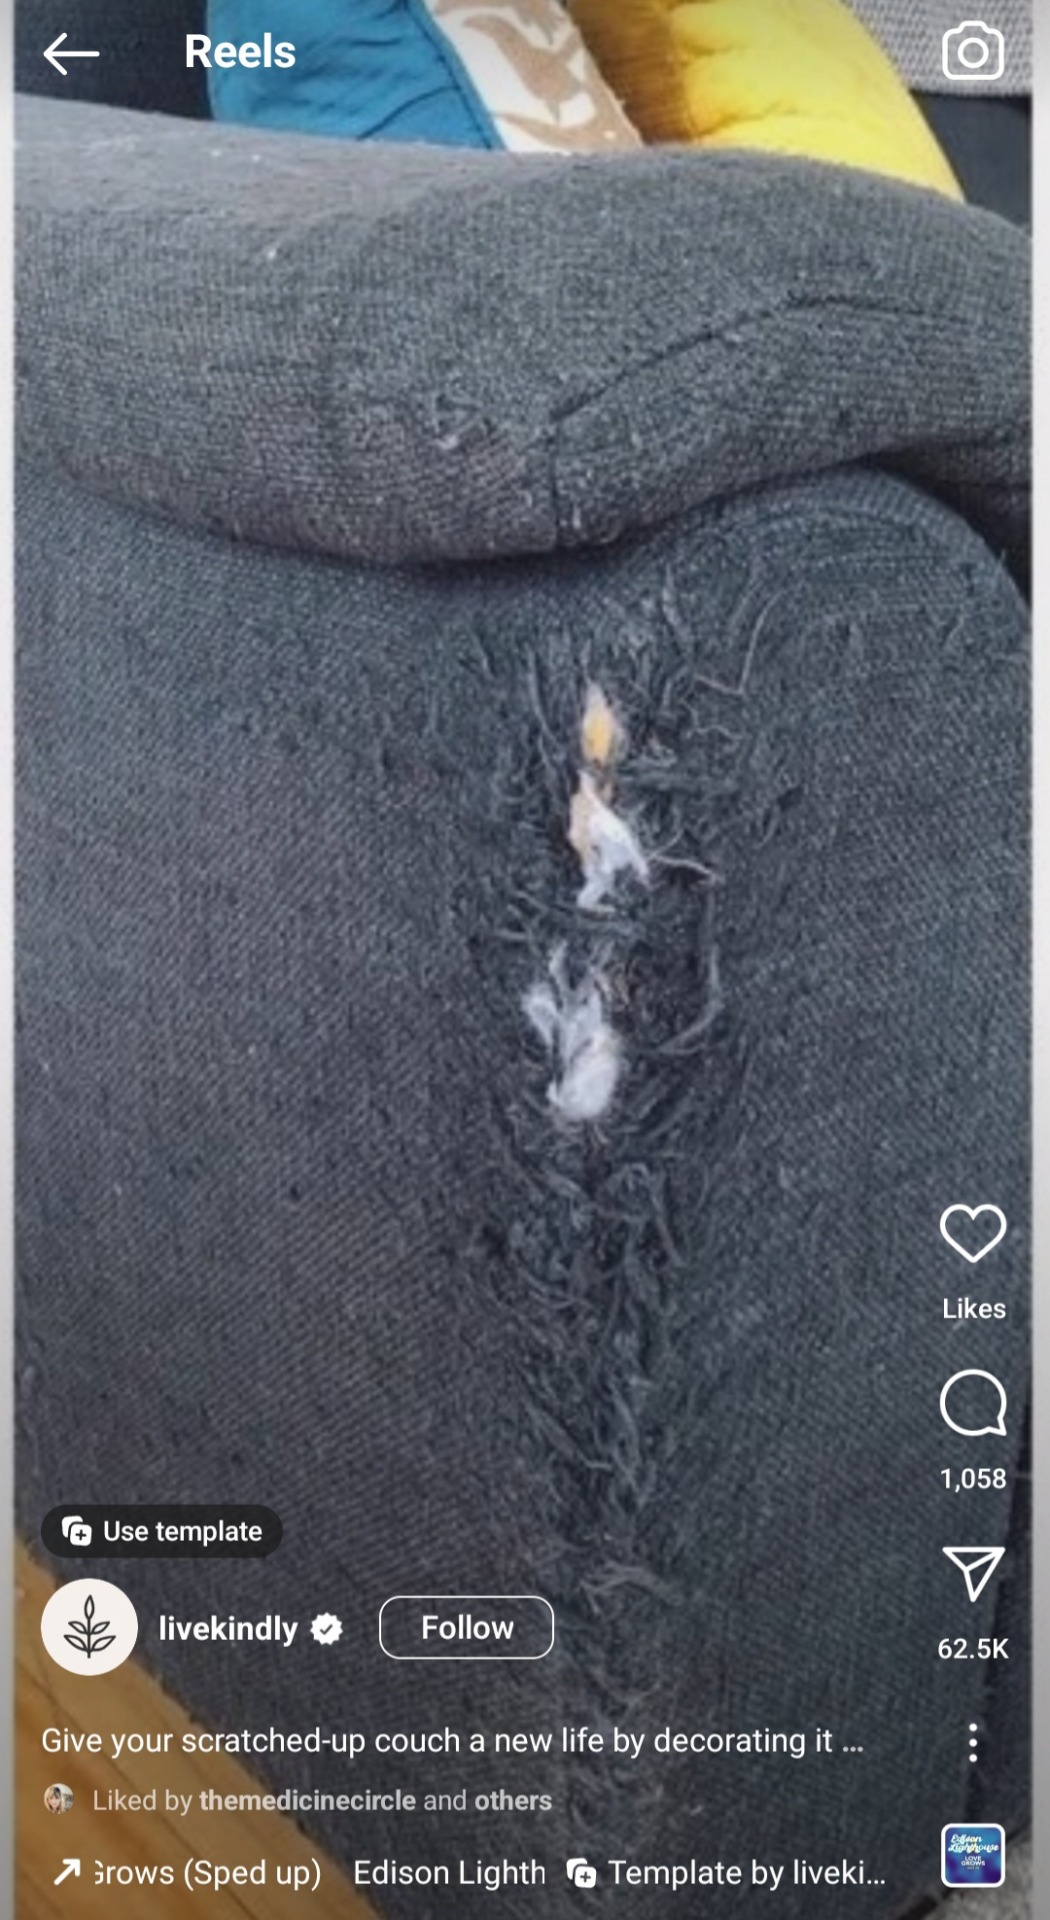
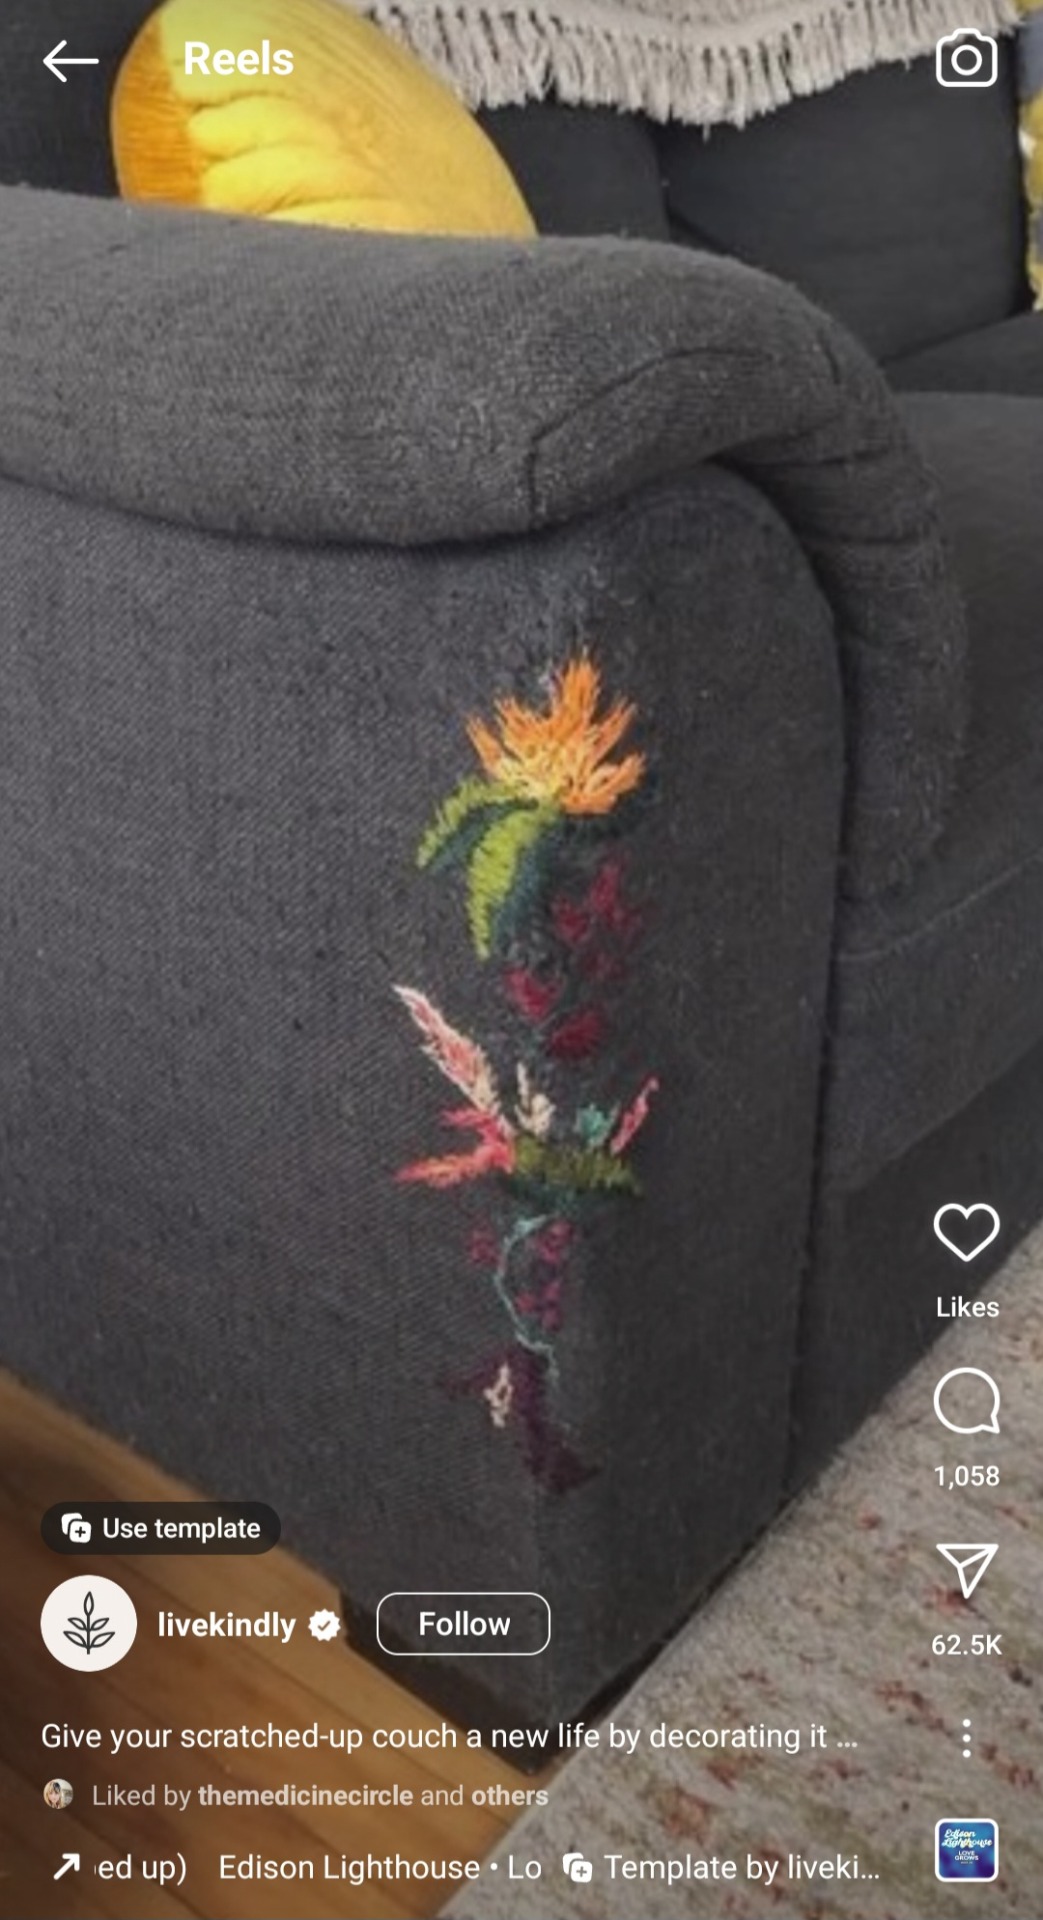
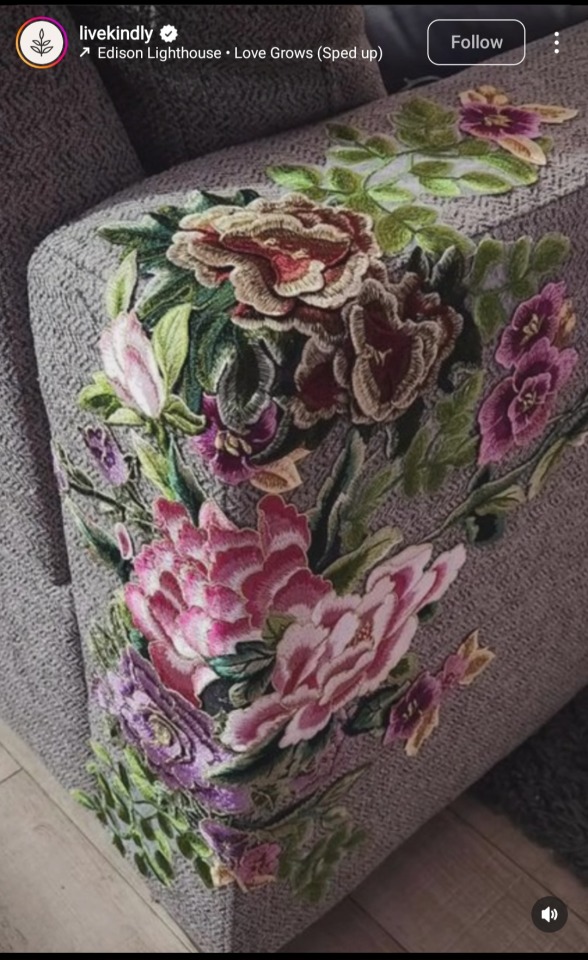
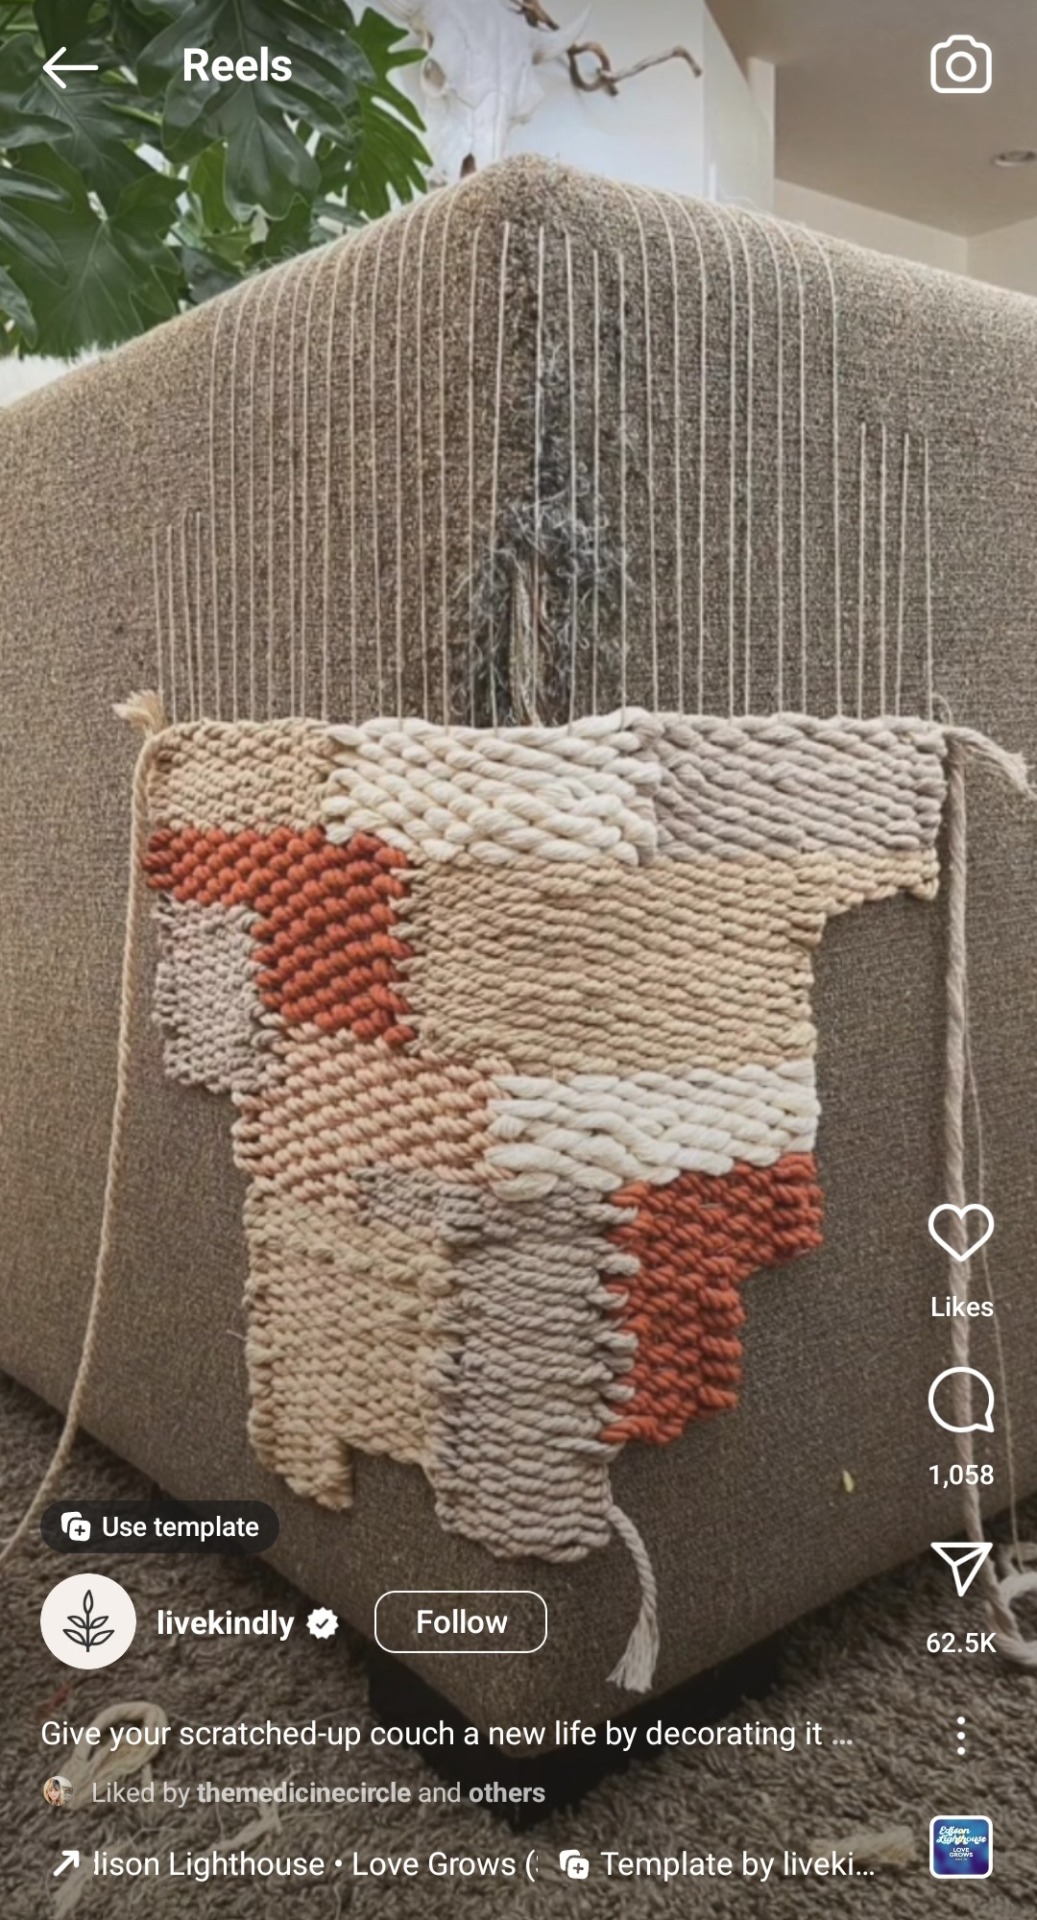
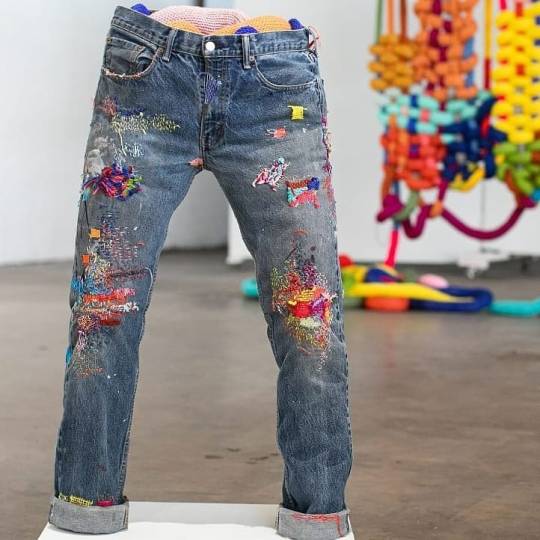
Did some fancy repairing, my pal said this would probably "do numbers on tumblr"...so ta da!
824 notes
·
View notes
Photo

Visible mending by Katrina Sánchez
11K notes
·
View notes
Text
Part 1 of my mending series! I embroidered the edge of the right pocket!
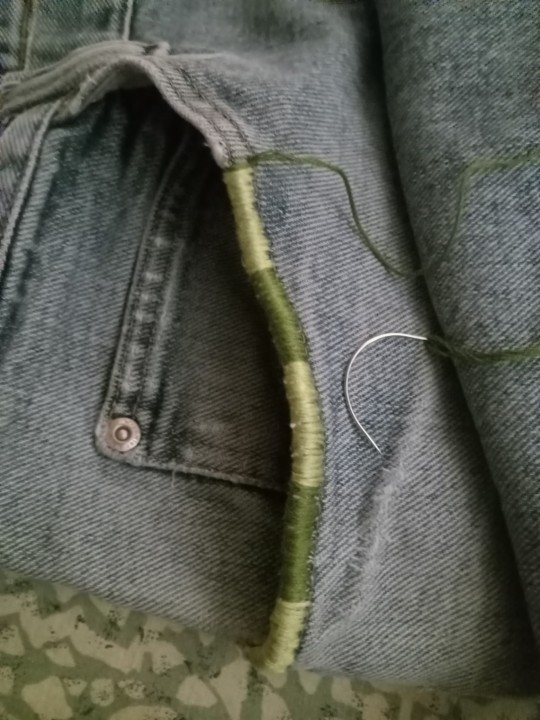

This alone took a while so I'm definitely taking my time with this project lol. But I'm making progress :)
I think I'll use browns or maybe blues for the left pocket for asymmetry and then next I'll tackle the waist band. Idk yet we'll see
[Image ID: two pictures of the right pocket on a worn out pair of light blue jeans. The top edge of the pocket is reinforced with light green and dark green embroidery thread and it alternates in-between the colors. Each block of color is about an inch long before it changes to the other color. The first image shows when it was almost done with the needle in the frame and the second image is the finished product. End ID]
#trash pants: reborn#solarpunk#solarpunk fashion#solarpunk aesthetic#punk#punk fashion#hopepunk#ecopunk#sewing#embroidery#mending#visible mending#sustainable fashion#sustainability#diy#solarpunk diy#punk diy#hatchet mends things
715 notes
·
View notes
Text


Finally got around to finishing this visible mending project from this fall.
#solarpunk#printmaking#punk patch#punk#diy fashion#blockprinting#punk patches#diy punk#patches#solarpunk fashion#eco fashion#visible mending#mending#clothing repair#sewing
572 notes
·
View notes
Text
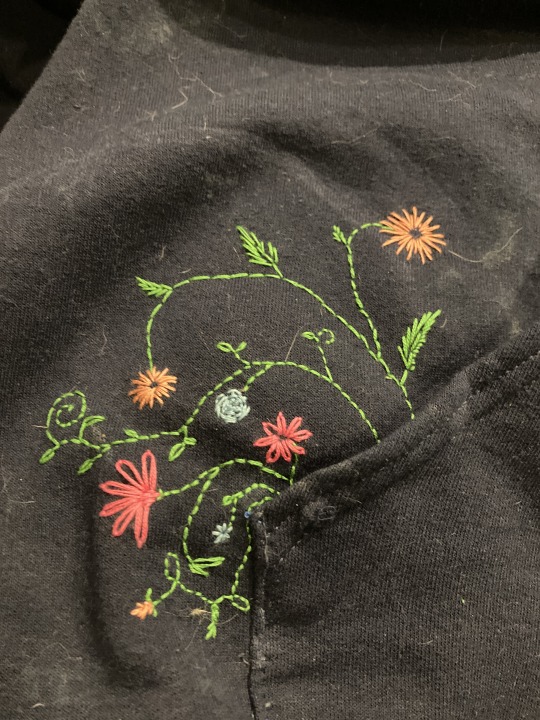
My friend asked me to sew back the front pocket of her work hoodie, which had been torn off by an overeager dog looking for treats.
I decided to put a little surprise in the repaired pocket for her.
This one was fun. I should do more freehand embroidery.

#visible mending#upcycling#embroidery#flowers#pocket full of posies#mending#sewing#crafting#fiber crafts
412 notes
·
View notes
Text
thinking today about how much I love literally all fiber arts. I am hopeless at almost every other kind of art, but as soon as there is thread, yarn, or string I can figure it out fairly quickly.
I learned how to knit when i was eight, started sewing at nine, my dad taught me rock climbing knots around that age, I figured out from a book how to make friendship bracelets, I've made my own drop spindle to make yarn with, and more recently I've picked up visible mending. I've learned embroidery through fixing my overalls, and this year I've learned how to darn and how to do sashiko (which I did for the first time today). After years of being unable to crochet I finally figured it out last night and made seven granny squares in just a few hours.
I want to learn every fiber art that I can. I want to quilt, I want to use a spinning wheel, I want to weave, I want to learn tatting, I want to learn how to weave a basket, I want to learn them all. If I could travel through time and meet anyone in the Bible, high on my list are the craftsmen who made the Tabernacle.
I want to travel the world and learn the fiber arts of every culture, from the gorgeous Mayan weaving in Guatemala, to the stunning batik of Java, to Kente in Ghana. I want to sit at the feet of experienced men and women and watch them do their craft expertly and learn from them.
Of every art form I've seen, it's fiber arts that tug most at my heartstrings.
#Fiber arts#fibre arts#knitting#Sewing#Mending#visible mending#sashiko#Darning#friendship bracelets#Spinning#drop spindle#embroidery#crochet#quilting#Tatting#weaving#basket weaving#Mayan fabric#Kente#Batik
493 notes
·
View notes
Text
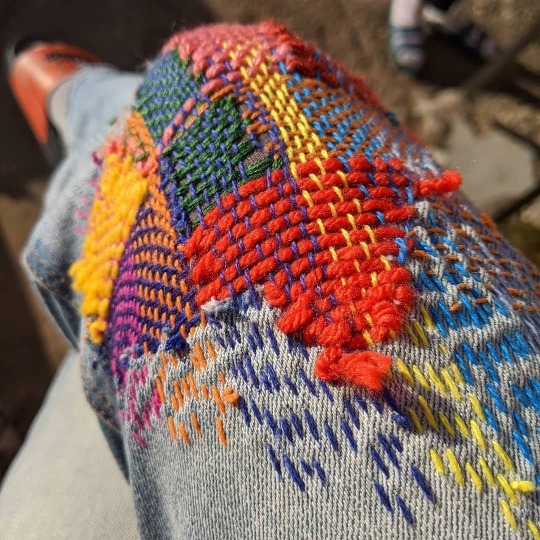
My DIY ripstop worked!
Inspired by ripstop fabric, and by the idea of reinforcing stuff before it breaks, I machine-sewed a little grid along the inside part of the jeans where they always wear out first.
Tonight I was venting about an awful group project to a friend and I draped myself dramatically over the couch and felt something rip a little.

Look! The rips stayed inside their little squares. Look how small it is! Look how easy it'll be to mend!
Ok actually since the fabric's been fading and the thread now looks really dark, I'll probably unpick the grid and sew it again. I'll do thread a shade lighter than the fabric currently is so it'll still match as fading continues.
#diy ripstop#cj sews#solarpunk#sewing#diy#it's not waste until you waste it#beginner sewing#visible mending#mending#ripstop
637 notes
·
View notes
Text
(source)
762 notes
·
View notes
Text
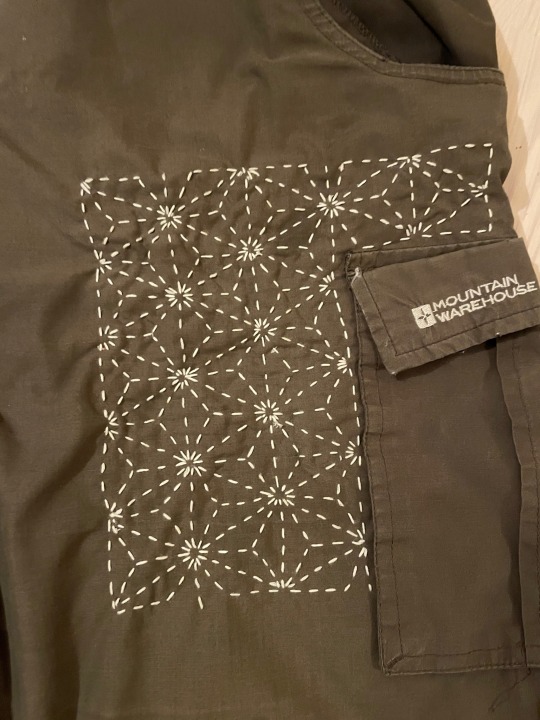
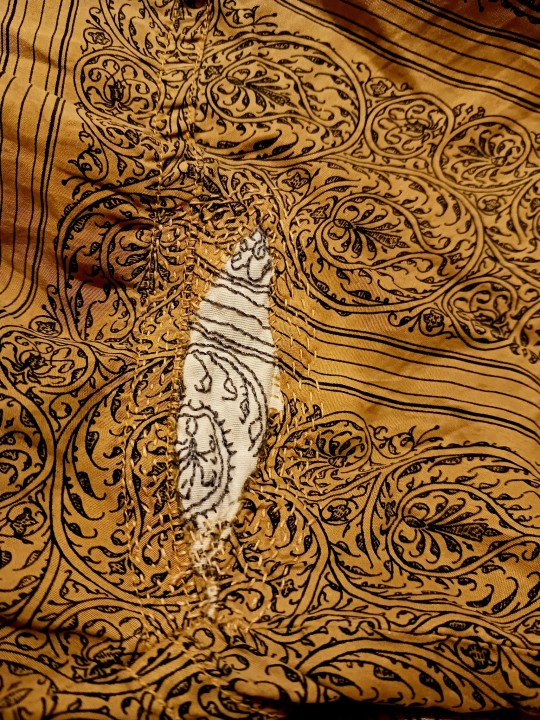
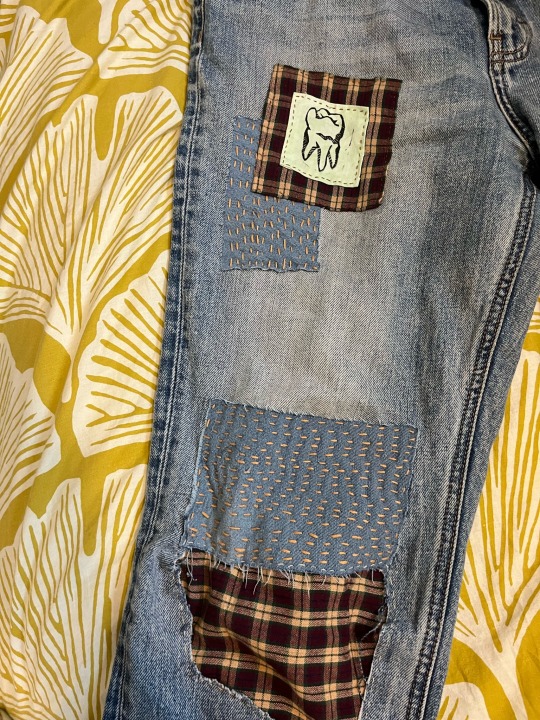
My latest sashiko patch, using the asanoha (hemp leaves) pattern.
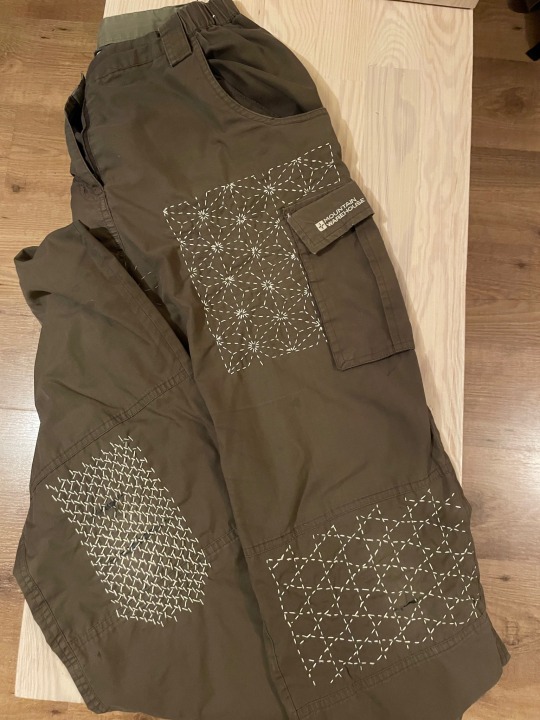
This is the second mend I’ve done using a tissue paper template. See below for details on how it works (or doesn’t - I’m undecided).
1. Pin your patch in place on the inside of the item of clothing.
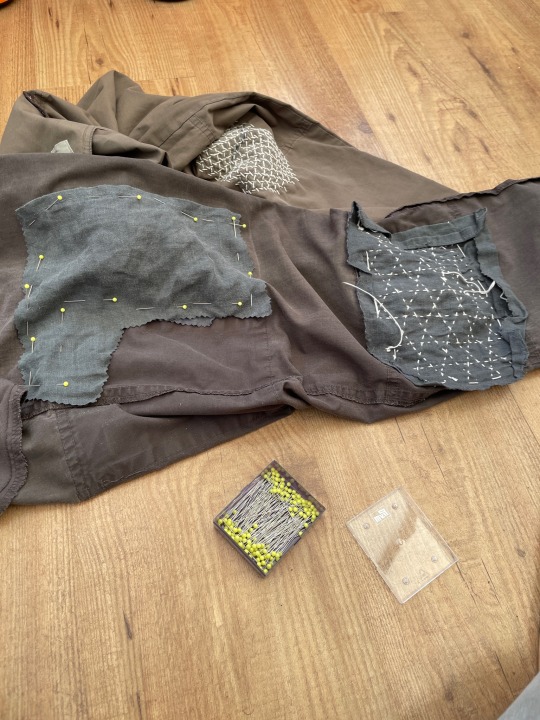
2. Trace grid and design onto tissue paper. My tissue is just scrap from packaging. I traced over a quilting ruler to get everything lined up.
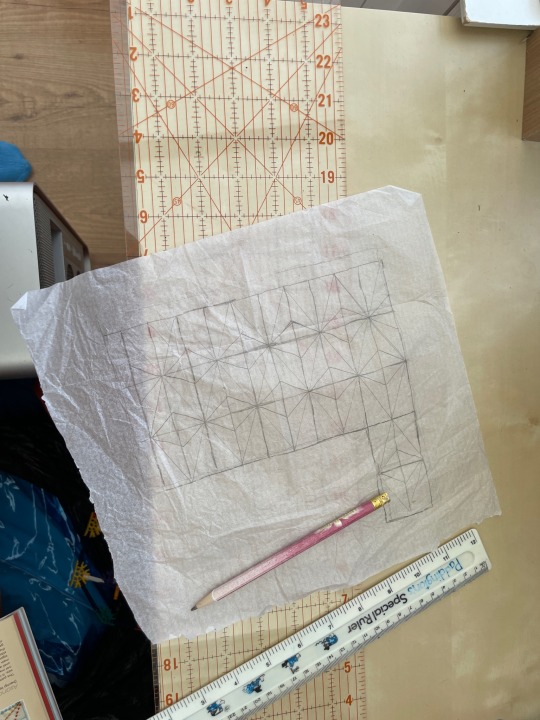
3. Pin in place over the fabric. I didn’t bother removing the original pins, but did leave a wide border round the tissue to help with pinning.
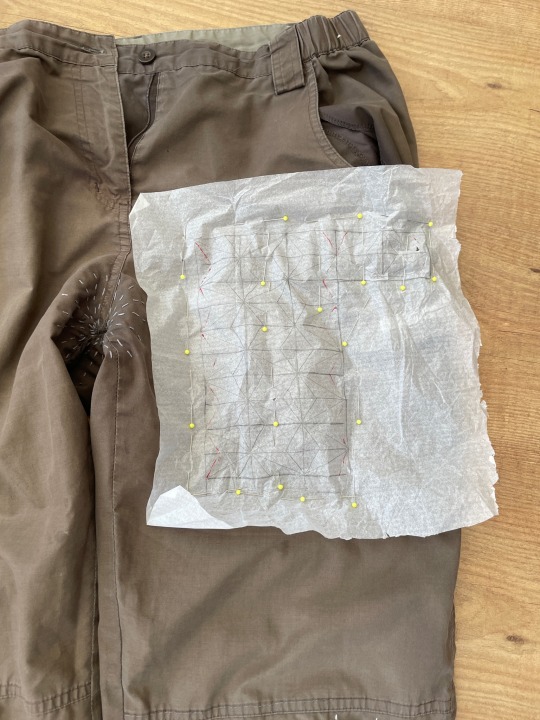
4. Use the pattern guide to sew, stitching through the tissue, original fabric and reinforcing fabric. The tissue will start to tear as you do this. I took out all the pins once I’d stitches all the vertical lines.
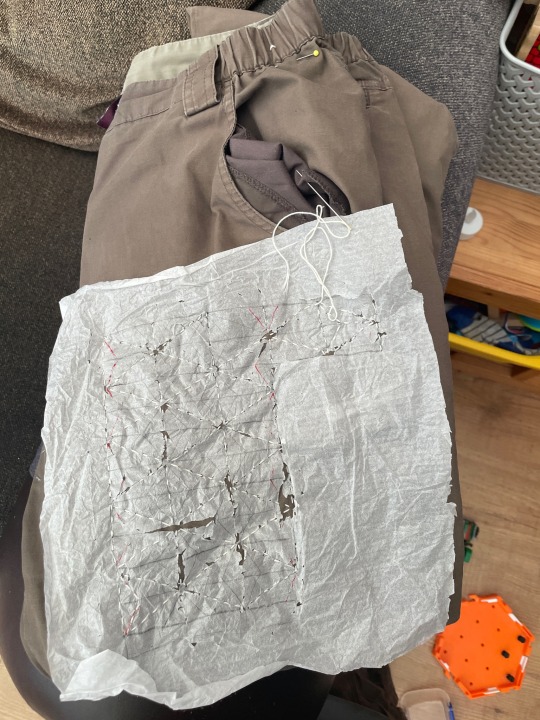
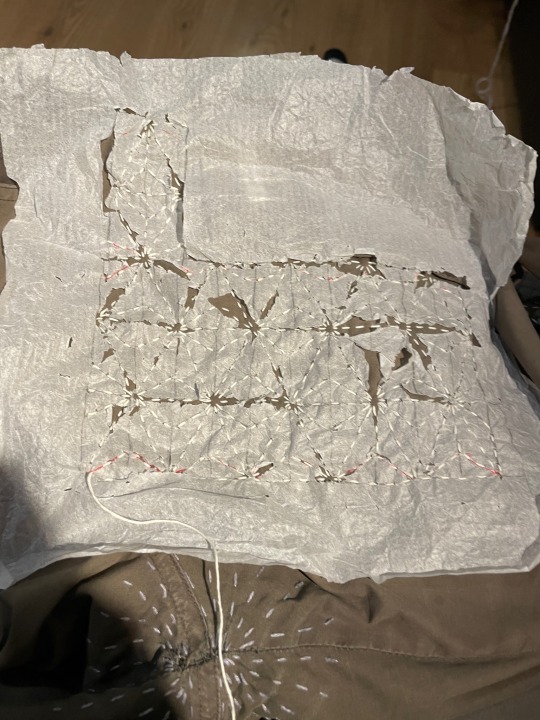
5. Peel away the tissue paper and your pattern is revealed! I actually did this a little early, as I had enough lines in place to complete the pattern without a template.
This is the second time I’ve tried this approach. It is really good for getting an accurate pattern - I’ve never had much luck with marking grids straight onto the fabric. However, it does make it really hard to get the fine details right, as the paper obscures them as you’re stitching. That’s why the centre points on my piece look so messy - I just couldn’t see where the other stitches were.
605 notes
·
View notes
Last Seen Blogs

tattoosbytammie
Tattoos by Tammie

designifying1-blog
Designifying

shibuyaas
𝘀𝗸𝘆𝗲

unlikely--lovers
Love is blimd

maizonoapologist
danganronpa got me in the year of our lord 2020