#Sourdough Pizza Dough recipe
Text
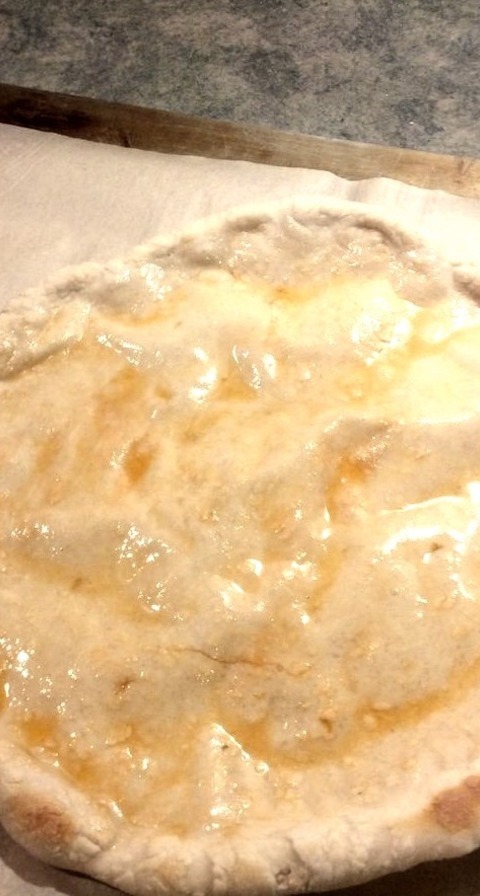
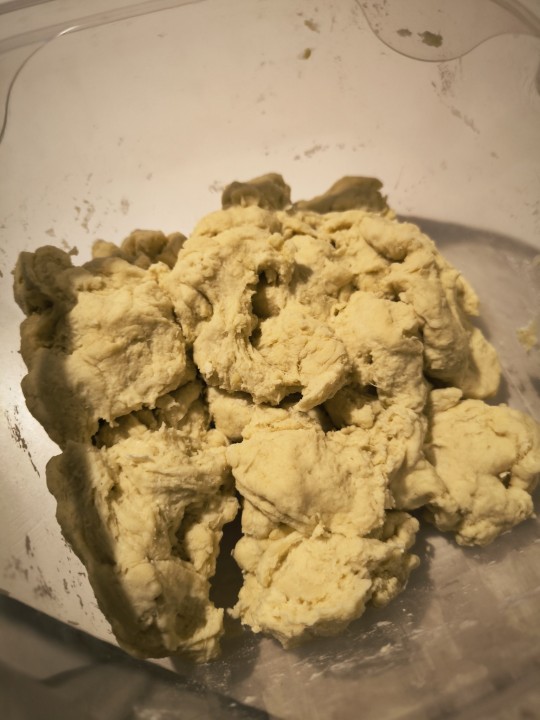
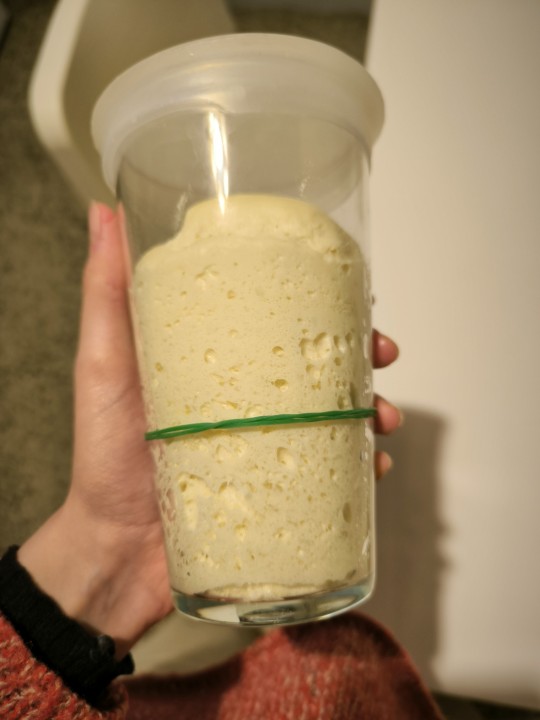
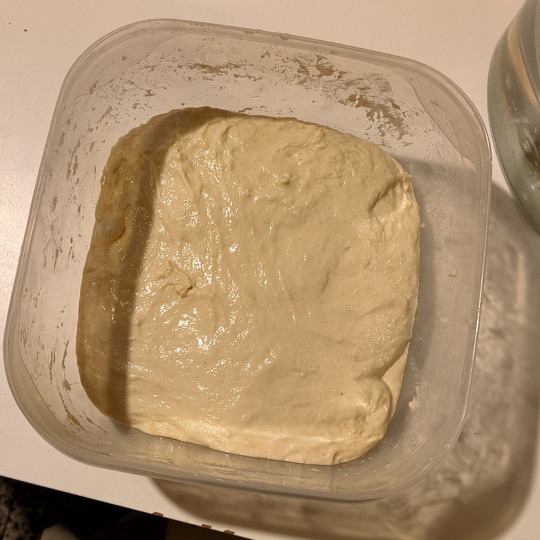
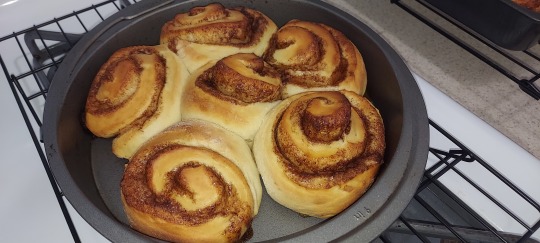
Spending my Sunday enjoying the little things. Wearing my cozy cute nightgown/robe set from Walmart. Savoring a delicious cup of coffee. Making a pizza dough with sourdough discard.
I went out with my old coworkers yesterday and this time there were only a couple “you’re not drinking!?” moments. This is also the 3rd time we have gotten together, it’s always a bar/brewery. I think they’re finally taking my “I’m not drinking because it messes with my stomach too much” seriously. Even though in truth I just don’t want to drink anymore. But no one really gets that excuse.
#and tomorrow I’ll make a sourdough bread for the week#I’m hoping the pizza dough works well it’s the first time I’m trying a discard pizza dough recipe
20 notes
·
View notes
Text
Sourdough Pizza Crust Dough Recipe

Sourdough starter is used in this four-ingredient recipe to create a partially baked pizza crust that you can top with your preferred sauce and toppings.
0 notes
Text
Sourdough Empanadas
Mastering my easy recipe for sourdough pizza dough opens opportunities to make everything from baked and grilled pizza to stuffed pastries like empanadas. Learn to make Sourdough Empanadas.
When I first started baking with a sourdough starter, I was eager to bake loaves of tangy fermented bread with a cracking crust and tender crumb. Since then, baking bread has become a habit that ensures I always have a fresh homemade loaf ready to slice. Yet I probably make Sourdough Pizza Dough even more frequently because it can be transformed in so many ways. As I share this week in my Twice…

View On WordPress
#best empanadas#easy empanadas#empanada dough#empanada recipe#favorite empanada#flathead beacon#food column#homemade empanadas#recipe#savory stuffed pastries#sourdough pizza dough
0 notes
Photo
Sourdough Pizza Crust
After being kneaded, rested, and briefly baked, a soft sourdough flour mixture is prepared to be baked again with your preferred pizza toppings. 1.5 cups sourdough starter, 1.5 cups all-purpose flour, 1 teaspoon salt, 2 tablespoons olive oil
0 notes
Photo

Pizza Dough and Crust - Sourdough Pizza Crust
After being kneaded, rested, and briefly baked, a soft sourdough flour mixture is prepared to be baked again with your preferred pizza toppings.
0 notes
Text
Sourdough Panzerotti (Pizza Pockets)
A fun twist from our friday pizza night! Easy and ohh so yummy homemade pizza pockets!

View On WordPress
#basic panzerotti#creative sourdough recipe#difference between a panzerotti and a calzone#Easy Sourdough#easy sourdough pizza#easy sourdough pizza dough#easy sourdough pizza dough recipe#easy sourdough pizza recipe#Easy Sourdough recipe#Easy Vegetarian Meal#healthy meals#healthy pizza toppings#homemade pizza dough#how to make a panzerotti#how to make sourdough panzerotti#how to make sourdough pizza#how to make sourdough pizza dough#Is sourdough complicated to make?#Is sourdough good for digestion?#is sourdough good for you#Is sourdough good for you?#Is sourdough hard to make#is sourdough healthy#is sourdough healthy for you#making pizza#nutrition facts of sourdough pizza#panzerotti#panzerotti filling#panzerotti vs calzone#panzerotti vs calzoner
0 notes
Text
yo anyone got a good sourdough pizza dough recipe?
I usually like the king arthur recipes for sourdough but their recipe has me adding additional yeast instead of being fully reliant on the starter yeast (and I don't think I keep instant yeast in my apartment anymore)
765 notes
·
View notes
Text
I tried to make sourdough biscuits to freeze as a test to see if they would bake afterwards, and how, and so I mixed them up and cut them out and carefully preserved them on parchment paper in my freezer and then hours later I bagged them once they were frozen so I could take them to my mom's and then I went to sit down and realized oh FUCK. I fucking forgot the butter. I FORGOT the BUTTER. I skipped a whole ass step.
And I told my mother, shit I forgot the butter, and she goes what do you mean like inside or on top?
Inside!!! Inside!!!!!!!!! I didn't mix the butter in during prep!!! These are unbuttery biscuits!!!
And she goes
I didn't add butter to mine (I had brought her some discard to bake these biscuits with a few days ago)
I said what do you mean?
She goes, the recipe you told me didn't have butter (I told her the recipe from memory)
I FORGOT THE BUTTER TWICE
but wait there's more!!!
She goes, your dad liked them
At which point I'm forced to ask: did he tho. Did he like them, or did he tell you he liked them, the way he LIED to us for 35 years about liking pizza?
Well, she says, I don't know. he did admit tonight to not liking brussel sprouts
Which they've been eating together for years now, literally this man is incapable of telling someone he doesn't like a food which explains a lot of my childhood meals
So I'm like okay okay okay okay. Okay. I know I forgot the butter and I know these biscuits are frozen hockey pucks right now but hear me out... What if I turn the oven on to preheat it, and then put the biscuits under the oven vent to thaw, and then just mix the butter in after? Surely nothing will go wrong with this plan.
So I break out the biscuits, and I turn on the oven, and I start thawing them, and I put the butter into a bowl, and start frantically trying to mash it with a pastry masher. This goes about as well as you might expect, which is to say terribly, because the butter just sort of turns into a pile of butter instead of a stick, and I need it to be pebbles of butter.
So I start sprinkling in flour, just until the butter stops re-amalgamating. The biscuits are basically thawed by this point so I try to mash those in and that goes very very very badly, so I clean the tool and just start folding the butter in with my hands like kneading bread, desperately just trying to mash it into one coherent form. It makes a ball of dough, or good enough to pass for one, and I cut out six biscuit sized chunks.
Put them in. Bake them. My oven light doesn't work so I can't even check on them while they're baking to see if I fucked it up worse.
Finally I pull them out, and I realize I fucked up but at least it was in the right direction. The biscuits don't look like they're supposed to, but they do look like layered biscuits, and they taste fine. I put a bunch of honey on one of them and it was pretty good.
I tell all of this to my partner when he gets home and he listens to all of it in silence. When I'm done his only comment is:
"Well, I guess we know how puff pastry was invented, now."
Yeah, it was some asshole hundreds of years ago trying to cover up biscuit sins!!
#breadventure#personal#stories about ked's life#sigh#this is why i can't be left alone in a house by the way#i just start committing crimes against myself
1K notes
·
View notes
Text
i was just reading a fic where someone said they needed to set aside their pasta dough "to rise", and that made my eye twitch badly enough that i would like to give you all a quick lesson about dough for all your writing needs.
without getting into fussy details, there are four basic types of dough/batter. yeasted doughs, quick breads, laminated/pastry doughs, and unleavened doughs.
the only one of those that ever needs to rise is yeasted dough.
yeasted doughs are, as the name suggests, leavened with yeast. yeast is a microorganism that, when activated in water, feeds on sugars to produce gas. that gas, when trapped in dough, creates bubbles. most breads are yeasted, as are things like bagels, rolls, pizza crust, soft pretzels, english muffins, etc. yeasted doughs are also typically made by kneading, a process that develops the sticky gluten in wheat and makes the dough strong enough to hold onto itself and gives a pleasantly chewy result. (sourdough is also yeasted, but it's made by capturing wild yeast from the air rather than using prepackaged yeast.)
quick breads are leavened with baking soda and/or baking powder. these agents do not need rise time, as the chemical reaction happens when they are introduced to water/acid and heat. muffins, pancakes, cake, and sweet breads like banana, pumpkin, and zucchini are quick breads, and not only are they not kneaded, they shouldn't be overworked. overworking activates the gluten in the wheat, which isn't desired in these soft, tender breads. cookies and brownies would go under this umbrella as well.
laminated/pastry dough is leavened by thin layers of cold butter reaching a quick boiling point and releasing a steam that separates the layers of dough. this effect can be most clearly seen in something like a croissant, though croissants are also yeasted. pie crusts, most biscuits (the american kind), scones, and many other types of pastries are made this way. any time a recipes instructs you to "cut" butter into flour, this is what you're doing. phyllo, the type of dough used to make baklava, uses a similar process where oil or melted butter is brushed between paper-thin sheets of dough.
unleavened dough is exactly that, unleavened. there is nothing in this dough that makes it rise. pasta, many crackers, some flatbreads like tortillas - they don't rise at all. you do, on the other hand, typically have to let it rest for at least fifteen minutes, as the mixing of the dough creates elastic gluten strands that will resist attempts to roll it out.
special mention: whipped egg whites. when eggs are whipped into stiff peaks, they become filled with air, and some recipes use whipped egg whites folded carefully into batter as a leavener. angel food cake, for example, is leavened with nothing but egg whites. many cake recipes use this technique, as it creates a very light and delicate result.
SO. please take this knowledge and incorporate it in your writing as you will. thank you. <3
ps: things that are gluten free never require kneading, as there is no gluten to develop. gluten free baking is an alchemy which i do not pretend to understand.
#note: i am not a professional baker just a home baker#and not the kind that goes on GBBO just an amateur#but i know enough to share the knowledge so#writing#mini mine
66 notes
·
View notes
Text
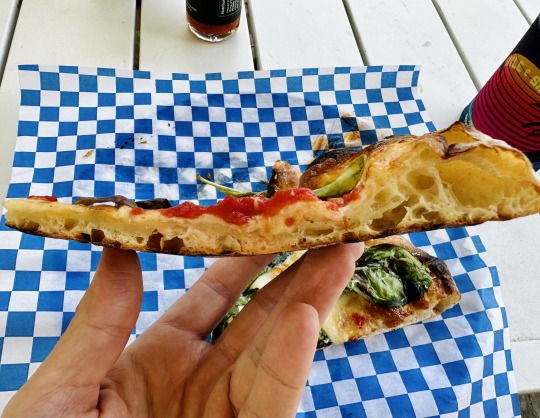
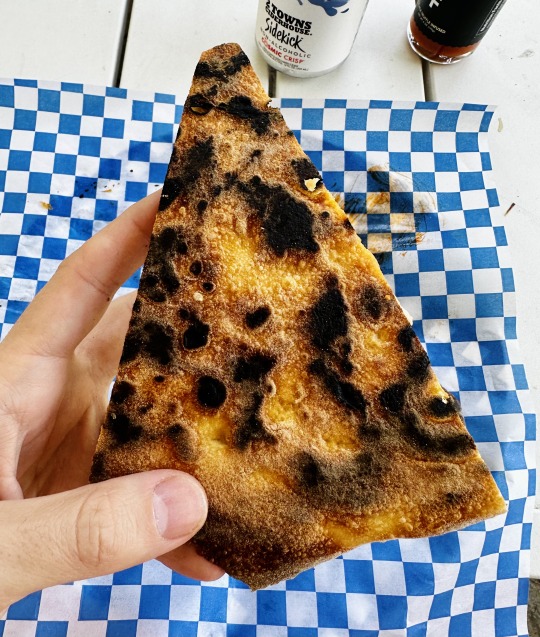
Pizza anon this is all for you!!!!
So!!! Today is pizza dough day. It is Tuesday evening and this pizza will be eaten on Thursday. Yes you read right. It will rest for very long but that's fine. Pizza dough can also only take 6 hours, but that's another recipe that definitely does not involve sourdough.
Also I know that I'm gonna explain everything as if you've never made pizza, feel free to write again. But I still think it's fun to show you (all) everything
Starting with autolyse, which comprises all of the flour and most of the water which are left together for a while (not long enough in my case). This will make the dough start to ferment and like, give better flavour.
Yes, it looks like big bread crumbs (or better, mollica)
Then we gotta add the sourdough!!! It goes with the rest of the water and a tiny bit of honey, to jumpstart the rising. Depicted is my Cupolino in all his might
Then you gotta mix it all in and at last add salt and oil and leave it to rest for a little. It will become like this
What happens next will come in another reblog cause it's gonna take a while!!
15 notes
·
View notes
Text
Sourdough is solar punk and communism and all the good things
Sourdough is the gift that keeps giving. It's an ancient tradition that's been shared and passed down between neighbors, friends, families, lovers, and communities. You can create the magic goo (sourdough starter) yourself from just flour and water, then spread it to others, or get a starter from someone else, often one that's decades (or even centuries!) old. Once you have starter, you don't have to buy yeast from the megacorporations that are killing the planet grocery stores. Or sandwich bread. Or dinner rolls. Or cinnamon rolls. Cookies. Tortillas. Bagels. Pie crusts. Pizza. Naans. Flatbread. Croutons. Bread crumbs. Pancakes. Waffles. Crumpets. Garlic knots... you see my point. And I'm certain there's way more.
You will still have to buy flour for feeding starter and baking ingredients for whatever you're making, and a water that's acceptable for your starter. However, you'll know what's in your food, you know how it's made- with love/care in it, as fresh as you can get it. And you will support the systems that devastate our planet and bodies and country slightly less. If you can secure a direct supply of grains (then mill them yourself) or flour, say from a farmer's market or friend, you can be completely independent for stuff that's purely bread- loafs, sandwiches, buns, etc. You can also source most baking ingredients in sustainable ways, such as farmer's markets or growing them. You can choose how deep you want to go with this. Think about how much of your diet is bread/grains, and how much that affects your wallet and health (not the carbs, but the preservatives/fake ingredients/contaminants)

What about disabled people? Busy people?
That's the beauty in sourdough. While establishing a new starter can be tricky, if you buy/are gifted and established one, it's VERY forgiving and can be flexible. You can feed it daily and make stuff multiple times a week, OR you can stick that bad girl in the fridge and feed a little flour and water every two weeks to every few months- whenever you have time to bake and are feeling excited/able! Baking takes some time, sure, but most of that time is letting the thing just sit, so it's not too bad labor wise. And the discard that you accumulate is both an ingredient AND a back up starter in the event your starter dies. Reactivate it by setting it out and feeding or simply dry it out, powder it, and store for up to, oh, a few thousand years. You can then rehydrate it and reactivate when you're ready.

It's good for your gut, great for diabetics, AND most recipes are friendly to peeps with gluten issues because the longer doughs does the big ferment, the less gluten it has!
If you're not self sufficient and homesteading or whatever the ideal solar punk communist dream is, that's ok. You will still have to buy some things. But sourdough is one of many steps you can take to make yourself less dependent on the rich jerks who own everything and poison us. Happy baking! Get involved! Talk to people about it! Trade starter/baked goods for other things! Mutual aid and mutual support!

(all pics are my baking)
13 notes
·
View notes
Photo

I’ll start doing some more casual blogging in the future. (Trying to see what happens if I’m using the socials for ...fun!)

I already went on several longer (about 20km) hikes this year and it’s been doing wonders for my mental health. Also I saw this little buddy.

Painted the first proper personal piece in like half a year! But not quite happy with it yet, so I’ll have to do some more editing on it before releasing it into the wild.
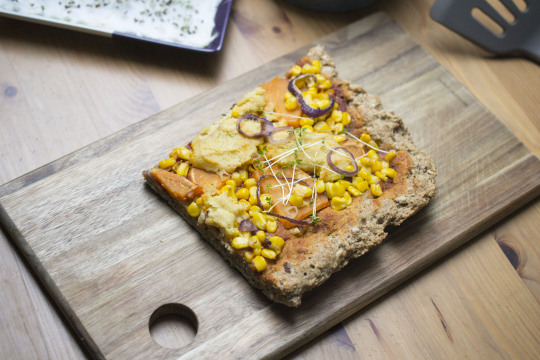
Indulged by baking myself the best vegan pizza! (There’s no recipe. Just make veggie pizza as you usually would and switch out the cheese for hummus. I’m personally not strictly vegan and I genuinely prefer this to cheese nowadays! Also, add some seeds to the dough for extra crunch.)
Went to the Ballet Life Drawing Session at the Drink+Draw Berlin and held another online workshop with them as well. Was suuuuper nervous about that and afterwards my voice was gone, but everybody seemed happy with what I had to share, that’s the most important bit! I’m actually working on a manuscript about freelance illustration advice through the lens of an anxious person which most of the workshop was based on, so it’s nice to know I’m heading in the right direction with that one. (though I won’t be done in a while)

I upped my sourdough baking game and finally invested in a bread knife. Of course the first order of action was to cut myself. Oops. (Second order of action was creating a dramatic hand study. I even made a recording of the process, but haven’t gotten around to editing it yet.)
Considering I meant to take this year mostly off to focus on personal work and exploring different creative avenues because I’ve been skirting burnout for a while it’s somewhat stupid I ended up booked solid with client work until April. Then again I like food and shelter and I can hardly say no to a dream client!
So worked on some client stuff this year, but I’m currently in that period of an artist’s life where I dislike 80% of what I create, so I’m not really feeling like sharing work currently (if I’m even allowed to) and am fortunately in the position where I can take some time off my usual social media promo train.
Oh yeah. And I shut down my Patreon again. I just cannot figure out how to make that thing work for me. Nevermind, I’ll just try again one day.

Last but not least--despite having zero green thumbs I’ve tried my hand at growing my own kitchen herbs and at least some of them seem to want to continue to do this whole sprouting thing. Look at that tiny parsley leaf!
27 notes
·
View notes
Text
The best home-oven pizza
I like dozens of different pizza styles—sometimes it's nice to mix things up, other times a particular style fits your circumstances best. I most commonly make sourdough pizza, mixed with a stand mixer, fermented in the fridge for a few days, and baked in an Ooni Koda.
But what if I don't have access to a mixer; I want to eat pizza the next day; and it's too wet and windy outside to fire up the Ooni? Thanks to my friend Adam who originally developed this dough recipe, I also have the makings of an incredible indoor-oven pizza in my back pocket. It's bubbly, light, and crunchy.
The best home-oven Pizza
Servings: two 14” pizzas.
Time: 3 hours (mix and proof) + 1 to 2 days (fridge-ferment) + 4 hours (final proof) + 10 to 20 minutes (shape, top, and bake)
INGREDIENTS:
400 g white flour (high-gluten, bread-, or all-purpose flour)
20 g (5%) whole wheat or rye flour (or any flour, really)
12 g (3%) salt
.85 g (1/4 tsp, .2%) instant yeast
320 g (76%) water
DIRECTIONS:
Put the flours and the salt into a large mixing bowl. Stir with a spatula or fork to mix evenly. Add the yeast and stir again. Pour in the water and stir with a spatula, scraping down the sides and the bottom of the bowl. After 30-60 s of this, you should have a cohesive, shaggy mass of dough in the middle of the bowl. You're not looking for a smooth ball; you just want to work in all the dry flour. Gently knead this ball for a minute with your hands, folding and turning it to make it just a little more even; it'll still be a bit of a mess, which is fine.
Pick up the dough and spray or wipe a tiny bit of oil into the bowl, then put the dough back in. Cover with a shower cap, a large plate, or a tea towel and let the dough rest in a warm spot (70–74°F?) for 3 hours. Every 30 minutes or so, perform a stretch-and-fold. This video shows the process; it uses a different dough, but the principle is the same.
youtube
Stretching and folding every 30 minutes is ideal, but the timeline is forgiving. Just try to give it at least 3 folds during the 3 hours of proof time. By the end, you should have a fairly smooth and uniform dough.
After the 3 hours are up, cover the bowl again and pop it in the back of the fridge for 1-3 days. If you go past a day and a half, check to make sure the dough isn't overproofing and exploding out of the bowl.
The day you plan to make pizza, remove the dough from the fridge 3-4 hours before baking. (3 hours on a hot day, 4 on a cold one.) Cut into two pieces of the same size and roll each one into a ball.
Note that this is high-hydration dough, so it'll feel pretty loose and lively. Balling it up when cold will make that easier. Here's a video showing how to ball:
youtube
Grab two deep, round bowls or containers and oil them lightly. Place one dough ball in each, smooth side up, and cover. If the containers have well-fitting lids that won't crush the expanding dough, use them. Rest for 3-4 hours as described above.
1 hour before baking, get your home oven ready. Pop a baking stone or baking steel or upside-down pan on a rack 6-8" from the top broiler. Crank it up to 550ºF (or however high your oven goes) and leave it there.
To stretch the dough: hold the container upside down and wiggle the dough out of it gently; dont worry about whether it stays a perfect ball. Place it directly into a shallow, wide bowl of flour, and make sure the wet end and the sides get some flour (not too much) on them. Place the dough ball on your wooden peel with the dry (previously the top) side down and press gently around the inside of the rim to make a little ringed pizza-prototype. Drape the disc over your knuckles, then rotate around gently, letting gravity droop the dough to grow it. There should be no need to tug and stretch it with your fingers. Here's a video again:
youtube
My topping strategy for a standard cheese pizza: layer the dough with sliced mozzarella cheese, then add dabs of sauce, then your toppings (including torn fresh mozzarella). Now gently tug under the rim all around to stretch to 14″; the weight of the toppings will help prevent pullback.
Redistribute the toppings if needed. Shimmy again. Expertly slide onto the steel/stone/pan in the oven.
Once the pizza is in, set a timer for 3 minutes. Then, open the oven door and check the underside of your pizza. Rotate the pizza 180º to get even baking from back to front. Set a timer for another 3 minutes. During that time, rotate the pie 90º every 30 seconds or so. If it looks done after the total 6 minutes of bake time, pull it out; it might still need 1-2 minutes more.
You may need to shift between "bake" (bottom heat) and "broil" modes of your oven. Every oven is different, so use your judgment, checking to see if it's the top or the bottom of your pie that need more heat.
When the pizza is gorgeous, slide it out with a metal pizza peel or a large flat spatula or a cookie sheet or whatever. (Don’t use your wooden peel—that’s for shaping and launching only.) Rest it on a cooling rack for 1-2 minutes to dry out the bottom. Then move to a cutting board or plate and slice. (Please don't slice on your wooden peel.)
Since we're making two pizzas with this recipe, you'll need to repeat the process now. It's best to give your baking surface 5-7 minutes to recover the lost heat; don't forget to set it bake to "bake" mode during this time.
And there you go—tremendous pizza, made in your regular-ass home oven. It's possible, and it's delicious.
P.S. I have a bunch more pizza recipes on my website. Even if you don't plan to make any of the other styles, they could be instructive, as every recipe has helpful steps and notes of its own.
9 notes
·
View notes
Note
Pizza Headcanons:
Dr. Keh's pizza probably tastes like a really really really good fast food pizza. Without the enhancer it probably tastes like flour and fat.
Cicero's pizza tastes like a pizza you could get from home. Like grandma's cooking. It's a family recipe.
Alicante's pizza is really hearty. He always adds a lot of cheese and sauce, and his doughs are super thick and chewy. There's something about the way he melts the cheese that makes the pizza really good.
Angelica's pizza looks super neat. Like the toppings are very neatly stacked. Plus it's really yummy bc she uses a lot of herbs. Her pizzas have thin crusts, and she uses a special type of flour.
The ovenist's pizza is all natural. The ovenist actually goes to the farm, buys the grain, tomatoes, etc, and makes it themselves every single day. They won't consider doing anything otherwise. The dough is sourdough too.
HAHAHA! I imagine keh just skipping/forgetting the spices when he first joined the competition. And he never actually detected the issue of his first pizza when he straight up used a flavor enhancing dust for years
Homey taste fits so much for Cicero's pizza. I headcannon that mostly middle aged or old people frequently visits her pizza parlor while teenagers are the regular at Alicante's
Angelica's pizza is so neatly organized because of robots that are probably doing the job. Like the pizza is so perfectly presented each time
I can see the ovenist having gloves on their dominant hand while making the pizza. And while preparing all the toppings
4 notes
·
View notes
Text

Pizza Dough (with Sourdough Version)
https://www.seriouseats.com/jim-laheys-no-knead-pizza-dough-recipe
Ingredients
Active dry yeast
250 g AP flour / bread flour
1g (1/4 teaspoon) active dry yeast
12g (2 teaspoons) fine sea salt
175 g water
Sourdough
60g starter discard
220g bread flour
145 g water
Instructions
Wake up yeast for 10 minutes using warm water and 10 g flour.
Mix flour and salt, then add sourdough starter to water (if not using active dry yeast) and mix wet ingredients into dry ingredients.
Rest for 18 hours or until doubled.
Split into two portions.
To use - oil individual dough balls, then stretch onto corn floured surface. Add ingredients and bake in oven on pizza stone, warmed to 500F. Crust takes 5-10 minutes to bake.
Regular Yeasted Pizza Dough
https://www.kingarthurbaking.com/recipes/pizza-crust-recipe
Ingredients
2 teaspoons active dry yeast or instant yeast
7/8 to 1 1/8 cups (198g to 255g) lukewarm water*
2 tablespoons (25g) olive oil
3 cups (360g) King Arthur Unbleached All-Purpose Flour
1 1/4 teaspoons (8g) table salt
*Use the lesser amount in summer (or in a humid environment), the greater amount in winter (or in a dry climate), and somewhere in between the rest of the year, or if your house is climate controlled.
Instructions
If you're using active dry yeast, dissolve it, with a pinch of sugar, in 2 tablespoons of the lukewarm water. Let the yeast and water sit at room temperature for 15 minutes, until the mixture has bubbled and expanded. If you're using instant yeast, you can skip this step.
Weigh your flour; or measure it by gently spooning it into a cup, then sweeping off any excess. Combine the dissolved yeast (or the instant yeast) with the remainder of the ingredients. Mix and knead everything together —by hand, mixer or bread machine set on the dough cycle — till you've made a soft, smooth dough. If you're kneading in a stand mixer, it should take 4 to 5 minutes at second speed, and the dough should barely clean the sides of the bowl, perhaps sticking a bit at the bottom. Don't over-knead the dough; it should hold together, but can still look fairly rough on the surface.
To make pizza up to 24 hours later, skip to step 5.
To make pizza now: Place the dough in a lightly greased bowl, cover the bowl, and allow it to rise till it's very puffy. This will take about an hour using instant yeast, or 90 minutes using active dry. If it takes longer, that's OK; just give it some extra time.
To make pizza later: Allow the dough to rise, covered, for 45 minutes at room temperature. Refrigerate the dough for 4 hours (or for up to 24 hours); it will rise slowly as it chills. This step allows you more schedule flexibility; it also develops the crust's flavor. About 2 to 3 hours before you want to serve pizza, remove the dough from the refrigerator.
Decide what size, shape, and thickness of pizza you want to make. This recipe will make one of the following choices:
Two 1/2"-thick 14" round pizzas (pictured);
Two 3/4"-thick 12" round pizzas;
One 3/4" to 1"-thick 13" x 18" rectangular (Sicilian-style) pizza (pictured);
One 1 1/2"-thick 9" x 13" rectangular pizza;
One 1"-thick 14" round pizza.
Divide the dough in half, for two pizzas; or leave it whole for one pizza.
If you're making a rectangular pizza, shape the dough into a rough oval. For a round pizza, shape it into a rough circle. In either case, don't pat it flat; just stretch it briefly into shape. Allow the dough to rest, covered with an overturned bowl or lightly greased plastic wrap, for 15 minutes.
Use vegetable oil pan spray to lightly grease the pan(s) of your choice. Drizzle olive oil into the bottom of the pan(s). The pan spray keeps the pizza from sticking; the olive oil gives the crust great flavor and crunch.
Place the dough in the prepared pan(s). Press it over the bottom of the pan, stretching it towards the edges. You'll probably get about two-thirds of the way there before the dough starts shrinking back; walk away for 15 minutes. Cover the dough while you're away, so it doesn't dry out.
When you come back, you should be able to pat the dough closer to the corners of the pan. Repeat the rest and dough-stretch one more time, if necessary; your goal is to get the dough to fill the pan as fully as possible.
Allow the dough to rise, covered, till it's noticeably puffy, about 90 minutes (if it hasn't been refrigerated); or 2 to 2 1/2 hours (if it's been refrigerated). Towards the end of the rising time, preheat the oven to 450°F.
Bake the pizza on the lower oven rack till it looks and feels set on top, and is just beginning to brown around the edge of the crust, but is still pale on top. This will take about 8 minutes for thinner crust pizza; about 10 to 12 minutes for medium thickness; and 12 to 14 minutes for thick-crust pizza. If you're baking two pizzas, reverse them in the oven (top to bottom, bottom to top) midway through the baking period.
To serve pizza immediately: Remove it from the oven, and arrange your toppings of choice on top. Return to the oven, and bake on the upper oven rack for an additional 10 to 15 minutes, until the crust is nicely browned, both top and bottom, and the cheese is melted. Check it midway through, and move it to the bottom rack if the top is browning too much, or the bottom not enough.
To serve pizza up to 2 days later: Remove the untopped, partially baked crust from the oven, cool completely on a rack, wrap in plastic, and store at room temperature. When ready to serve, top and bake in a preheated 450°F oven, adding a couple of minutes to the baking times noted above. Your goal is a pizza whose crust is browned, and whose toppings are hot/melted.
Remove the pizza from the oven, and transfer it from the pan to a rack to cool slightly before serving. For easiest serving, cut with a pair of scissors.
Tips from our Bakers
To freeze partially baked pizza crust: Bake crust as directed in step 13. Remove from the oven, cool to room temperature, wrap well, and freeze for up to 3 months. When you're ready to serve pizza, remove the crust from the freezer, and allow it to thaw, loosely wrapped, at room temperature. Once it's completely thawed, complete pizza by starting at step 15 above.
To add flexibility to your schedule, let the dough rise once at room temperature, gently deflate it, then cover and put in the fridge overnight. Next day, remove the dough from the fridge and stretch it into its pan. Let it rest and warm up until slightly puffy, then proceed with the recipe as written.
If you like pizza with a deep golden brown, crispy crust, bake on a baking stone. Preheat the stone in the middle of the oven for 45 to 60 minutes. Shape and top your pizza on parchment paper or a baker's peel and when you're ready to bake, slide the pizza onto the hot stone (parchment and all, if you're using parchment).
2 notes
·
View notes
Text
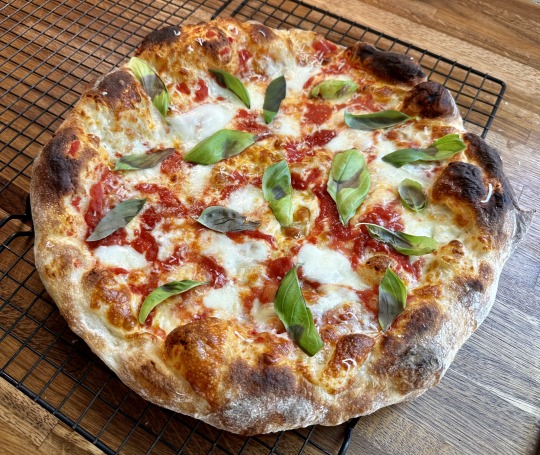
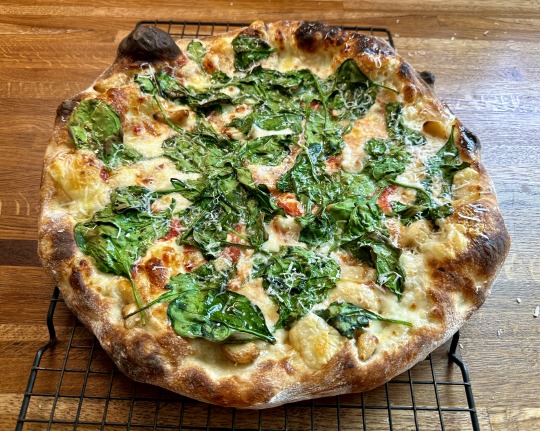
Sourdough pizza
This is our Friday night tradition: Homemade Sourdough Pizza and a family movie!
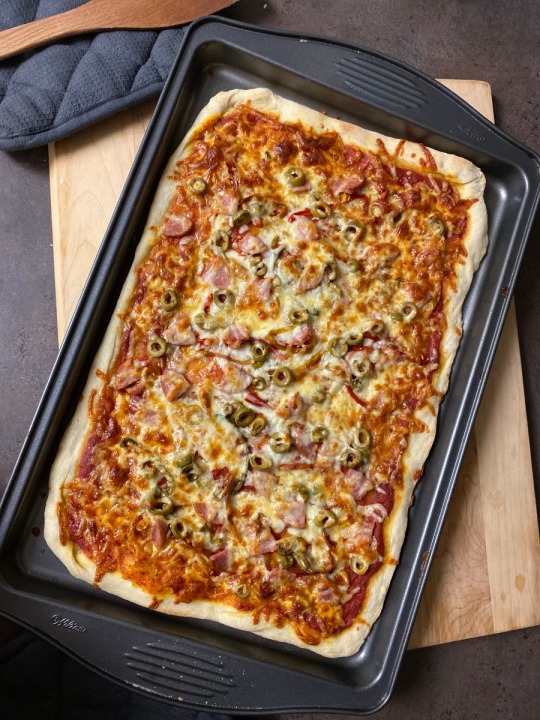
View On WordPress
#Cheese#Easy#Easy Sourdough#easy sourdough pizza#easy sourdough pizza dough#easy sourdough pizza dough recipe#easy sourdough pizza recipe#Healthy#healthy pizza toppings#Homemade#homemade pizza#homemade pizza dough#how to make sourdough pizza#how to make sourdough pizza dough#how to spend less on pizza toppings#how to use dehydrated mushrooms on pizza#how to use dehydrated peppers on pizza#Is sourdough good for you?#is sourdough healthy#making pizza#Nutrafarms Bacon#nutrition facts of sourdough pizza#Nutritious#pizza topping#pizza topping ideas#Recipe#Recipes#sougdough entree ideas#Sourdough#sourdough baking ideas
0 notes
Last Seen Blogs

seekstrivefind
TO SEEK, TO STRIVE, TO FIND, AND NOT TO YIELD

anneirual
Evi3

tadstrange42
a fucking mess

illtalbeats
ILL TAL beats
modestoautosmogandrepair
Modesto Auto Smog & Repair