#ansel's filters are fun
Text
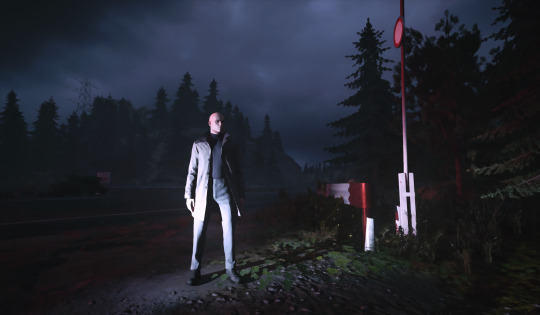


A few moody screenshots from Hitman 3. I suddenly got a prompt upon booting up the game recently that said I could use Nvidia Ansel for screenshots, so I had some fun messing around with that!
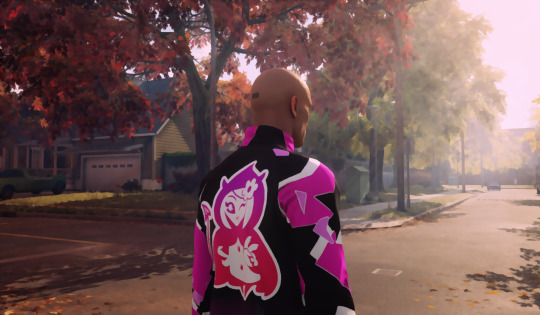
(bonus Whittleton Creek screenshot, I thought it was pretty but it didn't fit with the aesthetic of the rest of the pics)
I specifically love the artistic filters that the program lets me use! it looks super cool imo ;o;
8 notes
·
View notes
Text

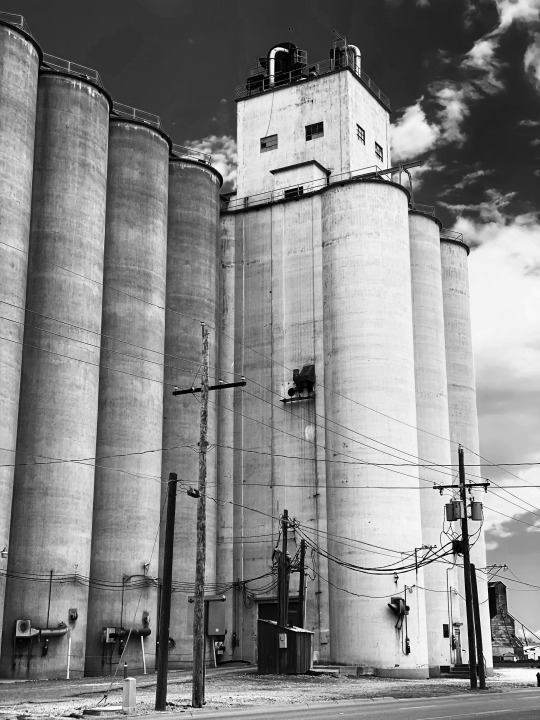

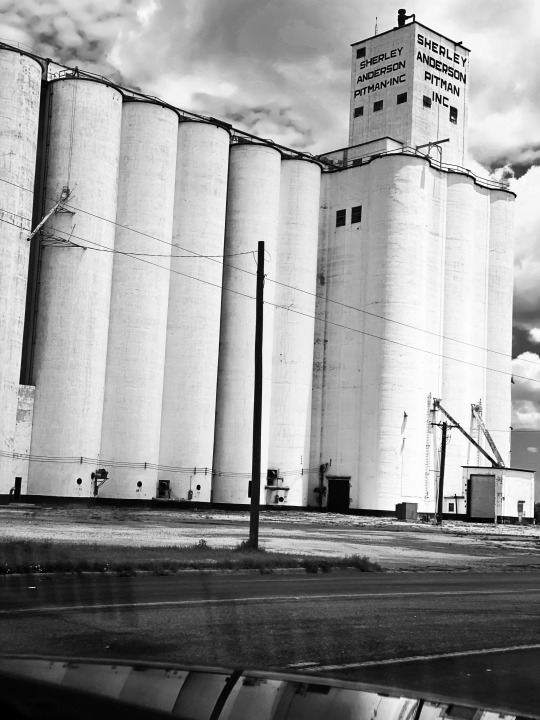


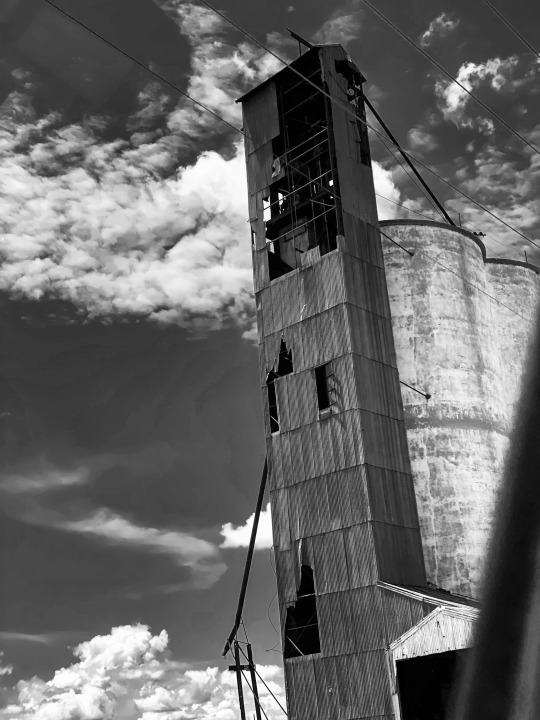
I've been slowly doing a sort of personal project - I think of these thematically as a rather un-PC "drive-by shootings" ... just things I've snapped when driving through Northwest Texas. These old grain elevators are huge and just fascinate me. They're the tallest things for miles and miles of flatland driving. Particularly suited to black and white, IMHO. I have better images elsewhere, and Insta won't show the full selection (more on my Facebook), but thought I'd post some of the outtakes for you to take a gander at.
And yes, Garry Winogrand-ish ... *ish*.
Also, these were shot with Argentum app on iPhone. Totally fun. I used the AA (Ansel Adams) filter. Gives a good quick contrasty B/W result just about every time. Big recommend.
1 note
·
View note
Photo

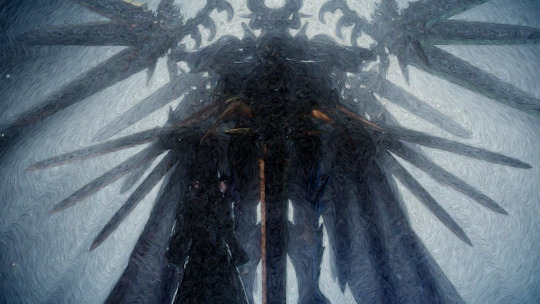
#ffxv#ff15#episode ardyn#ardyn izunia#bahamut#ansel's filters are fun#this looked like a rly nice opportunity to use this one even though it's noisy#i was right#i'm a fan
23 notes
·
View notes
Text
Lizzy’s Book Recs

After posting a little book recommendation a few weeks ago, I received a few comments about some more recs. And seeing as I am currently reading book 70 for the year, I thought it could be fun. So this is what this post is. These are all contemporary romances (I'm not a historical fiction fan) and will be either new adult or adult romance. Sorry, but I’m too old for young adult these days as teenagers piss me off.
These will be placed into categories of my favourite tropes.
Enemies to Lovers:
The Hating Game by Sally Thorne. This has to be hands down the best enemies to lovers story I have ever read. This is about Lucy and Josh, both assistants at a publishing company. She’s happy, he’s grumpy. They are colleagues and enemies, they fight all the time. But the sexual tension is off the charts. The best slow burn book I’ve ever read and definitely worth the wait. (plus this is going to be a movie with Lucy Hale and Robbie Amell, perfect right?)
Vicious by LJ Shen. Baron (Vicious) Spencer is an asshole. He’s a rich, spoilt brat with one love. Emilia Leblanc. He wanted her when they were teenagers, but she was with his best friend. He is a bully, mean and a horrible person to her and forces her to leave the state when he doesn’t get what he wants. Years later, he needs her help. She begins to work for him and discovers the act he puts on to hide his true scars. This book is sexy and dark. Not a cute fluffy story. But a good read (just don’t take it too seriously)
Into The Wild by KA Tucker. A big-city girl from Toronto goes to Alaska to visit her sick dad she hasn’t seen in over 25 years. Calla runs into cocky bush pilot Jonah. He hates her spoilt brat personality, she can't stand his cocky attitude. Hate turns to like, and eventually. Love. This is one of the best books I’ve read this year. This story is sad, funny, sweet and romantic. And has the best banter ever. (plus there is a sequel) Eeek.
Red, White and Royal Blue by Casey McQuisten. What happens when the prince of England and the first son of the USA have a secret gay love affair? This book, I love! They hate each other, then they become friends then they become lovers. The end. Perfect book. Just perfect.
Hate They Neighbour by S.M Soto. Sexy bad boy jerk Roman gets a new neighbour with sweet Olivia. She wants to be his friend, he is nothing but mean to her. She is recovering from a broken heart, he is trying to keep his family together. This is HOT HOT HOT! This has one of the sexist scenes I’ve ever read in a while including a lollipop. Trust me, this is soo good.
Friends to Lovers
Beard Science by Penny Reid. Jennifer is sick of being under her parent's thumb so she in lists the town’s evil genius, Cletus to help her and find her husband. I love this book, Jennifer is sweet. Cletus is not. He is brash and no-nonsense but I love him. Their love story is so sweet and turns from friends to lovers in such a sweet way it will have you awwing in no time.
Josh and Hazel’s Guide to Not Dating by Christina Lauren. This is another fav. While I love a bad boy, sometimes the good guys do finish first. This is a friend to lovers story. Quirky Hazel and newly single Josh decided to set each other up on dates. When they are a series of disasters one after the other, and a drunken night later. They end up in bed together and discover love was in front of them the whole time. This is a cute and heartwarming story. You can never go wrong with a book by Christina Lauren.
Strangers to Lovers
Beard in Mind by Penny Reid. OMG! You can not get me to shut up about Penny Reid and her Winston series. It is the best series I have ever read. Every book is perfect. But this one here is my favourite of the series. This is a story about kind-hearted Beau Winston. He meets new mechanic at his garage Shelly Sullivan. She is bold, brash and has no filter. While Beau is used to women being charmed by his smile and good looks. Shelly is different. This book deals with some sensitive issues so if you get trigged by self-harm and real conversations about mental health. Stay clear. But this book is so good. Beau is the best book boyfriend ever. And I love him. (shoutout to Truth of Beard. Duane is Beau’s twin and his love story is so good)
Sweet Filthy Boy by Christina Lauren. I know, I’ve got another Christina Lauren book on the list, but I just love them. And this book is one of their best! Mia and her friends go to Vegas after college. They get drunk, meet some handsome men and oopps, they get married. Mia wakes up married to sexy Frenchman Ansel. He invites her to Paris for the summer. And she accepts. After a horrible start, they begin to learn more about each other and fall for each other in the city of love. This book is so hot, and while Ansel may be the sweetest he has a dirty mouth and a few secrets in his closet. (This is part of a series involving Mia and her 2 other friends that also got married in Vegas. They are worth a read, but this one is my favourite)
Second Chance Romance
You Deserve Each Other by Sarah Hogle. I wasn't sure where to put this one because it is a second chance romance and enemies to lovers. Anyway, this story is about Naomi and Nicholas. They are engaged but hate each other. Naomi wants to call off the engagement, the bad news is she can’t afford to fit the bill. So she tries to get Nicholas to end it instead. They are mean and horrible to each other, but as they spend more time together they soon begin to realise what they loved in the first place. When I first started this book I was in the belief that this couple should not be together. But by the end, all I wanted was them to be happy together. I loved this book, not as hot as the others. But worth a read.
Workplace Romance
Neanderthal Seeks Human by Penny Reid. What a surprise, another Penny Reid Book on my list. This is the first book in the Knitting in the City series (which I am currently reading right now and am on book 3) This is the story of Janie. In one day she is fired, finds out her boyfriend cheated on her and is kicked out of her apartment. That same day she meets Quinn Sullivan. He escorts her out of the building only to run into her again a few weeks later and save her from being drugged at a club. He gets her new job and turns out to be the millionaire boss. This is a lovely story. Janie has to be the most quirky heroine I’ve ever read. And I love her. (There is also a sequel called Neanderthal marries human which is also good.)
This is just a shortlist of my favs, if you like this or want more recs. Let me know, this was so much fun.
#rec list#books#reading#recommendations#book recommendations#christina lauren#penny reid#sarah hogle#lj shen#casey mcquiston#sally thorne#KA tucker#s.m soto#mine#me#elizabeth's book rec
88 notes
·
View notes
Text
when i tell y’all that midterm was some bs i mean that midterm was some bs. but it’s okay bc my prof realized it was bs and is curving it. but anyways now i can do a real post :) like i said -- hi, i’m sabrina, i’m a 20 year old pre-law major who definitely isn’t going to practice constitutional law after that test, and here’s a li’l teensy info on my children ! can’t wait to start writing with u all <3
daisy’s pinterest: https://pin.it/5panMWb
daisy moretti is my ariana fc who:
loves fashion and luxury (think cher horowitz and carrie bradshaw)
wants to become president (but not of masters, oh, no, no no. that’d be cute, though. no, she wants to be president of the country)
is the biggest bully you will ever meet. she’s very picky about who she hangs out with at the office or is even seen walking past because if she’s going to be president one day, she can’t have the press bringing up pictures of her around locals. duh.
wants to be the best at everything and truly will do anything to anyone if it means they’re knocked down.
has no filter. whatsoever. it’s so, so bad. she’s the type of girl who if you for some reason decided to ask her if she liked your shoes, she’d snort, walk past you, and say, “quick movements will help break in the cheap heels better.”
jude’s pinterest: https://pin.it/2UzDoro
jude valentine is my ansel fc who:
is from tuscaloosa, alabama
is the sweetest, kindest, warmest, friendliest, most fun guy you’ll ever meet. he’ll knock on your door and ask how your day is going and then five minutes later is offering to pick you up lunch from the sushi place downtown
is a corporate attorney for masters, so he handles all the copyright stuff and when people try to start management companies called maestro’s international and get away with it. he also deals with the shady stuff too, but. attorney-client privilege. he’s not going to say anything about that.
sleeps around a lot -- not really Bible belt things, now is it
likes to sing africa by toto when he’s drunk and at the karaoke bar a few blocks over after work
ik this is so short and like . not a lot of information at all but i wanted 2 keep things a li’l cryptic for now and save all the real juicy stuff n’ secrets for when we officially plot ;) i’ll probs post some graphics and headcanons eventually tho just cuz. what else am i going to do. my state’s on lockdown. but for real i’m really excited for this ! not long now before we open, hopefully !
4 notes
·
View notes
Text
PHOTOGRAPHY CRITICISM
Qualities of a photograph that are the most important or useful for making an insightful critique of the image.
Framing
Lighting
Composition
Narrative
Color - black and white or color
Focus - details included and not
perspective/angel
Unique moments
What is in the frame
Creativity
Which genres of photography emphasize certain qualities over others.
Photojournalism: is one of the genres of photography that comes to mind because their are so many rules that goes with gener. I believe since photojournalism is close to documentary photography it has to also have similar rules. “Photojournalism is not about shooting unexpected events, but about capturing unexpected moments at events that are planned. It is serious journalism and a person needs to plan it right to be at the right place and at the right time.” With this said, one is not allowed to manipulate an image shot for their benefit or in a way of trying to make the public see.
Analyze two photographs according to your own criteria: one of yours, one of a classmate’s. “Maddie Smith”
Caricature is what comes to mind when i first saw this project. It was focused on enlarging different parts of the face through using cutouts from another set of face and also with a magnifier. I like the concept of the magnifying glass to enlarge the lips. however, the strong grip of the hand that is holding the magnifying glass which is held onto the lips draws my attention it's not the hand but what the hand is doing. I feel a lot of tension and almost as if their had been an argument before that hand held the magnifier. I find the eyes to be rather piercing, a littel bit scary. They're two different sizes and colors and for some reasons i feel they are both pleading but in different ways. With the way the various parts has been cut out and placed I feel the was making an even obvious emphasis on these parts. The wig is also an interesting i almost overlooked but the wig is like a form of disguise of not wanting to be seen as their true self.

Ansel Adams
He is known to be among the best photographers in the world. He was among a group called the f/64 the aperture which all the members shot at. He was a purist, In references to Ansel Adams works, He was a photographer who paid so much attention to light, tone, details and technical aspect of his work. He worked and experimented in order for his prints to be what he exactly wants them.

Ansel Adams (1902-1984) - 'Jeffrey Pine Sentinel Dome', Yosemite National Park, California, 1930's
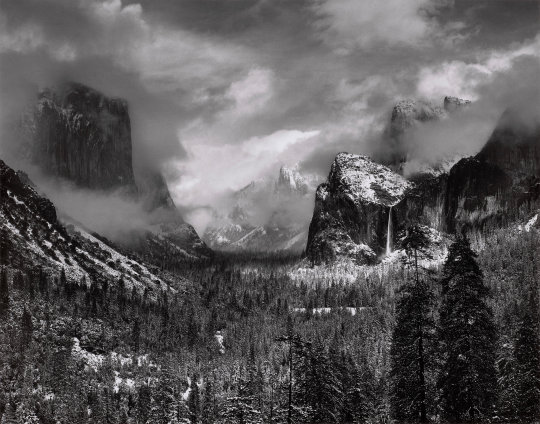
“Clearing Winter Storm, Yosemite National Park,” by Ansel Adams, about 1937.
Purism:
Purism in it's 'rawest form' is about using a manual camera with an optical viewfinder, a manual focus lens, a lens filter, a roll off film and a brain that can determine the exposure in relation to the light and the pressing of the shutter button to fire the shutter and capture the image.
Isuues raised concerning purism

Pictorialism:
Pictorialism was closely linked to prevailing artistic movements, as the photographers took inspiration from popular art, adopting its styles and ideas to demonstrate parity between it and photography. Pictorialist where the ones to start up the conversation a photography being art and doing so discussions such as photographic manipulation was brought up.
William Mortensen
Willianm Mortensen is a successful Hollywood portrait photographer and also a pictorialist. His style of photography relied on painterly soft-focus and darkroom techniques to produce lavishly toned prints he found himself at odds with the new "purist" movement in fine arts photography. His compositions and subject matter were steeped in Gothic traditions often theatrical, strange, grotesque and bizarre.
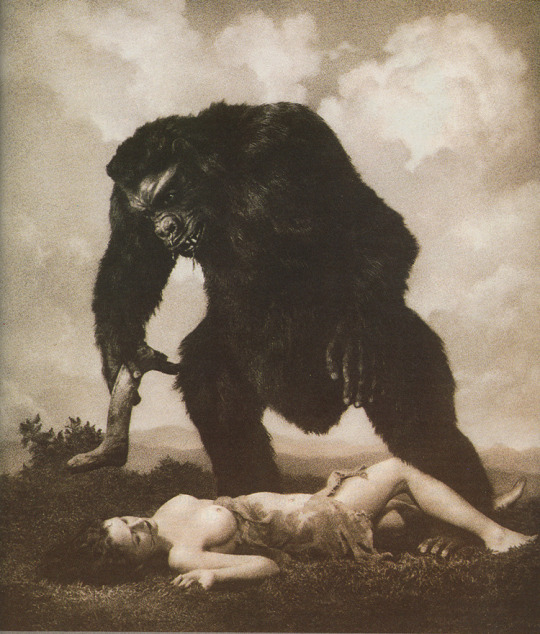
L’Amour (1935). Photograph: William Mortense
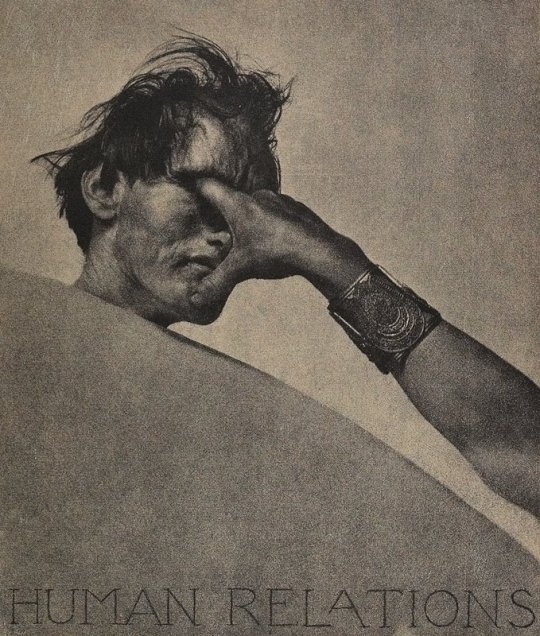
Human Relations 1932 William Mortensen
Debate between Pictorialism and Purism
The fight between purism and pictorialism is all about who is right in the content they produce. It all brings back the question of what is art and what is photography. Does anyone has the right to say a photographic content is wrong just because it does lot follow a certain procedure?
For me this was what was going on with Ansel Adams and William Mortensen. the Pictorialist believed that people believed more about the way purist went about their work because they where often recognized publicly. Then it was difficult to get people to be on the same boat as you with something that is new to them and also in terms of ideas and what one belived and so they was a long drag about photographers making fun of each other in reference to what they chose to photograph and how they chose to carry out a project. I do not think any of them were doing something wrong rather the purisit and and Pictorialist introduced possible different ways on can chose to experess themselves of show people what Is actually around them. Photography to me has always been a way to show people things that influnce me and a journey that takes time to unfold itself.
1 note
·
View note
Text
The Ansel “Crawl”
This is for @atinyumbra (it’s not letting me tag you so I also put a link to this post in the answer to your ask)
atinyumbra asked:
Hello there! Recently I got into using Ansel and I've been wondering, how do you get screenshots during cutscenes and the like? Everytime I try, I'm always thrown under the world or at a ridiculous distance that it would take forever to get back to where I would like to be. Many thanks in advance.
------------------------------------
Since you are able to get into cutscenes, I’m assuming you have the Ansel Break thing downloaded?
Ansel can be tricky when it comes to cutscenes.
Sometimes if you don’t use Ansel at all before a cutscene, you can open it and it will pop you out right there in the scene if you’re really lucky.
Sometimes you get spit out at the location you last used Ansel in game (and if it was kind of far away...whoops) AND THEN there’s the times where, whether you’ve done both previous options, you’re spit out at some completely random place on the map...and you have to find your way to where you are currently. WHICH IS SO MUCH FUN! *rolls eyes* lol cause 90% of the time you’re trying to do this during a camp or lodging scene which takes place AT NIGHT so it’s DARK lol So trying to find your way around the map when it’s pitch black is awesome 👍 lol
That being said, here’s a few things I do:
(super long, image heavy post under cut)
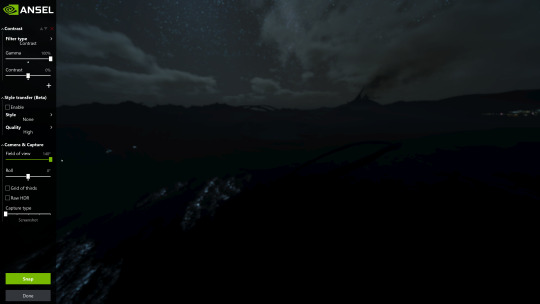
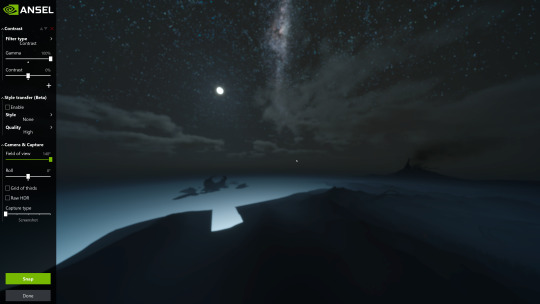
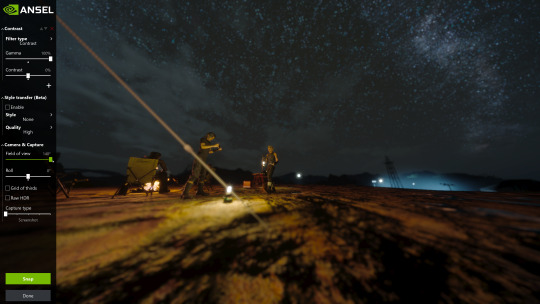
1.) TURN UP THE CONTRAST
Right when you open Ansel and you realize you’re in the middle of freaking nowhere. Go up to Filter Type>Contrast> and turn the Gamma ALL THE WAY UP TO 100%. It’s not gonna make it daylight outside but it will make it a bit brighter so you can see a BIT better.
Before:

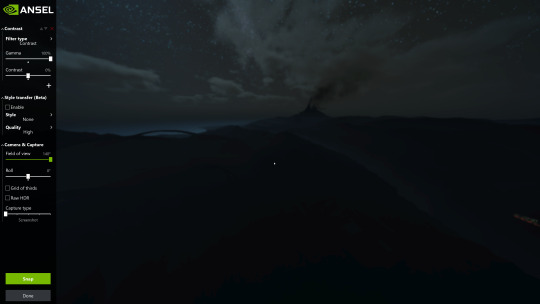
After:

2.) Turn the "field of View” all the way up to max if need be so you can see the “bigger picture”
The more you can see, the easier it will be sometimes to realize where you are on the map.
3.) Familiarize yourself with the surroundings.
When you’re out in the open world, there’s some rather large landmarks to look out for.
Lestallum
Ravatogh
The Disc of Cauthess (if the meteor is still there, even better)
The Bridge to Insomnia
Angelgard

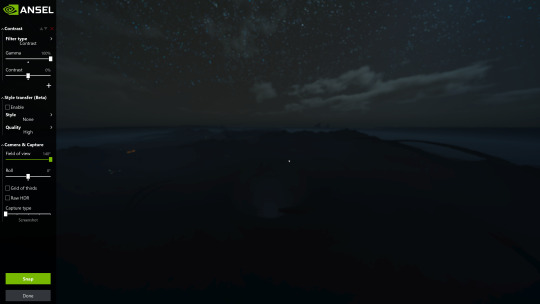

These are pretty easy to locate when you turn the gamma all the way up as you can see in the above pictures. Once you find these landmarks, you can kind of get a feel for where you should head to on the map. Granted it’s a little rougher when you’re in Altissia, or in Chapter 10 and 11. There are also some cutscenes you will not be able to find your way to no matter what you do.
Which leads me to Number Four.
4.) Some scenes are pre-rendered and will not let you in them no matter what you do.
Episode Ignis Death Scene (if you die fighting Ardyn/choose give up)
Episode Prompto Ending Cutscene (where he talks to Noctis)
Final Campsite Cutscene that takes place during the ending credits
Episode Ignis Ending cutscene (the “good” ending cutscene)
to name a few lol. When you try to access them you’ll usually just be spit out in the previous scenes. For instance these were taken during the ending scene of Episode Ignis. As you can see this is not the ending scene but the last scene before the credits and cutscenes start:


The characters will just be standing around like statues when you use Ansel during these lol and no matter what you do you won’t be able to get into those scenes.
There are a few scenes that won’t let you in sometimes BUT if you DO NOT USE ANSEL AT ALL until you reach that scene, it will spit you out in the scene. If you do use Ansel before the scene, it won’t let you into the scene. You’ll be spit out in a random spot or the last place you used Ansel. Examples of this for me would be:
The Beyond Scene (when you defeat Ardyn)
The Wedding Scene at the very end of the game
The Crystal Scene where Prompto, Gladio, and Ignis confront Ardyn
those are a few I can think of off the top of my head. Those will let you in them but only if you don’t use Ansel until you get into that scene.
5.) Use Shift and Use Z!
I know when you start to move using the camera, it will seem like you are going nowhere. It’s even worse if you’ve been spit out underground or in a mountain side like I’ve had happen sometimes.
In these cases, if you are underground, use Z to start moving upwards to get above/out of what you are in. Even if you aren’t underground, use Z to move up into the sky a bit to get a better view of your surroundings.
Using Shift while moving the camera will start to speed the camera’s movement up. It starts REALLY, REALLY SLOW at first, you won’t even think you are moving...but you are! Just keep holding it down, pretty soon the camera will start to speed up. Eventually it’ll get so fast you’ll just be zooming around the map. The catch is once you let go of shift before you get near the bros, you have to start “the crawl” over again. Meaning that when you start moving again using Shift, the camera will be super slow and gradually speed up. This will stop once you get within a certain range of the Bros.
FOUND THEM! LOL

6.) Turn off Gamma, fix your “Field of View” and take those shots!
Once you find your spot. Then all you gotta do is turn off the gamma, and then move your field of view around so you can get clear shots.
You can easily turn off the Gamma by hitting the red X in the upper left hand corner next to the filter you have turned on:
Before:

After:

This whole process can usually take anywhere from a minute or two if you’re lucky, or up to five minutes if you have trouble finding where you are on the map. This “crawl” right here took me about 3 minutes.
17 notes
·
View notes
Text
Daz Studio To Unreal Engine 4

BONUS : Registration now includes the Tyrannosaurus Rex 3 model (worth $28.95 in the DAZ 3D store) and other assets for everyone that registers (premium ticket only)!
Daz Studio To Unreal Engine 4 26
Daz Studio To Unreal Engine 4 25
Herschel Hoffmeyer is an established published artist at the DAZ 3D store. He is an expert at producing high quality 3D models, especially when it relates to dinosaurs! In this webinar he reveals how he creates his stand-out promotional art by using both DAZ Studio and the Unreal Engine, which has assisted him in depicting his content in the very best way. The Unreal engine can be used as an additional marvellous asset to quickly render out your DAZ studio sourced content at high resolution. He will also go through a valuable catalogue of tips for posing, lighting and cameras in DAZ as well as key post-work actions in Photoshop.
Join us in this webinar to learn how to creates polished renders with DAZ and Unreal and learn more about Herschel’s fantastic range of models in more detail. Even if you’re not familiar with the Unreal Engine, we’ll take you step by step on how to take advantage of this under-used facility for rendering artwork.
Please note – it’s an advantage if you have an nvidia graphics card for this session.
Date : 16/06/2019 20:00 BST/15:00 EDT (New York)/ 12:00 PDT (Los Angeles)
Jan 21, 2020 The version of Daz3D that I’m using is 4.12 and Unreal Engine is version 4.24.1. I am using the genesis8 figure that comes free with Daz. But I also purchased a face morph add-on. Unreal Engine has his own file format called.uasset and.umap if you want you can export those files here. Swim with dolphins kona. Before you buy an asset make sure it is compatible with Daz to Unreal plugin. Inside the shop page, you can filter by software. Select Daz To Unreal Bridge software. Open your character in Daz Studio. At the same time, have your Unreal Project open for an automated process. Make sure any clothing or hair is parented to the main body. Locate Daz to Unreal under FileSend ToDaztoUnreal.
Duration : 1.5 hours +
Webinar Content

The Strengths and Weaknesses of Using Daz Studio and Unreal Engine for rendering.
Coming up with an idea of the scene/image you want to produce
Daz Studio: Placing and posing key elements
Daz Studio: Setting up a camera, hdri’s, and dynamic lighting
Daz Studio: Placing props and background elements
Daz Studio: Rendering in layers
Exporting assets from Daz Studio
Importing Assets into Unreal Engine 4
Unreal Engine 4: Assembling imported assets so they’re ready to be rendered
Unreal Engine 4: Establishing your scene
Using Ansel to render high resolution images of your UE4 scene
Using Unreal Engine 4 to render high resolution images of your scene (for non-nvidia card users)
Adobe Photoshop: Adjust lighting, getting rid of noise, and sharpening your image
Adobe Photoshop: Adding effects such as shadows, fog, debris, saliva, and blood.
Adobe Photoshop: HDR Toning and Final Touches
About the Presenter : Herschel Hoffmeyer

Herschel is a respected 3D digital artist from Northern Missouri in the United States and uses Zbrush, Unreal Engine 4, Daz Studio, and Adobe Photoshop to produce his illustrations. He’s been providing commercial work for projects since 2013.
Daz Studio To Unreal Engine 4 26
He fell in love with dinosaurs at a very young age. The Internet was still in its early stages and with no computer, the best place to learn about dinosaurs was from books. Once he had memorised all the dinosaur books from his local library, he then sought out the next library to do the same! Cmake nvcc address. Learning about dinosaurs was a lot of fun, but what he found most interesting was recreating artistic works with some added flavour!
Read a full interview with Herschel in our 2019 February magazine
Daz Studio To Unreal Engine 4 25
Herschel’s DeviantArt gallery
0 notes
Text
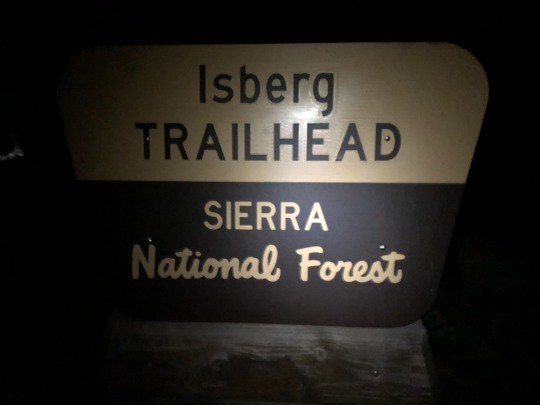
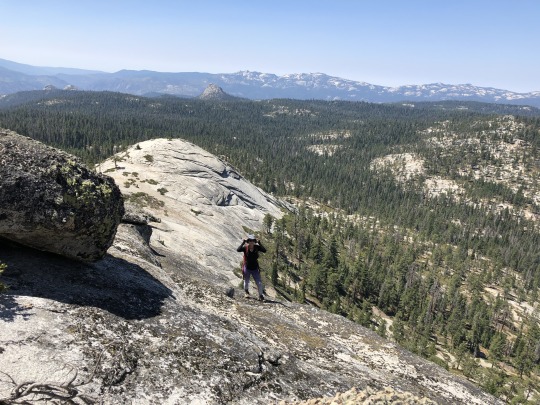
Foerster Peak from Isberg Trailhead via The Niche
youtube
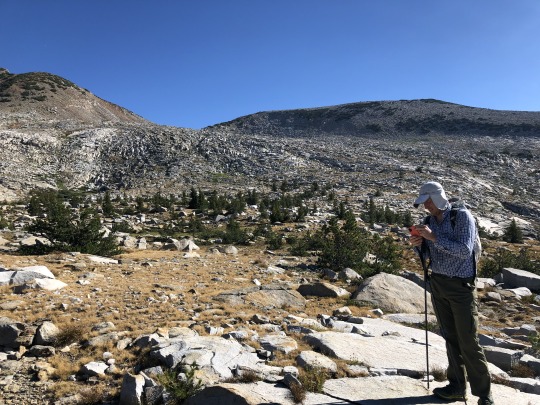
It was my final week of training prior to the 2020 Sierra Challenge. I chose Foerster Peak because it seemed to fit right within my abilities. At 27 miles and 7,000 ft of gain, I wondered if I was pushing my limits a bit too far, but Tom Becht described the hike as “incredibly easy” giving me some confidence. Sean King and Chris Henry responded to my bat signal, and we all agreed to give the peak a shot. There was some road construction on the approach to the trailhead, which added some length an difficulty to the long drive, but we eventually found the Isberg Trailhead where I planned to sleep in the car. There was a couple there with an awesome van, and I spent some time chatting it up with them. Sean and Scott would arrive an hour after me, and we expected Chris to arrive even later, though we never saw him that night. The next morning Sean and I were ready to go at 4:30am, but there was no sign of Chris. My emotions had me worried, but my brain told me that he would arrive any minute. Sure enough, I spotted a head lamp bobbing in the distance. It turns out that he had slept at Granite Creek Campground a half mile away, and had begun his hike from there. We greeted each other then started off through the dark forest.
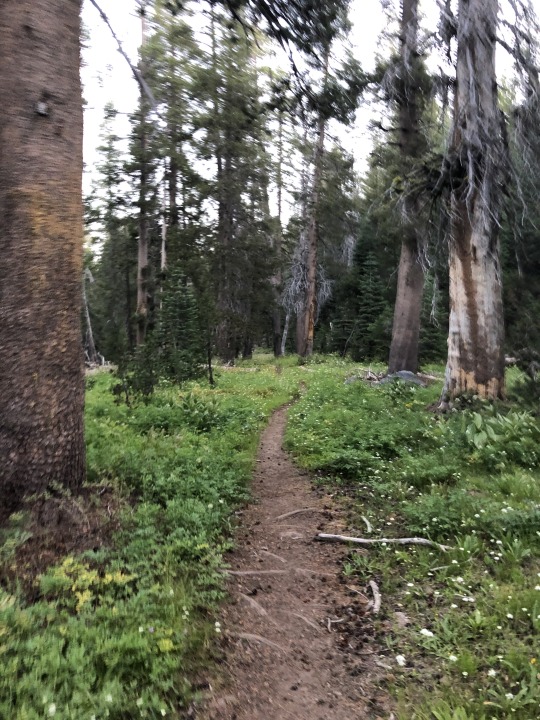
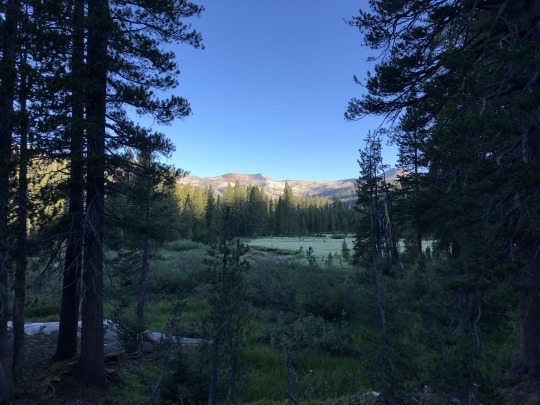
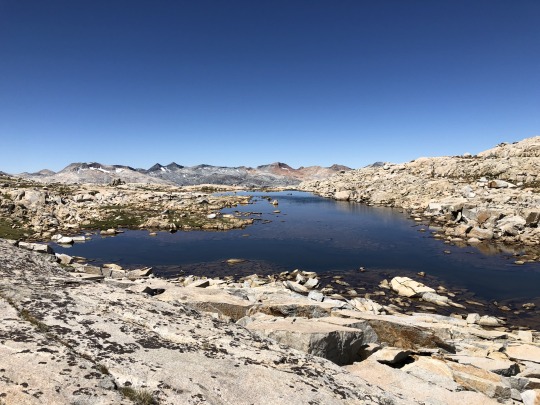
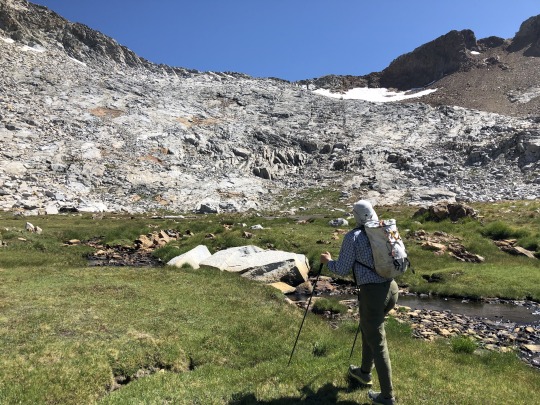
I expressed my concern in actually being able to pull off this long day, but Chris was not the least worried, and rather was extremely confident that we would succeed. We spent the first few miles talking about the corona virus and the risk associated with hiking. We entered the niche, which was a small gap in a ridgeline through which the east fork of Granite Creek flowed.

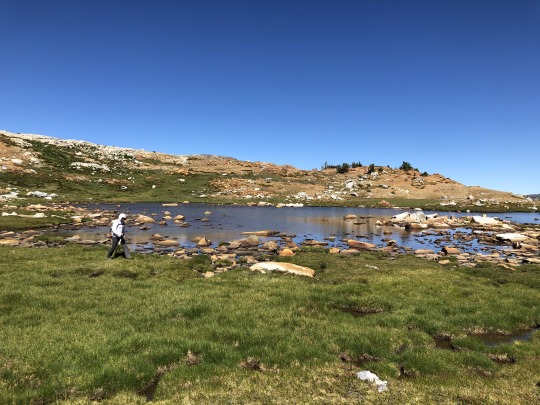
The trail gradually cut through green forests and meadows.
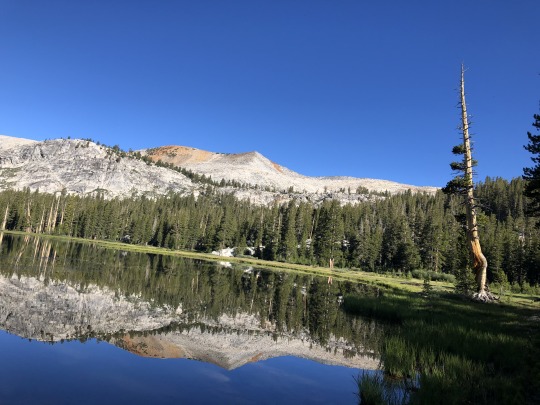
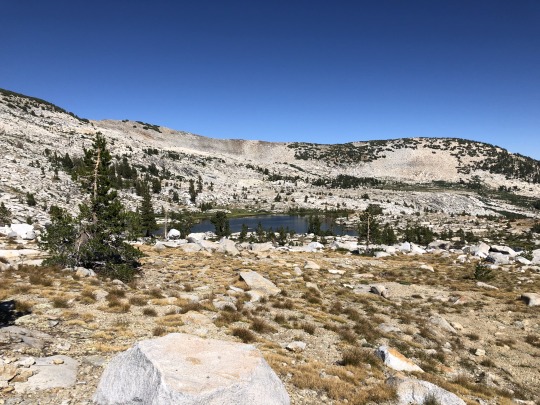
After four miles, we reached Cora Lakes.

After another mile and a half we reached Knoblock Meadow.
After 8 miles I started to feel a little tired. I wanted to postpone all significant rests until we reached Saddler Lake. We finally reached the lake a mile later where we took our first long rest.

Our route passed below the gap to the left of Long Mountain, which was now visible to our north.
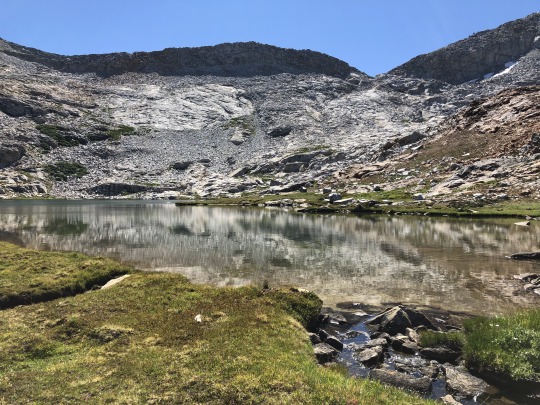
We left the trail after 9.5 miles and headed cross country up steep slabs towards McGee Lake.
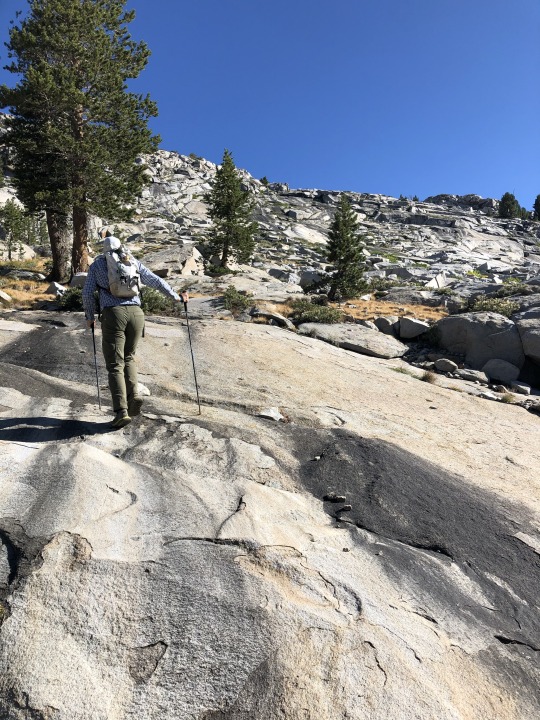
We didn’t bother stopping at McGee Lakes and continued of the glacier carved runway.

The slabs became less steep here. Chris showed his grit and powered ahead towards the pass. I maintained my comfortable pace, knowing that this hike was not a sprint and literally a marathon. The cross country travel was incredibly easy with smooth slabs and granite and many grassy ramps.

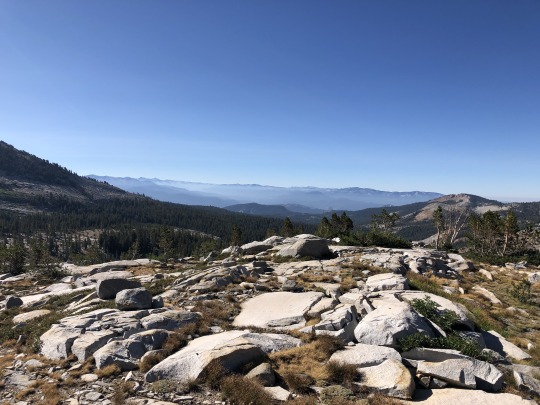
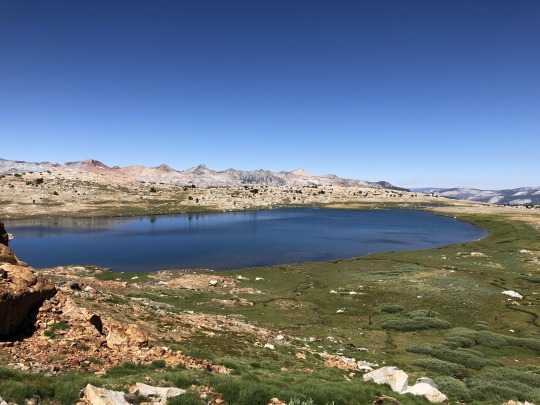
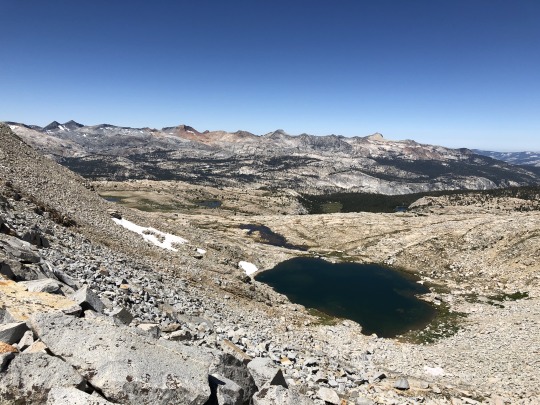
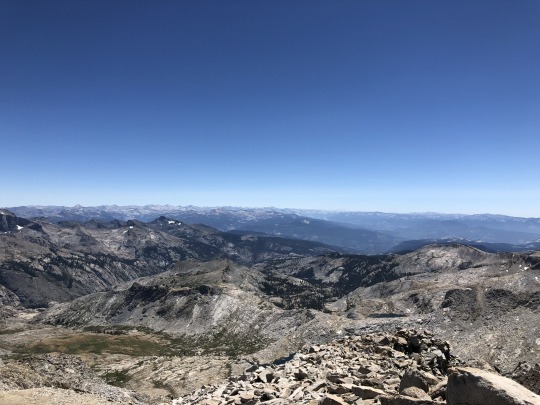
After 11 miles, we reached our pass by 10am. This was also the border of Yosemite National Park. Harriet Lake was a nice sight down below.

Foerster Peak was finally visible and somewhat close, but the remaining necessary drop in elevation was a little disheartening.

The drop down to the lakes was very steep, but travel became quick and easy once we reached the grassy meadows below.

The Clark Range stood to our west across the drainage.
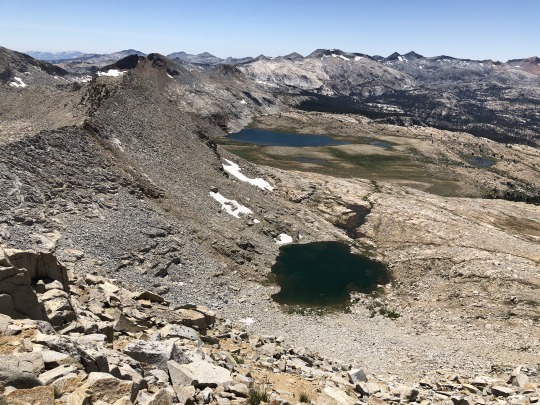
We continued towards the general area of Foerster Creek and followed the drainage towards the unnamed tarn feeding the creek. Foerster Peak stood above us to the northeast. We felt the easiest route would be to aim for the notch to the south of the peak.

We spotted some people ahead of us at the notch. We wondered if it was someone we knew.

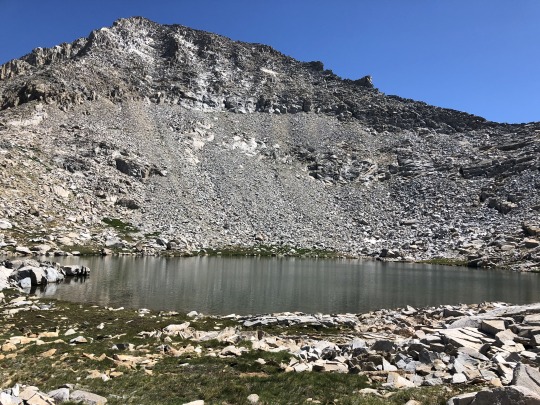
We took a good rest on the grassy shore of the uppermost tarn. We noticed there were now multiple people at the notch, most likely consisting of multiple parties. With 1,100 ft of vertical remaining, we got back to work and headed towards the notch.

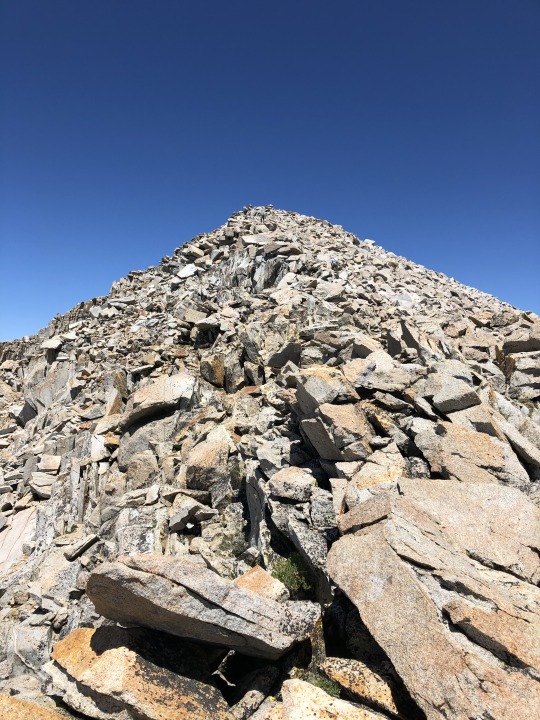
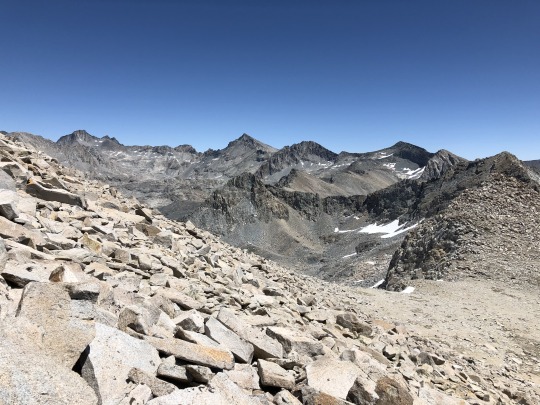
We passed a couple dudes heading down from the notch. We chatted for a bit and learned they were doing the Sierra High Route. We trudged up the broken granite 400 feet until we reached our checkpoint. To the east were Mt Ritter, Banner Peak and The Minarets.

Back to the west were the Clark Range and the unnamed tarn.
From here we followed the ridgeline directly towards the peak.

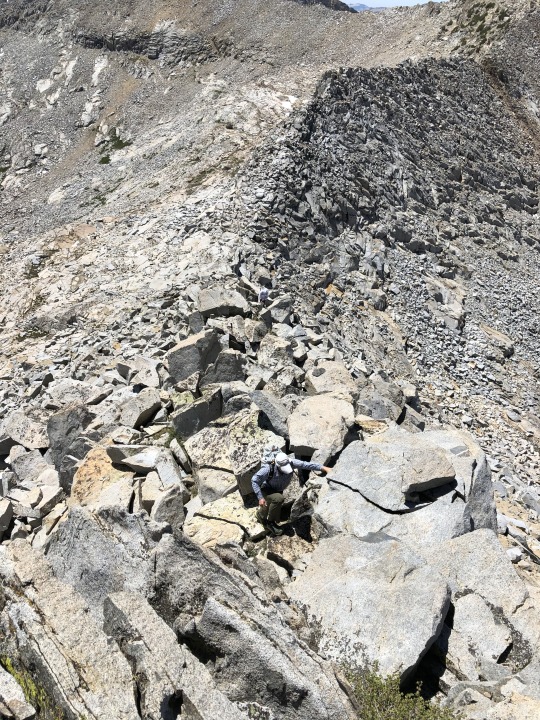
The peak can be done solely with class 2, but our ridge route was class 3. We even chose some voluntary class 4 to add some style to our climb.
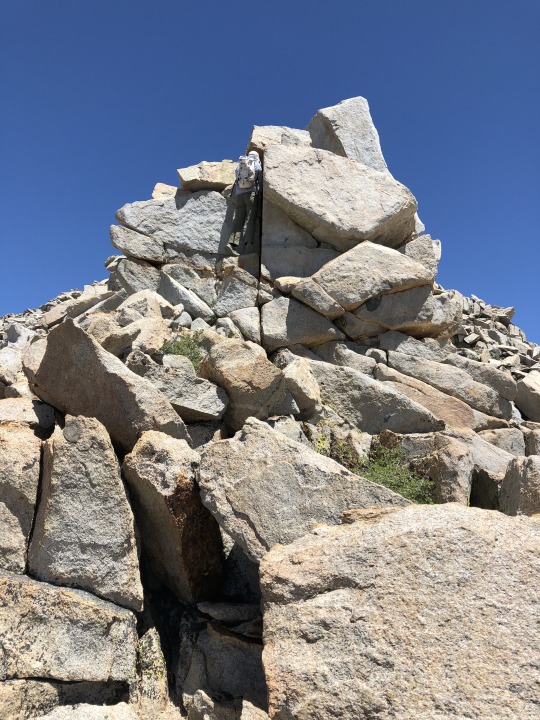
There was a lone hiker ahead of us and we steadily gained on him. He reached the top a few minutes before us.
I spotted Mt Ansel Adams, which was a bonus peak that I really wanted to add to our trip, but I knew that I was pushing my limits far enough with Foerster Peak alone.
Soon we all joined the lone hiker on the summit.
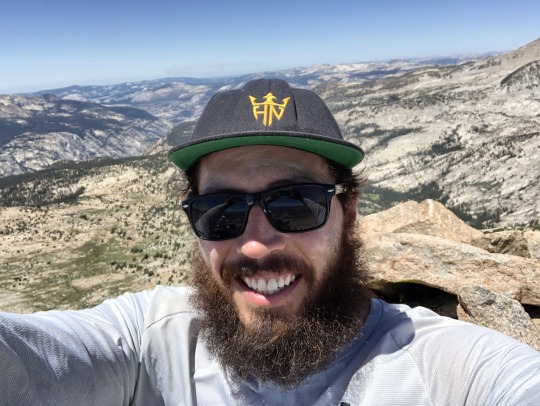
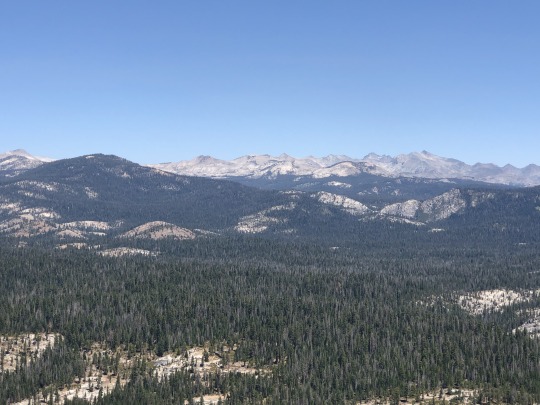
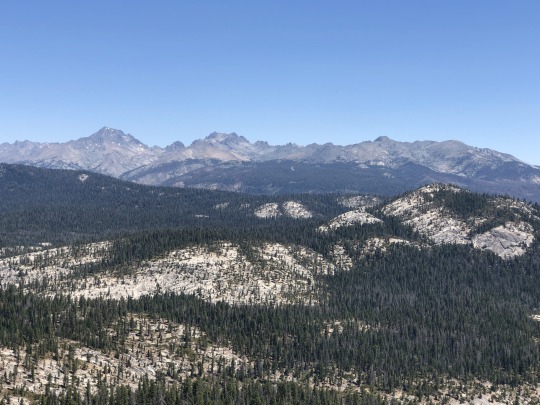
To the northeast were Mt Maclure, Mt Lyell and Rodgers Peak. Mt Ansel Adams stood below us in the foreground.

To the east were Banner Peak, Mt Ritter and The Minarets.

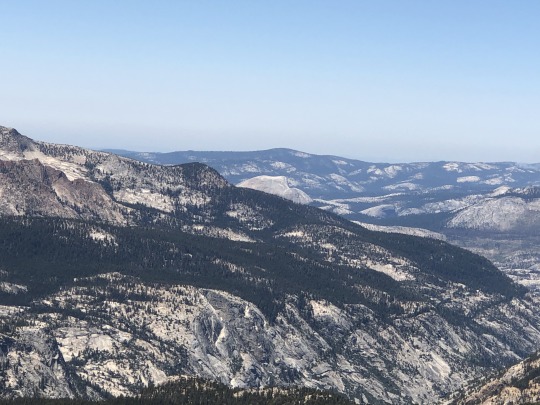
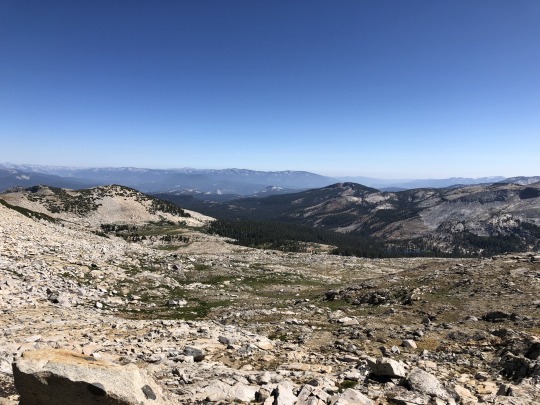
To the south was the San Joaquin River Drainage.
To the southwest were Long Mountain, Isberg Peak and Triple Divide Peak.

To the west were Merced Peak, Red Peak, Gray Peak and Mt Clark.
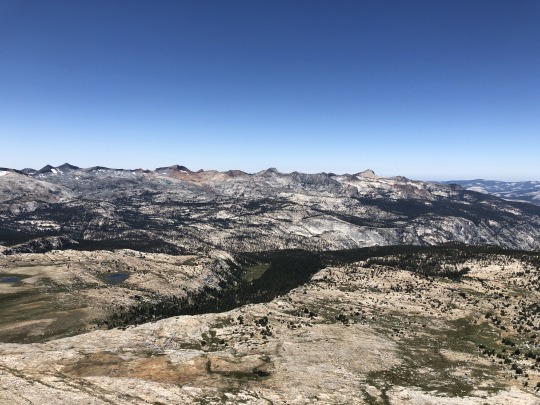
To the northwest were Yosemite Valley and Mt Florence.

The summit of Half Dome was just visible.
Our pace to the summit was not as fast as I hoped, but 8 hours was acceptable. On top of that I was feeling pretty decent. We considered taking an alternative route back to Long Mountain and the pass below, but in the end decided against it. We did however choose a slightly different route, dropping directly to the tarn below rather than returning to the notch.
We found the descent to be mostly class 2-3, with one tricky slab section as the crux. I was a little unsure that the route would work, so I was relieved to make it back to the tarn.

We circled back around to the Harriet Lake Basin, where the inevitable pass loomed high above us.

We stopped at the smaller and higher lake where we all jumped in for an aqua challenge. We needed a jolt to our system before the steep climb back up to the pass.
We methodically made our way back up the pass. I really wanted to get Long Mountain as a bonus peak, but the others lacked the enthusiasm. While it was very close, it required 400 feet of gain, and at least I needed every bit of strength to make it back to the car.
Sean radioed his dad and we learned that he was at Cora Lakes with Asaka and Leif.

From the pass, we hiked together back to the trail. Once on the trail, we felt free to go at our own comfortable paces.
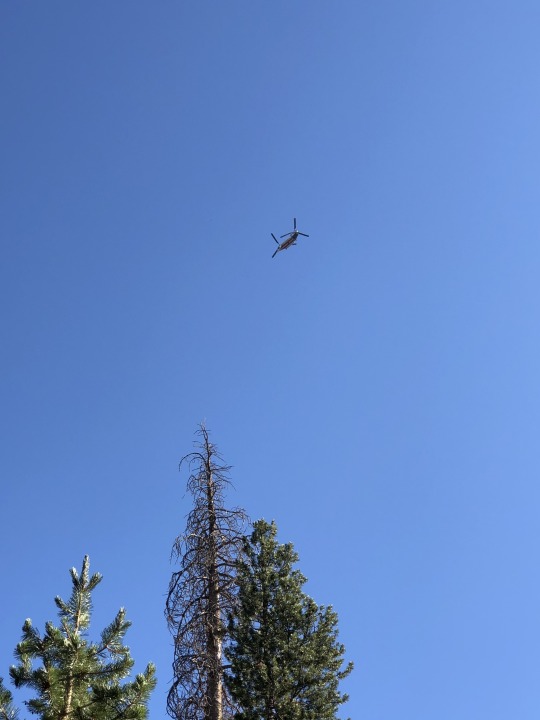
I continued feeling good until I reached Sadler Lake. Fatigue was finally starting to set in. Chris took off ahead of us down the trail, while Sean waited longer at the lake to filter water. I was in the middle of the two, but remembered Sean had saved an extra coffee drink for me. I waited for him for a long time but he never showed up. I figured he was probably fine, so I decided to go on without him. Exhaustion finally started to hit me at mile 20. A helicopter flew overhead and I started to worry about Sean. I was going pretty slow and was surprised he hadn’t caught me yet.
There was a faint chance that I would see Leif and Asaka at Cora Lakes but my pace was too slow. I alternated between power walks and short jogging sessions, and every time I checked the remaining mileage on my GPS, I was let down with the amount of distance remaining. I emerged through The Niche and was surprised to find service. I called Asaka to let her know that I was only 2 miles away, meaning I would probably be back in an hour.

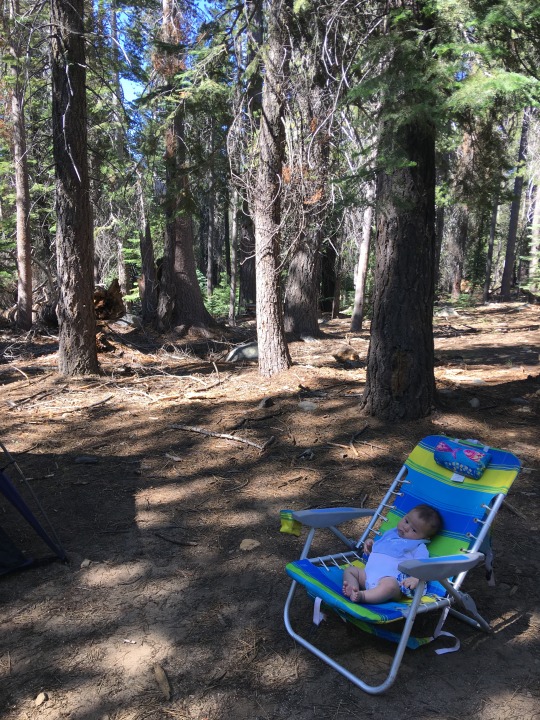
The last two miles I dealt with some stomach problems of which I will not delve into the details, but my pace was slowed considerably because of this. Now I really started to worry about Sean. The last couple hundred sandy meters was especially difficult. I emerged at the trailhead and collapsed in my camping chair. Sean showed up just a few seconds after; the first time I had seen him over the last nine miles. I had told Chris earlier that he should move his camp so we could celebrate our achievement together, but I was too weak and collapsed in my tent. Asaka prepared me dinner which I ate in bed, then it was lights out for me.
The next morning I slept in. I woke up withered, but looking to climb one more bonus peak in the nearby area.
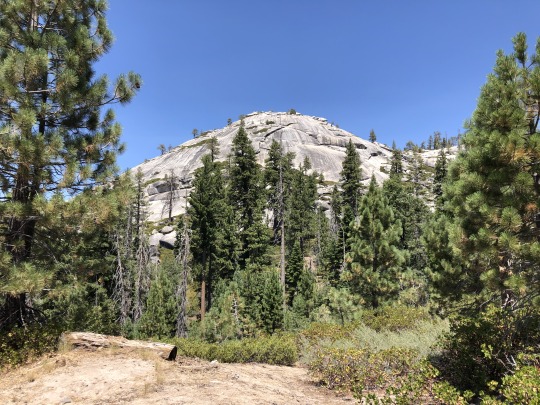
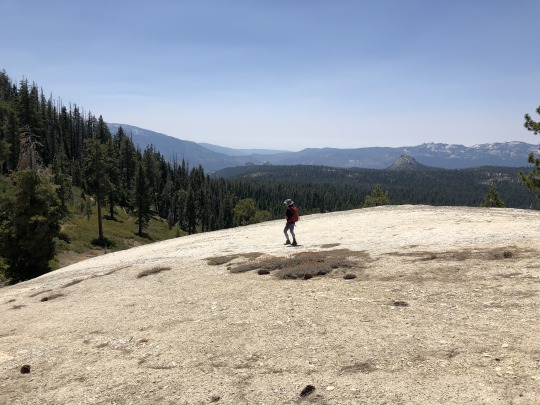
We stopped by Piyaou Dome on our drive back. We drove to the official trailhead on the south side of the dome, and followed this deteriorated use trail to the base of the granite monolith.
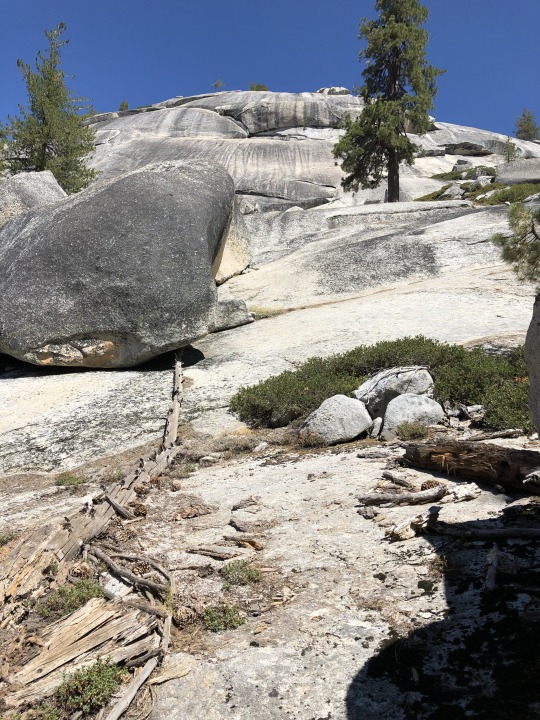
From there I picked a route up sand and open slabs, following someone’s footprints at times. I would learn later that these were Chris’s from earlier that morning.
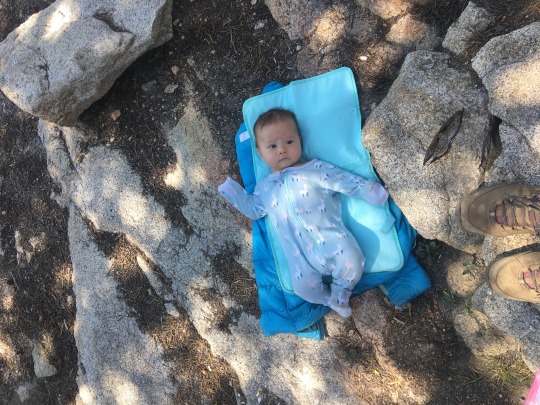
There was some fun class 3, and I was very careful while carrying the baby. After a mile we made it to the summit. The views were great, especially those of Balloon Dome.
It is said that Fred Becky’s signature is in the Balloon Dome summit register, so I hope to climb this little known peak one day.

To the north were Post Peak, Isberg Peak, Long Mountain, the tip of Foerster Peak and Electra Peak.
To the northeast were Mt Ritter, The Minarets and Iron Mountain.
We had spaghetti for lunch underneath the shade of of a pine tree and stared at Balloon Dome. We then walked back to the car, taking a more direct approach down granite friction slabs.


I was now ready for the 2020 Sierra Challenge.
0 notes
Text
Watch Edward Weston create a darkroom print
Edward Weston is one of the photographic masters of the 20th century and some recently unearthed newsreel footage gives us a glimpse into his technique in the darkroom.
The footage debuted last week on Marc Silber's Advancing Your Photography YouTube channel and shows Weston working in his darkroom and discusses some of the photographer's who influenced his work. Although photography these days seems to be all about face filters, endless scrolling and likes, it's fun to reflect on the way that people once thought about the medium.
“Unprinted negatives have the attraction and drama of buried treasure,” a news announcer states before we watch Weston enter the darkroom. From there we see Weston prep a plate and begin the printing process.
Edward Weston at work in the darkroom in 1948. (Advancing Your Photography/)
The procedure is strikingly simple compared to similar old footage from other masters like Ansel Adams, who was a renowned technician when printing. Weston makes a simple contact print, which involves placing the negative over some photographic paper, then flattening them together with a piece of glass. This process, called contact printing because the negative is literally touching the paper, doesn't require a complicated enlarger, but rather a simple lightbulb.
As he exposes the print, he waves an opaque wand over parts of the image in a process called dodging. It’s a technique that allows him to reduce exposure in a specific area of the photo (in this case, the dark tree) and prevent shadow detail from getting lost in black tones.
The resulting images are beautiful and crisp, but the print is the same size as the source material, so it requires a very large negative.
The footage was shot back in 1948, and there are definitely some cringeworthy quirks that reflect its time—especially when it comes to the female assistant/student whose main job seems to be smiling and batting her eyelashes at Weston as he prints. If you can get past it there are actually some interesting insights into the way that photographers like Weston thought about the printing process. Check out the footage in the video above.
from Popular Photography | RSS https://ift.tt/32Xe6rQ
0 notes
Link
Kodak announced Thursday that it will partner with fast-fashion retailer Forever 21 for a 26-piece collection — T-shirts, crop tops, jackets, loungewear, polos, and sweatshirts.
The clothes are emblazoned with Kodak logos and color schemes from the ’90s. Specifically, design elements from the company’s old NASCAR team, making them simultaneously a callback to a time when Kodak was wealthy and beloved, and a tie-in to a moment where streetwear-chasing kids are heavily into logos. (They already love NASCAR.)
It’s a big play for youth culture by the storied film brand, which declared bankruptcy in 2012, and it can tell us a lot about the way the analog renaissance is being capitalized on by huge — and sometimes floundering — tech companies.
Best known for photography, Kodak has been an industrial printer company since the fall of film. The vast majority of the company’s revenue comes from making newspapers, custom labels, and other things that need to be printed at scale with a high level of detail. It’s keeping the business alive, but it’s not cool.
If Kodak is going to stage a comeback in consumers’ hearts, it needs the teens.
“I have this ambition to return Kodak to being one of the world’s best-known, best-loved brands,” Dany Atkins, Kodak’s chief branding officer, said. Atkins was poached from Apple’s Beats by Dre three years ago, and her first order of business was to point out that, uh, Kodak needed to have an Instagram account.
Kodak may have been the most recognizable photography brand in the world in the ’90s, but among the kids it’s chasing, now it’s easily a distant third. Urban Outfitters has stocked Fujifilm’s instant-printing Instax camera in its brick-and-mortar stores and on its website for years, offering dozens of photo frames and photo albums and photo-related accessories that are specifically designed for the size and shape of the Instax print-outs.
Polaroid leveraged the rise of nostalgia-inspired Instagram filters and online fervor for analog culture into “The Impossible Project,” a much-hyped and crowd-driven campaign that lasted years and culminated in the release of an “adorable” instant camera — almost exactly 10 years after the company had stopped making film. Both rode an analog wave that also lifted sales of record players, handicrafts, longhand writing, and books.
“I have this ambition to return Kodak to being one of the world’s best-known, best-loved brands”
So, Kodak needs Forever 21 the way a saltine needs literally any topping, but none of this should be too hard. They’re just copying an already codified playbook.
Atkins has spearheaded a series of fashion collaborations, starting with a pure hypebeast play in August 2015 — a Carol Lim-designed Opening Ceremony capsule collection (a $145 long-sleeve tee and a $195 crewneck sweater) inspired by the work of director Spike Jonze. Lim designed more T-shirts that fall, considered a success not just because they sold out but also because Joe Jonas wore one for a day out in Beverly Hills.
Kodak’s new streetwear-inspired Forever 21 zip-ups. Kodak
Forever 21 is Kodak’s biggest play to edge out Fujifilm in the youth market. Kodak
“[Fashion] took our brand to a whole new audience and positioned it as aspirational in a way that perhaps it hadn’t been before,” Atkins says. “I think there’s something about the fact that film is now premium. That enabled us to make that switch.”
Borrowing from the skateboarder-first strategy that built Supreme — a major reference point for the new Kodak — Atkins arranged a collaboration with the California skateboard collective Girl, which resulted in skateboards and clothing and skateboarding videos shot on Super 8 film.
In the last year, they’ve helped Lana Del Rey’s sister shoot a music video on Super 8, they hired hip-hop scene photographer Renell Medrano to shoot a short film with Cara Delevingne, and they invited Ansel Elgort’s brother to the Los Angeles launch party for the Forever 21 line. In January, years after they came back into style, Kodak announced its own Instax-esque instant print cameras and then got an extreme close-up shot of one into a Khalid and Ty Dolla $ign music video.
You couldn’t come up with a more on-trend series of keywords if your life depended on it.
Kodak’s also benefited from the fact that big-budget Hollywood directors are eternally enamored with film, have possibly become even more so in recent years. Kodachrome, the $20 art magazine the brand launched last year with the endorsement of forever it-girl Chloe Sevigny, is made expressly to emphasize that fact. The latest cover story was on Patty Jenkins, who’s currently shooting the Wonder Woman sequel on film.
Joshua Coon, head of content marketing at Kodak and the editor of the magazine, said that their target audience is people who are interested in film not out of nostalgia but because they’re using it for the first time and valuing it as a craft.
“I don’t know if there’ll ever be a time where Blockbuster, for example, will be socially relevant again,” he says, “But a film picture to a lot of people is still worth more because it’s a more considered image. It lasts longer. Think about how many pictures we take on our phones and how many we actually go back and look at and use, versus 36 very considered shots on a film camera.”
Kodak’s new Forever 21 line takes inspiration from its ’90s NASCAR team. Kodak
Asked why the company needs a full magazine to promote this idea, he points out that Kodak is also a printer company, which is an interesting thing to emphasize. Kodak is a printer company. Specifically, an industrial printer company. It was once a camera and film company. Film and the other consumer goods like the ones we’ve been discussing here accounted for just $47 million (flat year-over-year) of the $414 million the company brought in during Q4 of 2017, while the commercial printing division brought in $261 million.
Kodak went bankrupt because of the dedication to film these branding measures emphasize — it clung to it, adapting poorly to the rise of the digital camera, and in doing so set itself up to eventually shuck over 100,000 jobs and kneecap a city. (Three years after its collapse, Kodak’s hometown of Rochester, New York, had a median household income half that of the rest of the state.)
That partially explains why Atkins was given just six months to bring this collection to life and stresses that almost all of the marketing will happen via unpaid Instagram promotion and organic influencer relationships. She’s doing work that’s fun — and it would be nice to see Kodak bounce back into the popular culture! — but ultimately this brand work is a pet project for a lumbering tech giant still trying to figure out exactly how to keep existing.
Despite all the celebration around t-shirts selling out and J.J. Abrams talking about the magic of Super 8, Kodak was still cutting jobs and selling off entire divisions as recently as last month. It now employs about 6,000 people, down from 19,000 just before it declared bankruptcy, and 145,000 at its peak during the decade this Forever 21 project pays tribute to. As much as the analog resurgence is something Kodak is savvily leaning into, it’s also something Kodak’s just kind of been waiting around for.
The analog trend — like all trends — will come to an end. In the meantime, it’s hard to deny that this $15 Kodak x Forever 21 fanny pack is very, very on-trend.
Original Source -> Kodak wants teens to help resurrect it. So it’s teaming up with Forever 21.
via The Conservative Brief
0 notes
Text
Dating Profile Photos: How to Pick and Take Them
Dating profile photos—a phrase that usually elicits a collective sigh from all single people in earshot. We all know that photos are the most important element of a successful online dating profile, yet we still leave our profiles feeling like we could’ve done better. If you’re looking for ways to improve your profile photos, this guide won’t have you strutting your stuff on the next season of America’s Next Top Model, but, at the cost of a little extra effort, it’ll help anyone take flattering, attractive photos that get noticed by more people on online dating apps.
What Makes a Good Photo
People are visual creatures. We all know a good photo when we see one, even if we can’t place a finger on just what makes it so appealing. Nobody’s asking you to be the next Ansel Adams—you’re shooting for a dating profile—but knowing some photography basics can go a long way in improving your online dating game.
Here are a few small components that can improve your photos dramatically:
1. Smiling
First, in every photo the subject should be you smiling. Photo data from the online dating site and app Zoosk, shows that people smiling receive almost four times as many messages and those who don’t. If you think you’re less attractive smiling, then take our word for it: you’re not. Ok, so you may be thinking that people can tell when a smile is canned for a photo. You’re right. So how do you get around that? The key is to smile with your eyes. Crinkled eyes are the main way people can tell a genuine smile from a fake. So just take a moment to remember that time your best friend spilled spaghetti all down their white shirt before you say cheese.
2. Framing
Next, I want to touch on framing, or what’s in the shot. Are you in the stands at a football game with 10,000 other spectators, or is it a selfie with your hair cropped out? Framing determines not only what makes it into the shot, but what our eyes are drawn to. The Rule of Thirds is a quick photography technique to help you with your framing. Take your photo frame and draw two lines lengthwise and heightwise, cutting the frame into thirds each way. There should be four intersections where the length lines and height lines meet. This is where our eyes tend to focus in a photo. Make sure that your face hits these focal points in your photos. That’s the basics of the Rule of Thirds.
3. Lighting
Lastly, let’s talk briefly about lighting and resolution. When taking dating photos, you want to make sure that the light is bright enough to let us see the details of your photo, but not so bright that we’re blinded. If the shot is a little too bright, you can usually apply a filter from your phone to dim the brightness. With photos that are too dark, fixes aren’t so easy. Resolution is pretty simple—just make sure your photos are high quality and in focus. These days, even lower end smartphones can snap very nice photos, so there’s no excuse for grainy specks floating around!
How to Make a Photo Interesting
If you’re like me, you probably just took a few selfies and called it a day. Unfortunately, six selfies against your kitchen wall will get old pretty quick. Now that we know the qualities that make a good photo from a technical standpoint, we need to spice them up.
Add photos of yourself doing things you love.
A dating profile is an opportunity for other daters to get a feel for your personality, so let them! Start by including some photos that show off your interests. Whether you’re hiking Half Dome or jumping 10 stairs on a skateboard, action shots make for more interesting photos than you tucked behind the desk of your home office. Hobbies and interests can serve as common ground to get you and other daters talking.
Vacation photos are always a good idea.
Have any beachside memories from your last Hawaii trip? Don’t hesitate to throw a photo of onto your profile. Zoosk data shows that vacation photos net profiles way more messages. Colorful and exotic locations are a good way to draw in the eyes of daters that would otherwise wander to other profiles.
Use group photos sparingly.
Next up: group photos. OK, this is a controversial one. If you’ve dated online before, you’ve probably come across a photo of 32 people that reads, “I’m the one in the middle.” If someone has to spend time to identify who in the photo the profile belongs to, chances are, they’ll move onto the next profile. I usually like to use a group shot as one of my last photos, because it can show me having fun with friends at a party or event in the way reading at a coffee shop can’t. Still, if you have any doubts, leave out the group shots. Definitely not required.
Balance it out.
You’re profile should tell a cohesive story through your photos, not a life history. Picking photos is a balancing act of showing who you are and showing off how you look. Your profile doesn’t need to prompt a proposal. If you’re not sure what vibe you should be going for, it should always be two words: attractive and interesting.
Profile Tips and Tricks
Once you’ve settled on a few photos, you’re almost on your way. Here are a couple extra tips to help you optimize your efforts:
1. Your first photo is the most important and should always be your most photogenic. Make sure you’re wearing your best smile for this one.
2. Always have at least one full-body shot. Having two or three good shots is probably best, but Zoosk data shows that profiles with at least one body shot get over twice as many incoming messages. Physical attraction is an important quality for many in deciding who they would date, so don’t hide who you are.
3. Make sure your clothes fit well and are location appropriate. Nothing says staged photo like designer jeans on a beach towel.
4. More photos are a good thing. Some apps and services allow up to twenty photos, but our data suggests that having at least five photos will have you getting more messages and longer conversations. Don’t skimp on the number!
5. If you don’t have good photos on hand, don’t hesitate to grab a friend, pack a few outfits, and go out on a shoot. Lunch on you. If you don’t pose for photos often, modeling can be difficult. Using props is a good way to add to the fun factor of a photo and the shoot. Props can be anything from a book to a cup of coffee, anything to keep your hands out of your pockets.
Well, that’s about it. It may sound like a lot and it is. But putting a little more effort into your photos may be the best way to bump your chances.
The post Dating Profile Photos: How to Pick and Take Them appeared first on The Date Mix.
from Meet Positives SMFeed 8 https://ift.tt/2LfNrgp
via IFTTT
0 notes
Text
Baby Driver Review
Baby Driver is a blast! After taking on zom-rom-coms, buddy cops, alien invasions, and video games, Edgar Wright’s heist film is my favorite of his movies yet. Wright first played with the idea of a getaway driver who timed crimes using songs in a music video for Mint Royale, and the expanded version is even better. While the broad concepts of the movie: a driver forced to continue working for criminals, “one last job,” etc. are not new, filtering them through music made the movie feel fresh and exciting.
The music, selected before Wright even wrote the film (here’s why he chose a few of the tracks), made for a cool, unique window into Baby's (Ansel Elgort) life. Baby was a solid, sympathetic lead, enjoying his ability behind the wheel even while wanting out of the crime business. From the trailers, I’d expected Baby to have a tortured-if-meticulously-cool personality, but Elgort made him a happy dancing idealist. I was pleasantly surprised. Baby’s tinnitus was a real-world handicap film heroes don't usually have and it provided a smart reason for planning his life around his tunes. An early sequence of Baby getting coffee as the lyrics of the song he’s listening to appeared in graffiti on the streets around him was a great way to physicalize the impact and importance of music on his world: it’s everything to him and it’s the stabilizing force of his entire life. When his songs got screwed up, like during a frantic foot chase or a heist that doesn’t time out as planned, his disorientation was a stumbling block we don't normally see in movies. Baby's hobby of making mix tapes of conversations was a cool connection to his mom's would-be singing career as well as another example of Baby processing and reshaping the world around him with music. Elgort displayed great range with his various scene partners, particularly with his roommate/foster father Joseph (CJ Jones), Kevin Spacey's Doc, and Lily James' Debora.
Doc ran a tight ship and Spacey was great as the ultra-cool (and scary, when need be) crime boss. It was clever to make him a twisted reflection of Joseph as a criminal “father figure” to Baby. Doc could seamlessly segue from protective and respectful of Baby to threatening and casually dangerous, making him unpredictable. With that in mind, I shouldn’t have been surprised at his reaction to Baby trying to leave with Debbie towards the end. Still, I bought it and liked that it revealed an unexpected layer of his character. Doc’s nephew Sammy (Brogan Hall), just as cool about crime as his uncle, was an awesome surprise that I didn't see coming at all.
I loved that Baby and Joseph communicated in sign language, neatly displaying the flip side to Baby’s musical life. Even without saying a word verbally, you could feel their familial connection and the strength of that relationship was an unexpected plus. Jones’ expressions spoke volumes about how much he wished Baby could escape the criminal life (or at least do something to help his son) and casting an actor who’s actually deaf was a great move, as representation is important. While Lily James was charming and I was rooting for her and Baby’s sweet love story, I couldn’t help but think “you basically just met” when they were so hot to run away together and leave Atlanta behind. This could’ve been easily remedied by giving us a short montage of their relationship or even just a line that indicated a time jump between (light spoilers) Baby paying Doc back and Doc insisting he continue working for him (“What? I gave you six months off” or something). I also wish we’d learned more about Debora’s dreams beyond just driving west. Debora’s lack of goals outside the diner/Baby and their underdeveloped relationship were the weak points in an otherwise totally solid movie.
On the surface, Jamie Foxx didn't get an opportunity to show much range as Bats, but I didn't need him to be anything more than the total whack job he was. He was great as an unhinged trigger-happy criminal and he was truly scary for pretty much every scene he was in. As crazy as he was, he clearly wasn’t “Joker” insane: he’s a thinking criminal whose self-preservation instincts and impossible standards mixed with his shoot-first tendencies to create arguably the most dangerous character in the movie. We don’t get much background on anyone besides Baby, but I thought it was clever to have Bats reveal a hidden talent for reading people when he accurately guessed Buddy and Darling’s pasts.
Jon Hamm's Buddy probably had the most range of the criminals besides Doc, going from the one underling who seemed genuinely interested in connecting with Baby as an older brother-type figure to a much darker path by the last act of the movie. Hamm played it very well. I thought he and Darling (Eiza Gonzalez) had good chemistry and felt like a real couple; a modern Bonnie and Clyde. Her enjoyment of heists and general verve for life made her stand out from the typical gangster’s moll. Gonzalez didn’t play this obvious sense of fun as “crazy,” preventing her from coming off as a Harley Quinn rip-off; she simply enjoyed what she did and who she did it with. While Buddy seems to want to retire at some point (his potential white collar background indicated he might be above this stuff), I could see her having too much fun to stop.
The other criminals, Griff (Jon Bernthal), JD (Lanny Joon), and Eddie No-Nose (Flea) rounded out Doc’s crew in colorful fashion. I’d say Griff was a little too similar to Buddy in terms of style and Bats in terms of how he distrusted and antagonized Baby to truly stand out, but he’s in the film for such a short time it didn’t bother me. JD has some great comedic bits and a totally distinct demeanor from everyone else; I wish we got more from him. Eddie seemed like he had a wealth of character to him and I liked that he kept getting brought up as the inside man on Doc’s various heists (assuming his nickname is the “nasal problem” Doc kept referring to).
The romance is rushed a bit (though Elgort and James’ chemistry saves it), but the pacing is quick and the editing is flawless. I’ve always found Edgar Wright’s ability to choreograph and film much more intricate action sequences than you’d expect from the genres he works in impressive, and this was no exception: most if not all of the action was synched to the music! The car chases and action all felt very real and immediate; as smooth and polished as this movie is, it doesn’t feel like your typical CGI blockbuster because everything is happening for real. I will say that the armored car heist, foot chase, and climax were too loud at points (particularly the crashes) for me to comfortably hear everything, but that may’ve been the theater I was in rather than the sound mix of the film. Nevertheless, I liked that the soundtrack was a mix of familiar and less well-known songs and look forward to buying it.
If you’re looking for something original and stylish to compliment your typical summer blockbusters, take Baby Driver for a spin!
Full Spoilers…
-I was surprised Baby didn’t bristle at all under the paltry earnings he made as a pizza driver—he was just happy to be free and still got to drive fast in his legit job—and it's one reason I can't see Baby getting back into crime in a potential sequel at all. The movie even has Doc point out that Baby won’t be able to give Debora the finer things in life—and she isn’t someone who’d demand them—and Baby doesn’t give it so much as a second thought, so I don’t believe he’d find himself as a criminal again, unless maybe the cops asked him to go undercover. And I don’t think he’d do it even then. As much as I liked this world and these characters, this felt right as a one-and-done with a happy ending and doesn’t need a sequel. On the other hand, I trust Edgar Wright, so if he sees a story I’ll check it out.
-I thought for sure Baby’s tapes would come back and help exonerate him, so when they didn’t pop up at his trial to prove he was coerced into at least some of the heists it felt like a small dangling thread.
-In fact, I was surprised Baby served time at all. I totally expected a generic “he was coerced; let him off with a slap on the wrist” ending, so actual consequences to Baby’s actions was a respectable twist.
-I was surprised Griff of all people survived, but as my brother pointed out he did say, “If you don’t see me again, I’m dead.” haha
-At first, I didn’t like that Buddy went EVIL-evil because Darling died. I’ve gone back and forth as to whether or not she was fridged—killed just to make Buddy angry—but ultimately I think it’s her choice to open fire on the cops instead of standing down (and instead of standing behind cover, just like at the arms dealer shootout), which is consistent with her character in the rest of the movie. She has agency in that moment, even if Buddy pins the blame on Baby. Additionally, (as TV Tropes reminds me) if you take her warning to Bats seriously, Buddy was always this crazy killer and Darling’s death didn’t create it. Again, I feel like she was having too much fun to ever stop and was always headed for this moment.
#baby driver#ansel elgort#baby#lily james#debora#kevin spacey#doc#jamie foxx#bats#john hamm#buddy#eiza gonzalez#darling#cj james#joseph#edgar wright
0 notes
Text
John Thomas Grant artist analysis 1
What is the name of the photographer? (date and country of birth if you can find it) is this photographer a professional photographer? if so what companies has he or she worked for , what famous magazines have their photographs featured in or what galleries has he or she exhibited their work in?
John Thomas Grant is a photographer , and an author. “Final thoughts: eternal Beauty in stone” was a personal journey that he went through. He was in the music business for 30 years before retiring in the mid 90s. John currently has two solo exhibitions of his photography in progression. one through October 28th at the Cahoon Museum of American Art in Cotuit, Massachusetts, and another at the Vanover Fine Arts Gallery in Springville, New York, through November 3rd.
What is the photographers motivation for being a photographer? What is the photographers motivation for taking/ creating these types of images?
“My feeling for cemeteries comes strictly from an artistic, and life, point of view”.
John feel like when he is in cemeteries his artistic side of him comes out and he sees life and scenery in an artistic point of view that speaks in the quality of his photographs.
Genealogy bought him to the cemetery and that sparked his interest in graveyards.
“It all became crystal clear to me. I truly realised that one day I will experience death”.
Cemeteries made him realise that death is inevitable and it will all come to us one day , it is a cycle that only repeats itself once.
What is the location in the photograph:urban (town or city) , Rural (village or countryside) or Coastal ( by the sea )?
The location in this photograph is in a town called Beverly , Massachusetts , it is an ancient burial ground with a few graveyards but it also has a playground in the background making the image a contradiction as playgrounds are happy and fun but then grave stones are there bringing sorrow in the atmosphere.
Discuss whether this photograph has been taken for a commercial purpose or for an editorial purpose or a fine art purpose.
I feel like this photograph was taken for an editorial purpose but not for the purpose of marketing or selling the image , maybe just to show the scenery of the photograph and display its meaning to other photographers or viewers looking at the photograph.
Discuss the content of this photograph?
What is the photographer / artist trying to communicate to the viewer about this particular landscape?
Peace and tranquility
Beauty
Emptiness
Perfection
Dessolation or neglect
Ugliness
Everyday life
John is trying to envision peace and tranquillity after death through this image.
As it is set in a playground the photograph shows everyday life through the swing set in the background. But what catches your eyes when you first look at this picture are the headstones causing it to give off a vibe of emptiness and departure.
Discuss the main technical or formal elements in this photograph?
Unusual composition
Strong angles
shallow or deep depth of field
Blurry movement
Negative space
Nd filters
strong colours or monochrome tones and shades.
The image clearly presents monochrome tones some dark and light in the background as well as in the foreground. The strong angles of the headstones creates shadows on the back of them concluding that the image has a deep depth of field.
Read the quotes by different famous photographers.
Research the photographer to see whether she or he is a contemporary or historic photographer
Explain what has been said in the quote in your own words
Respond to the quote
See if you can relate to the quote
Quote 3 “ Landscape photography is the supreme test of the photographer- and often supreme disappointment” - Ansel Adams
Ansel Adams was a photographer and environmentalist.
Landscape photography is testing your abilities to capture the scenery in front of you at the write time, angle and composition and often when some photographer do it they tend to fail and their picture will turn out to be a disappointment. I agree with what the quote says because some fields of photography are harder than others and you might not get it on the first you but if you try you will overcome that disappointment, i can relate to this quote as i have felt like that sometimes when taking my own set of photographs, i will have to test my ability to the fullest and will not be disappointed.
Do you think the photographer has manipulated this photograph using digital editing such as Photoshop? If you think then what impact do you think that this could have had on the way that viewers react and respond to the photograph?
I don't think that John Thomas grant could have digitally edited his photographs to the point where the viewers would respond negatively to it. His photographs have the sentimental yet sad feeling to it and i don't think those feeling could start a controversy between the viewers.
what is your personal response to this photograph and how does this photograph inspire or relate to your own work?
My personal response to not only this photograph but many of John Thomas Grant’s images relate to me as they all have a meaning and a story to be told behind it in this case death is everywhere and it will follow you around , it's a life cycle we have to endure and of course it's inevitable. The photographs also inspire me to do more with my own photographs to bring more detail within my images to make it stand out with the rest. Overall they have related to my work in the sense of we all have to experience death.
0 notes
Text
6 Places To Capture Incredible Landscape Shots In Grand Teton National Park
By Jonathan Irish
To say that Grand Teton National Park is an iconic photography destination is almost an understatement. The jagged peaks of the Teton Range, along with the stunning natural beauty and wild animals on the valley floor, have long lured photographers from around the world. In particular, the arrival of autumn, when the aspen trees explode in extraordinary hues of yellows, oranges, and reds, makes this park one of the finest places to take pictures in the world. We timed our visit to coincide with this explosion of color, and it did not disappoint. Whether you are visiting during the fall or any other time of year, there are endless opportunities to photograph the incredible. Here are a few suggestions for some great locations to shoot within this dynamic national park.
#1 Oxbow Bend
Photo credit: Jonathan Irish
The first moment you set eyes on Oxbow Bend, you can hardly believe it is real. The scene is so stunning…so jaw-dropping…that it seems unreal. Or, you may believe it was the work of divine creation; or that you stepped into a dream. It is a fine place and stands among the most beautiful landscapes I’ve ever had the privilege of photographing.
What to shoot: The main shot here is looking down the Snake River to the distant Teton Range, and catching the range (in particular, Mount Moran) reflected in the water.
How to get here: The turnoff is located in between Jackson Lake and the Moran entrance station (closer to Jackson Lake) on the north side of the park. It will be hard to miss this turnoff, not only because of the incredible beauty, but also because of the crowds that gather here. At any time of day there will be tourists, photographers, sightseers, etc. there to see this amazing spectacle.
Location tip: A lot of photographers congregate around the turnoff, however, having scoped this location out from every angle, I don’t think this is the ideal location to shoot this scene (also, if you don’t arrive 1 to 2 hours early you will not get a spot due to overcrowding.) There is a very small space where you can get the money shot about 100 yards down the road (to the right of the turnoff.) There is plenty of space to setup there, and you can get close to the water for more complete and unobstructed reflections. You won’t also have to worry about anyone stepping in front of a long exposure, which happens a lot near the turnoff.
Best time to shoot: This is a sunrise location, and is best-photographed early- to mid-morning. However, stunning images can be captured any time of day.
Equipment suggestions: A mid range wide-angle lens (in the 35-50mm range) is best for capturing the scene. I also liked having a longer lens (in the 70-200mm range) for distant subjects and to isolate parts of the scene that are quite interesting. A tripod is a must for low-light (early morning) shots, and I suggest bracketed at least one stop +/- in order to capture the full dynamic range.
Other suggestions: A word of caution: the main shot here (the distant Teton range) is so beautiful that you might not be able to take your eyes off of it. But I implore you to look around when shooting here, as there are details in every direction that are just as compelling. Here are a few examples…
#2 Schwabachers Landing
Photo credit: Jonathan Irish
Another awesome location within the park is called Schwabachers Landing. This area is used as a launch location for boaters and fisherman seeking access the Snake River, and it also happens to be a stunning location for photography.
What to shoot: Once again, the Teton Range serves as the backdrop here for calm water reflections. A variety of pools and forested areas provides many opportunities for creative compositions.
How to get here: Schwabachers Landing is located about 2 miles south of the Snake River Overlook, and 5 miles north of Moose, WY along highway 191. There is a nondescript dirt road leading down to the landing, just north of the Glacier View Turnout. You might miss it the first time you pass, but once you’ve been there it is pretty easy to find the second time.
Location tip: I would say that there are actually three separate locations here to shoot, all with their own unique attributes (although they all frame the Teton Range). The first is accessed from the main parking area, at the end of the road. From there, you can shoot a beautiful reflection of the Teton Range. Most people never leave that area. If you walk down the path about 100 yards you will come to an equally impressive and much less visited spot, which I will call Schwabachers #2. The active beavers in the area have created a dam that allows for calm water in a beautiful pool that provides excellent reflections of the distant mountains. I recommend going there first and then working back to the main area. The last spot, Schwabachers #3, is located near a small parking lot on the same road, before you reach the end (where the main shooting area is.) You have to pass this spot to get to the main area, and you might not think there is much there, as all the cars will be parked further down. This location provides yet another area for creative water reflections of the distant Teton Range, and the great beaver dam adds a nice leading line.
Best time to shoot: This is a sunrise location, and is best photographed before sunrise (alpenglow!) and just after sunrise when the peaks start to become lit by sunlight. Once again, don’t be afraid to stop here any time of day as the reflections can be beautiful even at midday.
Equipment suggestions: A wide-angle lens (in the 16mm to 24mm range) is best for capturing the wide view here (at all three locations). A tripod is also highly recommended.
#3 Snake River Overlook
Photo credit: Jonathan Irish
Who can forget to Ansel Adams‘ famous Snake River Overlook image? It has inspired endless amateur and professionals alike to try their hand at capturing such beauty found in nature. It certainly has inspired me, and that is why half the fun of taking this shot is simply knowing that Ansel once stood in the very place that you are standing when you visit there–that alone is worth the price of admission.
What to shoot: Like Ansel’s visionary image, the shot here is to try and capture the Snake River as it bends into the horizon, back dropped by the Teton mountain range.
How to get here: The overlook is located about 8 miles north of Moose, WY, off highway 191.
Location tip: Ansel shot his famous image over 70 years ago, and the trees have grown and obstructed much of the view in the passing years. It will be near impossible to create his same shot, but try getting as high as possible to bring as much of the Snake River out from the treeline. Trees or not, it is still an incredibly beautiful scene.
Best time to shoot: While sunrise can be a popular time to photograph here, I preferred the late afternoon light on a cloudy/overcast/stormy day. I love the moodiness the clouds can bring, and the opportunities for rays breaking through the clouds and highlighting different features of the scene. I patiently waited for weather and I believe it was the right call.
Equipment suggestions: A wide-angle lens (in the 24-35 mm range) is best for the scene here. While most photographers don’t own this, I have the MegaMast Carbon Fiber Camera Stand, which is a monster carbon fiber tripod that can extend up to 27′ in the air. I love this thing, and I only use it for situations like this where I want a different shot. I also get a ton of snickers and onlookers who have never seen such a tall tripod. But I tell ya, it works really well! This is one way to get above the treeline to get this shot.
#4 Mormon Row
Photo credit: Jonathan Irish
Mormon settlers from Idaho arrived to the Grand Teton area in the 1890’s, and clustered their farms together in what is known as the Gros Ventre/Antelope Flats area of the park. The relics of their once flourishing farms can still be seen today, and make for some incredible photography subjects. Mormon Row was added in 1997 to the National Register of Historic Places as a Historic District. It is indeed a historic, and very beautiful place.
What to shoot: The barns on the Moulton homesteads with the Teton Range in the backdrop.
How to get here: Driving north on highway 191, turn right onto Antelope Flats road just past Moose Junction. About a mile and a half down this road you will come to a small dirt road leading north/south in both directions (respectively). Turn left to park at the little parking area to access barn #1 (John Moulton barn), and turn right to get to barn #2 (T.A. Moulton barn).
Location tip: There are two barns here that I thought were significant and beautiful shots: #1 is the John Moulton barn, and #2 is the T.A. Moulton barn. Both barns are easily accessed, and on adjacent homesteads. Truthfully, I was fonder of the John Moulton barn as I liked the shape of it and thought it composed better against the mountains, but I know some photographers prefer the T.A. Moulton barn. You can’t go wrong with either spot…they are both very photogenic.
Best time to shoot: This is a sunrise location. I liked the alpenglow that occurs on the mountains right before sunrise, but first light is pretty special as well. Get here early (at least an hour before sunrise, preferably 1.5-2 hours), as this is a very busy sunrise photography location and there aren’t a ton of prime locations to setup your tripod.
Equipment suggestions: A wide-angle lens (in the 21-24mm range) is best for capturing the barn backdropped by the mountains. I’d also bring a 70-200mm that you can use when you move back a bit at the John Moulton barn. A tripod is a must, and a graduated neutral density filter is highly recommended to properly expose the shadowed foreground when the light starts to hit the mountains.
Other suggestions: I was also lucky enough to convince some of my fellow shooters (at the John Moulton barn) to try moving back about 50-100 yards, as the longer lens helps compress the scene and make the Tetons seem even bigger. I think that was a once-in-a-lifetime occurrence, getting him to move–most of the time, there is at least one person who will set up in too close and stay there for the duration…but it is still worth trying. If you can’t convince people to move back, still try shooting from farther back as I do believe it to be the better shot at that location (you just may need to test your skills at removing people from within the frame in Photoshop.)
#5 The Owl Area (a.k.a. The Moose-Wilson Scenic Drive)
Photo credit: Jonathan Irish
I call this site “The Owl Area” because of the two beautiful Great Horned Owls I saw during one trip down the same road (I also couldn’t remember the name of the road for the longest time, but I’ve resolved that, see below.) There is a lot of wildlife in this area–when I was there parts of the road were closed to vehicle stopping because of recent bear activity; we saw elk as well, and of course, the majestic owl.
What to shoot: Wildlife. This scenic drive passes through wetlands and forested areas that are rife with fauna and the backdrop is stunning.
How to get here: One of the beautiful things about the Moose-Wilson Scenic Drive is that it is not as busy as a normal park scenic drive. I think that has to do with its location, which starts right before the main entrance station in Moose (if coming from the south.) It’s a dirt road that I think a lot of people simply pass it by… it turned out to be a place that we loved.
Location tip: Go slow. Not only will you be trying to spot owls and other animals who are very well cloaked and elusive, but animals can run out in front of the car from the brush alongside the road at any moment. It helps to have a spotter with keen vision in addition to the driver, but you can spot while driving as well (just be careful.) Be sure to look to the tree branches that are 10 to 20 feet off the ground, where owls often sit while hunting prey. If you see an one in the distance, park your car in a pull-off (animal jams can happen quite quickly if you are not considerate) and go for a walk to try and get a bit closer.
Best time to shoot: You can take this drive anytime, but I usually hit this around midday when the sun was too bright for other shooting. Most of the drive is through forested area, which provides nice shade from midday sun.
Equipment suggestions: You really need a longer zoom to capture wildlife here. I loved having my 100-400mm, as it could handle most situations. As the forest can be in shade, don’t be afraid to bump your ISO up so you are getting shutter speeds in the 500 (minimum) range.
#6 Moose heaven at Gros Ventre campground
Photo credit: Jonathan Irish
If you want to see moose (who doesn’t?) the Gros Ventre campground is the place to go in Grand Teton National Park. You can see moose just about anywhere in the park, but this area is known for being as close as you can get to having a guaranteed sighting of a moose.
What to shoot: Moose! In all their glory.
How to get here: The Gros Ventre campground is located about 11 miles south and east of (appropriately named) Moose, WY, and is situated along the Gros Ventre River.
Location tip: The best spot to find the moose is along the road leading to the Gros Ventre campground (both before and after the campground entrance) eating and relaxing in the sagebrush and cottonwoods that grow along the Gros Ventre River.
Best time to shoot: I found that mid to late afternoon was best to find the moose, but they can be there any time of day.
Equipment suggestions: Although you are likely to get pretty close to the moose, I’d still suggest a longer zoom lens for wildlife shooting. I was perfectly happy with my 100-400mm, which I think will cover most scenarios you will run into at this location. You can always go longer, and wider, and I saw all sizes and types of lenses here.
A word of caution: Be a careful and responsible wildlife viewer and stay at least the recommended 25 yards away from moose, and never position yourself between an adult and its offspring. These animals can be territorial and dangerous and you do not want to have an encounter with such a large animal.
There’s so much to see, do, and photograph within Grand Teton National Park. This list could be endless! It is not meant to be a comprehensive itinerary, but a short and easy grouping to help you get to some of the very best views and wildlife areas in the park. Enjoy!
— This feed and its contents are the property of The Huffington Post, and use is subject to our terms. It may be used for personal consumption, but may not be distributed on a website.
from Travel – The Huffington Post ift.tt/2kGyYjA
The post 6 Places To Capture Incredible Landscape Shots In Grand Teton National Park appeared first on YachtAweigh.
from http://yachtaweigh.com/6-places-to-capture-incredible-landscape-shots-in-grand-teton-national-park/
from https://yachtaweigh.tumblr.com/post/156909047591
0 notes
Text
6 Places To Capture Incredible Landscape Shots In Grand Teton National Park
By Jonathan Irish
To say that Grand Teton National Park is an iconic photography destination is almost an understatement. The jagged peaks of the Teton Range, along with the stunning natural beauty and wild animals on the valley floor, have long lured photographers from around the world. In particular, the arrival of autumn, when the aspen trees explode in extraordinary hues of yellows, oranges, and reds, makes this park one of the finest places to take pictures in the world. We timed our visit to coincide with this explosion of color, and it did not disappoint. Whether you are visiting during the fall or any other time of year, there are endless opportunities to photograph the incredible. Here are a few suggestions for some great locations to shoot within this dynamic national park.
#1 Oxbow Bend
Photo credit: Jonathan Irish
The first moment you set eyes on Oxbow Bend, you can hardly believe it is real. The scene is so stunning…so jaw-dropping…that it seems unreal. Or, you may believe it was the work of divine creation; or that you stepped into a dream. It is a fine place and stands among the most beautiful landscapes I’ve ever had the privilege of photographing.
What to shoot: The main shot here is looking down the Snake River to the distant Teton Range, and catching the range (in particular, Mount Moran) reflected in the water.
How to get here: The turnoff is located in between Jackson Lake and the Moran entrance station (closer to Jackson Lake) on the north side of the park. It will be hard to miss this turnoff, not only because of the incredible beauty, but also because of the crowds that gather here. At any time of day there will be tourists, photographers, sightseers, etc. there to see this amazing spectacle.
Location tip: A lot of photographers congregate around the turnoff, however, having scoped this location out from every angle, I don’t think this is the ideal location to shoot this scene (also, if you don’t arrive 1 to 2 hours early you will not get a spot due to overcrowding.) There is a very small space where you can get the money shot about 100 yards down the road (to the right of the turnoff.) There is plenty of space to setup there, and you can get close to the water for more complete and unobstructed reflections. You won’t also have to worry about anyone stepping in front of a long exposure, which happens a lot near the turnoff.
Best time to shoot: This is a sunrise location, and is best-photographed early- to mid-morning. However, stunning images can be captured any time of day.
Equipment suggestions: A mid range wide-angle lens (in the 35-50mm range) is best for capturing the scene. I also liked having a longer lens (in the 70-200mm range) for distant subjects and to isolate parts of the scene that are quite interesting. A tripod is a must for low-light (early morning) shots, and I suggest bracketed at least one stop +/- in order to capture the full dynamic range.
Other suggestions: A word of caution: the main shot here (the distant Teton range) is so beautiful that you might not be able to take your eyes off of it. But I implore you to look around when shooting here, as there are details in every direction that are just as compelling. Here are a few examples…
#2 Schwabachers Landing
Photo credit: Jonathan Irish
Another awesome location within the park is called Schwabachers Landing. This area is used as a launch location for boaters and fisherman seeking access the Snake River, and it also happens to be a stunning location for photography.
What to shoot: Once again, the Teton Range serves as the backdrop here for calm water reflections. A variety of pools and forested areas provides many opportunities for creative compositions.
How to get here: Schwabachers Landing is located about 2 miles south of the Snake River Overlook, and 5 miles north of Moose, WY along highway 191. There is a nondescript dirt road leading down to the landing, just north of the Glacier View Turnout. You might miss it the first time you pass, but once you’ve been there it is pretty easy to find the second time.
Location tip: I would say that there are actually three separate locations here to shoot, all with their own unique attributes (although they all frame the Teton Range). The first is accessed from the main parking area, at the end of the road. From there, you can shoot a beautiful reflection of the Teton Range. Most people never leave that area. If you walk down the path about 100 yards you will come to an equally impressive and much less visited spot, which I will call Schwabachers #2. The active beavers in the area have created a dam that allows for calm water in a beautiful pool that provides excellent reflections of the distant mountains. I recommend going there first and then working back to the main area. The last spot, Schwabachers #3, is located near a small parking lot on the same road, before you reach the end (where the main shooting area is.) You have to pass this spot to get to the main area, and you might not think there is much there, as all the cars will be parked further down. This location provides yet another area for creative water reflections of the distant Teton Range, and the great beaver dam adds a nice leading line.
Best time to shoot: This is a sunrise location, and is best photographed before sunrise (alpenglow!) and just after sunrise when the peaks start to become lit by sunlight. Once again, don’t be afraid to stop here any time of day as the reflections can be beautiful even at midday.
Equipment suggestions: A wide-angle lens (in the 16mm to 24mm range) is best for capturing the wide view here (at all three locations). A tripod is also highly recommended.
#3 Snake River Overlook
Photo credit: Jonathan Irish
Who can forget to Ansel Adams‘ famous Snake River Overlook image? It has inspired endless amateur and professionals alike to try their hand at capturing such beauty found in nature. It certainly has inspired me, and that is why half the fun of taking this shot is simply knowing that Ansel once stood in the very place that you are standing when you visit there–that alone is worth the price of admission.
What to shoot: Like Ansel’s visionary image, the shot here is to try and capture the Snake River as it bends into the horizon, back dropped by the Teton mountain range.
How to get here: The overlook is located about 8 miles north of Moose, WY, off highway 191.
Location tip: Ansel shot his famous image over 70 years ago, and the trees have grown and obstructed much of the view in the passing years. It will be near impossible to create his same shot, but try getting as high as possible to bring as much of the Snake River out from the treeline. Trees or not, it is still an incredibly beautiful scene.
Best time to shoot: While sunrise can be a popular time to photograph here, I preferred the late afternoon light on a cloudy/overcast/stormy day. I love the moodiness the clouds can bring, and the opportunities for rays breaking through the clouds and highlighting different features of the scene. I patiently waited for weather and I believe it was the right call.
Equipment suggestions: A wide-angle lens (in the 24-35 mm range) is best for the scene here. While most photographers don’t own this, I have the MegaMast Carbon Fiber Camera Stand, which is a monster carbon fiber tripod that can extend up to 27′ in the air. I love this thing, and I only use it for situations like this where I want a different shot. I also get a ton of snickers and onlookers who have never seen such a tall tripod. But I tell ya, it works really well! This is one way to get above the treeline to get this shot.
#4 Mormon Row
Photo credit: Jonathan Irish
Mormon settlers from Idaho arrived to the Grand Teton area in the 1890’s, and clustered their farms together in what is known as the Gros Ventre/Antelope Flats area of the park. The relics of their once flourishing farms can still be seen today, and make for some incredible photography subjects. Mormon Row was added in 1997 to the National Register of Historic Places as a Historic District. It is indeed a historic, and very beautiful place.
What to shoot: The barns on the Moulton homesteads with the Teton Range in the backdrop.
How to get here: Driving north on highway 191, turn right onto Antelope Flats road just past Moose Junction. About a mile and a half down this road you will come to a small dirt road leading north/south in both directions (respectively). Turn left to park at the little parking area to access barn #1 (John Moulton barn), and turn right to get to barn #2 (T.A. Moulton barn).
Location tip: There are two barns here that I thought were significant and beautiful shots: #1 is the John Moulton barn, and #2 is the T.A. Moulton barn. Both barns are easily accessed, and on adjacent homesteads. Truthfully, I was fonder of the John Moulton barn as I liked the shape of it and thought it composed better against the mountains, but I know some photographers prefer the T.A. Moulton barn. You can’t go wrong with either spot…they are both very photogenic.
Best time to shoot: This is a sunrise location. I liked the alpenglow that occurs on the mountains right before sunrise, but first light is pretty special as well. Get here early (at least an hour before sunrise, preferably 1.5-2 hours), as this is a very busy sunrise photography location and there aren’t a ton of prime locations to setup your tripod.
Equipment suggestions: A wide-angle lens (in the 21-24mm range) is best for capturing the barn backdropped by the mountains. I’d also bring a 70-200mm that you can use when you move back a bit at the John Moulton barn. A tripod is a must, and a graduated neutral density filter is highly recommended to properly expose the shadowed foreground when the light starts to hit the mountains.
Other suggestions: I was also lucky enough to convince some of my fellow shooters (at the John Moulton barn) to try moving back about 50-100 yards, as the longer lens helps compress the scene and make the Tetons seem even bigger. I think that was a once-in-a-lifetime occurrence, getting him to move–most of the time, there is at least one person who will set up in too close and stay there for the duration…but it is still worth trying. If you can’t convince people to move back, still try shooting from farther back as I do believe it to be the better shot at that location (you just may need to test your skills at removing people from within the frame in Photoshop.)
#5 The Owl Area (a.k.a. The Moose-Wilson Scenic Drive)
Photo credit: Jonathan Irish
I call this site “The Owl Area” because of the two beautiful Great Horned Owls I saw during one trip down the same road (I also couldn’t remember the name of the road for the longest time, but I’ve resolved that, see below.) There is a lot of wildlife in this area–when I was there parts of the road were closed to vehicle stopping because of recent bear activity; we saw elk as well, and of course, the majestic owl.
What to shoot: Wildlife. This scenic drive passes through wetlands and forested areas that are rife with fauna and the backdrop is stunning.
How to get here: One of the beautiful things about the Moose-Wilson Scenic Drive is that it is not as busy as a normal park scenic drive. I think that has to do with its location, which starts right before the main entrance station in Moose (if coming from the south.) It’s a dirt road that I think a lot of people simply pass it by… it turned out to be a place that we loved.
Location tip: Go slow. Not only will you be trying to spot owls and other animals who are very well cloaked and elusive, but animals can run out in front of the car from the brush alongside the road at any moment. It helps to have a spotter with keen vision in addition to the driver, but you can spot while driving as well (just be careful.) Be sure to look to the tree branches that are 10 to 20 feet off the ground, where owls often sit while hunting prey. If you see an one in the distance, park your car in a pull-off (animal jams can happen quite quickly if you are not considerate) and go for a walk to try and get a bit closer.
Best time to shoot: You can take this drive anytime, but I usually hit this around midday when the sun was too bright for other shooting. Most of the drive is through forested area, which provides nice shade from midday sun.
Equipment suggestions: You really need a longer zoom to capture wildlife here. I loved having my 100-400mm, as it could handle most situations. As the forest can be in shade, don’t be afraid to bump your ISO up so you are getting shutter speeds in the 500 (minimum) range.
#6 Moose heaven at Gros Ventre campground
Photo credit: Jonathan Irish
If you want to see moose (who doesn’t?) the Gros Ventre campground is the place to go in Grand Teton National Park. You can see moose just about anywhere in the park, but this area is known for being as close as you can get to having a guaranteed sighting of a moose.
What to shoot: Moose! In all their glory.
How to get here: The Gros Ventre campground is located about 11 miles south and east of (appropriately named) Moose, WY, and is situated along the Gros Ventre River.
Location tip: The best spot to find the moose is along the road leading to the Gros Ventre campground (both before and after the campground entrance) eating and relaxing in the sagebrush and cottonwoods that grow along the Gros Ventre River.
Best time to shoot: I found that mid to late afternoon was best to find the moose, but they can be there any time of day.
Equipment suggestions: Although you are likely to get pretty close to the moose, I’d still suggest a longer zoom lens for wildlife shooting. I was perfectly happy with my 100-400mm, which I think will cover most scenarios you will run into at this location. You can always go longer, and wider, and I saw all sizes and types of lenses here.
A word of caution: Be a careful and responsible wildlife viewer and stay at least the recommended 25 yards away from moose, and never position yourself between an adult and its offspring. These animals can be territorial and dangerous and you do not want to have an encounter with such a large animal.
There’s so much to see, do, and photograph within Grand Teton National Park. This list could be endless! It is not meant to be a comprehensive itinerary, but a short and easy grouping to help you get to some of the very best views and wildlife areas in the park. Enjoy!
— This feed and its contents are the property of The Huffington Post, and use is subject to our terms. It may be used for personal consumption, but may not be distributed on a website.
from Travel – The Huffington Post ift.tt/2kGyYjA
The post 6 Places To Capture Incredible Landscape Shots In Grand Teton National Park appeared first on YachtAweigh.
source http://yachtaweigh.com/6-places-to-capture-incredible-landscape-shots-in-grand-teton-national-park/
from http://yatchaweigh.blogspot.com/2017/02/6-places-to-capture-incredible.html
0 notes
Last Seen Blogs

seehang
pls go to SeeQSee

weeping-parasite
Shattered Angel

kiwimendori
Kiwicedonia

greatcateblanchett
Cate Blanchett

zahrart17
🔹 zahrart17 🔹