#artbyzhivago
Text
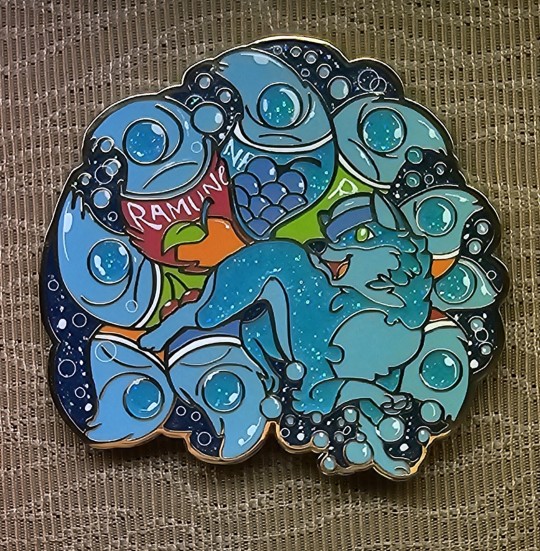
My 3 favorite pins from the haul I bought at San Japan


Top two are from @chunkytomatoart
I adore White Diamond in this art style, the portrait looks so good and I love the design of the pin around it too, the glitter reminiscent of a field of stars for the background looks so fucking good. I just can't it's so good. The androgynous pride witch (which the artist also has masc and femme versions of) is just straight up goals and I love them.
Number 3 is from @artbyzhivago , the Ramune Kitsune, and he's just such a great little friend, the concept is adorable and the execution on it is perfect
#pins#enamel pins#steven universe#white diamond#witch#lgbt#pride#nonbinary#is there an animal version of a moe anthropomorphism#like the ramune kitsune clearly is one but I dont have a word/tag for it#gijinka#but animal I guess?#well gijinka is 擬人化#so just swap out the 人?#but gidoubutsuka sounds awful#oh right#擬獣化#gijuuka#lol i guess that works#sounds better than gikemonoka
1 note
·
View note
Photo
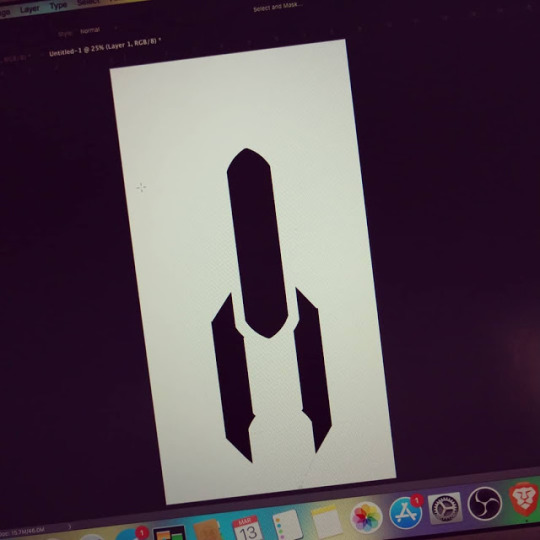
CHAIN BRUSH ASSEMBLY TUTORIAL
CHAINS CAN BE A PAIN TO DRAW. Here's how I make it easy AF. Follow the directions below using your own art to develop your own brush.
OR YOU CAN DOWNLOAD IT
Download includes ZIP file with one 200px Chain Brush with Presets for Photoshop.
Click here to download this brush from my DeviantArt page
TUTORIAL TIME!
Step One
DRAW A ROCKET. It's two chain links. I put a gap in the bottom because that is where the pieces will link.
Step Two
Rotate it to go left to right. From the Edit menu, Define Brush Preset.
Step Three
Open the Brush Panel and select the new brush (It's probably at the end). Go to Shape Dynamics and set the Angle Jitter to Direction
Step Four
Set the Size Jitter to Off.
Step FIVE
Go back to the Brush Tip Shape panel and adjust the spacing until it looks right. In my case, 216% is what worked for me.
USE YER BRUSH
You can use it as is, or add Blending Layers to add 'Lineart' for a toonier look.
Shown: Chains on separate layer with Blending Layers - Color Overlay set to White, 100% opacity, and Stroke added.
Not half bad for a quick lil thing, eh???
69 notes
·
View notes
Photo
Script #1: Automatic WIP Maker
Here is how to create a one-click action that marks and sequentially saves every stage of your project without missing a beat! The really nice thing about Photoshop is that you can program automatic processes to make your life easier. Here is a short tutorial on how I make my life a little easier with Actions and Scripts! These instructions are for Adobe Photoshop CC. If you don't have it... well, I can't force you to get it, but scripts like these make me urge you to try it out. You can subscribe to Adobe Creative Cloud for as little as $9.99/mo and that's a pretty cheap price to pay for the ability to automate things like this. There's a 30 day free trial as well. I will not be making instructions on how to do this in any other programs because I don't know how to use them! GET PHOTOSHOP
LIKE THE DOWNLOAD? CONSIDER SUPPORTING!
Please consider supporting me somehow if you like the pack! Every follow, pledge or subscription helps me make more of these!
Follow me on Twitter, Instagram or Facebook
Buy something you like off of FandomFashions.com
Follow or Subscribe on Twitch!
For those of you who opted to go the analog route and DIY this sucker, onto the tutorial!
CREATING YOUR AUTOMATIC WIP MAKER
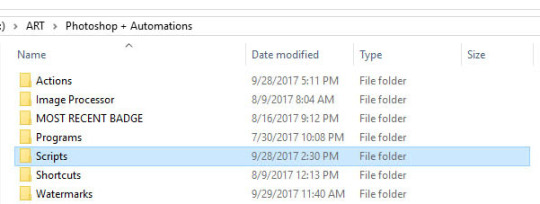
Preparation:
Since this is an automated process, you'll need to set aside a directory where you will NEVER move these files. I created a directory in my artwork drive that is dedicated to files that are made specifically for automation. That way they don't get caught in the fray of any other files. Tucked away in a dark corner where they only speak when spoken to is exactly where you want them. Like enslaved podlings except digital files so there's no ethical questions.
THE STAMP
Create a WIP Stamp you'd like to put on your artwork. It will need to be visible on both dark and light backgrounds. I made a black splash and added white text over it with my information. I've made this mark nice and big so that it can be used on any size image without a loss in quality. Really big. Like this sucker is 2283x1190 at 150 dpi big. I ain't kiddin' around.
THE SCRIPT
Before you create your action, you'll need your script ready to include in the action. This script will make a JPG image of your file in the same directory as your working PSD file.
STEP ONE: Open up Notepad/Notepad II and paste the following code into a new document:
#target photoshop
main();
function main(){
if(!documents.length) return;
var Name = app.activeDocument.name.replace(/\.[^\.]+$/, '');
Name = Name.replace(/\d+$/,'');
try{
var savePath = activeDocument.path;
}catch(e){
alert("You must save this document first!");
}
var fileList= savePath.getFiles(Name +"*.jpg").sort().reverse();
var Suffix = 0;
if(fileList.length){
Suffix = Number(fileList[0].name.replace(/\.[^\.]+$/, '').match(/\d+$/));
}
Suffix= zeroPad(Suffix + 1, 4);
var saveFile = (savePath + "/" + Name + "_" + Suffix + ".jpg").replace("__","_");
SaveJPEG(File(saveFile), 8);
}
function SaveJPEG(saveFile, jpegQuality){
var doc = activeDocument;
if (doc.bitsPerChannel != BitsPerChannelType.EIGHT) doc.bitsPerChannel = BitsPerChannelType.EIGHT;
jpgSaveOptions = new JPEGSaveOptions();
jpgSaveOptions.embedColorProfile = true;
jpgSaveOptions.formatOptions = FormatOptions.STANDARDBASELINE;
jpgSaveOptions.matte = MatteType.NONE;
jpgSaveOptions.quality = jpegQuality;
activeDocument.saveAs(saveFile, jpgSaveOptions, true,Extension.LOWERCASE);
};
function zeroPad(n, s) {
n = n.toString();
while (n.length < s) n = '0' + n;
return n;
};
STEP TWO: Save it to your Scripts folder and call it something you'll remember. Set the filetype to 'All Files' and give it a .jsx extention
Name your Script file and give it the correct extension If you go into the folder later and realize that your file ends in .jsx.txt - It's okay. Just edit it and take the .txt off. It won't work if .txt is on there so just be sure to remove it.
You're ready to record!
RECORD YOUR ACTION
Open up your Actions Panel. You can find it under Window > Actions or press Alt+F9
Press record and here we go!
Step 1: Save
This is important because we will be using the revert command to undo everything at the end and we don't want to accidentally revert to a phase where we lose work.
Step 2: Flatten Image
This makes the image easier for the computer to process during the action because the file size is smaller. This is located in the Layer dropdown at the bottom.
Step 3: Place Image, Press Enter to place.
This adds your watermark. I use 'Place Embeded' because it doesn't matter and we'll revert all our changes anyway. Navigate to your watermark file. If you made it nice and big, it should appear as large as it can fit on the canvas in the current orientation, right in the center.
Press enter to accept the mark's position. Do not move it or resize it yet.
Step 4: Rasterize Layer
Pretty self explanatory. Right click the watermark layer to open the menu and select Rasterize Layer. Now the mark has a new 100% size and we can resize it in proportion to the piece.
Step 5: Transform Layer
From the top menu, go to Edit > Free Transform or press Ctrl+T. DO NOT resize using the corners of the selection box. You'll want to use the percentages box up here so that the action can record it properly. I set mine to 70%. I want my mark to be big in order to compensate for my shortcomings, like my height.
Step 6: Select All
Get the dancing ants! You should still be on the watermarks layer. From the top menu, click Select > Select All or press Ctrl+A to select the entire canvas.
Step 7: Align the Layer
Layer > Align Layers to Selection > Your Choice - I want it on the bottom.
Lather, rinse, repeat to move it to on side. My marks usually go on the right.
Step 8: Layer > Align Layers to Selection > Your Choice
Boop.
Step 9: Nudge it
Using the arrow keys, put it in the exact spot you want it in. DO NOT CLICK AND DRAG. This will not record correctly. This command won't appear in the list until you move to the next step so don't worry when it doesn't show up immediately.
→→→→→→→↓↓↓↓↓↓↓↓↓↓
OPTIONAL: BE FANCY
If you like your mark as it is, then skip this part. I like to add an effect because I'm a tryhard.
OPTIONAL STEP: STOP RECORDING FIRST. Play with the layer effects to find one you like. When you make your choice, set the layer back to Normal before you click record again. I like Difference in this case because it applies my Black splash only when the background is light.
Step 10: Revert
This resets the canvas back to whence you came.
STOP RECORDING.
That's it! You now have an action that instantly saved a marked WIP for you! It's now saved in the same folder as your original PSD file and has the same name, with a number added after it.
If you're having trouble, go through these instructions again with a fine toothed comb. Actions can be VERY picky and one wrong click can botch the whole thing so I've tried my best to make this as simple as possible. Hope you were able to get it working!
Now all of your WIP's can be safely marked before you share them with minimal additional effort!
Enjoy! ~Your friendly neighborhood cat-bird, Z
3 notes
·
View notes
Photo
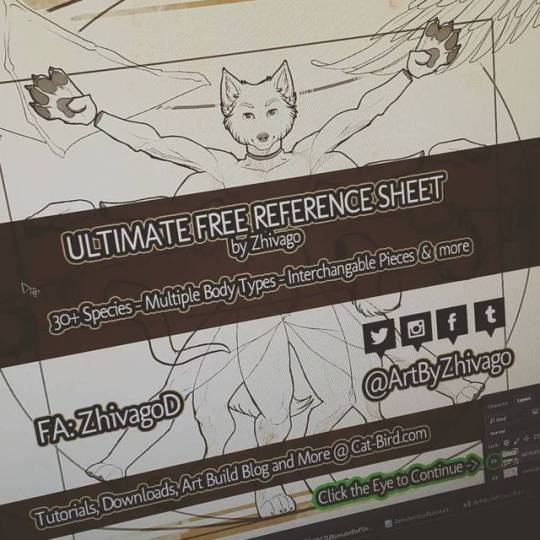
An update for the Ultimate Free Ref Sheet is now online - Download it at www.cat-bird.com #furry #furries #furryfandom #refsheet #referencesheet #furryartist #furrycostume #fursona #fursonaart #charactercreation #charactersheet #characterdesign #fursuitdesign #artbyzhivago #freelines #freeart #freeart4u
#artbyzhivago#refsheet#fursonaart#freeart4u#furryfandom#charactercreation#fursona#furrycostume#charactersheet#characterdesign#freeart#furry#freelines#furries#referencesheet#furryartist#fursuitdesign
1 note
·
View note
Photo

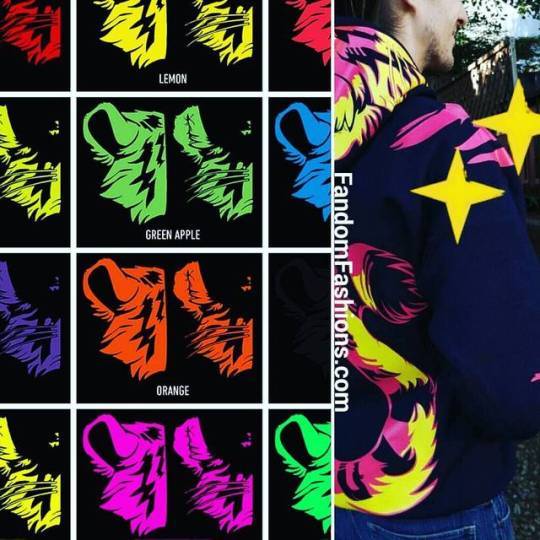
The Monster Tiger hoodies are now customizable!! Pick your colors at FandomFashions.com - http://fandom.fashion/2u1Z6GK #artbyzhivago #zhivago #fandomfashions #tigerhoodie #tigerjacket #tiger #gotigers #tigers #forsale #shop #shopping #hoodie #furry #furryfandom #furries #coolclothes #coolclothing #instastyle
#shop#forsale#zhivago#furry#tigerhoodie#coolclothing#shopping#instastyle#tigers#coolclothes#fandomfashions#furryfandom#furries#hoodie#artbyzhivago#gotigers#tiger#tigerjacket
3 notes
·
View notes
Photo
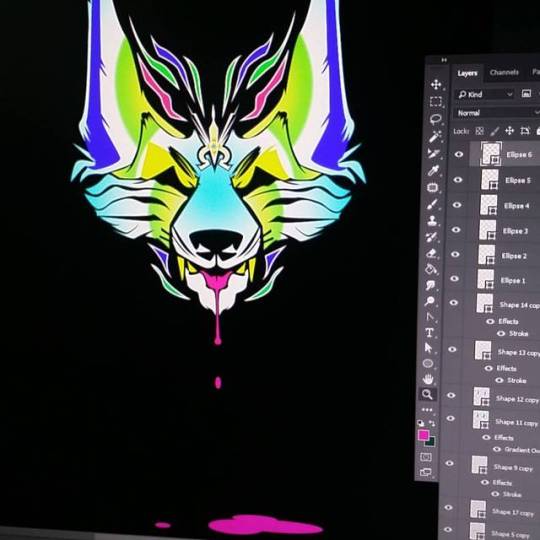
Doodley-doo... Random tank top design? Still playing with the colors. I honestly have no idea what kind of color scheme I'm going for right now. #furry #furryfandom #dog #canine #animalart #digitalart #digitalartist #vector #photoshop #drip #design #shirtdesign #artbyzhivago #fandomfashions #fandomfashionsdotcom #cirque #clown #circus #festive #colorful #wip #workinprogress
#artbyzhivago#dog#design#vector#canine#photoshop#furry#workinprogress#shirtdesign#fandomfashions#furryfandom#drip#animalart#wip#cirque#digitalart#fandomfashionsdotcom#digitalartist#clown#circus#festive#colorful
1 note
·
View note
Photo

Just finished up this sticker pack for Shizen! You can download these for Telegram over at www.cat-bird.com/stickers :3 #telegram #stickers #furry #furries #furryfandom #shizen #fursona #emotions #cute #cutefurries #artbyzhivago #zhivago
#furry#stickers#emotions#cutefurries#furries#zhivago#fursona#telegram#shizen#cute#furryfandom#artbyzhivago
4 notes
·
View notes
Photo
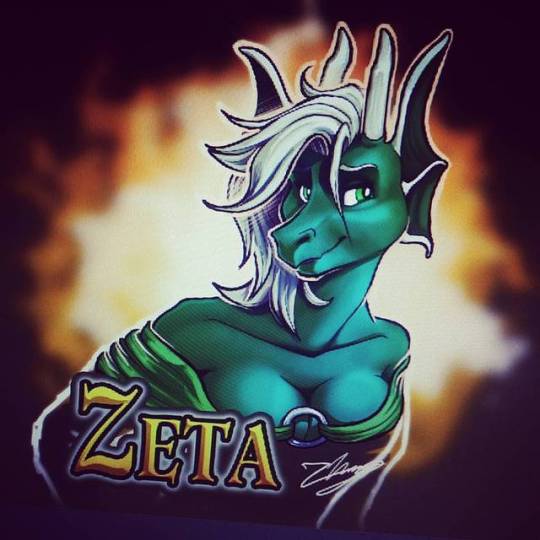
Just finished up this badge for Zeta! #furry #furries #furryart #furryartist #furrycommission #commission #artbyzhivago #zhivago #dragon #fursona #dragoness #badge #furrybadge #badgecommission #digitalart #photoshop #digitalartist #coolart #cool #
#artbyzhivago#cool#furry#furryartist#badge#badgecommission#commission#furries#zhivago#furrybadge#dragoness#digitalart#photoshop#fursona#digitalartist#furrycommission#coolart#furryart#dragon
1 note
·
View note
Photo

Getting this Kudu design ready to post over on @fandomfashionsdotcom - Keep an eye out! #kudu #fandomfashions #fandomfashionsdotcom #artbyzhivago #zhivago #furry #furries #furryart #furryartist #furryartists #furcon #BLFC #BLFC17 #furryshirt #furryclothes #furryfandom #furfan #lion #hunter #digitalart
#digitalart#furryart#zhivago#furryclothes#furries#furryfandom#furcon#lion#kudu#furfan#furry#furryartists#furryartist#furryshirt#fandomfashions#blfc17#fandomfashionsdotcom#artbyzhivago#hunter#blfc
1 note
·
View note
Photo

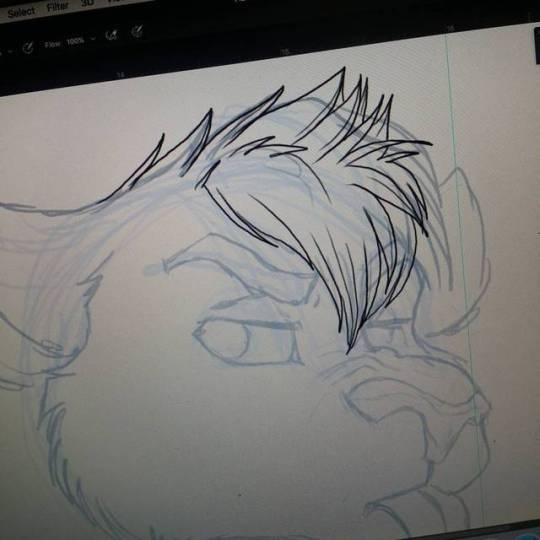
Here is a #WIP of another project! More spacecats! More!!! #workinprogress #furry #furryart #furryartist #furrycommission #commission #scifi #armor #digitalart #furryfandom #coolart #artbyzhivago #zhivago
#furry#artbyzhivago#wip#coolart#furryart#furryfandom#furrycommission#scifi#furryartist#armor#digitalart#zhivago#commission#workinprogress
2 notes
·
View notes
Photo

Making a crap-ton of #stickers for #FWA2017! SO MANY HNNNNGH. #fandomfashions #fandomfashionsdotcom #zhivago #artbyzhivago #decals #decalsticker #carsticker #furry #furries #furryfandom #furryfan #furryweekendatlanta #fwa #arf #bleat #meow
#furryfan#stickers#fandomfashionsdotcom#fwa#arf#furryweekendatlanta#carsticker#decalsticker#bleat#meow#artbyzhivago#furryfandom#zhivago#fandomfashions#fwa2017#furry#decals#furries
2 notes
·
View notes
Photo

Made a pet portrait of Myotis for @softglue for Christmas! I joined TikTok as @artbyzhivago if y'all wanna watch me trial by fire on videos there #cat #catsofinstagram #catart #catdrawing #blacksiamese #fancycat #catfancy #petportrait #petart #art #traditionalart #artistsoninstagram #artistsofinstagram #artistsofig #catartist #cutecatart #artinprogress #artwork #artoftheday #artworks #animalartist #animalsketch #animallovers #animalart #handmadegift #imadethis #imadeitmyself https://www.instagram.com/p/B6hTSkNp-bM/?igshid=1f5urlhi9fky7
#cat#catsofinstagram#catart#catdrawing#blacksiamese#fancycat#catfancy#petportrait#petart#art#traditionalart#artistsoninstagram#artistsofinstagram#artistsofig#catartist#cutecatart#artinprogress#artwork#artoftheday#artworks#animalartist#animalsketch#animallovers#animalart#handmadegift#imadethis#imadeitmyself
1 note
·
View note
Photo
You can now customize your tiger hoodie! Rep your colors! Http://fandom.fashion/2u1Z6GK #tiger #tigers #gotigers #team #hoodie #clothing #forsale #shop #shopping #artbyzhivago #fandomfashions #bigcatsofinstagram #instastyle #instagood #instafashion #stylish #raver #furry #furryfandom #furries #furryart #wearableart
#stylish#wearableart#furry#gotigers#fandomfashions#raver#shopping#instagood#forsale#hoodie#tiger#artbyzhivago#shop#clothing#instastyle#bigcatsofinstagram#furryart#instafashion#team#tigers#furries#furryfandom
0 notes
Photo

Wanted to draw but decided to do some studying instead :3 #drawing #artist #studying #study #artprogress #learn #learning #furryartist #art #artbyzhivago #comicdevelopment #research #practicepracticepractice #practice
#studying#learning#research#artprogress#art#practicepracticepractice#artbyzhivago#furryartist#comicdevelopment#practice#learn#drawing#artist#study
0 notes
Photo
Hey im grump #wip #furry #furryart #furrycommission #commission #refsheet #workinprogress #artbyzhivago #zhivago #grumpycat #furryartist #tigrett #expression #grump #furryfandom
#grumpycat#furryart#zhivago#tigrett#artbyzhivago#wip#furry#expression#furryfandom#refsheet#furrycommission#workinprogress#commission#furryartist#grump
0 notes
Last Seen Blogs

rozkoszn-a
Gifs | Erotica | Masks
bxkut0
read one punch man for good health

nrmlc
NRMLC
crazedcartoonaddict
Your Friendly Neighborhood Hot Mess™
sapphirestarlove
Suga Free