#azone body
Video

flickr
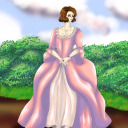
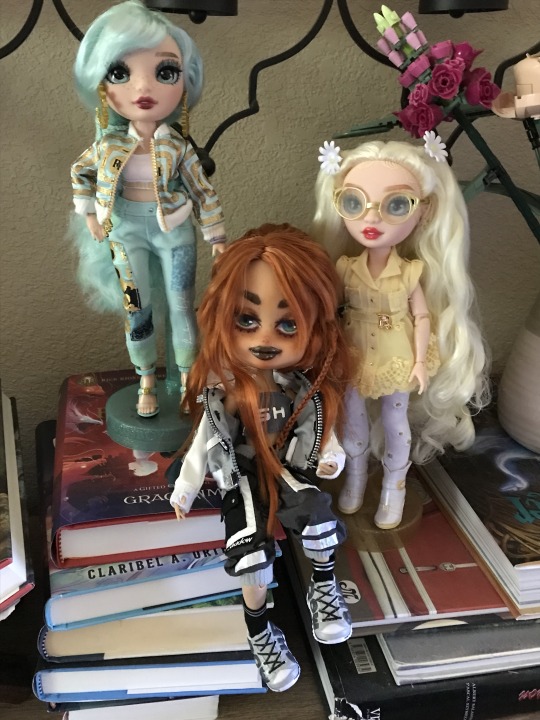
Sailor Moon Picco Neemos! by Dollish Gambino
Via Flickr:
I’ve been slowly collecting casual clothes for these girls and I’m so excited that they all have full outfits now! I need to do a school uniform shoot (and buy more TINY socks). I also picked up a few more bodies and I’m slowly converting everyone to Azone bodies. I wanna grab some of the shorter ones for Chibusa and Saturn.
#Picco Neemo M body#Azone#Picco Neemo#custom sailor moon doll#sailor moon dream pocket#sailor moon mini collection#flickr
3 notes
·
View notes
Text
okay i get that some bjd people are pretentious and overly gatekeepy about what counts as a bjd, but there really are a lot of people going around calling things bjds when they are so blatantly not and it's a little frustrating to see LOL. people will just see any japanese doll with a high price tag and call it a bjd. i see it with blythe a lot
#and also what's weird is people make those blythe/azone hybrids so often that#a lot of people legit don't seem to know that the actualy blythe body is totally different from that#and you'll get people calling the azone bodies 'blythe bodies' it's weird#vivi.txt
2 notes
·
View notes
Text
I got...
a smol friend coming in the mail soon. It was something I had been wanting for a long while and found at an extremely incredible price that I’m still wondering if the seller didn’t simply leave off a 0 in it. Either way, smol doll incoming to make my person out of. Because I like smol things and large dolls (anything bigger than say a msd) is a no go for me and even msd’s are just kinda not my wheel house or want ever really.
Also I’m very tired today, long day with doc visit and lots of blood work. @3@
#skudd rambles#nendoroid doll#i am excite#but also worry#because swapable faceplates are pricey#also pretty sure its not a full nedoroid doll#but like a ymc body and nendo head#which is fine honestly#i like mixing and matching#dream doll is honestly a lil'fairy from azone#but alas the one i want i can not find#le sobs
1 note
·
View note
Text
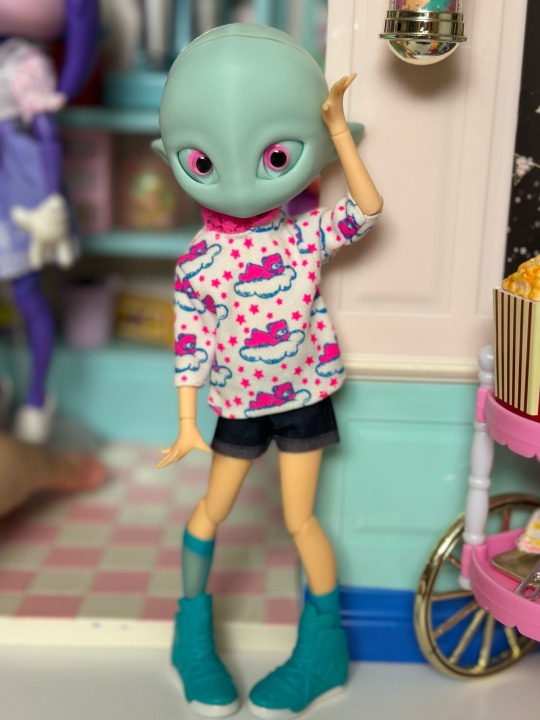
Got the Novi Stars type head from Cosmo @cosmomoore !! It's adorable!
The head hole is made to go on a RH body but with the included elastic band I was able to bulk up this Azone I had on hand just for fun.
As I was toying around with options, T came and earnestly entreated me to use two googly eyes he picked from his craft supplies. So I did. 😆
What are you all looking at over there?
96 notes
·
View notes
Text

Switched her to a sixth scale ufdoll body and I love it so much better! Even though ufdoll sucks bc they stain if you look at it the wrong way but the posing and overall look is so much better. She used to have an azone emotion body.
12 notes
·
View notes
Text
Ha már "Magyar Péter a Lisan al-Gaib",
akkor folytatva a sci-fis hasonlatokat, nekem meg kicsit az Öszvér ugrott be az Asimov Alapítványából róla. Nyilván figyelembe véve azt nem elhanyagolható különbséget, hogy a "slim fit" jelző az Öszvérre biztosan nem volt alkalmazható és a body shaming területén még Menczer Tamás is számtalan jobb támadási felületet talált volna egy uniszex napszemüvegnél azon a mutánson.
10 notes
·
View notes
Note
(As an ask for the mod, what doll line inspires you most when writing/designing galaco?
Oh! Mod question!
I’m inspired by a couple different dolls, actually.
The one that inspired me around the time I started my big stylistic change in my art was the Pinky Street series.
Their proportions and infinite clothes options make me super super happy, and I just love how they’re shaped.


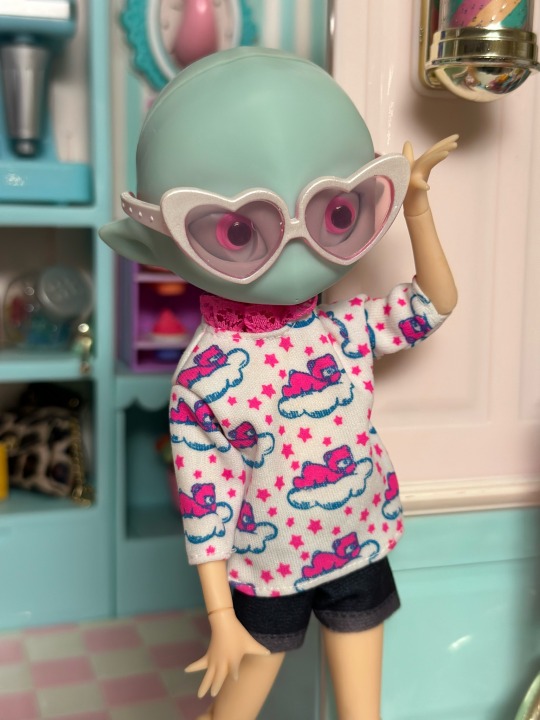
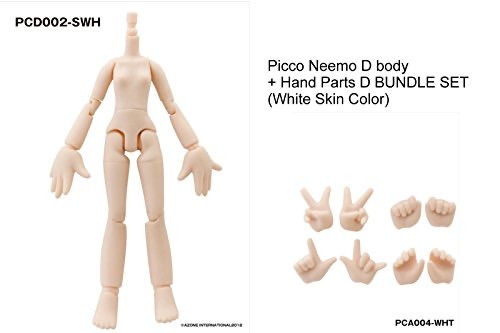
The other dolls I take inspiration from are the Azone Picco Neemo D series. Their huge hands and thicker legs just feel so expressive to me.

The last one that brings me a lot of inspo for shape design is the Piccodo Cute Body 10. Just look at those shapes! They’re full of joy!!

I also take inspirations from Licca-chan and Barbie in that they’re fashion dolls with infinite wardrobes, hairstyles, and possibilities!!
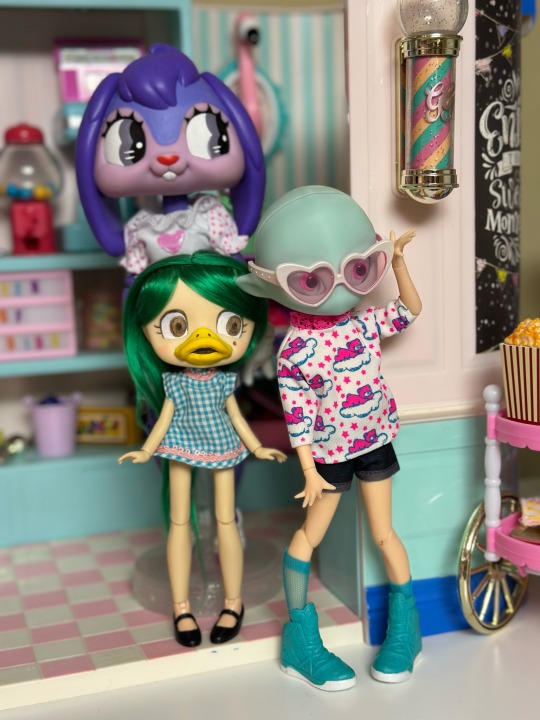
Bonus image: mini mod and galaco chilling in Licca-chan clothes in their dollhouse

Thank you so much for this ask, though! It was super fun!!!
#Mod question!#galaco#I love dolls so much#There are a few more galaco dolls around who do not fit the parameters of this question but I don’t wanna bombard with images#Two handmade cloth girls…a few more pinky street customs#and an obitsu 11#If I’m not forgetting any…..??
12 notes
·
View notes
Text

"What do you want? Why are you in my room?!" >__>
Figma Shiroko Sunaookami head on Azone PiccoNeemo body
#figma#figma figure#sunaookami shiroko#azone#azone international#picco neemo#doll#doll collector#doll photography#anime doll#kawaii#kawaii doll#kemonomimi#miniatures#1/12 scale#dollhouse
37 notes
·
View notes
Text
y'all's fake custom aliexpress blythes with fake azone pureneemo bodies are ugly btw
4 notes
·
View notes
Text
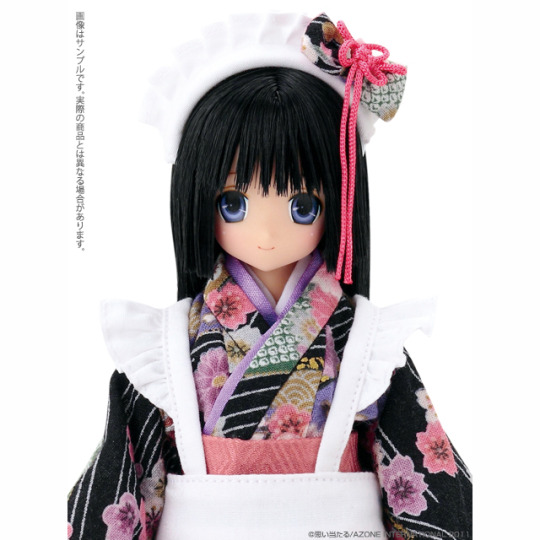
A(nother) Feudal Fairy Tale: Behind the Scenes
Welcome to the behind the scenes footage of creating my Azone Pure Neemo Character Kagome Higurashi! To see the photo gallery, click here!

Step one: Make sure the outfit can be made. Because this will all be in vain if that can’t be done. Once again, I consulted my dear friend Elenpriv and asked if she could make a second Kagome uniform (she’d made the one for the Barbie body) for a Blythe body (Azone Pure Neemo doll bodies are identical to Blythe, or at least very close). She said yes! WOO!
Side note: Azone has made several outfits for their dolls, including a lot of sailor style school uniforms. They’re perfect - but none of them are green! There is a dark blue/navy one, a black one, I think a red one... all kinds of options, but not a green one. Dang it! LOL
Anyway, next up was finding the perfect doll candidate. I didn’t want to use one of the actual character dolls because, well, they’re already a character from another series lol. So my first step was looking at all the 1/6 scale dolls with black hair. Creating a doll without a reroot was ideal.
There were several options to choose from, but even though they had black hair, there were some other issues.
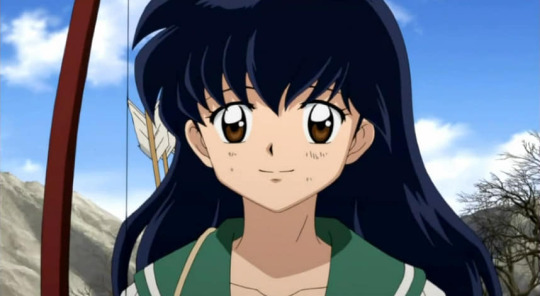
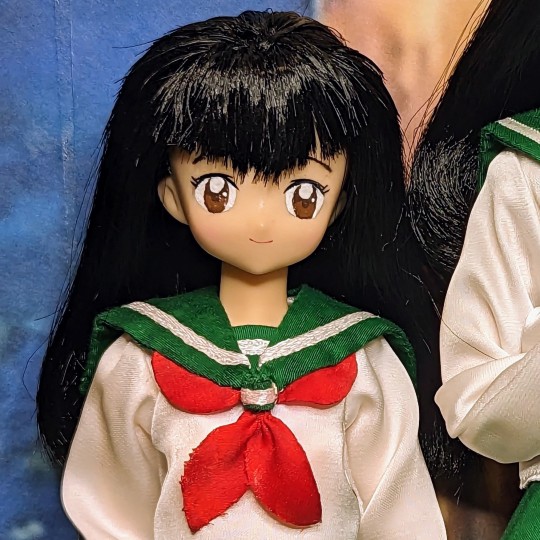
For one, Kagome’s face is more “pointed” than round. I felt this particular face/head shape was too round.
I did start with her, but the slightly smaller mouth just didn’t say Kagome to me lol, especially when I kept looking at these pictures for reference:

So on to the next candidate! This one is nice, she has a nice face shape and a wider mouth:

I like her, but... her eyes don’t go quite high enough, I don’t think. And I need a template, since I can’t draw to save my life, so I wasn’t going to remove the eyes and start from scratch. She also has a side part, and try as I might, I couldn’t get the bangs to shape properly to hide it. I kept her on the back burner just in case, though. I looked into a couple of other ones like these two:
But they both have dark brown hair, not black. And the second one has too round of a face as well.
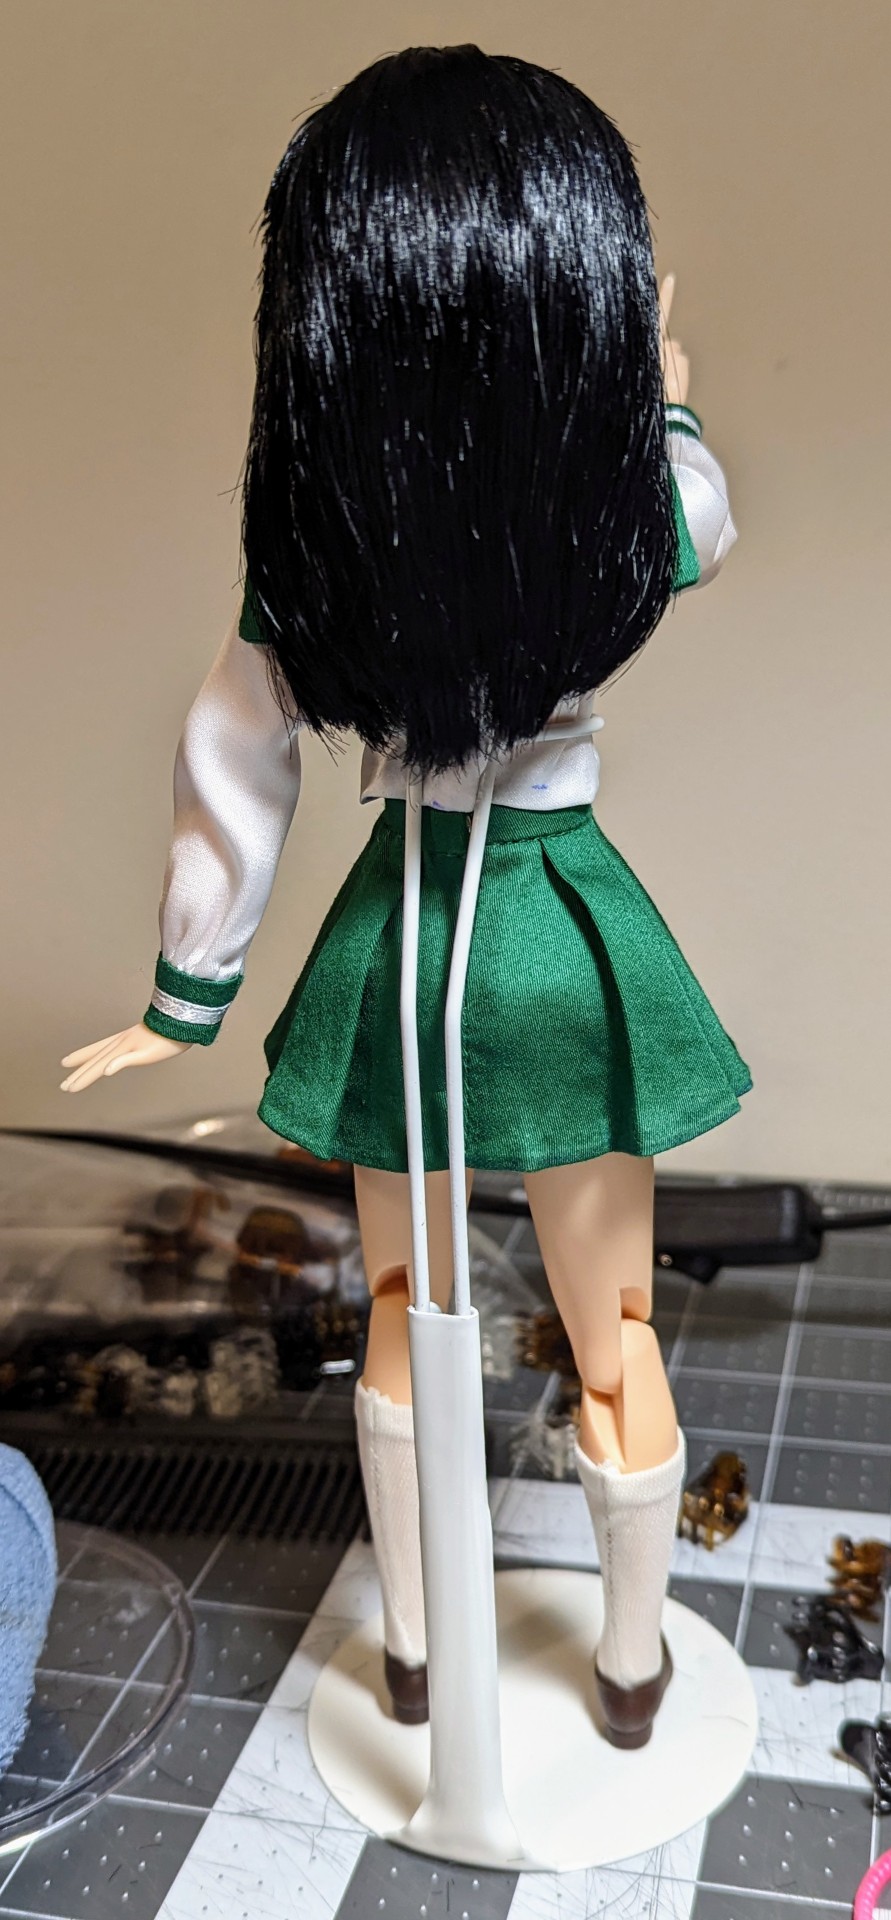
I went back to my original choice and attempted to style the hair. Well, one thing about Azone dolls - their hair is saran. That means it doesn’t work with heat very well, and it’s hard to style (or dye, apparently). At least, that’s been my experience. Nylon hair works much better, and is much more heat-resistant.
So at this point, I figured I’d have no choice but to do a reroot. Luckily for me, I’d already done a complete reroot with Olivier Mira Armstrong. So this would be my second one!
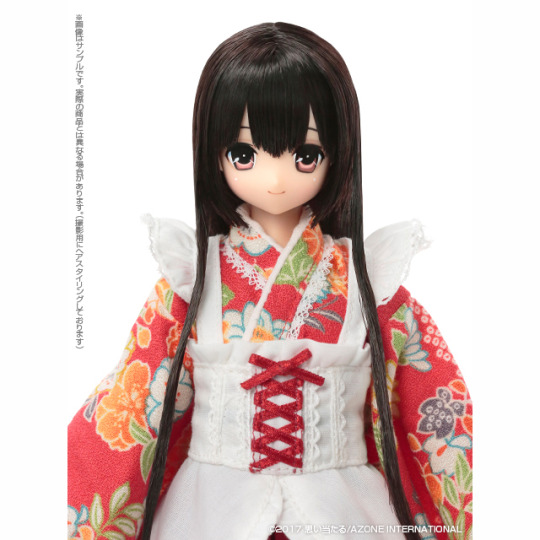
But I still needed a doll. As I looked at option number 3 more, I absolutely loved her face. The shape was right, and she had the wider smile. All of these dolls would have the same issue of needing their eyes repainted due to how their irises are compared to Kagome, so I wasn’t even looking at that.
Well, I didn’t want to buy one of these dolls (they’re designed for collectors, so they’re not just cheap play line ones you can get off a shelf - plus they’re all from Japan, which raises the price tag) just to “tear up.” So I looked in my stash and discovered I had two of one doll, and it happened to be the one with that face! So here’s the winner:
Her hair is actually the same color as mine in real life lol. That’s super hard to find... but not with Azone! They’ve designed several with that hair color, to which I say hallelujah. I’ve seen maybe two Barbies with that hair color. Come on, Mattel, get with it!
Anyway, the first step was to make sure I could pull off the reroot. I’d repainted Kagome’s face before (plus Sango’s, which is pretty much the same except for pink eyeshadow as well), so you’d think I’d be an expert at that. (More on that later).
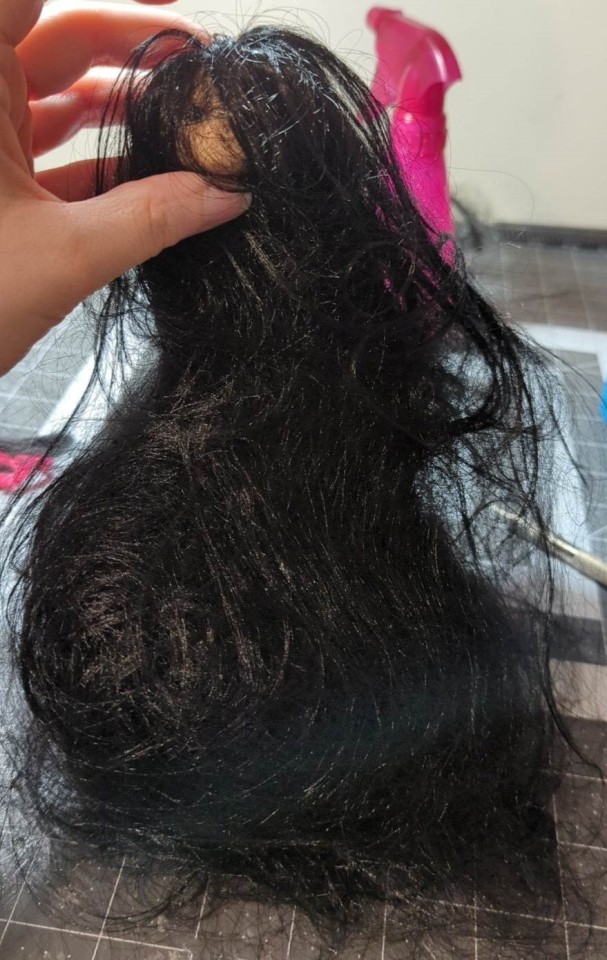
I cut the hair off and then used small needle nose pliers to pull out the rest. Azone doll heads, it seems, don’t have glue on the inside - the hairs were all kind of weaved together inside the head. And there was one large piece where the part was that kind of held it all together, so I was left with a larger hole than I liked when I got all the hair out. But I did use some Loc-Tite to close it, just to be safe, and it seemed to be okay.

Next I painted the scalp black to match the hair she’d be getting. Of course, I forgot to use acetone to remove the original paint, and then I forgot to seal the black paint. So during the reroot process, it kept chipping away. Oops. I’m still new at this lol. Fortunately, you can’t see any of that with the final product.
So, during this rerooting process, I kept reminding myself of how I had to go back and add more hair to Olivier a few times because I’d made it too thin. So this time I went all out, even though most rerooters say you don’t have to plug every single hole (even though the factory did)... there’s a head in here somewhere LOL.
Once I was finished with all that hair, it was time for the boil wash. It never fails - whenever I do this, loose hairs that didn’t get plugged always come out. I need to figure out a method to prevent that, as well as prevent the hair from becoming a big stringy mess during the reroot process.
Of course, I probably should have taken a batch of hair and cut it so it didn’t wind up this long because I knew I’d have to cut it anyway:

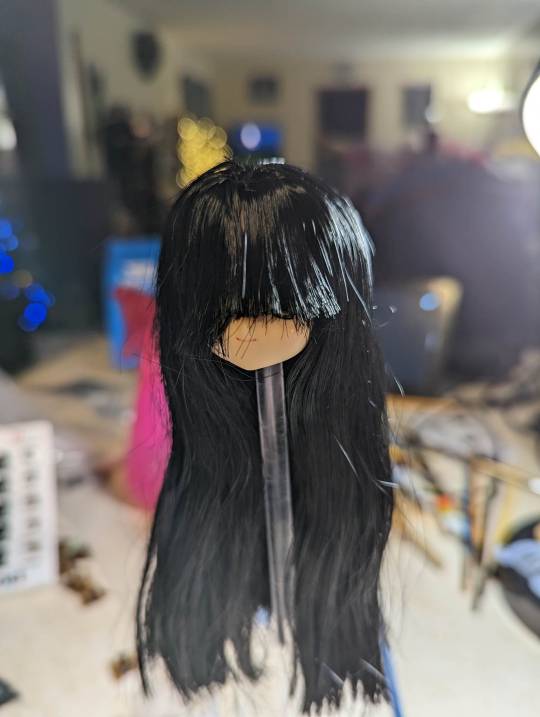
Anyway, once the boil wash was done, it was time to do the bangs. Bangs have always been tricky for me. I don’t know how I managed to give my Anastasia Steele bangs without much of an issue... but perhaps it was because I used the method in this video, which I repeated for Kagome. I got them cut into shape (and again, they have such an odd shape compared to other characters - they’re almost triangular whereas all the other girls have straight bangs), then used the method in the video to get them to lay flat. When the face was done, I used some of my Volks doll hair spray to help the bangs stay in place.
Speaking of the face, that came next (I cut the hair first to make it easier to work with, with the intention of styling it later). Another difference between Azone dolls and other dolls I’ve worked with (particularly Barbie and Disney Store) - their eyes are stickers. Maybe other dolls are too now, but these particular stickers come off very easily if you rub them with a toothpick. Which I tend to do quite often when painting doll faces/eyes because inevitably some paint will stray from the brush and go where I don’t want it.
But I did use this to my advantage because the doll I chose had eyes with lashes that were pointing outward a little too far to match Kagome’s shape. So I used my toothpick to remove them, giving the eyes a more rounded appearance.
My original goal was to just draw over the eyes already in place, essentially changing the color from light brown/gold to dark brown. Well, Azone doll eyes have large pupils and smaller irises, and the white parts are smaller yet. The Inuyasha art style is different, with a large white part going from the top to the center of the eye, surrounded by a little bit of black and an almost horseshoe shape made up of two different shades of the iris color. Yeah, I studied that a lot. :D Plus, in many instances, Kagome’s eyes don’t look perfectly round, but more oval/oblong. But I did have to work with the shape of the sculpt/eye socket of the doll, so I tried to give her the appearance of having the “taller” eyes with the shape of the iris. And then there was the fun issue of getting those eyes even and the same size! I literally painted over the entire original eye with white paint, then went back in with the blacks and browns. I did discover that watercolor pencils will color on acrylic paint, so that helped me sketch out the design and go over it with paint again. It took some time, but finally, the face was ready! Mod Podge sealer applied!


The next step was styling the hair. You’d think I’d have it down by now, but noooo. Kagome has the most complicated hair of all the Inuyasha girls, I think. Sango and Kikyo have simple hairstyles and straight bangs. Kagome has triangular shaped hair all the way around. It ends at a point in the back, as do the bangs. Sigh.
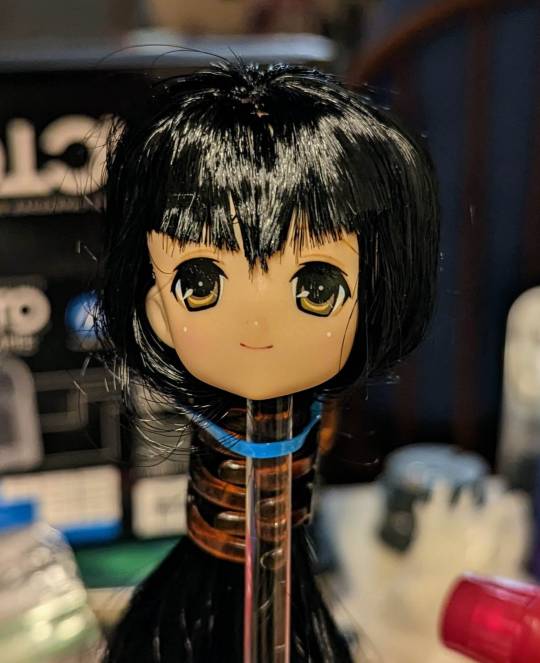
So I got the hair trimmed into the proper shape using a layering method, which made her look like she stuck her finger in a light socket in the process. :D Once I was satisfied with the shape/length, I attached the head back onto the body, which already had the uniform on. Success!
Except...
The hair looked too thick, and a few people confirmed this when I showed it to them. Yeah, I was so worried about not having to add more hair later that I actually added too much.


It was also too long at this point as well. So then I was frantically trying to figure out how to salvage the situation without completely starting over. Some people suggested using a razor to thin it out. Yeah, I think they meant a straight razor like a barber uses, because my Dollar Shave Club razor didn’t work very well...

Then someone suggested shearing scissors. I’d previously purchased a hair styling set with two types of scissors (one of which was shearing) and combs. I’d never used those scissors before, because I didn’t know how the heck they worked. So I dug them out and used a practice doll to see what they did. And they did what I needed them to! Instead of cutting the length of the hair, it just cuts pieces to thin it out.
So I took these shearing scissors to the hair and made it a lot less bulky. Then I used my curling iron (and a spray bottle to get the hair completely soaked to be safe) to help shape the hair in the back. Of course, that’s easier said than done... there’s that pointy shape at the end, but the primary view will be from the front, so I had to be wary of that as well. And I didn’t want to cut too much, either. Kagome’s hair is most often seen above the waist, about mid-back under her green collar. It’s definitely shorter than Inuyasha’s. I was afraid I’d cut it too short when I applied the curling iron, but I took some of the curl out a bit and it seems to be okay now. Whew! I really didn’t want to have to redo all that... why didn’t I just send the head off to be rerooted professionally? Because I hate the post office and don’t trust them not to lose the head, and these dolls are, again, meant for adult collectors, so they’re not cheap. No way was I risking losing it. Plus, I wanted more practice anyway, and it did save me money. A professional reroot is worth it, but for this doll, I wanted to do it all by myself (except the uniform because no way can I do that lol).

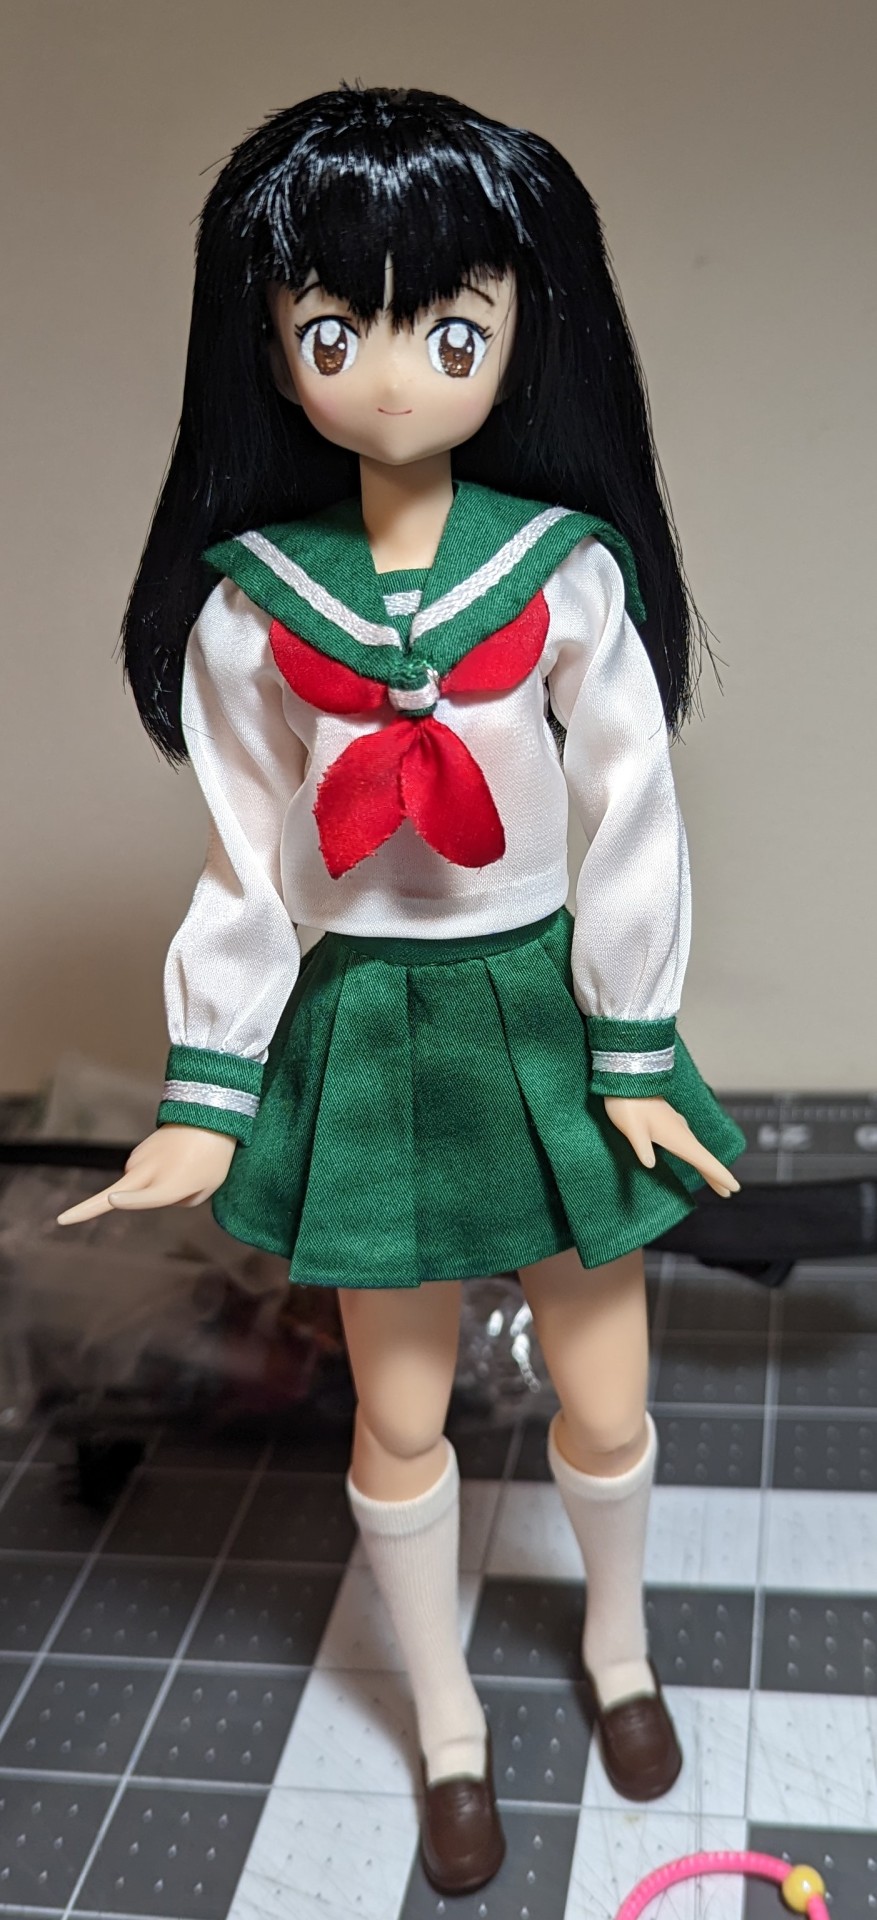
So, finally, after playing with the hair a bit, I added some of the Volks spray and mousse (used to prevent flyaway strands), and she was ready! Woo!!!

But she wasn’t done yet! She still needs her accessories. :D She’ll be sharing her backpack and bike with my Barbie size Kagome, but I wanted to give her a bow for sure and maybe even some better arrows. Well, what luck - hubby got me a 3D printer for Christmas! And I managed to find a 3D print file for Kagome’s bow, arrows, and quiver on Etsy! These were cosplay size, but the seller was able to size them down for 1/6 scale for me. (The seller has since closed her shop, so I can’t post the link here, unfortunately.) Those little arrows were super delicate, but they look better than my first batch! Well, the arrow heads do, anyway. My first batch was the perfect size all the way except the arrowheads, which I attempted to replicate out of Crayola Model Magic. And it didn’t look good lol. So now I’ll probably try to print some more heads and glue them to the Barbie ones so they look better.
But first, let’s get the Azone one done, shall we? Because these were all 3D printed, they were one solid color and needed to be painted. Well, that was easy. I’d kept notes of all the colors and color combinations I’d used for my other dolls, so I just dug those out again and got to work. I glued some thin twine around the quiver like before, as well as a strap to go over Kagome’s shoulder. The bow string is made of black thread.

(Notice how she has her finger pointing to guard her aim! See - interchangeable hands!!!)
I painted one arrow head to look like a sacred arrow. :D We attempted to print probably six or eight arrows, but some of them fell apart because they’re just so fragile. The heads survived, though, so they’ll be good experiments for the Barbie arrows lol.
So, remember how I said Azone dolls are meant to have their hands changed? Yeah, that made for some awesome posing. Kagome can actually properly hold her bow and arrows now! (Okay, the Barbie can too, but removing those hands requires heat and more muscle since they’re not designed to be removed like that.)
I’d originally planned to give Kagome a 26cm Obitsu body. The Inuyasha doll is about 30cm, so 26cm would be about right for Kagome if we’re going in terms of actual height. The Barbie is technically a bit tall, but I’m still satisfied with her. Plus she has the proper skin tone to match the Inuyasha doll. The Azone dolls have two skin tones - flesh and white. Both are much more pale than the Inuyasha doll, so she’d wind up looking more like Kikyo in the long run. Same with Obitsu bodies.
Anyway, why didn’t I go with the Obitsu body? Well, all would have been fine if the shoes had fit. :D Obitsu feet are wider/larger than Azone, despite the bodies being almost identical in height. So with her socks on, the shoes would not go on the Obitsu feet. So back to the original Azone body! But hey, she’s a “true” Azone Pure Neemo Character Series doll now - all the character dolls have either Pure Neemo Flection (this one) or Emotion (more articulation but significantly smaller/thinner) bodies, so this makes her accurate to the series. And she’s not really meant to go with the Inuyasha doll, honestly; she’s my interpretation of another doll line that I love. And many of those dolls only have character made from the series, not all of them. There are a few exceptions like K-ON! and Love! Live! Sunshine! But mostly, it’s just one character like Nezuko and Asuna.
Size comparison to the 12″ collector doll and the Barbie size Kagome I made to go with him:
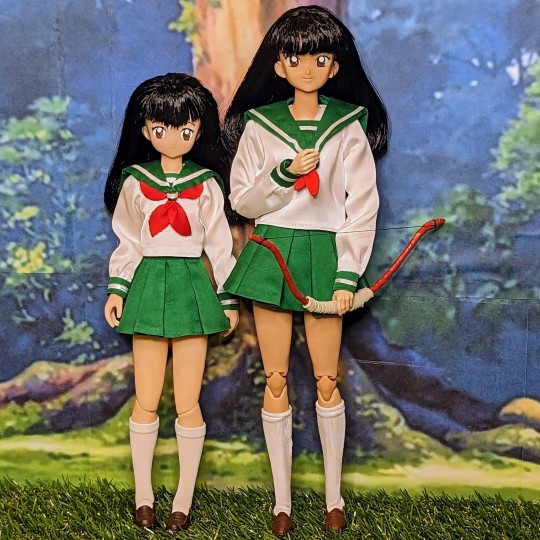

So for that reason as well, I am not going to make more Azone dolls lol. Or at least, I don’t plan to... we know how that goes LOL. But for right now, I’m content with my Azone Kagome! She may not be perfect, but I’m proud of myself for doing everything completely on my own (except the uniform). It makes her even more special!
#My Plastic Life#doll photography#Azone International#Azone#azonejp#Azone Pure Neemo#Azone Pure Neemo Character#custom doll#OOAK doll#custom anime doll#OOAK anime doll#anime doll#Inuyasha#Kagome#Kagome Higurashi#one sixth scale#myfroggystufffanpics#TenderWolf#anime#manga
21 notes
·
View notes
Text
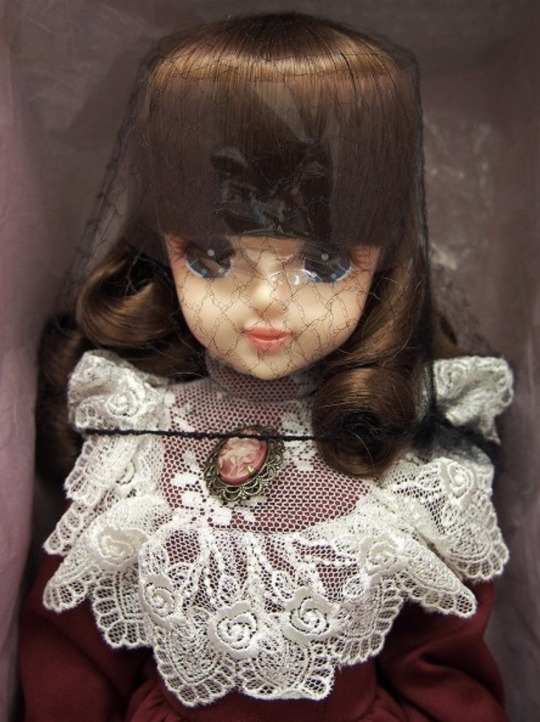
Sweet Memorial Jenny EX (2007)
Just doing a quick info dump here for now lol

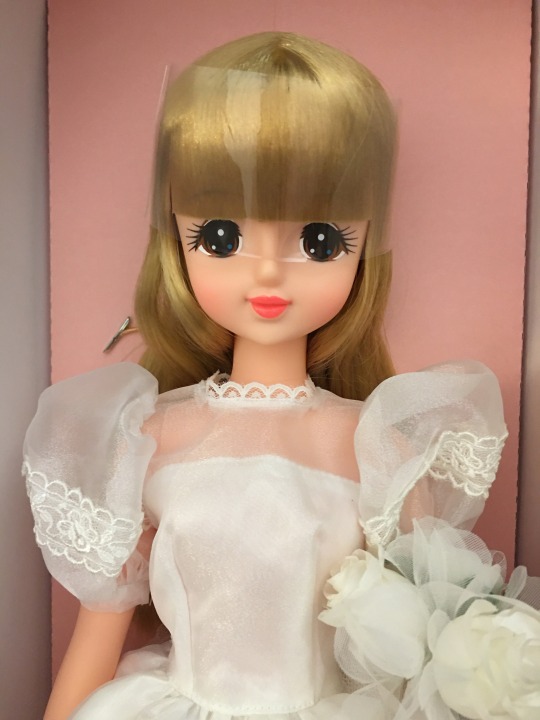
This is the 52cm Sweet Memorial Wedding Jenny (EX ver) made by Star Inc. in collaboration with Takara Tomy in 2007 for Jenny’s anniversary, as part of the Sweet Memorial collection that was designed to resemble the original Jenny/Takara Barbie dolls; the other three dolls in this collection are 1/6 scale.
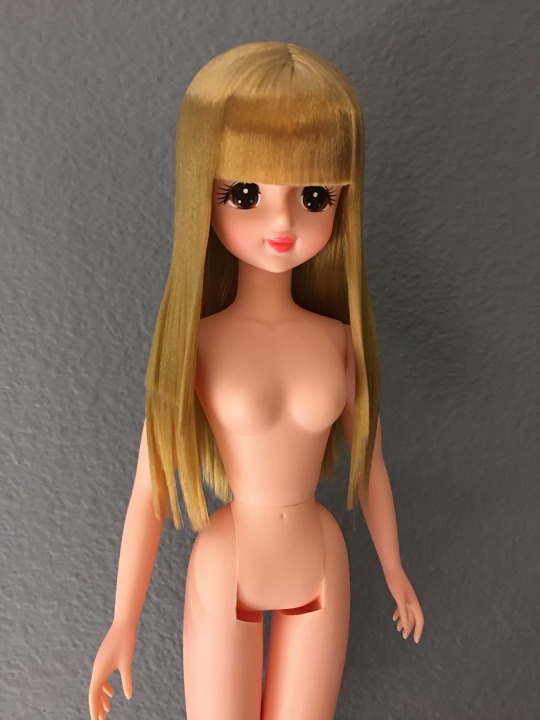
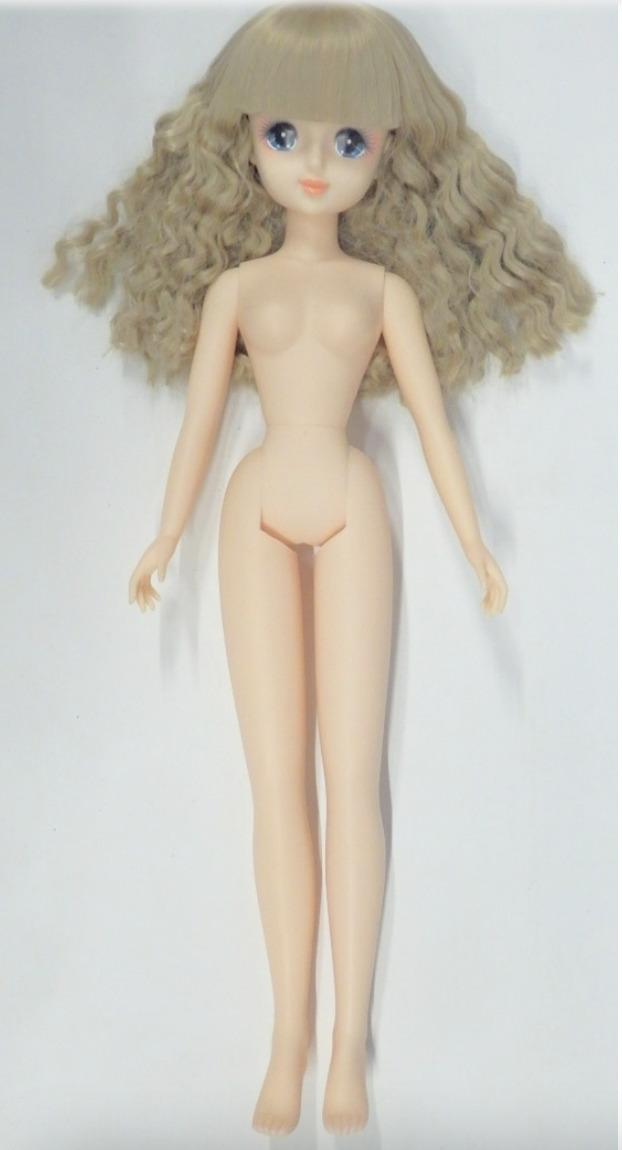
Her body is a slightly upgraded, enlarged replica of the regular 1/6 Jenny body with less articulation (no wiring in her arms or legs) made entirely with vinyl:
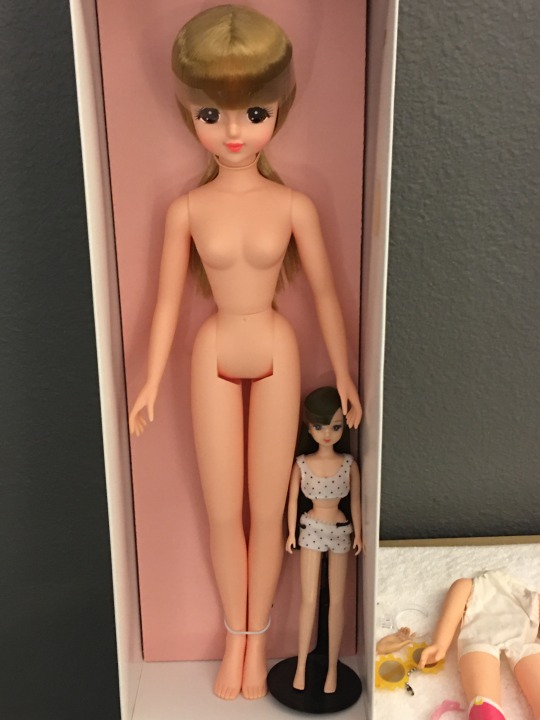
(Licca for size comparison)
She mostly-fits 1/4 shoes, not 100% sure about what clothing fits but I’m guessing select 1/3 clothes fit, some loose 1/4 pieces, Azone 50cm clothing is probably the best bet. I have a feeling Lorifina and similar-size doll clothes should fit, but I haven’t tried yet!
Eventually I’d like to do a comparison with my other big fashion dolls from Japan, but she doesn’t have a stand atm so we’ll just have to settle for this right now lol
She’s also not the only big Jenny doll, much to my surprise, and is in fact the very last big Jenny ever made!
Prior to SM Jenny’s release in 2007, in 2002, Takara collaborated with Star Inc to release 52cm dolls for the Jenny Excelina line- these dolls have the same sculpt and body as Sweet Memorial EX, but much more elaborate outfits with detailed undergarments, stands, and a scaled up version of the Excelina Jenny screening and a paler skintone:
(photos nabbed from Mandarake and old YJA listings for reference purposes)

The Star Excelina Jenny line was also a lot more expensive than Sweet Memorial! While SM would have been around 400 USD at the time of her release, the Star Excelina line retailed for more than double.
95 notes
·
View notes
Note
Could you pretty please post your list of dolls who have a blythe body size/can share clothes with blythe ?
Sure!
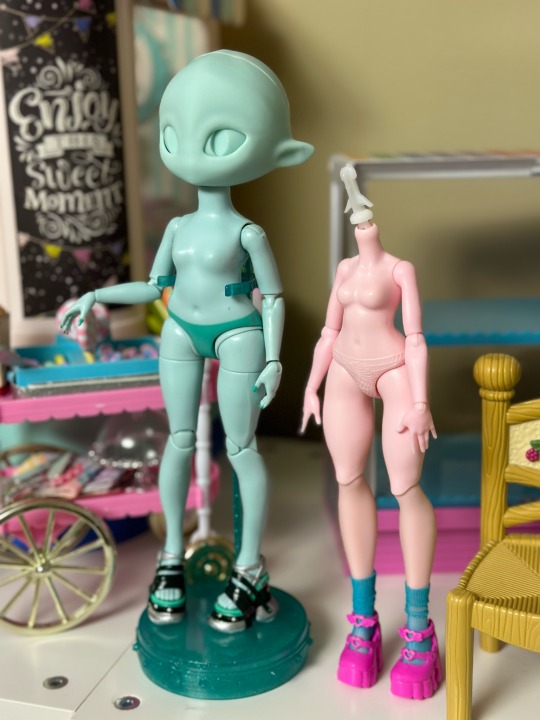
I'll start with dolls in this picture, since it shows how they compare to Blythe
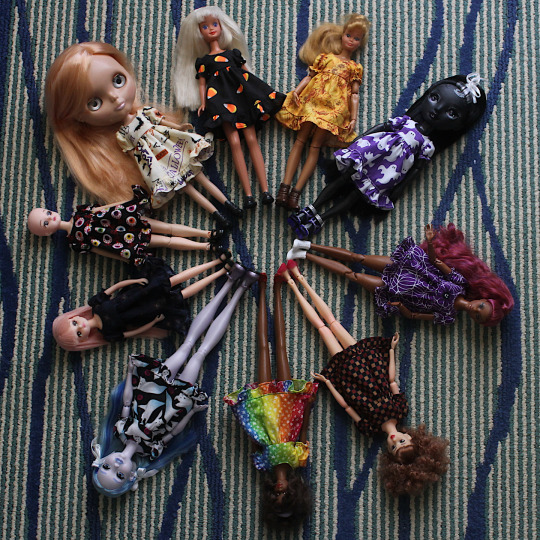
Starting with the shorter doll on the lower left (pink hair) and moving clockwise as height increases (more or less):
G4 (modern) Licca
Azone Pure Neemo S
Blythe
1987 Skipper
Creatable World
Rainbow High/Shadow High
Made To Move Barbie Petite
Momoko
Reproduction Francie
DC Super Hero Girls (first version)
I can also think of Pullip as having a similar size body, and some Obitsu bodies whose numbers I can't remember
I know there are more--here's hoping other people can add to the list!
16 notes
·
View notes
Text
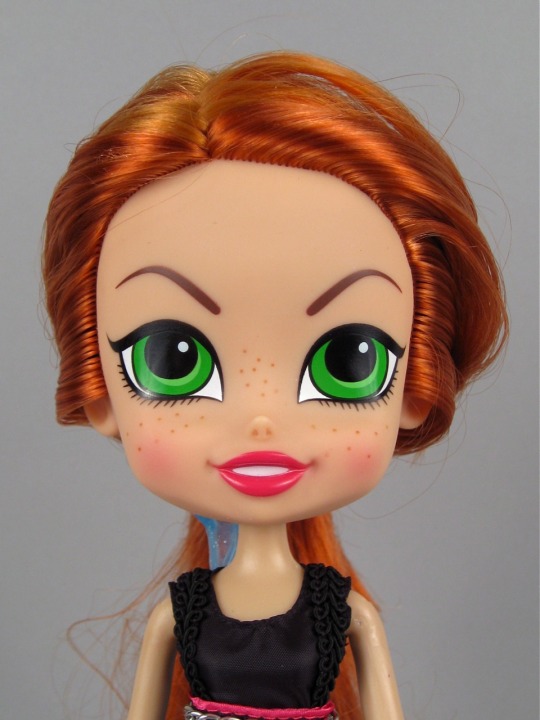
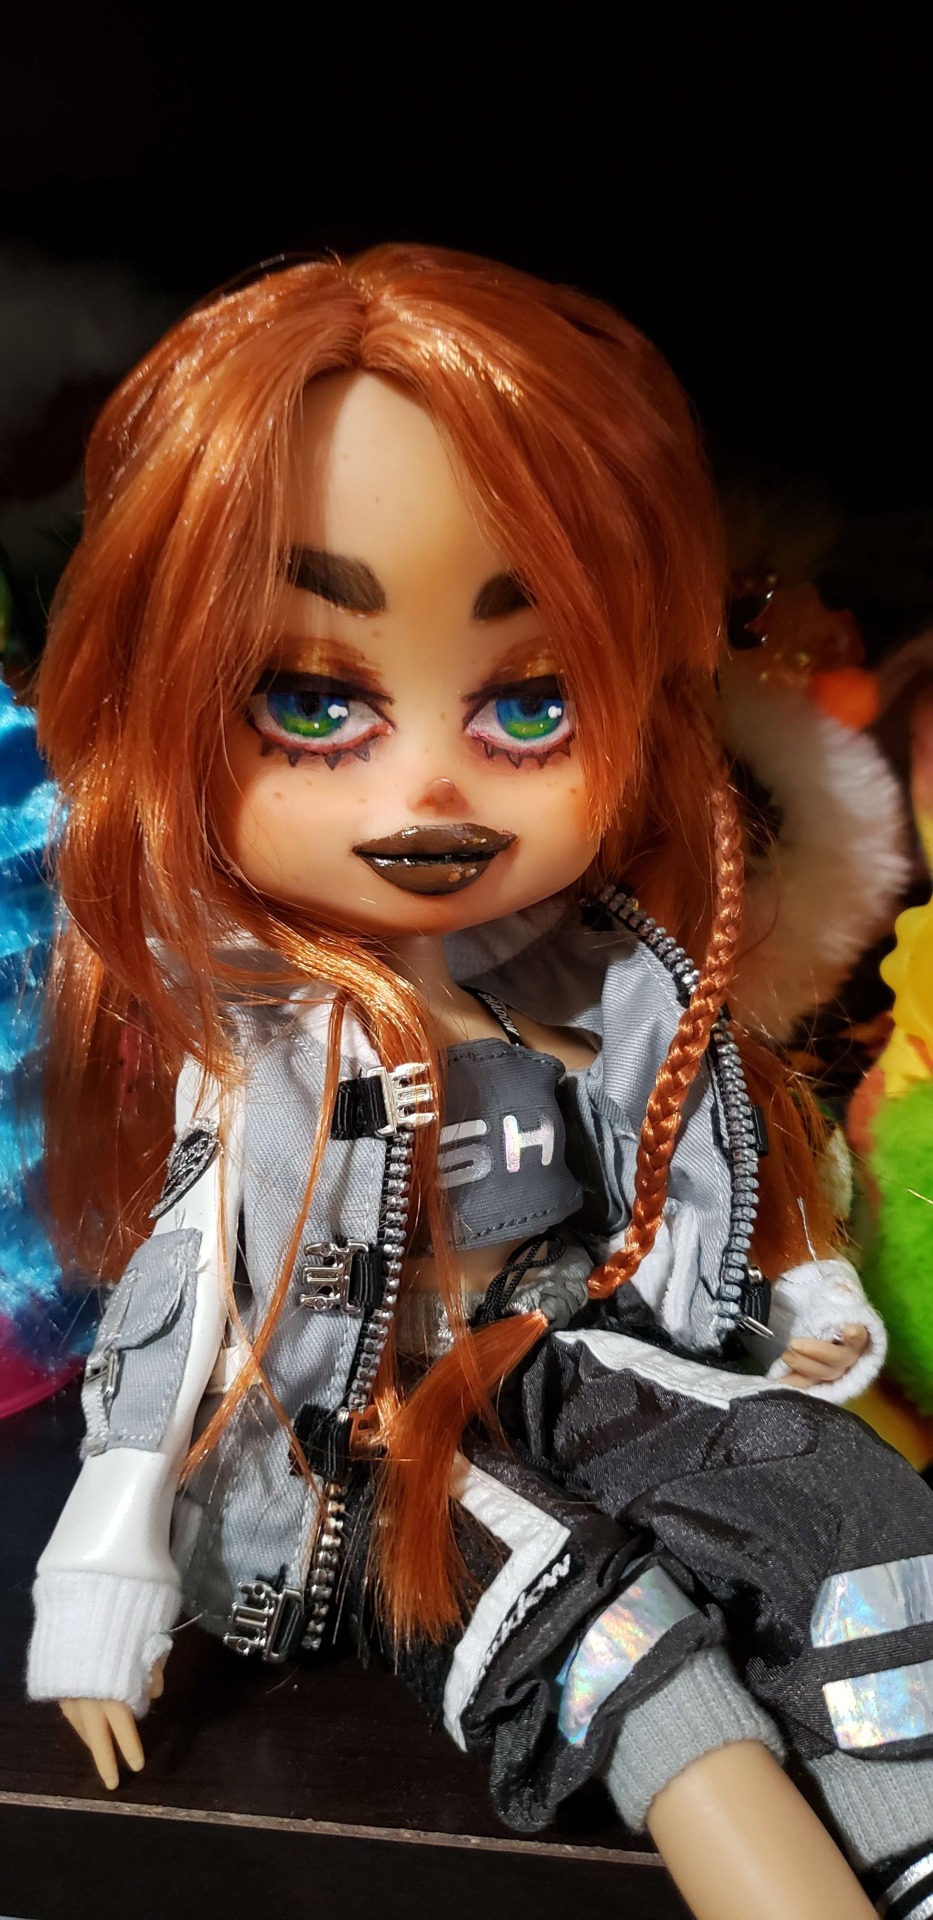
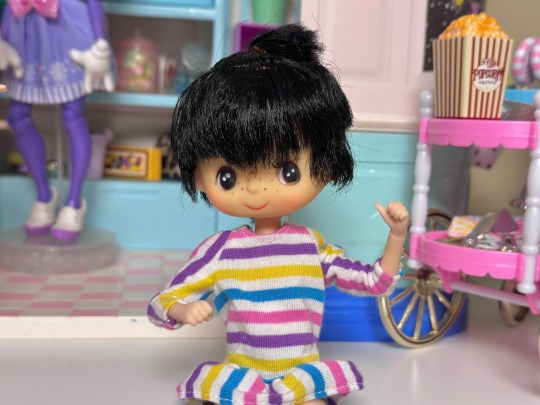
So I've had this Pop Star Lark 2012 doll sitting in my "eventually will customize maybe probably" box. Her body was broken (I got her from a savers) around uhhh 5+ years ago and just could never get over how gigantic her head was. Well fast forward to February of this year (2023) and I'm cleaning out my stock and see this doll head just sitting there still with factory paint and the like. I've had an azone tan body I got off ebay a year or so ago sitting around and was like...oh okay fine, lets see what I can do.
Well this is what happened. Firstly, I made her bigger ears because they just didn't look proportional to her head, are they now? No, probably not but I like them better. 2nd was fixing her mouth, don't really like the open smile look on the doll so more apoxy and a side smirk was created. She's currently just in some shadow high clothes as I sit here debating what sort of outfit to make for her. I dont' have a name idea for her either, and I've restyled her hair because when I got her she was clearly a child's doll and there was marker/ hair cut at those fun stick up angles and uneven everywhere.
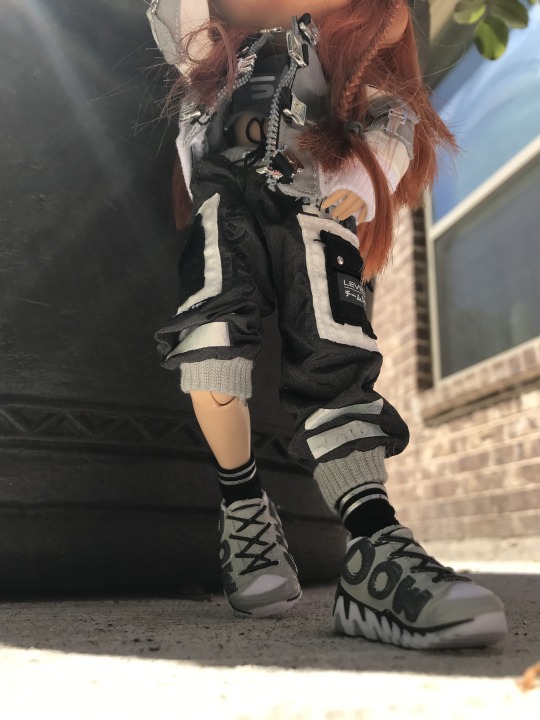

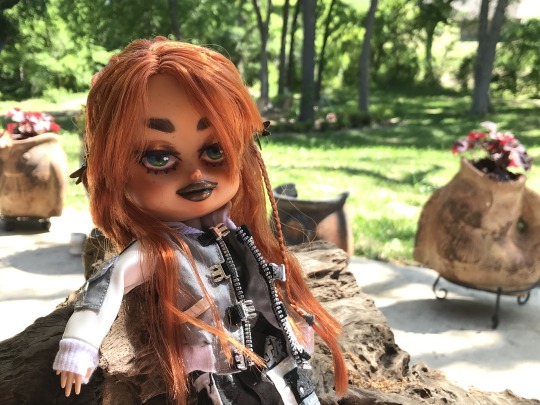


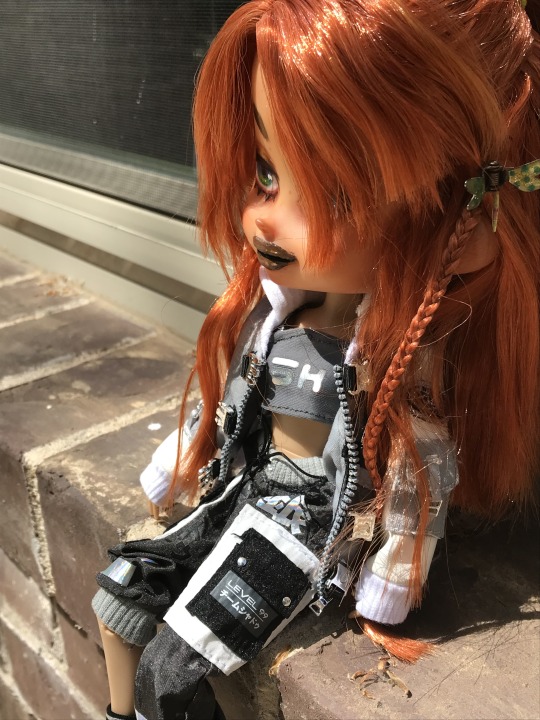
Some pics from today, and chilling with some Rainbow Highs that belong to my mom. Overall I'm happy with how her face and hair turned out. I wanted her to have that sassy kinda look and believe it was pulled off. I also learned apoxy is a beast when you only have grey colored and need to repaint it to skin tone. So the lips went a darker brown shade for that grunge look, and her ears took a couple of coats to get as close as a match as possible to her face.
#pop stark Lark#my dolls#NymsDolls#doll photography#doll photoshoot#dollblr#ooak doll#doll restyle#doll repaint#doll mashup#franken doll#mydolls#mydoll
21 notes
·
View notes
Text


Stuck one of the twin thrifted dolls onto an Azone body, cute as heck. The head was a little difficult to work with cause it's sooooo thin that the slightest heat or pressure has it flattening like a deflated balloon. And the hair is falling out at a breeze too. But it's cuuuuute.
I finally broke down and got a new Draculaura just to see the cute body shape for myself. And while I was out I just happened to find the Shadow High girl that matches @cosmomoore 's Novi Stars head print soooo I grabbed her too. Now that I have the right body for the neck hole, I LOVE the press and turn mechanic to affix the head!!!! Fantastic
Then I spied the Make It Mini espresso machine ball! These are dangerously fun since they show on the ball which machine you are getting, it's not a blind box exactly, though it looks like the color may be a surprise? I dunno but they are adorable.
94 notes
·
View notes
Text

my custom blythe on an azone xs boy body
3 notes
·
View notes
Text
I made a flickr album for all of my doll photos :)
My dolls:
* Myou Martha 1/4 ver3 body
* Myou Tuotuo 1/6 ver2 body
* Blythe (Black Berry Bush) on Azone Pure Neemo S body
* Barbie
* Liroro Summer Island blind box doll
2 notes
·
View notes
Last Seen Blogs