#clipping path
Photo
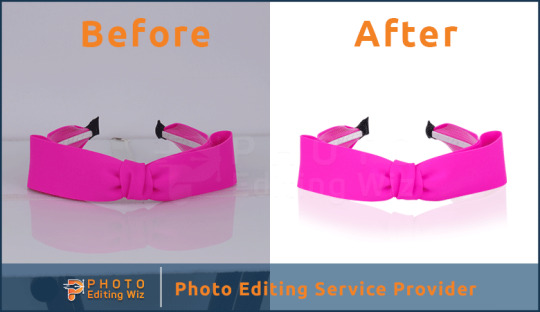
Unlock the Power of Photoshop: A Step-by-Step Guide to Creating Clipping Path Easily.
7 notes
·
View notes
Text
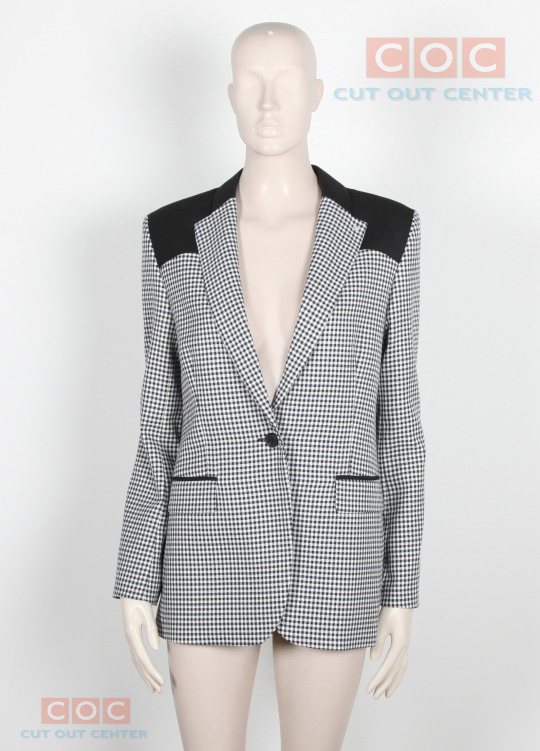
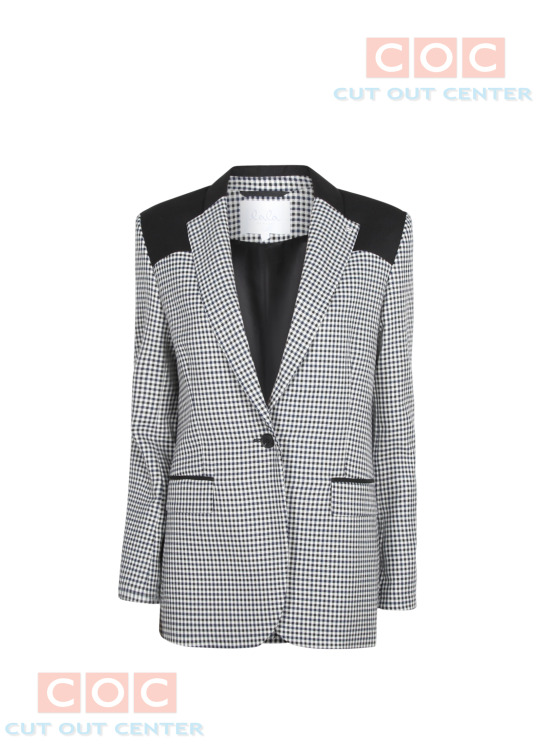
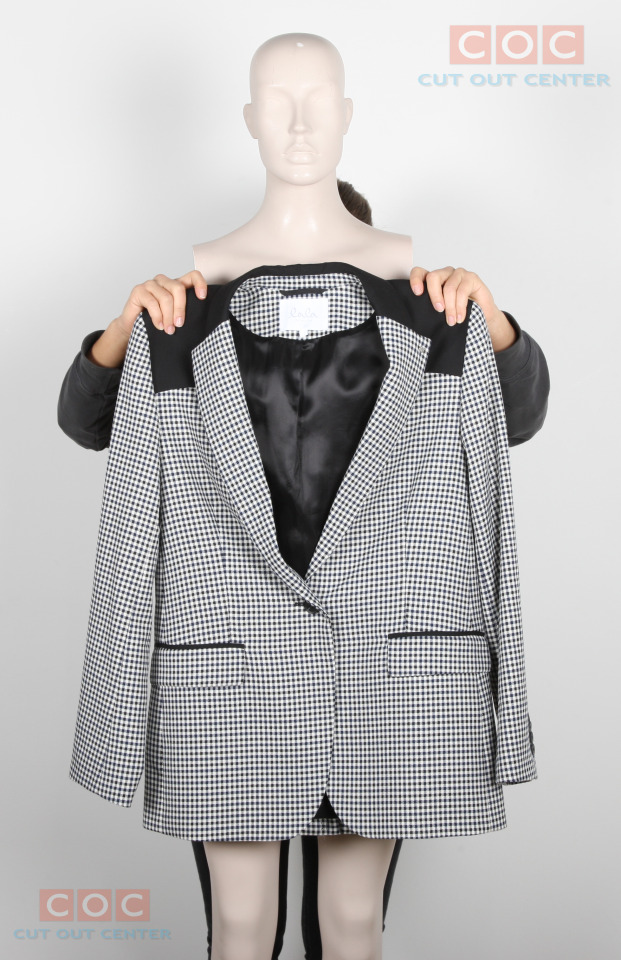
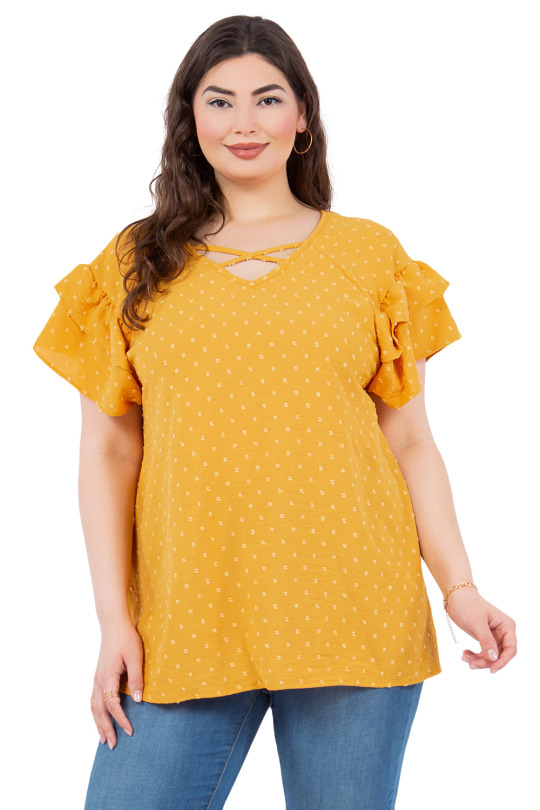
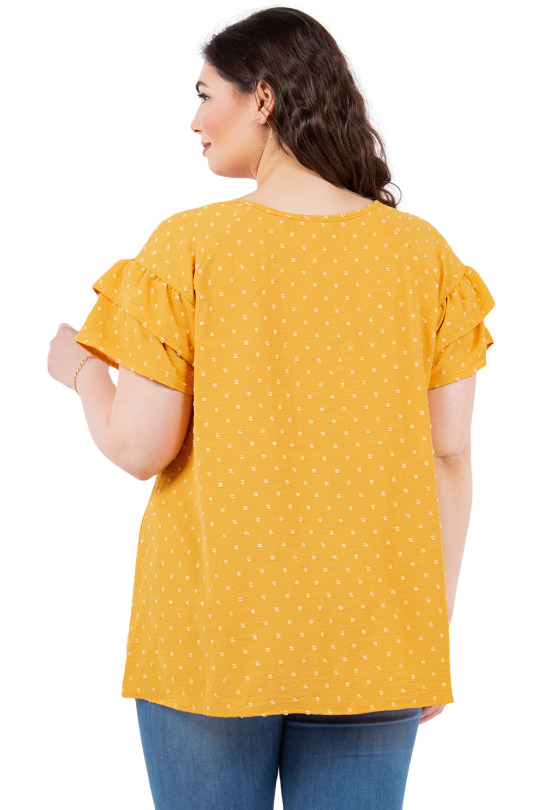
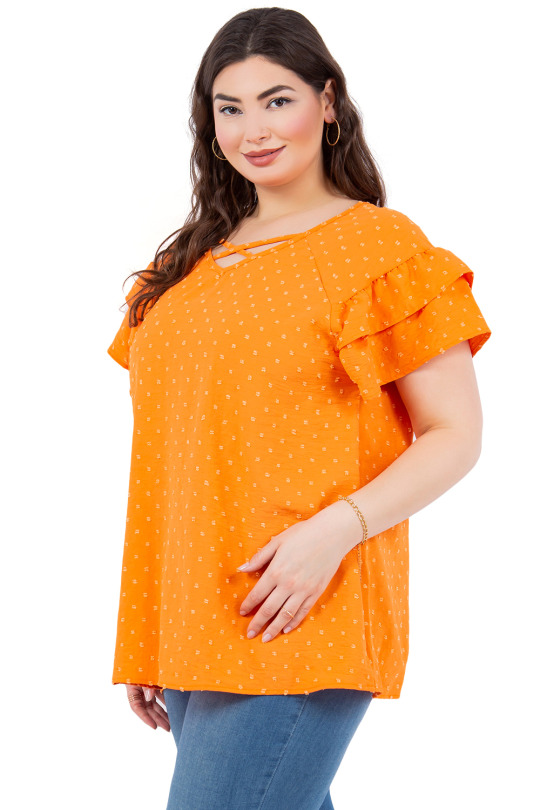
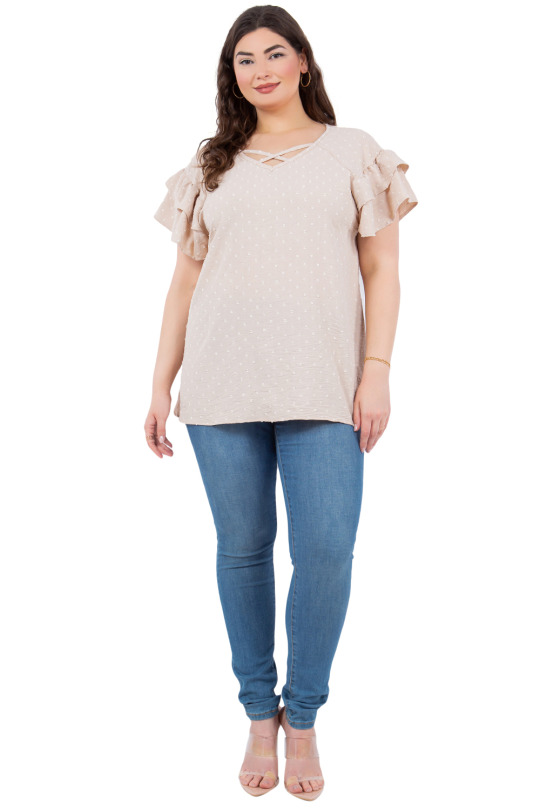
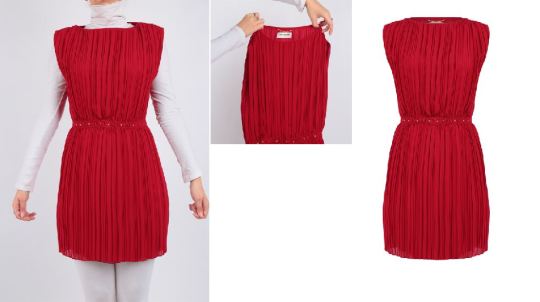
Cut Out Center (COC) designers use neck joint/Ghost mannequin service to remove the doll from the images and combine them to show the garments in their proper sizes and shapes.
Daily 3000 E-Commerce Image Editing Capacity. Dedicated Secure FTP Account. Urgent Delivery Service (1 Hour, 3 Hours, 6 Hours)High-Quality Service Up To 60% Discount 50-100 IMAGES ORDER 10 IMAGES FREE Facility And Many More.
Our company's Graphics Design Experts are the best in this market.
Free-Trial Link: https://lnkd.in/gYJkXjh9
W: https://cutoutcenter.com/
#clipping path#shadow creation#color correction#background remove#raster to vector#resize#photo retouching#shoe retouch#background change#recolor#neckjoint#photoretouching#backgroundremoval#clippingpath#photo manipulation#gust mannequin
2 notes
·
View notes
Photo

Drop shadow is a service for getting shadows like a natural shadow to an image. It makes the image look more realistic.
8 notes
·
View notes
Text
Unleash Your Creativity with Our Exclusive Free Editing Offer!
Are you ready to transform your photos from ordinary to extraordinary? Our Free Editing Offer is here to take your visuals to new heights of brilliance and creativity! Whether you're an aspiring photographer, a business owner, or simply someone who loves capturing moments, this is an opportunity you won't want to miss.
#commercial#marketing#ecommerce#branding#product photo editing#smartservice24#upwork#fiverr#freelance#virtual assistant#freelancers#photoshop#editing#image_editing#graphics design#product design#designer#studio#clipping path#background remove#Photo Editing#Photoshop#E-commerce#Image Editing#Commercial Product#Photography
2 notes
·
View notes
Text
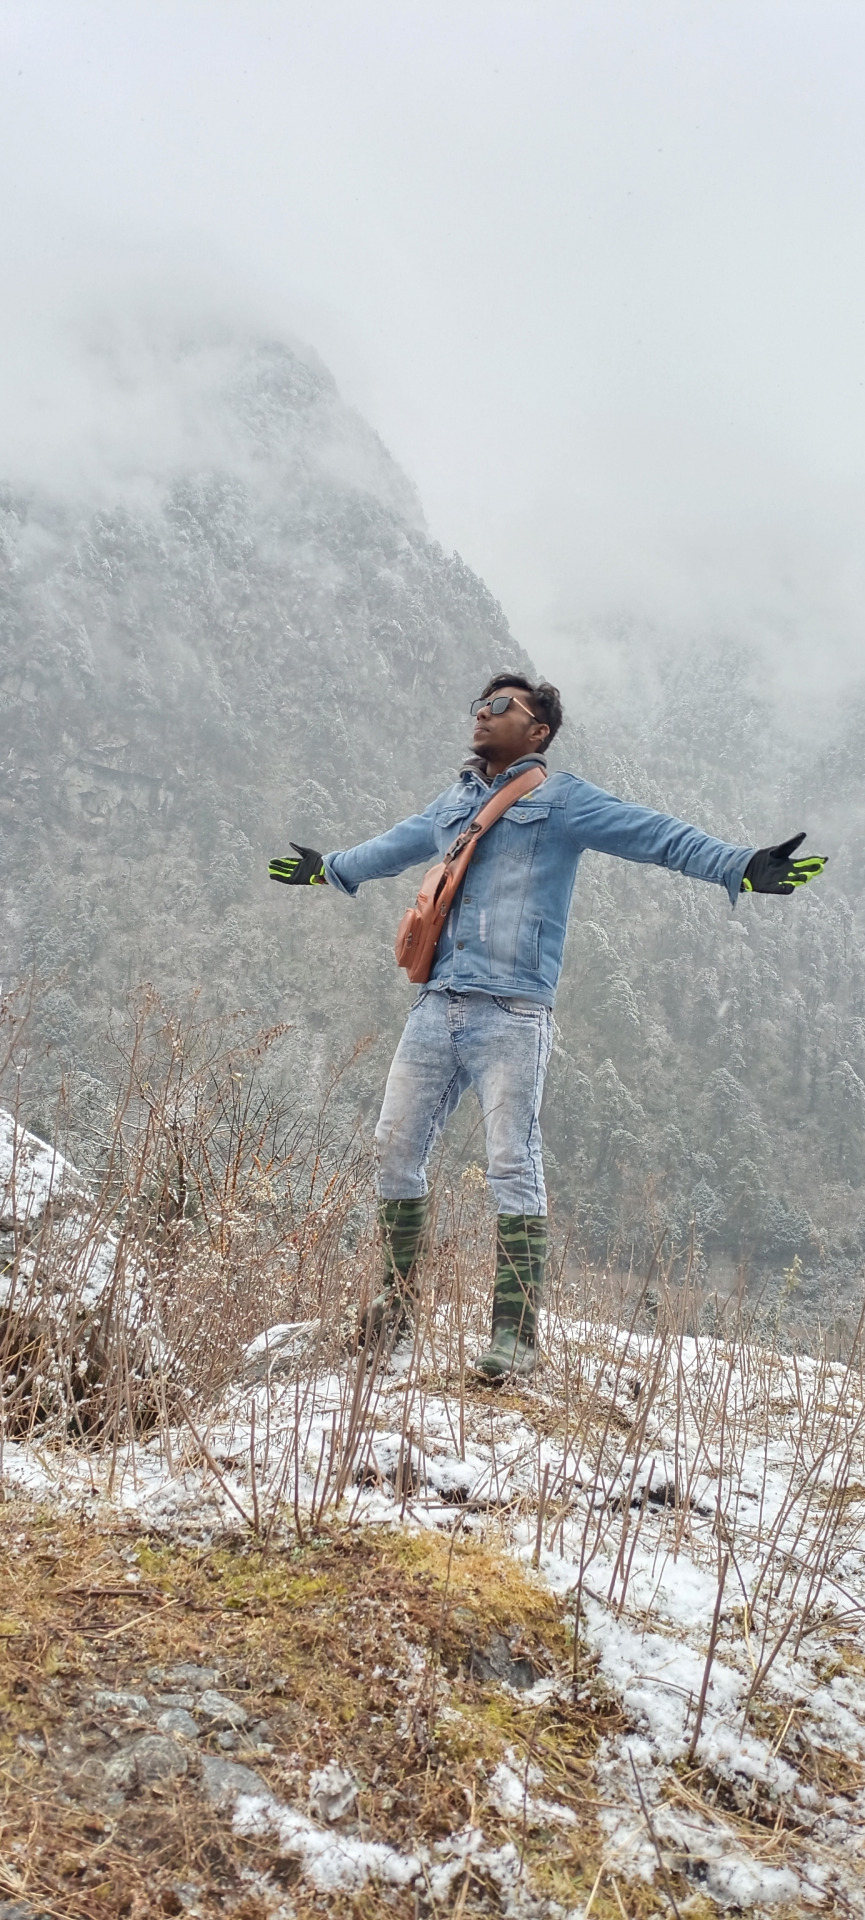
Let travel change you.💔
#imageediting#mdishakrahman#shadow#graphicdesign#photography#clipping path#photo retouching#neckjoint#ghostmannequin#background#travel#sikkimtrip#sikkim#tourism#gangtok#car photography#photoshop#i sell photos#photo edit#photoshoot#my photos#photographer#munshiganj#bikrampur#india#tour
2 notes
·
View notes


Text
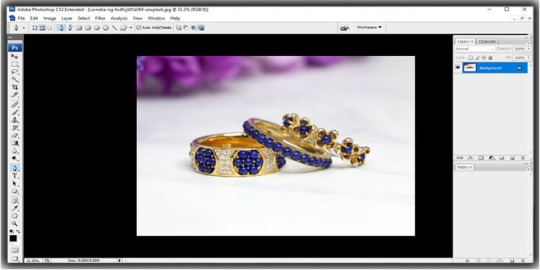
Best Remove Photo Background with Photoshop | Background Removal Service

How to Remove Photo Background with Photoshop
Imagine your photo subject with removed photo background with photoshop that you designed from scratch with your imagination. Before placing an object in an entirely new landscape, you must remove photo the background with photoshop from the original image. Removing the background is a complex art and requires more than an eraser, but you don’t have to be a graphic designer to learn the steps in Adobe Photoshop CC.
Remove Photo Background in Photoshop.
Different programs are used in the Remove photo background in Photoshop. Adobe Photoshop came first in this matrix. You may prefer it over others because of its wide range of photo editing tools and options. The best tools to remove the background are Pen Tool, Magic Wand, Lasso Tool, Layer Mask, Channel Mask, Plug-in, etc. This article will discuss the best Photoshop tools to remove background from photos, along with a guide for the process.
#1. Magic Wand Tools [remove photo background with Photoshop]
It is a great tool that can remove a photo background with Photoshop. It’s a magic wand because it works like a bit of magic. It looks like a great magical tool. Very effective on shaped images. The tool works well if the background is solid and the image’s outline is strong.
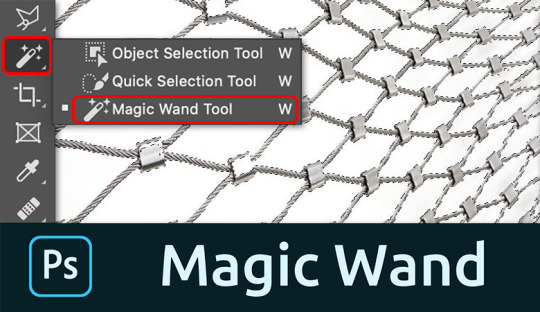
As you know, the image of this tool should have a solid outline. So we selected this image and opened it in Photoshop to remove the background.
We select the Magic Wand tool in the left pane of Photoshop. You can select this tool by clicking the tool or just pressing “W/Shift + W” on the keyboard to select it.
Click on the background you want to select. A dotted line may flash around the selected layer.
If you feel confused with options like dashes, you can move on to something else, namely tolerance, as we show in the snapshot below. We used a tolerance of 50% to select this image, with proven and continuous anti-aliasing. This part will vary with different images. You should try if the selection is imperfect.
Press Ctrl+D to deselect the main theme. Go to the layer palette, create a new layer and place the new layer below the main layer by dragging it from top to bottom.
Set the background color, and make sure it is cropped properly. By the way, after all these steps, you can remove the background with the magic wand.
# 2.Quick Selection Tool [remove photo background with Photoshop]
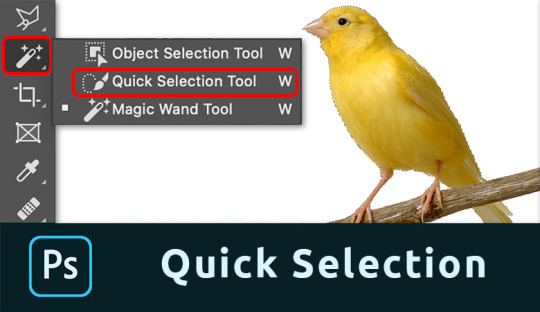
The quick selection tool will do a lot of the work for you and works best when there is good contrast between the subject and the background.
Take a photo with Photoshop. We use the same football image here. You can apply the method to any image you want to process.
Before starting work, ensure that the image’s background is locked or open. Double-click the lock icon to unlock the layer if it is locked.
Select the Lasso tool from the toolbar. Draw a line around the main object by dragging. Hover over the starting point.
After drawing the line, click the Path palette in the Layers palette and create a path by clicking the Path Trace image.
Next, click on the Selection tool from the toolbar.
We think you are still concerned because your drawing is wrong. No problem, click on the drawing line with the Pick tool, and you will get several reference points to help you resize the line.
Press Ctrl + Enter to select the rows. Return to the Layers palette.
To separate the subject from the background, click Select at the top and then Invert. You can do this from the keyboard by pressing Ctrl+Shift+I. Now press Delete to remove the background.
Take a new layer below the main layer and give it a background color. This way, you can remove unwanted background.
# 3. Pen Tool [remove photo background with Photoshop]
The pen tool works best with simple objects. It is ideal for making a selection of objects with solid, straight, or curved lines.
Select pen tool
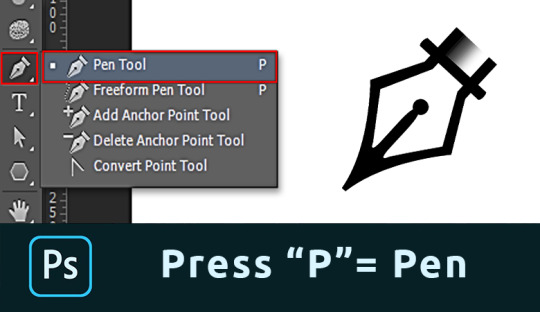
Select the Pen tool from the toolbar on the left. You can also use the key combination “P.” Make sure to set “Path” in the top menu.
Make path

Click any edge of the object to create the first anchor point. Create another landmark. If correct, click. If you want a curved line, click and drag an arc from the line.
This allows you to work smoothly around rounded and curved edges.
Always press the Option key (Alt in Windows) on the last reference point after the curve. If you don’t, the next row will automatically appear according to the previous row.
Pressing the Option key resets the reference point, allowing you to recreate the line.
It takes some practice to master, but you will progress much faster after a while. Continue the process until you have created a path around the object.
When you reach the first character, click it. The road will be closed automatically.
Convert Path

In the Paths window, hit the “Load path as selection” icon.
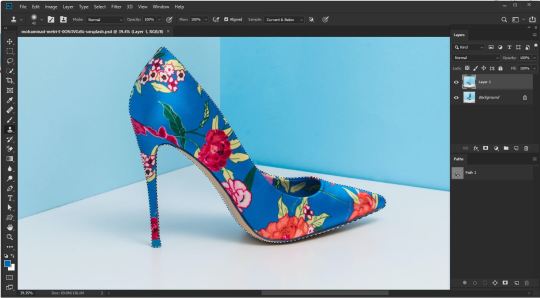
Remove background with Photoshop.
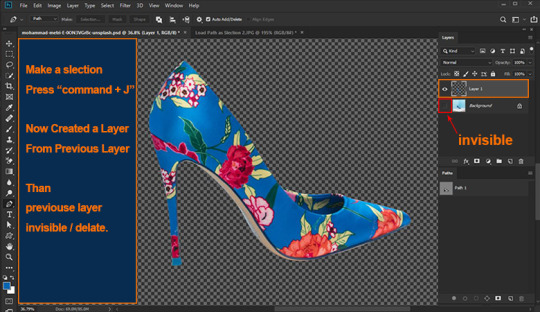
Now there are several options. To remove the background, select> Invert and press the Remove button. You can also use the keyboard shortcut Cmd + Shift + I (Ctrl + Shift + I for Windows).
Just press Cmd + J (Ctrl + J for Windows) to copy the object to a new layer. That’s it; you’ve isolated the subject and removed the background in Photoshop.
# 4. Background Eraser Tool [remove photo background with Photoshop]
Next, we have the Background Eraser tool. Again, it works best with a clean background.
Background Eraser Tool
Select the Background Eraser tool from the toolbar on the left. It is usually hidden behind the eraser tool. Hold down the eraser tool to reveal it.
Erase the Background
Start by removing the background. Automatically detects edges of objects that are not in the background. It is better to set a smaller brush size for more complex areas.
Selection edge on image
The background eraser is great but not perfect. Sometimes the subject and background have the same colors and shades. You must select these fields yourself. We recommend selecting the bottom layer and clicking the Add Mask button in the Layers panel.
Fill the layer mask with black. To do this, select the Paint Bucket tool, set it to black and click on your photo with the mask thumbnail selected. Now use the brush and set it to white or black. Black color erases parts, and white shows parts.
Make sure the mask size is selected and start painting the image. This way, you can manually adjust the areas that need more work.
FAQs about removing photo background with Photoshop
How do I remove background from hair in Photoshop?
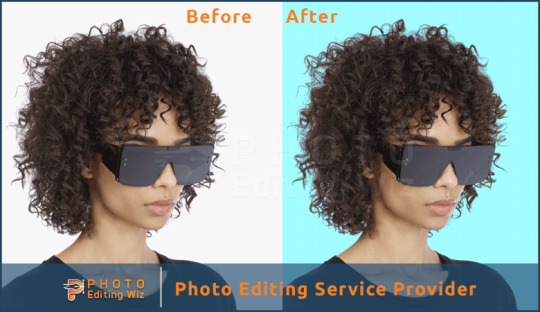
You remove the background from hair in Photoshop using the steps in this post:
Set up your layers
Create a high-contrast layer
Remove the background around the hair and model
Replace the background
How can I change my hair background?
You can change the background of your hair by removing the background by following the steps in this guide. Then choose a background color or a new image to replace it, or leave it as transparent background.
How Do I Make a Background Transparent in Photoshop CC?
To create a transparent background, you need to open the background layer. Double click on it and click OK. Now start erasing the areas, and you will see a shiny background.
How Can I Remove a Background From a Picture?
There are two options here. First, select the background and click the Remove button. The background disappears.
You can also add a layer mask instead of removing the background. This way, you can always re-expose the background.
#Backgroundremoval#clipping path#cutoutimage#removebackground#silopath#deepetching#adobephotoshop#imageediting
8 notes
·
View notes
Text

Are you tired of wasting time on sophisticated image editing? Learn why selecting the finest clipping path service provider is essential for workflow productivity and outstanding visual outcomes! #clippingpath #clippingpathservices #designservices
5 notes
·
View notes
Link

6 notes
·
View notes
Text
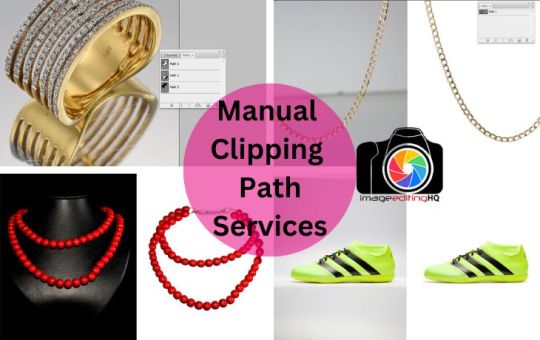
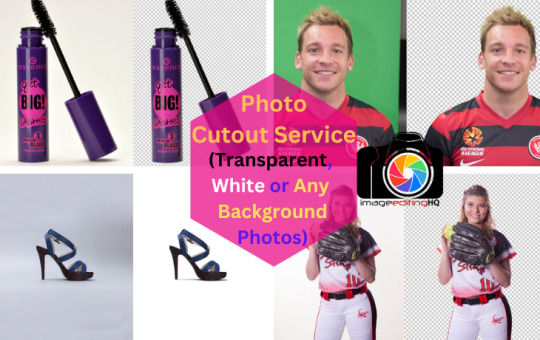
Get the Perfect Photo Cutouts with Our Clipping Path Service
Your pics are awesome, but some parts of them aren’t really usable the way they are. Don’t worry! We can help with that. We’re an image Cutout company, and our Clipping Path service will remove any unnecessary or distracting elements from your photos so you can use them as you see fit. Not sure what kind of photo Cutout service to get? You can find out more here! Get in touch with us today to find out how we can help you with your next project!
Why Hire an Expert
When it comes to cutting out images from their backgrounds, you need a professional who can provide high-quality, precise results. With our clipping path service, you can get just that. We have a team of experts who are skilled in using the latest tools and techniques to deliver perfect photo cutouts every time. Plus, we're always keeping up with the latest industry trends to make sure we're providing the best possible service.
Can I Use My Own Images?
Of course! We want you to be happy with your results, so feel free to use your own images. We'll take care of the rest. Just send us your image and we'll get started on your project right away.
How Do I Submit Files?
Submitting files to us is easy! Just fill out the form on our website and upload your images. We'll take it from there.
What is Your Turnaround Time?
At clipping path service, we understand that you may need your photos edited as soon as possible. That's why we offer a quick turnaround time for all of our clients. We can usually have your photos back to you within 24 hours.
Are You a Design Agency or Do You Outsource as Well?
If you are a design agency, you know that time is money. The last thing you want to do is spend hours editing photos when you could be working on other projects. That's where our clipping path service comes in. We can quickly and easily remove backgrounds from photos so that you can focus on what's important - your design work!
What If I Need Changes After Approval?
If you need changes made to your photos after you've approved the final product, no problem! We're happy to make any adjustments you need. Just send us an email with your request and we'll take care of it as soon as possible. We want you to be 100% satisfied with our work.

-----------------------------------------------------------------------
9 notes
·
View notes
Text
Do not hesitate to contact me with any questions or problems.
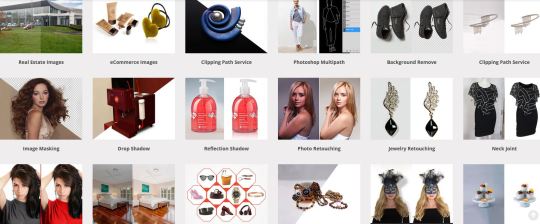
The services we provide are given below:
• Clipping Path/Silo
• Photo Background Removal
• Ghost Mannequin Effect/Neck Joint
• Image Masking
• Shadow Making
• Mirror Shadow
• Color Correction/ Multiple Clipping paths
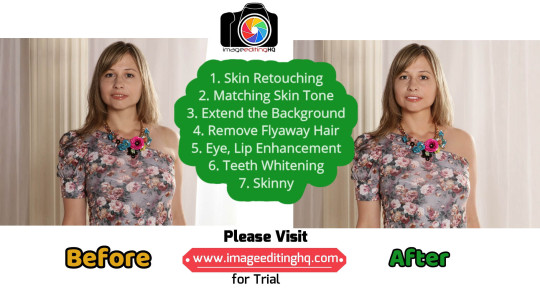
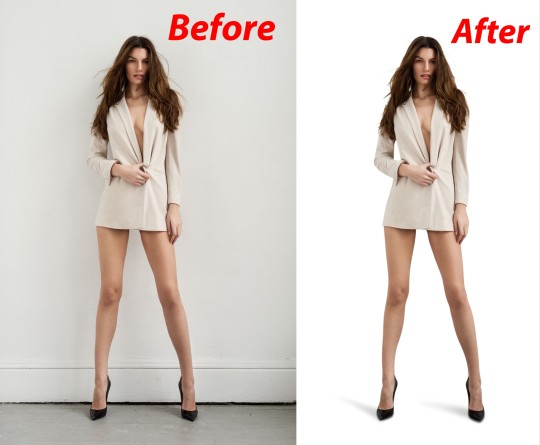
• Image Retouching / Touch Up Service
• E-Commerce Website Image Optimization
• Image Manipulation Service
• Photo Resizing
• Headshot retouch
• High end retouching
• Model retouching
• etc
• All Photoshop working
* Please give me a free trials.
* Iam waiting for your reply.
Best regards,
Sorowar
Client Service
https://www.linkedin.com/in/md-sorowar-hossain-429a86167
#clipping path#photoshop#retouching#retouch#masking#jwellery#silo#multipath#shadow create#backround remove#model retouching
2 notes
·
View notes
Text
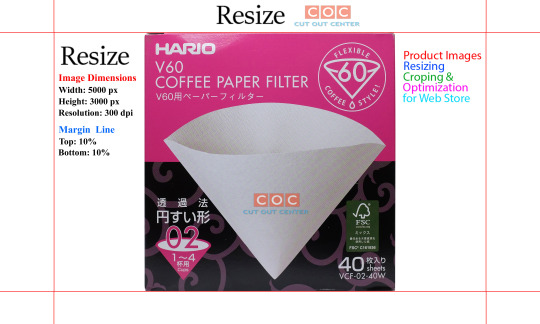
Best Resize Photo Editing Service || Cut Out Center || Asia Best Photo Editing Company
We Have In-House 500+ Expert image editors and Graphics Designers. Each Client Wise Personal Dedicated 24/7 Support. Daily 3000
E-Commerce Image Editing Capacity. Dedicated Secure FTP Account.
Our image editing services :
➱Background Removal
➱Clipping Path
➱Image Retouching
➱Ghost Mannequin
➱Color Correction
➱Ecommerce Photo Editing
➱Shadow Creation
➱Image Masking
➱Image Manipulation
#clipping path#shadow creation#color correction#background remove#raster to vector#resize#photo retouching#shoe retouch#background change#recolor
2 notes
·
View notes
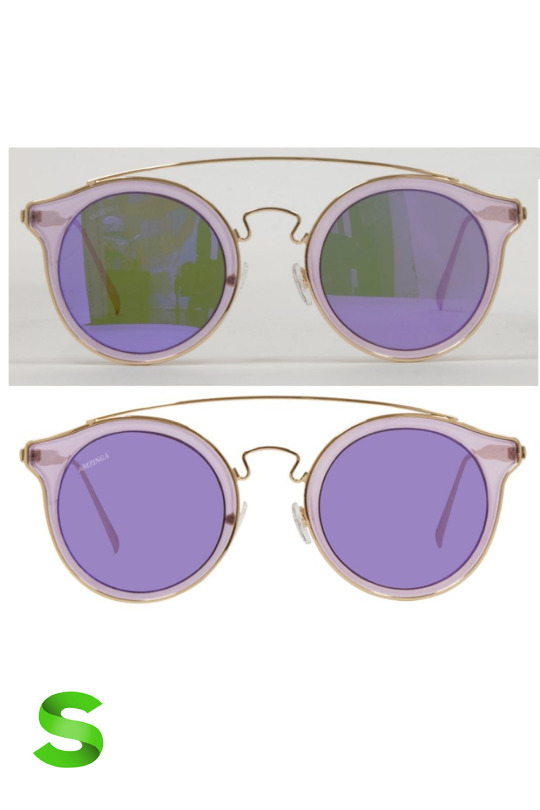
Text
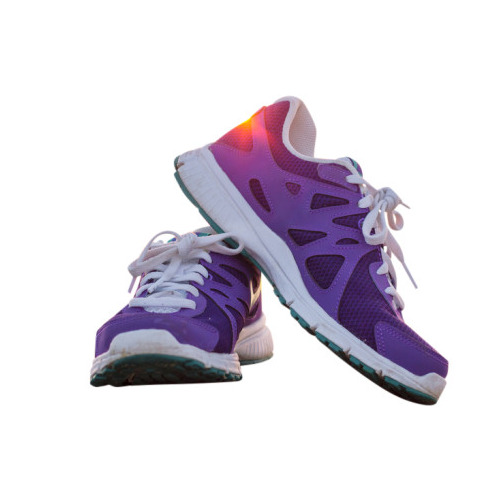
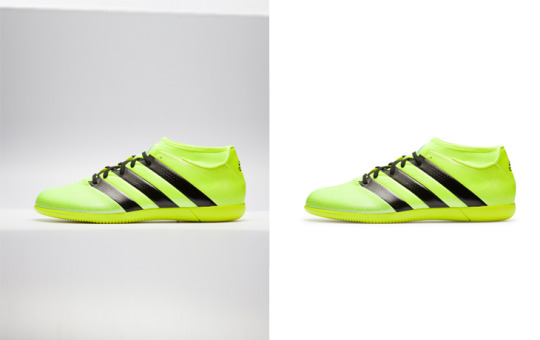
showcase your products
Automatically cut the object from the background to better highlight your products in your online shop.
#clipping path#remove background#image retouching services#image masking service#color correction#Ecommerce Photo Editing#Crop#Resize#image optimization#multi-clipping path#Professional Image Editing#Image Editing#image editing#beautiful photos#photo blog#photo edit#photo exif editor
2 notes
·
View notes
Text
#clipping path#clipping#photoshop clipping path#clipping path service#picturecorrect#hamsteak#looybi#photography#lakeconews#fragrantblossoms
6 notes
·
View notes
Text
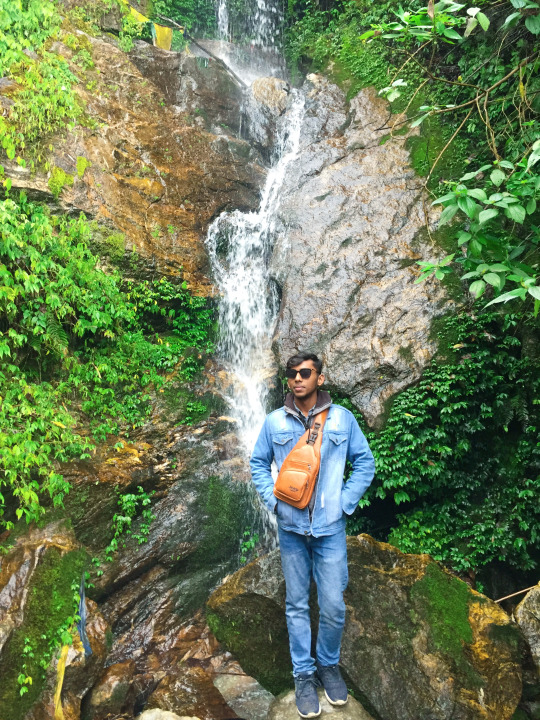
Taking the scenic route.💔
#mdishakrahman#imageediting#photography#shadow#photo retouching#graphicdesign#clipping path#neckjoint#ghostmannequin#background#car photography#photoshoot#my photos#photo edit#picture#photographer#sikkim#travel#gangtok#tourism#travel photography#carphotoedit#northsikkimm#love#self love#love yourself#mdishakrahmanmd#md ishak rahman#dress#fashion
2 notes
·
View notes
Text
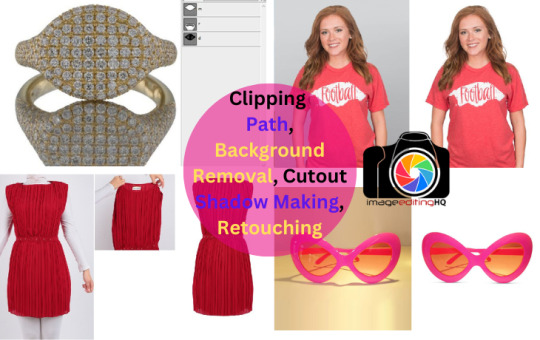
Are you looking for a professional Photo Editing Service? Then I am here to fulfill your all kind of demand very professionally. We would love to discuss your product Design requirements and partner with you. on your upcoming projects.
Our services
Clipping path
Background remove
Image Manipulation
Ghost Mannequin
Image Masking
Photo Retouching
Shadow Creation
Color Correction
Photo Restoration
Photo Blending Service
Real Estate Photo Editing
Jewelry photo Editing
E-Commerce Photo Editing Vehicles Image Editing
Regards..
Ifrat Jahan
#clipping path#colorcorrection#backgroundremoval#photoediting#ecommerceservices#photoretouching#retouching#retouchingservices#photo edit#photoshop#image edit#resize#skin tone retouch
2 notes
·
View notes
Last Seen Blogs

dccomicsfam
Car crash compilation

cxratlvteen
cxratlvteen

currentlysleepin
Unbetitelt

swdsqx
Shi.Wudu

soaplock44-blog
Plumbing Service in Tarzana CA