#credit: kpop24hrs
Photo
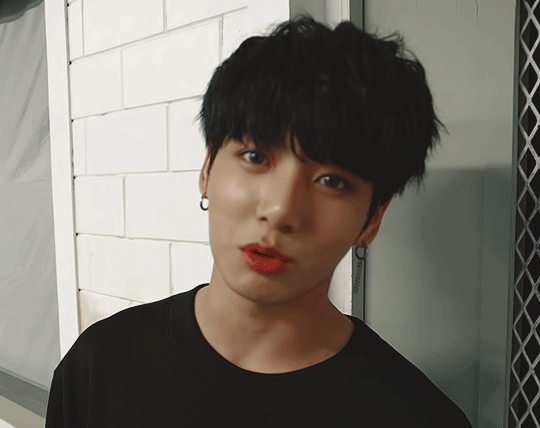

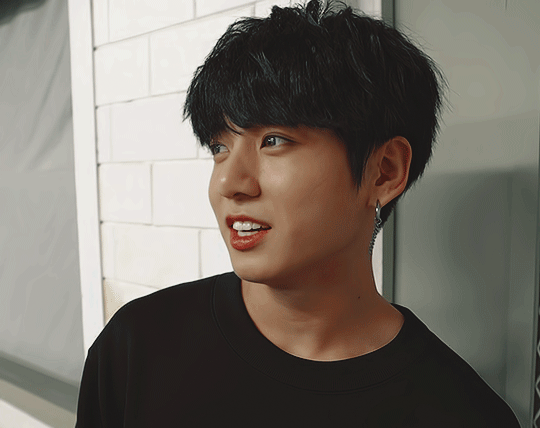
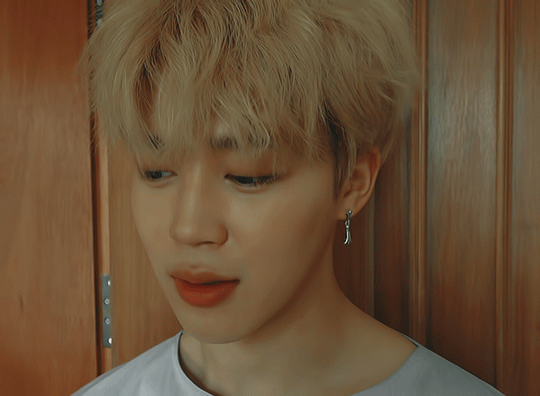
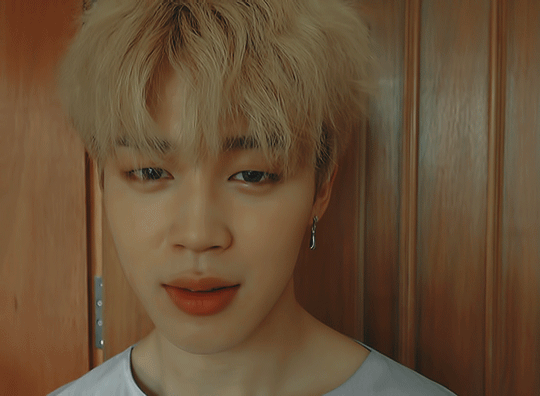
pretty ♥
#jeon jungkook#networkbangtan#btsgif#bangtan#bts#kat:gf#source: memories of 2017#credit: kpop24hrs#this has been sitting in my drafts for exactly a year#i completely forgot about it kslfjasld
936 notes
·
View notes
Note
just add the @ in the text not just the screenshot and also add a hyperlink to the original blog and maybe a small not mine just to stay safe (also I'm not the person who told someone else that you stole something bc honestly wtf does that 3rd person have anything to do with it in the first place) I'm telling you this so you can avoid any future accusations or copyright/intellectual property issues. there's ugly trolls everywhere so just avoid giving them anything to talk about (or just ignore them cause they just love to hate)
thank you anon. but when i post videos and scans from others i leave the link to their twitter in description, when i post screenshot i always leave their username, when i use trans. i put the credits in the description of the set. when i use other peoples videos for my gifs, in addition to putting their twitter or website link in the description, i also put their name on my gifs. i just dont put it when i use videos from my friends, from kpop24hrs and sharemania. i've already talked to some of the uploaders there who already said they dont need it. they just dont want me to say the video is mine.
i dont know what they want from me anymore :/
7 notes
·
View notes
Photo
One of the most frequent asks I get is “how do you make your gifs?” Previously I had just linked my FAQ where I have some resources on how to gif listed, but I figured to (hopefully) stop receiving the same ask over and over, I’d just make a tutorial on how I personally gif!
* Please note that everyone has different giffing styles and settings preferences, so the following is just how I make my gifs. Other people are likely to do things differently!
This post will be a comprehensive guide that includes details about DOWNLOADING VIDEOS, USING VAPOURSYNTH TO MAKE GIFS, USING PHOTOSHOP TO MAKE GIFS (+ a blurb on TOPAZ), and COLORING.
This post was last updated on July 30, 2020. Keep reading to get started!
DOWNLOADING VIDEOS
I use a number of sources to download videos/get video clips, depending on the origin of the video. In general, I try to gif from videos that are at least 1080p - the higher, the better. It’s almost impossible to make gifs look high quality if they don’t originate from a high quality video! Below are the sources I use:
TS files: kpop24hrs (you need an account), kpopexciting, occasionally torrent links from Google or download links from Twitter (search the group name + date in YYMMDD format + .ts)
Youtube videos: 4K Video Downloader
Vlive videos: Soshistagram
Twitter videos: Twitter Video Downloader
Instagram videos: Dredown
Long videos: If I don’t have the space (or patience) to download a certain video, or if it’s not a downloadable video (e.g. Fanship, paid online concert, etc.) then I screen record with Quicktime Player
(Side question: what’s a TS file? A TS file is essentially a very high quality video that you can find for live show performances and aired music show interviews! TS files are generally 60fps, so they’re how gifmakers can make those super clear and smooth live performance gifs. If a TS file is available for what you want to gif, use it.)
USING VAPOURSYNTH TO MAKE GIFS - OLD AND NEW VERSION
05/2020 update: I have re-installed Vapoursynth to its latest version, so I am including updated instructions/screenshots for both the old version (that I downloaded ~mid-2018) and the latest version.
After I’ve downloaded my video, I use Vapoursynth to crop, resize, sharpen, and denoise gifs. Vapoursynth is like Avisynth in that both programs can be used to crop and resize gifs without losing video quality, but VS has the added capabilities of sharpening and denoise. VS is the reason I don’t need to use Topaz on any of my gifs! You can install Vapoursynth here.
First you drag your video file to the Vapoursynth app installed on your computer. You’ll be prompted to enter a start timestamp in HH:MM:SS format (so if you want the video to start 5 seconds in, you would enter 00:00:05). Then you put the encoding duration also in HH:MM:SS format (if you want the video to be 8 seconds long, you would enter 00:00:08). Generally I’ll look for the exact moment I want to gif and enter the start timestamp 1 second earlier and have the encoding duration be between 3-5 seconds.
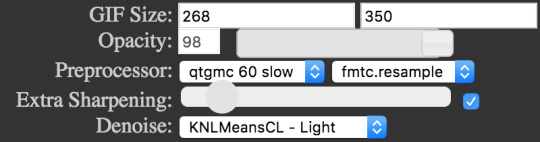
After you’ve entered this, a resizer.html window will automatically pop up. Below are screenshots of examples of my normal settings for my performance gif 4sets (ex. here or here) for both the old and new versions of Vapoursynth.
Old version:
New version:
Below is an explanation of the parts:
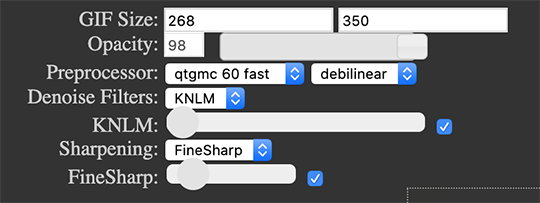
GIF Size | The gif widths (the first number) recommended for Tumblr:
1 gif per row: 540px
2 gifs per row: 268px
3 gifs per row: 177px
You can use any height, but these are the ones that I tend to use:
1 gif per row: 243px or 300px most frequently, but sometimes I’ll do 220px/201px/400px/450px/540px depending on how large or small I want them
2 gifs per row: 350px
3 gifs per row: 300px, occasionally I’ll do 375px or 400px if it’s a very long video (e.g. some fancams)
Opacity | Don’t worry about this; it just changes how you view the video in the window.
Preprocessor | This refers to how the video will render! Super important because you’ll be given the option of 60 vs. 30 - these numbers refer to frames per second. For live performance gifs, I always use qtgmc 60 fast (slow in theory gives you better quality gifs but I’m far too impatient for that). For all other gifs, I do not use any preprocessing method. A basic rule is that if you’re using a TS file, you should preprocess it because it’ll de-interlace the file. If you’re using an mp4 or mkv or any other file, you don’t need to preprocess.
Extra Sharpening/Sharpening | Pretty self-explanatory. You can move the slider up or down depending on personal preference! I try to keep the sharpening low unless the video quality is especially bad. In the new version, I use FineSharp over VCFreq because I find the latter a little harsh for my tastes.
Denoise/Denoise Filters | Will help remove noise from gifs. In the old version, I almost always used the Light setting unless the video is super grainy, and then I might have chosen Medium instead. In the new version, I use KNLM at its lowest setting. I’ll only bump it up if the original video is quite grainy.
Once you’ve configured all your desired settings, you can copy & paste the output in the resizer.html window to your Vapoursynth editor file and enter the beginning and end frames.
The editor file for the old version:

The editor file for the new version:
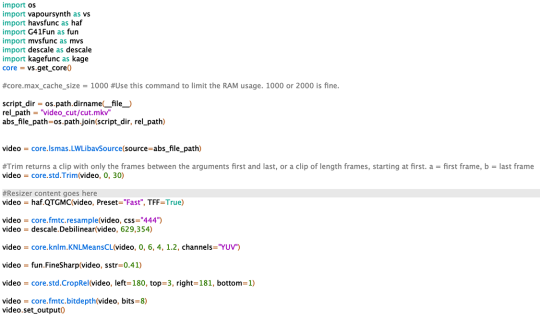
To make the gifs in the old version, just save the file and then wait until everything finishes processing! In the new version, you have to go to Script > Encode video, and then under the gif preset click ‘start.’ Wait until it finishes encoding. On my laptop, this takes anywhere from 20 seconds to 3-4 minutes, so sometimes you have to be patient. This is the end of the Vapoursynth portion of gifmaking.
USING PHOTOSHOP TO MAKE GIFS
To create gifs in Photoshop, go to File > Import > Video Frames to Layers and then select your video file/output file from Vapoursynth (output.mov). These are my settings to create the frame animation:

Once your frames have been imported, you can delete frames and add a coloring psd on top of all your layers.
Photoshop is also where you adjust the timing of your gif. In general, these are my settings:
30fps: 0.04/0.05
60fps: 0.02/0.03/occasionally 0.04 if I want it to be super slo-mo
Honestly, just use whatever timing setting that looks good to you! Some prefer faster gifs, others prefer slower, so just do what you like and things will be okay.
Save through File > Export > Save for Web (Legacy) with these settings (you can play around with selective vs. adaptive or diffusion vs. pattern; they all have slightly different looks, but 256 colors is a must):
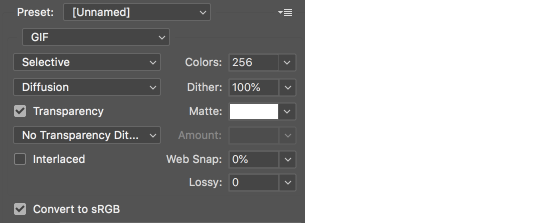
Make sure your gif is under 8mb - to decrease a gif’s size, I usually delete frames and/or use selective color to increase the black percentage for whites, neutrals, and blacks.
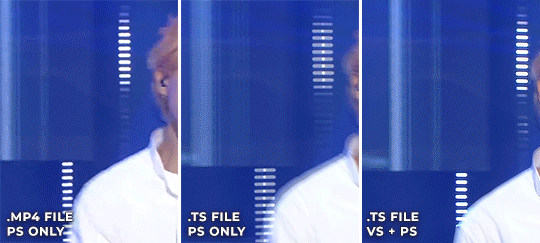
After you save, you’ll have your gif! Below is the same moment giffed in different ways to illustrate how much a difference that file type + giffing style can make. You can tell that the TS file is higher quality and less grainy than the mp4 file, but it really isn’t unless you use Vapoursynth that the gif becomes super sharp and smooth. This is because if you import a TS file straight into Photoshop, it will only import at 30fps because the video itself is interlaced. You have to run it through a de-interlacer (like VS) to actually get a 60fps clip.
With regard to TOPAZ*, I mentioned above that because Vapoursynth has sharpening and denoise functionalities built into the program, I no longer use Topaz. However, if you do not have access to Vapoursynth, then I highly recommend downloading Topaz (download links can be found through quick searches on Tumblr) and using Denoise and Clean to adjust your gifs. A warning: Topaz can take a long time to process and many gifmakers have a love/hate relationship with it, so be prepared for that. The way you apply Topaz is to select all your frames and layers, then do Filter > Convert to Smart Filters. Add the Topaz/smart sharpen adjustments, then Flatten Frames Into Layers. Once that has happened, hit Convert Frames > Flatten Frames to Clips and then Convert Frames > Make Frames from Clips.
COLORING
I get questions a lot on coloring and the truth is that coloring is an art - I by no means consider myself an expert, but I do experiment a fair amount with different settings and layers so I at least have a decent understand of what’s possible when it comes to coloring.
A few tips I’ll give:
Everyone has different coloring preferences! Whatever coloring you like may not be what others like, and that’s okay. Don’t be afraid to experiment!
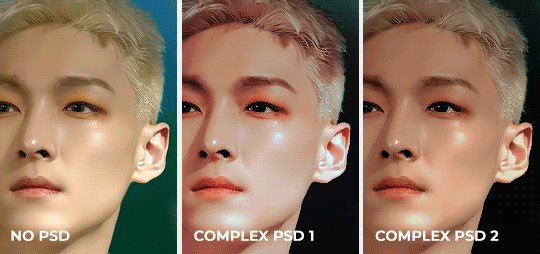
PSDs are good for learning how to color - download premade ones and look at how other people made them: what layers did they use? in what order did they put them? what blending mode? at what opacity? These are all questions you’ll need to ask yourself when you create your own PSDs. (Remember not to edit others’ PSDs if they do not allow it, and given them due credit when necessary. Also don’t claim as your own!)
Tips to bring out idols’ natural tan/unwhitewash: increase vibrance, decrease brightness + increase contrast, use selective color and decrease cyan and increase black on the reds channel, use a gradient map that goes from a black/dark red to light pink/coral and change the blending mode to soft light or decrease opacity of the layer to 20-40%.
Below are some examples to show how much a difference coloring can make. I’d consider a basic PSD one that has less than 10 coloring layers/doesn’t make much change to the actual coloring of the gif besides lighting adjustments. More complex PSDs generally have 15 or more layers (the ones I used below in have 16-25+) and drastically change the colors in the original gif. You can also mix PSDs too - for a lot of my performance gifs, I’ll first add a basic PSD that increases the contrast of a gif to make the skin glow, and then I’ll add an additional PSD that adjusts colors and other various lighting aspects.

You can see just how much of a difference coloring makes:
Don’t be afraid to experiment with different layers/styles! Everyone has individual preferences for how they like their gifs to look, and in a sense, coloring is the main way you can make gifs “yours.”
FINAL NOTES
Giffing is hard and requires a lot of patience - you definitely won’t be able to make amazing gifs right when you start! Even though I’ve been giffing for close to a year now, I still dislike many of the gifs I make and think that I can definitely improve. Don’t be afraid to reach out to other gifmakers for advice and help - 99% of the time, they’ll be happy to answer your questions!
I have posted a sped-up version of my gifmaking process here that you can also use as a resource!
Please let me know if I’ve missed something, and feel free to reach out if you still have questions. Good luck!
888 notes
·
View notes
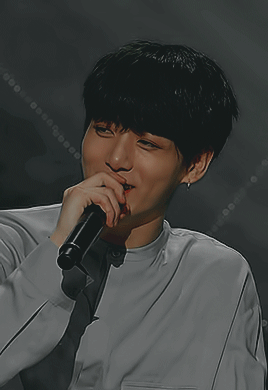
Photo

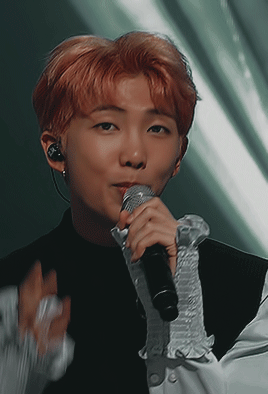
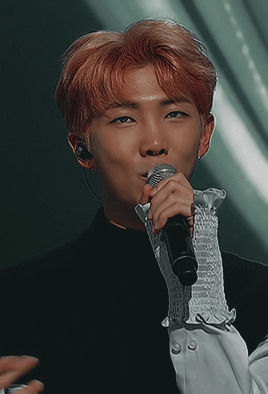
mic drop yoongi hits different 😳
#min yoongi#networkbangtan#armiesnet#hyunglinenetwork#btsgif#bangtan#bts#kat:gf#source: memories of 2017#credit: kpop24hrs#no memories of 2020 yet so this one it is!
4K notes
·
View notes
Photo


cutie
#min yoongi#networkbangtan#armiesnet#hyunglinenetwork#btsgif#bangtan#bts#kat:gf#source: memories of 2017#credit: kpop24hrs
2K notes
·
View notes
Photo

boyfriend 😩
#min yoongi#networkbangtan#armiesnet#hyunglinenetwork#btsgif#bangtan#bts#kat:gf#source: 2015 bts live hyyh on stage#credit: kpop24hrs
2K notes
·
View notes
Photo

fluffy and soft 🥰
#park jimin#networkbangtan#armiesnet#btsgif#bangtan#bts#kat:gf#source: memories of 2017#credit: kpop24hrs
2K notes
·
View notes
Photo


cutie
#kim taehyung#networkbangtan#armiesnet#bt21net#btsgif#bangtan#bts#kat:gf#source: 180524 mnet bts comeback show#credit: kpop24hrs
4K notes
·
View notes
Photo


jinnie ♥
#kim seokjin#networkbangtan#armiesnet#hyunglinenetwork#btsgif#bangtan#bts#kat:gf#source: memories of 2017#credit: kpop24hrs
1K notes
·
View notes
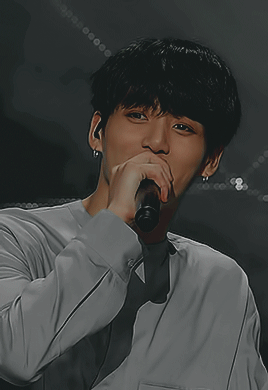
Photo


talking in pout 🥺
#min yoongi#networkbangtan#armiesnet#hyunglinenetwork#btsgif#bt21net#bangtan#bts#kat:gf#source: 180524 mnet bts comeback show#credit: kpop24hrs
3K notes
·
View notes
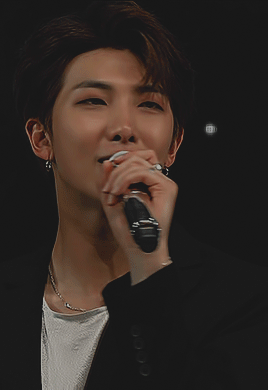
Photo


the cutest dimples 🥺
#kim namjoon#networkbangtan#armiesnet#hyunglinenetwork#btsgif#bangtan#bts#kat:gf#source: 170921 mnet bts comeback show#credit: kpop24hrs#0.02 is too fast and 0.03 is slow whyyyyy
1K notes
·
View notes
Photo

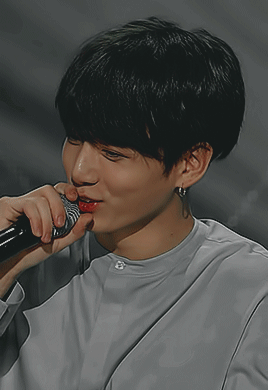
angel
#jeon jungkook#networkbangtan#armiesnet#btsgif#bt21net#bangtan#bts#kat:gf#source: 170921 mnet bts comeback show#credit: kpop24hrs#lots of things happening in the background ://///#it's too grainy
1K notes
·
View notes
Photo


gorgeous ♥
#kim namjoon#networkbangtan#armiesnet#hyunglinenetwork#btsgif#bt21net#bangtan#bts#kat:gf#source: 180524 mnet bts comeback show#credit: kpop24hrs
1K notes
·
View notes
Last Seen Blogs

threghack-blog
fake ids

melrcold
MyEndlessLuv

aitataizm52n
こぎたないおたくの

alunasky-blog
Alunasky

the-lemonade-mouth
Lemonade mouth over here