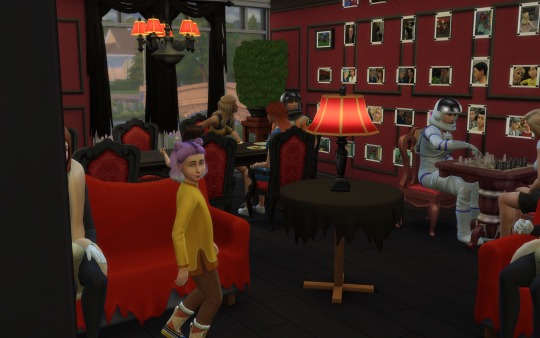
#darkflame family
Text


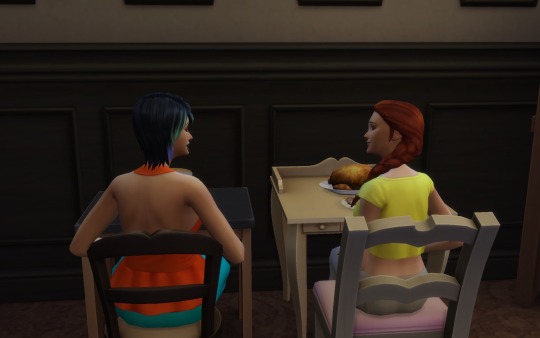
Halloween Party
#mais4#Darkflame 1 house 2#sims halloween#halloween party#darkflame family#Ana Darkflame branch#sims 4#simblr#my sims interior design#ts4#the sims community#Amanda Darkflame#Phoenix Darkflame II#Rosalia Darkflame#lavender darkflame#Bianca Darkflame#Rosario Darkflame#violet darkflame#samantha darkflame#burgundy darkflame
6 notes
·
View notes
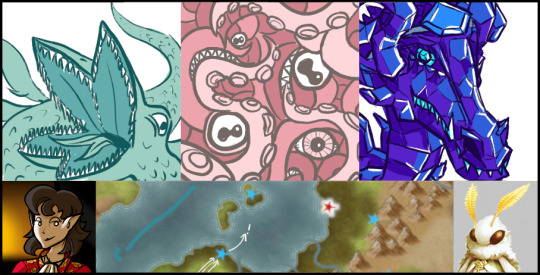
Text
The reason that BIONICLE will never get an intelligent reboot like She Ra or any of the other things is that The Lego Group is very protective of its family-friendly image. Projects like Darkflame Universe and BIONICLE: Masks of Power were only allowed to exist under strict stipulations. The way that the old comics, novels, and web serials were written, bionicle wanted to be edgy, and only ever got away with anything because of what I imagine to be severe oversight. These days, TLG would never approve of any revival that takes bionicle as seriously as it wants to be.
64 notes
·
View notes
Text
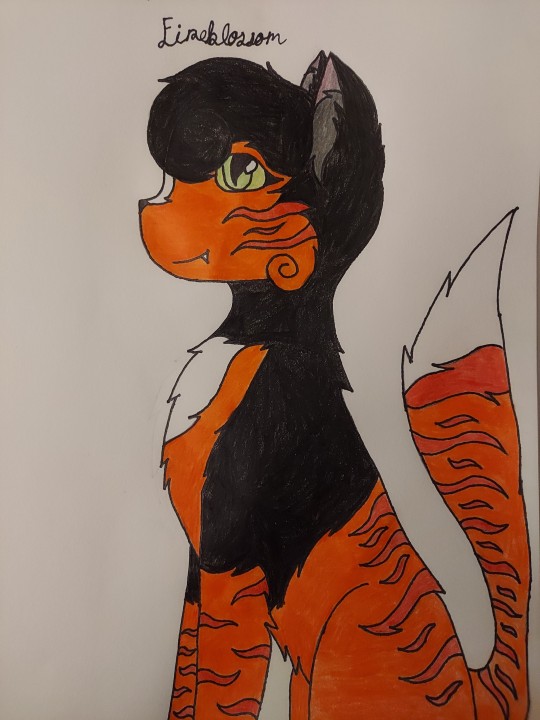
A Warrior cat OC from an RP I've done with a friend of mine. His name is Crowflight, one of the cross-clan kits we got.
Names: Crowkit, Crowpaw, & Crowflight
Gender: Male(He/Him)
Sexuality: Bisexual
Family:
Darkflame(M)(Father)
Hollyblossom(F)(Mother)
Fireblossom(F)(Sister)
Ashwillow(F)(Aunt)
Frostheart(M)(Uncle)
Blazeglow(M)(Uncle)
Tigerlily(F)(Grandmother)
Night(M)(Grandfather)
Cadaver(M)(Great Uncle)
Ambrosia(F)(Great Aunt)
Firefox(F)(Great Grandfather)
Frostbite(M)(Great Grandmother)
Mate: N/A
Clan: Oakclan
Rank: Young Warrior
Mentor: Whitetiger
Apprentice: N/A
Backstory:
Crowflight was born into Oakclan to his mother, Hollyblossom, and his sister Fireblossom. He adores his family and his clan. Crowflight is a strong and dependable warrior who would always be there for any of his clanmates. Whitetiger's strict teachings show in how Crowflight conducts himself he's fiercely loyal and follows the Warrior Code to the letter. His sister Fireblossom often teases him for, and he quotes, "Not being that much fun," but he always finds time to have fun with his sister. Crowflight is close with his mother and his old mentor Whitetiger. Now, one thing that bothers Crowflight is that he never knew who his father is, which has always been a point of sensitivity for him. Sometimes, he gets visions of a black fire, and he often wonders if these visions have anything to do with his father.

#artwork#original art#art#my art#oc artwork#artists on tumblr#character art#oc art#my oc art#oc artist#warrior cat oc#warrior cats#cat oc art#cat ocs#cat oc#black cats#black cat#cat#2d art#art oc#my oc#my oc character#my oc drawing#my oc stuff#my ocs#my ocs are my babies#my ocs art#oc character#my ocs are my children#oc design
6 notes
·
View notes
Photo

Hi everyone, I know it’s been a few days since the terrible news of the tragic passing of Jason David Frank, but I still wanted to post this tribute to him because this is so heartbreaking💔 and I had to talk about Jason and what he meant to me as a kid watching Power Rangers..I wish I could’ve met him..he was such a HUGE part of my childhood..I loved watching him as Tommy Oliver and kick major ass with the rest of the Rangers..Jason was my childhood hero, and my favorite ranger..he was the heart and soul of that show, and he left behind a legacy, one hell of a legacy..one filled with kindness and goodness, and where people will remember him, and talk about what he meant to them for generations to come..god this hurts, I am so devastated over this😭 but I also feel so terribly bad for Jason’s family and friends, and the other Rangers who were also his family..god I hope they can get through this ok..I am so sick and tired of these amazing good, kindhearted people dying..I mean first Kevin Conroy, now Jason David Frank, what is happening😫 I feel like pieces of my childhood are being chipped away😢Jason was a bright light in this world, and even tho he’s gone, that light shines through the many fans that he had and lives that he touched!❤️ Once a Ranger, Always a Ranger.. Rest In Power Jason David Frank, thank you for being our Green/White Ranger and making our childhoods AWESOME!🙏🦸♂️ GO GO Power Rangers!! And also, credit for the first photo I used goes to Darkflame on YouTube..it was his thumbnail. I just found it on Google!👌🏻 #jasondavidfrank #ripjasondavidfrank #jdf #ripjdf #jasondavidfranktribute #tommyoliver #anothertragedy #thegreenranger #thewhiteranger #tommyolivergreenranger #tommyoliverwhiteranger #powerrangers #oncearangeralwaysaranger #mightymorphinpowerrangers #gogopowerrangers⚡ (at Taft, California) https://www.instagram.com/p/Clag7tarjU6/?igshid=NGJjMDIxMWI=
#jasondavidfrank#ripjasondavidfrank#jdf#ripjdf#jasondavidfranktribute#tommyoliver#anothertragedy#thegreenranger#thewhiteranger#tommyolivergreenranger#tommyoliverwhiteranger#powerrangers#oncearangeralwaysaranger#mightymorphinpowerrangers#gogopowerrangers⚡
5 notes
·
View notes
Text

Ah yes the whole reason I created this blog in the first place: JULIA RAINBOWFIST!!! My main, my myth, and my highest lvl wizard!!
A little (Edited) backstory on her!
Julia was born in a world called Faraway to her fathers: Vladan Drake’s disowned-and-kicked-out-brother, Vladimir Drake and his fiancé Julián Madmund! Her fathers came with Juli to Dragonspyre a few months before its devestation to “visit family”.
But you see, this was code for “hunting shadow creatures”, because both Vladimir and Julián were professional shadow monster hunters. Their whole job was to prevent the devestation of Dragonspyre, abd Vladimir Darkflame was dealing with Shadow magic to revive the Dragon Titan. They sadly failed. And so, Vladimir died along with Vladan in a fight to the death while Julián gave Julia to the escaping Malistaire and Sylvia so he could go and save his fiancé.
Afterwards, Mali and Sylvia escaped to Wizard City with Julia, where she gained an affinity for myth magic immediately as a toddler and so she spent a lot of time with ‘papa’ Cyrus as she called him. The three Drakes raised their little cousin together. Julia then was enrolled in Ravenwood and things went downhill from there :)
She still hates Ambrose with a passion <\3
#wizard101#wizzy101#I love..Julia#she#girlboss#arc 1 & 2 hurt more than it should now with this edited backstory of hers AAUGHHHHHH
51 notes
·
View notes
Text
Two-Faced Jewel: Session 14
A Ferry Good Experience
A half-elf conwoman (and the moth tasked with keeping her out of trouble) travel the Jewel in search of, uh, whatever a fashionable accessory is pointing them at.
[Campaign log]
Last time, the party finally wrapped up their business in the small town of Barley, and headed back to Cauterdale to catch the ferry to Thunderbrush across the Bay of Uneasy Repose. In this session, they make a few more last-minute preparations, and embark on a nautical voyage!
Said nautical voyage is swiftly set upon by a few different kinds of trouble.
Before they leave for the docks, Looseleaf catches Orluthe alone while he's having some trouble with street food. There's some sort of tough overcooked octopus dish he can't quite figure out how to eat.
Looseleaf: "You could, maybe, use a knife?"
"Or, I guess, maybe you're not supposed to because overcoming a challenge like extremely overcooked seafood is, like, a triumph or something and you're not supposed to back down from those?"
"Is that how the cleric thing works?"
Orluthe Chokorov: "Sorry, um..."
He looks around nervously. "What, um, makes you say that?"
Looseleaf: "Well, you know, the fact that, all your combat cantrips involve you declaring how victory is certain or whatever, the fact that after Oyobi dealt with that bobbledragon you channeled your divine avatar to heal Mr. Cutter and your god was all like 'ah, that great beast you have overcome and slain is a honorable offering and you're super cool for having overcome this challenge my man' or whatever..."
"Like, I'm just, puttin' all my cards on the table here, it's pretty obvious?"
Orluthe Chokorov: "..."
"You, uh..."
"That's not... something you can, um, prove," he says, unsure.
Looseleaf manages to talk Orluthe into putting his cards on the table, too. Apparently he's next in line to be the head of the Temple of Diamode in his hometown, and he's been sent to study at Blacksky to prepare. Only problem is- he's not a cleric of Diamode. Or even a cleric, for that matter- he's something else, instead. His disposition is noticeably non-Iska-Peakstrider-Goddess-of-Triumph-ish, you might've noticed.
Remember how Orluthe is a shifter? Apparently he thinks of his other form as a different person, and that person is way more in line with Iska and her obsession with victory and superiority. Iska chose his feral warball champion alter ego- the Alpha Doomhound- and has been helping his more mild-mannered side fake being a cleric of Diamode in order to help him attain the headship of the temple for some reason.
Looseleaf... attempts to pry a little more.
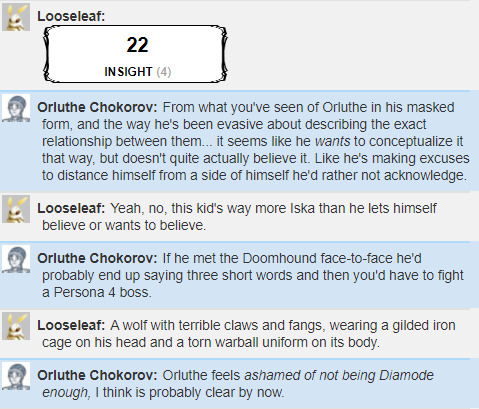
After asking a few more questions about how exactly channeling divinity works and feels (kind of incomprehensible sometimes, since godthoughts connect to godmemories you don't have when the channeling ends), Looseleaf reassures Orluthe she'll keep his secret, and the party sets off for the docks.
At the docks, they meet a few goblins from Cauterdale Harbor Management, who tell them all about the amazing deals! Ferry vouchers (like those provided by Blacksky) are four gold, good for any ferry at the harbor- but some ferries cost extra on top of the voucher. Their options are:
The Satellite Islands Transit Company is the budget option, which will get you across the bay for only the price of the voucher- if you're fine riding a crowded and dubiously-seaworthy old tub.
The Cauterdale Armored Navy operate a smaller and more secure ferry- an armored military vessel with advanced protection against sea monsters, for an extra two gold.
Cabana Jim's Pleasure Cruise is an enormous yacht with an onboard spa, for an extra ten gold on top of the voucher- and comes with a coupon for half-off at Cabana Jim's Luxury Resort and Spa.
Looseleaf sees no reason not to cheap out, so they pick the SITC- except Vayen, who goes for the Armored Navy so as not to be on a crowded boat with the rest of the party. Until... the surprise reveal that oops, they've got fantasy airport security, and in order to go on the SITC ferry, they need to submit to an inspection due to an "elevated maritime threat level".
The inspection is pretty thorough, and Saelhen's sleight-of-hand rolls to conceal her knives fail- which they apparently don't care about. What they care about are the party's magic items. The cloak, rug, and pillow all check out, apparently- too minor, not waterproof.
Unfortunately, Saelhen is unable to conceal her bracer, and as it's apparently an ancestral heirloom. They're going to need to put it in a lead carrying case, which costs extra- and also, oops, it doesn't come off Saelhen's arm, so it's going to cost extra extra to stow her entire body in a lead vault.
Why? Because Darkflame Retribution Everwatchful Black Sapphire, Mistress of Turbulent Waters might be out there, and she has a habit of attacking ships to steal powerful magic items. Unnessie just likes fish, and Krakalackie "plays with boats" but is harmless, but "Darkie" is a genuine threat if she senses a magic item.
So, the party instead springs for the Cauterdale Armored Navy ferry, since they have certain measures in case of dragon attack. They head to the boat and find it manned by Medd Cutter, the guardsman they rescued! Also, they find a rich dwarf, a family of gnomes, and Vayen, who is unpleasantly surprised that the party changed their minds and followed him.
Medd explains the security measures on the ship:
The mess hall inside the cabin, which locks with an airtight seal
The recessed seating area on the deck, featuring seatbelts
The diving-bell helmets under the seats, which have an air supply if they get pulled underwater
The magical water-repelling forcefield that holds out long enough to get everyone's helmets on
The levers on the helmets that switch on to make them soundproof in case of dragon
There's a cacophany of acknowledgment from the load of gnome children, and the ferry gets underway.
As they're traveling, Saelhen and Looseleaf ask Kensa why exactly she's so excited to get to Corolos.

They show Kensa the Anycloak, and she immediately loses her entire got damn mind. She offers to do ANYTHING, ANYTHING to have it! Saelhen... takes this as a teachable moment. Kensa needs to learn to haggle.

She doesn't do a particularly good job, and Saelhen gives her some pointers- and eventually agrees to four conjurations per fashion lesson. With that, she puts on the cloak... and makes the Wisdom save that using the cloak triggers.
She gets a 1.
And what happens is... the last thing the cloak transformed into, a super-opulent fancy armored winged battledress... bleeds into the sundress Kensa imagines up. And those elements of the design, leftover from Looseleaf's imagination, seem to Kensa to have been her idea, somehow.
That's... probably... safe??
And soon after Kensa revises her design again, she looks out at the sea, and points at something in the distance, and asks "What's that?"

It's some sort of huge mutant plesiosaur, sniffing at the SITC ferry.
Saelhen du Fishercrown: "Yamatake, I swear to heaven, if you try this again I will tell the dean that you tried to murder me in my sleep for my valuables."
Oyobi Yamatake: "Gods, don't freak out. It's not like I could even fight it anyway! It's under the water!"
Then Unnessie cries out in pain and dives back below the water, leaving the SITC ferry alone. Just as a giant tentacle spears out of the water right next to the party.
Everyone scrambles to get on their seatbelts and helmets as the tentacles wrap around the ship and begin pulling it underwater. The gnome kids scream in terror and/or delight as the parents try to corral them, and the dwarf retreats into the cabin. The party stays out on the deck, and the layers of magic forcefield begin to fail as they're pulled underwater.
So, this incomprehensible warball-field-sized eldritch abomination pulls both the CAN and Cabana Jim ferries underwater, and starts swinging them around. Everyone but Saelhen passes their CON save against nausea!
Saelhen du Fishercrown: "I AM A DELICATE FLOWER AND DO NOT DESERVE THIS TREATMENT."
They both roll high on perception, though, and are able to notice...
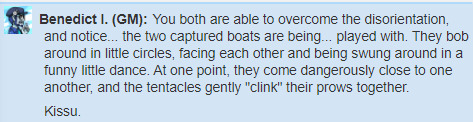
Benedict I. (GM): After about ten minutes, as promised, the tentacles retract, and the boats begin their ascent back to the surface.
The horror retreats back into the depths.
Looseleaf: A very timely horror!
Most children aren't so fastidious about keeping to their deadline promises.
Benedict I. (GM): You break the surface, and after a minute of checks, the magic fields turn off. Water drains out the edges of the boat.
Looseleaf: Is this not another example of the marvelous beauty inherent to this world?
"That was... actually a lot more- a lot of fun!"
"Nobody got hurt, right?"
Orluthe Chokorov: "I'm all good!"
Oyobi Yamatake: "Oh I have to kill one of those someday."
Looseleaf: "Oyobi noooooo. It's just a little baby."
Kensa Kanthalga: "That... was fun, right? That was fun? I'm not traumatized?"
Saelhen du Fishercrown: "Well, I had a nice time."
And then, because two sea monsters wasn't enough, something huge and made of deep-blue crystal breaches the surface of the water right next to them, and lazily leans its upper body on the deck.
Everyone immediately switches on their soundproof helmets, and the dragon... pulls out from the water a terrified-looking sahuagin dressed in rags, holding a sign reading "Parley". The dragon performs a lip-zipping gesture, and points at the fishman.
Next time: oh my god a DRAGON in this DUNGEONS AND DRAGONS campaign
1 note
·
View note
Text
Antidote
(written with @selisekinsolving), Part 2 continued from here
Chery settled Tess on the floor near the door, she pulled a stuffed bunny from her bag and handed it to her niece, “That’s alright. She’ll stay here. Won’t ya Tess.” Chery smiled at her then turned fully to Selise stepping close to look at what the doctor was doing. At the question, her gaze met Selise’s “Disturbances?” She then made an “Oh” sound, “The stuff at the cathedral? I couldn’t go in to volunteer the other day cause they had it locked down. But it was opened back up later that day. Jazi had found me by then so I didn’t go in, what happened, do you know?”
Selise gave Cherysa a skeptical look as she placed the toddler on the floor. “Not specifically, no, but I’ve heard the stories flying around the city. They don’t sound too far off from an outbreak that swept through some years ago. To the untrained mind, the void can drive you mad. Even practiced users run the risk. This antidote worked in the past. I want you to learn it...just in case.” She stole a glance towards the child again then walked over and gently scooped her and her bunny off the floor. “I will walk you through it.”
Chery watched Selise with a little bit of amusement but quickly hid it as the doctor turned back around. She eyed the vials and jars laid out on the table then turned back serious and ready to get to work, “So this antidote, it works for everyone?”
“It did the last time.” She adjusted Tess onto her hip. “But every situation is different. I would advise you only attempt this as a last resort. The people I was treating were so far gone that they no longer recognized family nor reality. The side effects are severe, intense full body pain that can last for hours or days and eventually vomiting up what appears to be black sludge. That ends it, but it’s a process that is hard on the patient and can kill them if they can’t handle it. I did not use it until one of our own doctors tested it on themself…”
Chery’s eyes went wide at the explanation. She listened, her expression going from disbelief to concern, “Goodness. That seems dire. What was the black sludge? Some kind of contaminant?”
“I can’t say, but the symptoms were caused by the influence of Old God magic.” She nodded to the vessels on the table as she spoke. “Stonebloom, ground fine. Bitterblossom buds, harvested fresh just before opening. Darkflame ember, frequently found in Twilight Cultist camps. The herbs grow in Mount Hyjal. The cultists are harder to pin down, but mercs usually have good information.”
Chery had pulled out her notebook and started taking notes while Selise spoke, “Cultist camps?” she mouthed as she wrote that down. She looked up as she finished, “So do I only use it in a worst case? Or can it be used before someone is infected or whatever?”
“Worst case. It’s an antidote, not a vaccine. Never was able to get my hands on that…” She shifted her weight a bit and made a face as a bunny butt was shoved into her cheek.

(art by @seraphimalexandraart)
“So, what you need to do is combine equal parts Stonebloom and Bitterblossom and heat it over the darkflame ember until the blossom liquefies. Stir it frequently until boiling. You’ll know it’s done when all the grains of Stonebloom have dissolved...and by the smell. Make it in small doses, it doesn’t keep for more than a few hours.” (Lore reference here)
Again the red head made notes, looking up at the ingredients as Selise named each step off. At the giggle from Tess, she shot a glance over and bit the inside of her cheek at the sight of Selise’s face and her niece giggling as she said “Bunny like.”
Chery turned back to her note-taking before Selise could catch her looking. At the mention of it not keeping, “Does it change color or anything to let you know its not good anymore?”
“Bunny has a very creative name…” she looked back to Chery. “It will have no odor...trust me, you’ll know. Give it a go then.”
5 notes
·
View notes
Text
Honestly, 2017 was such a good year for the humble LEGO Universe fandom!
The efforts of projects such as Darkflame Universe on bringing back the game also brought with it the old fans back on the track! But not only the game itself, I also managed to stumble upon a podcast, and a 3D series! And all without mentioning Our Universe, whose family grew a lot this year!
This year was also by far one of the most art-filled ones for a long time. With various different pieces from various different artists (shoutout to @joshuad17 and @arandomartistusingthissite in particular, you the MVPs!). Not without mentioning the soft return of a good friend of mine! Without her and her LU art, I would’ve never come here. Heck, OU might’ve not even become what it is today!
And needless to say, my appearance on a certain podcast also got to share the word of LU and OU to even more people!
Here I am for another good year for LEGO Universe. Be it through art, videos, fiction, AUs, and of course the game itself. I look forward to this!
#LEGO Universe#To whoever took the time to hear at my random LU ramblings all throughout the year#You deserve my respect#Also we want to give you a lil' OU teaser soon. Stay tuned!
8 notes
·
View notes
Text
Religion
These cats worship a system of gods and goddesses, and they also believe in an afterlife. However, as time has shifted, some worship what they call the old gods, and others worship the new gods.
Tribe Religion:
The Tribe believes in their ancestors ruling over them. They don’t believe in gods, and only believe in the power of the universe and nature.
The Old Gods:
These are gods who never truly existed. As such, the ones who worship them consider them superior to the new gods, since they never took a mortal form. Cats choose one God to specifically worship, though they may pray to any of them. They often keep their chosen God’s symbol on a chain around their neck. These are purchasable from any trader or builder. Cats who worship these gods go to their version of heaven and hell, separate from the version of the new gods. This version is referred to as Sanctuary (heaven) and Underworld (hell).
Lightningfrost. The God of weather and justice. He is considered the king of gods. His symbol is the thunderbolt.
Grayfrost. The Goddess of marriage and fertility. Her symbol is the peacock.
Troutfrost. The God of seas, water, storms, and earthquakes. His symbol is a dolphin.
Runningberry. The Goddess of the seasons. Her symbol is wheat.
Dewfrost. The Goddess of wisdom and war. Her symbol is the owl.
Amberhawk. The God of light, the sun, prophecy, healing, medicine, truth, and arts. His symbol is the sun.
Lizardhawk. The Goddess of the hunt. Her symbol is the deer.
Snailstrike. The Goddess of love, passion, desire, and procreation. Her symbol is a rose.
Emberstrike. The God of craftsmanship. His symbol is fire.
Reedheart. The God of madness and ecstasy. His symbol is a pine cone.
Brindlefrost. The God of death. His symbol is the cornucopia.
Darkmouse. The Goddess of night. Her symbol is the moon.
Sloeclaw. The Goddess of magic, witchcraft, and ghosts. Her symbol is a cauldron.
The New Gods:
These gods truly did exist and were spectacular heroes. Those who worship them consider them to be greater than the old gods, since they had actual triumphs and can relate more to their struggles now. Cats who below in these gods go to Bliss (heaven) or Agony (hell).
Eelpelt. The God of war, wisdom, poetry, and magic. His symbol is a wizard’s hat.
Tansypelt. The Goddess of family, marriage, and childbirth. Her symbol is a ring.
Oliveheart. The God of thunder. His symbol is the hammer.
Finchpelt. The God of trickery and fatherhood. His symbol is the wolf.
Cedarbranch. The God of fairness, law, and glory. His symbol is the sword.
Mottlewing. The God of light, joy, purity, and day. His symbol is antlers.
Webfall. The God of senses (eyesight, hearing, smell, etc.) and knowledge. His symbol is the horn.
Fernshine. The Goddess of war, love, and witchcraft. Her symbol is the butterfly.
Meadowbee. The Goddess of death and destruction. Her symbol is the skull.
Darkflame. The God of sin (wrath, envy, gluttony, sloth, lust, pride, and greed). His symbol is an X.
Atheism:
Some cats do not believe in any gods or goddesses, and simply believe there is nothing beyond life. Their own belief makes this somewhat true, as they won’t be given passage to any heaven or hell, but will instead be reincarnated. Depending on their will to live, they may either be reincarnated or completely gone forever.
Naturism:
Some cats do not believe in gods or goddesses, though they do believe that the treatment of the earth and other living creatures affects what happens to you. Due to this, almost every cat who believes in this religion is kind and goes to Heaven.
0 notes
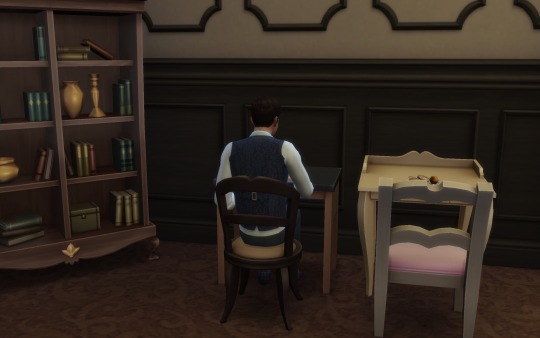
Text
accidental screenshot from a party
#darkflame family#mais4#my sims interior design#Layla Darkflame#lial darkflame#violet Darkflame#samella Darkflame#Phoenix Darkflame II#olive delgato#birthday party#sims 4#simblr#the sims 4#ts4#the sims community#sims family#Darkflame 1 house 2
4 notes
·
View notes
Text
here yall go.. all the undead by world....
Wizard City
Angrus Hollowsoul: Colossus Boulevard—Briskbreeze Tower
Argent Clatterer: Colossus Boulevard—Briskbreeze Tower
Baron Mordecai: Triton Avenue—Mordecai’s Tower
Bastilla Gravewynd: Firecat Alley—Bastilla’s Bastion
Bone Digger: Ravenwood—Hallowe’en Master Tower
Crypt Crawler: Colossus Boulevard—Briskbreeze Tower
Crypt Walker: Triton Avenue—Mordecai’s Tower
Death Whisperer: Ravenwood—Hallowe’en Adept Tower
Field Guard: Haunted Cave, Olde Town—Sapphyra’s Tower
Fire Shrieker: Colossus Boulevard—Briskbreeze Tower
Fire Wraith: Olde Town—Telegraph Box (Wizard City)
Foulgaze: Olde Town—Sapphyra’s Tower
Frost Phantom: Colossus Boulevard—Briskbreeze Tower
Grubb: Sunken City—Grubb’s Castle
Hallowe’en Trickster: Ravenwood—Hallowe’en Apprentice Tower
Haunted Minion: Dark Cave, Firecat Alley, Triton Avenue
Haunting Banshee: Ravenwood—Hallowe’en Apprentice Tower
Howling Ghost: Ravenwood—Hallowe’en Adept Tower
Lady Blackhope: Unicorn Way—Lady Blackhope’s Tower
Living Scarecrow: Sunken City, Sunken City—Grubb’s Castle
Loathsome Creeper: Triton Avenue—Mordecai’s Tower
Lord Nightshade: Haunted Cave—Stormdrain Tower
Lost Soul: Unicorn Way
Maiden of Hate: Ravenwood—Hallowe’en Adept Tower, Ravenwood—Hallowe’en Master Tower
Melweena Smite: Firecat Alley—Forlorn Tower
Midnight Shuffler: Ravenwood—Hallowe’en Adept Tower
Norton: Sunken City—Norton’s Tower
Nosferabbit: Haunted Cave—Mysterious Cave (Wizard City)
Orrick Nightglider: Colossus Boulevard—Briskbreeze Tower
Paulson: Sunken City—Sunken City Second Tower
Plagued Soul: Ravenwood—Hallowe’en Apprentice Tower
Pumpkin Head: Ravenwood—Hallowe’en Master Tower
Rattlebones: Unicorn Way—Rattlebones’ Tower
Rotted Fodder: Triton Avenue—The Harvest Lord’s Tower
Rotting Fodder: Triton Avenue, Haunted Cave, Dark Cave, Ravenwood—Hallowe’en Apprentice Tower
Scarlet Screamer: Triton Avenue
Sergeant Skullsplitter: Triton Avenue—Skull Fort
Simon the Sayer: Sunken City—Simon’s Workshop
Skeletal Corsair: Unicorn Way—Lady Blackhope’s Tower
Skeletal Pirate: Unicorn Way
Skeletal Retainer: Ravenwood—Hallowe’en Master Tower
Skeletal Soldier: Ravenwood—Hallowe’en Adept Tower
Skeletal Warrior: Firecat Alley, Dark Cave
Soul Hunter: Ravenwood—Hallowe’en Master Tower
Swimming Specter: Crab Alley—Waterworks
The Harvest Lord: Triton Avenue—The Harvest Lord’s Tower
The Reaper: Ravenwood—Hallowe’en Adept Tower
Veggie Remnant (Balance): Haunted Cave—Mysterious Cave (Wizard City)
Veggie Remnant (Death): Haunted Cave—Mysterious Cave (Wizard City)
Veggie Remnant (Fire): Haunted Cave—Mysterious Cave (Wizard City)
Veggie Remnant (Ice): Haunted Cave—Mysterious Cave (Wizard City)
Veggie Remnant (Life): Haunted Cave—Mysterious Cave (Wizard City)
Viridian Specter: Colossus Boulevard—Briskbreeze Tower
Wailing Wraith: Sunken City
Wandering Specter: Sunken City
Wormguts: Firecat Alley—Wormguts’ Stronghold
Krokotopia
Ahnic Strider: Ahnic Family Tomb, Entrance Hall
Akori Nirini: Palace of Fire—Akori’s Chamber
Crypt Scavenger: Djeserit Family Tomb—Scavenged Tomb
Defender of the Fang: The Vault of Ice
Djeserit Dweller: Djeserit Family Tomb, Entrance Hall
Forgotten Djeserit Soul: Djeserit Family Tomb
Grumish Greataxe: Entrance Hall
Guardian of the Fang: The Vault of Ice
Itennu Sokkwi: Grand Arena—Moon Gate
Karanahn Deathfeeder: Karanahn Palace, Tomb of Storms
Karanahn Keeper: Tomb of the Beguiler
Karanahn Mortifier: Karanahn Palace
Keeper of the Fang: The Vault of Ice
King Shemet Djeserit: Djeserit Family Tomb
King Uro Ahnic: Ahnic Family Tomb
Krokomummy: Throne Room of Fire
Nirini Ancient Guard: Throne Room of Fire
Nirini Fire Spirit: Throne Room of Fire
Nirini Intimidator: Tomb of the Beguiler
Pike Spirit Crusher: Royal Hall—Spiritcrusher’s Tomb
Protecter of the Fang: The Vault of Ice
Queen Irisi Djeserit: Ahnic Family Tomb
Risen Djeserit: Djeserit Family Tomb
Shambling Ahnic: Ahnic Family Tomb
Soul of the Charmed: Chamber of the Charmed
Soul Scavenger: Hall of Champions—Soul Chamber
Soul Keeper: Chamber of the Charmed
Soulsapper: Temple of Storms
Tempestra: Temple of Storms
The Bonekeeper: Ahnic Family Tomb—The Bonekeeper’s Crypt
Vault Haunter: The Vault of Ice
Vigilant Defender: The Vault of Ice
Wandering Ahnic Spirit: Ahnic Family Tomb
Marleybone
Agony Wrath: Newgate Prison—Great Clocktower, Royal Museum—Big Ben
Grave Phantom: The Ironworks, Newgate Prison
Half-Witted Skeleton: Regent’s Square—Warehouse (Spiral Geographic)
Icy Ghost: Regent’s Square—Warehouse (Spiral Geographic)
Lazy Henchman: Regent’s Square—Warehouse (Spiral Geographic)
Nightmare Spirit: Royal Museum—Big Ben
Screecher: Regent’s Square—Warehouse (Spiral Geographic)
Seething Wraith: Regent’s Square—Warehouse (Spiral Geographic)
Shield Skeleton: Newgate Prison, Royal Museum—Big Ben
Shrieker: Newgate Prison
Tired Fighter: Regent’s Square—Warehouse (Spiral Geographic)
Tomb Roamer: Newgate Prison
Mooshu
Akuji: Tree of Life
Anguished Wraith: Jade Palace—Telegraph Box (Mooshu)
Crying Spirit: Jade Palace—Telegraph Box (Mooshu)
Cursed Ronin: Village of Sorrow, Ancient Burial Grounds
Death Soldier: Ancient Burial Grounds, Ancient Burial Grounds—Mysterious Dojo, Village of Sorrow
Dishonored Samoorai: Ancient Burial Grounds
Fushiko: Village of Sorrow—Fushiko’s House
Grief Spectre: Village of Sorrow—Fushiko’s House
Howling Shade: Village of Sorrow—Fushiko’s House
Kakeda Spirit Slave: Tree of Life
Oyotomi the Defiler: Village of Sorrow
Pirate Ravager: Jade Palace—Telegraph Box (Mooshu)
Sorrow Whisperer: Village of Sorrow, Ancient Burial Grounds
Tomugawa the Evil: Ancient Burial Grounds
Tortured Kakeda Soul: Tree of Life
Walking Dead: Village of Sorrow, Village of Sorrow—Fushiko’s House
Dragonspyre
Andor Bristleback: The Labyrinth
Armored Bonewalker: The Necropolis—Pyromancer’s Tomb, The Necropolis—Lord Obsidian’s Tomb
Barbarian Spirit: The Labyrinth
Beghastion Crowcaller: Plaza of Conquests, The Grand Chasm, The Grand Chasm—Kyanite Tower
Beghastion Fieldburner: The Necropolis—Sylvia Drake’s Tomb, The Grand Chasm—Kyanite Tower
Bone Warrior: The Necropolis—Sylvia Drake’s Tomb
Boris Blackrock: The Crucible
Bound Specter: The Crucible, The Necropolis—Pyromancer’s Tomb, The Necropolis—Lord Obsidian’s Tomb
Crying Spirit: The Necropolis—Sylvia Drake’s Tomb, The Necropolis—Lord Obsidian’s Tomb, The Necropolis—Nightreaver’s Lair
Dark Poltergeist: The Crucible—Fleshless Tower
Decayed Blackguard: The Great Spyre—The Crown of Fire
Decaying Blackguard: The Great Spyre—The Crown of Fire
Devora Shadowcrown: The Labyrinth
Drusilla Morningbane: The Necropolis—Pyromancer’s Tomb
Fallen Merc: The Tower Archives—Zarathax’s Tower
Fleshless Sentry: The Crucible—Fleshless Tower, The Necropolis—Pyromancer’s Tomb
Fleshrot Retriever: The Crucible—Fleshless Tower
Foul Reaper: The Crucible
Gallium Footman: The Grand Chasm—Kyanite Tower, The Grand Chasm—Unused Vault
Gallium Juggernaut: The Drake Hatchery
Gallium Paladin: The Labyrinth
Gallium Shardtrooper: The Crucible, The Necropolis—Lord Obsidian’s Tomb
Ghastly Slave: The Tower Archives—Oskar’s Tower, Plaza of Conquests
Ghost of Sylvia Drake: The Necropolis—Sylvia Drake’s Tomb
Iona Pyrelance: The Crucible
Irate Banshee: Plaza of Conquests
Katia Firewinter: The Crucible
Kyanite Lancer: The Crucible
Kyanite Lieutenant: The Crucible, The Necropolis, The Necropolis—Lord Obsidian’s Tomb
Kyanite Valkyrie: The Drake Hatchery
Loathsome Creeper: The Tower Archives
Mavra Flamewing: Plaza of Conquests—Flamewing’s Tower
Necrotic Haunter: The Necropolis—Sylvia Drake’s Tomb
Orin Grimcaster: The Crucible—Fleshless Tower
Petrov Gloomstrider: The Tower Archives—Petrov’s Tower
Pirate Ravager: The Tower Archives
Reanimated Draconian: The Forum—Vesta Shadowmark’s Tower, The Forum—Abandoned Tower
Restless Soldier: The Tower Archives, The Necropolis—Well of Fear
Rotten Scallywag: The Crucible
Rurik Flamesoul: The Crucible
Sandor Spearcaller: Plaza of Conquests—Spearcaller’s Tower
Scarrik Gallowgaunt: The Labyrinth
Soul Searcher: The Great Spyre—Dragon’s Maw, The Great Spyre—The Path of Scales
Soul Servant: The Great Spyre—The Crown of Fire
Soulless Servant: The Great Spyre—The Crown of Fire
The Collector: The Drake Hatchery
Undead Draconian: The Forum
Undead Wizard: The Grand Chasm, The Necropolis—Well of Fear
Valerik Brightsword: The Crucible
Valeska Redwind: The Drake Hatchery—Secure House
Vasek Ashweaver: The Grand Chasm—Vault 1933
Vesta Shadowmark: The Forum—Vesta Shadowmark’s Tower
Vika Markmaker: The Crystal Grove
Victor Snowcrusher: The Drake Hatchery
Vilara Moonwraith: The Tower Archives—Moonwraith’s Tower
Vile Apparition: The Crucible—Fleshless Tower, The Necropolis—Pyromancer’s Tomb
Vladimir Darkflame: The Labyrinth
Wandering Wizard: The Tower Archives
Zora Steelwielder: The Labyrinth
Grizzleheim/Wintertusk
Asrik Widebelt: Vestrilund—Asrik’s Cave
Frost Bones: Hrundle Fjord—Battlegloom’s Cave, Austrilund—Grimaldi’s Cave, Austrilund—Mysterious Cave (Grizzleheim), Vestrilund—Asrik’s Cave, Vestrilund—Gerda’s Tower
Gothric Honorbound: Sudrilund—Barrow
Halfang Bristlecrown: Vestrilund—Halfang’s Cave
Howling Banshee: Mirkholm Keep
Hungry Soul: Vigrid Roughland—Vigrid Roughland Crypt
Kulgrim Soulsunder: Nastrond—Kulgrim’s Lair
Lothin Doombringer: Vigrid Roughland—Vigrid Roughland Crypt
Mimir Winterbane: Hrundle Fjord—Well of Urd
Osvud Fleetpaw: Vestrilund—Osvud’s Cave
Snow Skull: Vestrilund—Magni’s Tower, Nastrond
Troubled Warrior: Savarstaad Pass, Vigrid Roughland Crypt
Winter Skull: Nordrilund, Nastrond
Yngvar Sharptooth: Savarstaad Pass—Yngvar Sharptooth’s Mound
Wysteria
Kaimanite Mummy: Pegasus Place—Tower of the Helephant
Celestia
Arachtus Duskweb: Stormriven—Duskweb’s Barracks
Blue Bart: Crustacean Empire
Celestian Remnant: Stormriven, The Lunarium
Karolak Nightspinner: Stormriven—Sorcerer’s Sanctum
Narallor Nightborn: Stormriven—Summoning Pylons
Queen Calypso: Crustacean Empire—Calypso’s Cavern
Sea-Booter: Crustacean Empire
Selwyn Skywatcher: The Stellarium—Selwyn’s Chamber
Servus Bloodsword: The Portico
Shadow-Web Conscript: Stormriven, Stormriven Hall, The Portico, The Lunarium
Shadow-Web Mercenary: Stormriven, Stormriven Hall
Thrale Bonestriker: The Portico
Vorgen Soulbreaker: The Portico
Zafaria
Bwana Shadowriver: Savannah—Shadowriver’s Cave
Elephant Spectral Guardian: Shining Mountain
Gorilla Spectral Guardian: Shining Mountain
Iklaw Ghost Warrior: Zamunda—King’s Tomb
Killmare Spiritwalker: Savannah—Spiritwalker’s Cave
Lion Spectral Guardian: Shining Mountain
Zanga Zebu: Zamunda—King’s Tomb
Zebra Spectral Guardian: Shining Mountain
Avalon
Disloyal Knight: The Wyrd—Tomb of the Nameless, Ghost Avalon—Armory
Drowned Knight: Deepwater—Cavern of Broken Virtures
Lambent Fire: Crystal Caves—Crystal Caves Stone Key Room
Lord of the Brocken: The Wyrd—The Lost Abbey
Nameless Knight: The Wyrd—Tomb of the Nameless
Spectre of the Brocken: The Wild—Frozen Cave, The Wyrd
Tarn the Drowned: Deepwater—Diabhal Cave
Azteca
Anacaona Black Snake: Mangrove Marsh—Anacaona Black Snake’s Tomb
Azcal Fire Ant: Cenote—Fire Ant’s Tomb
El Marrow: Twin Giants—Cave of the Dawn
Ezhua Bad Taste: Tierra de Brea—Cave of Bad Taste
Grim Calaca: Cenote—Huascar Bent Wing’s Mine, Pitch Black Lake—Pyramid of Mother Moon, Twin Giants, Twin Giants—Cave of the Dawn, Twin Giants—Wings of the Obsidian Butterfly Shrine, Twin Giants—Pyramid of the Falling Star, Xibalba
Grinning Death Moon: Pitch Black Lake—Pyramid of Mother Moon
Guillermo Shatterer: Cenote—Ruined Mine
Malistaire the Undying: Xibalba
Moon Skull Wight: Three Points—Black Sun Pyramid Master Chamber, Xibalba
Moon Skull Zombie: Three Points—Black Sun Pyramid Lower Chamber, Cenote, Tierra de Brea—Chamber of Red Sorrow
Mozar Turtle Hunter: Mangrove Marsh—Mozar Turtle Hunter’s Tomb
Neza the Poet: Pitch Black Lake—Pyramid of Mother Moon
Poca Cruel Star: Mangrove Marsh—Poca Cruel Star’s Tomb
Shambling Zombie: Xibalba
Smoking Mirror Zombie: Cenote, Pitch Black Lake—Pyramid of Mother Moon
Storm Caiman: Saltmeadow Swamp—Pyramid of the Storm Eye
Thunder Horn Ghoul: Mangrove Marsh, Cenote—Fire Ant’s Tomb, Tierra de Brea—Cave of Bad Taste
Thunder Horn Zombie: Three Points—Black Sun Pyramid Lower Chamber, Cenote, Pitch Black Lake—Nauyotol Down in the Hole, Mangrove Marsh—Actun Caban, Mangrove Marsh—Falling Cavern
Uacalxochitl Blood Eye: Mangrove Marsh—Blood Eye’s Lair
Xipe Flayed One: Xibalba
Xiuhcoatl Barbed Tooth: Saltmeadow Swamp—Swamp Clearing (Southeast)
Youala Night Drinker: Xibalba
Khrysalis
Arkyn Moonblade: Moon Cliffs—Eclipse Tower (Left)
Cree Curdwright: Bastion—Curdwright Crypt
Deer Mouse Revenant (Balance): Bastion—Mausoleum West, Kondha Desert—Chamber of the Sun’s Shadow
Deer Mouse Revenant (Ice): Last Wood—Reverence Cave
King Alric Fatesailor: Last Wood—Reverence Cave
Laughing Calaca: Moon Cliffs—Eclipse Tower (Left)
Phantom Ace: Ruined Alcazar—Ruined Hall, Ruined Alcazar—Serpent Tower
Phantom Glider: Ruined Alcazar—Ruined Hall, Ruined Alcazar—Serpent Cave
Wraith Knight: Kondha Desert—Chamber of the Sun’s Shadow
Polaris
Broken Land Guardian: Forlorn Tayg—Cave of the Broken Land
Broken Land Spirit: Forlorn Tayg—Cave of the Broken Land
Shattered Sky Guardian: River of Frozen Tears—Cave of the Shattered Sky
Shattered Sky Spirit: River of Frozen Tears—Cave of the Shattered Sky
Sundered Seam Guardian: Frigid Maw—Cave of the Sundered Seam
Sundered Seam Spirit: Frigid Maw—Cave of the Sundered Seam
Mirage
Ghulture (Death): Caravan
Scrollkeeper: Zruvan Grotto—House of Scrolls
Shadowbones: Chronoverge—East Time Dunes
Shrowdenger’s Cat (Death): Istanboa—Hall of Secrets
Shrowdenger’s Cat (Life): Istanboa—Hall of Secrets
Aquila
Boatswain McGee: Atlantea—Watery Graves
Chief Mate McGurk: Atlantea—Watery Graves
Doomed Bones: Mount Olympus—Pit of the Noxii, Tartarus
Lost Maiden: Atlantea—Watery Graves
Four Dungeons
Anguished Wraith (Ice): Castle Darkmoor—Graveyard
Bunferatu: Castle Darkmoor—Upper Halls Gold Key Room
Condemned Soldier: Upper Zigazag—House of Scales, Lower Zigazag—Lower Zigazag Stone Key Room
Count Bela BlackSleep: Castle Darkmoor—Castle Darkmoor (Dungeon)
Darkmoor Serf: Castle Darkmoor—Castle Darkmoor (Dungeon), Castle Darkmoor—Upper Halls, Castle Darkmoor—Graveyard
Darkmoor Squire: Castle Darkmoor—Castle Darkmoor (Dungeon), Castle Darkmoor—Upper Halls Gold Key Room
Draconian Conjurer: Castle Darkmoor—Graveyard
Draconian Diviner: Castle Darkmoor—Graveyard
Draconian Necromancer: Castle Darkmoor—Graveyard
Draconian Pyromancer: Castle Darkmoor—Graveyard
Draconian Sorcerer: Castle Darkmoor—Graveyard
Draconian Thaumaturge: Castle Darkmoor—Graveyard
Draconian Theurgist: Castle Darkmoor—Graveyard
Haunted Malistaire: Castle Darkmoor—Graveyard
Malistaire the Undying (Shadow): Castle Darkmoor—Graveyard
Scarlet Wampyr: Castle Darkmoor—Castle Darkmoor (Dungeon), Castle Darkmoor—Upper Halls Gold Key Room
Shane von Shane: Castle Darkmoor—Upper Halls
Shane von Shane (Star): Castle Darkmoor—Graveyard
Sir Blackwater: Castle Darkmoor—Castle Darkmoor (Dungeon)
Spirit of Darkmoor: Castle Darkmoor—Upper Halls
Yevgeny NightCreeper: Castle Darkmoor—Graveyard
#wizard101#w101#wizzy fandom#under the cut bc. long af#sorry if anything's wrong i did this in all of two hours#im so tired but its done#i can finally rest#monstrology ref
21 notes
·
View notes
Text
Made Crowflight's energetic and fun-loving sister Fireblossom enjoy! 😁
Names: Firekit, Firepaw, & Fireblossom
Gender: Female(She/Her)
Sexuality: Pansexual
Family:
Darkflame(M)(Father)
Hollyblossom(F)(Mother)
Crowflight(M)(Brother)
Ashwillow(F)(Aunt)
Frostheart(M)(Uncle)
Blazeglow(M)(Uncle)
Tigerlily(F)(Grandmother)
Night(M)(Grandfather)
Cadaver(M)(Great Uncle)
Ambrosia(F)(Great Aunt)
Firefox(F)(Great Grandfather)
Frostbite(M)(Great Grandmother)
Mate: N/A
Clan: Oakclan
Rank: Warrior
Mentor: Sandstripe
Apprentice: N/A
Backstory:
Fireblossom was born into Oakclan to Hollyblossom and Darkflame. Granted like Crowflight, she never knew who her father was, but despite that, she has always been an energetic kit. When she became an apprentice, she struggled at times with staying focused. Sandstripe, however, was patient and kept her focused, and sometimes, she would train with her brother with Whitetiger. She works hard and is a great warrior despite her tendency to have a short attention span. Fireblossom also asked that she get the same last part of her name as her mother since she admired her mother's talent as a warrior despite being a kittypet.
#artwork#original art#art#my art#oc artwork#artists on tumblr#character art#oc art#my oc art#oc artist#warrior cat oc#warrior cats#cat oc
1 note
·
View note
Text

the curly black haired gals from Elias and Inez’s family
#amber gets it from some recessive genes from both parents though she has ember’s hair color (Inez’s hair color from her mom) and Charlotte#gets her hair color and texture from her mom Charlotte#her mom Gracelynn#mais4#amber darkflame#Charlotte Darkflame#cousins#darkflame family#sims selfie#sims 4#the sims 4#the sims screencaps
0 notes
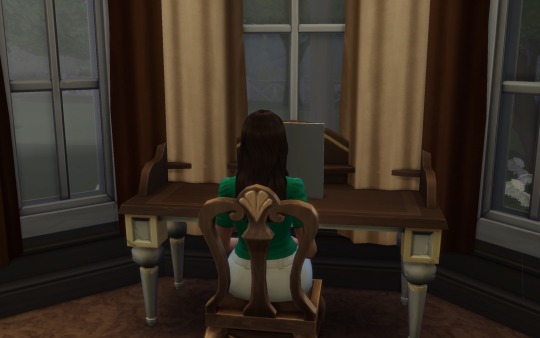
Text


doing a school 🏫 project
#darkflame family#mais4#Amir Darkflame#Garcia Darkflame#mirzan darkflame#siblings#half-siblings#cousins#my sims interior design#Darkflame 4.2 house#sims children#the sims#the sims 4#sims 4 story
0 notes
Text
a tucked away thanksgiving
#erin darkflame#Adelaide Darkflame#Nathaniel Darkflame#Natasha Darkflame#Wade Darkflame#Darkflame 2.3 house#darkflame family#thanksgiving#sims family#office#my sims interior design#simblr
0 notes
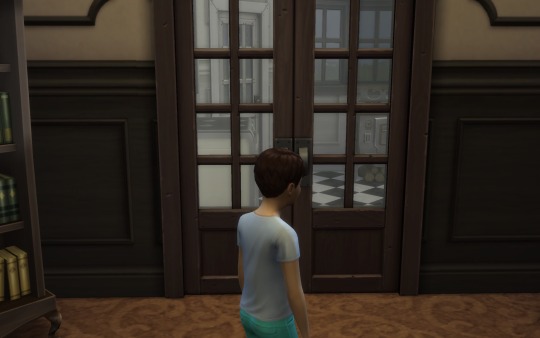
Text
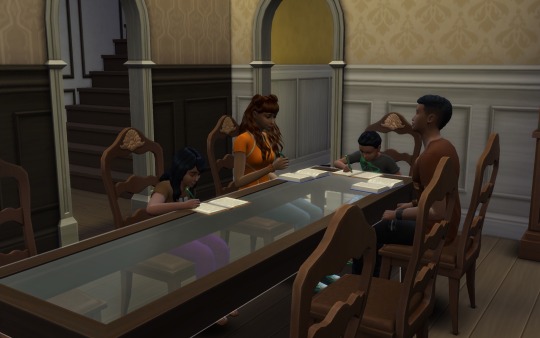
all of Angel’s kids, together doing homework 📄
#WHY DO THE WALLS NOT MATCH#mais4#darkflame family#Raphael Darkflame#camael darkflame#nuriel darkflame#Nanael Darkflame#Darkflame 4 house#sims 4#simblr#the sims gameplay#sims family#siblings
0 notes
Last Seen Blogs

alutsista4r
alutsista

asleepygremlin
Autistic Burnout

totallyinlovewithyurioppa-blog
PrideIn_

horiibeiitona
!! MOVED TO @a-kuma !!
toasthaste
I am planting flowers