#digitalarttutorial
Photo
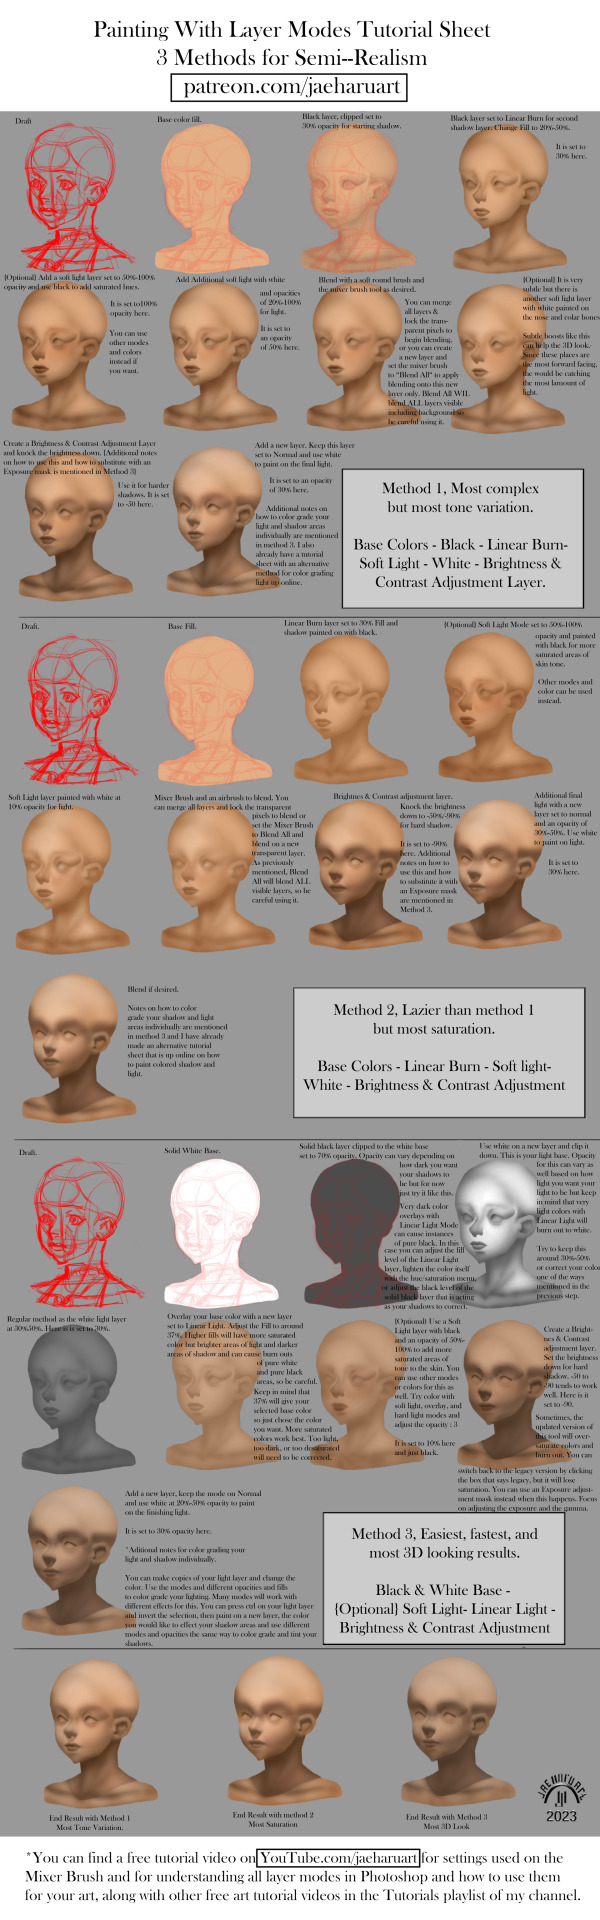
Tutorial sheet walking you through the steps to take to paint something semi-realistically using the layer modes in Photoshop and your base colors or black and white bases, because I spent years studying them and jump around these 3 methods myself depending on what look I'm going for. So here's this for myself and others. There a few typos in this. I really don't care.
Patreon: https://www.patreon.com/JaeHaruArt?fan_landing=true
Link Tree: https://linktr.ee/jaeharuart
#arttutorial#drawingtutorial#paintingtutorial#semirealismtutorial#digitalarttutorial#layermodestutorial#jaeharuart#digitalpainting#digitaldrawing#photoshoptutorial#semirealstic tutorial#art tutorial#drawing tutorial#painting tutorial#semi realism tutorial#digital art tutorial#digitalart tutorial#layer modes tutorial#digital drawing#photoshop tutorial
20 notes
·
View notes
Photo
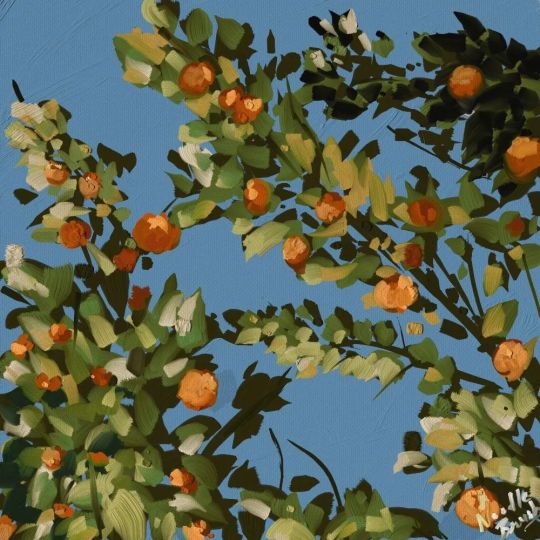
🍊🍊🍊 #digitalart #digitalarts #digitalartists #digitalartistsoninstagram #digitalartlook #digitalartsociety #digitalartistoninstagram #digitalarte #digitalartgallery #digitalartoftheday #digitalartdesign #digitalartpainting #digitalartmuseum #digitalarttutorial #digitalartdrawing #digitalartoninstagram #digitalartanime #digitalartz #Digitalartofinstagram #digitalartistsofinstagram #digitalartphotography https://www.instagram.com/p/CgRYNDGvpxS/?igshid=NGJjMDIxMWI=
#digitalart#digitalarts#digitalartists#digitalartistsoninstagram#digitalartlook#digitalartsociety#digitalartistoninstagram#digitalarte#digitalartgallery#digitalartoftheday#digitalartdesign#digitalartpainting#digitalartmuseum#digitalarttutorial#digitalartdrawing#digitalartoninstagram#digitalartanime#digitalartz#digitalartofinstagram#digitalartistsofinstagram#digitalartphotography
3 notes
·
View notes
Text
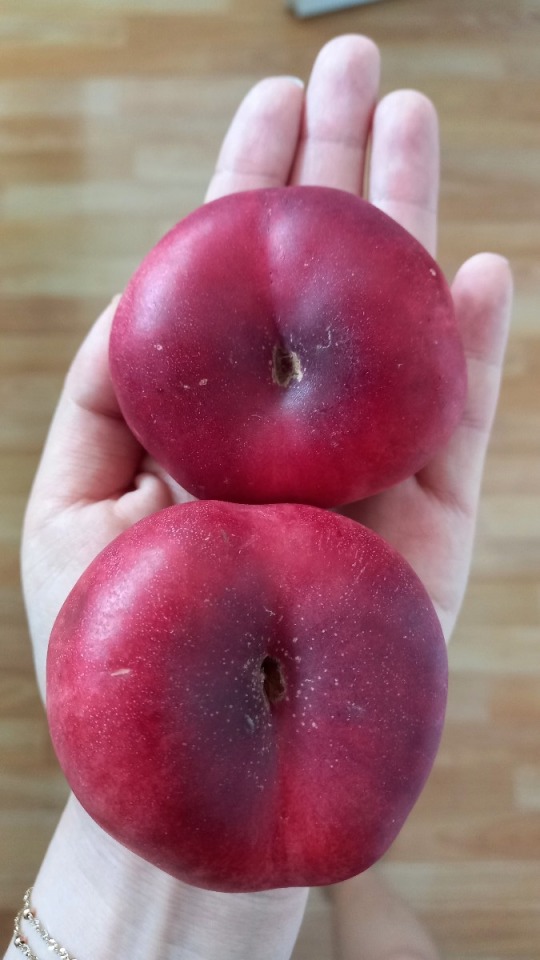
Peach
#peaches#illustration#illustrator#character illustration#character#drawings#digitalarttutorial#digitalartists
1 note
·
View note
Video
youtube
Creating Stunning Images with Midjourney AI Bot: Your Ultimate Guide
Step 1: Sign up for a Discord account
1.1. Go to the Discord website and click on the "Sign Up" button located at the top right corner of the homepage.
1.2. Fill out the required fields such as your email address, username, and password.
1.3. Click on the "Continue" button and follow the instructions to complete the sign-up process.
Step 2: Create your own server
2.1. Once you are logged into your account, click on the "+" icon located on the left-hand side of the Discord window.
2.2. Select the "Create a Server" option from the dropdown menu.
2.3. Choose a name for your server, select a region, and click on the "Create" button.
Step 3: Invite the MidJourney bot to your new server
3.1. Go to the server where you currently have the MidJourney bot.
3.2. Right-click on the MidJourney bot and select "Server Settings" from the dropdown menu.
3.3. Click on the "Authorize" button located at the bottom of the "OAuth2" tab.
3.4. Select the new server you just created from the dropdown menu.
3.5. Choose the appropriate permissions for the bot and click on the "Authorize" button.
3.6. The MidJourney bot will now be added to your new server.
Step 4: Open the MidJourney bot
4.1. Go to your server where you have added the MidJourney bot.
4.2. Type the command "/imagine" in the chat to activate the image generation prompt.
Step 5: Enter the image prompt
5.1. After selecting the image model, the bot will prompt you to enter an image prompt.
5.2. Type in a description of the image you want to generate with ‘Catgut can be anything from a specific object or scene to an abstract concept.
5.3. For example, if you want to generate an image of a cat, you can type " create a beautiful car ,background dark, highway surface, cyberpunk, realistic, neon,—v 4".
Step 6: Wait for the image to generate
6.1. After entering the image prompt, the bot will start generating the image.
6.2. This process can take a few minutes depending on the complexity of the prompt and the image model you are using.
6.3. Once the image is generated, the bot will post it in the chat for you to view and you scale it.
Step 7: Download the image
7.1. To download the image, right-click on the image and select "Save Image As".
7.2. Choose a location on your computer where you want to save the image and click "Save".
Step 7: Upload your image as reference
Find the option to upload a photo by clicking on the"+" sign.
Select the photo you want to upload from your gallery.
Add a caption or description to your photo if desired.
Click the "Post" or "Share" button to upload your photo.
Notice:Make sure you have a stable internet connection to successfully upload your photo during your mid-journey.
#AIimagecreation#midjourneyai#createimages#aitechnology#digital art tutorial#digitalarttutorial#chatgpt#verdantofficialtech
0 notes
Photo
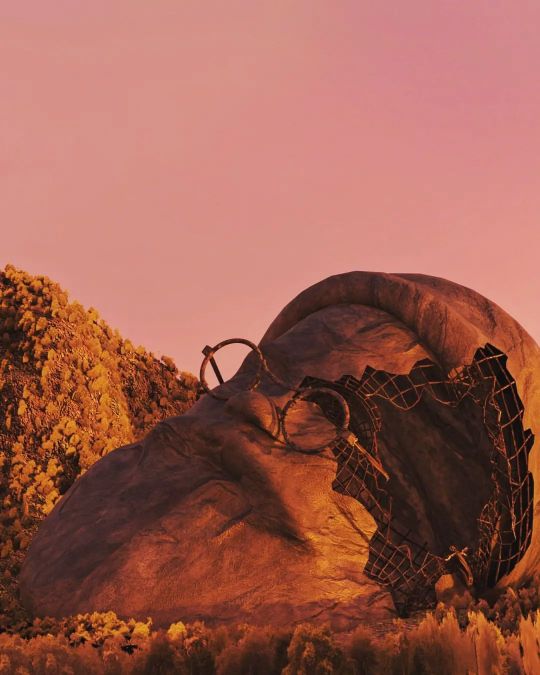
What is it anyways (Blender) #digitalart #digitalarts #digitalartists #digitalartistsoninstagram #digitalartlook #digitalartsociety #digitalartistoninstagram #digitalarte #digitalartgallery #digitalartoftheday #digitalartdesign #digitalartpainting #digitalartmuseum #digitalarttutorial #digitalartdrawing #digitalartoninstagram #digitalartanime #digitalartz #Digitalartofinstagram #digitalartistsofinstagram #digitalartphotography https://www.instagram.com/p/CmTj58Kvpzr/?igshid=NGJjMDIxMWI=
#digitalart#digitalarts#digitalartists#digitalartistsoninstagram#digitalartlook#digitalartsociety#digitalartistoninstagram#digitalarte#digitalartgallery#digitalartoftheday#digitalartdesign#digitalartpainting#digitalartmuseum#digitalarttutorial#digitalartdrawing#digitalartoninstagram#digitalartanime#digitalartz#digitalartofinstagram#digitalartistsofinstagram#digitalartphotography
0 notes
Photo

👻 @monosenju #digitalart #digitalarts #digitalartists #digitalartistsoninstagram #digitalartlook #digitalartsociety #digitalartistoninstagram #digitalarte #digitalartgallery #digitalartoftheday #digitalartdesign #digitalartpainting #digitalartmuseum #digitalarttutorial #digitalartdrawing #digitalartoninstagram #digitalartanime #digitalartz #Digitalartofinstagram #digitalartistsofinstagram #digitalartphotography https://www.instagram.com/p/ChOUlEzsxEQ/?igshid=NGJjMDIxMWI=
#digitalart#digitalarts#digitalartists#digitalartistsoninstagram#digitalartlook#digitalartsociety#digitalartistoninstagram#digitalarte#digitalartgallery#digitalartoftheday#digitalartdesign#digitalartpainting#digitalartmuseum#digitalarttutorial#digitalartdrawing#digitalartoninstagram#digitalartanime#digitalartz#digitalartofinstagram#digitalartistsofinstagram#digitalartphotography
0 notes
Video
Hello guys! I share with you just a little tip that I use to speed up the colouring process. I use the lazo tool and then I click on "add" to select multiple parts of the drawing at the same time. Do you use this tool? . . #digitalarttips #digitalarttricks #digitalarttutorial #digitalarttutorials https://www.instagram.com/p/Cf8ghPFoK2e/?igshid=NGJjMDIxMWI=
0 notes
Photo
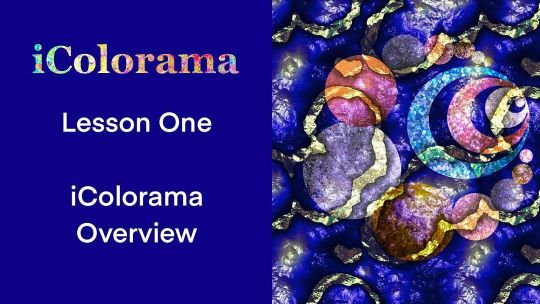
Free course for digital artists. Watch for one month Skillshare https://ski.sh/3ILmntu courses #icolorama #procreate #skillshare #digitalart #freecourse #abstractpainting #illustrationart #icoloramas #artclassroom #artcourse #freeart #patternartist #patterndesigner #procreateillustration #skillshareproject #digitalarttutorial https://www.instagram.com/p/CflQ-4KLMkX/?igshid=NGJjMDIxMWI=
#icolorama#procreate#skillshare#digitalart#freecourse#abstractpainting#illustrationart#icoloramas#artclassroom#artcourse#freeart#patternartist#patterndesigner#procreateillustration#skillshareproject#digitalarttutorial
0 notes
Video
Reposted from @the.artcurators Can you relate? Follow @the.artcurators for more Work by @ketnipz #makingbed #animationart #digitalart #illustration #digitalartist #digitalartwork #digitalartistsoninstagram #digitalartistry #procreate #digitalartsociety #digitalpainting #digitalartlook #digitalarttutorial #creative #artworks #contemporaryarts https://www.instagram.com/p/CdBP6W1oLur/?igshid=NGJjMDIxMWI=
#makingbed#animationart#digitalart#illustration#digitalartist#digitalartwork#digitalartistsoninstagram#digitalartistry#procreate#digitalartsociety#digitalpainting#digitalartlook#digitalarttutorial#creative#artworks#contemporaryarts
0 notes
Photo

She shone so beautifully in the darkness, every star in the sky envied her light. ~ Christy Ann Martine. #art #artwork #digitalart #digitaldrawing #portrait #artist #artistic #artistoninstergram #artgallery #wallart #wallartdecor #homedecor #digitalartist #digitalpainting #canvaspainting #canvasart #canvastotebag #digitalillustration #abstractart #artforsale #artoftheday #artcurator #artjournal #artcollective #digitalarttutorial #digitalartists https://www.instagram.com/p/CohJ6n1rrDQ/?igshid=NGJjMDIxMWI=
#art#artwork#digitalart#digitaldrawing#portrait#artist#artistic#artistoninstergram#artgallery#wallart#wallartdecor#homedecor#digitalartist#digitalpainting#canvaspainting#canvasart#canvastotebag#digitalillustration#abstractart#artforsale#artoftheday#artcurator#artjournal#artcollective#digitalarttutorial#digitalartists
2 notes
·
View notes
Photo

Your staring you want some? #digitalart #digitalartist #digitalartwork #digitalarts #digitalartists #digitalartworks #digitalartistry #digitalartistsoninstagram #digitalartlook #digitalartsociety #digitalartistoninstagram #abstractdigitalart #digitalartgallery #mydigitalart #digitalarte #animedigitalart #digitalartdesign #digitalartoftheday #digitalartmuseum #digitalartpainting #digitalart_id #gakkodigitalart #furrydigitalart #digitalarttutorial #digitalart_network #instadigitalart #digitalartoninstagram #digitalartdrawing #vtuber #vtubers https://www.instagram.com/p/ClSKq3zs0Tw/?igshid=NGJjMDIxMWI=
#digitalart#digitalartist#digitalartwork#digitalarts#digitalartists#digitalartworks#digitalartistry#digitalartistsoninstagram#digitalartlook#digitalartsociety#digitalartistoninstagram#abstractdigitalart#digitalartgallery#mydigitalart#digitalarte#animedigitalart#digitalartdesign#digitalartoftheday#digitalartmuseum#digitalartpainting#digitalart_id#gakkodigitalart#furrydigitalart#digitalarttutorial#digitalart_network#instadigitalart#digitalartoninstagram#digitalartdrawing#vtuber#vtubers
2 notes
·
View notes
Photo

느므 귀여운 할부지👨🏼🦳/Einen Tee in Rom🫖/unbezahlte Werbung . . . #illustration #illustrationartists #illustrator #illustagram #digitalarttutorial #digitalartwork #digitalillustratiton #travelgram #traveldrawing #traveldrawings #travelsketching #dailydrawing #dailyartwork #dailyillustrations #dailyillust #dailyillustration #artist #artworks #rometravel #rometravelers #tea #teadrawing #doodler #로마여행 #일러스트 #드로잉 #그리기 #그림 #손그림 #삽화 (Italien, Rom에서) https://www.instagram.com/p/ClMQmkkNqj9/?igshid=NGJjMDIxMWI=
#illustration#illustrationartists#illustrator#illustagram#digitalarttutorial#digitalartwork#digitalillustratiton#travelgram#traveldrawing#traveldrawings#travelsketching#dailydrawing#dailyartwork#dailyillustrations#dailyillust#dailyillustration#artist#artworks#rometravel#rometravelers#tea#teadrawing#doodler#로마여행#일러스트#드로잉#그리기#그림#손그림#삽화
1 note
·
View note
Text
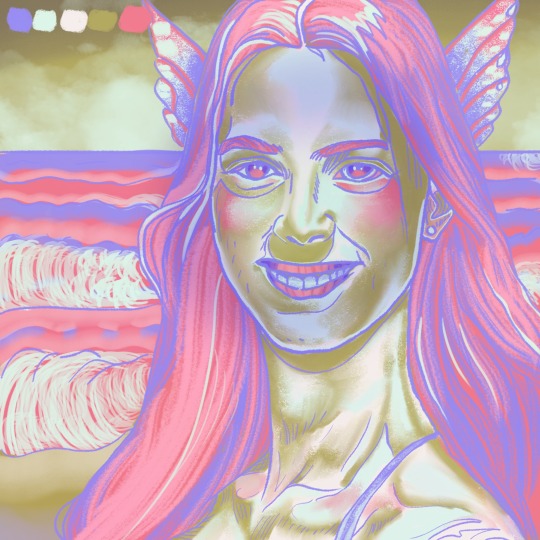
I love the ocean it’s a very spiritual place to be. 🌊I’m also really liking this color scheme. 🌺🌻🍇Let me know in the comments if y’all have any questions about buying my art.
.
.
.
.
.
#adobefresco #frescoadobe #adobefrescoart #adobefrescodrawing #adobefrescoapp #adobefrescoillustration #adobefrescowatercolour #adobefrescoanimation #adobefrescooilpainting #adobefrescopainting #adobefrescoartwork #paintinglife #paintinglovers #handpainting #handdrawntype #dailypainting #digitalartdrawing #artistadigital #digitalartworks #paintingforsale #paintingsforsale #digitallyart #digitalillustrationart #digitalarttutorial #paintingdaily #digitalartistsofinstagram #paintingnow #paintingreel #digitalartoninstagram #paintingoftheday🎨
0 notes
Text
#art process#digital art#world of warcraft art#anthro#furry character#worgen#digital art tutorial#art reel#digital sketch#digital drawing tutorial
0 notes
Photo
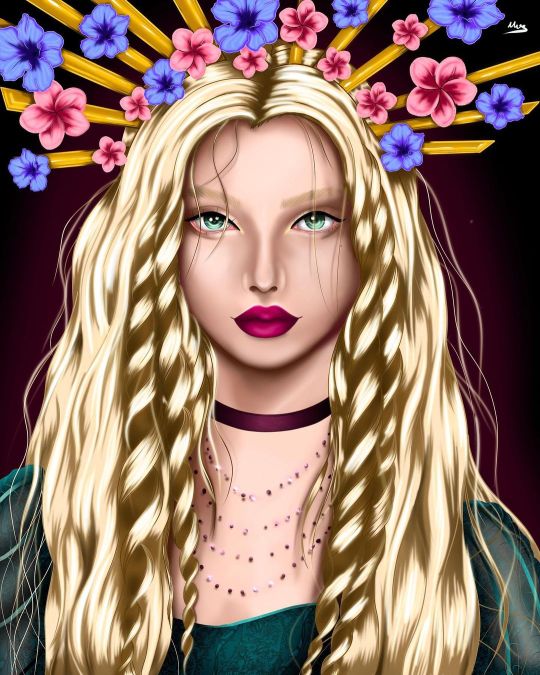
#newartist #queen #arttrade #originalart #originalcharacter #draw #digitalart #digitalart_network #digitalarttutorial #drawings #drawing #art #artistsoninstagram #artist #artwork #illustration #illustrator #illustrationartists #procreatecarepack #procreatepowerup #procreatefaces #procreate #fyp #magic #ipadart https://www.instagram.com/p/CidKrnIrDgz/?igshid=NGJjMDIxMWI=
#newartist#queen#arttrade#originalart#originalcharacter#draw#digitalart#digitalart_network#digitalarttutorial#drawings#drawing#art#artistsoninstagram#artist#artwork#illustration#illustrator#illustrationartists#procreatecarepack#procreatepowerup#procreatefaces#procreate#fyp#magic#ipadart#mirs#foryou
0 notes
Link
drawing ref on how to draw a sparkly dress
0 notes
Last Seen Blogs


rqrody
RODY

atertulia
Tertúlia
grapevynerendezvous
In The Eighth Year Trick's LPs
wickrdeepwebkorea-blog
wickr me (위커) : deepwebkorea떨 선드랍/떨 판매/떨 구