#drawing hair
Text
How to think when drawing hair
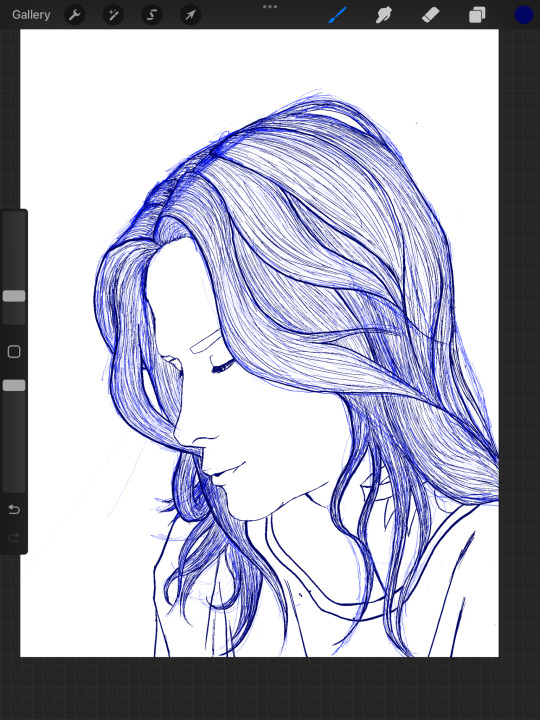
Here's a very rough five minute, uh, not really a tutorial, but a principle on how to draw hair that I did for a friend who voiced some struggles with drawing hair.
I promised to upload it here for safekeeping, maybe it'll be useful for some of you, too! It's not a full process but it shows how you can overcome the overwhelm that comes with drawing something detailed such as hair.
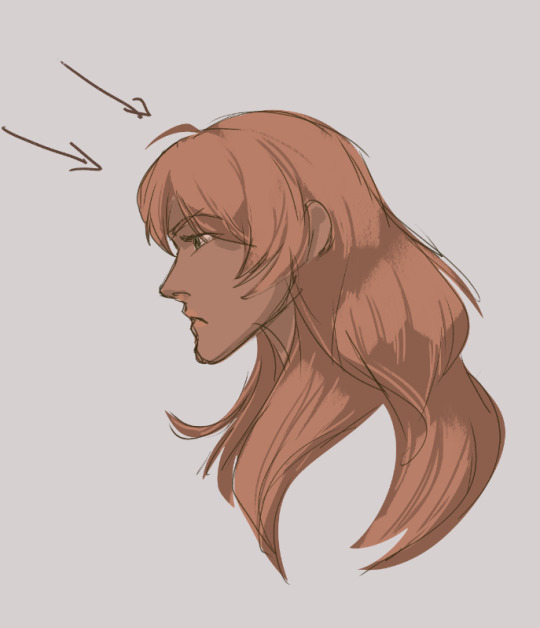
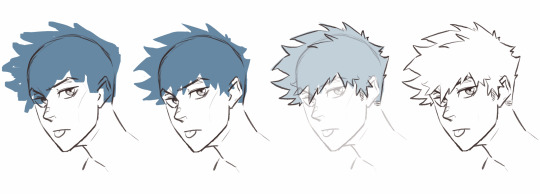
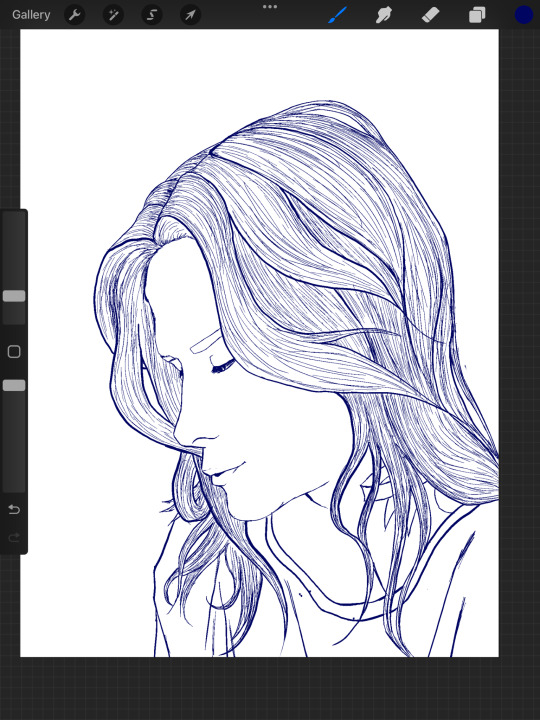
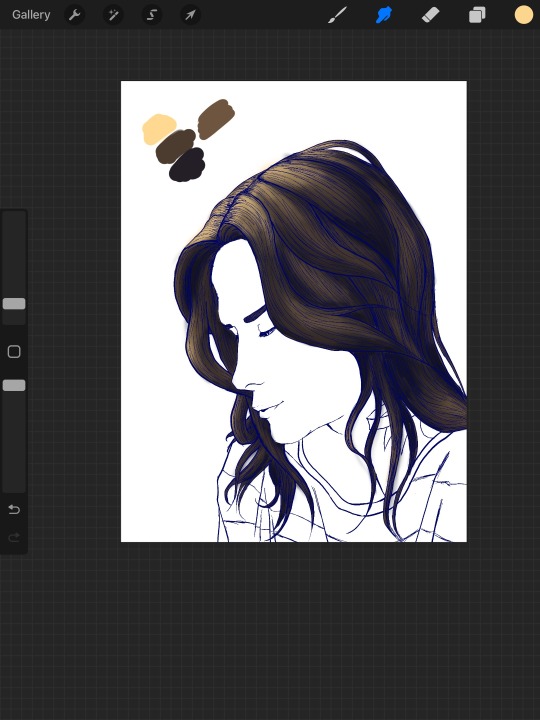
So first here's the drawing with some flat colors. The arrows are there to just point out the general direction of light. The key thing to drawing hair is to think of it as a 3D form and then imply detail which is what I'm showing here.

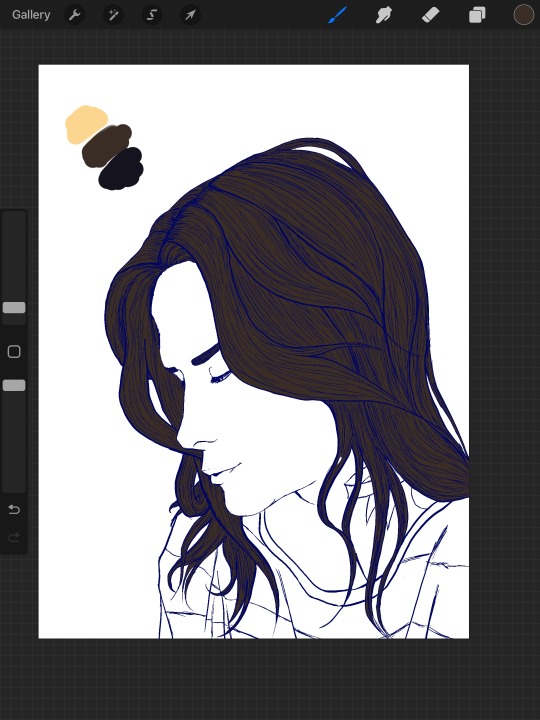
Now you gotta be bold and pick a big brush. Make it so big that it's almost clumsy so that you don't start noodling right at the get go. Lay down some very rough light areas.

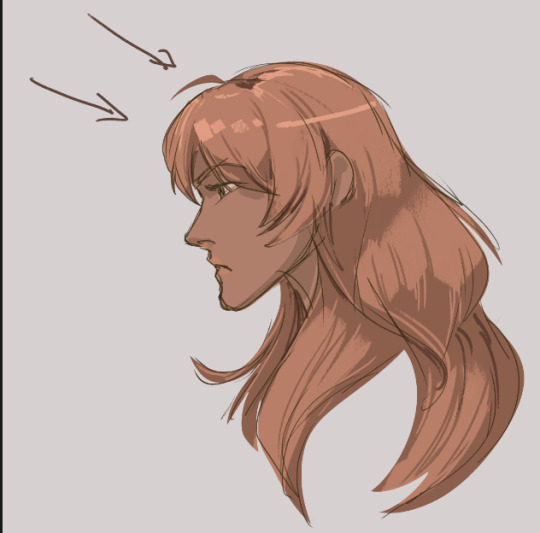
When you have the light areas down you can push and pull the lighter and darker colours to fine tune the shape of the areas and also imply detail in certain areas. Remember to not make things too monotonous! If you have the same level of detail everywhere you will lose the sense of the form and also overwhelm the viewer with too much detail.
Then I just popped on some highlights to make it slightly less flat and to illustrate that you can use the highest highlights very sparingly and it still does the job of both implying form and keeping the overall image readable.

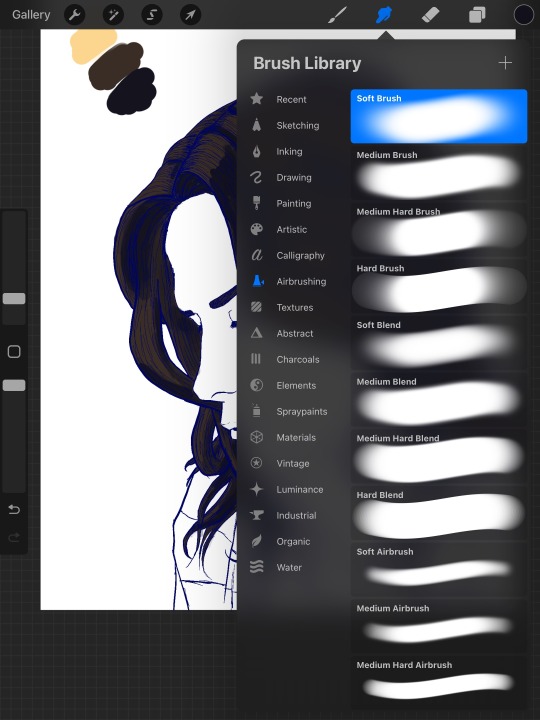
You can use whatever technique you fancy - erase light areas from the shadow layer, paint the light colour on top, paint the shadow colour on top - whatever works for you! The principle is the same. You can also add in darkest darks in the same fashion as the brightest highlights - sparingly but to give the hair a bit more oomph.
Hope this helps!
#digital art#drawing#tutorial#art tutorial#hair tutorial#hair#drawing hair#how to draw#art#drawing tutorial#artists on tumblr
278 notes
·
View notes
Note
How do you do hair so well? (specifically Raph’s hair in your mutation situation comic)
Hair, okay. I guess I don’t really think about it much, but I think I can make a little tutorial.
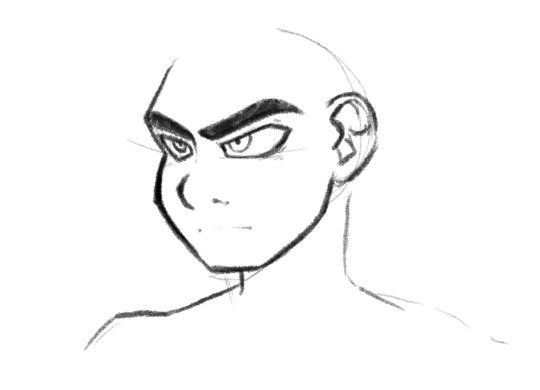
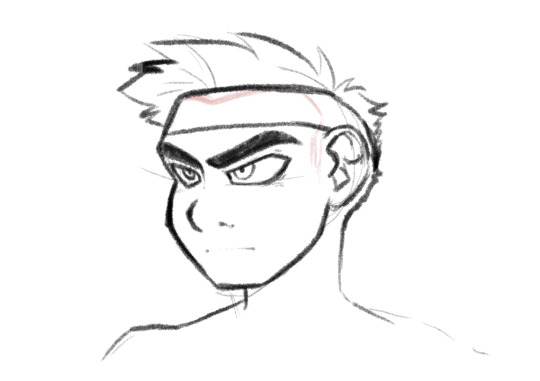
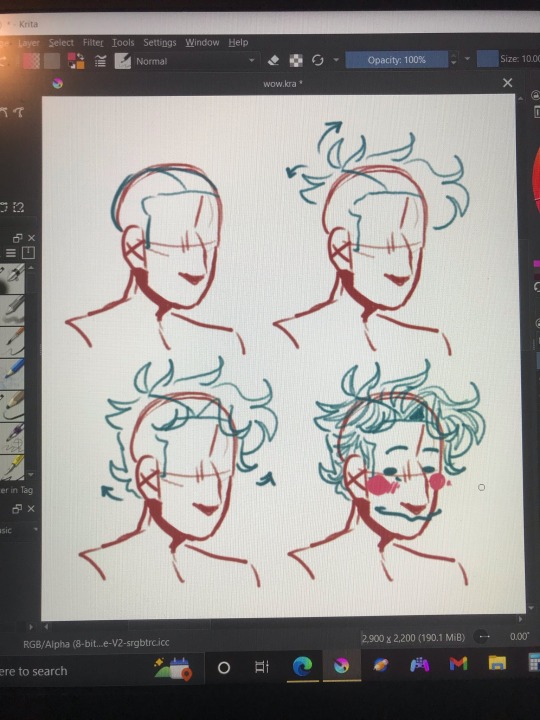
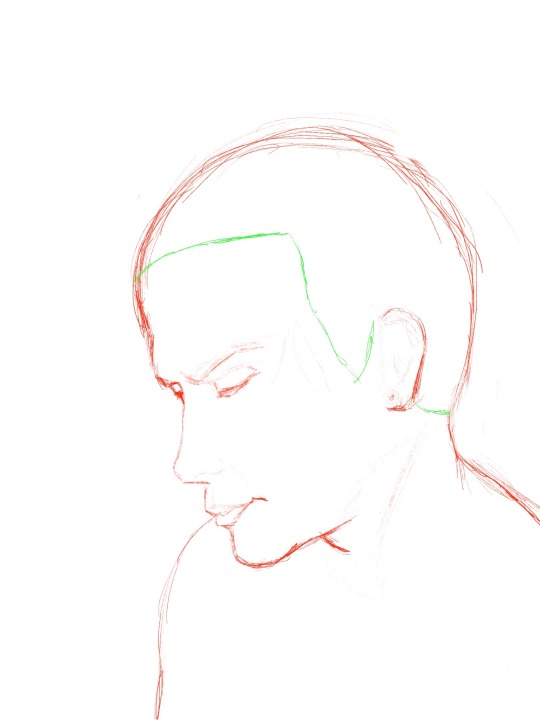
Alright, here’s a sketch. I’ve got a clear picture of where the most important points are, his forehead, his ear, and the crown of his head.
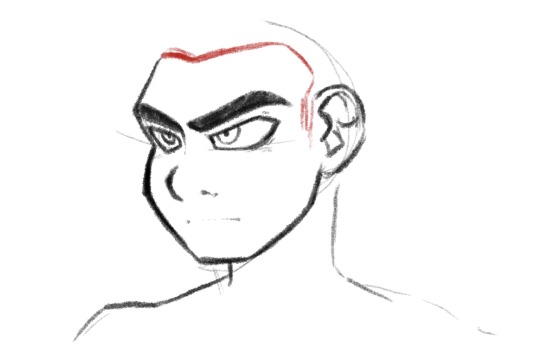
For me, I don’t have to do this step because I’ve drawn hair so many times, I just know where the hairline is, but for the sake of seeing what I see, I’ve drawn the hairline in red.
Pretty rough honestly, if the character had a buzz cut, I’d probably tweak a few things, but it’s just a rough outline. Anyway, it’s important to use the important points I mentioned above to not only draw the hairline, but also for the next step.
Now that I know where his hair is going to be, I can draw it. Raph would have bangs like his brothers, but his headband presses them up into spikes. I usually just make the spikes in a general randomized size, though a pattern I tend to follow starting at the origin point on the side of the character’s head is:
little, big, big, little, medium, little, little
Idk why, I guess I just gravitate towards that pattern.
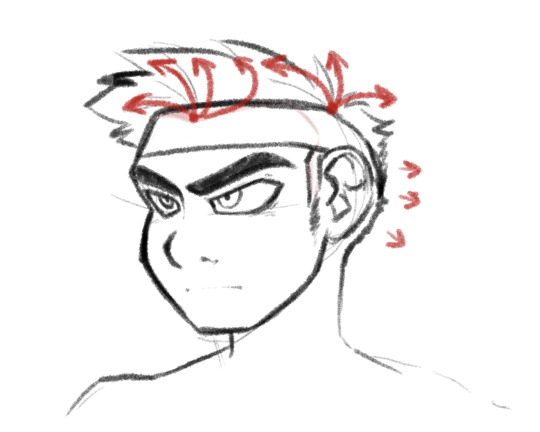
Something important to keep in mind when drawing hair is the direction in which it will naturally want to flow. I think at first this is tricky to understand and predict, kinda like a water splat, but the more you draw hair, the more you start to see the patterns.

Some basic rules about the flow of hair are that everyone has one or two “origin points.” My mom calls them swirlies. These are the little spots on the back/side of your head that is where the hair spikes out. Girls probably never knew about these or had to deal with them unless you’ve had really short hair before. For boys, this is the spot where they get the most annoying cowlicks. Keep in mind that hair spirals out from this point. However where this point is changes on every person, some people (like my brother) have two.
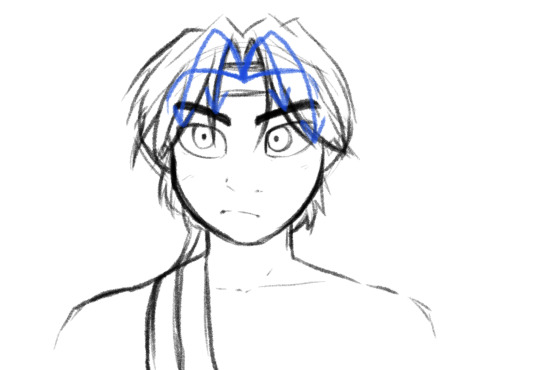
Another rule is that if someone has what’s called a “widow’s peak” then their hair will always part in the center and have puff a bit, I know because I have this 😭. People with a widow’s peak in their hair can’t have bangs that don’t part down the middle, naturally anyway. Their hair flows out from the center point as well as from the back. Not everyone has this, but it’s something to keep in mind :]
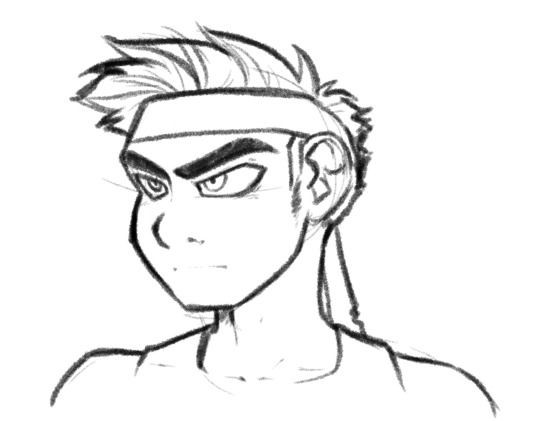
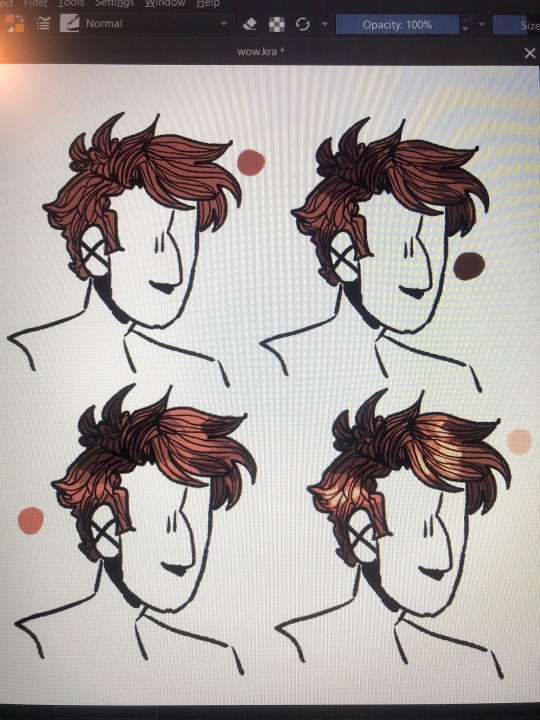
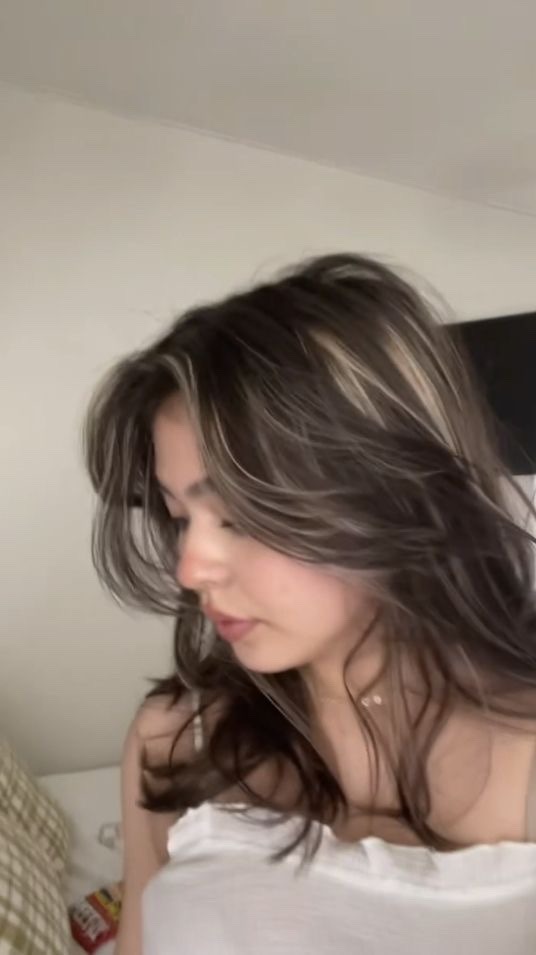
Knowing these points of flow, I can now refine the rough drawing into something pretty. The lines I put in show the origins of the hair an the direction of flow.
I hope this was helpful! I don’t really think about this kind of thing a lot since for me, I’ve had almost every length of hair, so drawing this is more intuitive. I tried to explain the best I could what goes through my mind, so hopefully this helps you with your drawings!
Good question! :]
#tmnt#q&a#the mutation situation#art#art stuff#art tips#drawing stuff#drawing tips#hair#drawing hair#tmnt 2012#teenage mutant ninja turtles 2012
271 notes
·
View notes
Text

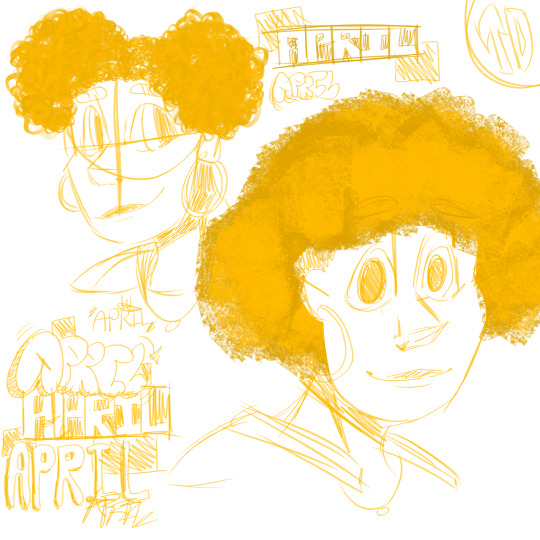
This is hair practice because all of my designs had Same Hair Syndrome
#it's not my fault they all look so similar#How people so easily tell Dick & Tim/Dick Tim & Jason in Robin costume apart is beyond me#dick grayson#richard grayson#jason todd#tim drake#damian wayne#drawing practice#drawing hair
39 notes
·
View notes
Text


Little hair sketches for future!GTROTM (TDcreates on Ao3)
#tmnt#art#rottmnt#rise of the tmnt#fanart#rise leo#rise donnie#tmnt donatello#rottmnt leonardo#rottmnt leo#rottmnt raph#rise raph#rottmnt raphael#rottmnt april#rise april#April O'neil#teenage mutant ninja turtles#leonardo#drawing hair#hair brushes#ibis#ibis paint x#ibispaintx#ibispaint art#ibispaintdrawing#sketch#sketches#drawing#GTROTM
23 notes
·
View notes
Text
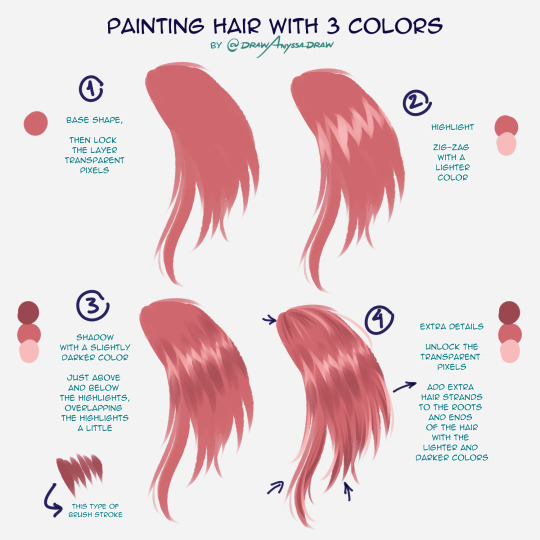
Some people asked how I paint hair, so I made this very simplified explanation, but I hope it helps someone.
The @ is my twitter btw ^~
#art tips#art tutorial#art help#art resources#drawing hair#how to paint#how to paint hair#hair tutorial
740 notes
·
View notes
Note
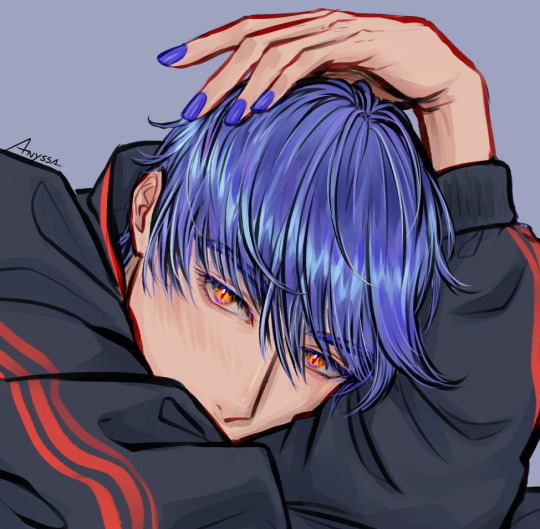
Hello again! I made a bkdk blog to match my Twitter but it’s not letting me ask you from there for some reason. Been on tumbler for years now and still don’t quite understand it. Oops anyways… One of the things I enjoy about your art is how fluffy the hair looks. Do you have any tips or favorite references for drawing/painting hair? That and finding a natural line of action are my main struggles with art rn. You seem to be swamped atm so no rush answering! I’m just having fun bothering you ;p
Here’s another picture of Pippin licking her butt
Pippin, hunny, you don't know where that's been!
Ok, I did this super quick so forgive the roughness BUT here's how I do hair:
I draw the head, and then I roughly scribble out the overall shape.
I tidy the overall shape up a bit
Sketch over the top, usually dropping the opacity of the head to help me visualise it
Erase and BOOM!
Silhouettes and block shapes just work better for me, and whilst drawing hair still gives me plenty of headaches, it's a little easier when I approach it in this way.
I hope that helps!
146 notes
·
View notes
Text
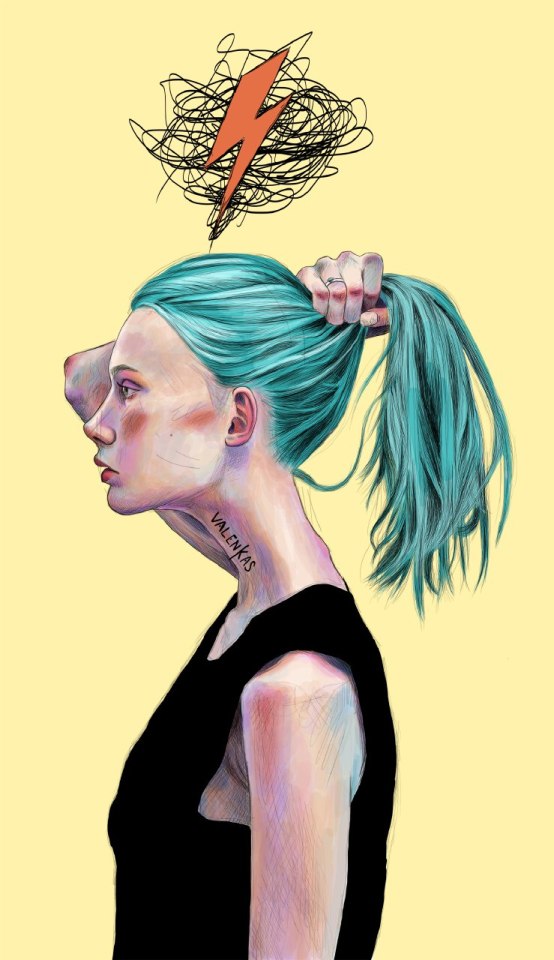
Ponytail ⚡ Digital illustration
////
Coleta⚡ Ilustración digital
#illustration#ilustracion#drawing#artists on tumblr#illustrators on tumblr#female illustrators#ilustradores en tumblr#ilustradoresespañoles#wacomillustration#wacomtablet#ponytail#drawing hair#dibujante#dibujando#ilustraciones
18 notes
·
View notes
Note
hi how would I draw a variety of hairstyles? Specifically Braids and Ringlets
14 notes
·
View notes
Note
Im absolutely in love with ur art style dude!! Can we get some tutorials on how you do anatomy/hair/faces etc? Whenever It is that you can. Lol :)
OKK SO- I managed to make an ok hair tutorial. it’s short but I think it’s helpful??
You wanna create the hairline and part first.
Start from the back and work around the head
When you reach the bottom of the head/the end of the hair, flow upward to make it erm more shaped
Add strands (although I do that in the lineart phase) and boom the sketch is done!

And you can do the same with longer hair!
For coloring!!
Base color
Darker shading at the top/back, and on the bottom
Highlight with a more saturated color (depending on hair color/outside lighting)
Another lighter highlight on an overlay layer (it’s hard to see here, but just make lil scribbles that are slightly smaller than the previous highlight)
And boom!! Hair tutorial <33
#hopefully it’s helpful <33#ask#giving me confidence that I can do more of these lmao#art tutorial#hair tutorial#drawing hair#drawing help
203 notes
·
View notes
Note
Hi! So, I really, REALLY love your art. Specifically, the way you draw hair is beautiful. Can you explain how you draw it, how you think about it?
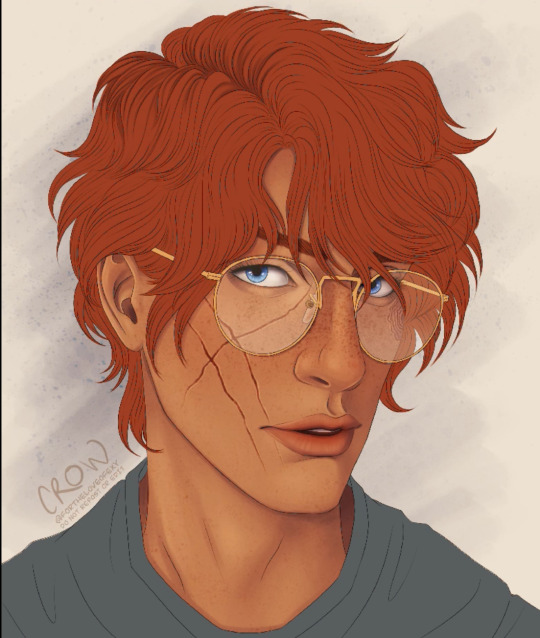
Hello! I’m happy to explain my process!
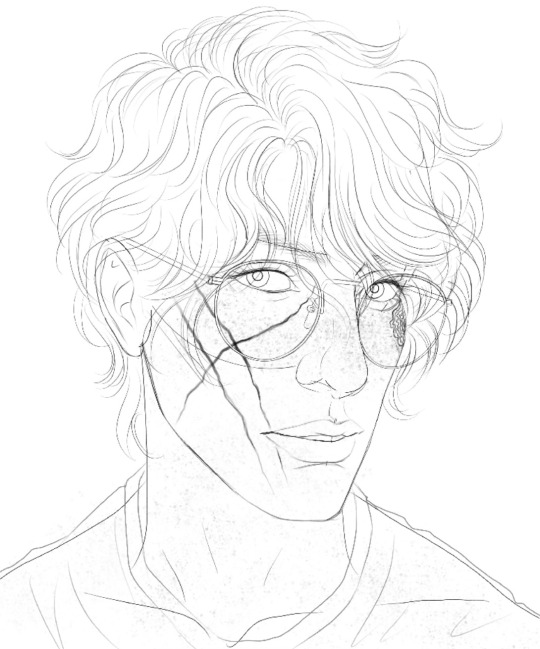
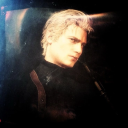
To help illustrate it better, I’m going to use this portrait of Neil as an example of how I draw hair. There are loads of different ways to draw hair btw, and the technique will vary based on the texture and type of hair you’re attempting to draw, but I’m just going to explain how I draw Neil’s hair right now for simplicity’s sake.
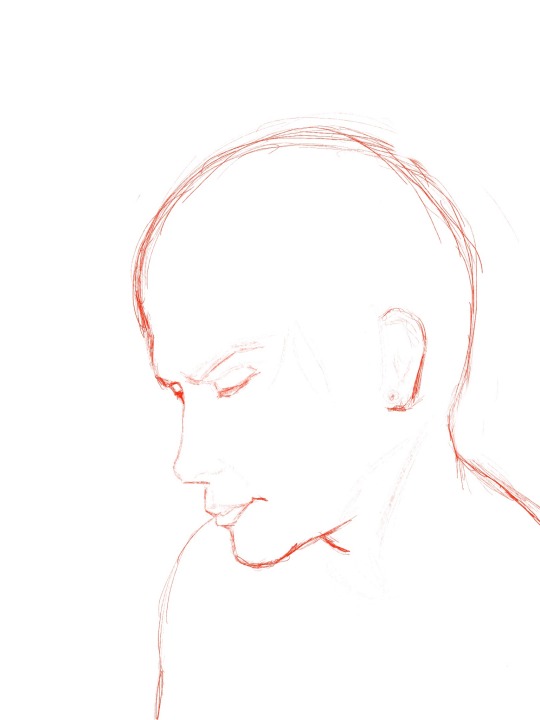
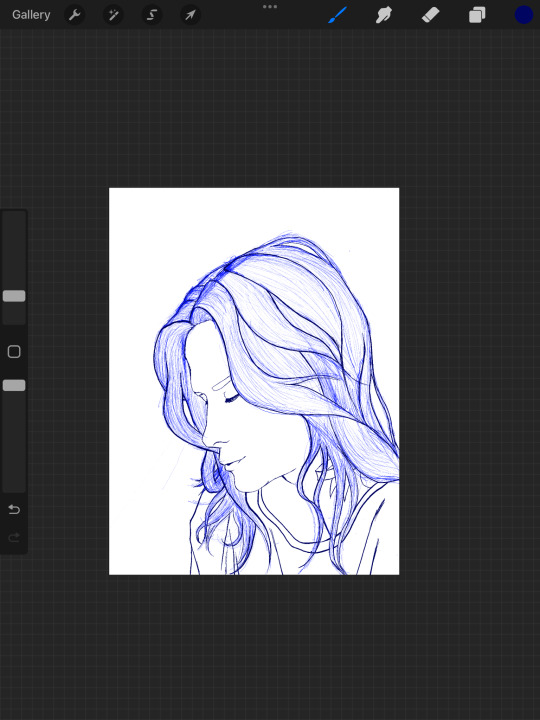
1. Starting with a rough sketch, I draw the face and body first. Then, on a new layer, I begin drawing the hair. This allows me to erase the hair and make corrections without messing with any of my other lines. I keep the initial sketch loose - it’s more about defining the overall shape and form of the hair, rather than getting specific strands drawn correctly since we can always define those later. I use a pencil texture brush for this, but you can use any that you like, since these lines will be gone by the time we’re done. For this drawing, I used the Pencil Sketch brush from the Vicente brush set.
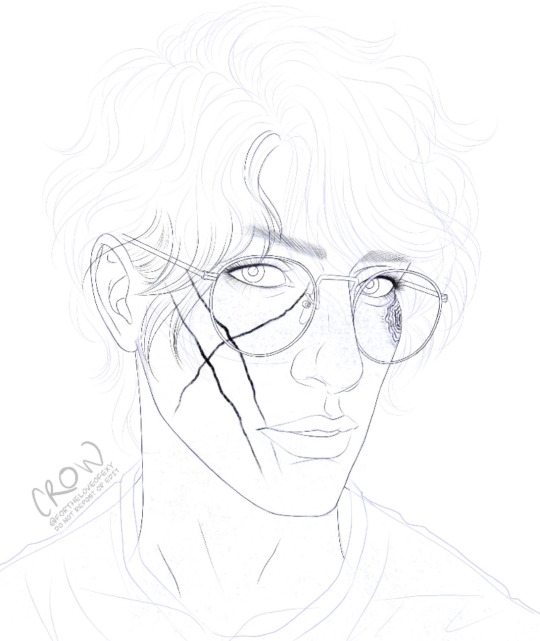
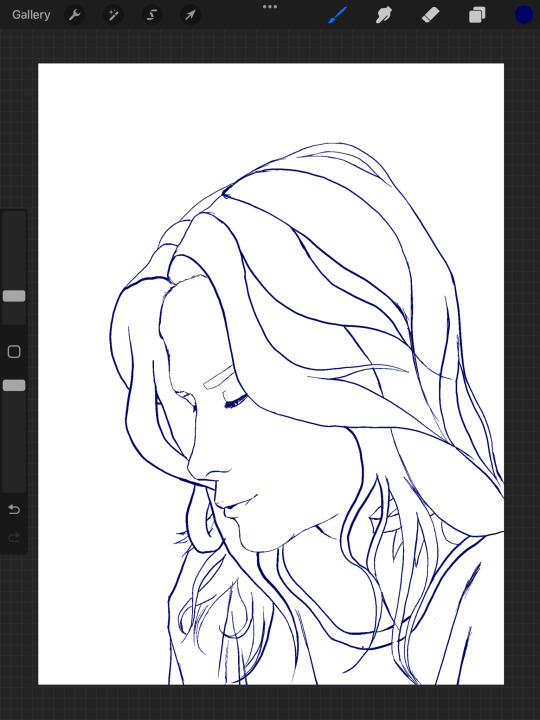
2. Once I’m happy with the initial rough sketch, I start the actual line art. As with the rough sketch, the hair will be drawn last, and on a separate layer. This is so I can easily erase anything the hair covers without messing up my lines. I try to go more carefully here, making sure my lines are neater, defining the hair into chunks and sections as I go. It helps to look at references of hair - you don’t have to draw each individual strand, but instead pay attention to how hair naturally falls into sections and clumps, depending on its texture and environmental conditions. For this, you can either use a smooth brush texture or a pencil texture brush, depending on which look you prefer. For this drawing, I used Clean Sketch brush from the Jingsketch Basics brush set.
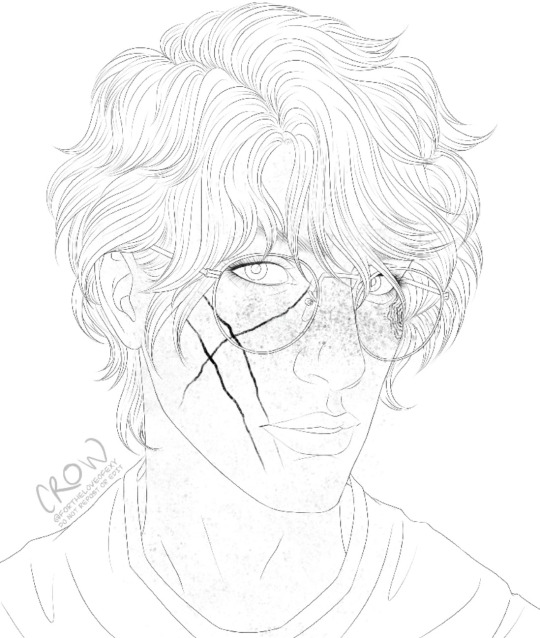
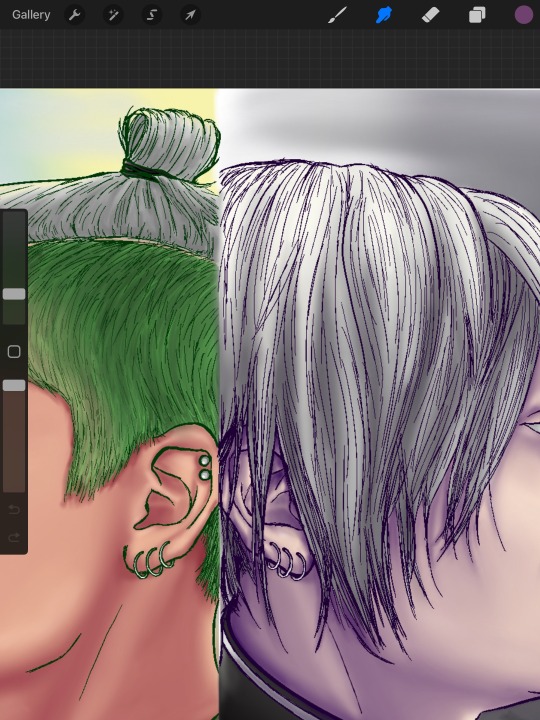
3. Once I’m happy with my lines and how the hair is coming together, it’s time to move on to flat colors. Same as before, the hair color will go on it’s own layer. I start by outlining the shape of the hair with the base hair color I’ve chosen, then fill it in. I use the Painting Flats brush from the Westwood set, but you can use whatever you prefer.

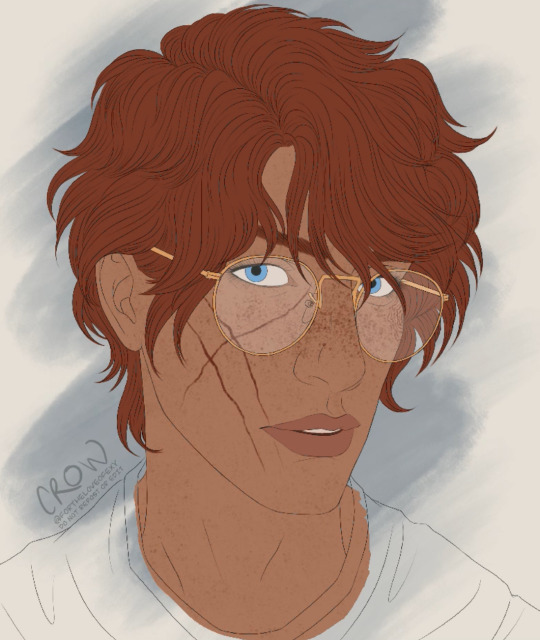
4. Now that we’re done with flats, it’s time to move on to rendering! This is where the magic happens. First, create a clipping mask over the hair color layer, then set it to multiply. Then, taking either a light grey-blue or light grey-purple color, start drawing in shadows around the chunks of hair. This will help create depth and give the hair more dimension and shape. I use the same brush as for flats, but if you have a different brush you prefer to render with, feel free to do so!
5. Once the sections have been defined, create a second clipping mask and set it to multiply as well. Now we’re going to add more shadows and depth to the hair - you’ll want to concentrate on shading more heavily in the sections of hair that will be least exposed to light, such as in the part, behind the ear and face, and under the bangs.

6. Next, create another clipping mask on top of your multiply layers, and set it to Soft Light. Grab your base hair color, and make it about 70% lighter and 50% less saturated (I usually just eyeball this). Taking this color, we’re going to go back in with a small rendering brush and define the high points of the hair (this would be any part of the hair that would get the most light - such as the “crest” of hair waves)

7. Once that’s done, I make another clipping mask and set it to “Soft Light”, grab an off-white color and select the pencil texture brush. With the smallest available brush size, I go back in and draw little white strands all over the hair, focusing on the highlighted parts especially. I try not to overlap these lines with the original line art. These white lines help give the hair more texture, creating an illusion of there being individual strands of hair there without you having to do all that work.

And voila! Neil has hair!
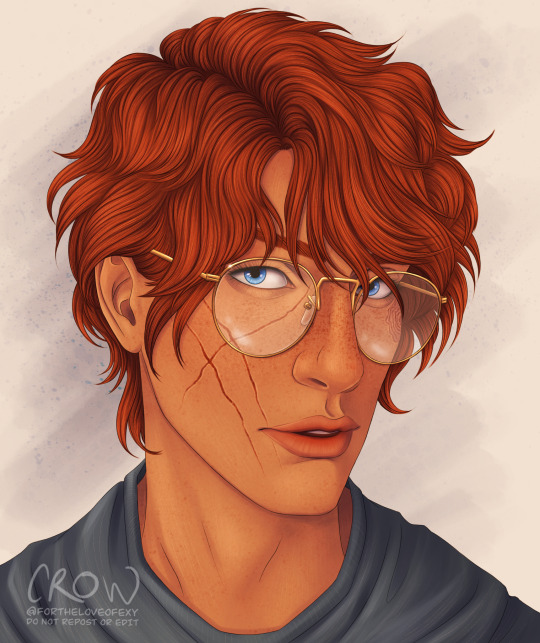
Sorry for the long, rambling answer. I hope this helps explain my process a little :)
#aftg#neil josten#aftg fanart#asks#ask crow#art tutorial#hair tutorial#drawing tutorial#drawing help#drawing hair#digital art#procreate
49 notes
·
View notes
Text
I’ve never made a tutorial in my life BUT. @icksludge asked me to show them how I draw hair (a month ago. But we don’t talk about that) and I thought I’d just make it a whole post.
So if you want to draw sexy ass hair like this, you may proceed
Draw a head. Optionally you can attach a face to it, like so:
roughly sketch out the hairline. This is more useful for short hairstyles, but also a nice guideline for longer hair like I’m drawing here
I would always recommend using a reference; you don’t need to, but it makes things a whole lot easier. This is mine:
Now pull up that reference and (on a separate layer) sketch out your hair. Try to put it into sections like you can hopefully see here; this will help you understand the structure of the hair. Or something. Anyway it will help with shading later

Now this is a step that I’m not entirely sure is necessary, but I always do it because it helps me understand the flow of the hair; I don’t know how to explain it but from the picture you can probably tell. Draw the hair. Try to keep the lines flowing and light. You probably don’t need as many as I drew here

Now you can erase the parts of the head that are hidden under the hair, clean up some parts, and hide (or delete) the hairline. I usually take away my reference at this point, but you can keep it if you want

Ink that fucker, but keep your sketch layer visible. Only ink the outlines of the hair sections at first
For reference, without the sketch layer they look something like this
Now do the same thing as earlier, and draw details into those sections. How many lines you draw is up to you, it’s all about finding a balance you like. Keep the sketch layer up, since you already have the directions for your lines on that
This is what it should look like once you hide the sketch layer. If you think there’s too many lines, you can erase some
Next, choose what base colour you want your hair to be, as well as what colour you want to shade with and what colour the highlights are. I usually stick to only three colours
For this one, I chose a dark brown as a base, shaded with a dark blue and used a light orange as highlights
Fill in your base colour
(After shading I changed it to this lighter shade of brown because I wanted more contrast)

If you haven’t already, decide where the light source is. On a new layer, block out your shading as you would on a flat surface. This is where the sections are handy

Select ye olde smudge tool
Use it for it’s intended purpose

Now, on another layer, roughly block where the light directly hits the hair

S m u d g e

For areas that aren’t directly hit by the light source, but are illuminated anyway (perhaps by light reflected by the floor or something), I usually use a lighter shade of the base colour, as long as the light doesn’t have it’s own colour. I barely used it here but you can see the colour swatch in the corner
Now clean up the edges. Boom, you made hair

So I hope this was at least mildly helpful. Let me know if you wanna know anything else. I made this in like an hour so if there’s any messy parts just like. Ignore them please
Also. I do commissions! I haven’t really set up all the technical aspects yet, but I’m working on it. So if anyone is interested let me know. I’m moving out of my parents house and I need to pay my bills

18 notes
·
View notes
Text
If there’s anything that been harder then sticking to one art style while drawing the same characters over and over again, its figuring out how to draw lokis fucking hair!!!. I don’t know how other artist do it.
You have no idea how many attempts i have made and fully completed before realizing that its either not working, or i want to switch from drawing AOS Loki for Avengers Lokii and then drop them both for loose long hair Lokiii. before i just decide on one that gives me the least headache.
#loki#loki art#loki struggles#art struggles#loki fanart#rant#artist rant#hair#drawing hair#his hairline is such a struggle
8 notes
·
View notes
Text
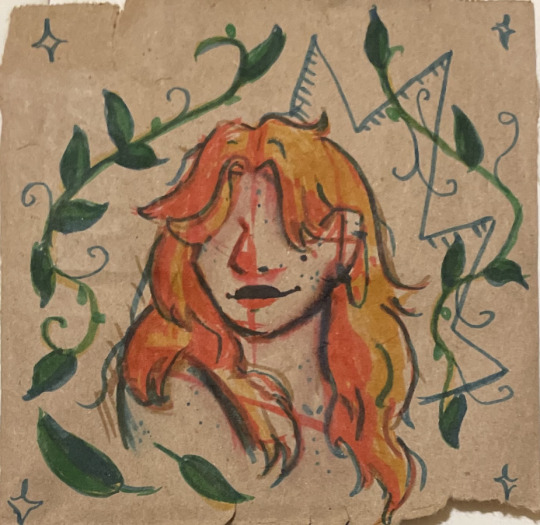
Lil doodle from the back of a paper bag™️
#art#artists on tumblr#oc#doodle#red hair#drawing hair#cottagecore art?#marker drawing#pen drawing#illustration
8 notes
·
View notes
Text
despite drawing for decades, im still a beginner due to the lack of practice
all that being said, i've started digital recently. and today, i've drawn my first afro/coily hair.
and i'm honestly saying this:
stop making excuses for not drawing afro hair.
it took me to read a very short and simple tutorial on a blog and then a couple minutes and i was able to end up with something very decent.
if, as a beginner artist, i was able to do it, so can any artist. you're not even trying. I dread drawing hair and this was legit the easiest i've had drawing hair
(tutorial here: very simple, but as a beginner, that's all i needed. And if you're an intermediate or advanced artist, you should be able to take it and make it more detailed/to you art style)
4 notes
·
View notes
Text

👀
H a i r
#art#artist#artists on tumblr#artwork#sketchbook#digital art#hair is hairing#art is arting#today is a good art day#requests open#art wip#drawing hair#is so much fun#???#I'm just improvising all of this#following my ✨gut✨#the strands tell me where they're supposed to go#that's literally 100% of my#art process#lmfao#the art tells me how to art it#I'm just the messenger
3 notes
·
View notes
Note
THE WAY YOU DRAW HAIR IS AMAZING, SO PRETTY!!!
I blew your hands, and hope that you have a good day :)
Oh thank you very much! Hands and hair are my favorite to draw, and for all of that, Crowley and Aziraphale are a blessing ^^
3 notes
·
View notes
Last Seen Blogs
conicownsmyheart
Conic Owns My Heart ❤

s0fhoney
Sof
itsjacobmiller
Sem título
codydbuni-blog
Cody D. Buni's Safehouse
almolly
彡☆Allmolly Valentine☆彡