#edited to move the id in alt text note to the main post
Text
Lorem Ipsum Shortcut

Ipsum Lorem Generator Characters
Lorem Ipsum Shortcut Icons
You are here:
Lorem Ipsum Dolor
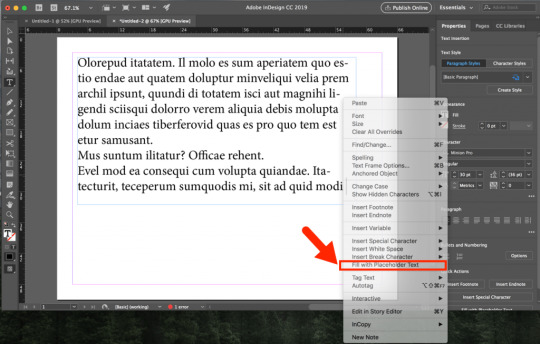
It allows to insert Lorem Ipsum in the editor via menu items or keyboard shortcuts. Select how much text you want from the menu item in Edit-Text-Lorem Ipsum or in the right click menu in Lorem Ipsum. Press the shortcut key (Alt+Shift+L) to add Lorem Ipsum text. Keep pressing to add more. Lorem ipsum, or lipsum as it is sometimes known, is dummy text used in laying out print, graphic or web designs. The passage is attributed to an unknown typesetter in the 15th century who is thought to have scrambled parts of Cicero's De Finibus Bonorum et Malorum for. Lorem ipsum resembles Latin but has no real meaning. Insert Dummy Text in Microsoft Word If you are working inside Microsoft Word and need some filler text to test the layout of fonts and other design elements of your document, there’s no need to hunt for an online generator as you can create “Lorem Ipsum” inside Word itself. Emmet lorem ipsum Mailchimp: Grow sales with Customer Journey Smarts Emmet is great for that. With it installed in the code editor you are using, you can type “lorem” and then tab and it will expand into a paragraph of Lorem Ipsum placeholder text.
Lorem Ipsum Dolor Sit Amet Copyfitting Text

Below is a sample of “Lorem ipsum dolor sit” dummy copy text often used to show font face samples, for page layout and design as sample layout text by printers, graphic designers, Web designers, people creating Microsoft Word templates, and many other uses. It mimics the look of real text quite well as you design and set up your page layouts.
People search for this Lorem ipsum dummy copy text using all kinds of names, such as Lorem ipsum, lorem ipsum dolor sit amet, Lorem, dummy text, loren ipsum (yes, spelled wrong), Lorem ipsum sample textipsum loremlorem ipsum sample, Latin copy text, Lorem ipsum text, Latin dummy text, template text, sample text, dummy copy text, Latin sample text, HTML dummy text, Lorem ipsum dummy text, filler text or copy filling text, and many other names. Regardless of what you wish to call it, this text possibly originated in the 1500s as scrambled Latin.
I’ve seen several versions of this Lorem ipsum text on the Internet, with various changes; however, this Lorem Ipsum dummy copy text doesn’t have any odd text sneaked in Hd audio to ac97 adapter. as I’ve seen in some of the others.
See also our other version Lorem Ipsum Numbered Copyfitting Text, with text that's numbered every 50 characters, up to 1,000 characters.

See also our new Lorem Ipsum Text Generator to generate a specific number of words, characters, or paragraphs.
If you would like to copy this text, take your pick of which is easier for you from the formats below.
Unformatted, Plain Lorem Ipsum Dummy Text
There is an unformatted plain text (.txt) version to either copy/paste or to save the .txt file to your computer. Note: it’s unformatted and will stretch across your screen.
Copy/paste Lorem Ipsum Dummy Text from this Page
Copy/paste from the text in the form field box below or from the Lorem Ipsum Dolor Sample Text below the form field box.
12+ Best TH8 Defense Base 2020 (New!) So, In this blog post we have come up with the best coc town hall th8 defense base with bomb tower 2019. You might be interested in exclusive town hall 8 bases. Best th8 defense base 2019 anti everything. Top 16+ Best TH8 war base Anti Dragons, Gowipe, Hogs, Valks. These Anti 1 Stars and 2 Star Town Hall 8 Layout Designs are really good at defending any. https://satloading933.tumblr.com/post/656097309993713664/best-design-for-th8. Best-town hall 8 base anti dragon The first design in the list is a best anti everything 2019 layout. You can also use this design to protect trophies in multi player battles. The construction of this village helps in the trophy saving. Best TH8 Base Anti Everything. These bases are made by keeping in mind, the main motive to tackle all the attacking strategy of Town Hall 8 so that it will be worth building. In below-given bases walls are perfectly placed with respect to traps so that opponent ground troops may bump up while moving between the walls.
Lorem Ipsum Dummy Text Within Form Field Box
Place the cursor at the top left of the form field, click CTRL+A to select all the text (the text should then be highlighted), then CTRL+C to copy the text.
Watch Badhaai Ho - Hindi Comedy full movie on Disney+ Hotstar now. 2 hr 3 min 2018 Comedy PG. Getting a new sibling at 25 is the last thing Nakul expected. Will he ever come to terms with the embarrassing 'good news' of his parents being pregnant? Badhaai ho watch full movie.
Lorem Ipsum Dolor Sample Text:
Lorem ipsum dolor sit amet, consetetur sadipscing elitr, sed diam nonumy eirmod tempor invidunt ut labore et dolore magna aliquyam erat, sed diam voluptua. At vero eos et accusam et justo duo dolores et ea rebum. Stet clita kasd gubergren, no sea takimata sanctus est Lorem ipsum dolor sit amet. Lorem ipsum dolor sit amet, consetetur sadipscing elitr, sed diam nonumy eirmod tempor invidunt ut labore et dolore magna aliquyam erat, sed diam voluptua. At vero eos et accusam et justo duo dolores et ea rebum. Stet clita kasd gubergren, no sea takimata sanctus est Lorem ipsum dolor sit amet. Lorem ipsum dolor sit amet, consetetur sadipscing elitr, sed diam nonumy eirmod tempor invidunt ut labore et dolore magna aliquyam erat, sed diam voluptua. At vero eos et accusam et justo duo dolores et ea rebum. Stet clita kasd gubergren, no sea takimata sanctus est Lorem ipsum dolor sit amet.

Duis autem vel eum iriure dolor in hendrerit in vulputate velit esse molestie consequat, vel illum dolore eu feugiat nulla facilisis at vero eros et accumsan et iusto odio dignissim qui blandit praesent luptatum zzril delenit augue duis dolore te feugait nulla facilisi. Lorem ipsum dolor sit amet, consectetuer adipiscing elit, sed diam nonummy nibh euismod tincidunt ut laoreet dolore magna aliquam erat volutpat.
Ut wisi enim ad minim veniam, quis nostrud exerci tation ullamcorper suscipit lobortis nisl ut aliquip ex ea commodo consequat. Duis autem vel eum iriure dolor in hendrerit in vulputate velit esse molestie consequat, vel illum dolore eu feugiat nulla facilisis at vero eros et accumsan et iusto odio dignissim qui blandit praesent luptatum zzril delenit augue duis dolore te feugait nulla facilisi.
Nam liber tempor cum soluta nobis eleifend option congue nihil imperdiet doming id quod mazim placerat facer possim assum. Lorem ipsum dolor sit amet, consectetuer adipiscing elit, sed diam nonummy nibh euismod tincidunt ut laoreet dolore magna aliquam erat volutpat. Ut wisi enim ad minim veniam, quis nostrud exerci tation ullamcorper suscipit lobortis nisl ut aliquip ex ea commodo consequat.
Duis autem vel eum iriure dolor in hendrerit in vulputate velit esse molestie consequat, vel illum dolore eu feugiat nulla facilisis. At vero eos et accusam et justo duo dolores et ea rebum. Stet clita kasd gubergren, no sea takimata sanctus est Lorem ipsum dolor sit amet. Lorem ipsum dolor sit amet, consetetur sadipscing elitr, sed diam nonumy eirmod tempor invidunt ut labore et dolore magna aliquyam erat, sed diam voluptua. At vero eos et accusam et justo duo dolores et ea rebum. Stet clita kasd gubergren, no sea takimata sanctus est Lorem ipsum dolor sit amet. Lorem ipsum dolor sit amet, consetetur sadipscing elitr, At accusam aliquyam diam diam dolore dolores duo eirmod eos erat, et nonumy sed tempor et et invidunt justo labore Stet clita ea et gubergren, kasd magna no rebum. sanctus sea sed takimata ut vero voluptua. est Lorem ipsum dolor sit amet. Lorem ipsum dolor sit amet, consetetur sadipscing elitr, sed diam nonumy eirmod tempor invidunt ut laboreet dolore magna aliquyam erat.
Consetetur sadipscing elitr, sed diam nonumy eirmod tempor invidunt ut labore et dolore magna aliquyam erat, sed diam voluptua. At vero eos et accusam et justo duo dolores et ea rebum. Stet clita kasd gubergren, no sea takimata sanctus est Lorem ipsum dolor sit amet. Lorem ipsum dolor sit amet, consetetur sadipscing elitr, sed diam nonumy eirmod tempor invidunt ut labore et dolore magna aliquyam erat, sed diam voluptua. At vero eos et accusam et justo duo dolores et ea rebum. Stet clita kasd gubergren, no sea takimata sanctus est Lorem ipsum dolor sit amet. Lorem ipsum dolor sit amet, consetetur sadipscing elitr, sed diam nonumy eirmod tempor invidunt ut labore et dolore magna aliquyam erat, sed diam voluptua. At vero eos et accusam et justo duo dolores et ea rebum. Stet clita kasd gubergren, no sea takimata sanctus est Lorem ipsum dolor sit amet.
See also our other version Lorem Ipsum Numbered Copyfitting Text, with text that's numbered every 50 characters, up to 1,000 characters.
See also our new Lorem Ipsum Text Generator to generate a specific number of words, characters, or paragraphs.
What does Lorem Ipsum mean?
Derived from Latin dolorem ipsum (“pain itself”), Lorem Ipsum is filler text used by publishers and graphic designers used to demonstrate graphic elements.
Let's say you're drafting the ultimate content marketing strategy. Lorem Ipsum is placeholder text that stands in for meaningful content. It allows designers to focus on getting the graphical elements such as typography, font, and page layout in place first, before you move forward with the rest of your strategy. Before publication, you replace the Lorem Ipsum text with your polished, high quality content.
Ipsum Lorem Generator Characters
Typically, Lorem Ipsum text consists of a jumbled section of De finibus bonorum et malorum, a first century, philosophical text written by Cicero. Words are added, modified, or removed to make it nonsensical.
Lorem Ipsum Shortcut Icons
One of the main benefits of using Lorem Ipsum is that it can be easily generated, and it takes the pressure off designers to create meaningful text. Instead, they can focus on crafting the best website possible, and add in content after a page has been designed.
Since the 1500’s, when a printer jumbled a gallery of type to create a type specimen book, Lorem Ipsum has been the industry standard for dummy text.
Today, a variety of software can create random text that resembles Lorem Ipsum. For example, Apple’s Pages and Keynote software use scrambled placeholder text. And Lorem Ipsum is featured on Google Docs, WordPress, and Microsoft Office Word.
0 notes
Text
How to format a blog post in 8 easy steps
Web users decide within seconds of visiting your website whether they’ll stay or leave and never come back.
If the page takes any longer than 2 seconds to load, it’s game over for nearly 50% of users. If the page loads within 2 seconds, but they don’t like what they see within the next 0.5 seconds, it’s also game over. If your site looks like this …
… it’s game over.
For 88% of web users, all it takes is one bad experience to put them off your brand for good.
This underscores the significance of good web design – for service and product pages, but also your company blog.
Your hub for resources and best practices should look polished, engaging and easily navigable. Like this:
And each click should take your target audience to a well-formatted blog post that’s organised, scannable for key points and visually appealing.
Otherwise, it’s game over.
So, without further ado, here’s how to format a blog post that will keep readers engaged:
Use style consistency
Divide text into sections with H2, H3, H4 (plus WP migration tips)
Provide an interlinking table of contents
Break up large chunks of copy with lists, pull quotes
Add imagery
Embed media
Incorporate a clear call to action
Do a test run
1. Use a style guide
Consistent branding is part of how your blog posts deliver a consistent experience for visitors.
If you’re creating and managing a blog, you need to have a brand style guide that will help you develop a consistent, tone, look and feel – especially if you have multiple people contributing to or managing the content.
Visually, you need to answer questions such as:
Which font will you use?
Which font size will you use?
What type of spacing will you use?
Will you justify your text (please don’t) or flush it left?
What kind of headers will you use (more on that later)?
Within the copy, style elements to consider include:
Do you capitalise the first letter of each word in your headline?
Do you put punctuation at the end of each item on a bulleted list? Like so.
How will you address dashes used to break up sentences – with the en-dash (–) the em-dash (—) or the hyphen (-)?
Are we picking at nits? Possibly – but who’s to say your audience won’t, especially if you’re writing to educated, well-read prospects? Could you imagine how much credibility you would lose if, in one sentence you used the Oxford comma, and then in the next, you didn’t?
View this post on Instagram
We beg to differ. A cartoon by @eflakeagogo. #TNYcartoons
A post shared by The New Yorker Cartoons (@newyorkercartoons) on Mar 31, 2017 at 7:39am PDT
Use a consistent style in your visual and verbal branding. And while you’re at it, make sure you edit and proofread everything you publish, whether it’s a blog or not.
Pobody’s nerfect.
2. Divide text into sections with H2, H3, H4 (plus WP migration tips)
Dividing your text into clearly labeled sections helps make your content more scannable, and ultimately much more useful to your target audience.
It can also simplify the process of blog writing by helping you create a rough skeleton for how you intend to organise the content.
If you’re writing in Google Docs, incorporating these headers is fairly straightforward:
In your copy, you can nest H2 headers under H1 headers, nest H4 headers under H3 headers, etc. We use H2 headers for the main headers throughout the post and then H3 and H4 for sub-sections within those. The specifics are really up to you (just be consistent).
Simple enough, right? On the page, you’ll end up with something like this:
In this example, “The visuals and tactics to use” is an h2 and “1. Always use high-quality images” is an h3 heading.
But there’s a catch, of course. Migrating content from Google Docs to WordPress often results in formatting changes or inconsistencies. Spaces are added, H2, H3 and H4 headers might be unformatted, typefaces can get left behind, images might not display correctly, etc.
There is no perfect solution that we know of to migrate content from Google Docs to WordPress, but here are the best solutions:
Move to the Gutenberg Block Editor
The Gutenberg Block Editor is available as part of WordPress 5.0 and later, and will replace the Classic Editor in 2021. It’s supposedly designed to fix the formatting issues introduced from a copy-paste into WordPress.
Instead of having one large text block that you can format as you please, you add “blocks,” each pre-formatted to display a certain type of content. For example, there’s a header block (which you can assign as an H2, H3 or another size. There are also blocks for classic paragraphs, images, custom HTML and more.
Choose the plus sign to open a menu of block options in the Gutenberg editor.
Use the Docs to Markdown add-on (our preferred method)
This Google Docs add-on converts the text in the document to HTML, which can then be copied and pasted directly into the WordPress text editor. The classic paragraph block in the Gutenberg editor has the option to view the source code. This is where you can paste your HTML.
This helps maintain blog formatting, including lists and hyperlinks, and eliminate any extraneous code additions (such as extra spacing). The only caveat is that images and embedded media will have to be added manually.
Other options exist – such as the Mammoth .docx converter plugin – but almost all of them have some sort of flaw or imperfection, some of which are more annoying than others.
We stick by our recommendations, but this might be one of those instances where a bit of trial and error is in order.
3. Provide an interlinking table of contents
Especially for long-form content (like this blog post), a clickable, interlinking table of contents – like the one at the top of this post – can save a lot of scanning to find the specific subset of information a reader is searching for.
Ideally, you want to include this table of contents as close to the top of your blog posts as possible. Try to work the table of contents into an introduction organically, rather than plopping it at the top of the post. This might require a bit of finessing, but you can take cues from this blog post.
Here’s another example (this one uses two columns!):
In this post, the writer has a short introduction that flows into an overview of what will be covered. Pretty straightforward.
As for how to create a table of contents that links to specific sections of your blog post?
Our preferred method is to place anchors next to your headers, then link to them from a list of those same headers at the top of your article.
Basically, place your cursor on the subhead that you would like to link to. Then click Insert > Anchor:
Next, name your anchor – keep it simple, so it’s not a pain to type in the anchor id later on.
Once you’ve done that, you’ll be able to see the id tag in the text version – notice that the end tag () comes immediately after the opening tag:
You can see the id tag within the h3 element tags.
Next, go back up to the top of your article and enter an href attribute around that item in your table of contents, like this:
The href tag surrounds the text you want linked to the content further down in your article.
Note: the hash symbol is an important part of the equation; this is what attaches the hyperlink to the element id in the page.
And voila. You can now click on the link in the table of contents to bring you to any part of the blog post.
4. Break up large chunks of copy with lists, pull quotes
First and foremost, use short paragraphs where you can. Large blocks of text make readers feel claustrophobic and force them to wade through more copy to find the information they’re looking for.
Conversely, short, concise paragraphs can make a blog post feel airy and generally more readable.
Non-textual elements, meanwhile, can help break up otherwise dense copy and emphasise certain information. Consider a few examples:
Bulleted lists.
Pull quotes (or blockquotes).
Imagery.
Social media embeds.
Another way to emphasise certain messaging is with italics, underlining and bold text.
But a word to the wise: Use bold text sparingly. Same with italics and underlining. They blunt their impact when you overuse them.
Also, don’t do the underline, italics, bold and ALL CAPS THING.
5. Add imagery
They say that the brain processes images faster than text. They also say that visual information is retained longer.
Some have even suggested that imagery has a positive effect on traffic, bringing in as much as 94% more page views.
Imagery also helps you rank in an image search (especially if you use alt text to contextualise the imagery for Google), as long as you avoid uploading pictures that are excessively large or unwieldy, as this can negatively affect page speed, and in turn, foil SEO.
But imagery’s greatest value is as another form of storytelling that conveys information in ways that are sometimes more engaging or entertaining than text.
For example GIFs and memes – the inside jokes of the web – can add personality. Charts can help simplify data.
Then there are GIFs of charts:
Screenshots, meanwhile can be instructive, especially for visual learners. For instance, here’s how you can find license-free imagery on a Google Image search:
Always cite imagery you use that you don’t have the rights to – and remove it from your site if the publisher complains.
As for stock imagery?
We’d recommend avoiding it where you can, and instead opting for custom illustrations, like the one at the very top of this blog post.
If you don’t have in-house graphic designers, free tools such as Canva can help you create your own graphics – though they may lack the style, nuance and craft that only a professional designer can provide.
And if you absolutely have to use stock imagery, here is a list of the sites that we recommend.
6. Embed media
By media, we primarily mean audio, video and social posts. As with imagery, you shouldn’t necessarily embed them in your content just for the sake of having them.
If your brand produces webinars or podcasts, be on the lookout for opportunities to plug that content where relevant. Remember, you want to keep leads and prospects on your site as long as possible – even if that means navigating away from your blog post to another page.
The best part? Embedding media is super easy. For popular video platforms such as YouTube and Vimeo, all you need is to include a link – plain old URL format – in the editor, and WordPress does the rest. Another option is to take the embed code straight from the video – in YouTube, you’ll find it when you click the “share” button and select the “embed” option. Insert the code into the text version of your post.
Same deal for social posts from Facebook, Twitter and Instagram. With Facebook and Twitter, just click on the timestamp of the post you want to embed, and then copy the URL for that page into the editor. Alternatively, you can find the embed code by clicking the small carrot in the upper righthand corner of your tweet:
If you prefer to customise how the post or video looks, however, you will need to copy and paste the embed code, and then tweak the dimensions.
And that’s really all there is to it.
7. Incorporate a clear call to action
Content marketing is about so much more than making your website more visible to search engines with primary and secondary keywords, or generating site traffic.
It’s also about fostering brand engagements that will ultimately make it easier for you to sell to prospects.
Every blog post you write should therefore contain one or more action items that will prolong the reader’s engagement with your brand and ultimately build a relationship that will turn leads into prospects.
For instance, you can use tools like SleekNote and OptinMonster to create popup boxes that will encourage readers to sign up for your newsletter, like this one:
Keep in mind that a first-time visitor might not be sold on your brand at first, so make sure you include a subscribe button somewhere on your site that they can come back to:
You’ll also notice that we’ve made it super easy for our audience to share our content on social media.
We also have a clear “Contact Us” button and several articles listed in the margin that might be of interest to readers.
In addition to all of that, you can also embed clickable calls to action within your content that encourage readers to take some other action, such as downloading an eBook:
8. Do a test run
In other words, click the preview button in WordPress to see what your article will look like when it’s live. Here a few steps to take in preview mode:
Scroll through your content and look for any extra paragraph breaks or other potential areas where formatting got wonky.
Open links to make sure they’re working correctly.
Ensure that video previews and images are displaying correctly.
Click on your CTAs and fill in the form with your own contact information to make sure that’s working correctly.
Click each item on your table of contents to ensure everything is linked correctly.
Once you’ve done all that, go right ahead and publish your content.
WordPress previews is pretty foolproof in terms of showing you exactly how everything will appear and function on the page, but it never hurts to do a quick scan of the live post.
If everything looks neat and tidy, then you’re good to go.
Pat yourself on the back, and move on to the next one.
Questions, comments, tips? We’re all ears!
Feel free to leave a comment below with your most profound and useful blog formatting tips and tricks.
from http://bit.ly/2P7Y4bt
0 notes
Text
EDITORIAL: Onnoghen: Time to halt Nigeria's slide to anarchy
EDITORIAL: Onnoghen: Time to halt Nigeria’s slide to anarchy
On Friday, President Muhammadu Buhari suspended the Chief Justice of Nigeria, Walter Onnoghen. He immediately swore in Justice Tanko Muhammad as his interim replacement in a development that had precedence in what happened over four decades ago under military rule.
The president said his action followed an order he obtained from the Code of Conduct Tribunal before which Mr Onnoghen is standing…
View On WordPress
0 notes
Text
Use a Story Map Series instead of PowerPoint
PowerPoint is the standard when it comes to presentations. But if you have to switch back and forth between PowerPoint and live demos, media, or websites, it can be inconvenient and clumsy, not to mention visually jarring and disruptive for your audience. Switching out from PowerPoint typically means exiting PowerPoint, or using Alt+tab or Command+tab to switch back and forth between slides and other content you want to show.
While any Story Map can be used to deliver a presentation, some are better suited to the task than others. My preference is the Story Map Series, specifically the bulleted or tabbed layout, since those provide sequential access moving from left to right, and advance on a click, rather than a scroll (like Story Map Cascade). Map Series bulleted and tabbed layouts also do not require using a side panel for additional text or media—something not needed for most presentations.
Here’s some tips on using a Story Map Series instead of PowerPoint for your presentations. In this example the bulleted layout is used, but the tabbed layout works in a similar way.
*
Adding PowerPoint slides to a Story Map Series
Once exported, the easiest and best way to add the slide images to your Story Map Series is to add them from your local drives where you’ve exported them. When using this method, the images are automatically resized and optimized, and stored within your story map.
*
Add a locally stored slide image
To add a slide image to your story map from a local file, add a new tab or bullet, click Image, then Upload. Browse for the image, or drag and drop into the story.
This is the recommended approach, unless you plan to display your slides via an embedded web page, a more advanced option discussed at the end of this post.
As with any image, you can also host them on your own servers, in your ArcGIS account, and can use other online locations, such as Flickr, Google Photos, Box, and Google Docs. When using locations other than Flickr, ensure your images are resized and optimized for web use.
*
Add a slide image from a URL location
To add a slide image to your story map from a URL location, add a new tab or bullet, click Image, then Link. Paste the URL into the link input.
*
Positioning the image
After adding your slide image, use Fit, rather than the default option of Fill.
This provides the best results for slides with text; the entire slide will be displayed ensuring no text will be cropped. Fit also ensures slides will display well on any projection resolution or aspect ratio.
*
An Example
In this Story Map Series, a PowerPoint slide has been exported and added to the first entry. When adding slides, the text panel can be left blank—you won’t need it since your slides will include all the necessary text.
View example
*
Consider the main stage background
The main stage of a Story Map Series has a background color. When using Fit the main stage background may be visible around the slide edges.
You can choose a different theme that will complement your slide backgound. Click Settings
Then click Theme, and choose a color scheme that works best with your slides. Click Apply when finished, and Save your story map.
*
Eliminating the background using Center
In some cases you may know the exact display resolution for your presentation in advance. If you do, another option is to determine the size needed to fill the main stage, add a few pixels on all sides to ensure the slide completely fills the space, then use a position of Center.
Note: This technique only works when you purpose-build a presentation for a specific event and know the exact display size, since when you use Center your slides can be cropped when displayed at different resolutions.
*
Eliminating the background using a web page
You can eliminate the background completely by using a web page to display your slide, then adding the web page to the main stage. This method requires you use a single color slide background and display the slide in a web page that sets the background color of the page to match the slide background. This is an effective technique for any display resolution or aspect ratio.
Below is a slide image inserted on the main stage using a Position of Fit, as described earlier. View example.
In the next example below, the slide has been added using a web page that sets the background color of the page to match the slide background color. View example.
Create the web page
Copy and paste the markup below into a new HTML document and make the necessary edits for the background color and slide URL as noted. Host the HTML document, and add it to your story map as a web page, using the default Fill option. The HTML will display the slide responsively, so that it fits any size or aspect ratio.
<!-- Add URL to slide location --></pre> <img id="slide-pic" src="http://downloads.esri.com/agol/blog/ppt-slide2.jpg" alt="" /> <pre>
*
Adding maps, apps, and more
In addition to your slides, you may want to add web maps, apps, and more. When adding a web map for use during a presentation, you may want to add the map using the Map Viewer to enable interactive demonstration capabilities. You can also add scenes using the Scene Viewer. Add them as a Web page using the URL of the web map or app.
Use the default Fill position. Since the Map Viewer and most apps and app templates are responsive, they’ll fill the entire main stage area.
Tip: When embedding apps and other Story Maps you can minimize the user interface, which is recommended for best results. See Embedding a Story Map within a Story Map. Other apps and the Scene Viewer can also be minimized, see details in the examples and descriptions below.
*
Examples
Open the Story Map Series Presentation Examples. Click the tabs at the top, or links below, to view the examples.
Tab 4: Embedded Map Viewer
By embedding the Map Viewer using your organization URL, you have complete access to all of the Map Viewer capabilities.
Tab 5: Embedded Scene Viewer
When embedding the Scene Viewer, you can append &ui=min to the end of the Scene Viewer URL to minimize the interface. When you mouse over the scene, navigation UI elements will appear. Compare the options below:
Default UI
Minimized UI
Tab 6: Embedded Web AppBuilder app.
When using Web AppBuilder or other configurable apps, you can make UI elements invisible or otherwise remove them for a better experience when embedded.
Tab 7: Embedded Story Map Swipe & Spyglass
By appending &embed to the URL of any Story Map, you can minimize the UI for embedding it within your presentation.
Default UI
Minimized UI
*
Maximizing your presentation
When displaying your Story Map presentation in a browser, maximize the display area by appending &embed to the end of your story map URL. This eliminates the title (and subtitle if you have one), and only displays the bullets or tabs.
You can also hide all browser bookmarks to gain additional space, and can display the presentation in full screen mode (F11 in Chrome) to omit browser tabs and use all of the available space.
*
Tips and considerations
Story Maps are a powerful way to tell a story using maps and media, and Story Maps can be a powerful way to deliver presentations. Some thought and planning will provide the best results. Here’s a few things to consider.
It’s easy to author a terrible PowerPoint presentation, and we’ve all suffered through our share of them. Crafting a great Story Map is somewhat of an art, and a great Story Map presentation is no different.
Omit, or limit, the text in the Story Map so that the audience listens to you, instead of reading words.
Story Map presentations work best when they are short. Story Map Series supports a maximum of 30 tabs or bullets.
Story Maps do not offer the slide transitions and animations that are available in PowerPoint. If you feel these are necessary, stick with PowerPoint.
Choose the best Story Map for your purpose. Story Map Series, using either the tabbed or bulleted layouts with their optional text panel, is ideal if you want your audience to focus on your slides and live apps.
When adding content via a URL that takes a while to initialize (like a detailed web scene), ensure that Unload when reader navigates away is unchecked for your entries.
Before your presentation you can “warm up” all your maps and apps, and unchecking this option ensures they do not need to be reloaded when you reach that part of your presentation.
*
For more information
Story Maps website
Story Map Series
Embedding a Story Map within a Story Map
from ArcGIS Blog http://ift.tt/2ErgHO1
0 notes
Last Seen Blogs