#everything with that went wrong including but not limited to having to scrub the entire kitchen because the bowl of pumpkin creme fell :)
Text
Junkrat/Roadhog:: Origins Ch. 15
(Just two more chapters left!)
Title: Origins
Characters: Junkrat, Roadhog
Rating: R
Summary: The origins of Junkrat and Roadhog. Junkrat finds a mysterious treasure in the nuclear wasteland of the Australian Outback and quickly finds himself a target. When a hitman is sent to kill him, he convinces the man to become his personal bodyguard in exchange for half the spoils. Their ensuing crime spree could be legendary – if they can get over the initial bad blood between them. Can also be found on AO3 if you prefer reading it there!
Chapter One
Chapter Two
Chapter Three
Chapter Four
Chapter Five
Chapter Six
Chapter Seven
Chapter Eight
Chapter Nine
Chapter Ten
Chapter Eleven
Chapter Twelve
Chapter Thirteen
Chapter Fourteen
Chapter Fifteen
---
“Cells 14 through 21, hit the showers. Fawkes, that includes you,” said the disembodied voice over the speaker.
Junkrat grimaced. He had made it over a week and a half without showering, just washing up with paper towels in his cell sink, and it looked like the correctional officers had finally taken notice. If his last encounter with a shower was any indication, it was not going to go well. What was worse than the difficulty of washing up was how vulnerable he’d be in a prison shower with two missing limbs. Instead, he’d taken to hanging out in his cell and waiting for the brief five minute overlap between when Roadhog’s cell group was called and his was sent back to their cells, when he could briefly communicate with Roadhog.
He scowled the entire way to the shower area, taking his sweet time getting there. He picked the stall furthest away from everyone else, grateful that there were at least curtains to shield him in his limbless state. He shrugged off the upper half of his jumpsuit and detached his right arm.
Junkrat stood there, staring at the arm and contemplating whether or not someone would try to steal it if he left it outside the shower. It wasn’t like he had much of a choice, but he was still reluctant to do so. He wondered if he could get away with keeping his peg leg on and trying to hold it out of the spray…
“Well, well, look who finally decided to stop being a dirty freak and show his ass around here.”
Junkrat dropped his arm with a metallic clang and whipped his head up to see a group of three inmates approaching him, grinning like hyenas. He recognised one of them as the man with work privileges and another as the howler who took to screaming at night. “Oh -- heh -- hey...” He laughed nervously and took a step backwards into the shower stall. He immediately regretted it, because there was nowhere else for him to go once the three of them crowded around the entrance to the stall. “What can I do ya for?”
“If you're askin', you can start by not being so fuckin’ annoying,” the howler said.
Junkrat couldn’t help but giggle hysterically. "Me? I’m not the one screamin’ bloody murder in the middle of the night!”
One of the other two men frowned. “See, he can’t help that. You can control that obnoxious voice of yours.” Junkrat was pretty sure he’d found the only two inmates on their block who would defend the screamer.
“Ain’t nothin’ wrong with me voice,” he protested weakly, falling back another step as the howler advanced on him. His back bumped against the knob of the shower.
“You say that, but you're not the one who has to listen to it.”
“You've been stirring up shit around here, Rat. You think you're so much better than the rest of us. Belmont, why dontcha teach him a lesson, we'll see if he's still singing that tune after this.”
Belmont, the inmate with work duty privileges, stepped forward. He was two or three inches shy of six feet, roughly Junkrat's height when he was hunched over in his usual slouch, but he was imposing. His very presence felt like a threat to Junkrat's well-being.
“Back off,” said a familiar, deep voice. “He's mine.” Roadhog grabbed Belmont and the howler by the backs of their prison uniforms and hauled them away from the entrance to the shower stall. The third man hastened to follow before he was forcibly removed as well. “Let me make something clear,” Roadhog snarled. “No one touches him. You mess with Junkrat, you mess with me. Understood?”
The offenders nodded, wide-eyed. Roadhog's stature and general bulk had a way of intimidating even the most hardened of felons. They slunk off, shooting dark looks over their shoulders.
Junkrat picked up his mechanical arm. “Thanks, mate. Woulda been fucked if ya hadn't shown up. But, ah -- I, I'm yours?” he said, raising his eyebrows at the choice of phrasing. And oh, he hated that that thought gave him a weird flutter in the pit of his stomach.
“Just in name,” Roadhog replied. “They won't bother you if I have your back.“
Junkrat nodded and gave a sheepish grin. “Glad yer stuck in this shithole with me, then.” There was a reason he'd hired Roadhog as his enforcer, after all -- he might have been a scrapper who could hold his own in a fight, but he needed someone to watch out for him when it was a matter of being ganged up on or squaring off against someone who was out of his league. He reattached his prosthetic. If Roadhog had been let out of his cell, then there were seconds left until he had to be back in his cell. Besides, he'd soured to the idea of a shower after that encounter. Scrubbing himself down in the sink was good enough for him.
---
The next day, Junkrat scanned the list of items offered by the commissary. If the available TV was the same as Thatcher's, it would be a small, old school flat screen that looked like it was from the 2020s. He could work with that. The radio would be even better though; it would give him batteries in addition to wires, and he would need the extras, given that he was limited to buying only two packs of D batteries at a time.
“Ooh hoo, coffee creamer, I can definitely get some use outta that.” He put a tick next to the item on the list. “Gotta get some coffee to go with that, though, can't just get the creamer by itself.”
“Do you always talk to yourself?” Thatcher asked, shooting him a look of irritation.
“That’s a stupid question.” Junkrat tapped the pencil against his metal arm. “I’m gonna get Roadhog somethin’,” he decided. “Say thanks for savin’ my ass all the time. D’ya think he’d like almonds?”
“How the fuck should I know?”
“I’m gonna get him almonds. Everyone likes nuts.” He finished checking off the list and folded up the piece of paper to give to the CO the next time he made his rounds.
He was already brainstorming how best to use the material parts he would pilfer from the various electronics he was going to acquire. They would only go so far, though; if he was going to build a functional bomb, he would need illicit supplies that he couldn’t acquire through the commissary.
“Say, Thatcher, you smoke, right? I mean, I figured, what with the durries y’ve got stashed and all.”
Thatcher hissed, slicing a finger across his throat as a warning signal to shut up. “Could you say that any louder?” He peered outside of the cell, but none of their neighbors were reacting. “You know what kinda shit I’d have to deal with if the rest of these assholes knew I was carrying? I wouldn’t get a moment’s piece. Probably get shanked by a smoker jonesing for a fix, so shut your fucking trap if you know what’s good for you.”
Junkrat held his hands up in surrender. “Just askin’! I wanted to know where ya get yer matches. Unless ya use a lighter?” He was very much hoping for the former, but he could make use of a lighter for alternative weapons
“Talk to Buzzard.”
Junkrat had no idea who Buzzard was. One of the inmates he had yet to interact with, most likely. “Buzzard?” he called out.
There was a moment’s silence, then a response. “What do you want?”
“I gotta talk to ya! What cell you in?”
“I know who you are.”
“We all know who you are,” Maynard sullenly interjected from a few cells down.
“I’ll find you during rec,” Buzzard finished.
“Works for me,” Junkrat agreed, ignoring Maynard’s comment entirely.
Buzzard stayed true to his word and approached Junkrat during their recreational hour. Despite being able to put a face to his name, Junkrat still barely recognised him. He had the impression that Buzzard, who had to have been in his sixties or seventies, didn’t leave his cell much even when he had the opportunity. “What?” he asked, blunt and to the point.
“I heard you’ve got access to matches. What’s a bloke gotta do to get his hands on some of those?” Junkrat wiggled his fingers.
Buzzard hushed him and led him over to his cell. Across the room, Roadhog’s eyes tracked them, and it reassured Junkrat to know that he was watching in case things went south. Buzzard pulled a stack of yellowing paper from beneath his bed and spread them out on the mattress. Junkrat gave a low whistle and picked up one of the pages to get a better look at it. Buzzard was an artist, showcasing dozens of illustrations in pencil and watercolour. Nearly all of them were of nature, vivid pictures of sunsets and flowers and desert oases, everything that he likely hadn’t seen in decades.
“Colours,” Buzzard said. He popped the back off an old school radio with loose screws, showing Junkrat how its innards had been ripped out and stuffed with as many matchbooks as it could possibly fit. He’d clearly been hoarding them over the years, perhaps from back in the days where inmates were still allowed to purchase cigarettes and smoke. “Two matchbooks for a packet of Skittles,” he said, closing up the radio once more and securing it so it appeared to be tightly screwed together. “I dilute them with water to make my paints.”
Junkrat admired his ingenuity, sensing a kindred spirit in Buzzard. It took a special kind of person to find such creative uses for everyday items. “There’s somethin’ I can give ya.” He made a mental note to add Skittles to his list of requested commissary items before he turned the list in at dinner.
The final piece needed to construct his makeshift explosives would be considerably more difficult to get his hands on, and it required asking a favor of someone he was not terribly fond of. Junkrat made a beeline to Roadhog when he left Buzzard’s cell. “Listen, mate,” he said in a low voice. “I gotta talk to that bastard what tried to jump me in the showers. Watch my back, will ya?”
Roadhog grunted in agreement, folding his arms over his chest and watching like a hawk as Junkrat approached Belmont.
“Say, Belmont...” he said, inching within earshot but keeping an arm’s length away. “Gotta ask ya for a favor.”
Belmont, who had been reclining on the couch, took off his headphones. “It better be good if you’re taking me away from my soaps.”
Junkrat glanced at the TV. He couldn’t hear anything, the sound funneled through headphones so as not to start a volume war with the other inmates, but it looked dramatic. “Yeah, no, it’ll just take a sec! Y’work in a workshop, roight? Any chance you can acquire a few pipes? Just like a plastic tube, don’t need nothin’ fancy.”
“What’s in it for me?”
This was the question Junkrat had been dreading. “Whaddya want?”
“A joint,” Belmont answered without hesitation.
Junkrat scratched the back of his had. “Well...” he said slowly. “Can’t get ya that. What about somethin’ else to smoke? I can get ya a pack of durries, easy. Might be a few missin’, but better than nothin’, eh? How many pipes’ll that get me?”
Belmont considered. “I’ll take it,” he said, slipping his headphones back on. “One pipe for every ten cigs. I’ll see what I can find tomorrow. Get me the goods by then. Now leave me the fuck alone, Anthony’s about to propose.”
Junkrat gave him a thumbs up and scurried back to Roadhog.
“You’re making friends,” Roadhog observed.
“More like business associates,” Junkrat amended. "Acquaintances. Gettin’ all my bombs in a row and all that.”
“What are you getting yourself into?” Roadhog warily asked.
“What makes ya think I’m gettin’ into anythin’?” Junkrat responded, offended.
“You always get into trouble.” It was more of an observation than anything else.
“Well, not this time. I’m gettin’ us out of trouble this time. Gonna blow this place to kingdom come and get us the hell outta here.”
Roadhog glanced around them. “You really need to be careful who you say that around.”
“I’ll be careful! Careful is me middle name.” They both enjoyed a hearty laugh at that, and Junkrat felt indescribably good, the way he did every time Roadhog laughed with him instead of at him.
---
Junkrat’s commissary processed the next day, and he giggled at the sight of his haul. “S’like Christmas in here!” He set aside the Skittles to swap with Buzzard and piled up the electronics in the corner by the toilet that Thatcher had designated for him, the implications of which did not escape his notice.
He waited until Thatcher left for his hour in the recreation yard before making his move. It took him a while to find the right brick, but he dug it out and pocketed the cigarettes before sealing it back up with the makeshift toothpaste grout. A closer look at it revealed that it was a 40 pack of cigarettes, with nine of them missing. He didn’t know when Thatcher had gotten his hands on the contraband, but he was clearly being economical with them.
Of all the goods he got from the commissary, the almonds had to be his favorite. He slipped them in his other pocket to deliver them to Roadhog during their recreation hour.
“I gotcha somethin’,” he told Roadhog when they met up by the chess set.
“Hm?”
Junkrat held up the bag of almonds. “To say thanks for havin’ my back.”
Roadhog chuckled and took the gift. “Thanks.”
Junkrat didn’t expect the heavy hand placed on his head, flattening his wild hair, but it made him glow with pride. “Ah, it’s nothin’!” He was mildly disappointed when Roadhog withdrew his hand, and he did his best to commit that sensation to memory. Roadhog so rarely touched him, but he craved those small moments of human contact. “Got some other things to deliver though, so I’ll be back in a tick.”
“You’re just handing out gifts left and right today.”
“Wha-- no!” he protested. “These ain’t gifts, they’re business transactions! You get the one and only gift, yer special.”
“I’m teasing,” Roadhog said gently.
“Oh. Well. Alright then.”
Junkrat traded Skittles for matches with Buzzard first and deposited the matchbooks inside his pillowcase for safekeeping. He tracked down Belmont, who brought him to his cell so they could make the transaction with some semblance of privacy.
“How many ya got?” he asked.
“Three. If you don’t got ten cigs, you’re not getting a single one of them, and I’ll be taking what you do have as payment for my trouble.”
Junkrat slapped the pack in Belmont’s hand. “Thirty two,” he said triumphantly. “I believe I’ll be takin’ all three of those pipes.”
Belmont weighed the pack in his hand before counting them to confirm Junkrat’s claim. “It’s thirty one, you idiot. You can’t count. But still, impressive,” he said. “Fine, a deal’s a deal.” He went to his cell and they completed the transfer, Belmont slipping him the short pieces of pipe he’d filched from the workshop. Junkrat shoved two in his pockets and the third down his pants to smuggle them back to his own cell.
He surveyed all of his goods and grinned, rubbing his hands together. "Now we’re cookin’ with fire.”
8 notes
·
View notes
Text
A Familiar Kind of Love Chapter Fourteen
A Familiar Kind of Love
Genre: Chaptered, ace/aro (flux and other experiences including but not limited to queerplatonic relationships), self discovery, witches, slow burn, getting together (eventually and in a mixed romantic/platonic way), RP format
Warnings: inaccurate herbology/plant & medicine stuff, self-esteem issues & confused hierarchy systems between familiars & witches (that does get resolved), threatened non-con (later, warned in chapter, and non-explicit), explicit discussions of nudity/sexual content but no actual smut, light experiences of ace/aro discrimination & feelings of discomfort/dysphoria during self-discovery, swearing
Summary: Born in a world full of magic, Dan spends his days running an apothecary and curing the sick. Potions and antidotes are his only friends, and he lives a happy life of quiet solitude - until a familiar he never wanted takes it all away. Forced to make a decision that’s life or death for one of them, Dan and Phil have to learn to co-exist together, entering a journey of self-discovery… and a familiar kind of love. Ace/Aro
Word Count: 9,912 this chapter
Thank you to @vanillasolitude who we could not have done this without. Every inch of their commentary and editing was a huge confidence boost, and we can not thank Emily enough for even being willing to do this with us. Seriously, it was a mammoth task and Emily just completely rose to the occasion, so giant thanks from us!
Updates: Monday & Friday
Disclaimer: In no way do I claim that this is real or cast aspersions on Dan or Phil.
For reference, @insanityplaysfics is Phil, @ineverhadmyinternetphase is Dan
(Previous) (Masterlist) (AO3)
Hey guys! Just a quick note at the top of this chapter; it looks like we’ve been nominated for a phanfiction award! A Familiar Kind of Love has been nominated for Best Collab, and it would be pretty amazing if you wanted to vote for us to win. You can vote here and check out the other nominations here!
Chapter Fourteen
"So... about that recipe we came up with together," Phil said as the two stood in front of Dan's still destroyed office. "I'm not sure we could magic it back, nor can I bring back the desk you apparently threw out, but... I think we can manage it again, if you wanted to try?" Phil asked, mindlessly letting his magic work to restore Dan’s office as he turned back to face Dan, who was standing just next to Phil in the doorway to his office. Phil tried for a sweet smile.
"I mean. After it's all fixed, of course. And maybe we could create you a new desk." Just like that, Phil's mind was building, and when he turned back around, there was a beautiful mahogany desk sat in the middle of the room. "Or I could create you one," he said, laughing and shrugging as Dan gave him a look. "It's like my magic has a mind of it's own," he teased.
Dan shook his head, staring with awe as Phil casually went about fixing up his office until it actually looked better than it ever had before. The new desk was shiny in its dark wood, and it glowed with something special that was probably the remnants of Phil's magic, which, apparently, was pretty strong just then.
"I think you're just excitable," Dan shook his head fondly at Phil. "No wonder you accidentally blow things up if I don’t keep an eye on you. Good work, though. I like the desk." Tentatively, Dan took a step further into the office and ran a hand across the wood, smiling at the soft texture.
Dan wasn't wrong. Phil was definitely just overly excitable, and that was probably a better explanation for why his magic had decided to create a desk for Dan instead of them doing it together, but Dan didn't truly seem to mind even as he teased Phil. Phil watched him take a step forward, looking shy but undoubtedly happy as his fingers ran over the wood of the desk Phil had created him. His paper and materials were still gone, but at least the walls weren't black anymore, and there was no lingering scent of destruction. At the very least, Phil could be proud of that. He smiled to himself, and followed Dan inside.
"This is actually the cleanest my office has ever been," Dan admitted, "So clearing it out may have been good. I'm sure we can come up with the recipe again - I hope so, anyway, that'll be a bestseller if we can cure the common cold." Dan smiled, relieved that he was back here with Phil this time. He hadn't been back since he'd been furiously scrubbing at the corners, and he was a bit worried at the amount of destruction his office had taken.
"I guess we've discovered what I'm good for then; cleaning up after you," he teased, and then laughed as he realised they very much seemed to clean up after each other. "Maybe that's just what our relationship is; two really tall boys who clean up after each other," he added, laughing and pressing his hand to his mouth when he felt something weird happening. He was surprised to feel his tongue poking out between his teeth, and blinked a few times before looking at Dan. Dan didn't seem to be paying him much attention though, digging around instead through his papers he'd managed to salvage, and coming back up with an excited "ah ha!"
"What is it?" Phil asked, stepping forward and around Dan's new desk to where he stood, taking in the sheets of paper he'd gathered before he realised it was a very old version of the recipe Phil had helped Dan to perfect. He grinned, and nudged Dan with his hip. "Budge over, I got this," he said, and grinned, laughing as Dan rolled his eyes. His tongue darted out between his teeth again, and he snapped his mouth shut in embarrassment. Dan's tongue didn't do that when he laughed.
Dan shook his head, relinquishing the papers with a long drawn out sigh. Clean up after each other’s messes they might do, but that didn't stop Phil from being a complete pain. An adorable pain who had a nice habit of hugging Dan whenever he could, but still a pain. At least they'd salvaged a very old version of the recipe, which had most, if not all, of Dan's equations on it. He thought he remembered the rest.
"Fine, I suppose I'll trust you to do it," Dan grumbled, moving around the desk to straighten up the chair that Phil had apparently magicked back into existence as well. It was covered in black velvet - very much Dan. Now they were both human, though, they were going to need two chairs, so Dan focused for a moment and flicked his fingers in his best imitation of Phil's magic.
Another chair appeared beside Dan's, almost identical except the velvet was blue instead of black. Dan pursed his lips. That would do for Phil, hopefully, even though Dan had been aiming for an exact copy. His magic, it seemed, had other ideas.
He turned back to Phil just in time to see Phil covering his mouth with his hand and looking a bit startled. Dan tilted his head. He hadn't quite looked quick enough to catch what Phil was up to, so he approached him with a slight frown. "What's up?"
Phil simply backed away, keeping his hand pressed over his mouth. Dan narrowed his eyes. "Am I going to have to hug the answer out of you?"
At that, Phil gave a surprised chuckle, and his hand moved just enough to reveal his tongue poking out of the side of his mouth. Dan's eyes brightened, his lips stretching into a smile, and he took a quick step forward. "Oh. That. Do that again, quickly."
Phil laughed, the sound shocked out of him by Dan's silly comment. If he was honest, he wouldn't mind if Dan hugged anything out of him, overly happy at the fact that Dan would want to, and quickly hid his mouth again after he accidentally revealed to Dan the strange thing his mouth was doing. Dan was quick to step towards him again, though, despite Phil having tried to sneak away from him, embarrassed and confused by the weird thing his tongue seemed to want to do.
"No," he whined, "it's weird."
Dan wasn't taking no for an answer, however, choosing instead to poke at Phil's ribs until he was laughing uncontrollably and his tongue was sticking out of it's own accord. His eyes were bright as he squirmed with mirth, trying to get away from Dan, laughing so loud he was sure that the entire world could hear him.
"Stop!" he whined, still laughing as Dan him backed into a corner. "I give, I give, you've seen enough!" he whined, still laughing as Dan finally pulled away. Phil bent over at the waist to catch his breath, and was wiping tears from his eyes when he straightened back up. "It's embarrassing," he claimed. "You don't do that!"
Dan grinned wickedly, only stepping back once he'd seen that Phil had laughed enough for his tongue to reappear again. That was...completely adorable. Dan could feel himself melting again, bursting with affection as he regarded Phil with a soft gaze.
"I may not do it, but I'm glad you do," Dan replied with a small grin. He reached out to rub Phil's cheek, his thumb swiping gently against Phil's soft skin. He was always so warm. Dan could feel himself dimpling just from touching Phil. "You're completely adorable, you know that?"
He glanced around the office with another warm smile, pleased that things were coming together. A lot of his books had been chucked out, but Dan knew where to get more copies, and he had enough recipes backed up that his loss wouldn't be disastrous. And he had Phil to help him bring everything back up.
"I should pop out to see PJ soon," Dan sighed. "Just to get the shop opening again. Then we can get going on some potions. Sound good?"
Something warm and fluttery filled Phil until he was practically squirming under it, inhaling sharply and just managing to catch his breath as he straightened up and stared at Dan, who reached out and touched his cheek gently. Phil tilted his face into the touch, still grinning even as his cheeks hurt from all the laughter, melting under the look Dan was giving him.
"I'm not cute," he complained, even as he sunk into the feelings swirling between them. Dan was just.. Dan. Phil wasn't sure he even knew how he made Phil feel all light and bubbly and like he was doing something right with his life each and every time Dan relaxed with him, made a sweet comment or implied that he did like Phil, on more than one level. He liked that Dan considered him adorable, and that he seemed to enjoy Phil's mind, and that he liked the way it felt when the two of them touched. Everything was just so right in Phil's world that he was practically beaming as he reached out and poked Dan's dimple.
"You're adorable, too," he murmured, and leaned in to press his face into Dan's shoulder, just wanting a hug. Dan's arms wound around him automatically, and Phil sighed, reaching out to do the same. He wouldn't be so embarrassed of the weird tongue thing if Dan liked it.
Sighing sadly, Phil let Dan go. "Off with you, then. I'll work on your equations and fix your remedy," he teased, and shoved Dan right out his office door. "I don't want to see you again until you're ready to give me all of your attention!"
Phil grinned as Dan laughed, shaking his head before leaving, and then sighed and turned around. He hadn't noticed until just that second that Dan had conjured a chair for him, nearly identical to Dan's own, and nearly melted into the ground at the sight of it. It was blue, the color of Phil's eyes, and matched Dan's black one quite nicely. Phil loved it, and sat in it immediately before finally getting to work on Dan's formula.
Dan squawked in something like professional fury, poking his tongue out at Phil and saying, "You always have my attention, greedy. Honestly, so needy, what on earth am I going to do with you?" He laughed again as Phil all but slammed the door in his face, turning to the empty shop before him.
There was still an hour before opening time (Dan tended to open late, he liked his lie ins), and so the shelves were spotless and the orderly aisles were empty. PJ had kept things spick and span in Dan's absence, which Dan was pleased about and knew he'd have to thank him for later.
Dan went about dusting down the counters and opening up the till for the day, and quickly popped out to check on his plants in his greenhouse. The dragonplant was still thriving the most out of all of his plants. Dan fingered the soft leaves thoughtfully before replacing their glass container and going about his business.
When he returned to the shop, PJ was already there. He dropped the folder he'd been holding, staring at Dan with wide eyes. "You're back!"
"That I am," Dan answered wryly. "Sorry for everything I've put you through. It's been...a crazy few days.
PJ simply shook his head, staring at Dan until he ran forward to wrap him in a hug. Dan patted his back awkwardly - he didn't do contact very well. At least, not with people who weren't Phil.
"I was worried," PJ confessed when he finally released Dan. "I thought you'd need more time to recover, after rescuing a familiar. No-one has done that before." At that, his voice took on a tinge of awe.
Dan shifted uncomfortably. "Yes, well," he answered in a gruff voice, privy to the information that it had indeed happened before, just not very often, "I had to. I couldn't leave Phil like that."
PJ smiled. "He seems nice."
"He is," Dan confessed, warming without realising it. He coughed, instantly getting back to business. "So, anyway. We're open as usual. You can watch the shop floor, I'll be in my office with Phil catching up on regulars and working on some new stuff."
"Sure thing." PJ gave him a two-fingered salute. "Oh, and the Bramley twins need their usual tonic."
Dan nodded, already on his way back into his office. That was enough interacting for one morning.
Phil thoughts were all over the place as he worked, thinking far too fast and remembering far too much at once to really keep track of himself. On top of that, he was still grinning over the chair Dan had conjured him while also giggling about Dan calling him needy and greedy for Dan's attention. It was all far too true, and Phil was warmed all the way to his toes. He hadn't even realised just how happy he was until the chair he was sat on suddenly began to float, shocking Phil out of his focus on the equations he was trying to re-organise and re-figure out.
He gasped when his pen fell, and just managed to regain enough control to set himself back to the floor safely before he burst into uncontrollable giggles. Was this how it would always be? He kind of hoped so. The idea of monotony ever being a part of Phil's life again was... not pleasing, and in fact, upset him quite a bit. He liked the way things were now, with his feelings for Dan propelling his magic into doing strange things... like apparently creating a small apple paperweight in gold that now sat in front of his chair. Phil blushed, and then laughed again, and turned back to Dan's formula.
It took a lot of figuring out and shifting through his thoughts, but Phil could still remember that afternoon when he'd helped Dan with the maths and had watched him flip numbers around until it worked. Eventually, Phil was satisfied that he'd done it right, and without bothering to wait for Dan, Phil set about preparing it.
Dan entered his office again and shut the door behind him, determined to keep Phil all to himself for now while they still worked things out. Thinking of, he hadn't seen the raven with PJ at all. Maybe she'd buggered off for the day - Dan wouldn't be missing her. Unless Phil wanted to talk to her, of course, but Dan felt an irrational flare of jealousy at that thought.
Phil was his, after all.
Upon looking into his office again, Dan nearly snorted at the golden apple paperweight that had mysteriously appeared on his desk. He could feel the thin tendrils of Phil's magic still floating in the air, and there also seemed to be a cauldron on the desk happily bubbling away that definitely hadn't been there before.
"Starting without me?" Dan questioned as he leaned against the wall and surveyed Phil with twinkling eyes. "And here I thought it was going to be a joint project."
Phil jumped when Dan spoke up behind him, having apparently appeared in the room without Phil realising it. The sound of his voice scared him so much that he literally jumped, and nearly knocked over his cauldron. In fact, the only reason he didn't lose his potion was because of Dan's magic suddenly catching it and preventing it from burning a hole through the desk Phil had only just conjured up for him.
"Don't scare me like that!" he complained, whining a little as he whirled on Dan with his hand over his heart. He laughed, tongue sticking out and everything, and closed his mouth only to shake his head at Dan. "It's hardly fair for you to just appear out of nowhere!" he added, motioning Dan inside. "Come help me! I'm not sure if I read your handwriting right. Do I stir counter clockwise six times, or eight? Your writing is atrocious," Phil complained, handing Dan the paper as he approached and leaned into his side.
"Now that you're here, it can be a joint project," he added, grinning as Dan told him eight - "eight, how the heck is that an eight anyway!?" - and stirred twice more before letting it simmer. "So. You're back. That means you're ready to ignore everyone but me now, right?" he teased, though he really was greedy for Dan's attention to be focused on him while he taught Phil how to help him with his work.
"That's so obviously an eight!" Dan whined, pointing at the paper and brandishing it in Phil's face. "It's not my fault if you can't read properly, just look at that - look at that curl, right there. It's so obviously not a six, you spork." He ruffled Phil's hair, promptly ducking out of the way of his retaliating whack and snickering.
Dan quickly returned his attention to the cauldron, though, making sure his magic was keeping it in check. With Phil, you never knew when some random spark could appear and burn a hole through his carpet. Still, Dan was having fun as he picked up his recipe sheet and scanned over the additions Phil had made. It looked pretty perfect to Dan.
"Alright, needy," he chuckled, sending Phil a small, fond smile. "I promise to give you my full and undivided attention for the rest of the day. Happy now?" He shook his head, then moved up behind Phil and took his hand in his own. "You're stirring a bit wrong. You have to use your elbow - like this." Dan opened up the bond, showing him how it was supposed to feel as he moved Phil's arm in careful circles. "See?"
Right, so. Apparently there were still some new sensations that Dan could give Phil, and one of those was a greedy feeling in the pit of his stomach at Dan coming up behind him and gripping his hands to show Phil the proper way to stir. He didn't understand it, but he liked the way it made him feel. It was something like affection and safety that made him grin and immediately lean backwards against Dan's chest. He was that little bit shorter, so he was able to lay his head on Dans' shoulder and grin up at him. "Hi," he greeted with a little giggle, enjoying the way Dan's lips quirked and his cheek dimpled, laughing harder as he sat back up straight, focusing more on the the potion he was meant to be brewing.
"I didn't think being human would be so hard," Phil complained as the new movements made his arm ache, and he blew air up at his fringe to force the long black hair out of his face. Seeing it made him miss his fur, but he was learning to enjoy being human, and it really was more useful in some things. Phil was sure he'd find a way to switch back and forth in the future.
Dan snorted when Phil leaned against him and looked up at him with a cheeky little grin. He nudged back, muttering, "A menace, you are. We're supposed to be working." He was smiling, though, as he directed Phil back. Dan had done this often enough that it was instinctual, even though he was using his weaker right hand to show Phil how to properly stir.
"Oi, being a human isn't so bad," Dan sniffed. "Thumbs are useful! And you must be cooler without all that fur." Dan paused for a moment, though, because he actually kind of missed that black fur. It had been soft and nice to curl his fingers through, never mind how nice it was to have Phil sprawling in his lap.
Well. They'd probably figure out how to switch him back eventually, and for now it made more sense to see a human talking out loud than a cat.
"What exactly are we making?" Dan asked after a moment. He stepped back from Phil, sure he'd got the hang of it by now, and instead scooped the altered recipe back up again. He scanned it quickly, lips pursing, and smiled when he saw that Phil had near-perfectly remembered the recipe from before - the one to cure the common cold. This could potentially solve an issue Dan had spent most of his career trying to fix.
Phil rolled his eyes. "Always with the thumbs," he complained. "As if the mouth isn't just as useful for picking things up," he added, though he truly did have a new appreciation for fingers than he might have had before the switch. It was nice to know he could pick up something easily without breaking it or hurting his mouth. Using his hands was just safer on so many levels.
"It's really not all that hot to have so much fur," Phil explained, considering the concept. "In fact, right now I constantly feel cold. There isn't enough hair on me to keep me warm," he said, glancing down at the jeans and t-shirt Dan had given him to wear. It was far warmer than the robe had been, and Phil appreciated them, but it wasn't quite enough. He still felt cold to the bone, and honestly missed the heavy fur coat that had kept the weather out. "Maybe I'm just more used to being warm than cold?" he guessed, finally finishing stirring and glancing back at Dan, who’d moved away from Phil to glance at the recipe he'd come up with.
"How's it look? I thought I remembered fairly well."
Dan pursed his lips to Phil saying he felt constantly cold. "Really? Because you always feel boiling hot to me. Maybe familiars just run at a different temperature?" He tilted his head, considering Phil, and determined to look it up later. For now, he'd just make sure to lay out a bunch of warm woolly jumpers for Phil to wrap himself up in.
Maybe it would give Dan an excuse to hug him some more, too. He was missing the touch, if he was completely honest with himself.
"Yeah, it looks pretty good to me," Dan agreed, brandishing the recipe. "We might have to play with the ingredients a bit, I'm not sure there's enough foxglove. We can test it next time I catch a cold." Dan slipped over to his cupboard and pulled out a large mixing bowl, then started to gather up some of his dried ingredients for the twins' tonic. "We've got some other customers to work on," he explained at Phil's questioning look. "I've been neglecting my regulars."
Phil pouted a little. He'd thought he'd done pretty well with the formulae and ingredients, but he supposed there was no way he was going to do a perfect job his first time around. Even when he'd helped Dan, it had mostly been Dan who'd figured things out with Phil's opinion offering a new perspective on the things Dan had taught him. Sighing a little, Phil tried to drop it from his mind, raising a brow and a questioning look at Dan as he started to pull out another cauldron and different ingredients.
Grinning excitedly, Phil set a timer for his boiling concoction, and rushed to Dan's side, practically bouncing on the balls of his feet. "Can I help?" he requested. "If I know how to help your regulars, you can concentrate on new patients and new recipes to help the ill," Phil explained, eager to be of proper use to Dan. He wanted to make his witch's life easier the way he was meant to, after all.
Dan gave a startled laugh at Phil's excitement. He'd never worked with someone as eager to please as Phil, but it seemed to run deeper even than that - Phil wasn't just excited about this because he wanted to help Dan, he was actually excited about the process, too. Dan could feel his interest thrumming through their bond. No one had ever wanted to share this with Dan before - even PJ was more interested in serving people than in coming up with recipes.
"Of course you can help," Dan agreed with a warm smile. "I'm starting off with a tonic against childhood bone weakness. The twins are five now, I've been making it a while. Come along." He brought Phil over to the desk and showed him the recipe from among the piles of books, as he began to chop up the dried herbs.
"It's a pretty simple one. Then we've got plenty of other regulars to work on. Together we'll get it done much faster than I ever managed alone."
**
Phil had never felt more happy or proud of himself than that morning he spent with Dan, learning recipes and the best way to go through them for the best results. The stronger your magic, the better the potion was likely to come out, as Dan showed Phil how his magic managed to seep into almost everything he did, including touching the ingredients. Phil listened intently, doing as Dan said, and tried to monitor his own excitable flow of magic that always seemed to want to get involved, whether it was meant to or not.
It was fun, as well. Phil had never enjoyed himself as much as when he was applying himself to potion making, the puzzle of it all and the way it stretched his muscles - physical and mental. He was panting by the third brewing, arms sore, and trying not to pout at Dan who thought it was hilarious that Phil was having a hard time. Phil knew it wasn't malicious laughter, though, and teased Dan back as often as he was able, grinning and rolling his eyes and messing about with him whenever he could.
Dan, mostly, helped Phil and worked on new formulas quietly when Phil was concentrating too much. On those occasions, Phil would sometimes sneak up on him and hug him from behind, pressing his chin over Dan's shoulder bone for his own comfort and sighing against the skin as they spoke. Sometimes, Dan jumped and tensed for a moment before relaxing, but he stuck true to his word, and didn't seem to mind that Phil was so touchy feeling and needed the comfort of Dan pressed to him often.
By afternoon, PJ was popping his head in as if to check in on them, and Phil was wishing he was a cat so he could take a cat nap on top of Dan's desk. As it was, he was slouched over in his chair while potions simmered and Dan took care of measuring them out, taking a much needed but probably very short break.
The afternoon wore on slowly but comfortably. After PJ had popped in to check on them both, Dan reassured him that they were both fine and sent him back out to the shop front armed with the tonic for the twins and some other regular medications that he'd worked on with Phil. PJ raised an impressed brow at how much they'd got done. Dan grinned proudly back. He was allowed to be proud of Phil, now that they were starting to iron things out.
Once PJ had gone again, Phil and Dan settled back into their routine. They'd settled into Phil stirring and watching the cauldrons as Dan read and added to recipes, occasionally chopping up dry ingredients and passing them onto Phil. Occasionally, Dan also pointed out ways to help Phil, or poked fun at him for his overexcited magic. Dan had already had to curb his enthusiasm, much to the relief of his desk and lightbulb.
Things were good, though. A quiet day spent in another's company could be a truly beautiful thing - and Phil's habit of randomly hugging Dan was hardly a bad thing, either.
When it was getting late, Dan set down his recipe and glanced over to where Phil was bent down over the fireplace eagerly watching a cauldron bubble away. Dan smirked and edged up behind him, suddenly throwing his arms around Phil's waist and chuckling at his yelp.
"Hello," Dan snickered, pressing his face into Phil's shoulder. "How much longer have you got on that? I'm just about done for the day, but I need to go check on my greenhouse. You want to come?"
Phil's only solace for the day was his ability to kind of cat-nap while in human form, sleeping with one eye open while his potions simmered, and only tuning back in when things needed to be stirred. It helped to give him his energy back, and soon enough, he was up and about again, encouraging Dan's teasing with small pouts of his own and bitter words that only made Dan come over and hug him to comfort him. Phil was pleased, feeling mischievous but also able to tell quite clearly that Dan was very aware of what he was doing. It was good, though, and Phil loved it; even when they grew quiet or didn't speak much, when their concentration was at it's peak. It was just nice to have someone there, someone who was meant for you and provided comfort just by being them.
Phil even managed to avoid any more total disasters, though there was a point where Phil got distracted by something shiny and nearly knocked over a cauldron that needed eight hours to simmer, just barely catching it before Dan could yell at him or notice. Phil snuck a glance back at him, but Dan wasn't paying attention, and Phil picked up the shiny coin on the ground and shoved it on his pocket to play with later.
There was one potion in particular that Phil really liked. It bubbled a dark purple color, flashing green from time to time, and swung over the fireplace in the back of Dan's office. While the rest of his potion work was being cleaned up and put away by Dan, Phil sat hunched in front of the cauldron and watched the flickering color excitedly. Magic was honestly a lot cooler when it was small things like this than it was when Phil merely snapped his fingers to make something happen.
Dan's arms suddenly appeared around his waist, then, and Phil yelped, jumping and nearly falling backwards into Dan, who caught him easily enough. Phil relaxed, smiling to have Dan initiating contact like this for once without any type of prompting from Phil, and just relaxed as Dan nuzzled his shoulder.
"Hello," Phil greeted back, eyes closing from contentment. He was humming again, proud of their easy familiarity with each other now. "It needs another hour but if I set a timer..." Phil murmured, already clicking one on in head. "Okay!" he said, growing excited already. "I want to come with you!"
Dan frowned, glancing around. He couldn't see a timer anywhere, despite Phil proudly announcing that he'd set one. After a moment of contemplating it, Dan shook his head, and mumbled, "Timer? What timer?" not quite loud enough for Phil to hear. The other boy was far too busy jumping up and down eagerly to hear much of anything, though.
Dan gave the cauldron a quick once-over, admiring the swirling green pattern, but after clarifying that it was bubbling along nicely and would be fine on its own for an hour, Dan gripped Phil's arm and tugged him out of the office. PJ was starting to close up the shop for the day, so Dan simply waved at him before heading out of the back door and towards his greenhouse.
Dan was proud of his greenhouse. He'd spent years cultivating the most precious herbs and plants around, creating special environments to grow the most delicate of flowers while lining the whole thing with hardy ferns that were the staple of any good potion. Dan had resolved to stop ordering in any plants over the next few years, determined to grow them all himself.
There was a burst of colour and smells as Dan opened the door and let Phil in. Flower after flower, shoot after shoot decorated the entire place, with creepers growing right up to the roof and shrubbery and leaves littered all over the floor. Dan gave the harberry shrub a pat on his way in, and then instantly went to check on his most valuable crop - the dragonplant. It was taking over well over a quarter of the far wall by now, encased behind a warm glass screen.
"Well?" Dan asked, spinning around to face Phil with a small, suddenly shy smile. "What do you think?"
Phil was feeling ridiculously giddy as Dan led him out and into the front shop, waving to PJ on his way by and grinning happily at the bemused man whose raven was currently missing. He smiled and waved back at Phil, shaking his head like he couldn’t believe what he was actually seeing, and Phil squeezed his fingers tighter around Dan's.
Before he knew it, he was being led back and into a greenhouse he had only been outside the front door of before, and the first thing he noticed was the sheer mass of magic and power emanating from inside. His skin crackled with all the power overlaid with the essence of Dan, but most definitely outlining just what was inside. The smells hit him next, like a slap to the face in the best way. Phil inhaled deeply, smiling as he glanced around himself to take it all in.
Every inch of the greenhouse was covered in plants of all kinds, some tall, some small, and some growing in small patches that might have looked like mould if Phil hadn't known any better. There were things in the building that Phil hadn't even known could exist together, and then, as Dan walked off, Phil following behind blindly, they came upon a supply of dragonplant that Phil had not been expecting to see.
"Wow," he said, awed by the sheer mass of it encased behind a glass screen. "When you said it was flourishing, well, I didn't imagine you meant like this," Phil whispered, reaching forward and stroking his fingers over the glass.
He turned to Dan with a grin.
"I love it here. It's beautiful. It's perfect, Dan."
Dan grinned back, more pleased than he could say that Phil liked it in here. Dan spent most of his time here, pottering around his plants and tending to them. It often felt more like home than his empty flat did.
Not so empty anymore. Not with Phil around.
"Yes," Dan snorted when he looked at the dragonplant. "It's your fault entirely it's doing so well. I've tried and failed four times to grow my own crop, and then you turn up and give me the best quality I've ever seen, and it just keeps growing. I barely have to do anything to it, other than build it a bigger screen."
He turned to the back of the greenhouse, then, where he had a small table full of his tools and bits and bobs for caring for the plants. He gestured Phil over. "Hey. Can you use your overexcited magic to float these things around for me? Then I don't have to keep coming back to the table."
Phil smiled, eyes going bright with the knowledge that he'd given Dan the best of the best to help him cultivate his own crops, rather than having to buy from an outside seller. From the looks of his garden, it seemed pretty obvious that was his overall goal for all of the plant based materials he would need in the future, and Phil could see already it was definitely working for him.
Following Dan further into his greenhouse, Phil felt himself beginning to bounce on the balls of his feet with excitement. More than anything now, he wanted to see how Dan took care of things, desperate to help as much as he could. He pouted as Dan teased him again, though, and shoved him a little, nearly upending himself in the process.
"Stop it. You need me," he whined, but did as he was told. His magic followed his command, gripping the items and dragging them behind the two of them as they moved about Dan's greenhouse. Phil continued to stare around in awe, handing Dan item after item as they went on.
Nearly overbalancing at the unexpected shove from Phil, Dan flailed his arms around windmill-fashion until he managed to save himself by grabbing onto the branches of a giant tree with one hand, and Phil's shoulder with the other. His nails dug in slightly and he straightened himself, giving the tree branch an apologetic little pat.
To Phil, he simply rolled his eyes with a fond smile and released him. Neither of them had enough balance to risk playing around in here - at least, not seriously. Dan still planned to have a little fun.
He started moving among his plants, taking the watering can from Phil's little floating selection of tools and carefully pouring exact amounts into the rich, earthy soil of his plant pots. He sprinkled light portions of feed lovingly into their roots, stroked carefully through their leaves, and tended to their dead shoots or dying leaves by carefully clipping them away and sending them into the compost pile heaped in a corner, where they could naturally decompose and add to the growing of new shoots.
Dan had always had green fingers. For as long as he remembered, plants were his only company, and he loved them perhaps more than anything or anyone else in his life (Phil notwithstanding). It showed in the affectionate way he patted branches and ran leaves through his fingers, knowingly avoiding thorns and sprinkling feed and water wherever it was needed.
As he went, Dan also began clipping some fresh leaves and petals and roots to use in his potions, once they had been dried and clumped together. His clippers were thin and delicate, and he gestured Phil closer to show him how to properly cut the shoots without damaging the plants.
"The trick is not to take too much at once," he explained, voice rough with so much talking as he'd been telling Phil stories all about his favourite plants as they moved through the greenhouse. He'd never talked this much at once ever. "They'll grow better if you leave good young shoots, but the adult ones can be clipped and brought inside. It's like giving the plants a haircut." He sent Phil a mischievous grin, playfully snipping the clippers at him. "Could give you one, too, while I'm at it."
Dan's voice was music to Phil's ears, and as he began talking, sharing stories with Phil's about the first time he'd brought in each plant, and how and why he loved this one in particular, Phil began to watch him, staring at the side of his face in order to just take him and everything he was saying in. It was enjoyable, just watching Dan, listening to him, laughing with him about his stories while his fingers stroked over his favorite plants with so much affection it reminded Phil of when Dan pet him as a cat.
The plants almost seemed to love Dan back, issuing forth magic every time he fed and cared for them, snipping away dead parts and feeding the healthy bits, only taking from the oldest parts of their shoots and leaves and leaving the new bits intact. All the while, he talked, teasing Phil and claiming to want to give Phil a hair cut. Pouting, Phil nearly dropped all of Dan's tools as he reached up in distress to cover his hair.
"No!" he wailed, but he could see the twinkle in Dan's eye, knew his witch was teasing, and grinned as he caught Dan's tools before they touched the ground. "If you cut my hair, I'll cut yours," he complained, lips twitching. "What if it affects my fur!"
At that, Dan couldn't hold back a snort of laughter. "You know, that's a pretty decent idea, actually. When you've figured out how to be a cat again I'll give your fur a snip." He snapped the clippers shut to make his point, and quickly dodged Phil's indignant whack with another snort of laughter.
The mental image of an indignant Phil in cat form with wild, messy, chopped black fur was slightly too entertaining to ignore.
Still, that thought sent Dan down a different track, and he tilted his head, considering Phil for a moment. There was something he'd never understood, or at least never paid much attention to before. Now they were getting on better, though, Dan thought he could risk asking. It couldn't hurt, right?
"Phil," he started, biting his lower lip for a moment before releasing it, "Can I ask you something? So you know why you're a cat?" He shook his head, trying to explain. "It's just - PJ loves birds, and he's got a raven. I thought familiars represented something of their witch, but...I've never really liked cats. Until you, I mean," Dan hastened to add, "I'm not saying I don't like you. I'm just curious. Why a cat?"
Phil would have hissed had he the ability to make such a noise, but as it was, he huffed out something akin to a growl and shrunk away from Dan, giving him the dirtiest look he could manage while he pouted to himself. He would kill Dan if he ever tried to snip Phil's fur, and his magic would probably freak out. Dan didn't need to know that, though. If his witch considered it a funny prank, than he got whatever he deserved in retaliation. Part of Phil knew that Dan meant it completely as a joke, but the other part of him was just too horrified by the idea to calm himself down.
They had stopped walking by now, when Dan spoke up again, asking the same question he'd asked Phil weeks before. Sort of. He'd wanted to know then too if Phil had any control over his form and why he'd picked a cat. This time, though, Phil had the feeling Dan wanted to know why a cat suited Dan's soul enough for Phil's mind to pick that form. He thought about it for a minute.
"Well... as I told you before, I didn't get to pick my form, and I can't change it at will," he said, "But I think I'm beginning to understand why your soul seems to think a cat is the best representation of you, whether you like it or not," he teased, finally sidling up to Dan again and knocking his hip into his witches. "For one, you're really stubborn," he said, considering it. "And I've got first hand knowledge of that one." Dan had been very difficult in the beginning, not that Phil could truly blame him, but to a point of contention. Phil was pretty stubborn as well, though, so it would be okay. "And you're inherently lazy. Don't pretend. The amount of time's I've caught you catching cat naps," Phil teased, laughing as Dan gave him an affronted look.
"But you're also proud, and keen, and far too intelligent and curious for you own good. Really, Dan, when you think about it, every inch of you is feline."
Dan's face went through a whole range of emotions, from indignation to huffing to smiling until he finally settled on a pout. Mostly, though, he was honestly surprised that Phil had already picked up on so many of Dan's traits and habits - even the ones he didn't want to admit to himself.
Was he right, though? Was Dan actually best represented by a cat? He could feel his pout growing, a small huff leaving him. He could have sworn he was more canine. Hell, he'd even have settled on being a bird, like PJ. But a cat? Him?
Well, it could have been worse. At least he wasn't a seal.
"I'm totally not a cat," he mumbled after a moment, knowing full well he sounded like a sulky child. As he pruned one of the bushes, he turned to Phil again, pointing an accusatory finger at him. "Besides, you're just as bad! I'm sure you're more stubborn than me. And you nap as well, don't think I haven't caught you."
Phil couldn't stop laughing; not only at Dan's ridiculous pout, but at the way he seemed to think pointing out Phil's traits as worse than his own was going to prove somehow that Dan was less of a cat than Phil. It was laughable, and Phil moved towards him to wind his arms around his waist.
"You're a dork," he said fondly, tucking his face over Dan's shoulder. "You realise I was created from you, right?" he teased. "So... of course I'm going to be stubborn, and lazy, and just as keen as you. Makes us a good match, doesn't it?" he whispered. "Who else is going to be able to combat your silliest ideas, who else is ever going to be able to challenge you and win? I was made for you, Dan Howell," Phil said, sighing happily. "I was made in the image of you. So. Embrace your feline-aspects, because I'm not going away now."
It didn't occur to Phil until after he'd let go of Dan just how sensual a thing that had been to do, and he blushed from the tips of his hair to his toes, embarrassed and hoping he hadn't made Dan too uncomfortable. His smile faded as he turned away. In fact, he had made himself a little uncomfortable with how close and intimate they'd been, and Phil loved intimacy.
Dan froze up a bit when Phil leaned into his shoulder, whispering in his ear. It wasn't unpleasant, not exactly, but it was new and strange and a bit overwhelming again. Dan had been growing accustomed to cuddling and hand-holding, even started initiating them himself, but this was...different. He wasn't entirely sure if he liked it.
Luckily, Phil seemed to be on exactly the same page as him, as he drew back from Dan and glanced down, and the sensation of embarrassment flowed gently through their bond. Dan's first reaction to that was to turn around and reassure Phil, laying a calming hand on his arm but standing far enough away that they weren't pressed together anymore.
"Well, when you put it like that," he tried to sound normal as he smirked, "I suppose we do make a good match. Fuck knows what we'll do when we have to clean up, though. Or early mornings. I so do not do early mornings." He shuddered, though he was still teasing, and he rubbed reassuringly at Phil's arm.
It was comforting when Dan pressed a calming hand on Phil's arm, rubbing reassuringly in light circles in understanding and a reminder that Dan understood. Neither one of them had quite been prepared for that, not that Phil was ever expecting them to be. He just hadn't realised how strange and intimate a thing it would be until he'd done it. Whispering into Dan's ear was not something Phil ever wanted to do again, but he was happy to know that Dan wasn't angry with him for it. He hadn't intended to make either of them uncomfortable, after all.
"I mean," Phil said, chuckling a little and finally looking up at Dan. "I'm sure if it gets bad enough we'll manage to force each other to clean," he reassured Dan. "But... if I'm a cat, you can't make me do anything," he teased, and laughed when Dan shoved him. Phil lost his balance for all of a few seconds, catching himself on a potted plant that he nearly upended and managed to grab onto with his magic. However, righting that before he could do any damage to it meant that Phil lost control, and dropped Dan's tools before finally falling to the ground himself, covered in water from Dan's watering can.
He pouted up at a laughing Dan, and tried not to whine too obviously as he pushed himself back up into a sitting position. "Shut up," he complained. "That was your fault."
"You can't blame me for your wild magic," Dan argued through his chuckles, a hand pressed to his mouth. He couldn't help himself. Phil was just sitting there, drenched in water, looking utterly disgruntled. His hair was flat and dripping, and his clothes were sticking to him. Dan could be forgiven for laughing, he thought.
"C'mere, you clumsy spork." Dan sighed through his chuckles, bending down and extending a hand out to Phil. Phil accepted it, and Dan pulled him up to his feet, gently dusting him down and ending with his hands on Phil's shoulders. They weren't pressed together, so he didn't think it was too much for them. Phil could step back if he wanted to.
"Maybe we should head back inside," Dan offered, lips still twitching. "Get you all dried off. Cats don't like being wet, right? And you're so obviously a cat."
Phil was still pouting when Dan helped him up, glaring at the other man even as he dusted him off and very gently took care of him. This was all his fault, and Phil was fully putting the blame on the other man and not his own magic.
"You realise that if I'm clumsy, you must be clumsy too, right?" Phil argued, still grumpy even as Dan put his hands on his shoulders in what seemed to be an attempt to reassure and comfort. Glaring into the warm brown eyes of witch, Phil felt himself beginning to melt into a puddle of gooey happiness just from the sheer reminder that Dan was finally his.
Until said man started making fun of him again, and then Phil's anger was back quick as a flash. He glared at Dan, turned on his heel, and stormed from the greenhouse. His magic swarmed over him, drying him instantly, and he'd just reached the door when the timer he'd set in his head went off.
His eyes went wide.
"My potion!" he cried, and then proceeded to trip right out the door. He landed on his face, and, frustrated as he was, vanished himself only to reappear just in time to flick out the flame in the fireplace. His potion was safe.
Dan watched Phil go with a bemused expression. Where had Phil just winked himself out of existence to? It was like when he'd first appeared and used to disappear seemingly at will. Dan thought he was going back to his own word then, but how could he have done that now? It was impossible, wasn't it? Now Dan had accepted him?
Or had Dan still not accepted him fully? Did Dan get something wrong again?
With fear beginning to wrap cold fingers around his heart, Dan locked up his greenhouse with a flick of his fingers and sprinted quickly back into the shop. PJ had locked up and disappeared already, so it was quiet and dark. There was no sign of Phil. A bit frantic now, Dan searched every aisle and then peeked into the medical room where he'd first let Phil sleep. There was still nothing.
With panic bursting in his chest, Dan finally pulled open the door to his office and nearly collapsed when he saw Phil there, bent over the fireplace. Dan had forgotten completely about the potion. "Thank fuck," he gasped, and threw himself across the room until he had his arms around Phil's waist and his face pressed against Phil's back.
Honestly, the last thing Phil had been expecting was for Dan to burst through the door of his office like a rampaging bull while Phil was working on getting the potion away from the still burning embers of the fire pit, only to then launch himself at Phil's back and curl his body around him. The fear in Dan hit Phil hard, then, and he shivered and whined a little at the overwhelming fear of loss that spread through him.
He felt his chest tighten with the ache of nearly losing Dan, and then realised what had gone through Dan's head when Phil had disappeared so suddenly. Tears were pricking at Phil's eyes, and he could feel Dan's falling onto the shirt he'd left Phil borrow.
"Dan?" he asked, sad and quiet. "I'm - I'm sorry, I didn't mean to scare you," he whispered, biting his lip against the lump he could feel in his throat. If this was how Phil was feeling from Dan's emotions crashing through their bond, he couldn't imagine how terrible Dan must be feeling just then. "I'm - I'm not going anywhere. You're stuck with me now," he tried to reassure as Dan just continued to cling to him from behind, not allowing Phil to move, face buried in his back and arms tight around him.
Phil felt the tears slip down his cheeks, and laughed a little through the tense, overwhelming feeling. It was a reminder that Dan cared, and while Phil knew that now, while the last thing Phil would have ever wanted was to make Dan think he was going anywhere, he couldn't help appreciating the sensation of overwhelming want for Phil.
Dan kept his face pressed tight against Phil's back, his eyes squeezed shut to try and contain their burning. He couldn't help it. There had been so much terror in him, then, when Phil just disappeared without any warning. It reminded Dan of when he'd just wink out of this world, and he couldn't bear the thought that he might lose Phil again. Not now, not when he was just beginning to finally appreciate his presence.
It struck Dan, then, just how much things had changed. It wasn't so long ago that Dan had fought completely against the idea of having anyone in his life, let alone a familiar. He hadn't wanted anyone invading his thoughts. And while that was still partly true, now Dan knew just how much good could come from being close to someone. Phil was a good addition to his life, and not one Dan was willing to lose just yet.
Eventually, Dan loosened his grip enough to let Phil move, but he instantly wound his hand around Phil's, keeping them connected. He avoided Phil's gaze, mumbling, "Sorry. I was just...you disappeared, and all I could think was you weren't going to come back, that I'd done something wrong again." He sniffled, wiping his hand on his sleeve, and giving Phil a watery smirk. "Stupid, I know. What the fuck was so important that you had to leave like that, though?”
Dan let him go, but reached for his hand almost immediately, seeming to need something, anything, to weigh him down and remind him that Phil was still there. Phil could give that to him easily enough, turning so he could actually look at Dan and squeezing his fingers around Dan's. Dan's hands were clammy and wet, and he was sniffling, which broke Phil's heart more than he could ever say. He wanted to reach up and wipe away the light tear tracks currently on his face, but it seemed Dan was trying to pretend he hadn't been crying at all, so Phil held himself back.
"The - the potion for your chronic illness patient? I - I almost forgot about it, and the timer went off in my head, and I thought - I didn't realise you would have forgotten as well," Phil explained, distressed as he stared at Dan and realised just how worked up he was that he was cursing at Phil again, something he hadn’t done since the last time Phil had pissed him off and began this whole mess.
"You didn't do anything wrong," Phil promised, biting his lip and crowding into Dan's space a little in an attempt to grab his attention and reassure him. The hand Dan wasn't holding came up to press comfortingly to Dan's cheek, and Phil peered back and forth between each of Dan's eyes. "You're stuck with me now, I promise. Only death can drag us apart. If I disappear, I'm coming back. Promise."
Dan stared intently back into Phil's eyes, tracking his every emotion, looking for a lie. But he didn't find one. Phil was telling him the truth, he could see it in his face, and Phil's face was an open book. He didn't hide his emotions, never had. He was telling the truth - he was never going to leave again. Dan wasn't going to mess up like that again.
Dan wilted. He pressed into Phil's arms and nuzzled his face into Phil's shoulder, pressing himself as close as he could. Phil wrapped his arms around him, and Dan sighed, feeling grounded again after his little freak-out. He was trembling, he realised belatedly, but it was fading under Phil's gentle touches.
"Sorry," he mumbled into Phil's shoulder, still refusing to back away. "I didn't mean to swear at you. I was just..." He trailed off, and let out a deep sigh. He tightened his grip. "I... care about you, okay, Phil?"
Phil opened his arms to Dan easily, embracing him tightly as Dan pressed his face into Phil's shoulder, bodies so close Phil could feel the heat radiating off of Dan. He could also feel the residual fear, and the pain that seemed to still linger in Dan's heart. Phil hated how badly he'd scared the other man, and kissed the side of his head lightly. He'd always kissed Dan's head, now that he thought about it, and he wasn't sure where he'd learned it, but he hoped that it didn't bother Dan. He hadn't complained so far.
"It's okay," Phil reassured him, hoping Dan's trembling would calm down if Phil kept holding him. "I know," he said, and held Dan tighter to him. There had a been a time when Phil had thought this would never be a thing, and now, Dan was terrified at the possibility of Phil ever disappearing on him again. It warmed him, made him feel proud that he could hold Dan and comfort him, and he sighed as he rested his cheek on the top of Dan's head.
It was times like these where Phil felt bigger, stronger, like he could protect Dan.
"It's time for dinner, I think. You said we should settle down for the night, and there's nothing left to take care of. Come on," Phil insisted, still cradling Dan against his chest.
Dan stayed in place for a moment longer, savouring the kisses pressed to his head and the heavy warmth of Phil's arms wrapped around him. It turned out that Phil had a very comfortable chest. He rested there for as long as it took for his trembling to stop, and then he drew back with a small nod.
"Yeah. Let's go rest," Dan agreed, and kept one hand wrapped tight around Phil's. He didn't want to let him go, in fact he was rather savouring the thought of curling up in Phil's arms some more, up in the privacy of their flat.
(next)
14 notes
·
View notes
Text
The Duplex Is Tiled! Here’s What We Loved & What We Wouldn’t Do Again
Tiling was one of the most daunting tasks on our duplex to-do list this year (four bathrooms! two mudrooms! and there are still two backsplashes on the list) so it’s a HUGE relief to say that all of those floors and showers and tub surrounds are officially done (well, like 95% done – more on that later). So today we wanted to show you how they’ve all turned out and share some of the lessons we learned along the way, including which tiles we’d buy again in a heartbeat… and the ones we’d think twice about attempting ever again.
floor tile | wall tile | shower floor | grout: frost | door: SW Oyster Bay
Listeners of last week’s podcast know that after two long weekends spent tiling the duplex, we completed all six of the floors ourselves (two mudrooms and four bathrooms!) but we decided to hire out the four remaining shower surrounds in order to keep things on schedule. What would’ve taken me and Sherry several more weekends to accomplish was knocked out by our contractor’s crew in less than a week. For each of the four shower/tub surrounds we chose white subway tile for the walls (simple, classic, affordable, and it’s a tile that falls back and won’t compete with the bolder patterned floor tile that we chose for each room). So this post is mostly going to focus on the floors in each space since we’ve covered our adventures in subway tile here and here already.
floor tile | wall tile | shower floor | grout: warm gray | door: SW White Truffle
But as for the subway tile we used, we went with this affordable 3 x 6″ subway tile installed in a standard running bond pattern (the same stuff we used and loved on the beach house’s kitchen backsplash). And the two master showers got this white herringbone on the floor, which added a hint of interest to that surface without being too crazy busy.
We showed you all of the floor tile selections in this post about how we chose our tile, cabinets, and paint colors. But we did make one last minute change to the plan from that post: we swapped the two master bathroom tile choices (seen in the two photos above) because the marble-looking tile ended up pairing better with the blue-green doors than the pink ones. As much planning as you do beforehand, there’s really nothing like seeing the tile in the space next to the items that are in there, hence that last minute swap.
We mentioned in that same post that we limited ourselves to larger tiles with interesting patterns, rather than smaller mosaics because we knew it would help the process go faster (we LOVE our pink house master bathroom floor, but it took us forever and a day). But even within that larger-tile parameter, we learned that some tiles were faster, easier, and more foolproof to lay than others. We LOVE how all of them turned out in the end, but there are some that gave us more difficulty (and took much longer to install) than others. So if speed and ease are an important factor when it comes to picking tile, or if you’re a newbie tiler and want to choose something that’s simple & straightforward, this post should help.
So let’s start with the easiest ones:
The Square Patterned Tiles
floor tile | grout: warm gray | door: SW White Truffle
The blue patterned tiles that we laid in the bathrooms on the left side were the fastest and the most straightforward to install. Why? Because (1) they were square and (2) the pattern was symmetrical on all sides, meaning you could put the tile down in any orientation and it would line up. The combination of those two factors made it much easier to lay out, cut, and install because we were always working with right angles (we’ll talk about hex tile in a moment!). And because the pattern was the same on every edge, we had less waste because we could use both sides of a cut tile again in another smaller spot (like around any edge).
floor tile | grout: warm gray | door: SW White Truffle | wall: SW Spare White
The size of these tiles was also really easy to work with. The master bath tile (above) was around an 8 x 8″ square while the hall bath tile (below) was 9 x 9″, so they weren’t heavy or unruly like larger tiles can be, but they filled the space more quickly than a smaller mosaic would have. I think each room took us about two hours to lay, which felt like nothing compared to some of the others.
floor tile |grout: frost | door: SW White Truffle
And even though they were just simple square tiles that went down easily, the final floor still looks interesting and intricate – which was the goal. So we’re thrilled with these. Ten stars. Would recommend. Final verdict: If you’re looking to achieve something similar and keep your project as simple as possible, I would choose square tiles like these and these. They’re both porcelain too, so they don’t need to be sealed and cared for like more finicky materials do (we’re looking at you cement tile).
floor tile | wall tile | grout: frost | door: SW White Truffle | drop-in tub
The only thing we’d do differently next time is we’d use a darker gray grout in the room above. We were trying to streamline everything and keep cost down by not buying different grout colors for each room (and whatever color went on the floors also went in the shower – some of which weren’t grouted at the time of these photos). But Sherry thinks a darker gray would’ve made the grout lines recede a bit more, helping the diamond pattern show through stronger. Anything for a diamond, right?
Let’s move on to the next simplest tile to install…
The Marble Hex Tile
floor tile | grout: frost | door: SW Oyster Bay
Now, this tile isn’t actually marble (it’s porcelain, just like everything else – because they’re extra durable and never need to be sealed) but it may be our favorite in the entire house. The marble-like finish is classic and bright, but the geometric pattern that’s layered on top makes it unique and unusual. We’ve actually talked about maybe using the same tile in our own bathroom here in Richmond – thats how much we like it.
(Note: the space between the tile & the tub or the tile & the baseboard in various shots throughout this post will get white quarter round molding, so it all looks seamless in the end)
floor tile | wall tile | grout: frost | door: SW Oyster Bay | wall: SW Spare White
Like the square tiles, this hex was about 8 x 8″ so the size was very manageable to work with and it provided fast coverage in the room. I think this one maybe took us 3-4 hours instead of 2. And that’s mainly because (1) the hex shape took more care to cut and lay and (2) the asymmetrical pattern took more concentration to not screw up. Speaking of which, there are two different looks you can get with this tile. See how the triangles are all the same color in the left picture below and they’re shaded differently in the right picture because we rotated the hexes? We laid out both options and picked the one on the right – but you could lay it the other way if your eyes like that better.
In addition to having to concentrate on not screwing up the pattern, hex tiles are a bit more finicky when it comes to spacing and not letting your layout drift. One tile laid too close to another in your first corner can cause big headaches down the line as that little inconsistency gets magnified in each subsequent row. So we actually laid out lots of tile BEFORE mixing Thinset to check how everything lined up and to ensure that we didn’t end up with slivers of tile anywhere. This may seem like overkill, but it made things go much faster once we actually started setting things for good.
Final Verdict: Ultimately this tile was noticeably (but not dramatically) harder than the square tiles, and with enough spacers (we used 1/16th spacers) we were able to keep everything lined up and spaced similarly. Even if our spacing had drifted a little, the grout color we used disguised the spacing pretty well anyways.
Sidenote: we love this Mapei grout because it comes premixed AND doesn’t need to be sealed and is durable/flexible/stain resistant. So once it’s dried and any grout haze is buffed off, it’s totally good to go. Our contractor swears by it and won’t use anything else, so we tried it throughout the pink house and after over a year of heavy use, all the grout in the bathrooms & the mudroom still looks mint (no grout scrubbing in over a year, folks!)
But just because this hex tile went down smoothly, doesn’t mean it all will…
The Patterned Hex Tile
This other hex tile went in hall bathroom on the same side as the one above and, well, it’s a good thing we love how this tile turned out because it felt straight up cursed when we were installing it.
floor tile | grout: warm gray | door: SW Oyster Bay
First, it presented some of the same challenges as the last hex tile – a non-square shape and an asymmetrical pattern. But this pattern was even trickier to keep straight, which caused a few bad cuts along the way (plus, it was much harder to reuse cut pieces because the pattern was so particular). I actually laid one tile in the WRONG direction and we didn’t notice it until a week later when it was time to grout. Can you spot it below?
It wasn’t a big deal to fix. I just broke it up with a hammer, removed the shattered pieces of that single tile, and installed a new piece in its place – but it did set my grouting back a day because we had to wait for that new thinset to cure before grouting. And of course, this happened AFTER we had run out of tile during the actual installation. Yep, we were like 80% done and had to order another box. So this room had two pretty frustrating setbacks. But eventually we got it done.
floor tile | grout: warm gray | door: SW Oyster Bay | wall: SW Spare White | drop-in tub
We actually think the square footage calculations on the website are wrong because a couple of our readers reported being short on these same tiles as well. And even without any bad cuts, we don’t think we would have had enough (again: it’s really really hard to reuse your scraps with a pattern like this). So if you use these tiles, I’d recommend getting around 25% extra (not just your typical 10-15% recommended overage).
Final Verdict: If ease and speed are important factors for you when you’re choosing a tile, I would NOT recommend this one. The result was great, but keeping the pattern straight kinda made our brains hurt, this specific tile ran short for us based on the square footage listed on the site (and we heard it did for a few other people), and now we know that we can get interesting patterns with simpler square tiles.
The Chevron Mudroom Tile
Let’s move downstairs to the two mudrooms / laundry rooms. I don’t have “after” photos of these because we haven’t grouted them quite yet (since the back doors act as the main entrances for the crew, the mudrooms are still seeing a lot of foot traffic and grime). So right now they’re both covered in protective paper and we’ll grout once things calm down over there. That means my best photos are mostly progress photos.
floor tile | spacers |wall: SW Spare White | trim: SW Extra White
We really liked installing this chevron tile because the rectangular shape made it easy to lay out and cut, plus the size (17″ x 35″) meant the room – which is nearly the size of all four bathrooms combined – filled up very quickly. The only downside to the size was that they were a bit heavy and cumbersome to maneuver, and I had to get creative with how I rested them on the guide of my wet saw to get them to fit under the blade while I cut them. Plus, keeping big tiles level can be challenging so we always recommend using these LASH spacers, which you can read more about in this post.
My only beef with this tile is that ideally, your spacing between tiles would match the spacing of the zigzags within the tile itself. However, to do that, the manufacturer recommends a (wait for it) … 2/17th spacer. WHO THE HECK SELLS A TWO-SEVENTEENTHS SPACER?! Fortunately, a standard 1/8th or 1/16th (which is what we did) is pretty close to 2/17ths. But still, I feel like it’s an unnecessary complication that could make your chevron not line up perfectly. But even still, for a big room, I would definitely choose this tile again.
Final Verdict: Larger tiles can be harder to handle, cut, and to get level, but these tiles were worth the trouble and we finished the room quickly since they were so large. It’s also one our favorite tiles looks-wise (this room gets the most in-person compliments) and it’s extremely durable (porcelain again) so we would recommend this for sure, especially with the LASH spacers we used.
The Herringbone Mudroom Tile
I’ve saved the best for last. And by the best, I mean hands-down-the-hardest. Yes folks, this is the one we probably would NOT do again… which is hard to say because it’s so darn cool to look at (even here, when it’s still ungrouted). Reminder: the space between the tile & the baseboard in various shots throughout this post will get white quarter round molding, so it’ll all look seamless in the end.
floor tiles: pink, white, and taupe | wall: SW Spare White | trim: SW Extra White
To create this floor we laid three different colors of long porcelain tiles (pink, white, and taupe) in a herringbone pattern, making it a perfect storm of all the challenges of the previous rooms combined:
The tri-color pattern took lots of concentration to keep straight
Despite being long rectangular tiles, laying a herringbone meant LOTS of angled cuts, which are less forgiving
It was difficult to reuse cut pieces because of the alternating colors and angled cuts
A herringbone pattern needs meticulous spacing to keep your pattern from drifting
Because of all of those factors – and because it was such a large room – this is the only space that took us an entire day to complete. Heck, it took us more than two hours just to get our pattern planned and the initial pieces cut. Maybe we were just tired (this was room five of six that we did across two consecutive weekends) but it took nearly all of our mental energy to precisely measure all of these angled cuts, to keep things square to the walls, and to not screw up the color sequence in the process.
Final Verdict: This was by far the hardest tile choice and it took the longest and required the most mental calculations (angled cuts, creating the pattern ourselves with three different colored tiles, etc). I think it could’ve been simpler had it been a smaller room (or frankly, just a wider room with more full pieces) or if we hadn’t done the herringbone pattern, so I don’t want to totally dissuade anyone from recreating this. Because again, we’re REALLY happy with the result. But I do want you guys to know what you’re getting yourselves into.
And One More Thing… About Toilet Holes
This post didn’t cover a lot of “how to” because tiling is something we’ve talked a lot about over the years (I’ll link to some of our previous tutorials at the bottom of this post). But I did want to cover one thing that lots of people asked about on Instagram: cutting around the toilet flange in the floor. See that nice round cut below? Who knew so many people would notice and ask us how it’s done. So here ya go.
I didn’t document this process and we were already done by the time the requests for tips arose, so I’ve tried to illustrate below what I do to make the round cuts around the flange. Most people use an angle grinder to get a really pretty circle cut, but I don’t own one, so my process involves my wet saw and it’s decidedly less pretty, but here it goes…
Basically once I’ve marked the area that needs to be cut, I make a two long cuts from each side at the shallowest angles I can manage (marked in red and purple in the top right picture). This removes a few big chunks and makes the next cuts easier.
Then I make a bunch of short cuts very close together – almost like making teeth – along the edge of the circle (marked in purple and red in the bottom left picture above). The “teeth” usually break off in the process, or if they’re too thick I just run my blade against them again. The final result is rarely a perfect circle and often has little indentations where I made the teeth cuts. But it’ll all be covered by a toilet anyways, so it doesn’t need to be perfect.
In fact, I probably don’t need to be as meticulous as I am since it’ll be hidden under the toilet. But you don’t want to get too lazy because your toilet needs a flat solid surface to rest on and if your chosen porcelain throne has an especially small base, a larger cut could end up peeking out.
Speaking of which, the upstairs toilets and vanities got installed last week so we’re hoping to make a trip out there this weekend to check it all out! Things are really coming together!!
More Tiling Projects & How To’s:
If you’re interested in more tutorials on tiling or want to check out some of our previous tile projects, here you go:
How to install a subway tile backsplash (with video!)
How to mix thinset and how to install penny tile
How to install subway tile in a herringbone pattern
How to install cement board and large floor tiles
How to install a herringbone marble backsplash using mastic
How to install oversized tile in an outdoor area
How we customized a hex mosaic in the beach house
*This post contains affiliate links*
The post The Duplex Is Tiled! Here’s What We Loved & What We Wouldn’t Do Again appeared first on Young House Love.
The Duplex Is Tiled! Here’s What We Loved & What We Wouldn’t Do Again published first on https://bakerskitchenslimited.tumblr.com/
0 notes
Text
The Duplex Is Tiled! Here’s What We Loved & What We Wouldn’t Do Again
Tiling was one of the most daunting tasks on our duplex to-do list this year (four bathrooms! two mudrooms! and there are still two backsplashes on the list) so it’s a HUGE relief to say that all of those floors and showers and tub surrounds are officially done (well, like 95% done – more on that later). So today we wanted to show you how they’ve all turned out and share some of the lessons we learned along the way, including which tiles we’d buy again in a heartbeat… and the ones we’d think twice about attempting ever again.
floor tile | wall tile | shower floor | grout: frost | door: SW Oyster Bay
Listeners of last week’s podcast know that after two long weekends spent tiling the duplex, we completed all six of the floors ourselves (two mudrooms and four bathrooms!) but we decided to hire out the four remaining shower surrounds in order to keep things on schedule. What would’ve taken me and Sherry several more weekends to accomplish was knocked out by our contractor’s crew in less than a week. For each of the four shower/tub surrounds we chose white subway tile for the walls (simple, classic, affordable, and it’s a tile that falls back and won’t compete with the bolder patterned floor tile that we chose for each room). So this post is mostly going to focus on the floors in each space since we’ve covered our adventures in subway tile here and here already.
floor tile | wall tile | shower floor | grout: warm gray | door: SW White Truffle
But as for the subway tile we used, we went with this affordable 3 x 6″ subway tile installed in a standard running bond pattern (the same stuff we used and loved on the beach house’s kitchen backsplash). And the two master showers got this white herringbone on the floor, which added a hint of interest to that surface without being too crazy busy.
We showed you all of the floor tile selections in this post about how we chose our tile, cabinets, and paint colors. But we did make one last minute change to the plan from that post: we swapped the two master bathroom tile choices (seen in the two photos above) because the marble-looking tile ended up pairing better with the blue-green doors than the pink ones. As much planning as you do beforehand, there’s really nothing like seeing the tile in the space next to the items that are in there, hence that last minute swap.
We mentioned in that same post that we limited ourselves to larger tiles with interesting patterns, rather than smaller mosaics because we knew it would help the process go faster (we LOVE our pink house master bathroom floor, but it took us forever and a day). But even within that larger-tile parameter, we learned that some tiles were faster, easier, and more foolproof to lay than others. We LOVE how all of them turned out in the end, but there are some that gave us more difficulty (and took much longer to install) than others. So if speed and ease are an important factor when it comes to picking tile, or if you’re a newbie tiler and want to choose something that’s simple & straightforward, this post should help.
So let’s start with the easiest ones:
The Square Patterned Tiles
floor tile | grout: warm gray | door: SW White Truffle
The blue patterned tiles that we laid in the bathrooms on the left side were the fastest and the most straightforward to install. Why? Because (1) they were square and (2) the pattern was symmetrical on all sides, meaning you could put the tile down in any orientation and it would line up. The combination of those two factors made it much easier to lay out, cut, and install because we were always working with right angles (we’ll talk about hex tile in a moment!). And because the pattern was the same on every edge, we had less waste because we could use both sides of a cut tile again in another smaller spot (like around any edge).
floor tile | grout: warm gray | door: SW White Truffle | wall: SW Spare White
The size of these tiles was also really easy to work with. The master bath tile (above) was around an 8 x 8″ square while the hall bath tile (below) was 9 x 9″, so they weren’t heavy or unruly like larger tiles can be, but they filled the space more quickly than a smaller mosaic would have. I think each room took us about two hours to lay, which felt like nothing compared to some of the others.
floor tile |grout: frost | door: SW White Truffle
And even though they were just simple square tiles that went down easily, the final floor still looks interesting and intricate – which was the goal. So we’re thrilled with these. Ten stars. Would recommend. Final verdict: If you’re looking to achieve something similar and keep your project as simple as possible, I would choose square tiles like these and these. They’re both porcelain too, so they don’t need to be sealed and cared for like more finicky materials do (we’re looking at you cement tile).
floor tile | wall tile | grout: frost | door: SW White Truffle | drop-in tub
The only thing we’d do differently next time is we’d use a darker gray grout in the room above. We were trying to streamline everything and keep cost down by not buying different grout colors for each room (and whatever color went on the floors also went in the shower – some of which weren’t grouted at the time of these photos). But Sherry thinks a darker gray would’ve made the grout lines recede a bit more, helping the diamond pattern show through stronger. Anything for a diamond, right?
Let’s move on to the next simplest tile to install…
The Marble Hex Tile
floor tile | grout: frost | door: SW Oyster Bay
Now, this tile isn’t actually marble (it’s porcelain, just like everything else – because they’re extra durable and never need to be sealed) but it may be our favorite in the entire house. The marble-like finish is classic and bright, but the geometric pattern that’s layered on top makes it unique and unusual. We’ve actually talked about maybe using the same tile in our own bathroom here in Richmond – thats how much we like it.
(Note: the space between the tile & the tub or the tile & the baseboard in various shots throughout this post will get white quarter round molding, so it all looks seamless in the end)
floor tile | wall tile | grout: frost | door: SW Oyster Bay | wall: SW Spare White
Like the square tiles, this hex was about 8 x 8″ so the size was very manageable to work with and it provided fast coverage in the room. I think this one maybe took us 3-4 hours instead of 2. And that’s mainly because (1) the hex shape took more care to cut and lay and (2) the asymmetrical pattern took more concentration to not screw up. Speaking of which, there are two different looks you can get with this tile. See how the triangles are all the same color in the left picture below and they’re shaded differently in the right picture because we rotated the hexes? We laid out both options and picked the one on the right – but you could lay it the other way if your eyes like that better.
In addition to having to concentrate on not screwing up the pattern, hex tiles are a bit more finicky when it comes to spacing and not letting your layout drift. One tile laid too close to another in your first corner can cause big headaches down the line as that little inconsistency gets magnified in each subsequent row. So we actually laid out lots of tile BEFORE mixing Thinset to check how everything lined up and to ensure that we didn’t end up with slivers of tile anywhere. This may seem like overkill, but it made things go much faster once we actually started setting things for good.
Final Verdict: Ultimately this tile was noticeably (but not dramatically) harder than the square tiles, and with enough spacers (we used 1/16th spacers) we were able to keep everything lined up and spaced similarly. Even if our spacing had drifted a little, the grout color we used disguised the spacing pretty well anyways.
Sidenote: we love this Mapei grout because it comes premixed AND doesn’t need to be sealed and is durable/flexible/stain resistant. So once it’s dried and any grout haze is buffed off, it’s totally good to go. Our contractor swears by it and won’t use anything else, so we tried it throughout the pink house and after over a year of heavy use, all the grout in the bathrooms & the mudroom still looks mint (no grout scrubbing in over a year, folks!)
But just because this hex tile went down smoothly, doesn’t mean it all will…
The Patterned Hex Tile
This other hex tile went in hall bathroom on the same side as the one above and, well, it’s a good thing we love how this tile turned out because it felt straight up cursed when we were installing it.
floor tile | grout: warm gray | door: SW Oyster Bay
First, it presented some of the same challenges as the last hex tile – a non-square shape and an asymmetrical pattern. But this pattern was even trickier to keep straight, which caused a few bad cuts along the way (plus, it was much harder to reuse cut pieces because the pattern was so particular). I actually laid one tile in the WRONG direction and we didn’t notice it until a week later when it was time to grout. Can you spot it below?
It wasn’t a big deal to fix. I just broke it up with a hammer, removed the shattered pieces of that single tile, and installed a new piece in its place – but it did set my grouting back a day because we had to wait for that new thinset to cure before grouting. And of course, this happened AFTER we had run out of tile during the actual installation. Yep, we were like 80% done and had to order another box. So this room had two pretty frustrating setbacks. But eventually we got it done.
floor tile | grout: warm gray | door: SW Oyster Bay | wall: SW Spare White | drop-in tub
We actually think the square footage calculations on the website are wrong because a couple of our readers reported being short on these same tiles as well. And even without any bad cuts, we don’t think we would have had enough (again: it’s really really hard to reuse your scraps with a pattern like this). So if you use these tiles, I’d recommend getting around 25% extra (not just your typical 10-15% recommended overage).
Final Verdict: If ease and speed are important factors for you when you’re choosing a tile, I would NOT recommend this one. The result was great, but keeping the pattern straight kinda made our brains hurt, this specific tile ran short for us based on the square footage listed on the site (and we heard it did for a few other people), and now we know that we can get interesting patterns with simpler square tiles.
The Chevron Mudroom Tile
Let’s move downstairs to the two mudrooms / laundry rooms. I don’t have “after” photos of these because we haven’t grouted them quite yet (since the back doors act as the main entrances for the crew, the mudrooms are still seeing a lot of foot traffic and grime). So right now they’re both covered in protective paper and we’ll grout once things calm down over there. That means my best photos are mostly progress photos.
floor tile | spacers |wall: SW Spare White | trim: SW Extra White
We really liked installing this chevron tile because the rectangular shape made it easy to lay out and cut, plus the size (17″ x 35″) meant the room – which is nearly the size of all four bathrooms combined – filled up very quickly. The only downside to the size was that they were a bit heavy and cumbersome to maneuver, and I had to get creative with how I rested them on the guide of my wet saw to get them to fit under the blade while I cut them. Plus, keeping big tiles level can be challenging so we always recommend using these LASH spacers, which you can read more about in this post.
My only beef with this tile is that ideally, your spacing between tiles would match the spacing of the zigzags within the tile itself. However, to do that, the manufacturer recommends a (wait for it) … 2/17th spacer. WHO THE HECK SELLS A TWO-SEVENTEENTHS SPACER?! Fortunately, a standard 1/8th or 1/16th (which is what we did) is pretty close to 2/17ths. But still, I feel like it’s an unnecessary complication that could make your chevron not line up perfectly. But even still, for a big room, I would definitely choose this tile again.
Final Verdict: Larger tiles can be harder to handle, cut, and to get level, but these tiles were worth the trouble and we finished the room quickly since they were so large. It’s also one our favorite tiles looks-wise (this room gets the most in-person compliments) and it’s extremely durable (porcelain again) so we would recommend this for sure, especially with the LASH spacers we used.
The Herringbone Mudroom Tile
I’ve saved the best for last. And by the best, I mean hands-down-the-hardest. Yes folks, this is the one we probably would NOT do again… which is hard to say because it’s so darn cool to look at (even here, when it’s still ungrouted). Reminder: the space between the tile & the baseboard in various shots throughout this post will get white quarter round molding, so it’ll all look seamless in the end.
floor tiles: pink, white, and taupe | wall: SW Spare White | trim: SW Extra White
To create this floor we laid three different colors of long porcelain tiles (pink, white, and taupe) in a herringbone pattern, making it a perfect storm of all the challenges of the previous rooms combined:
The tri-color pattern took lots of concentration to keep straight
Despite being long rectangular tiles, laying a herringbone meant LOTS of angled cuts, which are less forgiving
It was difficult to reuse cut pieces because of the alternating colors and angled cuts
A herringbone pattern needs meticulous spacing to keep your pattern from drifting
Because of all of those factors – and because it was such a large room – this is the only space that took us an entire day to complete. Heck, it took us more than two hours just to get our pattern planned and the initial pieces cut. Maybe we were just tired (this was room five of six that we did across two consecutive weekends) but it took nearly all of our mental energy to precisely measure all of these angled cuts, to keep things square to the walls, and to not screw up the color sequence in the process.
Final Verdict: This was by far the hardest tile choice and it took the longest and required the most mental calculations (angled cuts, creating the pattern ourselves with three different colored tiles, etc). I think it could’ve been simpler had it been a smaller room (or frankly, just a wider room with more full pieces) or if we hadn’t done the herringbone pattern, so I don’t want to totally dissuade anyone from recreating this. Because again, we’re REALLY happy with the result. But I do want you guys to know what you’re getting yourselves into.
And One More Thing… About Toilet Holes
This post didn’t cover a lot of “how to” because tiling is something we’ve talked a lot about over the years (I’ll link to some of our previous tutorials at the bottom of this post). But I did want to cover one thing that lots of people asked about on Instagram: cutting around the toilet flange in the floor. See that nice round cut below? Who knew so many people would notice and ask us how it’s done. So here ya go.
I didn’t document this process and we were already done by the time the requests for tips arose, so I’ve tried to illustrate below what I do to make the round cuts around the flange. Most people use an angle grinder to get a really pretty circle cut, but I don’t own one, so my process involves my wet saw and it’s decidedly less pretty, but here it goes…
Basically once I’ve marked the area that needs to be cut, I make a two long cuts from each side at the shallowest angles I can manage (marked in red and purple in the top right picture). This removes a few big chunks and makes the next cuts easier.
Then I make a bunch of short cuts very close together – almost like making teeth – along the edge of the circle (marked in purple and red in the bottom left picture above). The “teeth” usually break off in the process, or if they’re too thick I just run my blade against them again. The final result is rarely a perfect circle and often has little indentations where I made the teeth cuts. But it’ll all be covered by a toilet anyways, so it doesn’t need to be perfect.
In fact, I probably don’t need to be as meticulous as I am since it’ll be hidden under the toilet. But you don’t want to get too lazy because your toilet needs a flat solid surface to rest on and if your chosen porcelain throne has an especially small base, a larger cut could end up peeking out.
Speaking of which, the upstairs toilets and vanities got installed last week so we’re hoping to make a trip out there this weekend to check it all out! Things are really coming together!!
More Tiling Projects & How To’s:
If you’re interested in more tutorials on tiling or want to check out some of our previous tile projects, here you go:
How to install a subway tile backsplash (with video!)
How to mix thinset and how to install penny tile
How to install subway tile in a herringbone pattern
How to install cement board and large floor tiles
How to install a herringbone marble backsplash using mastic
How to install oversized tile in an outdoor area
How we customized a hex mosaic in the beach house
*This post contains affiliate links*
The post The Duplex Is Tiled! Here’s What We Loved & What We Wouldn’t Do Again appeared first on Young House Love.
The Duplex Is Tiled! Here’s What We Loved & What We Wouldn’t Do Again published first on https://aireloomreview.tumblr.com/
0 notes
Text
The Duplex Is Tiled! Here’s What We Loved & What We Wouldn’t Do Again
Tiling was one of the most daunting tasks on our duplex to-do list this year (four bathrooms! two mudrooms! and there are still two backsplashes on the list) so it’s a HUGE relief to say that all of those floors and showers and tub surrounds are officially done (well, like 95% done – more on that later). So today we wanted to show you how they’ve all turned out and share some of the lessons we learned along the way, including which tiles we’d buy again in a heartbeat… and the ones we’d think twice about attempting ever again.
floor tile | wall tile | shower floor | grout: frost | door: SW Oyster Bay
Listeners of last week’s podcast know that after two long weekends spent tiling the duplex, we completed all six of the floors ourselves (two mudrooms and four bathrooms!) but we decided to hire out the four remaining shower surrounds in order to keep things on schedule. What would’ve taken me and Sherry several more weekends to accomplish was knocked out by our contractor’s crew in less than a week. For each of the four shower/tub surrounds we chose white subway tile for the walls (simple, classic, affordable, and it’s a tile that falls back and won’t compete with the bolder patterned floor tile that we chose for each room). So this post is mostly going to focus on the floors in each space since we’ve covered our adventures in subway tile here and here already.
floor tile | wall tile | shower floor | grout: warm gray | door: SW White Truffle
But as for the subway tile we used, we went with this affordable 3 x 6″ subway tile installed in a standard running bond pattern (the same stuff we used and loved on the beach house’s kitchen backsplash). And the two master showers got this white herringbone on the floor, which added a hint of interest to that surface without being too crazy busy.
We showed you all of the floor tile selections in this post about how we chose our tile, cabinets, and paint colors. But we did make one last minute change to the plan from that post: we swapped the two master bathroom tile choices (seen in the two photos above) because the marble-looking tile ended up pairing better with the blue-green doors than the pink ones. As much planning as you do beforehand, there’s really nothing like seeing the tile in the space next to the items that are in there, hence that last minute swap.
We mentioned in that same post that we limited ourselves to larger tiles with interesting patterns, rather than smaller mosaics because we knew it would help the process go faster (we LOVE our pink house master bathroom floor, but it took us forever and a day). But even within that larger-tile parameter, we learned that some tiles were faster, easier, and more foolproof to lay than others. We LOVE how all of them turned out in the end, but there are some that gave us more difficulty (and took much longer to install) than others. So if speed and ease are an important factor when it comes to picking tile, or if you’re a newbie tiler and want to choose something that’s simple & straightforward, this post should help.
So let’s start with the easiest ones:
The Square Patterned Tiles
floor tile | grout: warm gray | door: SW White Truffle
The blue patterned tiles that we laid in the bathrooms on the left side were the fastest and the most straightforward to install. Why? Because (1) they were square and (2) the pattern was symmetrical on all sides, meaning you could put the tile down in any orientation and it would line up. The combination of those two factors made it much easier to lay out, cut, and install because we were always working with right angles (we’ll talk about hex tile in a moment!). And because the pattern was the same on every edge, we had less waste because we could use both sides of a cut tile again in another smaller spot (like around any edge).
floor tile | grout: warm gray | door: SW White Truffle | wall: SW Spare White
The size of these tiles was also really easy to work with. The master bath tile (above) was around an 8 x 8″ square while the hall bath tile (below) was 9 x 9″, so they weren’t heavy or unruly like larger tiles can be, but they filled the space more quickly than a smaller mosaic would have. I think each room took us about two hours to lay, which felt like nothing compared to some of the others.
floor tile |grout: frost | door: SW White Truffle
And even though they were just simple square tiles that went down easily, the final floor still looks interesting and intricate – which was the goal. So we’re thrilled with these. Ten stars. Would recommend. Final verdict: If you’re looking to achieve something similar and keep your project as simple as possible, I would choose square tiles like these and these. They’re both porcelain too, so they don’t need to be sealed and cared for like more finicky materials do (we’re looking at you cement tile).
floor tile | wall tile | grout: frost | door: SW White Truffle | drop-in tub
The only thing we’d do differently next time is we’d use a darker gray grout in the room above. We were trying to streamline everything and keep cost down by not buying different grout colors for each room (and whatever color went on the floors also went in the shower – some of which weren’t grouted at the time of these photos). But Sherry thinks a darker gray would’ve made the grout lines recede a bit more, helping the diamond pattern show through stronger. Anything for a diamond, right?
Let’s move on to the next simplest tile to install…
The Marble Hex Tile
floor tile | grout: frost | door: SW Oyster Bay
Now, this tile isn’t actually marble (it’s porcelain, just like everything else – because they’re extra durable and never need to be sealed) but it may be our favorite in the entire house. The marble-like finish is classic and bright, but the geometric pattern that’s layered on top makes it unique and unusual. We’ve actually talked about maybe using the same tile in our own bathroom here in Richmond – thats how much we like it.
(Note: the space between the tile & the tub or the tile & the baseboard in various shots throughout this post will get white quarter round molding, so it all looks seamless in the end)
floor tile | wall tile | grout: frost | door: SW Oyster Bay | wall: SW Spare White
Like the square tiles, this hex was about 8 x 8″ so the size was very manageable to work with and it provided fast coverage in the room. I think this one maybe took us 3-4 hours instead of 2. And that’s mainly because (1) the hex shape took more care to cut and lay and (2) the asymmetrical pattern took more concentration to not screw up. Speaking of which, there are two different looks you can get with this tile. See how the triangles are all the same color in the left picture below and they’re shaded differently in the right picture because we rotated the hexes? We laid out both options and picked the one on the right – but you could lay it the other way if your eyes like that better.
In addition to having to concentrate on not screwing up the pattern, hex tiles are a bit more finicky when it comes to spacing and not letting your layout drift. One tile laid too close to another in your first corner can cause big headaches down the line as that little inconsistency gets magnified in each subsequent row. So we actually laid out lots of tile BEFORE mixing Thinset to check how everything lined up and to ensure that we didn’t end up with slivers of tile anywhere. This may seem like overkill, but it made things go much faster once we actually started setting things for good.
Final Verdict: Ultimately this tile was noticeably (but not dramatically) harder than the square tiles, and with enough spacers (we used 1/16th spacers) we were able to keep everything lined up and spaced similarly. Even if our spacing had drifted a little, the grout color we used disguised the spacing pretty well anyways.
Sidenote: we love this Mapei grout because it comes premixed AND doesn’t need to be sealed and is durable/flexible/stain resistant. So once it’s dried and any grout haze is buffed off, it’s totally good to go. Our contractor swears by it and won’t use anything else, so we tried it throughout the pink house and after over a year of heavy use, all the grout in the bathrooms & the mudroom still looks mint (no grout scrubbing in over a year, folks!)
But just because this hex tile went down smoothly, doesn’t mean it all will…
The Patterned Hex Tile
This other hex tile went in hall bathroom on the same side as the one above and, well, it’s a good thing we love how this tile turned out because it felt straight up cursed when we were installing it.
floor tile | grout: warm gray | door: SW Oyster Bay
First, it presented some of the same challenges as the last hex tile – a non-square shape and an asymmetrical pattern. But this pattern was even trickier to keep straight, which caused a few bad cuts along the way (plus, it was much harder to reuse cut pieces because the pattern was so particular). I actually laid one tile in the WRONG direction and we didn’t notice it until a week later when it was time to grout. Can you spot it below?
It wasn’t a big deal to fix. I just broke it up with a hammer, removed the shattered pieces of that single tile, and installed a new piece in its place – but it did set my grouting back a day because we had to wait for that new thinset to cure before grouting. And of course, this happened AFTER we had run out of tile during the actual installation. Yep, we were like 80% done and had to order another box. So this room had two pretty frustrating setbacks. But eventually we got it done.
floor tile | grout: warm gray | door: SW Oyster Bay | wall: SW Spare White | drop-in tub
We actually think the square footage calculations on the website are wrong because a couple of our readers reported being short on these same tiles as well. And even without any bad cuts, we don’t think we would have had enough (again: it’s really really hard to reuse your scraps with a pattern like this). So if you use these tiles, I’d recommend getting around 25% extra (not just your typical 10-15% recommended overage).
Final Verdict: If ease and speed are important factors for you when you’re choosing a tile, I would NOT recommend this one. The result was great, but keeping the pattern straight kinda made our brains hurt, this specific tile ran short for us based on the square footage listed on the site (and we heard it did for a few other people), and now we know that we can get interesting patterns with simpler square tiles.
The Chevron Mudroom Tile
Let’s move downstairs to the two mudrooms / laundry rooms. I don’t have “after” photos of these because we haven’t grouted them quite yet (since the back doors act as the main entrances for the crew, the mudrooms are still seeing a lot of foot traffic and grime). So right now they’re both covered in protective paper and we’ll grout once things calm down over there. That means my best photos are mostly progress photos.
floor tile | spacers |wall: SW Spare White | trim: SW Extra White
We really liked installing this chevron tile because the rectangular shape made it easy to lay out and cut, plus the size (17″ x 35″) meant the room – which is nearly the size of all four bathrooms combined – filled up very quickly. The only downside to the size was that they were a bit heavy and cumbersome to maneuver, and I had to get creative with how I rested them on the guide of my wet saw to get them to fit under the blade while I cut them. Plus, keeping big tiles level can be challenging so we always recommend using these LASH spacers, which you can read more about in this post.
My only beef with this tile is that ideally, your spacing between tiles would match the spacing of the zigzags within the tile itself. However, to do that, the manufacturer recommends a (wait for it) … 2/17th spacer. WHO THE HECK SELLS A TWO-SEVENTEENTHS SPACER?! Fortunately, a standard 1/8th or 1/16th (which is what we did) is pretty close to 2/17ths. But still, I feel like it’s an unnecessary complication that could make your chevron not line up perfectly. But even still, for a big room, I would definitely choose this tile again.
Final Verdict: Larger tiles can be harder to handle, cut, and to get level, but these tiles were worth the trouble and we finished the room quickly since they were so large. It’s also one our favorite tiles looks-wise (this room gets the most in-person compliments) and it’s extremely durable (porcelain again) so we would recommend this for sure, especially with the LASH spacers we used.
The Herringbone Mudroom Tile
I’ve saved the best for last. And by the best, I mean hands-down-the-hardest. Yes folks, this is the one we probably would NOT do again… which is hard to say because it’s so darn cool to look at (even here, when it’s still ungrouted). Reminder: the space between the tile & the baseboard in various shots throughout this post will get white quarter round molding, so it’ll all look seamless in the end.
floor tiles: pink, white, and taupe | wall: SW Spare White | trim: SW Extra White
To create this floor we laid three different colors of long porcelain tiles (pink, white, and taupe) in a herringbone pattern, making it a perfect storm of all the challenges of the previous rooms combined:
The tri-color pattern took lots of concentration to keep straight
Despite being long rectangular tiles, laying a herringbone meant LOTS of angled cuts, which are less forgiving
It was difficult to reuse cut pieces because of the alternating colors and angled cuts
A herringbone pattern needs meticulous spacing to keep your pattern from drifting
Because of all of those factors – and because it was such a large room – this is the only space that took us an entire day to complete. Heck, it took us more than two hours just to get our pattern planned and the initial pieces cut. Maybe we were just tired (this was room five of six that we did across two consecutive weekends) but it took nearly all of our mental energy to precisely measure all of these angled cuts, to keep things square to the walls, and to not screw up the color sequence in the process.
Final Verdict: This was by far the hardest tile choice and it took the longest and required the most mental calculations (angled cuts, creating the pattern ourselves with three different colored tiles, etc). I think it could’ve been simpler had it been a smaller room (or frankly, just a wider room with more full pieces) or if we hadn’t done the herringbone pattern, so I don’t want to totally dissuade anyone from recreating this. Because again, we’re REALLY happy with the result. But I do want you guys to know what you’re getting yourselves into.
And One More Thing… About Toilet Holes
This post didn’t cover a lot of “how to” because tiling is something we’ve talked a lot about over the years (I’ll link to some of our previous tutorials at the bottom of this post). But I did want to cover one thing that lots of people asked about on Instagram: cutting around the toilet flange in the floor. See that nice round cut below? Who knew so many people would notice and ask us how it’s done. So here ya go.
I didn’t document this process and we were already done by the time the requests for tips arose, so I’ve tried to illustrate below what I do to make the round cuts around the flange. Most people use an angle grinder to get a really pretty circle cut, but I don’t own one, so my process involves my wet saw and it’s decidedly less pretty, but here it goes…
Basically once I’ve marked the area that needs to be cut, I make a two long cuts from each side at the shallowest angles I can manage (marked in red and purple in the top right picture). This removes a few big chunks and makes the next cuts easier.
Then I make a bunch of short cuts very close together – almost like making teeth – along the edge of the circle (marked in purple and red in the bottom left picture above). The “teeth” usually break off in the process, or if they’re too thick I just run my blade against them again. The final result is rarely a perfect circle and often has little indentations where I made the teeth cuts. But it’ll all be covered by a toilet anyways, so it doesn’t need to be perfect.
In fact, I probably don’t need to be as meticulous as I am since it’ll be hidden under the toilet. But you don’t want to get too lazy because your toilet needs a flat solid surface to rest on and if your chosen porcelain throne has an especially small base, a larger cut could end up peeking out.
Speaking of which, the upstairs toilets and vanities got installed last week so we’re hoping to make a trip out there this weekend to check it all out! Things are really coming together!!
More Tiling Projects & How To’s:
If you’re interested in more tutorials on tiling or want to check out some of our previous tile projects, here you go:
How to install a subway tile backsplash (with video!)
How to mix thinset and how to install penny tile
How to install subway tile in a herringbone pattern
How to install cement board and large floor tiles
How to install a herringbone marble backsplash using mastic
How to install oversized tile in an outdoor area
How we customized a hex mosaic in the beach house
*This post contains affiliate links*
The post The Duplex Is Tiled! Here’s What We Loved & What We Wouldn’t Do Again appeared first on Young House Love.
The Duplex Is Tiled! Here’s What We Loved & What We Wouldn’t Do Again published first on https://ssmattress.tumblr.com/
0 notes
Text
The Duplex Is Tiled! Here’s What We Loved & What We Wouldn’t Do Again
Tiling was one of the most daunting tasks on our duplex to-do list this year (four bathrooms! two mudrooms! and there are still two backsplashes on the list) so it’s a HUGE relief to say that all of those floors and showers and tub surrounds are officially done (well, like 95% done – more on that later). So today we wanted to show you how they’ve all turned out and share some of the lessons we learned along the way, including which tiles we’d buy again in a heartbeat… and the ones we’d think twice about attempting ever again.
floor tile | wall tile | shower floor | grout: frost | door: SW Oyster Bay
Listeners of last week’s podcast know that after two long weekends spent tiling the duplex, we completed all six of the floors ourselves (two mudrooms and four bathrooms!) but we decided to hire out the four remaining shower surrounds in order to keep things on schedule. What would’ve taken me and Sherry several more weekends to accomplish was knocked out by our contractor’s crew in less than a week. For each of the four shower/tub surrounds we chose white subway tile for the walls (simple, classic, affordable, and it’s a tile that falls back and won’t compete with the bolder patterned floor tile that we chose for each room). So this post is mostly going to focus on the floors in each space since we’ve covered our adventures in subway tile here and here already.
floor tile | wall tile | shower floor | grout: warm gray | door: SW White Truffle
But as for the subway tile we used, we went with this affordable 3 x 6″ subway tile installed in a standard running bond pattern (the same stuff we used and loved on the beach house’s kitchen backsplash). And the two master showers got this white herringbone on the floor, which added a hint of interest to that surface without being too crazy busy.
We showed you all of the floor tile selections in this post about how we chose our tile, cabinets, and paint colors. But we did make one last minute change to the plan from that post: we swapped the two master bathroom tile choices (seen in the two photos above) because the marble-looking tile ended up pairing better with the blue-green doors than the pink ones. As much planning as you do beforehand, there’s really nothing like seeing the tile in the space next to the items that are in there, hence that last minute swap.
We mentioned in that same post that we limited ourselves to larger tiles with interesting patterns, rather than smaller mosaics because we knew it would help the process go faster (we LOVE our pink house master bathroom floor, but it took us forever and a day). But even within that larger-tile parameter, we learned that some tiles were faster, easier, and more foolproof to lay than others. We LOVE how all of them turned out in the end, but there are some that gave us more difficulty (and took much longer to install) than others. So if speed and ease are an important factor when it comes to picking tile, or if you’re a newbie tiler and want to choose something that’s simple & straightforward, this post should help.
So let’s start with the easiest ones:
The Square Patterned Tiles
floor tile | grout: warm gray | door: SW White Truffle
The blue patterned tiles that we laid in the bathrooms on the left side were the fastest and the most straightforward to install. Why? Because (1) they were square and (2) the pattern was symmetrical on all sides, meaning you could put the tile down in any orientation and it would line up. The combination of those two factors made it much easier to lay out, cut, and install because we were always working with right angles (we’ll talk about hex tile in a moment!). And because the pattern was the same on every edge, we had less waste because we could use both sides of a cut tile again in another smaller spot (like around any edge).
floor tile | grout: warm gray | door: SW White Truffle | wall: SW Spare White
The size of these tiles was also really easy to work with. The master bath tile (above) was around an 8 x 8″ square while the hall bath tile (below) was 9 x 9″, so they weren’t heavy or unruly like larger tiles can be, but they filled the space more quickly than a smaller mosaic would have. I think each room took us about two hours to lay, which felt like nothing compared to some of the others.
floor tile |grout: frost | door: SW White Truffle
And even though they were just simple square tiles that went down easily, the final floor still looks interesting and intricate – which was the goal. So we’re thrilled with these. Ten stars. Would recommend. Final verdict: If you’re looking to achieve something similar and keep your project as simple as possible, I would choose square tiles like these and these. They’re both porcelain too, so they don’t need to be sealed and cared for like more finicky materials do (we’re looking at you cement tile).
floor tile | wall tile | grout: frost | door: SW White Truffle | drop-in tub
The only thing we’d do differently next time is we’d use a darker gray grout in the room above. We were trying to streamline everything and keep cost down by not buying different grout colors for each room (and whatever color went on the floors also went in the shower – some of which weren’t grouted at the time of these photos). But Sherry thinks a darker gray would’ve made the grout lines recede a bit more, helping the diamond pattern show through stronger. Anything for a diamond, right?
Let’s move on to the next simplest tile to install…
The Marble Hex Tile
floor tile | grout: frost | door: SW Oyster Bay
Now, this tile isn’t actually marble (it’s porcelain, just like everything else – because they’re extra durable and never need to be sealed) but it may be our favorite in the entire house. The marble-like finish is classic and bright, but the geometric pattern that’s layered on top makes it unique and unusual. We’ve actually talked about maybe using the same tile in our own bathroom here in Richmond – thats how much we like it.
(Note: the space between the tile & the tub or the tile & the baseboard in various shots throughout this post will get white quarter round molding, so it all looks seamless in the end)
floor tile | wall tile | grout: frost | door: SW Oyster Bay | wall: SW Spare White
Like the square tiles, this hex was about 8 x 8″ so the size was very manageable to work with and it provided fast coverage in the room. I think this one maybe took us 3-4 hours instead of 2. And that’s mainly because (1) the hex shape took more care to cut and lay and (2) the asymmetrical pattern took more concentration to not screw up. Speaking of which, there are two different looks you can get with this tile. See how the triangles are all the same color in the left picture below and they’re shaded differently in the right picture because we rotated the hexes? We laid out both options and picked the one on the right – but you could lay it the other way if your eyes like that better.
In addition to having to concentrate on not screwing up the pattern, hex tiles are a bit more finicky when it comes to spacing and not letting your layout drift. One tile laid too close to another in your first corner can cause big headaches down the line as that little inconsistency gets magnified in each subsequent row. So we actually laid out lots of tile BEFORE mixing Thinset to check how everything lined up and to ensure that we didn’t end up with slivers of tile anywhere. This may seem like overkill, but it made things go much faster once we actually started setting things for good.
Final Verdict: Ultimately this tile was noticeably (but not dramatically) harder than the square tiles, and with enough spacers (we used 1/16th spacers) we were able to keep everything lined up and spaced similarly. Even if our spacing had drifted a little, the grout color we used disguised the spacing pretty well anyways.
Sidenote: we love this Mapei grout because it comes premixed AND doesn’t need to be sealed and is durable/flexible/stain resistant. So once it’s dried and any grout haze is buffed off, it’s totally good to go. Our contractor swears by it and won’t use anything else, so we tried it throughout the pink house and after over a year of heavy use, all the grout in the bathrooms & the mudroom still looks mint (no grout scrubbing in over a year, folks!)
But just because this hex tile went down smoothly, doesn’t mean it all will…
The Patterned Hex Tile
This other hex tile went in hall bathroom on the same side as the one above and, well, it’s a good thing we love how this tile turned out because it felt straight up cursed when we were installing it.
floor tile | grout: warm gray | door: SW Oyster Bay
First, it presented some of the same challenges as the last hex tile – a non-square shape and an asymmetrical pattern. But this pattern was even trickier to keep straight, which caused a few bad cuts along the way (plus, it was much harder to reuse cut pieces because the pattern was so particular). I actually laid one tile in the WRONG direction and we didn’t notice it until a week later when it was time to grout. Can you spot it below?
It wasn’t a big deal to fix. I just broke it up with a hammer, removed the shattered pieces of that single tile, and installed a new piece in its place – but it did set my grouting back a day because we had to wait for that new thinset to cure before grouting. And of course, this happened AFTER we had run out of tile during the actual installation. Yep, we were like 80% done and had to order another box. So this room had two pretty frustrating setbacks. But eventually we got it done.
floor tile | grout: warm gray | door: SW Oyster Bay | wall: SW Spare White | drop-in tub
We actually think the square footage calculations on the website are wrong because a couple of our readers reported being short on these same tiles as well. And even without any bad cuts, we don’t think we would have had enough (again: it’s really really hard to reuse your scraps with a pattern like this). So if you use these tiles, I’d recommend getting around 25% extra (not just your typical 10-15% recommended overage).
Final Verdict: If ease and speed are important factors for you when you’re choosing a tile, I would NOT recommend this one. The result was great, but keeping the pattern straight kinda made our brains hurt, this specific tile ran short for us based on the square footage listed on the site (and we heard it did for a few other people), and now we know that we can get interesting patterns with simpler square tiles.
The Chevron Mudroom Tile
Let’s move downstairs to the two mudrooms / laundry rooms. I don’t have “after” photos of these because we haven’t grouted them quite yet (since the back doors act as the main entrances for the crew, the mudrooms are still seeing a lot of foot traffic and grime). So right now they’re both covered in protective paper and we’ll grout once things calm down over there. That means my best photos are mostly progress photos.
floor tile | spacers |wall: SW Spare White | trim: SW Extra White
We really liked installing this chevron tile because the rectangular shape made it easy to lay out and cut, plus the size (17″ x 35″) meant the room – which is nearly the size of all four bathrooms combined – filled up very quickly. The only downside to the size was that they were a bit heavy and cumbersome to maneuver, and I had to get creative with how I rested them on the guide of my wet saw to get them to fit under the blade while I cut them. Plus, keeping big tiles level can be challenging so we always recommend using these LASH spacers, which you can read more about in this post.
My only beef with this tile is that ideally, your spacing between tiles would match the spacing of the zigzags within the tile itself. However, to do that, the manufacturer recommends a (wait for it) … 2/17th spacer. WHO THE HECK SELLS A TWO-SEVENTEENTHS SPACER?! Fortunately, a standard 1/8th or 1/16th (which is what we did) is pretty close to 2/17ths. But still, I feel like it’s an unnecessary complication that could make your chevron not line up perfectly. But even still, for a big room, I would definitely choose this tile again.
Final Verdict: Larger tiles can be harder to handle, cut, and to get level, but these tiles were worth the trouble and we finished the room quickly since they were so large. It’s also one our favorite tiles looks-wise (this room gets the most in-person compliments) and it’s extremely durable (porcelain again) so we would recommend this for sure, especially with the LASH spacers we used.
The Herringbone Mudroom Tile
I’ve saved the best for last. And by the best, I mean hands-down-the-hardest. Yes folks, this is the one we probably would NOT do again… which is hard to say because it’s so darn cool to look at (even here, when it’s still ungrouted). Reminder: the space between the tile & the baseboard in various shots throughout this post will get white quarter round molding, so it’ll all look seamless in the end.
floor tiles: pink, white, and taupe | wall: SW Spare White | trim: SW Extra White
To create this floor we laid three different colors of long porcelain tiles (pink, white, and taupe) in a herringbone pattern, making it a perfect storm of all the challenges of the previous rooms combined:
The tri-color pattern took lots of concentration to keep straight
Despite being long rectangular tiles, laying a herringbone meant LOTS of angled cuts, which are less forgiving
It was difficult to reuse cut pieces because of the alternating colors and angled cuts
A herringbone pattern needs meticulous spacing to keep your pattern from drifting
Because of all of those factors – and because it was such a large room – this is the only space that took us an entire day to complete. Heck, it took us more than two hours just to get our pattern planned and the initial pieces cut. Maybe we were just tired (this was room five of six that we did across two consecutive weekends) but it took nearly all of our mental energy to precisely measure all of these angled cuts, to keep things square to the walls, and to not screw up the color sequence in the process.
Final Verdict: This was by far the hardest tile choice and it took the longest and required the most mental calculations (angled cuts, creating the pattern ourselves with three different colored tiles, etc). I think it could’ve been simpler had it been a smaller room (or frankly, just a wider room with more full pieces) or if we hadn’t done the herringbone pattern, so I don’t want to totally dissuade anyone from recreating this. Because again, we’re REALLY happy with the result. But I do want you guys to know what you’re getting yourselves into.
And One More Thing… About Toilet Holes
This post didn’t cover a lot of “how to” because tiling is something we’ve talked a lot about over the years (I’ll link to some of our previous tutorials at the bottom of this post). But I did want to cover one thing that lots of people asked about on Instagram: cutting around the toilet flange in the floor. See that nice round cut below? Who knew so many people would notice and ask us how it’s done. So here ya go.
I didn’t document this process and we were already done by the time the requests for tips arose, so I’ve tried to illustrate below what I do to make the round cuts around the flange. Most people use an angle grinder to get a really pretty circle cut, but I don’t own one, so my process involves my wet saw and it’s decidedly less pretty, but here it goes…
Basically once I’ve marked the area that needs to be cut, I make a two long cuts from each side at the shallowest angles I can manage (marked in red and purple in the top right picture). This removes a few big chunks and makes the next cuts easier.
Then I make a bunch of short cuts very close together – almost like making teeth – along the edge of the circle (marked in purple and red in the bottom left picture above). The “teeth” usually break off in the process, or if they’re too thick I just run my blade against them again. The final result is rarely a perfect circle and often has little indentations where I made the teeth cuts. But it’ll all be covered by a toilet anyways, so it doesn’t need to be perfect.
In fact, I probably don’t need to be as meticulous as I am since it’ll be hidden under the toilet. But you don’t want to get too lazy because your toilet needs a flat solid surface to rest on and if your chosen porcelain throne has an especially small base, a larger cut could end up peeking out.
Speaking of which, the upstairs toilets and vanities got installed last week so we’re hoping to make a trip out there this weekend to check it all out! Things are really coming together!!
More Tiling Projects & How To’s:
If you’re interested in more tutorials on tiling or want to check out some of our previous tile projects, here you go:
How to install a subway tile backsplash (with video!)
How to mix thinset and how to install penny tile
How to install subway tile in a herringbone pattern
How to install cement board and large floor tiles
How to install a herringbone marble backsplash using mastic
How to install oversized tile in an outdoor area
How we customized a hex mosaic in the beach house
*This post contains affiliate links*
The post The Duplex Is Tiled! Here’s What We Loved & What We Wouldn’t Do Again appeared first on Young House Love.
The Duplex Is Tiled! Here’s What We Loved & What We Wouldn’t Do Again published first on https://novaformmattressreview.tumblr.com/
0 notes
Photo
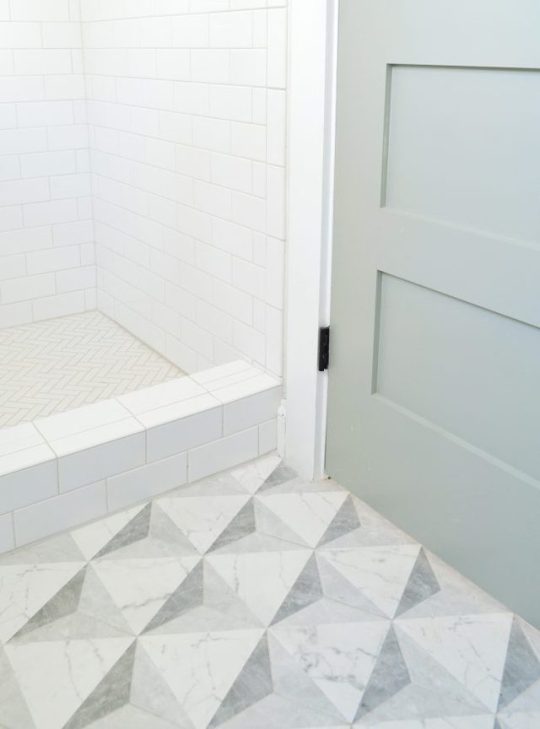
The Duplex Is Tiled! Here’s What We Loved & What We Wouldn’t Do Again https://ift.tt/2TSQyzF
Tiling was one of the most daunting tasks on our duplex to-do list this year (four bathrooms! two mudrooms! and there are still two backsplashes on the list) so it’s a HUGE relief to say that all of those floors and showers and tub surrounds are officially done (well, like 95% done – more on that later). So today we wanted to show you how they’ve all turned out and share some of the lessons we learned along the way, including which tiles we’d buy again in a heartbeat… and the ones we’d think twice about attempting ever again.
floor tile | wall tile | shower floor | grout: frost | door: SW Oyster Bay
Listeners of last week’s podcast know that after two long weekends spent tiling the duplex, we completed all six of the floors ourselves (two mudrooms and four bathrooms!) but we decided to hire out the four remaining shower surrounds in order to keep things on schedule. What would’ve taken me and Sherry several more weekends to accomplish was knocked out by our contractor’s crew in less than a week – which means we got to spend all that time we saved doing actual work that we get paid for, so it worked out well.
For each of the four shower/tub surrounds we chose white subway tile for the walls (simple, classic, affordable, and it’s a tile that lets the more interesting floor tile in each room be the star). So this post is mostly going to focus on the floors in each space since we’ve covered our adventures in subway tile here and here already.
floor tile | wall tile | shower floor | grout: warm gray | door: SW White Truffle
But as for the subway tile we used, we went with this affordable 3 x 6″ subway tile installed in a standard running bond pattern (the same stuff we used and loved on the beach house’s kitchen backsplash). And the two master showers got this white herringbone on the floor, which added a hint of interest to that surface without being too crazy busy.
We showed you all of the floor tile selections in this post about how we chose our tile, cabinets, and paint colors. But we did make one last minute change to the plan from that post: we swapped the two master bathroom tile choices (seen in the two photos above) because the marble-esque tile ended up looking better with the blue-green doors than the pink ones. As much planning as you do beforehand, there’s really nothing like seeing the tile in the space next to the items that are in there, hence that last minute swap.
We mentioned in that same post that we limited ourselves to larger tiles with interesting patterns, rather than smaller mosaics because we knew it would help the process go faster (we LOVE our pink house master bathroom floor, but it took us forever and a day). But even within that larger-tile parameter, we learned that some tiles were faster, easier, and more foolproof to lay than others. We LOVE how all of them turned out in the end, but there are some that gave us more difficulty (and took much longer to install) than others. So if speed and ease are an important factor when it comes to picking tile, or if you’re a newbie tiler and want to choose something that’s simple and straightforward… this post should help.
So let’s start with the easiest ones:
The Square Patterned Tiles
floor tile | grout: warm gray | door: SW White Truffle
The blue patterned tiles that we laid in the bathrooms on the left side were the fastest and the most straightforward to install. Why? Because (1) they were square and (2) the pattern was symmetrical on all sides, meaning you could put the tile down in any orientation and it would line up. The combination of those two factors made it much easier to lay out, cut, and install because we were always working with right angles (we’ll talk about hex tile in a moment!). And because the pattern was the same on every edge, we had less waste because we could use both sides of a cut tile again in another smaller spot (like around any edge).
floor tile | grout: warm gray | door: SW White Truffle | wall: SW Spare White
The size of these tiles was also really easy to work with. The master bath tile (above) was around an 8 x 8″ square while the hall bath tile (below) was 9 x 9″, so they weren’t heavy or unruly like larger tiles can be, but they filled the space more quickly than a smaller mosaic would have. I think each room took us about two hours to lay, which felt like nothing compared to some of the others.
floor tile |grout: frost | door: SW White Truffle
And even though they were just simple square tiles that went down easily, the final floor still looks interesting and intricate – which was the goal. So we’re thrilled with these. Ten stars. Would recommend. Final verdict: If you’re looking to achieve something similar and keep your project as simple as possible, I would choose square tiles like these and these. They’re both porcelain too, so they don’t need to be sealed and cared for like more finicky materials do (we’re looking at you cement tile).
floor tile | wall tile | grout: frost | door: SW White Truffle | drop-in tub
The only thing we’d do differently next time is we’d use a darker gray grout in the room above. We were trying to streamline everything and keep cost down by not buying different grout colors for each room (and whatever color went on the floors also went in the shower – some of which weren’t grouted at the time of these photos). But Sherry thinks a darker gray would’ve made the grout lines recede a bit more, helping the diamond pattern show through stronger. Anything for a diamond, right?
Let’s move on to the next simplest tile to install…
The Marble Hex Tile
floor tile | grout: frost | door: SW Oyster Bay
Now, this tile isn’t actually marble (it’s porcelain, just like everything else – because they’re extra durable and never need to be sealed) but it may be our favorite in the entire house. The marble finish is classic and bright, but the pattern on top makes it unique and unusual. We’ve actually talked about maybe using the same tile in our own bathroom here in Richmond – thats how much we like it.
(Note: the space between the tile & the tub or the tile & the baseboard in various shots throughout this post will get white quarter round molding, so it all looks seamless in the end)
floor tile | wall tile | grout: frost | door: SW Oyster Bay | wall: SW Spare White
Like the square tiles, this hex was about 8 x 8″ so the size was very manageable to work with and it provided fast coverage in the room. I think this one maybe took us 3-4 hours instead of 2. And that’s mainly because (1) the hex shape took more care to cut and lay and (2) the asymmetrical pattern took more concentration to not screw up. Speaking of which, there are two different looks you can get with this tile. See how the triangles are all the same color in the left picture below and they’re shaded differently in the right picture because we rotated the hexes? We laid out both options and picked the one on the right.
In addition to having to concentrate on not screwing up the pattern, hex tiles are a bit more finicky when it comes to spacing and not letting your layout drift. One tile laid too close to another in your first corner can cause big headaches down the line as that little inconsistency gets magnified in each subsequent row. So we actually laid out lots of tile BEFORE mixing Thinset to check how everything lined up and to ensure that we didn’t end up with slivers of tile anywhere. This may seem like overkill, but it made things go much faster once we actually started setting things for good.
Final Verdict: Ultimately this tile was noticeably (but not dramatically) harder than the square tiles, and with enough spacers (we used 1/16th spacers) we were able to keep everything lined up and spaced similarly. Even if our spacing had drifted a little, the grout color we used disguised the spacing pretty well anyways. Sidenote: we love this Mapei grout because it comes premixed AND doesn’t need to be sealed and is durable/flexible/stain resistant. So once it’s dried and any grout haze is buffed off, it’s totally good to go. Our contractor swears by it and won’t use anything else, so we tried it throughout the pink house and after over a year of heavy use, all the grout in the bathrooms/mudroom still look mint (no grout scrubbing in over a year, folks!)
But just because this hex tile went down smoothly, doesn’t mean it all will…
The Patterned Hex Tile
This other hex tile went in hall bathroom on the same side as the one above and, well, it’s a good thing we love how this tile turned out because it felt straight up cursed when we were installing it.
floor tile | grout: warm gray | door: SW Oyster Bay
First, it presented some of the same challenges as the last hex tile – a non-square shape and an asymmetrical pattern. But this pattern was even trickier to keep straight, which caused a few bad cuts along the way (plus, it was much harder to reuse cut pieces because the pattern was so particular). I actually laid one tile in the WRONG direction and we didn’t notice it until a week later when it was time to grout. Can you spot it below?
It wasn’t a big deal to fix. I just broke it up with a hammer, removed the shattered pieces of that single tile, and installed a new piece in its place – but it did set my grouting back a day because we had to wait for that new thinset to cure before grouting. And of course, this happened AFTER we had run out of tile during the actual installation. Yep, we were like 80% done and had to order another box. So this room had two pretty frustrating setbacks. But eventually we got it done.
floor tile | grout: warm gray | door: SW Oyster Bay | wall: SW Spare White | drop-in tub
We actually think the square footage calculations on the website are wrong because a couple of our readers reported being short on these same tiles as well. And even without any bad cuts, we don’t think we would have had enough (again: it’s really really hard to reuse your scraps with a pattern like this). So if you use these tiles, I’d recommend getting around 25% extra (not just your typical 10-15% recommended overage).
Final Verdict: If ease and speed are important factors for you when you’re choosing a tile, I would NOT recommend this one. The result was great, but keeping the pattern straight kinda made our brains hurt, this specific tile ran short for us based on the square footage listed on the site (and we heard it did for a few other people), and now we know that we can get interesting patterns with simpler square tiles.
The Chevron Mudroom Tile
Let’s move downstairs to the two mudrooms / laundry rooms. I don’t have “after” photos of these because we haven’t grouted them quite yet (since the back doors act as the main entrances for the crew, the mudrooms are still seeing a lot of foot traffic and grime). So right now they’re both covered in protective paper and we’ll grout once things calm down over there. That means my best photos are mostly progress photos.
floor tile | spacers |wall: SW Spare White | trim: SW Extra White
We really liked installing this chevron tile because the rectangular shape made it easy to lay out and cut, plus the size (17″ x 35″) meant the room – which is nearly the size of all four bathrooms combined – filled up very quickly. The only downside to the size was that they were a bit heavy and cumbersome to maneuver, and I had to get creative with how I rested them on the guide of my wet saw to get them to fit under the blade while I cut them. Plus, keeping big tiles level can be challenging so we always recommend using these LASH spacers, which you can read more about in this post.
My only beef with this tile is that ideally, your spacing between tiles would match the spacing of the zigzags within the tile itself. However, to do that, the manufacturer recommends a (wait for it) … 2/17th spacer. WHO THE HECK SELLS A TWO-SEVENTEENTHS SPACER?! Fortunately, a standard 1/8th or 1/16th (which is what we did) is pretty close to 2/17ths. But still, I feel like it’s an unnecessary complication that could make your chevron not line up perfectly. But even still, for a big room, I would definitely choose this tile again.
Final Verdict: Larger tiles can be harder to handle, cut, and to get level, but these tiles were worth the trouble and we finished the room quickly since they were so large. It’s also one our favorite tiles looks-wise (this room gets the most in-person compliments) and it’s extremely durable (porcelain again) so we would recommend this for sure, especially with the LASH spacers we used.
The Herringbone Mudroom Tile
I’ve saved the best for last. And by the best, I mean hands-down-the-hardest. Yes folks, this is the one we probably would NOT do again… which is hard to say because it’s so darn cool to look at (even here, when it’s still ungrouted). Reminder: the space between the tile & the baseboard in various shots throughout this post will get white quarter round molding, so it’ll all look seamless in the end.
floor tiles: pink, white, and taupe | wall: SW Spare White | trim: SW Extra White
To create this floor we laid three different colors of long porcelain tiles (pink, white, and taupe) in a herringbone pattern, making it a perfect storm of all the challenges of the previous rooms combined:
The tri-color pattern took lots of concentration to keep straight
Despite being long rectangular tiles, laying a herringbone meant LOTS of angled cuts, which are less forgiving
It was difficult to reuse cut pieces because of the alternating colors and angled cuts
A herringbone pattern needs meticulous spacing to keep your pattern from drifting
Because of all of those factors – and because it was such a large room – this is the only space that took us an entire day to complete. Heck, it took us more than two hours just to get our pattern planned and the initial pieces cut. Maybe we were just tired (this was room five of six that we did across two consecutive weekends) but it took nearly all of our mental energy to precisely measure all of these angled cuts, to keep things square to the walls, and to not screw up the color sequence in the process.
Final Verdict: This was by far the hardest tile choice and it took the longest and required the most mental calculations (angled cuts, creating the pattern ourselves with three different colored tiles, etc). I think it could’ve been simpler had it been a smaller room (or frankly, just a wider room with more full pieces) or if we hadn’t done the herringbone pattern, so I don’t want to totally dissuade anyone from recreating this. Because again, we’re REALLY happy with the result. But I do want you guys to know what you’re getting yourselves into.
And One More Thing… About Toilet Holes
This post didn’t cover a lot of “how to” because tiling is something we’ve talked a lot about over the years (I’ll link to some of our previous tutorials at the bottom of this post). But I did want to cover one thing that lots of people asked about on Instagram: cutting around the toilet flange in the floor. See that nice round cut below? Who knew so many people would notice and ask us how it’s done. So here ya go.
I didn’t document this process and we were already done by the time the process arose, so I’ve tried to illustrate below what I do to make the round cuts around the flange. Most people use an angle grinder to get a really pretty circle cut, but I don’t own one, so my process involves my wet saw and it’s decidedly less pretty, but here it goes…
Basically once I’ve marked the area that needs to be cut, I make a two long cuts from each side at the shallowest angles I can manage (marked in red and purple in the top right picture). This removes a few big chunks and makes the next cuts easier.
Then I make a bunch of short cuts very close together – almost like making teeth – along the edge of the circle (marked in purple and red in the bottom left picture above). The “teeth” usually break off in the process, or if they’re too thick I just run my blade against them again. The final result is rarely a perfect circle and often has little indentations where I made the teeth cuts. But it’ll all be covered by a toilet anyways, so it doesn’t need to be perfect.
In fact, I probably don’t need to be as meticulous as I am since it’ll be hidden under the toilet. But you don’t want to get too lazy because your toilet needs a flat solid surface to rest on and if your chosen porcelain throne has an especially small base, a larger cut could end up peeking out.
Speaking of which, the upstairs toilets and vanities got installed last week so we’re hoping to make a trip out there this weekend to check it all out! Things are really coming together!!
More Tiling Projects & How To’s:
If you’re interested in more tutorials on tiling or to check out some of our previous tile projects, check out some of the links below:
How to install a subway tile backsplash (with video!)
How to mix thinset and how to install penny tile
How to install subway tile in a herringbone pattern
How to install cement board and large floor tiles
How to install a herringbone marble backsplash using mastic
How to install oversized tile in an outdoor area
How we customized a hex mosaic in the beach house
*This post contains affiliate links*
The post The Duplex Is Tiled! Here’s What We Loved & What We Wouldn’t Do Again appeared first on Young House Love.
0 notes
Text
The Duplex Is Tiled! Here’s What We Loved & What We Wouldn’t Do Again
Tiling was one of the most daunting tasks on our duplex to-do list this year (four bathrooms! two mudrooms! and there are still two backsplashes on the list) so it’s a HUGE relief to say that all of those floors and showers and tub surrounds are officially done (well, like 95% done – more on that later). So today we wanted to show you how they’ve all turned out and share some of the lessons we learned along the way, including which tiles we’d buy again in a heartbeat… and the ones we’d think twice about attempting ever again.
floor tile | wall tile | shower floor | grout: frost | door: SW Oyster Bay
Listeners of last week’s podcast know that after two long weekends spent tiling the duplex, we completed all six of the floors ourselves (two mudrooms and four bathrooms!) but we decided to hire out the four remaining shower surrounds in order to keep things on schedule. What would’ve taken me and Sherry several more weekends to accomplish was knocked out by our contractor’s crew in less than a week – which means we got to spend all that time we saved doing actual work that we get paid for, so it worked out well.
For each of the four shower/tub surrounds we chose white subway tile for the walls (simple, classic, affordable, and it’s a tile that lets the more interesting floor tile in each room be the star). So this post is mostly going to focus on the floors in each space since we’ve covered our adventures in subway tile here and here already.
floor tile | wall tile | shower floor | grout: warm gray | door: SW White Truffle
But as for the subway tile we used, we went with this affordable 3 x 6″ subway tile installed in a standard running bond pattern (the same stuff we used and loved on the beach house’s kitchen backsplash). And the two master showers got this white herringbone on the floor, which added a hint of interest to that surface without being too crazy busy.
We showed you all of the floor tile selections in this post about how we chose our tile, cabinets, and paint colors. But we did make one last minute change to the plan from that post: we swapped the two master bathroom tile choices (seen in the two photos above) because the marble-esque tile ended up looking better with the blue-green doors than the pink ones. As much planning as you do beforehand, there’s really nothing like seeing the tile in the space next to the items that are in there, hence that last minute swap.
We mentioned in that same post that we limited ourselves to larger tiles with interesting patterns, rather than smaller mosaics because we knew it would help the process go faster (we LOVE our pink house master bathroom floor, but it took us forever and a day). But even within that larger-tile parameter, we learned that some tiles were faster, easier, and more foolproof to lay than others. We LOVE how all of them turned out in the end, but there are some that gave us more difficulty (and took much longer to install) than others. So if speed and ease are an important factor when it comes to picking tile, or if you’re a newbie tiler and want to choose something that’s simple and straightforward… this post should help.
So let’s start with the easiest ones:
The Square Patterned Tiles
floor tile | grout: warm gray | door: SW White Truffle
The blue patterned tiles that we laid in the bathrooms on the left side were the fastest and the most straightforward to install. Why? Because (1) they were square and (2) the pattern was symmetrical on all sides, meaning you could put the tile down in any orientation and it would line up. The combination of those two factors made it much easier to lay out, cut, and install because we were always working with right angles (we’ll talk about hex tile in a moment!). And because the pattern was the same on every edge, we had less waste because we could use both sides of a cut tile again in another smaller spot (like around any edge).
floor tile | grout: warm gray | door: SW White Truffle | wall: SW Spare White
The size of these tiles was also really easy to work with. The master bath tile (above) was around an 8 x 8″ square while the hall bath tile (below) was 9 x 9″, so they weren’t heavy or unruly like larger tiles can be, but they filled the space more quickly than a smaller mosaic would have. I think each room took us about two hours to lay, which felt like nothing compared to some of the others.
floor tile |grout: frost | door: SW White Truffle
And even though they were just simple square tiles that went down easily, the final floor still looks interesting and intricate – which was the goal. So we’re thrilled with these. Ten stars. Would recommend. Final verdict: If you’re looking to achieve something similar and keep your project as simple as possible, I would choose square tiles like these and these. They’re both porcelain too, so they don’t need to be sealed and cared for like more finicky materials do (we’re looking at you cement tile).
floor tile | wall tile | grout: frost | door: SW White Truffle | drop-in tub
The only thing we’d do differently next time is we’d use a darker gray grout in the room above. We were trying to streamline everything and keep cost down by not buying different grout colors for each room (and whatever color went on the floors also went in the shower – some of which weren’t grouted at the time of these photos). But Sherry thinks a darker gray would’ve made the grout lines recede a bit more, helping the diamond pattern show through stronger. Anything for a diamond, right?
Let’s move on to the next simplest tile to install…
The Marble Hex Tile
floor tile | grout: frost | door: SW Oyster Bay
Now, this tile isn’t actually marble (it’s porcelain, just like everything else – because they’re extra durable and never need to be sealed) but it may be our favorite in the entire house. The marble finish is classic and bright, but the pattern on top makes it unique and unusual. We’ve actually talked about maybe using the same tile in our own bathroom here in Richmond – thats how much we like it.
(Note: the space between the tile & the tub or the tile & the baseboard in various shots throughout this post will get white quarter round molding, so it all looks seamless in the end)
floor tile | wall tile | grout: frost | door: SW Oyster Bay | wall: SW Spare White
Like the square tiles, this hex was about 8 x 8″ so the size was very manageable to work with and it provided fast coverage in the room. I think this one maybe took us 3-4 hours instead of 2. And that’s mainly because (1) the hex shape took more care to cut and lay and (2) the asymmetrical pattern took more concentration to not screw up. Speaking of which, there are two different looks you can get with this tile. See how the triangles are all the same color in the left picture below and they’re shaded differently in the right picture because we rotated the hexes? We laid out both options and picked the one on the right.
In addition to having to concentrate on not screwing up the pattern, hex tiles are a bit more finicky when it comes to spacing and not letting your layout drift. One tile laid too close to another in your first corner can cause big headaches down the line as that little inconsistency gets magnified in each subsequent row. So we actually laid out lots of tile BEFORE mixing Thinset to check how everything lined up and to ensure that we didn’t end up with slivers of tile anywhere. This may seem like overkill, but it made things go much faster once we actually started setting things for good.
Final Verdict: Ultimately this tile was noticeably (but not dramatically) harder than the square tiles, and with enough spacers (we used 1/16th spacers) we were able to keep everything lined up and spaced similarly. Even if our spacing had drifted a little, the grout color we used disguised the spacing pretty well anyways. Sidenote: we love this Mapei grout because it comes premixed AND doesn’t need to be sealed and is durable/flexible/stain resistant. So once it’s dried and any grout haze is buffed off, it’s totally good to go. Our contractor swears by it and won’t use anything else, so we tried it throughout the pink house and after over a year of heavy use, all the grout in the bathrooms/mudroom still look mint (no grout scrubbing in over a year, folks!)
But just because this hex tile went down smoothly, doesn’t mean it all will…
The Patterned Hex Tile
This other hex tile went in hall bathroom on the same side as the one above and, well, it’s a good thing we love how this tile turned out because it felt straight up cursed when we were installing it.
floor tile | grout: warm gray | door: SW Oyster Bay
First, it presented some of the same challenges as the last hex tile – a non-square shape and an asymmetrical pattern. But this pattern was even trickier to keep straight, which caused a few bad cuts along the way (plus, it was much harder to reuse cut pieces because the pattern was so particular). I actually laid one tile in the WRONG direction and we didn’t notice it until a week later when it was time to grout. Can you spot it below?
It wasn’t a big deal to fix. I just broke it up with a hammer, removed the shattered pieces of that single tile, and installed a new piece in its place – but it did set my grouting back a day because we had to wait for that new thinset to cure before grouting. And of course, this happened AFTER we had run out of tile during the actual installation. Yep, we were like 80% done and had to order another box. So this room had two pretty frustrating setbacks. But eventually we got it done.
floor tile | grout: warm gray | door: SW Oyster Bay | wall: SW Spare White | drop-in tub
We actually think the square footage calculations on the website are wrong because a couple of our readers reported being short on these same tiles as well. And even without any bad cuts, we don’t think we would have had enough (again: it’s really really hard to reuse your scraps with a pattern like this). So if you use these tiles, I’d recommend getting around 25% extra (not just your typical 10-15% recommended overage).
Final Verdict: If ease and speed are important factors for you when you’re choosing a tile, I would NOT recommend this one. The result was great, but keeping the pattern straight kinda made our brains hurt, this specific tile ran short for us based on the square footage listed on the site (and we heard it did for a few other people), and now we know that we can get interesting patterns with simpler square tiles.
The Chevron Mudroom Tile
Let’s move downstairs to the two mudrooms / laundry rooms. I don’t have “after” photos of these because we haven’t grouted them quite yet (since the back doors act as the main entrances for the crew, the mudrooms are still seeing a lot of foot traffic and grime). So right now they’re both covered in protective paper and we’ll grout once things calm down over there. That means my best photos are mostly progress photos.
floor tile | spacers |wall: SW Spare White | trim: SW Extra White
We really liked installing this chevron tile because the rectangular shape made it easy to lay out and cut, plus the size (17″ x 35″) meant the room – which is nearly the size of all four bathrooms combined – filled up very quickly. The only downside to the size was that they were a bit heavy and cumbersome to maneuver, and I had to get creative with how I rested them on the guide of my wet saw to get them to fit under the blade while I cut them. Plus, keeping big tiles level can be challenging so we always recommend using these LASH spacers, which you can read more about in this post.
My only beef with this tile is that ideally, your spacing between tiles would match the spacing of the zigzags within the tile itself. However, to do that, the manufacturer recommends a (wait for it) … 2/17th spacer. WHO THE HECK SELLS A TWO-SEVENTEENTHS SPACER?! Fortunately, a standard 1/8th or 1/16th (which is what we did) is pretty close to 2/17ths. But still, I feel like it’s an unnecessary complication that could make your chevron not line up perfectly. But even still, for a big room, I would definitely choose this tile again.
Final Verdict: Larger tiles can be harder to handle, cut, and to get level, but these tiles were worth the trouble and we finished the room quickly since they were so large. It’s also one our favorite tiles looks-wise (this room gets the most in-person compliments) and it’s extremely durable (porcelain again) so we would recommend this for sure, especially with the LASH spacers we used.
The Herringbone Mudroom Tile
I’ve saved the best for last. And by the best, I mean hands-down-the-hardest. Yes folks, this is the one we probably would NOT do again… which is hard to say because it’s so darn cool to look at (even here, when it’s still ungrouted). Reminder: the space between the tile & the baseboard in various shots throughout this post will get white quarter round molding, so it’ll all look seamless in the end.
floor tiles: pink, white, and taupe | wall: SW Spare White | trim: SW Extra White
To create this floor we laid three different colors of long porcelain tiles (pink, white, and taupe) in a herringbone pattern, making it a perfect storm of all the challenges of the previous rooms combined:
The tri-color pattern took lots of concentration to keep straight
Despite being long rectangular tiles, laying a herringbone meant LOTS of angled cuts, which are less forgiving
It was difficult to reuse cut pieces because of the alternating colors and angled cuts
A herringbone pattern needs meticulous spacing to keep your pattern from drifting
Because of all of those factors – and because it was such a large room – this is the only space that took us an entire day to complete. Heck, it took us more than two hours just to get our pattern planned and the initial pieces cut. Maybe we were just tired (this was room five of six that we did across two consecutive weekends) but it took nearly all of our mental energy to precisely measure all of these angled cuts, to keep things square to the walls, and to not screw up the color sequence in the process.
Final Verdict: This was by far the hardest tile choice and it took the longest and required the most mental calculations (angled cuts, creating the pattern ourselves with three different colored tiles, etc). I think it could’ve been simpler had it been a smaller room (or frankly, just a wider room with more full pieces) or if we hadn’t done the herringbone pattern, so I don’t want to totally dissuade anyone from recreating this. Because again, we’re REALLY happy with the result. But I do want you guys to know what you’re getting yourselves into.
And One More Thing… About Toilet Holes
This post didn’t cover a lot of “how to” because tiling is something we’ve talked a lot about over the years (I’ll link to some of our previous tutorials at the bottom of this post). But I did want to cover one thing that lots of people asked about on Instagram: cutting around the toilet flange in the floor. See that nice round cut below? Who knew so many people would notice and ask us how it’s done. So here ya go.
I didn’t document this process and we were already done by the time the process arose, so I’ve tried to illustrate below what I do to make the round cuts around the flange. Most people use an angle grinder to get a really pretty circle cut, but I don’t own one, so my process involves my wet saw and it’s decidedly less pretty, but here it goes…
Basically once I’ve marked the area that needs to be cut, I make a two long cuts from each side at the shallowest angles I can manage (marked in red and purple in the top right picture). This removes a few big chunks and makes the next cuts easier.
Then I make a bunch of short cuts very close together – almost like making teeth – along the edge of the circle (marked in purple and red in the bottom left picture above). The “teeth” usually break off in the process, or if they’re too thick I just run my blade against them again. The final result is rarely a perfect circle and often has little indentations where I made the teeth cuts. But it’ll all be covered by a toilet anyways, so it doesn’t need to be perfect.
In fact, I probably don’t need to be as meticulous as I am since it’ll be hidden under the toilet. But you don’t want to get too lazy because your toilet needs a flat solid surface to rest on and if your chosen porcelain throne has an especially small base, a larger cut could end up peeking out.
Speaking of which, the upstairs toilets and vanities got installed last week so we’re hoping to make a trip out there this weekend to check it all out! Things are really coming together!!
More Tiling Projects & How To’s:
If you’re interested in more tutorials on tiling or to check out some of our previous tile projects, check out some of the links below:
How to install a subway tile backsplash (with video!)
How to mix thinset and how to install penny tile
How to install subway tile in a herringbone pattern
How to install cement board and large floor tiles
How to install a herringbone marble backsplash using mastic
How to install oversized tile in an outdoor area
How we customized a hex mosaic in the beach house
*This post contains affiliate links*
The post The Duplex Is Tiled! Here’s What We Loved & What We Wouldn’t Do Again appeared first on Young House Love.
0 notes
Text
WHFJ 7 Thy Body In Remembrance of You pt.12 Jim & Caleb II
They walked in and Jim searched Caleb for any weapons. In his jacket he discovered an manila packet folded in half with his name in very familiar writing.
"Who gave you this?" Jim asked shucking out of his boots and coat, leaving them in the hall on the floor.
"The same person who tasked me to keep an eye on you. Fury."
Jim hands it back and says "Oh, really? Open it. If it explodes, I don't want a face full." He's kinda being mean, but he doubts Caleb would be running around with a bomb in his pocket unknowingly. He wanted to yell or argue but he knew it would lead nowhere and that this was just a symptom of what had gone wrong. He was intensely hurt by the idea Caleb had been getting close for forget nefarious, professional reasons. His mind harkened back to the time they shared in his kitchen. He felt an almost begrudging pulse of lust for Caleb. Then the image of a pile of worms swimming in slime against each other. The slime reminded him of cum, the kind that comes from a well pleased woman. 'Jesus, fucking fuck. God, what is wrong with me?' he cried in the silence of his own mind.
Caleb unwinds the string keeping it shut and takes out first a photograph, a letter, and a card. Handing each to Jim one by one.
The photo is of Nickelle Fury, a sever woman with an eye patch over her left eye with Agent Pollock Carter, the guy who Steve knew that helped Jim get out of Hydra. In the photo they are shaking hands and each holding one side of the packet. In the background Jim could see a bit of a calender behind them. This photo was taken the same month, a year after he got out. They've had this down as a possible eventuality. May very well have trained Caleb since he was a small child to deal with Jim. He can think of no other way they could have hoped to bring him down or in should the need arise. Thank god he is not as far gone as they seemed to think he could go. At least he can understand what is happening.
He kinda knows what the letter will say. he is a bout to speak when Caleb speak first.
"Project White Winged Dove. It wasn't just for you, but I was. I was never surprised you don't remember me. They had a hard time trying to find an adult who could content with you and so began scrubbing for enhanced people who, even if they were still minors, could be trained in the event the Winter Soldier reform ever derails. You yourself taught me everything I know.
I'm gonna tell you all the truth I can right now and forever because... I need you to know I would never hurt you. I really care about you.
I am telepathic and telekinetic. I use telepathic illusion to shape your perception of how you feel the contact I make with you and telekinesis to make said contact. The other way I work, I can take control of other living things like people or animals, right down to their cells. I could give you cancer or another arm, make you blond or eat a crepe if I wanted to. And I could watch you do it from anywhere, we think as long as I have met you in person or be in your body, doing it myself. I can't seem to fix my disorder with it, so that's a bummer.
I have been using non humans who live in the town proper to keep an eye out for you or anyone trying to get to you. We can't risk you being controlled again. And..." He says a bit more meekly "if you don't mind me saying, you've worked too hard for it all to come crashing down. But anyway, animals, the smaller the better; humans not so much. Too much power leak, I can't keep it all in one place for very long. And the more I use, the more robust it becomes. Like a gas tank that when nearing empty just grows bigger and somehow the liquid inside grows in volume to fit thr proportions.
We really don't understand what my limits are yet.
Beings I control all vary in degrees, distances, and lengths of time. During that time I can not move my own physical body. During times of immobilization, I can project what is called an astral form, either a copy of one or more of my own body or multiple limbs of different types that can go unseen and interact with the physical things the way my physical body does. I am not to use this ability for combat. I meant it when I said I can hardly move anything thicker than syrup. I take medications to dampen it down, it works like a psionic muscle relaxant. Otherwise I'd lose control while sleeping.
I am well disciplined in telepathic cloaking, detection, communication and mnemokinesis, specifically detecting changes to memories and removing thoughts and memories. Just to be clear, no, I have never removed yours. " He explained quite formally, fussing with a string on the cuff of his left sleeve.
"Okay, that is way more than I thought you'd say. Wow. What a mouthful. If you are telling me the truth, I apprieciate it and can understand how I have been alarming you. I know I've been acting like I've lost my mind, I can explain that." he makes a gesture with his hands first the right pointing over his left shoulder then left pointing over his right followed by a shake of his shaggy damp hair before gesturing behind himself once more this time with both hands closed with thumbs extended as if he is trying to explain geographic directions incorrectly.
"Well, some of that." Jim sighs, placing his open hands in the air at chest height pushing down gently twice as he does so before continuing, "Where ever we go from here, I just have one request. If you are asked to watch me, don't do it in secret anymore. Call me, visit me, make me talk. I now understand none of this, well this part of it, would have never happened if I had trusted my friends and asked for help. I'm not used to having help or solving problems with out breaking something. But I know I have to change, I have to learn to do things differently. I can hardly look at you, for a moment you were in serious danger because I'm a fucking lunatic who doesn't know how to just be normal. I have to learn I am not alone anymore and I have to care for my friends better than I have been." Jim says.
Caleb, God bless his soul, only blinks twice in baffelment at Jim's change in mood then nods seemingly to himself now reassured Jim is going to kill him.
"Listen, I've been having some... odd experiences. I have also been experiencing some psychological problems. What you just said explains some of it but, I'm still... going through something. I think I am either going insane in a totally new way than usual, have encountered a local enhanced child in multiple places around town including my own bedroom, or am at the center of a haunting, mostly by someone I killed... when I was...was...the Winter Soldier." those last two words come out of his mouth with a shudder in the tone of a child who knows the boogeyman is real. And unfortunately, a quite unhinged laugh tore free from him as soon as this statement was out of his mouth. "I'm pretty sure it's a haunting now though. I'm very sure such things are real. I'd tell you all about it, but you might want to sleep tonight, ha."
"Under other circumstances with someone besides you, I'd have assumed you have lost touch with reality and would keep you restrained till I update with my contact. I have seen you doing some questionable things over the last few months. I mean, take the day I lead you home from the store." Seeing the look on Jim's face Caleb continued, "I was two of them. I chose the bird to check your breathing, pulse and dilation of your pupils. The rabbit was because I wasn't sure if you could see properly. From my point of view you walked up the street, became startled and upset, then rushed to an empty spot on the sidewalk then ask a squirrel who his friend was. It was rather bizarre."
"I wasn't... So you weren't...the squirrel was just..."Jim begins to ask with a slightly deflated air.
"No. But I was here the other day. I'll entirely be honest. I'm not lying about how I feel about you. And I know it's wrong... I just missed you so much and you didn't want m-me to get any closer. But I keep wanting you. So I came to see you and uhm I saw... i i-in the bath..." Caleb blushing deeply biting the corner of his lower lip, goes on, " When you were...busy I began hearing the voice you also heard. I actually went downstairs in a spider long before you did and took note of the temperature change and mood there. I thought things like that didn't really happen but I've had some experiences in Jansenhaven that support the possibility."
"What kind of experiences? Oh, but- you heard that? The crying?" Jim asked unabashedly comforted that someone else experienced it as well.
"Yes, Jim. It incapacitated you for a while. I tried to get your attention but you couldn't hear I guess. I didn't use telepathy because I didn't want to invade you again, I know you didn't like that very much when it was telekinetic. I got hold of a racoon and was gonna break in and at the very least dial 911 for you. As for my experience, we can talk abut that stuff later if you want, right now would you mind if took an assessment of your physical and mental state?"
"I guess I have to, huh?"
"Yes. I need to know what to tell my mom."
"Your what now?"
"I'll explain later. Let's get some drinks and sit. This will only take a bit."
After retrieving two glasses of water Jim returned seeing Caleb had seated himself on the floor at the coffee table. Jim did the same.
"Do you think you can tell me about the two things in your life that worry you the most?" Caleb asks as soon as Jim has made himself comfortable.
With a stricken look Jim reaches up pushing his hair back the gripping it with both hands as if he is going to pull it out. He blinks and when his eyes open again they are wide as if he is trying to see everything that is a problem.
"Take a breath Jim. Tell me what you feel most strongly at the moment. " Caleb asks gently.
Jim closes his eyes letting go of his softly waved dark brown hair. He takes a breath and says "Pain. I am in pain. " almost instantly.
"Will you let me use telekinesis to help?"
Jim nods.
A hand tests on his shoulder a moment then sinks beneath his skin he can feel another on the back of his neck doing the same.
As Caleb works, Jim asks "You said I've met you before? Really? Can you tell me... am I why you..." without meaning to but also understanding Caleb can hear '...feel the way you do? Did...did I do something, say something that took advantage of you during that time? Did I prey upon you and make you think you like it?'
With a smile Caleb answers him. "Uht uhn. No. You were kind and good, always. I remember you were very sad though you tried not to show it and very confused about what was going to happen next. You wore long sleeve turtle necks and gloves when you were with me. We only worked together for about six months. You taught me my enhancements have a use and it made me really happy. You taught me how to fight with a knife, use a pistol and how to read other people without getting in their minds. You taught me how to be comfortable and love my body by teaching me how to dance. All so I could confidently go toe to toe with you if ever I needed to. I only started having those feelings when I started my new route at work. Before then I considered myself your guardian angel and nothing more."
"I'm sorry I can't remember. I'm sorry you had to do it, but I'm glad you learned well." 'I'm glad I wasn't that kind of monster also.'
"You are not a monster. You are not a bad person. You have had a hell of a life and still you try so hard to be a version of yourself you can feel proud of. You are my hero for not saying 'I'm messed up so I'm gonna do messed up things. It's not my fault if others get hurt, someone hurt me.' And I don't xare what you say, I love you. Not you in some other time and place, you now. Sick, tierd, troubled, whatever you are, how ever you are, now."
The sensation of the hands temperature is similar to that perfect level of warm you get when you turn on both hot and cold water from a single faucet. It will seem your mind can not decide whether it is more on the side of hot or more cold. The hands glide down into his body causing no pain but leaving a trail of blessedly cool numb behind on everything they touch. The hand on his shoulder walks it's fingers over the muscle and tendons along his left side while the other does the same down his spine then back up the muscles and the tissue connected to the hardware. A third hand comes to set at his temple the thumb resting over the markings of the blue girl. With a sensation of incredible depth the hand pressed forward on a diagnal toward the back of his skull. The blaring pain began to lessen significantly. After months Jim breathed a sigh of relief.
"Is this better?"
"Yes. The marks...they still hurt a bit. They weren't a physical injury I don't think. The pain from them was changing how I think, I was starting to be unable to make sense of some pretty simple concepts."
"I'm glad I could -oh no... " muttered Caleb.
Caleb's body waivers, he reaches clumsily forward knocking over several things. He grasps the cup of water and drags it toward himself as if it weights 20 pounds. With it finally closer breathing heavily "...I overdid it. Earlier I was just so scared..." he mutters. Out of his pocket he takes a pill case and begins trying to open it
His hands shake as he tries to take one pill out he spills several onto the table. his shoulders slump now and there's a weird feeling in the air like static electricity. Jim can see some of the pages on a book on the table beginning to lift some of the pills rolling around even though Caleb's not pushing them with his fingers his hair is starting to fluff about him as if there is a wind in the room with them. He throws a pill in his mouth and knocks back a sip of water he appears to be growing weaker, his posture is starting to slouch like he is going entirely limp.
He passes out, falling backward between the couch and the coffee table. There is a low buzzing that has been sub-audible for a few minutes now but is growing into a rapid drumming. Jim turns around and looks behind himself at the source of the noise. The lamp is sliding around on the side table and the table is trembling like someone is trying to lift it strait up with one hand and is losing balance. Jim feels several random tugs on his sleeves and hair, even felt some thing the size of a softball pushing back his right shoulder. As he sits he notices a growing rumbling which seems to be caused by everything in the room he's in being to be manipulated by unseen forces. The painting above the fireplace, the clock beside the window, the couch, the chair. It grows louder and louder until Jim is sure everything in the little house is rattling on their shelfs & tables, hell, he can hear the silverware clanging around inside the drawer and the cupboard doors quickly fluttering against their frames. He can hear water splashing upstairs and knows what he'd see if he went up and looked in the toilet: water sloshing about as if being carried none too carefully in a pail. Then as slowly as it began it winds down again then stops entirely.
He turns back and look at Caleb. Well, he wasn't lying about his control, he is indeed clumsy with the powder keg in his head, he does have trouble moving anything thicker than syrup. It'd be hard for Jim to use his arm while asleep or losing control of it, too. The boy's (for in Jim's mind, Caleb is too young for this shit) face is very troubled. His long eyelashes lay very prettily against his cheek, his skin still rosey from the wind outside. His lips are in a little pout and his brow is furrowed. Jim wonders if he's having a nightmare or is aware somehow of what is going on outside himself? Did the pill knock him out or did it immobilize his kinetic energy keeping him from letting loose a tornado of kinetic power in Jim's house? He could kill him and pick up stakes and run, but if Agent Carter is on the level, Jim just needs a therapist and maybe an exorcist. . Feeling bone tired he gets to his feet and gets Caleb off the floor. He is light in Jim's arms; his head flops back over Jim's right arm. There is a fine fuzz on his cheek that Jim just wants to rub his face in.
Jim is so angry, so confused and so in love, the breach of trust feels like it's killing him. The paranoia doesn't usually go this far. He just had to keep digging. But now is so disappointed that his suspicions turned out correct this time. He wants the knowledge to go away just so he doesn't have to feel the hurt anymore.
He's never fallen for a target before but has seen it happen, he can remember that all it lead to was pain for the two involved. It is the first thing Jim remembers about becoming lucid, watching confused as a man's heart was crushed before his eyes. He can remember the deceptive party lost his edge entirely and for months tried to live with the burning shame & absolutely undying desire washing away all reason. He saw the panic then final resolve in his eye when the deceptive one decided to come clean. His love was killed and he was deemed weak but before they could dispose of him the guy went mad with grief, Gustovovich killed himself.
He feels like if Caleb were playing him and there is no doubt Caleb could, Jim knows what kind of training spies worth their salt go through, Jim thinks he would see something further in passed the real guilt, a kind of trail of tells leading back to the truth that guilt is being redirected from.
He doesn't want this for Caleb, he doesn't want this kind of life to crush this boy's heart & soul. Even though he realizes as young as he is, Caleb is no boy. He can see five different ways Caleb can get hurt. Even as a minor he must have had to grow up so fast. Jim feels a feeling like petrifying terror when he thinks about Caleb living mentally as an adult to survive the world of enhanced politics and covert operations. Has he ever had to kill anyone? How many corpses has he seen? Has he ever been interrogated and tortured? Jim can only think of awful things that could happen to a child caught in the grinding teeth of political, economic or organized criminal espionage.
He rests Caleb on the couch laying him on his right side, and even though he is physically and mentally drained he can't leave Caleb's side. He sits on the floor beside the couch resting his right arm on the cushion and his head upon it. He can look directly into Caleb's face this way. He hopes Caleb can feel him there. He tentatively raises his metal hand. He wants Caleb to wake up and know he doesn't have to be afraid, doesn't have to fight or protect himself. Jim brushes Caleb's hair back caressing him softly so as not to wake him. He dozes gently if uncomfortably and wakes when he hears forlorn quiet sobs & sniffles beside him. They have a lot to talk about but being apart from each other is not one of them.
0 notes
Text
A Hard Year: Emergency Room
I left the ATM with a bit of cash which I figured I could afford to spend at my favorite coffee shop for dinner. This was a bit of a treat in February 2016--I wasn't eating enough, a problem I will examine in another post. I walked two miles to the Hard Times Cafe as the temperature fell.
Writing in my Moleskine has been a good way to organize my thoughts since I started directing. So while I was waiting for my food I just wrote what I had on my mind. I don't write free associations, but this entry has that feel about it.
The page wanders from instances of anxiety producing triggers in my life; some interpersonal difficulties I was facing in my living situation; a small meditation on film. One of the things that can happen in the real throes of anxiety seems to be valuable insight into a topic. There is a high degree of mental activity which can seem like an excess of clarity--like an over exposed photograph.
For a moment on this page I considered how music might inherently detract from film. The reasoning here is still very clear to me, something to return to. Basically the thinking goes that cinema is an art all its own, the addition of music or even dialogue, while perhaps powerful, also dilutes the medium. It hybridizes it, something perhaps problematic. This is something that's connected to many other thoughts I have on film as a medium and I think belies my interest in minimalism e.g. sound and music should only be deployed as little as needed in film.
I would like to come back to the idea, no doubt. In some way I'm sure I will. But my handwritten paragraph, rather than drawing a conclusion ended with the words "so fuck him." It's not even tangential like this reflection is. It's jumbled. The paragraph, the entire page, points to all sorts of things that were on my mind. It draws no conclusions.
One aside catches my attention though.
Only recently have I looked at the idea that "no one sees" and it's a deep yearning I feel. It was not something I merely wanted at the time, it underscores existence. The next morning I would live out the preceding description in this paragraph. I'd be alone.
February 13, 2016 I woke up at a friend's house, I slept on the couch because home wasn't where I wanted to be. That morning I had a meeting scheduled and I didn't make it. The temperature in Minneapolis that morning was -8 Fahrenheit and this was a problem. Unprotected and over used, my phone battery died again and again in the cold as I tried to reserve a Car2Go. I was running late, it was a Saturday, nothing was open and nothing worked. The batteries in a Smart Car struggle to start the engine in Minneapolis on a day like this.
Being in that kind of situation, constant failures and mental rerouting has a distinct feel to it. Wikipedia describes a diagnosis of a panic attack which includes the word "un-reality" and that is a true description. The thought in my head was "how is this possible?" It didn't seem like what was happening was remotely possible. Everything that I took for granted failed. My phone, the car, the stoplights didn't work, the streets seemed unnavigable. It's not bad luck and it's not first world problems at some point. And more than being self critical, there seemed to be no explanation of the situation I was in despite very real experience of it.
Eventually I was driving on I-94 toward St. Paul doing 80 and as the words in my head to describe whatever I was feeling at the moment failed me too. So I screamed and mugged. Trying to dead recon my way to where I was going, I pulled off the highway, got lost, and stopped near a BP.
I went in and asked to charge my phone. The answer was "no," and the guy at the gas station had probably seen a million crazier things than me at that moment. That's a problem too, I was holding myself to a standard of normality that required tremendous concentration. Shaking, I broke what might have been my last dollar into quarters and used a payphone outside in Minnesota's version of February to call my Dad, an analyst and LCSW. He cut through the noise and oncoming tears and told me to get to a hospital.
On this call a guy, Dave, asked me if I was okay. This was an unbelievably fortunate meeting. Looking back it is absolutely the kind of strange collision that killed the dinosaurs or welcomed the grief stricken mourners at the empty tomb of Christ. Dave asked me directly if I needed a ride someplace. I told my Dad I was going to get to a hospital and I hung up.
I pulled myself together as much as I could--any resolve must have been transparent--and said "uh, can you take me to a hospital." Dave took me to Regions Hospital and maybe I owe him my life.
Regions took good care of me. I've heard that the best way to get seen at the ER is to say you're bleeding and you move to the front of triage right away, but maybe saying you think you're having a panic attack works well too. They took my vitals, verifying the hypertension from the night before and pretty quick observation must've made diagnosis pretty easy. The doctors tell you who they are, there's two of them, then they ask you these questions:
"What brings you in today?"
And I said "I think I had a panic attack."
"Do you have any thoughts of harming yourself or others?"
And because if you're in that seat, being asked these questions, you do want to die you say "yes."
Then they ask if you've ingested any alcohol or drugs recently, and when your repression about the last days makes you clam up they tell you "we just need to know what we're dealing with." And you tell them the God's honest truth for what feels like the first time in your life even if ten seconds earlier was the first time you'd verbalized suicidal thoughts, and twenty minutes earlier you couldn't speak. The doctor said "I tried weed and didn't like it at all."
This was all good. It happened fast. And then things get a little less great and a lot more harsh reality. The hospital has some ward for emergency psychiatric issues, but it's not great. They take all your stuff and put it in a locked room while you change into scrubs. Then you get a room and a little later the worst cafeteria food ever, and they get your order wrong. But I hadn't eaten really at all. So I ate the chicken and peas.
This ward was actually in disrepair. They were building a new one, so maintenance wasn't a priority. But I had my own room with no windows and very beige walls and some stock photo of a palm tree bolted to the wall. There absolutely is a camera in there. And they check on you.
I know I was not the worst case in the hospital. At one point I heard a nurse remind the guy in the room next to me that he'd pulled a knife on a guy outside a bar last night. He denied it. But I think I was very high on their priority list because they had identified me as a suicide risk. Although by this point I felt like I'd seen too much to even try it.
So a doctor met with me pretty quick.
"We can give you a 'chill pill' that'll knock you out for a while," he offered. We talked about a bunch of things, but I didn't want medication like that. It seemed like it'd just be another blow. Then they tell you what they want to do. They wanted to move me "upstairs" as soon as they could, but this meant waiting in the room overnight. They didn't have the space or the doctors to make that happen.
The doctor also outlined other options for observation. In that situation the options really sound like the end of your ability to have any control in your life. I really didn't want to give up what little control I had over my life at that point. It's seemed like a misconception that being in even a pretty laissez-faire institution would be desirable. I could have my thoughts, but maybe not have control over my food. In other situations maybe that seems like a huge boon, like you wouldn't have to worry about living, but some pretty basic functions were the limits of my control and I didn't want to give them up. I thought about it though.
At some point I made a few phone calls. I called my work, told them I was in the emergency room and that they'd have to find some way of making coffee without me. I don't know if they could've guessed what'd happened. I feel like they had some idea. I called my parents and told them I made it to the hospital.
Then I waited for hours to be seen by a social worker. Apparently she described my looks as "he looks like he wants to crawl out of his skin." Basically I just lay in the bed. My cousin came by, she would help me immensely over the coming weeks.
In the end though they can't keep you in the ER when you ask to leave. But they will write a prescription for lorazepam to keep you from coming back in. I'll talk more about lorazapam in another soon, but it stops a panic attack like a freight train. This is the only time they'll just hand you this pill and basically tell you to stay doped up on it for as long as the prescription runs.
The hospital pays for a taxi. And this taxi driver was exactly the kind of over masculine, I work out, hot girlfriend, meathead I could barely deal with. I sat there next to the patriarchy for a little while.
I got home and made a few more calls. At this point there was also an early warning sign of things to come between me and one of my roommates. We got pizza and, couched in concern for me, he said "you've gotta go home, dude." And that's really hard to hear when your life is in this city and except for the last 12 hours you feel self sufficient. When I could think about it more rationally, my entire system of support was in Minneapolis--family, a therapist, hospitals, my job--and I wasn't about to abandon it to be home. And I hated Minneapolis. So it was a dubious claim. In hindsight this conversation began to make me unsure of myself in how I handled day to day situations and planted seeds of personal attacks that eventually did push me out of the house.
Ultimately I did the best I could. Eventually I did what I had to. Somewhere in there were some fuck-ups too.
On February 14, 2016 I was pretty doped up--lorazepam. But looking at the scribbles from two nights earlier, the beginnings of the effect the lorazepam has are clear. My writing was straight, pragmatic, to the point, and fiercely linear albeit a little more open than I like.
I've excerpted the entire page.
0 notes
Text
The Duplex Is Tiled! Here’s What We Loved & What We Wouldn’t Do Again
Tiling was one of the most daunting tasks on our duplex to-do list this year (four bathrooms! two mudrooms! and there are still two backsplashes on the list) so it’s a HUGE relief to say that all of those floors and showers and tub surrounds are officially done (well, like 95% done – more on that later). So today we wanted to show you how they’ve all turned out and share some of the lessons we learned along the way, including which tiles we’d buy again in a heartbeat… and the ones we’d think twice about attempting ever again.
floor tile | wall tile | shower floor | grout: frost | door: SW Oyster Bay
Listeners of last week’s podcast know that after two long weekends spent tiling the duplex, we completed all six of the floors ourselves (two mudrooms and four bathrooms!) but we decided to hire out the four remaining shower surrounds in order to keep things on schedule. What would’ve taken me and Sherry several more weekends to accomplish was knocked out by our contractor’s crew in less than a week. For each of the four shower/tub surrounds we chose white subway tile for the walls (simple, classic, affordable, and it’s a tile that falls back and won’t compete with the bolder patterned floor tile that we chose for each room). So this post is mostly going to focus on the floors in each space since we’ve covered our adventures in subway tile here and here already.
floor tile | wall tile | shower floor | grout: warm gray | door: SW White Truffle
But as for the subway tile we used, we went with this affordable 3 x 6″ subway tile installed in a standard running bond pattern (the same stuff we used and loved on the beach house’s kitchen backsplash). And the two master showers got this white herringbone on the floor, which added a hint of interest to that surface without being too crazy busy.
We showed you all of the floor tile selections in this post about how we chose our tile, cabinets, and paint colors. But we did make one last minute change to the plan from that post: we swapped the two master bathroom tile choices (seen in the two photos above) because the marble-looking tile ended up pairing better with the blue-green doors than the pink ones. As much planning as you do beforehand, there’s really nothing like seeing the tile in the space next to the items that are in there, hence that last minute swap.
We mentioned in that same post that we limited ourselves to larger tiles with interesting patterns, rather than smaller mosaics because we knew it would help the process go faster (we LOVE our pink house master bathroom floor, but it took us forever and a day). But even within that larger-tile parameter, we learned that some tiles were faster, easier, and more foolproof to lay than others. We LOVE how all of them turned out in the end, but there are some that gave us more difficulty (and took much longer to install) than others. So if speed and ease are an important factor when it comes to picking tile, or if you’re a newbie tiler and want to choose something that’s simple & straightforward, this post should help.
So let’s start with the easiest ones:
The Square Patterned Tiles
floor tile | grout: warm gray | door: SW White Truffle
The blue patterned tiles that we laid in the bathrooms on the left side were the fastest and the most straightforward to install. Why? Because (1) they were square and (2) the pattern was symmetrical on all sides, meaning you could put the tile down in any orientation and it would line up. The combination of those two factors made it much easier to lay out, cut, and install because we were always working with right angles (we’ll talk about hex tile in a moment!). And because the pattern was the same on every edge, we had less waste because we could use both sides of a cut tile again in another smaller spot (like around any edge).
floor tile | grout: warm gray | door: SW White Truffle | wall: SW Spare White
The size of these tiles was also really easy to work with. The master bath tile (above) was around an 8 x 8″ square while the hall bath tile (below) was 9 x 9″, so they weren’t heavy or unruly like larger tiles can be, but they filled the space more quickly than a smaller mosaic would have. I think each room took us about two hours to lay, which felt like nothing compared to some of the others.
floor tile |grout: frost | door: SW White Truffle
And even though they were just simple square tiles that went down easily, the final floor still looks interesting and intricate – which was the goal. So we’re thrilled with these. Ten stars. Would recommend. Final verdict: If you’re looking to achieve something similar and keep your project as simple as possible, I would choose square tiles like these and these. They’re both porcelain too, so they don’t need to be sealed and cared for like more finicky materials do (we’re looking at you cement tile).
floor tile | wall tile | grout: frost | door: SW White Truffle | drop-in tub
The only thing we’d do differently next time is we’d use a darker gray grout in the room above. We were trying to streamline everything and keep cost down by not buying different grout colors for each room (and whatever color went on the floors also went in the shower – some of which weren’t grouted at the time of these photos). But Sherry thinks a darker gray would’ve made the grout lines recede a bit more, helping the diamond pattern show through stronger. Anything for a diamond, right?
Let’s move on to the next simplest tile to install…
The Marble Hex Tile
floor tile | grout: frost | door: SW Oyster Bay
Now, this tile isn’t actually marble (it’s porcelain, just like everything else – because they’re extra durable and never need to be sealed) but it may be our favorite in the entire house. The marble-like finish is classic and bright, but the geometric pattern that’s layered on top makes it unique and unusual. We’ve actually talked about maybe using the same tile in our own bathroom here in Richmond – thats how much we like it.
(Note: the space between the tile & the tub or the tile & the baseboard in various shots throughout this post will get white quarter round molding, so it all looks seamless in the end)
floor tile | wall tile | grout: frost | door: SW Oyster Bay | wall: SW Spare White
Like the square tiles, this hex was about 8 x 8″ so the size was very manageable to work with and it provided fast coverage in the room. I think this one maybe took us 3-4 hours instead of 2. And that’s mainly because (1) the hex shape took more care to cut and lay and (2) the asymmetrical pattern took more concentration to not screw up. Speaking of which, there are two different looks you can get with this tile. See how the triangles are all the same color in the left picture below and they’re shaded differently in the right picture because we rotated the hexes? We laid out both options and picked the one on the right – but you could lay it the other way if your eyes like that better.
In addition to having to concentrate on not screwing up the pattern, hex tiles are a bit more finicky when it comes to spacing and not letting your layout drift. One tile laid too close to another in your first corner can cause big headaches down the line as that little inconsistency gets magnified in each subsequent row. So we actually laid out lots of tile BEFORE mixing Thinset to check how everything lined up and to ensure that we didn’t end up with slivers of tile anywhere. This may seem like overkill, but it made things go much faster once we actually started setting things for good.
Final Verdict: Ultimately this tile was noticeably (but not dramatically) harder than the square tiles, and with enough spacers (we used 1/16th spacers) we were able to keep everything lined up and spaced similarly. Even if our spacing had drifted a little, the grout color we used disguised the spacing pretty well anyways.
Sidenote: we love this Mapei grout because it comes premixed AND doesn’t need to be sealed and is durable/flexible/stain resistant. So once it’s dried and any grout haze is buffed off, it’s totally good to go. Our contractor swears by it and won’t use anything else, so we tried it throughout the pink house and after over a year of heavy use, all the grout in the bathrooms & the mudroom still looks mint (no grout scrubbing in over a year, folks!)
But just because this hex tile went down smoothly, doesn’t mean it all will…
The Patterned Hex Tile
This other hex tile went in hall bathroom on the same side as the one above and, well, it’s a good thing we love how this tile turned out because it felt straight up cursed when we were installing it.
floor tile | grout: warm gray | door: SW Oyster Bay
First, it presented some of the same challenges as the last hex tile – a non-square shape and an asymmetrical pattern. But this pattern was even trickier to keep straight, which caused a few bad cuts along the way (plus, it was much harder to reuse cut pieces because the pattern was so particular). I actually laid one tile in the WRONG direction and we didn’t notice it until a week later when it was time to grout. Can you spot it below?
It wasn’t a big deal to fix. I just broke it up with a hammer, removed the shattered pieces of that single tile, and installed a new piece in its place – but it did set my grouting back a day because we had to wait for that new thinset to cure before grouting. And of course, this happened AFTER we had run out of tile during the actual installation. Yep, we were like 80% done and had to order another box. So this room had two pretty frustrating setbacks. But eventually we got it done.
floor tile | grout: warm gray | door: SW Oyster Bay | wall: SW Spare White | drop-in tub
We actually think the square footage calculations on the website are wrong because a couple of our readers reported being short on these same tiles as well. And even without any bad cuts, we don’t think we would have had enough (again: it’s really really hard to reuse your scraps with a pattern like this). So if you use these tiles, I’d recommend getting around 25% extra (not just your typical 10-15% recommended overage).
Final Verdict: If ease and speed are important factors for you when you’re choosing a tile, I would NOT recommend this one. The result was great, but keeping the pattern straight kinda made our brains hurt, this specific tile ran short for us based on the square footage listed on the site (and we heard it did for a few other people), and now we know that we can get interesting patterns with simpler square tiles.
The Chevron Mudroom Tile
Let’s move downstairs to the two mudrooms / laundry rooms. I don’t have “after” photos of these because we haven’t grouted them quite yet (since the back doors act as the main entrances for the crew, the mudrooms are still seeing a lot of foot traffic and grime). So right now they’re both covered in protective paper and we’ll grout once things calm down over there. That means my best photos are mostly progress photos.
floor tile | spacers |wall: SW Spare White | trim: SW Extra White
We really liked installing this chevron tile because the rectangular shape made it easy to lay out and cut, plus the size (17″ x 35″) meant the room – which is nearly the size of all four bathrooms combined – filled up very quickly. The only downside to the size was that they were a bit heavy and cumbersome to maneuver, and I had to get creative with how I rested them on the guide of my wet saw to get them to fit under the blade while I cut them. Plus, keeping big tiles level can be challenging so we always recommend using these LASH spacers, which you can read more about in this post.
My only beef with this tile is that ideally, your spacing between tiles would match the spacing of the zigzags within the tile itself. However, to do that, the manufacturer recommends a (wait for it) … 2/17th spacer. WHO THE HECK SELLS A TWO-SEVENTEENTHS SPACER?! Fortunately, a standard 1/8th or 1/16th (which is what we did) is pretty close to 2/17ths. But still, I feel like it’s an unnecessary complication that could make your chevron not line up perfectly. But even still, for a big room, I would definitely choose this tile again.
Final Verdict: Larger tiles can be harder to handle, cut, and to get level, but these tiles were worth the trouble and we finished the room quickly since they were so large. It’s also one our favorite tiles looks-wise (this room gets the most in-person compliments) and it’s extremely durable (porcelain again) so we would recommend this for sure, especially with the LASH spacers we used.
The Herringbone Mudroom Tile
I’ve saved the best for last. And by the best, I mean hands-down-the-hardest. Yes folks, this is the one we probably would NOT do again… which is hard to say because it’s so darn cool to look at (even here, when it’s still ungrouted). Reminder: the space between the tile & the baseboard in various shots throughout this post will get white quarter round molding, so it’ll all look seamless in the end.
floor tiles: pink, white, and taupe | wall: SW Spare White | trim: SW Extra White
To create this floor we laid three different colors of long porcelain tiles (pink, white, and taupe) in a herringbone pattern, making it a perfect storm of all the challenges of the previous rooms combined:
The tri-color pattern took lots of concentration to keep straight
Despite being long rectangular tiles, laying a herringbone meant LOTS of angled cuts, which are less forgiving
It was difficult to reuse cut pieces because of the alternating colors and angled cuts
A herringbone pattern needs meticulous spacing to keep your pattern from drifting
Because of all of those factors – and because it was such a large room – this is the only space that took us an entire day to complete. Heck, it took us more than two hours just to get our pattern planned and the initial pieces cut. Maybe we were just tired (this was room five of six that we did across two consecutive weekends) but it took nearly all of our mental energy to precisely measure all of these angled cuts, to keep things square to the walls, and to not screw up the color sequence in the process.
Final Verdict: This was by far the hardest tile choice and it took the longest and required the most mental calculations (angled cuts, creating the pattern ourselves with three different colored tiles, etc). I think it could’ve been simpler had it been a smaller room (or frankly, just a wider room with more full pieces) or if we hadn’t done the herringbone pattern, so I don’t want to totally dissuade anyone from recreating this. Because again, we’re REALLY happy with the result. But I do want you guys to know what you’re getting yourselves into.
And One More Thing… About Toilet Holes
This post didn’t cover a lot of “how to” because tiling is something we’ve talked a lot about over the years (I’ll link to some of our previous tutorials at the bottom of this post). But I did want to cover one thing that lots of people asked about on Instagram: cutting around the toilet flange in the floor. See that nice round cut below? Who knew so many people would notice and ask us how it’s done. So here ya go.
I didn’t document this process and we were already done by the time the requests for tips arose, so I’ve tried to illustrate below what I do to make the round cuts around the flange. Most people use an angle grinder to get a really pretty circle cut, but I don’t own one, so my process involves my wet saw and it’s decidedly less pretty, but here it goes…
Basically once I’ve marked the area that needs to be cut, I make a two long cuts from each side at the shallowest angles I can manage (marked in red and purple in the top right picture). This removes a few big chunks and makes the next cuts easier.
Then I make a bunch of short cuts very close together – almost like making teeth – along the edge of the circle (marked in purple and red in the bottom left picture above). The “teeth” usually break off in the process, or if they’re too thick I just run my blade against them again. The final result is rarely a perfect circle and often has little indentations where I made the teeth cuts. But it’ll all be covered by a toilet anyways, so it doesn’t need to be perfect.
In fact, I probably don’t need to be as meticulous as I am since it’ll be hidden under the toilet. But you don’t want to get too lazy because your toilet needs a flat solid surface to rest on and if your chosen porcelain throne has an especially small base, a larger cut could end up peeking out.
Speaking of which, the upstairs toilets and vanities got installed last week so we’re hoping to make a trip out there this weekend to check it all out! Things are really coming together!!
More Tiling Projects & How To’s:
If you’re interested in more tutorials on tiling or want to check out some of our previous tile projects, here you go:
How to install a subway tile backsplash (with video!)
How to mix thinset and how to install penny tile
How to install subway tile in a herringbone pattern
How to install cement board and large floor tiles
How to install a herringbone marble backsplash using mastic
How to install oversized tile in an outdoor area
How we customized a hex mosaic in the beach house
*This post contains affiliate links*
The post The Duplex Is Tiled! Here’s What We Loved & What We Wouldn’t Do Again appeared first on Young House Love.
The Duplex Is Tiled! Here’s What We Loved & What We Wouldn’t Do Again published first on https://bakerskitchenslimited.tumblr.com/
0 notes
Text
The Duplex Is Tiled! Here’s What We Loved & What We Wouldn’t Do Again
Tiling was one of the most daunting tasks on our duplex to-do list this year (four bathrooms! two mudrooms! and there are still two backsplashes on the list) so it’s a HUGE relief to say that all of those floors and showers and tub surrounds are officially done (well, like 95% done – more on that later). So today we wanted to show you how they’ve all turned out and share some of the lessons we learned along the way, including which tiles we’d buy again in a heartbeat… and the ones we’d think twice about attempting ever again.
floor tile | wall tile | shower floor | grout: frost | door: SW Oyster Bay
Listeners of last week’s podcast know that after two long weekends spent tiling the duplex, we completed all six of the floors ourselves (two mudrooms and four bathrooms!) but we decided to hire out the four remaining shower surrounds in order to keep things on schedule. What would’ve taken me and Sherry several more weekends to accomplish was knocked out by our contractor’s crew in less than a week. For each of the four shower/tub surrounds we chose white subway tile for the walls (simple, classic, affordable, and it’s a tile that falls back and won’t compete with the bolder patterned floor tile that we chose for each room). So this post is mostly going to focus on the floors in each space since we’ve covered our adventures in subway tile here and here already.
floor tile | wall tile | shower floor | grout: warm gray | door: SW White Truffle
But as for the subway tile we used, we went with this affordable 3 x 6″ subway tile installed in a standard running bond pattern (the same stuff we used and loved on the beach house’s kitchen backsplash). And the two master showers got this white herringbone on the floor, which added a hint of interest to that surface without being too crazy busy.
We showed you all of the floor tile selections in this post about how we chose our tile, cabinets, and paint colors. But we did make one last minute change to the plan from that post: we swapped the two master bathroom tile choices (seen in the two photos above) because the marble-looking tile ended up pairing better with the blue-green doors than the pink ones. As much planning as you do beforehand, there’s really nothing like seeing the tile in the space next to the items that are in there, hence that last minute swap.
We mentioned in that same post that we limited ourselves to larger tiles with interesting patterns, rather than smaller mosaics because we knew it would help the process go faster (we LOVE our pink house master bathroom floor, but it took us forever and a day). But even within that larger-tile parameter, we learned that some tiles were faster, easier, and more foolproof to lay than others. We LOVE how all of them turned out in the end, but there are some that gave us more difficulty (and took much longer to install) than others. So if speed and ease are an important factor when it comes to picking tile, or if you’re a newbie tiler and want to choose something that’s simple & straightforward, this post should help.
So let’s start with the easiest ones:
The Square Patterned Tiles
floor tile | grout: warm gray | door: SW White Truffle
The blue patterned tiles that we laid in the bathrooms on the left side were the fastest and the most straightforward to install. Why? Because (1) they were square and (2) the pattern was symmetrical on all sides, meaning you could put the tile down in any orientation and it would line up. The combination of those two factors made it much easier to lay out, cut, and install because we were always working with right angles (we’ll talk about hex tile in a moment!). And because the pattern was the same on every edge, we had less waste because we could use both sides of a cut tile again in another smaller spot (like around any edge).
floor tile | grout: warm gray | door: SW White Truffle | wall: SW Spare White
The size of these tiles was also really easy to work with. The master bath tile (above) was around an 8 x 8″ square while the hall bath tile (below) was 9 x 9″, so they weren’t heavy or unruly like larger tiles can be, but they filled the space more quickly than a smaller mosaic would have. I think each room took us about two hours to lay, which felt like nothing compared to some of the others.
floor tile |grout: frost | door: SW White Truffle
And even though they were just simple square tiles that went down easily, the final floor still looks interesting and intricate – which was the goal. So we’re thrilled with these. Ten stars. Would recommend. Final verdict: If you’re looking to achieve something similar and keep your project as simple as possible, I would choose square tiles like these and these. They’re both porcelain too, so they don’t need to be sealed and cared for like more finicky materials do (we’re looking at you cement tile).
floor tile | wall tile | grout: frost | door: SW White Truffle | drop-in tub
The only thing we’d do differently next time is we’d use a darker gray grout in the room above. We were trying to streamline everything and keep cost down by not buying different grout colors for each room (and whatever color went on the floors also went in the shower – some of which weren’t grouted at the time of these photos). But Sherry thinks a darker gray would’ve made the grout lines recede a bit more, helping the diamond pattern show through stronger. Anything for a diamond, right?
Let’s move on to the next simplest tile to install…
The Marble Hex Tile
floor tile | grout: frost | door: SW Oyster Bay
Now, this tile isn’t actually marble (it’s porcelain, just like everything else – because they’re extra durable and never need to be sealed) but it may be our favorite in the entire house. The marble-like finish is classic and bright, but the geometric pattern that’s layered on top makes it unique and unusual. We’ve actually talked about maybe using the same tile in our own bathroom here in Richmond – thats how much we like it.
(Note: the space between the tile & the tub or the tile & the baseboard in various shots throughout this post will get white quarter round molding, so it all looks seamless in the end)
floor tile | wall tile | grout: frost | door: SW Oyster Bay | wall: SW Spare White
Like the square tiles, this hex was about 8 x 8″ so the size was very manageable to work with and it provided fast coverage in the room. I think this one maybe took us 3-4 hours instead of 2. And that’s mainly because (1) the hex shape took more care to cut and lay and (2) the asymmetrical pattern took more concentration to not screw up. Speaking of which, there are two different looks you can get with this tile. See how the triangles are all the same color in the left picture below and they’re shaded differently in the right picture because we rotated the hexes? We laid out both options and picked the one on the right – but you could lay it the other way if your eyes like that better.
In addition to having to concentrate on not screwing up the pattern, hex tiles are a bit more finicky when it comes to spacing and not letting your layout drift. One tile laid too close to another in your first corner can cause big headaches down the line as that little inconsistency gets magnified in each subsequent row. So we actually laid out lots of tile BEFORE mixing Thinset to check how everything lined up and to ensure that we didn’t end up with slivers of tile anywhere. This may seem like overkill, but it made things go much faster once we actually started setting things for good.
Final Verdict: Ultimately this tile was noticeably (but not dramatically) harder than the square tiles, and with enough spacers (we used 1/16th spacers) we were able to keep everything lined up and spaced similarly. Even if our spacing had drifted a little, the grout color we used disguised the spacing pretty well anyways.
Sidenote: we love this Mapei grout because it comes premixed AND doesn’t need to be sealed and is durable/flexible/stain resistant. So once it’s dried and any grout haze is buffed off, it’s totally good to go. Our contractor swears by it and won’t use anything else, so we tried it throughout the pink house and after over a year of heavy use, all the grout in the bathrooms & the mudroom still looks mint (no grout scrubbing in over a year, folks!)
But just because this hex tile went down smoothly, doesn’t mean it all will…
The Patterned Hex Tile
This other hex tile went in hall bathroom on the same side as the one above and, well, it’s a good thing we love how this tile turned out because it felt straight up cursed when we were installing it.
floor tile | grout: warm gray | door: SW Oyster Bay
First, it presented some of the same challenges as the last hex tile – a non-square shape and an asymmetrical pattern. But this pattern was even trickier to keep straight, which caused a few bad cuts along the way (plus, it was much harder to reuse cut pieces because the pattern was so particular). I actually laid one tile in the WRONG direction and we didn’t notice it until a week later when it was time to grout. Can you spot it below?
It wasn’t a big deal to fix. I just broke it up with a hammer, removed the shattered pieces of that single tile, and installed a new piece in its place – but it did set my grouting back a day because we had to wait for that new thinset to cure before grouting. And of course, this happened AFTER we had run out of tile during the actual installation. Yep, we were like 80% done and had to order another box. So this room had two pretty frustrating setbacks. But eventually we got it done.
floor tile | grout: warm gray | door: SW Oyster Bay | wall: SW Spare White | drop-in tub
We actually think the square footage calculations on the website are wrong because a couple of our readers reported being short on these same tiles as well. And even without any bad cuts, we don’t think we would have had enough (again: it’s really really hard to reuse your scraps with a pattern like this). So if you use these tiles, I’d recommend getting around 25% extra (not just your typical 10-15% recommended overage).
Final Verdict: If ease and speed are important factors for you when you’re choosing a tile, I would NOT recommend this one. The result was great, but keeping the pattern straight kinda made our brains hurt, this specific tile ran short for us based on the square footage listed on the site (and we heard it did for a few other people), and now we know that we can get interesting patterns with simpler square tiles.
The Chevron Mudroom Tile
Let’s move downstairs to the two mudrooms / laundry rooms. I don’t have “after” photos of these because we haven’t grouted them quite yet (since the back doors act as the main entrances for the crew, the mudrooms are still seeing a lot of foot traffic and grime). So right now they’re both covered in protective paper and we’ll grout once things calm down over there. That means my best photos are mostly progress photos.
floor tile | spacers |wall: SW Spare White | trim: SW Extra White
We really liked installing this chevron tile because the rectangular shape made it easy to lay out and cut, plus the size (17″ x 35″) meant the room – which is nearly the size of all four bathrooms combined – filled up very quickly. The only downside to the size was that they were a bit heavy and cumbersome to maneuver, and I had to get creative with how I rested them on the guide of my wet saw to get them to fit under the blade while I cut them. Plus, keeping big tiles level can be challenging so we always recommend using these LASH spacers, which you can read more about in this post.
My only beef with this tile is that ideally, your spacing between tiles would match the spacing of the zigzags within the tile itself. However, to do that, the manufacturer recommends a (wait for it) … 2/17th spacer. WHO THE HECK SELLS A TWO-SEVENTEENTHS SPACER?! Fortunately, a standard 1/8th or 1/16th (which is what we did) is pretty close to 2/17ths. But still, I feel like it’s an unnecessary complication that could make your chevron not line up perfectly. But even still, for a big room, I would definitely choose this tile again.
Final Verdict: Larger tiles can be harder to handle, cut, and to get level, but these tiles were worth the trouble and we finished the room quickly since they were so large. It’s also one our favorite tiles looks-wise (this room gets the most in-person compliments) and it’s extremely durable (porcelain again) so we would recommend this for sure, especially with the LASH spacers we used.
The Herringbone Mudroom Tile
I’ve saved the best for last. And by the best, I mean hands-down-the-hardest. Yes folks, this is the one we probably would NOT do again… which is hard to say because it’s so darn cool to look at (even here, when it’s still ungrouted). Reminder: the space between the tile & the baseboard in various shots throughout this post will get white quarter round molding, so it’ll all look seamless in the end.
floor tiles: pink, white, and taupe | wall: SW Spare White | trim: SW Extra White
To create this floor we laid three different colors of long porcelain tiles (pink, white, and taupe) in a herringbone pattern, making it a perfect storm of all the challenges of the previous rooms combined:
The tri-color pattern took lots of concentration to keep straight
Despite being long rectangular tiles, laying a herringbone meant LOTS of angled cuts, which are less forgiving
It was difficult to reuse cut pieces because of the alternating colors and angled cuts
A herringbone pattern needs meticulous spacing to keep your pattern from drifting
Because of all of those factors – and because it was such a large room – this is the only space that took us an entire day to complete. Heck, it took us more than two hours just to get our pattern planned and the initial pieces cut. Maybe we were just tired (this was room five of six that we did across two consecutive weekends) but it took nearly all of our mental energy to precisely measure all of these angled cuts, to keep things square to the walls, and to not screw up the color sequence in the process.
Final Verdict: This was by far the hardest tile choice and it took the longest and required the most mental calculations (angled cuts, creating the pattern ourselves with three different colored tiles, etc). I think it could’ve been simpler had it been a smaller room (or frankly, just a wider room with more full pieces) or if we hadn’t done the herringbone pattern, so I don’t want to totally dissuade anyone from recreating this. Because again, we’re REALLY happy with the result. But I do want you guys to know what you’re getting yourselves into.
And One More Thing… About Toilet Holes
This post didn’t cover a lot of “how to” because tiling is something we’ve talked a lot about over the years (I’ll link to some of our previous tutorials at the bottom of this post). But I did want to cover one thing that lots of people asked about on Instagram: cutting around the toilet flange in the floor. See that nice round cut below? Who knew so many people would notice and ask us how it’s done. So here ya go.
I didn’t document this process and we were already done by the time the requests for tips arose, so I’ve tried to illustrate below what I do to make the round cuts around the flange. Most people use an angle grinder to get a really pretty circle cut, but I don’t own one, so my process involves my wet saw and it’s decidedly less pretty, but here it goes…
Basically once I’ve marked the area that needs to be cut, I make a two long cuts from each side at the shallowest angles I can manage (marked in red and purple in the top right picture). This removes a few big chunks and makes the next cuts easier.
Then I make a bunch of short cuts very close together – almost like making teeth – along the edge of the circle (marked in purple and red in the bottom left picture above). The “teeth” usually break off in the process, or if they’re too thick I just run my blade against them again. The final result is rarely a perfect circle and often has little indentations where I made the teeth cuts. But it’ll all be covered by a toilet anyways, so it doesn’t need to be perfect.
In fact, I probably don’t need to be as meticulous as I am since it’ll be hidden under the toilet. But you don’t want to get too lazy because your toilet needs a flat solid surface to rest on and if your chosen porcelain throne has an especially small base, a larger cut could end up peeking out.
Speaking of which, the upstairs toilets and vanities got installed last week so we’re hoping to make a trip out there this weekend to check it all out! Things are really coming together!!
More Tiling Projects & How To’s:
If you’re interested in more tutorials on tiling or want to check out some of our previous tile projects, here you go:
How to install a subway tile backsplash (with video!)
How to mix thinset and how to install penny tile
How to install subway tile in a herringbone pattern
How to install cement board and large floor tiles
How to install a herringbone marble backsplash using mastic
How to install oversized tile in an outdoor area
How we customized a hex mosaic in the beach house
*This post contains affiliate links*
The post The Duplex Is Tiled! Here’s What We Loved & What We Wouldn’t Do Again appeared first on Young House Love.
The Duplex Is Tiled! Here’s What We Loved & What We Wouldn’t Do Again published first on https://bakerskitchenslimited.tumblr.com/
0 notes
Text
The Duplex Is Tiled! Here’s What We Loved & What We Wouldn’t Do Again
Tiling was one of the most daunting tasks on our duplex to-do list this year (four bathrooms! two mudrooms! and there are still two backsplashes on the list) so it’s a HUGE relief to say that all of those floors and showers and tub surrounds are officially done (well, like 95% done – more on that later). So today we wanted to show you how they’ve all turned out and share some of the lessons we learned along the way, including which tiles we’d buy again in a heartbeat… and the ones we’d think twice about attempting ever again.
floor tile | wall tile | shower floor | grout: frost | door: SW Oyster Bay
Listeners of last week’s podcast know that after two long weekends spent tiling the duplex, we completed all six of the floors ourselves (two mudrooms and four bathrooms!) but we decided to hire out the four remaining shower surrounds in order to keep things on schedule. What would’ve taken me and Sherry several more weekends to accomplish was knocked out by our contractor’s crew in less than a week – which means we got to spend all that time we saved doing actual work that we get paid for, so it worked out well.
For each of the four shower/tub surrounds we chose white subway tile for the walls (simple, classic, affordable, and it’s a tile that lets the more interesting floor tile in each room be the star). So this post is mostly going to focus on the floors in each space since we’ve covered our adventures in subway tile here and here already.
floor tile | wall tile | shower floor | grout: warm gray | door: SW White Truffle
But as for the subway tile we used, we went with this affordable 3 x 6″ subway tile installed in a standard running bond pattern (the same stuff we used and loved on the beach house’s kitchen backsplash). And the two master showers got this white herringbone on the floor, which added a hint of interest to that surface without being too crazy busy.
We showed you all of the floor tile selections in this post about how we chose our tile, cabinets, and paint colors. But we did make one last minute change to the plan from that post: we swapped the two master bathroom tile choices (seen in the two photos above) because the marble-esque tile ended up looking better with the blue-green doors than the pink ones. As much planning as you do beforehand, there’s really nothing like seeing the tile in the space next to the items that are in there, hence that last minute swap.
We mentioned in that same post that we limited ourselves to larger tiles with interesting patterns, rather than smaller mosaics because we knew it would help the process go faster (we LOVE our pink house master bathroom floor, but it took us forever and a day). But even within that larger-tile parameter, we learned that some tiles were faster, easier, and more foolproof to lay than others. We LOVE how all of them turned out in the end, but there are some that gave us more difficulty (and took much longer to install) than others. So if speed and ease are an important factor when it comes to picking tile, or if you’re a newbie tiler and want to choose something that’s simple and straightforward… this post should help.
So let’s start with the easiest ones:
The Square Patterned Tiles
floor tile | grout: warm gray | door: SW White Truffle
The blue patterned tiles that we laid in the bathrooms on the left side were the fastest and the most straightforward to install. Why? Because (1) they were square and (2) the pattern was symmetrical on all sides, meaning you could put the tile down in any orientation and it would line up. The combination of those two factors made it much easier to lay out, cut, and install because we were always working with right angles (we’ll talk about hex tile in a moment!). And because the pattern was the same on every edge, we had less waste because we could use both sides of a cut tile again in another smaller spot (like around any edge).
floor tile | grout: warm gray | door: SW White Truffle | wall: SW Spare White
The size of these tiles was also really easy to work with. The master bath tile (above) was around an 8 x 8″ square while the hall bath tile (below) was 9 x 9″, so they weren’t heavy or unruly like larger tiles can be, but they filled the space more quickly than a smaller mosaic would have. I think each room took us about two hours to lay, which felt like nothing compared to some of the others.
floor tile |grout: frost | door: SW White Truffle
And even though they were just simple square tiles that went down easily, the final floor still looks interesting and intricate – which was the goal. So we’re thrilled with these. Ten stars. Would recommend. Final verdict: If you’re looking to achieve something similar and keep your project as simple as possible, I would choose square tiles like these and these. They’re both porcelain too, so they don’t need to be sealed and cared for like more finicky materials do (we’re looking at you cement tile).
floor tile | wall tile | grout: frost | door: SW White Truffle | drop-in tub
The only thing we’d do differently next time is we’d use a darker gray grout in the room above. We were trying to streamline everything and keep cost down by not buying different grout colors for each room (and whatever color went on the floors also went in the shower – some of which weren’t grouted at the time of these photos). But Sherry thinks a darker gray would’ve made the grout lines recede a bit more, helping the diamond pattern show through stronger. Anything for a diamond, right?
Let’s move on to the next simplest tile to install…
The Marble Hex Tile
floor tile | grout: frost | door: SW Oyster Bay
Now, this tile isn’t actually marble (it’s porcelain, just like everything else – because they’re extra durable and never need to be sealed) but it may be our favorite in the entire house. The marble finish is classic and bright, but the pattern on top makes it unique and unusual. We’ve actually talked about maybe using the same tile in our own bathroom here in Richmond – thats how much we like it.
(Note: the space between the tile & the tub or the tile & the baseboard in various shots throughout this post will get white quarter round molding, so it all looks seamless in the end)
floor tile | wall tile | grout: frost | door: SW Oyster Bay | wall: SW Spare White
Like the square tiles, this hex was about 8 x 8″ so the size was very manageable to work with and it provided fast coverage in the room. I think this one maybe took us 3-4 hours instead of 2. And that’s mainly because (1) the hex shape took more care to cut and lay and (2) the asymmetrical pattern took more concentration to not screw up. Speaking of which, there are two different looks you can get with this tile. See how the triangles are all the same color in the left picture below and they’re shaded differently in the right picture because we rotated the hexes? We laid out both options and picked the one on the right.
In addition to having to concentrate on not screwing up the pattern, hex tiles are a bit more finicky when it comes to spacing and not letting your layout drift. One tile laid too close to another in your first corner can cause big headaches down the line as that little inconsistency gets magnified in each subsequent row. So we actually laid out lots of tile BEFORE mixing Thinset to check how everything lined up and to ensure that we didn’t end up with slivers of tile anywhere. This may seem like overkill, but it made things go much faster once we actually started setting things for good.
Final Verdict: Ultimately this tile was noticeably (but not dramatically) harder than the square tiles, and with enough spacers (we used 1/16th spacers) we were able to keep everything lined up and spaced similarly. Even if our spacing had drifted a little, the grout color we used disguised the spacing pretty well anyways. Sidenote: we love this Mapei grout because it comes premixed AND doesn’t need to be sealed and is durable/flexible/stain resistant. So once it’s dried and any grout haze is buffed off, it’s totally good to go. Our contractor swears by it and won’t use anything else, so we tried it throughout the pink house and after over a year of heavy use, all the grout in the bathrooms/mudroom still look mint (no grout scrubbing in over a year, folks!)
But just because this hex tile went down smoothly, doesn’t mean it all will…
The Patterned Hex Tile
This other hex tile went in hall bathroom on the same side as the one above and, well, it’s a good thing we love how this tile turned out because it felt straight up cursed when we were installing it.
floor tile | grout: warm gray | door: SW Oyster Bay
First, it presented some of the same challenges as the last hex tile – a non-square shape and an asymmetrical pattern. But this pattern was even trickier to keep straight, which caused a few bad cuts along the way (plus, it was much harder to reuse cut pieces because the pattern was so particular). I actually laid one tile in the WRONG direction and we didn’t notice it until a week later when it was time to grout. Can you spot it below?
It wasn’t a big deal to fix. I just broke it up with a hammer, removed the shattered pieces of that single tile, and installed a new piece in its place – but it did set my grouting back a day because we had to wait for that new thinset to cure before grouting. And of course, this happened AFTER we had run out of tile during the actual installation. Yep, we were like 80% done and had to order another box. So this room had two pretty frustrating setbacks. But eventually we got it done.
floor tile | grout: warm gray | door: SW Oyster Bay | wall: SW Spare White | drop-in tub
We actually think the square footage calculations on the website are wrong because a couple of our readers reported being short on these same tiles as well. And even without any bad cuts, we don’t think we would have had enough (again: it’s really really hard to reuse your scraps with a pattern like this). So if you use these tiles, I’d recommend getting around 25% extra (not just your typical 10-15% recommended overage).
Final Verdict: If ease and speed are important factors for you when you’re choosing a tile, I would NOT recommend this one. The result was great, but keeping the pattern straight kinda made our brains hurt, this specific tile ran short for us based on the square footage listed on the site (and we heard it did for a few other people), and now we know that we can get interesting patterns with simpler square tiles.
The Chevron Mudroom Tile
Let’s move downstairs to the two mudrooms / laundry rooms. I don’t have “after” photos of these because we haven’t grouted them quite yet (since the back doors act as the main entrances for the crew, the mudrooms are still seeing a lot of foot traffic and grime). So right now they’re both covered in protective paper and we’ll grout once things calm down over there. That means my best photos are mostly progress photos.
floor tile | spacers |wall: SW Spare White | trim: SW Extra White
We really liked installing this chevron tile because the rectangular shape made it easy to lay out and cut, plus the size (17″ x 35″) meant the room – which is nearly the size of all four bathrooms combined – filled up very quickly. The only downside to the size was that they were a bit heavy and cumbersome to maneuver, and I had to get creative with how I rested them on the guide of my wet saw to get them to fit under the blade while I cut them. Plus, keeping big tiles level can be challenging so we always recommend using these LASH spacers, which you can read more about in this post.
My only beef with this tile is that ideally, your spacing between tiles would match the spacing of the zigzags within the tile itself. However, to do that, the manufacturer recommends a (wait for it) … 2/17th spacer. WHO THE HECK SELLS A TWO-SEVENTEENTHS SPACER?! Fortunately, a standard 1/8th or 1/16th (which is what we did) is pretty close to 2/17ths. But still, I feel like it’s an unnecessary complication that could make your chevron not line up perfectly. But even still, for a big room, I would definitely choose this tile again.
Final Verdict: Larger tiles can be harder to handle, cut, and to get level, but these tiles were worth the trouble and we finished the room quickly since they were so large. It’s also one our favorite tiles looks-wise (this room gets the most in-person compliments) and it’s extremely durable (porcelain again) so we would recommend this for sure, especially with the LASH spacers we used.
The Herringbone Mudroom Tile
I’ve saved the best for last. And by the best, I mean hands-down-the-hardest. Yes folks, this is the one we probably would NOT do again… which is hard to say because it’s so darn cool to look at (even here, when it’s still ungrouted). Reminder: the space between the tile & the baseboard in various shots throughout this post will get white quarter round molding, so it’ll all look seamless in the end.
floor tiles: pink, white, and taupe | wall: SW Spare White | trim: SW Extra White
To create this floor we laid three different colors of long porcelain tiles (pink, white, and taupe) in a herringbone pattern, making it a perfect storm of all the challenges of the previous rooms combined:
The tri-color pattern took lots of concentration to keep straight
Despite being long rectangular tiles, laying a herringbone meant LOTS of angled cuts, which are less forgiving
It was difficult to reuse cut pieces because of the alternating colors and angled cuts
A herringbone pattern needs meticulous spacing to keep your pattern from drifting
Because of all of those factors – and because it was such a large room – this is the only space that took us an entire day to complete. Heck, it took us more than two hours just to get our pattern planned and the initial pieces cut. Maybe we were just tired (this was room five of six that we did across two consecutive weekends) but it took nearly all of our mental energy to precisely measure all of these angled cuts, to keep things square to the walls, and to not screw up the color sequence in the process.
Final Verdict: This was by far the hardest tile choice and it took the longest and required the most mental calculations (angled cuts, creating the pattern ourselves with three different colored tiles, etc). I think it could’ve been simpler had it been a smaller room (or frankly, just a wider room with more full pieces) or if we hadn’t done the herringbone pattern, so I don’t want to totally dissuade anyone from recreating this. Because again, we’re REALLY happy with the result. But I do want you guys to know what you’re getting yourselves into.
And One More Thing… About Toilet Holes
This post didn’t cover a lot of “how to” because tiling is something we’ve talked a lot about over the years (I’ll link to some of our previous tutorials at the bottom of this post). But I did want to cover one thing that lots of people asked about on Instagram: cutting around the toilet flange in the floor. See that nice round cut below? Who knew so many people would notice and ask us how it’s done. So here ya go.
I didn’t document this process and we were already done by the time the process arose, so I’ve tried to illustrate below what I do to make the round cuts around the flange. Most people use an angle grinder to get a really pretty circle cut, but I don’t own one, so my process involves my wet saw and it’s decidedly less pretty, but here it goes…
Basically once I’ve marked the area that needs to be cut, I make a two long cuts from each side at the shallowest angles I can manage (marked in red and purple in the top right picture). This removes a few big chunks and makes the next cuts easier.
Then I make a bunch of short cuts very close together – almost like making teeth – along the edge of the circle (marked in purple and red in the bottom left picture above). The “teeth” usually break off in the process, or if they’re too thick I just run my blade against them again. The final result is rarely a perfect circle and often has little indentations where I made the teeth cuts. But it’ll all be covered by a toilet anyways, so it doesn’t need to be perfect.
In fact, I probably don’t need to be as meticulous as I am since it’ll be hidden under the toilet. But you don’t want to get too lazy because your toilet needs a flat solid surface to rest on and if your chosen porcelain throne has an especially small base, a larger cut could end up peeking out.
Speaking of which, the upstairs toilets and vanities got installed last week so we’re hoping to make a trip out there this weekend to check it all out! Things are really coming together!!
More Tiling Projects & How To’s:
If you’re interested in more tutorials on tiling or to check out some of our previous tile projects, check out some of the links below:
How to install a subway tile backsplash (with video!)
How to mix thinset and how to install penny tile
How to install subway tile in a herringbone pattern
How to install cement board and large floor tiles
How to install a herringbone marble backsplash using mastic
How to install oversized tile in an outdoor area
How we customized a hex mosaic in the beach house
*This post contains affiliate links*
The post The Duplex Is Tiled! Here’s What We Loved & What We Wouldn’t Do Again appeared first on Young House Love.
The Duplex Is Tiled! Here’s What We Loved & What We Wouldn’t Do Again published first on https://aireloomreview.tumblr.com/
0 notes
Text
The Duplex Is Tiled! Here’s What We Loved & What We Wouldn’t Do Again
Tiling was one of the most daunting tasks on our duplex to-do list this year (four bathrooms! two mudrooms! and there are still two backsplashes on the list) so it’s a HUGE relief to say that all of those floors and showers and tub surrounds are officially done (well, like 95% done – more on that later). So today we wanted to show you how they’ve all turned out and share some of the lessons we learned along the way, including which tiles we’d buy again in a heartbeat… and the ones we’d think twice about attempting ever again.
floor tile | wall tile | shower floor | grout: frost | door: SW Oyster Bay
Listeners of last week’s podcast know that after two long weekends spent tiling the duplex, we completed all six of the floors ourselves (two mudrooms and four bathrooms!) but we decided to hire out the four remaining shower surrounds in order to keep things on schedule. What would’ve taken me and Sherry several more weekends to accomplish was knocked out by our contractor’s crew in less than a week – which means we got to spend all that time we saved doing actual work that we get paid for, so it worked out well.
For each of the four shower/tub surrounds we chose white subway tile for the walls (simple, classic, affordable, and it’s a tile that lets the more interesting floor tile in each room be the star). So this post is mostly going to focus on the floors in each space since we’ve covered our adventures in subway tile here and here already.
floor tile | wall tile | shower floor | grout: warm gray | door: SW White Truffle
But as for the subway tile we used, we went with this affordable 3 x 6″ subway tile installed in a standard running bond pattern (the same stuff we used and loved on the beach house’s kitchen backsplash). And the two master showers got this white herringbone on the floor, which added a hint of interest to that surface without being too crazy busy.
We showed you all of the floor tile selections in this post about how we chose our tile, cabinets, and paint colors. But we did make one last minute change to the plan from that post: we swapped the two master bathroom tile choices (seen in the two photos above) because the marble-esque tile ended up looking better with the blue-green doors than the pink ones. As much planning as you do beforehand, there’s really nothing like seeing the tile in the space next to the items that are in there, hence that last minute swap.
We mentioned in that same post that we limited ourselves to larger tiles with interesting patterns, rather than smaller mosaics because we knew it would help the process go faster (we LOVE our pink house master bathroom floor, but it took us forever and a day). But even within that larger-tile parameter, we learned that some tiles were faster, easier, and more foolproof to lay than others. We LOVE how all of them turned out in the end, but there are some that gave us more difficulty (and took much longer to install) than others. So if speed and ease are an important factor when it comes to picking tile, or if you’re a newbie tiler and want to choose something that’s simple and straightforward… this post should help.
So let’s start with the easiest ones:
The Square Patterned Tiles
floor tile | grout: warm gray | door: SW White Truffle
The blue patterned tiles that we laid in the bathrooms on the left side were the fastest and the most straightforward to install. Why? Because (1) they were square and (2) the pattern was symmetrical on all sides, meaning you could put the tile down in any orientation and it would line up. The combination of those two factors made it much easier to lay out, cut, and install because we were always working with right angles (we’ll talk about hex tile in a moment!). And because the pattern was the same on every edge, we had less waste because we could use both sides of a cut tile again in another smaller spot (like around any edge).
floor tile | grout: warm gray | door: SW White Truffle | wall: SW Spare White
The size of these tiles was also really easy to work with. The master bath tile (above) was around an 8 x 8″ square while the hall bath tile (below) was 9 x 9″, so they weren’t heavy or unruly like larger tiles can be, but they filled the space more quickly than a smaller mosaic would have. I think each room took us about two hours to lay, which felt like nothing compared to some of the others.
floor tile |grout: frost | door: SW White Truffle
And even though they were just simple square tiles that went down easily, the final floor still looks interesting and intricate – which was the goal. So we’re thrilled with these. Ten stars. Would recommend. Final verdict: If you’re looking to achieve something similar and keep your project as simple as possible, I would choose square tiles like these and these. They’re both porcelain too, so they don’t need to be sealed and cared for like more finicky materials do (we’re looking at you cement tile).
floor tile | wall tile | grout: frost | door: SW White Truffle | drop-in tub
The only thing we’d do differently next time is we’d use a darker gray grout in the room above. We were trying to streamline everything and keep cost down by not buying different grout colors for each room (and whatever color went on the floors also went in the shower – some of which weren’t grouted at the time of these photos). But Sherry thinks a darker gray would’ve made the grout lines recede a bit more, helping the diamond pattern show through stronger. Anything for a diamond, right?
Let’s move on to the next simplest tile to install…
The Marble Hex Tile
floor tile | grout: frost | door: SW Oyster Bay
Now, this tile isn’t actually marble (it’s porcelain, just like everything else – because they’re extra durable and never need to be sealed) but it may be our favorite in the entire house. The marble finish is classic and bright, but the pattern on top makes it unique and unusual. We’ve actually talked about maybe using the same tile in our own bathroom here in Richmond – thats how much we like it.
(Note: the space between the tile & the tub or the tile & the baseboard in various shots throughout this post will get white quarter round molding, so it all looks seamless in the end)
floor tile | wall tile | grout: frost | door: SW Oyster Bay | wall: SW Spare White
Like the square tiles, this hex was about 8 x 8″ so the size was very manageable to work with and it provided fast coverage in the room. I think this one maybe took us 3-4 hours instead of 2. And that’s mainly because (1) the hex shape took more care to cut and lay and (2) the asymmetrical pattern took more concentration to not screw up. Speaking of which, there are two different looks you can get with this tile. See how the triangles are all the same color in the left picture below and they’re shaded differently in the right picture because we rotated the hexes? We laid out both options and picked the one on the right.
In addition to having to concentrate on not screwing up the pattern, hex tiles are a bit more finicky when it comes to spacing and not letting your layout drift. One tile laid too close to another in your first corner can cause big headaches down the line as that little inconsistency gets magnified in each subsequent row. So we actually laid out lots of tile BEFORE mixing Thinset to check how everything lined up and to ensure that we didn’t end up with slivers of tile anywhere. This may seem like overkill, but it made things go much faster once we actually started setting things for good.
Final Verdict: Ultimately this tile was noticeably (but not dramatically) harder than the square tiles, and with enough spacers (we used 1/16th spacers) we were able to keep everything lined up and spaced similarly. Even if our spacing had drifted a little, the grout color we used disguised the spacing pretty well anyways. Sidenote: we love this Mapei grout because it comes premixed AND doesn’t need to be sealed and is durable/flexible/stain resistant. So once it’s dried and any grout haze is buffed off, it’s totally good to go. Our contractor swears by it and won’t use anything else, so we tried it throughout the pink house and after over a year of heavy use, all the grout in the bathrooms/mudroom still look mint (no grout scrubbing in over a year, folks!)
But just because this hex tile went down smoothly, doesn’t mean it all will…
The Patterned Hex Tile
This other hex tile went in hall bathroom on the same side as the one above and, well, it’s a good thing we love how this tile turned out because it felt straight up cursed when we were installing it.
floor tile | grout: warm gray | door: SW Oyster Bay
First, it presented some of the same challenges as the last hex tile – a non-square shape and an asymmetrical pattern. But this pattern was even trickier to keep straight, which caused a few bad cuts along the way (plus, it was much harder to reuse cut pieces because the pattern was so particular). I actually laid one tile in the WRONG direction and we didn’t notice it until a week later when it was time to grout. Can you spot it below?
It wasn’t a big deal to fix. I just broke it up with a hammer, removed the shattered pieces of that single tile, and installed a new piece in its place – but it did set my grouting back a day because we had to wait for that new thinset to cure before grouting. And of course, this happened AFTER we had run out of tile during the actual installation. Yep, we were like 80% done and had to order another box. So this room had two pretty frustrating setbacks. But eventually we got it done.
floor tile | grout: warm gray | door: SW Oyster Bay | wall: SW Spare White | drop-in tub
We actually think the square footage calculations on the website are wrong because a couple of our readers reported being short on these same tiles as well. And even without any bad cuts, we don’t think we would have had enough (again: it’s really really hard to reuse your scraps with a pattern like this). So if you use these tiles, I’d recommend getting around 25% extra (not just your typical 10-15% recommended overage).
Final Verdict: If ease and speed are important factors for you when you’re choosing a tile, I would NOT recommend this one. The result was great, but keeping the pattern straight kinda made our brains hurt, this specific tile ran short for us based on the square footage listed on the site (and we heard it did for a few other people), and now we know that we can get interesting patterns with simpler square tiles.
The Chevron Mudroom Tile
Let’s move downstairs to the two mudrooms / laundry rooms. I don’t have “after” photos of these because we haven’t grouted them quite yet (since the back doors act as the main entrances for the crew, the mudrooms are still seeing a lot of foot traffic and grime). So right now they’re both covered in protective paper and we’ll grout once things calm down over there. That means my best photos are mostly progress photos.
floor tile | spacers |wall: SW Spare White | trim: SW Extra White
We really liked installing this chevron tile because the rectangular shape made it easy to lay out and cut, plus the size (17″ x 35″) meant the room – which is nearly the size of all four bathrooms combined – filled up very quickly. The only downside to the size was that they were a bit heavy and cumbersome to maneuver, and I had to get creative with how I rested them on the guide of my wet saw to get them to fit under the blade while I cut them. Plus, keeping big tiles level can be challenging so we always recommend using these LASH spacers, which you can read more about in this post.
My only beef with this tile is that ideally, your spacing between tiles would match the spacing of the zigzags within the tile itself. However, to do that, the manufacturer recommends a (wait for it) … 2/17th spacer. WHO THE HECK SELLS A TWO-SEVENTEENTHS SPACER?! Fortunately, a standard 1/8th or 1/16th (which is what we did) is pretty close to 2/17ths. But still, I feel like it’s an unnecessary complication that could make your chevron not line up perfectly. But even still, for a big room, I would definitely choose this tile again.
Final Verdict: Larger tiles can be harder to handle, cut, and to get level, but these tiles were worth the trouble and we finished the room quickly since they were so large. It’s also one our favorite tiles looks-wise (this room gets the most in-person compliments) and it’s extremely durable (porcelain again) so we would recommend this for sure, especially with the LASH spacers we used.
The Herringbone Mudroom Tile
I’ve saved the best for last. And by the best, I mean hands-down-the-hardest. Yes folks, this is the one we probably would NOT do again… which is hard to say because it’s so darn cool to look at (even here, when it’s still ungrouted). Reminder: the space between the tile & the baseboard in various shots throughout this post will get white quarter round molding, so it’ll all look seamless in the end.
floor tiles: pink, white, and taupe | wall: SW Spare White | trim: SW Extra White
To create this floor we laid three different colors of long porcelain tiles (pink, white, and taupe) in a herringbone pattern, making it a perfect storm of all the challenges of the previous rooms combined:
The tri-color pattern took lots of concentration to keep straight
Despite being long rectangular tiles, laying a herringbone meant LOTS of angled cuts, which are less forgiving
It was difficult to reuse cut pieces because of the alternating colors and angled cuts
A herringbone pattern needs meticulous spacing to keep your pattern from drifting
Because of all of those factors – and because it was such a large room – this is the only space that took us an entire day to complete. Heck, it took us more than two hours just to get our pattern planned and the initial pieces cut. Maybe we were just tired (this was room five of six that we did across two consecutive weekends) but it took nearly all of our mental energy to precisely measure all of these angled cuts, to keep things square to the walls, and to not screw up the color sequence in the process.
Final Verdict: This was by far the hardest tile choice and it took the longest and required the most mental calculations (angled cuts, creating the pattern ourselves with three different colored tiles, etc). I think it could’ve been simpler had it been a smaller room (or frankly, just a wider room with more full pieces) or if we hadn’t done the herringbone pattern, so I don’t want to totally dissuade anyone from recreating this. Because again, we’re REALLY happy with the result. But I do want you guys to know what you’re getting yourselves into.
And One More Thing… About Toilet Holes
This post didn’t cover a lot of “how to” because tiling is something we’ve talked a lot about over the years (I’ll link to some of our previous tutorials at the bottom of this post). But I did want to cover one thing that lots of people asked about on Instagram: cutting around the toilet flange in the floor. See that nice round cut below? Who knew so many people would notice and ask us how it’s done. So here ya go.
I didn’t document this process and we were already done by the time the process arose, so I’ve tried to illustrate below what I do to make the round cuts around the flange. Most people use an angle grinder to get a really pretty circle cut, but I don’t own one, so my process involves my wet saw and it’s decidedly less pretty, but here it goes…
Basically once I’ve marked the area that needs to be cut, I make a two long cuts from each side at the shallowest angles I can manage (marked in red and purple in the top right picture). This removes a few big chunks and makes the next cuts easier.
Then I make a bunch of short cuts very close together – almost like making teeth – along the edge of the circle (marked in purple and red in the bottom left picture above). The “teeth” usually break off in the process, or if they’re too thick I just run my blade against them again. The final result is rarely a perfect circle and often has little indentations where I made the teeth cuts. But it’ll all be covered by a toilet anyways, so it doesn’t need to be perfect.
In fact, I probably don’t need to be as meticulous as I am since it’ll be hidden under the toilet. But you don’t want to get too lazy because your toilet needs a flat solid surface to rest on and if your chosen porcelain throne has an especially small base, a larger cut could end up peeking out.
Speaking of which, the upstairs toilets and vanities got installed last week so we’re hoping to make a trip out there this weekend to check it all out! Things are really coming together!!
More Tiling Projects & How To’s:
If you’re interested in more tutorials on tiling or to check out some of our previous tile projects, check out some of the links below:
How to install a subway tile backsplash (with video!)
How to mix thinset and how to install penny tile
How to install subway tile in a herringbone pattern
How to install cement board and large floor tiles
How to install a herringbone marble backsplash using mastic
How to install oversized tile in an outdoor area
How we customized a hex mosaic in the beach house
*This post contains affiliate links*
The post The Duplex Is Tiled! Here’s What We Loved & What We Wouldn’t Do Again appeared first on Young House Love.
The Duplex Is Tiled! Here’s What We Loved & What We Wouldn’t Do Again published first on https://bakerskitchenslimited.tumblr.com/
0 notes
Text
The Duplex Is Tiled! Here’s What We Loved & What We Wouldn’t Do Again
Tiling was one of the most daunting tasks on our duplex to-do list this year (four bathrooms! two mudrooms! and there are still two backsplashes on the list) so it’s a HUGE relief to say that all of those floors and showers and tub surrounds are officially done (well, like 95% done – more on that later). So today we wanted to show you how they’ve all turned out and share some of the lessons we learned along the way, including which tiles we’d buy again in a heartbeat… and the ones we’d think twice about attempting ever again.
floor tile | wall tile | shower floor | grout: frost | door: SW Oyster Bay
Listeners of last week’s podcast know that after two long weekends spent tiling the duplex, we completed all six of the floors ourselves (two mudrooms and four bathrooms!) but we decided to hire out the four remaining shower surrounds in order to keep things on schedule. What would’ve taken me and Sherry several more weekends to accomplish was knocked out by our contractor’s crew in less than a week – which means we got to spend all that time we saved doing actual work that we get paid for, so it worked out well.
For each of the four shower/tub surrounds we chose white subway tile for the walls (simple, classic, affordable, and it’s a tile that lets the more interesting floor tile in each room be the star). So this post is mostly going to focus on the floors in each space since we’ve covered our adventures in subway tile here and here already.
floor tile | wall tile | shower floor | grout: warm gray | door: SW White Truffle
But as for the subway tile we used, we went with this affordable 3 x 6″ subway tile installed in a standard running bond pattern (the same stuff we used and loved on the beach house’s kitchen backsplash). And the two master showers got this white herringbone on the floor, which added a hint of interest to that surface without being too crazy busy.
We showed you all of the floor tile selections in this post about how we chose our tile, cabinets, and paint colors. But we did make one last minute change to the plan from that post: we swapped the two master bathroom tile choices (seen in the two photos above) because the marble-esque tile ended up looking better with the blue-green doors than the pink ones. As much planning as you do beforehand, there’s really nothing like seeing the tile in the space next to the items that are in there, hence that last minute swap.
We mentioned in that same post that we limited ourselves to larger tiles with interesting patterns, rather than smaller mosaics because we knew it would help the process go faster (we LOVE our pink house master bathroom floor, but it took us forever and a day). But even within that larger-tile parameter, we learned that some tiles were faster, easier, and more foolproof to lay than others. We LOVE how all of them turned out in the end, but there are some that gave us more difficulty (and took much longer to install) than others. So if speed and ease are an important factor when it comes to picking tile, or if you’re a newbie tiler and want to choose something that’s simple and straightforward… this post should help.
So let’s start with the easiest ones:
The Square Patterned Tiles
floor tile | grout: warm gray | door: SW White Truffle
The blue patterned tiles that we laid in the bathrooms on the left side were the fastest and the most straightforward to install. Why? Because (1) they were square and (2) the pattern was symmetrical on all sides, meaning you could put the tile down in any orientation and it would line up. The combination of those two factors made it much easier to lay out, cut, and install because we were always working with right angles (we’ll talk about hex tile in a moment!). And because the pattern was the same on every edge, we had less waste because we could use both sides of a cut tile again in another smaller spot (like around any edge).
floor tile | grout: warm gray | door: SW White Truffle | wall: SW Spare White
The size of these tiles was also really easy to work with. The master bath tile (above) was around an 8 x 8″ square while the hall bath tile (below) was 9 x 9″, so they weren’t heavy or unruly like larger tiles can be, but they filled the space more quickly than a smaller mosaic would have. I think each room took us about two hours to lay, which felt like nothing compared to some of the others.
floor tile |grout: frost | door: SW White Truffle
And even though they were just simple square tiles that went down easily, the final floor still looks interesting and intricate – which was the goal. So we’re thrilled with these. Ten stars. Would recommend. Final verdict: If you’re looking to achieve something similar and keep your project as simple as possible, I would choose square tiles like these and these. They’re both porcelain too, so they don’t need to be sealed and cared for like more finicky materials do (we’re looking at you cement tile).
floor tile | wall tile | grout: frost | door: SW White Truffle | drop-in tub
The only thing we’d do differently next time is we’d use a darker gray grout in the room above. We were trying to streamline everything and keep cost down by not buying different grout colors for each room (and whatever color went on the floors also went in the shower – some of which weren’t grouted at the time of these photos). But Sherry thinks a darker gray would’ve made the grout lines recede a bit more, helping the diamond pattern show through stronger. Anything for a diamond, right?
Let’s move on to the next simplest tile to install…
The Marble Hex Tile
floor tile | grout: frost | door: SW Oyster Bay
Now, this tile isn’t actually marble (it’s porcelain, just like everything else – because they’re extra durable and never need to be sealed) but it may be our favorite in the entire house. The marble finish is classic and bright, but the pattern on top makes it unique and unusual. We’ve actually talked about maybe using the same tile in our own bathroom here in Richmond – thats how much we like it.
(Note: the space between the tile & the tub or the tile & the baseboard in various shots throughout this post will get white quarter round molding, so it all looks seamless in the end)
floor tile | wall tile | grout: frost | door: SW Oyster Bay | wall: SW Spare White
Like the square tiles, this hex was about 8 x 8″ so the size was very manageable to work with and it provided fast coverage in the room. I think this one maybe took us 3-4 hours instead of 2. And that’s mainly because (1) the hex shape took more care to cut and lay and (2) the asymmetrical pattern took more concentration to not screw up. Speaking of which, there are two different looks you can get with this tile. See how the triangles are all the same color in the left picture below and they’re shaded differently in the right picture because we rotated the hexes? We laid out both options and picked the one on the right.
In addition to having to concentrate on not screwing up the pattern, hex tiles are a bit more finicky when it comes to spacing and not letting your layout drift. One tile laid too close to another in your first corner can cause big headaches down the line as that little inconsistency gets magnified in each subsequent row. So we actually laid out lots of tile BEFORE mixing Thinset to check how everything lined up and to ensure that we didn’t end up with slivers of tile anywhere. This may seem like overkill, but it made things go much faster once we actually started setting things for good.
Final Verdict: Ultimately this tile was noticeably (but not dramatically) harder than the square tiles, and with enough spacers (we used 1/16th spacers) we were able to keep everything lined up and spaced similarly. Even if our spacing had drifted a little, the grout color we used disguised the spacing pretty well anyways. Sidenote: we love this Mapei grout because it comes premixed AND doesn’t need to be sealed and is durable/flexible/stain resistant. So once it’s dried and any grout haze is buffed off, it’s totally good to go. Our contractor swears by it and won’t use anything else, so we tried it throughout the pink house and after over a year of heavy use, all the grout in the bathrooms/mudroom still look mint (no grout scrubbing in over a year, folks!)
But just because this hex tile went down smoothly, doesn’t mean it all will…
The Patterned Hex Tile
This other hex tile went in hall bathroom on the same side as the one above and, well, it’s a good thing we love how this tile turned out because it felt straight up cursed when we were installing it.
floor tile | grout: warm gray | door: SW Oyster Bay
First, it presented some of the same challenges as the last hex tile – a non-square shape and an asymmetrical pattern. But this pattern was even trickier to keep straight, which caused a few bad cuts along the way (plus, it was much harder to reuse cut pieces because the pattern was so particular). I actually laid one tile in the WRONG direction and we didn’t notice it until a week later when it was time to grout. Can you spot it below?
It wasn’t a big deal to fix. I just broke it up with a hammer, removed the shattered pieces of that single tile, and installed a new piece in its place – but it did set my grouting back a day because we had to wait for that new thinset to cure before grouting. And of course, this happened AFTER we had run out of tile during the actual installation. Yep, we were like 80% done and had to order another box. So this room had two pretty frustrating setbacks. But eventually we got it done.
floor tile | grout: warm gray | door: SW Oyster Bay | wall: SW Spare White | drop-in tub
We actually think the square footage calculations on the website are wrong because a couple of our readers reported being short on these same tiles as well. And even without any bad cuts, we don’t think we would have had enough (again: it’s really really hard to reuse your scraps with a pattern like this). So if you use these tiles, I’d recommend getting around 25% extra (not just your typical 10-15% recommended overage).
Final Verdict: If ease and speed are important factors for you when you’re choosing a tile, I would NOT recommend this one. The result was great, but keeping the pattern straight kinda made our brains hurt, this specific tile ran short for us based on the square footage listed on the site (and we heard it did for a few other people), and now we know that we can get interesting patterns with simpler square tiles.
The Chevron Mudroom Tile
Let’s move downstairs to the two mudrooms / laundry rooms. I don’t have “after” photos of these because we haven’t grouted them quite yet (since the back doors act as the main entrances for the crew, the mudrooms are still seeing a lot of foot traffic and grime). So right now they’re both covered in protective paper and we’ll grout once things calm down over there. That means my best photos are mostly progress photos.
floor tile | spacers |wall: SW Spare White | trim: SW Extra White
We really liked installing this chevron tile because the rectangular shape made it easy to lay out and cut, plus the size (17″ x 35″) meant the room – which is nearly the size of all four bathrooms combined – filled up very quickly. The only downside to the size was that they were a bit heavy and cumbersome to maneuver, and I had to get creative with how I rested them on the guide of my wet saw to get them to fit under the blade while I cut them. Plus, keeping big tiles level can be challenging so we always recommend using these LASH spacers, which you can read more about in this post.
My only beef with this tile is that ideally, your spacing between tiles would match the spacing of the zigzags within the tile itself. However, to do that, the manufacturer recommends a (wait for it) … 2/17th spacer. WHO THE HECK SELLS A TWO-SEVENTEENTHS SPACER?! Fortunately, a standard 1/8th or 1/16th (which is what we did) is pretty close to 2/17ths. But still, I feel like it’s an unnecessary complication that could make your chevron not line up perfectly. But even still, for a big room, I would definitely choose this tile again.
Final Verdict: Larger tiles can be harder to handle, cut, and to get level, but these tiles were worth the trouble and we finished the room quickly since they were so large. It’s also one our favorite tiles looks-wise (this room gets the most in-person compliments) and it’s extremely durable (porcelain again) so we would recommend this for sure, especially with the LASH spacers we used.
The Herringbone Mudroom Tile
I’ve saved the best for last. And by the best, I mean hands-down-the-hardest. Yes folks, this is the one we probably would NOT do again… which is hard to say because it’s so darn cool to look at (even here, when it’s still ungrouted). Reminder: the space between the tile & the baseboard in various shots throughout this post will get white quarter round molding, so it’ll all look seamless in the end.
floor tiles: pink, white, and taupe | wall: SW Spare White | trim: SW Extra White
To create this floor we laid three different colors of long porcelain tiles (pink, white, and taupe) in a herringbone pattern, making it a perfect storm of all the challenges of the previous rooms combined:
The tri-color pattern took lots of concentration to keep straight
Despite being long rectangular tiles, laying a herringbone meant LOTS of angled cuts, which are less forgiving
It was difficult to reuse cut pieces because of the alternating colors and angled cuts
A herringbone pattern needs meticulous spacing to keep your pattern from drifting
Because of all of those factors – and because it was such a large room – this is the only space that took us an entire day to complete. Heck, it took us more than two hours just to get our pattern planned and the initial pieces cut. Maybe we were just tired (this was room five of six that we did across two consecutive weekends) but it took nearly all of our mental energy to precisely measure all of these angled cuts, to keep things square to the walls, and to not screw up the color sequence in the process.
Final Verdict: This was by far the hardest tile choice and it took the longest and required the most mental calculations (angled cuts, creating the pattern ourselves with three different colored tiles, etc). I think it could’ve been simpler had it been a smaller room (or frankly, just a wider room with more full pieces) or if we hadn’t done the herringbone pattern, so I don’t want to totally dissuade anyone from recreating this. Because again, we’re REALLY happy with the result. But I do want you guys to know what you’re getting yourselves into.
And One More Thing… About Toilet Holes
This post didn’t cover a lot of “how to” because tiling is something we’ve talked a lot about over the years (I’ll link to some of our previous tutorials at the bottom of this post). But I did want to cover one thing that lots of people asked about on Instagram: cutting around the toilet flange in the floor. See that nice round cut below? Who knew so many people would notice and ask us how it’s done. So here ya go.
I didn’t document this process and we were already done by the time the process arose, so I’ve tried to illustrate below what I do to make the round cuts around the flange. Most people use an angle grinder to get a really pretty circle cut, but I don’t own one, so my process involves my wet saw and it’s decidedly less pretty, but here it goes…
Basically once I’ve marked the area that needs to be cut, I make a two long cuts from each side at the shallowest angles I can manage (marked in red and purple in the top right picture). This removes a few big chunks and makes the next cuts easier.
Then I make a bunch of short cuts very close together – almost like making teeth – along the edge of the circle (marked in purple and red in the bottom left picture above). The “teeth” usually break off in the process, or if they’re too thick I just run my blade against them again. The final result is rarely a perfect circle and often has little indentations where I made the teeth cuts. But it’ll all be covered by a toilet anyways, so it doesn’t need to be perfect.
In fact, I probably don’t need to be as meticulous as I am since it’ll be hidden under the toilet. But you don’t want to get too lazy because your toilet needs a flat solid surface to rest on and if your chosen porcelain throne has an especially small base, a larger cut could end up peeking out.
Speaking of which, the upstairs toilets and vanities got installed last week so we’re hoping to make a trip out there this weekend to check it all out! Things are really coming together!!
More Tiling Projects & How To’s:
If you’re interested in more tutorials on tiling or to check out some of our previous tile projects, check out some of the links below:
How to install a subway tile backsplash (with video!)
How to mix thinset and how to install penny tile
How to install subway tile in a herringbone pattern
How to install cement board and large floor tiles
How to install a herringbone marble backsplash using mastic
How to install oversized tile in an outdoor area
How we customized a hex mosaic in the beach house
*This post contains affiliate links*
The post The Duplex Is Tiled! Here’s What We Loved & What We Wouldn’t Do Again appeared first on Young House Love.
0 notes
Last Seen Blogs

thickenmyblood
thicken my blood

lboogs973
Untitled

minsimagines
perfectly imperfect

hometoursandotherstuff
Home Tours & Other Stuff

edmarujo
EdMarujo