#finesources
Text

WELCOME TO DAILYTHEMES!
We are a source blog focused on themes, pages, posts about themes help, html and codes. This blog honors all the theme and page creators, the credits are all for them!
We track #dailythemes — tag us!
#signal boost#themes#pages#dailyresources#hisources#rresources#completeresources#finesources#allresources#evansyhelp#userbru#resourcemarket#ihaveresources#theme hunter
63 notes
·
View notes
Text
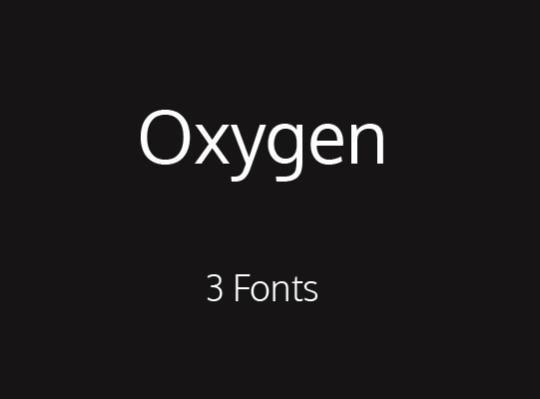
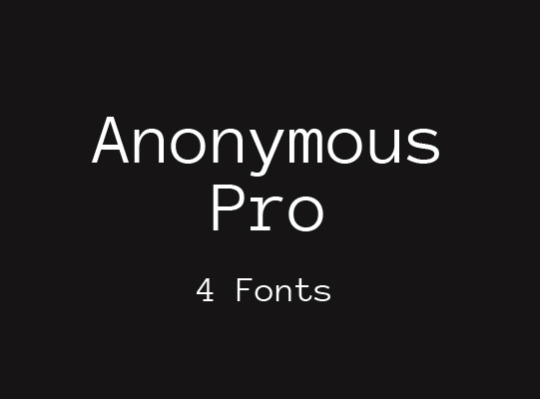
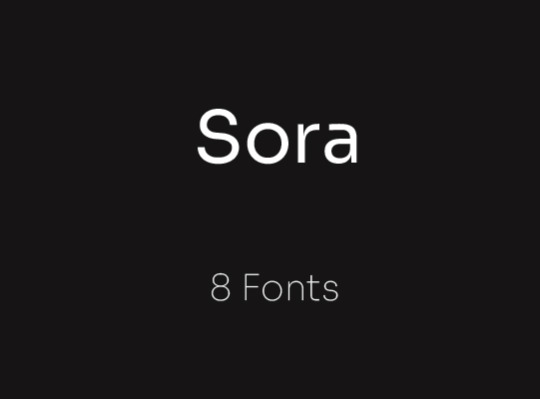
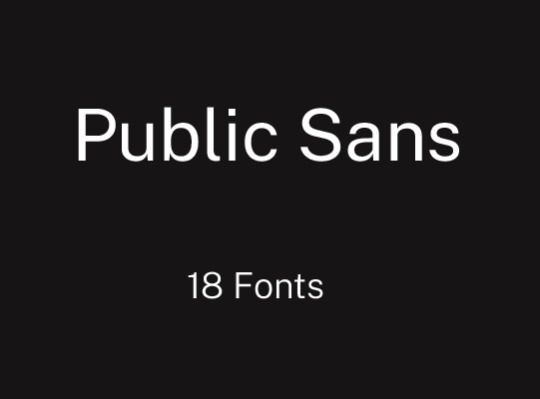
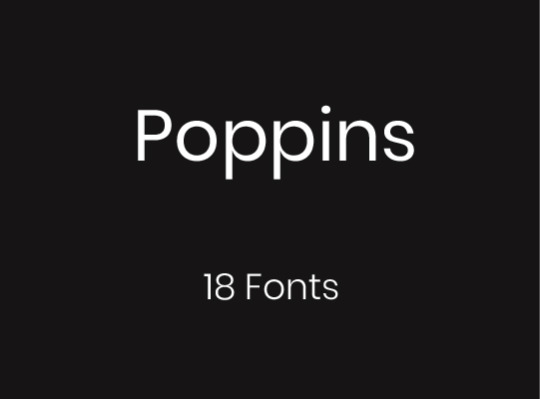
Free, High Quality Fonts for Gif Makers
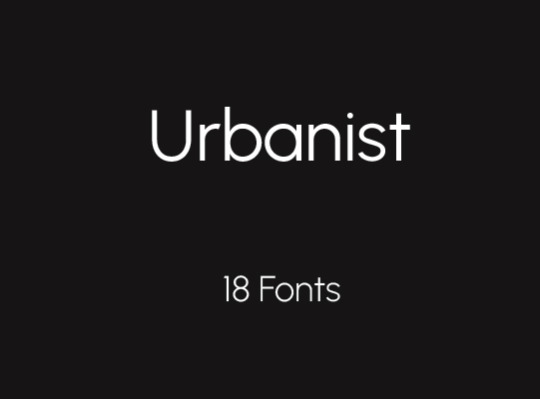
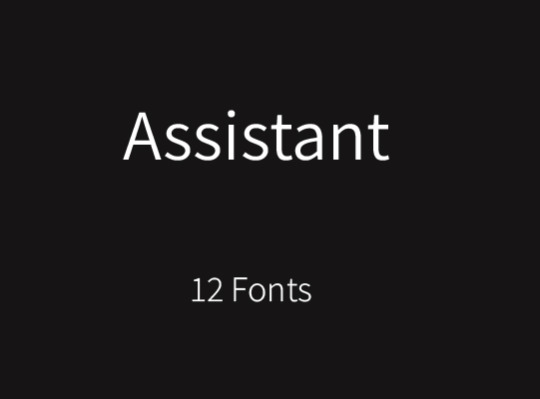
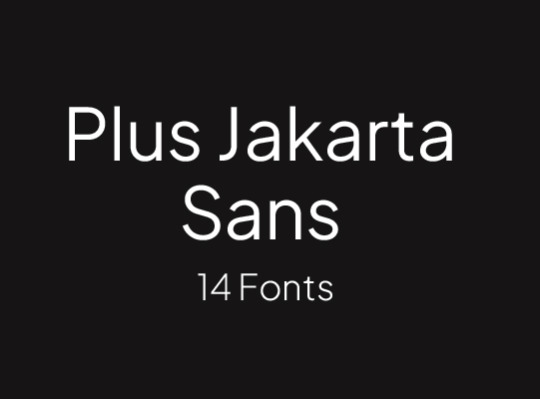
Urbanist | Assistant | Plus Jakarta Sans | Oxygen | Anonymous Pro | Sora | Public Sans | Poppins
#fonts#typeface#font family#gif edit#gif resources#resources#graphic design#gif making#text#typography#layout#completeresources#allresources#finesources
59 notes
·
View notes
Text
Animating Texts with Timeline Panel and Keyframes

Someone asked me for a tutorial on how I made this b99 gifset which involves text animation.
What you need: basic gif making skills, know your way around timeline panel and keyframes in photoshop, and a ton of patience.
TIPS: it'll generally be easier... if you know or have idea how you would want your text to be animated. Have your basic gif beforehand
This tutorial will be image heavy and very long, therefore I divided to 4 categories:
1. Make wiggly texts using keyframes and warp text
2. Make texts appear using layer mask
3. Make moving texts using keyframes and transform properties
4. Animate an object/shape
1. Make wiggly texts aka using keyframes and warp text

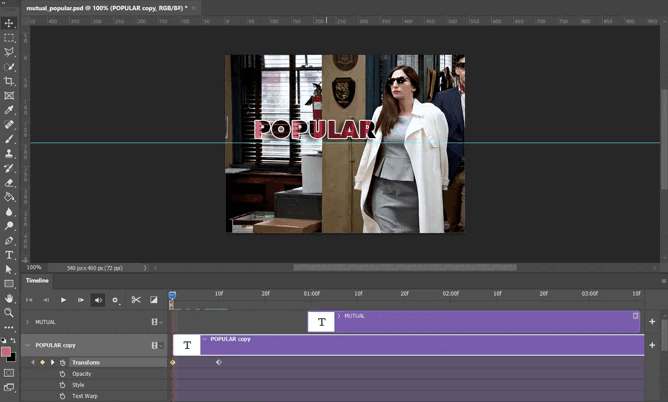
You have your basic gifs, now you want to make your texts dance. For all this to happen, you need to be in your timeline panel. Then type your text, choose your fonts and size and colour. Now the fun part!
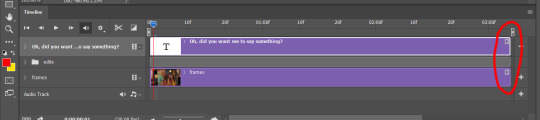
Select your text in the timeline panel and click this arrow. Your timeline panel should look like this:

Now click on the stopwatch next to the text warp. There should be a diamond/rhombus shape in the timeline panel, that's called a keyframe. Place the playhead further within the timeline and click the diamond next to the stopwatch to add another keyframe.
On the second keyframe head to the warp text and choose a warp effect you’d like to use. Edit it to your liking and click ok/press enter. Your text should be animated now.
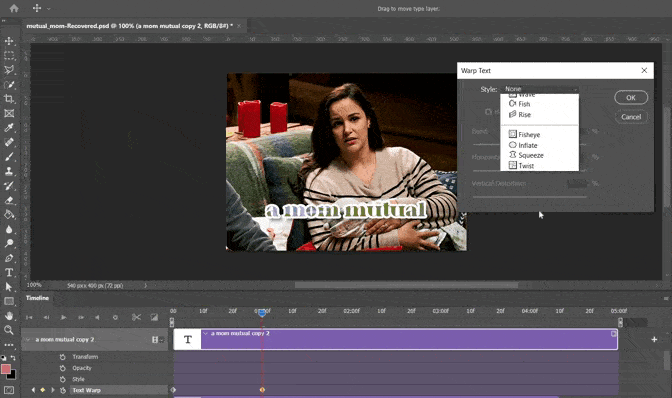
You can add another keyframe to add another movement, just repeat the step above. you can adjust the speed by dragging the keyframe.
2. Make texts appear aka using layer mask

Again you should have your basic gif and type out your text.
2a. Animate text with keyframes and layer mask (Hitchcock gif, left)
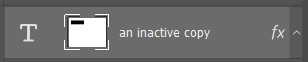
Select your text layer first. Then choose the marquee tool and make a selection as big as/bigger than your text. Press alt in your keyboard and click the layer mask button. Your text should have a layer mask as big as your selection from marquee tool and your text is hidden. Make sure you unlink the layer mask from your text layer so you can move the layer mask freely. It should look like this
Click the arrow on your text layer in timeline panel. You should see layer mask position. Click on the stopwatch to activate the keyframe. Make sure you select the layer mask of your text instead of your text layer! Then add a second keyframe by clicking the diamond next to stopwatch and press V so you can move your layer mask. On the second keyframe move your layer mask, so the text appears. If you can't move your layer mask with mouse, use your keyboard.

You’ve done it! On the timeline panel you could adjust the duration of each keyframe just drag them to anywhere you want.
2b. Animate Text with copy and paste and layer mask (Boyle gif, right)
Type out your text and click layer mask button. Make sure the black colour is above and click brush tool. You’d want to hide you text fully by covering the text in the layer mask. Your goal is like this

Now that you have your fully hidden text and erase a tiny bit. Copy and paste that layer and erase another part and so on and so on until the full text appears. It should look like this
On the timeline panel you can adjust the duration of each text layer just drag in or out to your liking.
3. Make moving texts aka using keyframe and transform properties
Have your gif ready and your text ready.
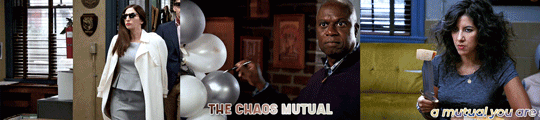
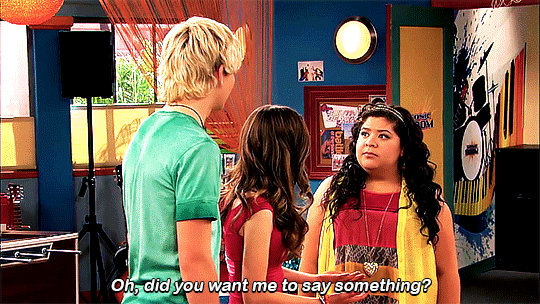
3a. Make texts come out of nowhere (Gina gif, left)
Select your text layer and click the arrow in timeline panel. You should see transform properties. Click on the stopwatch next to it. It should activate the keyframe. Drag the playhead further within the timeline and click the diamond next to stopwatch to add a second keyframe.
Now comes the tricky part. I usually have the keyframes ready first then animate the text. For this gif, I have my second keyframe to have the position and size of the text that I want it to look at the end.
Click the first keyframe and make sure the playhead is above it and press ctrl+T, now you can adjust the size of the text. Make them exceptionally big, so it appears like the text just come out of nowhere. You should double-check if the second keyframe showing you the desired position and size of the text.
TIP: don’t make the duration of this animation too long or it’ll lose its effect of sudden appearance.
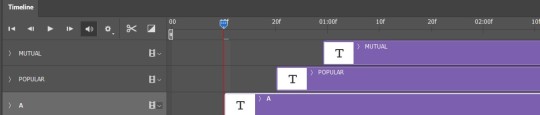
For this gif I have 3 separate text layers “a”, “popular”, and “mutual”. I did those steps on all of these texts but I arranged the texts after the other like this so they appear at different time.
3b. Make text bursts (Holt gif, middle)
This one has a similar concept with Gina gif. Except I make the text bigger on second keyframe and very tiny on the third keyframe. Set the duration to be so short, so they have the effect the burst/pop. It should look like this.

After that click on the stopwatch next to the opacity properties and ensure your playhead is above your third transform keyframe. Move the playhead a bit and click the diamond symbol next to the stopwatch to add a keyframe. On this keyframe change the opacity to 0.

I have 4 layers of text. One is the full “the chaos mutual”, then I have “the”, “chaos” and “mutual”. I separated each word bc I have 0 clue how to make the animation with them being in one layer lmao.
3c. Make a running text (Rosa gif, right)
Type the text in one layer and use the transform properties. Place the text layer almost out ouf the gif canvas and click the stopwatch for the transform properties to activate the keyframe. Move the playhead to end of your gif and then with ctrl+T, move the text layer to your desired place and press enter. It should create a second keyframe and your text should move by now.

If you're not satisfied with the second placement of the text, make sure you click on the second keyframe and the playhead is directly above the keyframe before you move the text. If not you'll create another keyframe and the movement will be messy.
4. Make crossed-out words with animating basic shape

Have your gif and text ready, and place your text wherever you want. Now create a shape, in these gifs I used line tool. Edit your shape to your liking.
Select the shape layer and click the arrow in timeline panel and you should see transform properties. Click on the stopwatch and that should create the first keyframe. Drag the playhead further the timeline and click the diamond next to stopwatch to add another keyframe. By now you have 2 keyframes.
Click on the first keyframe and ctrl+T so you could resize the shape, make them as small as possible. Double-check the second keyframe, they should retain the original size and placement of the shape.

Voila! you have animated your shape!
TIP: if you have any shape that has other formats like .png or .jpg, you should convert them to smart object first. If not your shape wouldn't be able to animate them.
This should cover most of my text animations I usually create in my edits. Hope this help! If you have any question shoot me a message
#gif tutorial#resources#photoshop tutorial#completeresources#finesources#evansyhelp#userbru#allresources#usersource#gif help#chaoticresources#dailyresources#sibylresources#userk8#hisources#resourcemarket#quirkyresources#yeahps#tracksintheam#i really hope this is understandable and can be followed through#i cant write for shit dsjab#you can also see my laptop is hanging for its dear life
299 notes
·
View notes
Text

.dancing in the sand.
hii! these psds were made by me, so please do not copy or claim as your own. you can repost if given credits! please like or reblog this post if you download, it encourages me to make more! i do not own these pictures! the credit goes to the person who took them. if you know who they are, please contact me so i can give credits.
(X)
#psd#psds#psd coloring#psds coloring#coloring psd#graphic psd#aesthetics#aesthetics psd#brown aesthetics#psd aesthetics#completeresources#ciaracoloring#allpsd#hisources#allresources#dailypsd#onlyresources#firesources#coloreds#finesources
57 notes
·
View notes
Photo
🌙 Death : PSD ® @wiiintermoon
PSD PREMIUM
Not available free !
Buy by : DEVIANTART or PAYHIP
Any problems or questions, contact me by ask or chat

#kpop psd#download psd#psd#colorize#coloring#colorized#effect#psd dark#ihaveresources#quirkyresources#finesources#dailypsd#tusermelissa#hisources#onlyresources#vannilapsds#wehearttutorials#wealphotoshop#allresources#completeresources#chaoticresources
245 notes
·
View notes
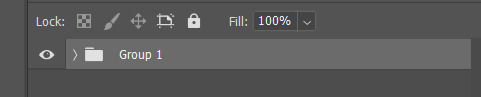
Text
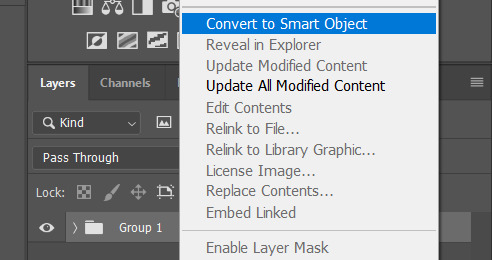
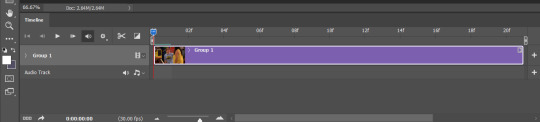
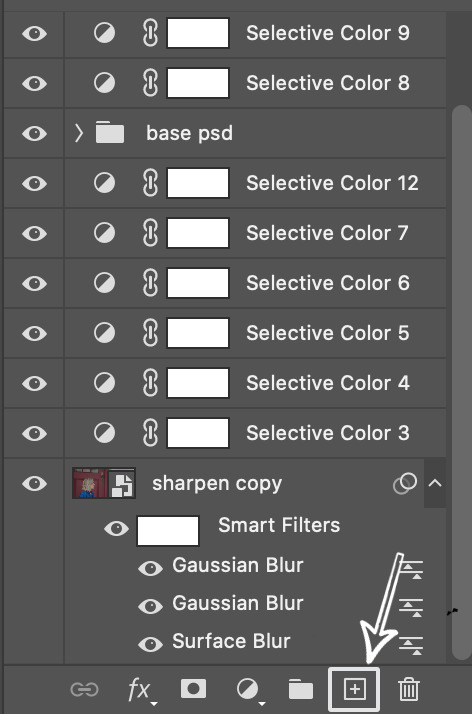
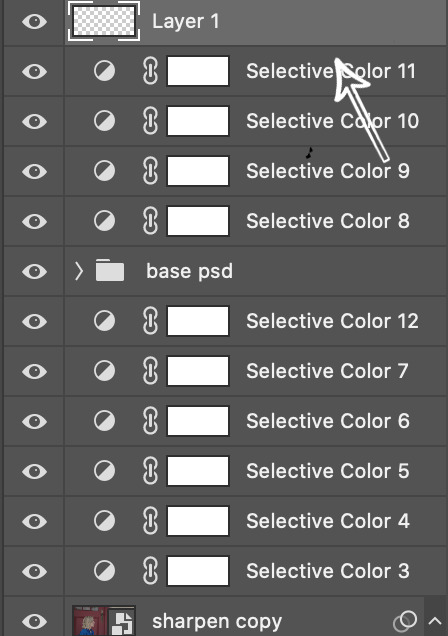
converting gifs from FRAMES TO TIMELINE in photoshop: a super quick tutorial
hi friends! as i started answering an anon just now, i went looking for a frames to timeline tutorial to include and couldn’t find one. as a gifmaker, switching to the timeline function completely changed my life, and i literally cannot imagine going back to editing with frames. the timeline function allows for lots more control, precision, and ease in the process, enables the use of keyframes, and helps with sharpening. if this tutorial helps you, please reblog it so it can help other people as well!
that being said, let’s get into it!
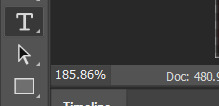
step 1: use the shift key to select all your layers in the layers panel

step 2: click the tiny lil folder icon in the bottom right to group the layers together

step 3: click the little horizontal bar icon in the bottom left corner of the timeline, right underneath the frames

step 4: right click on the group in the layers panel and select “convert to smart object”
in the end your timeline should look like this:
and your layers panel should look like this:

and now that you’re in the timeline function, you can use it for things like sharpening:

fading (with keyframes):

and tons of other giffing tricks that involve timing:
congrats! you’re a timeline master now! go forth and reach your highest giffing potential!
#gif tutorial#how to make a gif#frames to timeline#allresources#completeresources#convert gif from frames to timeline#timeline function photoshop#photoshop tutorial#gif tips#gif help#giffing#photoshop timeline#smilecapsules#tuserdi#quirkyresources#sibylresources#chaoticresources#finesources#mytutorials#waffle words of wisdom
139 notes
·
View notes
Text

PSD 30
(!) download here
Credits are not needed, but likes/reblogs are always welcome. In this way my work can be seen by more people.
As always, all the layers can be adjusted as desired.
If you have a question or a request, feel free to mesage me!
At last, thank you for the support!
18 notes
·
View notes
Photo

Requested tutorial: How to make a pale gif of Chidi Anagonye without whitewashing [click for example]
Note: If you have any questions don’t hesitate to ask me. If you have questions of another tutorial, just ask and I’ll see what I can do. And if you want me to make a .psd pack (in this case, a The Good Place .psd pack) just let me know!
From this:

To this:

I want to start off by saying that there are several ways to do this, everyone has their style. This is just the way I gif and colour to fit my “minimalist” aesthetic. There are several tutorials on how to colour BIPOC, this is simply the way that I do it and this is the way I coloured my Chidi Anagonye gifset.
To begin, I chose a scene with a solid background around the the character I’m giffing. For this example I have chosen this scene from season 1 episode 2.
Start the way you usually do, I usually start off my changing the speed of the gif, crop it, and sharpen it. Once that is done that Ie start to colour the gif.
I have a base .psd that I always start off with, and edit from there. In my base I have used colour balance, curves, selective colour, hue/saturation and brightness/contrast to make it lighter. I added these steps a few times to achieve my starting point. With the base .psd it looks like this.
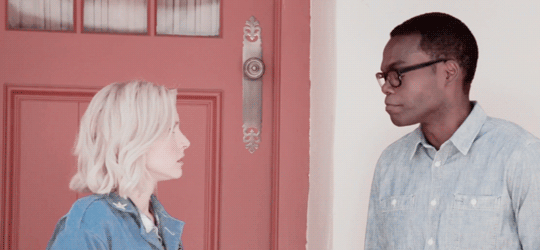
As you can see, the colour of Chidi’s skin is washed out and a bit ashy. Now I’m going to go in and add selective colour under/before the steps we’ve taken. I add the selective colour here, under my base .psd
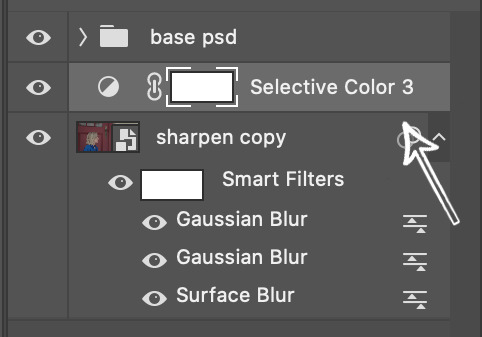
Here, I darken the red and the yellow, I play around a bit so it won’t look grainy and will be true to the colour of Chidi’s skin. Once I’ve done it a few times, I darken the last selective colour with some black so that his hair is the right colour. Now the steps look like this (this differs depending on the scene where you might need to add more selective colour or less)
Now that we have taken these steps, the gif looks something like this.

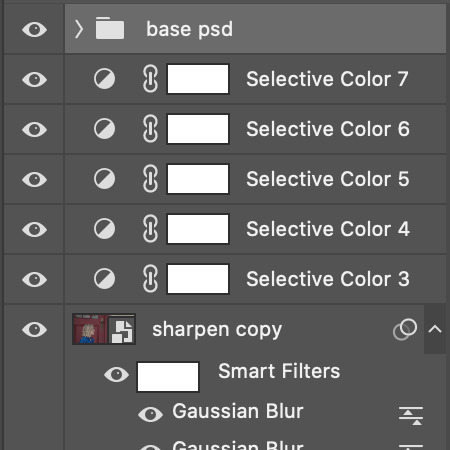
Now you can keep it like this. But I want the background to be lighter, almost white, and for only Chidi to be visible in the gif. So in order to do this I once again add selective colour, but this time over/after my base .psd. Like this:
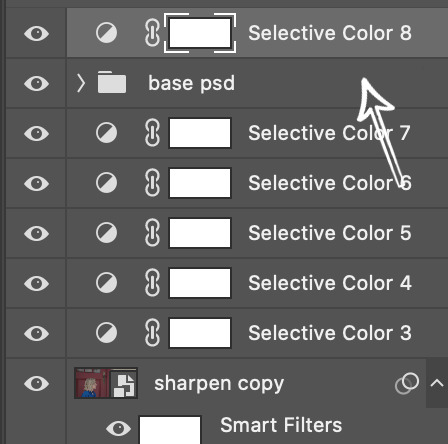
Here I start by making the white selective colour brighter, I usually do it a little every time so that it won’t get too grainy or change Chidi’s appearance. You can do this as many times as you want to reach the brightness of white that you want. Once I’ve added the white selective colour a few times, I check to see if the colour of Chidi’s skin isn’t washed out, if it is just go back to the selective colour under/before the base .psd in this image and darken the red and yellow more. Now the adjustments look something like this

I know it might look a bit much selective colour, but this is just the way that I do it. Now the gif will look something like this.

The last step (for me) is to remove the door and Eleanor from the gif and make the entire background solid. To do that I add a new layer, I click on this icon at the bottom of the adjustments bar
Now that I have a new layer over/after all my other layers here
Now that the new layer is added, I click the eyedropper tool in the sidebar (this icon)

With the eyedropper I click on the solid background around Chidi so that when I go in to colour the gif, the colours will match so that the background looks like one colour. Then I go in with the brush tool (this icon)

And now I start to colour all the areas that I want to cover in order to make the gif have a solid background. Just make sure you don’t brush the colour over Chidi. Once I’ve coloured all the parts of the gifs that I want, I double check so that the colour of Chidi’s skin is accurate and the gif should look something like this.
Voilà! We’re done!
If you have any question just send me a message ♡
#yeahps#allresources#chaoticresources#paleresource#finesources#fadenet#colouring tutorial#**resources#**colouringtutorial#**
437 notes
·
View notes
Photo


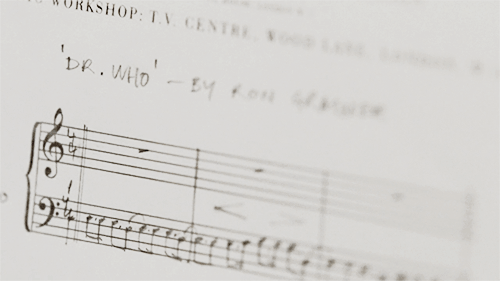
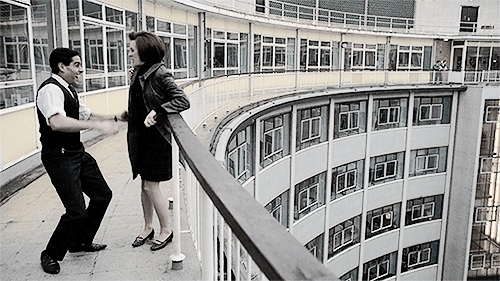

An Adventure in Space and Time (2013) | “ɪᴛ ɪs ɪᴍᴘᴏʀᴛᴀɴᴛ ᴛᴏ ʀᴇᴍᴇᴍʙᴇʀ, ʜᴏᴡᴇᴠᴇʀ, ᴛʜᴀᴛ ʏᴏᴜ ᴄᴀɴ’ᴛ ʀᴇᴡʀɪᴛᴇ ʜɪsᴛᴏʀʏ. ɴᴏᴛ ᴏɴᴇ ʟɪɴᴇ. ᴇxᴄᴇᴘᴛ ᴘᴇʀʜᴀᴘs, ᴡʜᴇɴ ʏᴏᴜ ᴇᴍʙᴀʀᴋ ᴏɴ ᴀɴ ᴀᴅᴠᴇɴᴛᴜʀᴇ ɪɴ sᴘᴀᴄᴇ ᴀɴᴅ ᴛɪᴍᴇ”
#doctor who#dwedit#usertoph#userhayf#userdiana#userhella#usersakshi#usertom#usersource#userjohn#dailyflicks#filmedit#mine:gifs#finesources#FADENET
211 notes
·
View notes
Photo

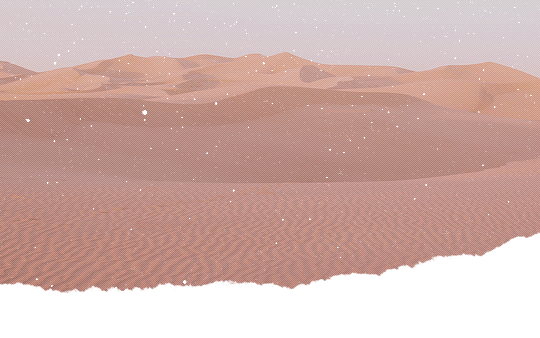
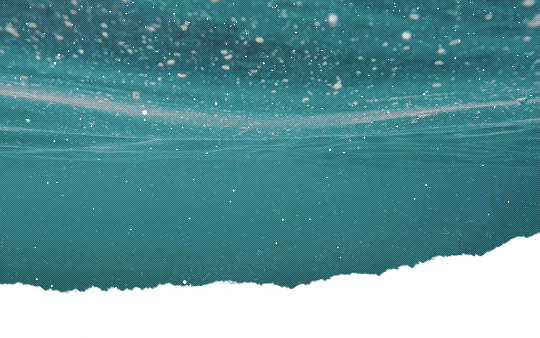
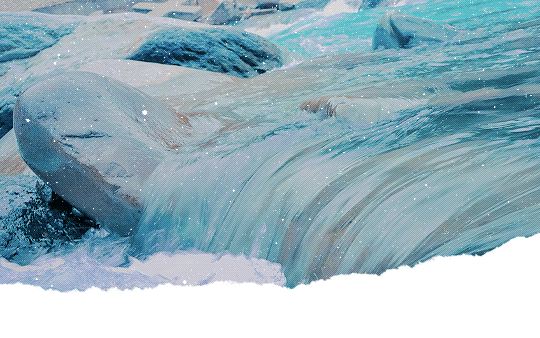
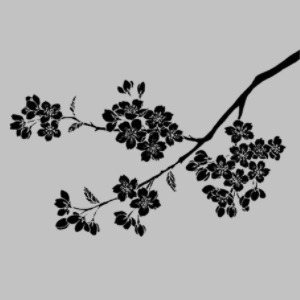
10 Nature headers under the cut *:・゚
Please like/reblog if saved and/or using
Credit isn’t necessary but appreciated!
Do not re-edit, repost anywhere or claim as your own
Enjoy! ♡


#headers#tusermelissa#resources#allresources#userdoctor#onlyresources#completeresources#yeahps#finesources#myedits#myheaders
884 notes
·
View notes
Photo


★ 7 It cast Icons ★
#i had forgotten post these lol#it icons#it cast#icons#finesources#chaoticresources#finn wolfhard#sophia lillis#jack dylan grazer#jeremy ray taylor#chosen jacobs#jaeden martell#wyatt oleff#myicons
124 notes
·
View notes
Text
sailor mars icons
hey guys! so i made a couple icons of sailor mars a while back (inspired by the lovely @sanssa) and i wanted to share it with you guys! however, i am extremely lazy and cbb to set up an icon page so you can find these icons below the cut!
icons are 150x150
please like/reblog if you use
do not repost/claim as your own
credit is not needed but is appreciated


#icon#resource#allresources#finesources#completeresources#sendbread#userhailee#sanssa#fadenet#paleresource#palenet#animationsource#allanimanga#sailor moon#animanga#fyeahshoujo#dailysailormoon#smedit#mine#mine:icon#( might make a page for icons later )
33 notes
·
View notes
Text

SPECIAL FOLLOW FRIDAY
Thank you so much for your support, you are amazing and talented. So let the halloween special begin!!!
reblogged resources
@finesources @completeresources @findingresources @hisources @dailypsd @makersleague
photoshop resources
@harupsds @peachcoloring @dewinniepsd @vannilapsds @opulenceps @sourvie @gmfioart @wasirauhlpsds @psdhampirs @psdland @atinicolors @miniepsds @wiiintermoon @plutopsd @selenapastel @photoshowski @apocalypseresources @autumngifs @auraiorpsds
edits
@cherrysource @stwbystuff @viciousedits @targarycon @focusedits @floralocks @sourvie @flighticons @f-airytale @skydiveicons @hunteredit @koreanwstuff @psdavengers @marspacks @mochiedits @kpop-locks @moldoland @marvelocks @awaregei @screensland @savagedits @editsfairchild @uwuedits @woops-icons @sabrinaicons @mengoicon @art-packs
58 notes
·
View notes
Text

.no choice.
hii! this psd was made by me, so please do not copy or claim as your own. you can repost if given credits! please like or reblog this post if you download, it encourages me to make more!
(✦)
#psd#psds#aesthetics#aesthetic#aesthetics psd#aesthetic psd#vintage#vintage psd#red#red psd#wantedreblogs#completeresources#ciaracoloring#coloreds#allresources#onlyresources#allpsd#dailypsd#finesources#random psd#psd random
127 notes
·
View notes
Note
Hello how did u edit and add subtitles to ur gifs
hi friend! thank you for coming to me with this question.
idk if you’re asking about the whole editing process or just adding subtitles, so before i go in depth about caption text, i wanna direct you towards my gif resources masterpost, where i compiled and organized a bunch of tutorials for different gif making processes. if your question isn’t answered here, its probably answered somewhere on there.
adding captions/subtitles to gifs: a detailed tutorial
(if this tutorial helps you in any way, please REBLOG it)
okay so when it comes to adding text to a gif it varies slightly whether you’re using frames or the timeline. i heavily recommend using the timeline function over frames just in general bc it allows for a lot more flexibility, ease, and precision with each effect that you add.
how to convert your gif from frames to timeline
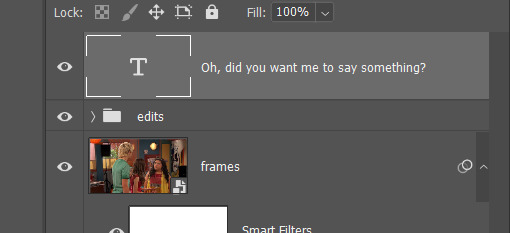
when you add caption text to a gif, you wanna make sure you’ve resized the gif first. here’s a quick guide to gif dimensions. additionally, always make sure that your text layer is above all of your editing/coloring layers.
after resizing and editing, go ahead and click the lil text icon in the tools panel on the left.
your cursor will change shape, and and then you can draw a text box on your gif. it will fill with placeholder text at first:

press ctrl+a to select all the text in the box and backspace to delete it. type in your caption text:
select all the text again and press the center icon (1) at the top of the screen to center it within the box. once you’ve done that, click the check mark (2) to tell photoshop you’re done editing the text:

now that your text is centered within the box, it’s time to center it horizontally on the gif. switch to the move tool:
and make sure your text layer is selected in the layers panel:
press ctrl+a. your entire gif should have a dashed line around it. press the center icon at the top:
(pro tip: this will work for any type of layer you want to center, not just text.)

from there, use the arrow keys to scoot your text up or down to whatever distance from the bottom you prefer:

now, let’s get into specifics like fonts, sizes, and shadows that will help make your text more clear and readable.
click the text tool icon again, click your text box, and press ctrl+a to select all your text. these are my preferred caption text settings:
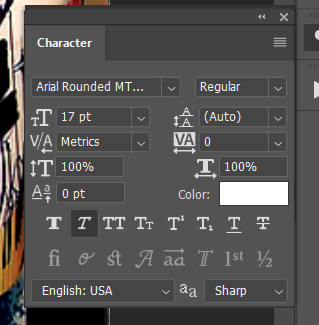
i use arial rounded MT bold font, 17pt for full size (540px width) gifs and 14pt for smaller gifs. i use the “faux italic” setting to add a slight slant.
next, let’s talk about blending. drop shadows and strokes are essential for helping your caption text show up clearly on any gif. right click on your text layer in the layers panel and click “blending options...” OR just double click your text layer.

these are my preferred blending settings for caption text:
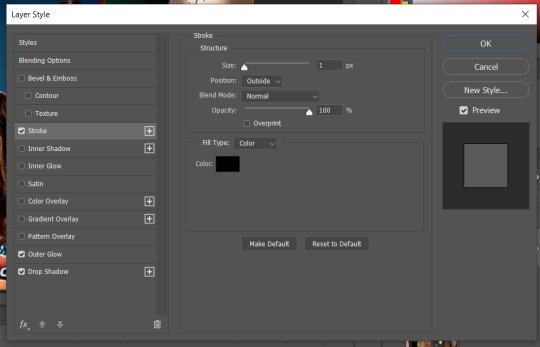
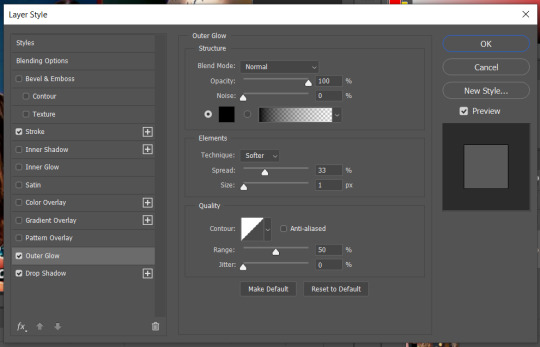
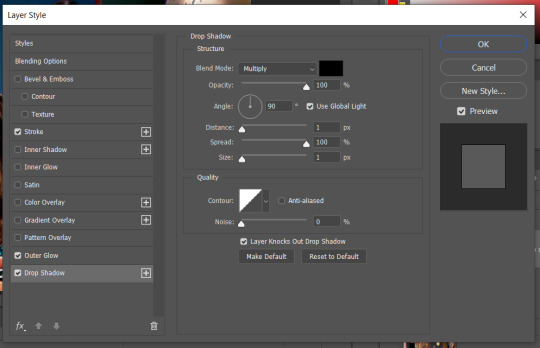
click “ok” in the top right of the panel to save the settings onto your text layer.
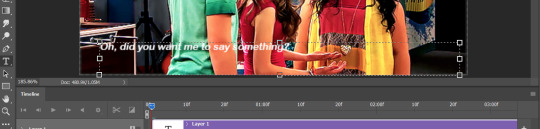
all right! you’re almost there! the last thing to do (if you’re editing in timeline) is to make sure that the length of your text layer matches the length of your gif layer.
if your timeline looks like this:

or this:
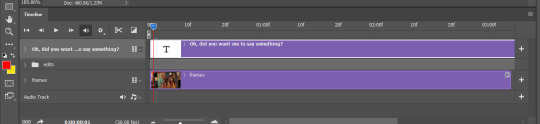
then you’ll need to adjust the length of the text layer. to do this, click and hold the right end of the purple bar representing the text, and drag it horizontally until it matches the length of your gif layer.
and you’re done! the finished product:
hope this helped!
#gif tutorial#how to make a gif#allresources#completeresources#caption text#gif caption tutorial#subtitle tutorial#gif subtitles#photoshop tutorial#gif help#gif tips#smilecapsules#quirkyresources#sibylresources#answered asks#anons#mytutorials#chaoticresources#finesources
61 notes
·
View notes
Note
i love your creations too,wish i could make some great graphics what programs do you use for gif making?
I'm using Photoshop. It's IMO the best software to make graphics & HD gifs. It's not cheap tho and you need some training to use it but it's worth it if you use it daily as I do.
Here some posts that might help :
elenaresources
finesources
Dm me if you need any help! Photoshop is my friend :)

11 notes
·
View notes
Last Seen Blogs
tristynquinn
Nicaragua

aspirant-voice
ASPIRANT-VOICE-UPSC
deceptibugs
...and autobuggies too
aggro-cucco
Salutations~♡
wtbthinn
Helplessly Hoping