#haha do y'all get it
Text
me: so i've gotta do a thing about a book coming out and it's fine but also i asked the author for an advance reader copy of the book since im quoted in it
my therapist: wait you're in a book? why?
me: oh you know, the whole The Dress thing
therapist: ...cates. im sorry, i have to derail this session. you were responsible for The Dress? like, that was you?? your post is the one that went viral???
me: yes? wait. WAIT. have i never mentioned this in the 2.5 years i've been seeing you??
therapist: CATES, NO YOU HAVE NOT. WHAT?? i've got a lot of questions and sorry but this is what we have to talk about right now because while i'm curious it'll also provide, like, SO MUCH context for how you feel about your career and identity of being a Person who Works on the Internet.
#personal#therapy is so great y'all#you get to do things like tell your therapist how you broke the internet#and how the resulting fallout was only the second worst targeted harassment campaign you've ever been subject to#'you can RANK your targeted harassment campaigns?' 'haha yeah'
514 notes
·
View notes
Text
So the wildest thing happened where @mactheactor decided to dub over (if that's even the correct terminology) the Chaos Sonic animation I made!!!!
I'm still in utter awe about this like, hands down the coolest thing ever I've been thinking about this non-stop. Hope y'all enjoy it as much as I do!!
#starrway art#sonic prime#chaos sonic#okay now that the nice text for the post is done AHHHHHHHH!!!! AAAAAAAHHHHHHH!!!!!!!!!!!#I've been screaming about this for the last 24 hours and the shock of it has worn down just enough for me to post this#NEVER WOULD HAVE GUESSED THIS WOULD HAPPEN IN A MILLION YEARS????#Sonic Prime is what got me on this long hyperfixation in the first place and I've met so many cool people in the fandom#and generally having a blast making art and it's been such a great time#so to then have Deven Mack come in and think that my stuff is awesome is such an insanely cool thing#it means a whole lot is what I'm trying to say haha#I do have to like microdose on this video because it makes me so incredibly happy that I get very overwhelmed by it#In a very good way though it makes me want to run laps outside#thanks to everyone I've met/interacted with so far being some of kindest people y'all are awesome#idk if this post is even like coherent I've been writing it in my mind for the past day because I have no idea how to even go about this#ok good night hehehe
190 notes
·
View notes
Text
this is a long shot and i'm sorry to ask, but if you don't mind, can mutuals (or contacts or regulars... just... this community) of mine who aren't jumping ship like... let me know? will any of us still be here? is it over? i'm trying to know if this really is it or what's... even happening. i hate to reassurance seek but i'm feeling pretty miserable and confused.
edit: felt like i was being really pitiful and fragile making this but everybody is being so nice to me and responding so patiently with all your thoughts and i'm in tears of gratitude thank you thank you thank you 💖
#i glanced and thought they brought out a feature so that we could turn off ai access#that seemed... okay? i thought? but now i'm really confused. i don't know. i'm so tired and scared. i just can't... keep doing this#i know this is stupid but this feels like it's my fault.#it happens every time i find something. if i'm happy somewhere. it just.... poof. goes away. i'm sorry. i'm sorry. i'm sorry#on the edit: i would only *ever* think this about myself. double standards that i hold for myself are high. i expect emotional control#& performance from myself only. i would never think badly of anyone else being stressed about this or anything. thank you for your kindness#this community has been so beautiful and kind at every turn. i'm so grateful to get to be here and meet you all#okay... being really sappy now. y'all get to see my anxiety first hand today!! whee!! anyway. i'll get it together. haha! thank you.
118 notes
·
View notes
Text
last line tag
tagged by @jesuisici33 @thewolvesof1998 @daffi-990 @jamespearce9-1-1 @lover-of-mine @hippolotamus @disasterbuckdiaz 💖💖
___
It’s a good few weeks, and it feels like everyone’s back on track, settling into their lives again, figuring everything out one day at a time. Buck’s happy. He has his awesome girlfriend, his best friend seems finally more at ease, even if the divorce is adding some stress, and his other best friend is happier than ever with his mom around. Everything’s finally starting to go great.
And then it all gets disrupted again.
___
no pressure tags: @elvensorceress @gaydiaz @diazass @thebravebitch @silentxxsoul @shortsighted-owl @eddiebabygirldiaz @arthursdent @diazblunt @911onabc @spagheddiediaz @housewifebuck @gayhoediaz @rogerzsteven @watchyourbuck @monsterrae1 @honestlydarkprincess @underwater-ninja-13 @eowon @exhuastedpigeon @weewootruck @loserdiaz @evanbegins @steadfastsaturnsrings @ladydorian05 @malewifediaz @pirrusstuff @theotherbuckley @911-on-abc @spotsandsocks @hoodie-buck @giddyupbuck @wildlife4life @fortheloveofbuddie @nmcggg @diazpatcher @jeeyuns
#the alive shannon fic#last line tag#buddie wip#buddie fic#wikiangela writes#my writing#fic snippet#clearly struggling to segue into the bombing lmao#my wips#skipped wip wednesday so have a lil line haha#thought id have the bombing written already but need to start getting ready for work so i guess writing's done for today lmao#i might be a little absent from the writing games in the next few weeks bc im just so exhausted lately lol#this scene I'm writing is so disjointed and out of order rn and i hate it i need to find more time to write it properly haha#but pls keep tagging me i love reading y'alls wonderful snippets!!#also what do we think shannon's job could be bc im trying to figure it out and have no clue lol#(also i have to actively remind myself of ali's existence and i can't wait until the break up so i don't have to anymore lmao)
66 notes
·
View notes
Text
So you wanna sell your art on Redbubble but you don't know how?
(Or, I meant to write this months ago but better late than never lol)
OKAY okay. I have a bunch of friends as well as mutuals who have lovely lovely art and have considered selling it online (specifically on Redbubble lol that's what's being covered today anyways) but don't really have any clue how RB works, if it's right for them, or what to expect. SO I'M HERE TO GUIDE Y'ALL THROUGH ALL THE BASICS and hopefully, if I've done my job right, this tutorial will help you set up your RB shop and start selling your art online (or help you decide that RB isn't for you lol).
Table of Contents:
What the heck is RedBubble and should I use it?
How to make your account and set up payment
How to add a new work
Pricing? Markup?
Extra: Checking sales and payment history
Extra: Taxes and copyright, in case that scares you.
Extra: The Partner Program (or how to make "officially licensed" fanart)
What the heck is RedBubble and should I use it?
>> RedBubble is a site that allows you to upload your artwork and sell it on quite a variety of different products.
>> The main benefit of using RedBubble, aside from reach and visibility, is that RB handles *everything* when it comes to the manufacturing and shipment of your product. You are literally not responsible for anything other than making the art, uploading it, and deciding how you want it to look on different products. If there is any kind of problem with material quality or delivery (though in my experience they're pretty good with both of those things), it's not your responsibility to correct!
>> RedBubble does not charge you to sell on their site, but they do set a base price for all products to cover manufacturing and to ensure that they make some level of profit for each sale. We'll look into the specifics of this in a later section when discussing pricing and markup, but it would be considered pretty standard, for example, for an item to cost $20 and you to make $4-$5 upon making a sale.
>> At the end of the day, whether or not RB is right for you largely depends on whether or not you feel their pricing and payment is fair, and whether their available products correspond to what you wish to sell.
Okay, so how do I get started?
Well first you're gonna need an account!
>> Head over to the RedBubble main page and click "Sign Up"

>> Select "Artist Signup"
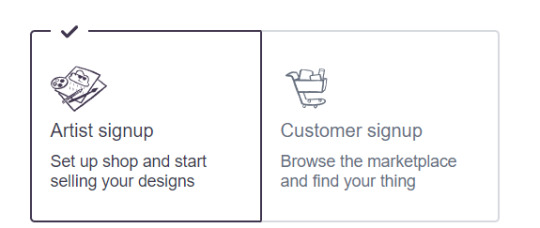
>> Fill in your email, shop name (this is your username also), and password
>> Click "Sign Up"
>> You will be brought to this dashboard page:
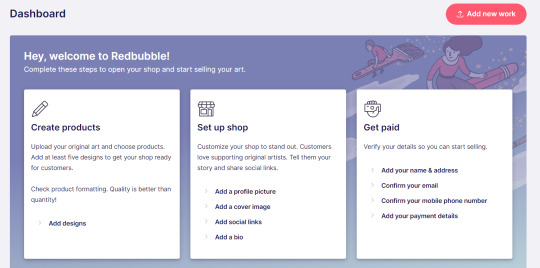
>> We will discuss creating products in the next section. Everything under "Set Up Shop" is optional and I'll let you explore that on your own so we can focus on the essentials. That just leaves... Getting paid!
>> First, check the email you used to confirm your email address. If you didn't receive an email to confirm your email address, don't worry, we can resend the form- keep going with the steps for now.
>> Then, under "Get Paid", click "Add your name & address". Note that all of the options in the "Get Paid" section actually lead to the same form, but selecting this option starts us near the top.
>> Fill out all the fields on this page. If you didn't receive the email to confirm your email address, click on this button:
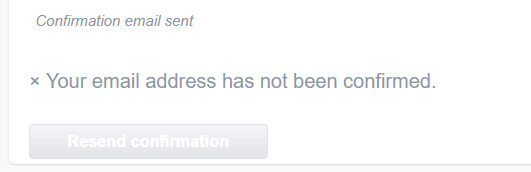
Then check your email again.
>> Note when choosing your payment method: if you are from Canada, like me, then paypal is your only option. Same for parts of Europe that aren't in the UK. Otherwise, you also have bank transfer options:
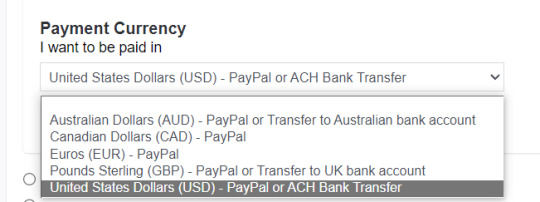
>> Once you've finished filling in everything on this page, click "Save Changes" at the bottom and... That's it! Now you can get paid :)
**Note: I believe RB still requires you to make a minimum amount of money before they do a transfer (for me in Canada I believe it's $20 CAD?), so do keep that in mind!
>> Payments are made to your account monthly, generally on the same day every month (assuming you've made profits!).
How to add a new work
So you've made your account, fantastic. Now you're ready to actually add your works to RB and make them available for purchase to the wider public! To demonstrate the process, we're gonna use our pal Nicky here (who was a gift from my lovely friend @llumimoon) and pretend that we want to upload him:
Ain't he a doll? Anyways, let's begin.
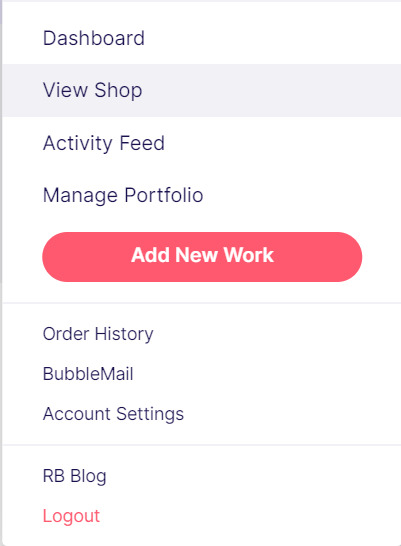
>> Hover your mouse over your pfp in the top right corner to make this drop down menu appear:
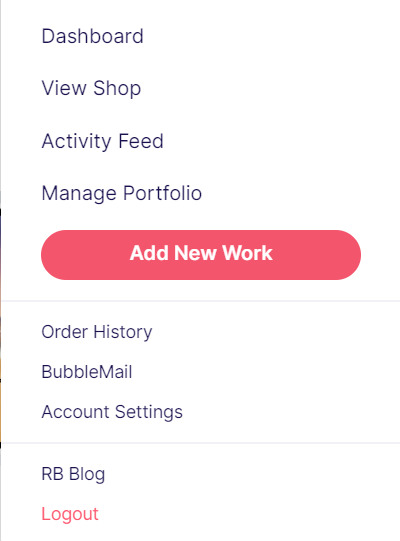
>> Click on "Add New Work"
**On a new account with nothing uploaded, this will look a bit different. instead choose "Sell Your Art" from this dropdown menu, then "Add New Work" from the top right corner of the same dashboard page from earlier.
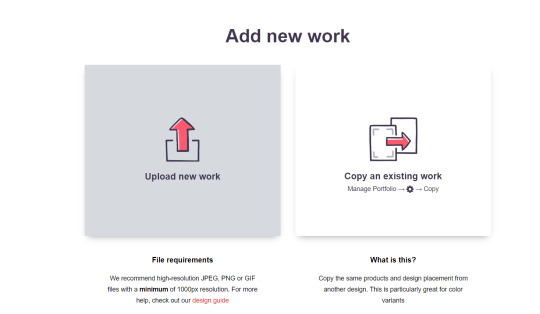
>> Click on "Upload New Work" (and note the file type and resolution requirements at the bottom. I always stick with PNGs, but in theory JPEG or GIF works as well.)
>> Select the file of the image you want to upload. In our case, that's Nicky.
>> Now write a title for your work, tags, and a description if you want. The tagging system is how people will actually find your work, it works a lot like Tumblr's! Try to choose things that are relevant to whatever your piece is. If you're uploading fandom-related art and aren't sure what tags are used for your fandom on RB, try looking some up and seeing what generates the most relevant results!

>> You may have noticed the "background color" section right below Nicky. This sets the default background color for your piece on different products. We're gonna keep this as the default white here, and I'll show you how to adjust this for individual products very soon.
>> Scroll down. This is where we decide what products we want this design to be available on and how we want Nicky to look on each thing we've enabled.
For example, if I were actually selling Nicky here (if that wasn't clear obviously I'm not actually selling my friend's art lol don't do that ofc) I would definitely want people to be able to buy him as a little sticker :]
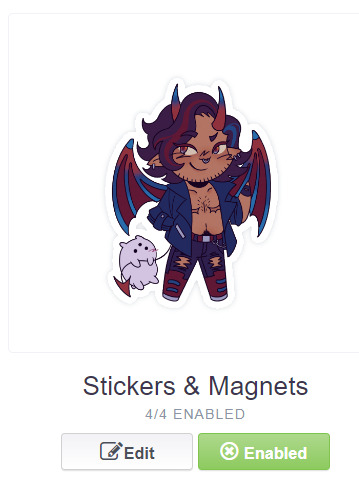
>> In this case, "Stickers & Magnets" have been enabled by default. If you wanted to disable them, you would simply click that little "Enabled" button. Similarly, if we want to enable a product type that is disabled, just click that same button (which will be grey rather than green and say "disabled").
>> If a product is disabled and you are being prevented from enabling it, that's because the dimensions of your image are too small for the product in question! You'll wanna resize your image (preferably in a manner that retains its resolution of course) and come back.
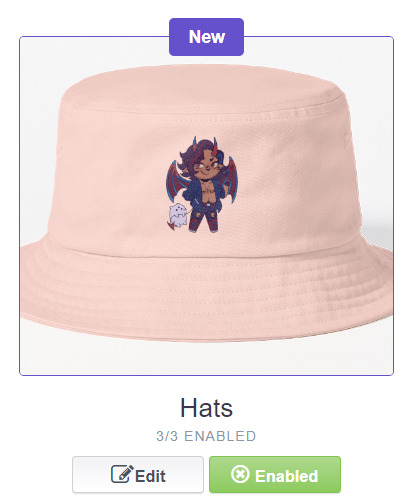
>> Hm. Let's use the hats here as an example of how we might make edits to the layout of a specific product.
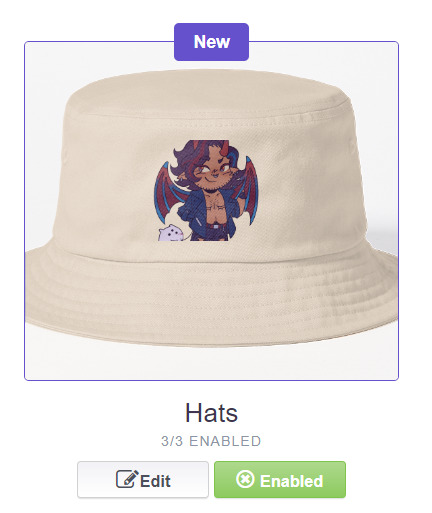
He's kind of cut off, as you can see actually that's pretty in-character, and I think I want this hat to be pink rather than this default beige-looking color.
>> Click on "Edit"
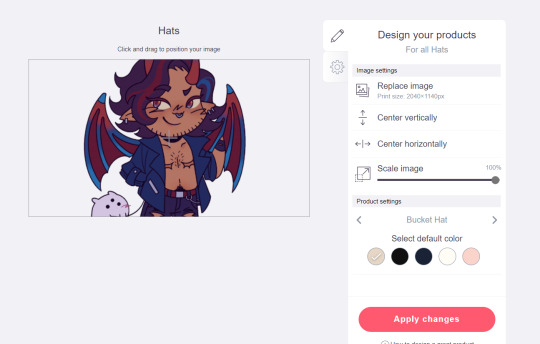
So, the first thing I'm gonna do here is use that "Scale Image" slider to scale him down a bit. I'm also gonna click the image and drag him up a bit to re-center him.
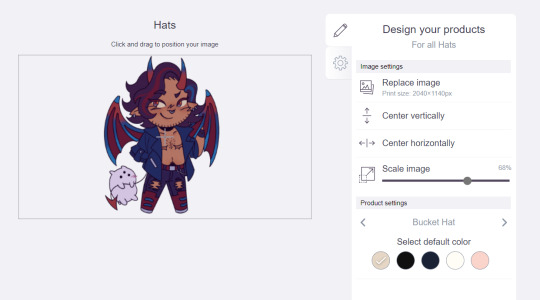
Next, I'm gonna pick from one of the default colors and choose the pink one.
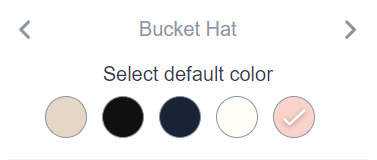
>> Notice the two arrows beside the words "Bucket Hat"? This lets me go through the different types of hats available and change the background/base color for each of those, like the dad hat:

>> Before we apply our changes, click that little gear icon right under the pencil icon
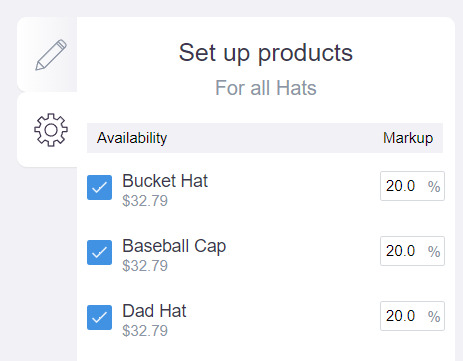
>> This lets us adjust the markup price for each individual hat. It is 20% by default. Changing the markup percentage affects how much you will make off of a sale, as well as how much your product will cost. More on that in the next section!
>> Click "Apply Changes"
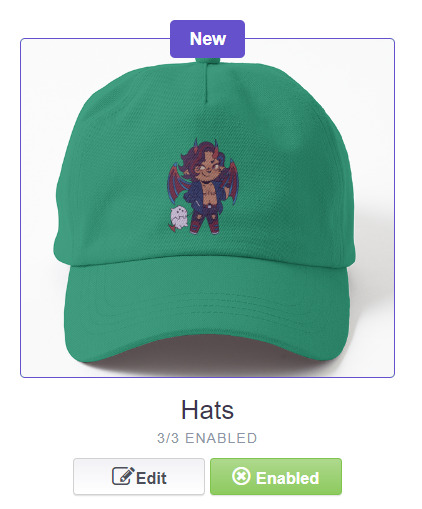
The "dad hat" was the last hat I had selected (when setting its color), so the display has changed to show that one in the preview. Here's our bucket hat from before:
Nice!
>> The specifics of how you can adjust your design will vary depending on the product. With pillows & totes, for example, the editing menu looks like this:
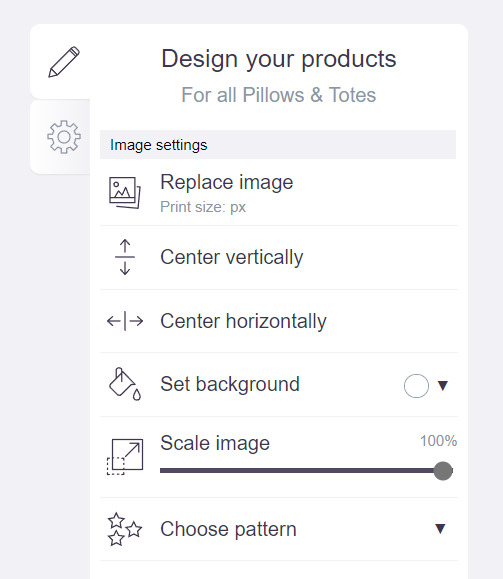
Using the "Choose pattern" option, I can make the Nicky image repeat as a pattern like so:
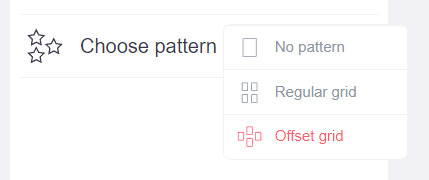

(note that I also scaled the image down a bit here too).
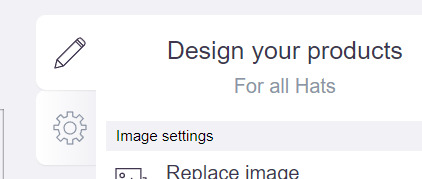
>> One last thing. See that "Replace Image" button near the top?
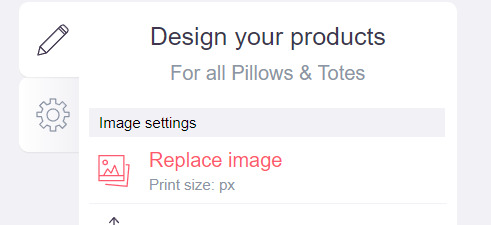
You can use this when you want to use a different version of your image altogether for a specific product.
>> That's the gist! Play around with the settings for each item as you see fit. You can always edit them again later.
>> Scroll down. Select up to 2 relevant media types.
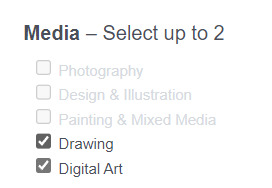
I'm pretty sure this affects search results when users choose specific filters, but tbh otherwise I don't think it's all too important.
>> Let's look at what remains.

>> I have the "Who can view this work?" section set to "Only You"- THIS IS SO I CAN FINISH THE STEPS HERE AND SAVE THE WORK WITHOUT ACTUALLY MAKING IT AVAILABLE TO THE PUBLIC. In practice, you'd only use this option if you wanted to buy your own work on something but didn't want other people to be able to see or buy it. Otherwise, you're always gonna choose "Anybody (public)".
>> Collections can be created to organize the pieces in your shop (for example, by fandom), but we won't cover the specifics of how to do that here.
>> Set whether or not your work contains "mature content".
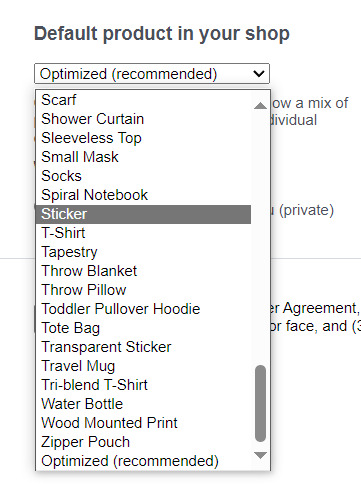
>> If you want, you can set which product shows up in the preview for your work when people view your shop. If you think your piece looks especially nice on a mug, for example, you can make sure that's what people see first.
>> Finally, agree to RedBubble's User Agreement (read that little blurble, since that's basically all you generally need to care about when it comes to what you can and can't sell on RB, but more on that later).

>> Click "Save Work" and voila! Your piece is now available in your shop, and can be found in the search results of whatever tags you left on it (this may take a few minutes to take effect).
>> If you want to check out your design in your shop, navigate to your pfp and click "View shop"
>> Don't fret if the design doesn't appear in your shop right away! Again, this can take several minutes.
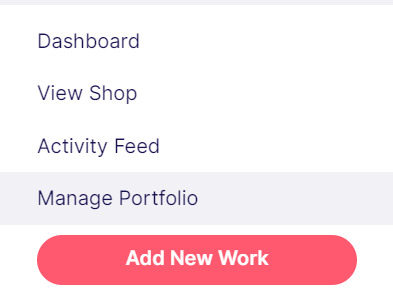
>> To edit your design again (and to view/purchase privately uploaded designs like Nicky here), click the "Manage Portfolio" option instead:
>> Here is Nicky as he appears in my portfolio (again, your portfolio and your shop are different things- Nicky will not appear in my shop at all because he is set to "private")

>> You can click that little gear icon to do a variety of things, like return to the editing menu from earlier. The three icons below Nicky refer to the amount of comments, sales, and likes your design has received in total.
>> Click on your design either from your shop page or your portfolio page. Wow! Your cool art is now available on all the products you enabled. Be sure to look through them and make sure that everything is to your liking!
Pricing? Markup? What's that about?
Well good tumblr user, RB handles everything regarding the production (and shipping) of your product, which means that they set a base (minimum) price for every kind of product to account for materials and production, and of course make some amount of profit themselves. The *markup* is a percentage that you the artist set (see the previous section on how to do so), and will determine how much you actually make off of a sale. Note that increasing the markup price means that your product will increase in price as well!
>> An Example (using hypothetical but more or less realistic numbers):
Let's say that the base price (0% markup, i.e. no profit for you) of a phone case on RB is $15. You set the markup to 30%. 30% of 15 is 4.5, so the public price is increased to $19.5, and if anyone purchases this phone case with your design on it, you will make $4.5.
And that's really the gist! Ultimately the markup price is up to you and what you feel is reasonable, though RB sets it to 20% by default.
Extra: Checking sales and payment history
Eheh, unfortunately I've reached the image limit for this post but:
To check your sales:
>> Click on your pfp
>> Click "Account Settings"
>> Under "Artist Tools" (on the left side), click "Sales History"
To check your payment history:
>> From the same "Artist Tools" menu (see above), click "Payment History"
Extra: Taxes and copyright, in case that scares you.
>> Do I need to report the income I make on RB when I do my taxes?
Yup! But dw, it isn't anything special. I mean, I'm not here to do your taxes for you, but money you make on Redbubble counts as "Self-Employment Income", same as if you sold your art just about anywhere else really!
>> So what am I actually allowed to sell on Redbubble? Is fanart okay?
Generally speaking... Yes! Obviously work should be your own, and it should not contain any company logos or names that you don't have the right to, nor photos of actual people unless you have their explicit permission.
>> Hm, okay, but what if I *do* accidentally sell something that isn't allowed?
In most cases, it'll just get taken down 👍. And no, you won't be asked to pay back any profits you made off the work in the meantime.
**A more extreme case: Story time. So, years ago a friend of mine uploaded some official Rick and Morty art that he forgot to set to "private". Overnight he made... Let's just say he made quite a bit of money. RB responded by taking down the work and banning his IP address, effectively preventing him from ever selling on the site again. But they still let him keep the money he made, and he didn't get into any actual trouble outside of that. What I'm saying is, even if you really fuck up, it'll be alright. And again, this was a pretty extreme scenario.
***Note: if your work falls under one of the brands in Redbubble's "Partner Program" (see the next section), it will be temporarily removed from the search results and your shop while it undergoes review. So don't panic if you see your fanart suddenly disappear from your shop!
Extra: The Partner Program (or how to make "officially licensed" fanart)
Very briefly, Redbubble has their partner program, which I won't explain in full detail here, but basically it means that if you upload a work and tag it as one of these brands, it will be inspected for review and, upon passing that brand's guidelines, will be considered "officially licensed" merch for that brand. Just felt worth mentioning!
So that's really the gist folks! There's certainly much more to play around with when it comes to RB, but that's all you need to know to get started! Hopefully this was useful? Hopefully lol. In any case, good luck out there!
#*breathes* OKAY#gee I sure do hope this is actually useful lol#artists on tumblr#redbubble#selling art#idk what to tag this as lmao#baba's tutorials#<- new tag ig lmao#if y'all have other questions (especially friends and mutuals and followers) feel free to reach out and I'll answer what I can!#so if you're wondering. yes I've sold on the site before. no you don't get to know what haha.#bought a lot from RB too- their shit's good quality!#but to be completely clear ofc I don't speak on their behalf haha this tutorial exists so that I can buy more of my friends' cool art lmao
30 notes
·
View notes
Text
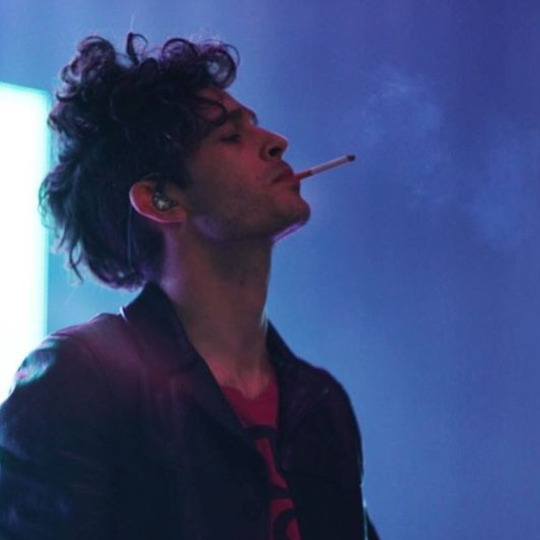

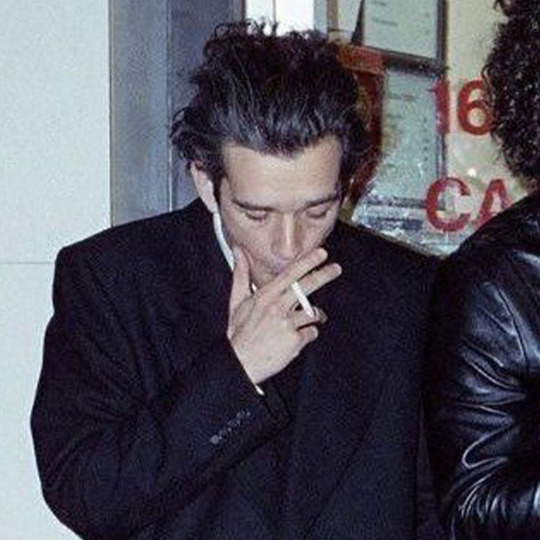

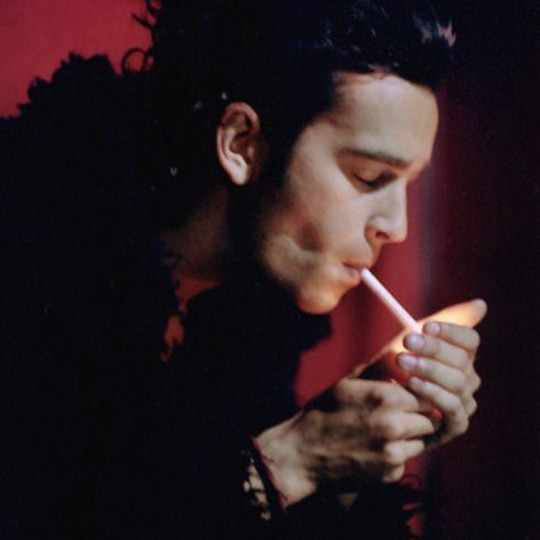

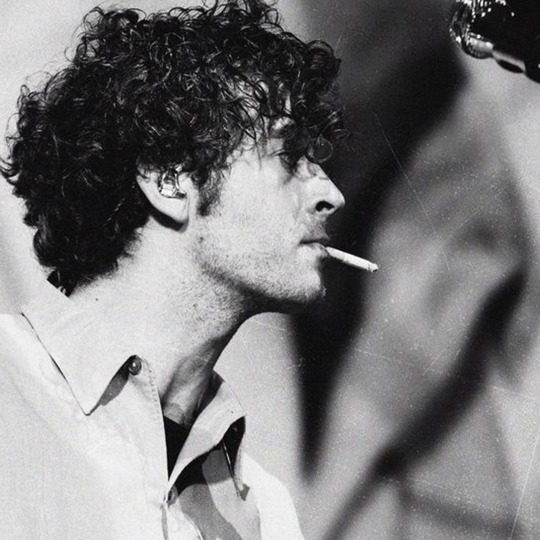
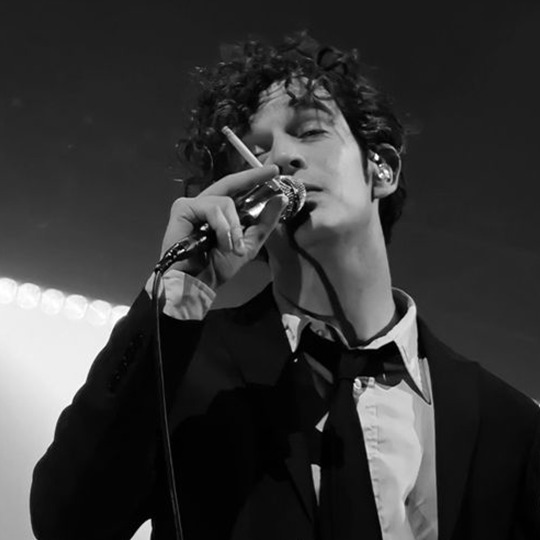


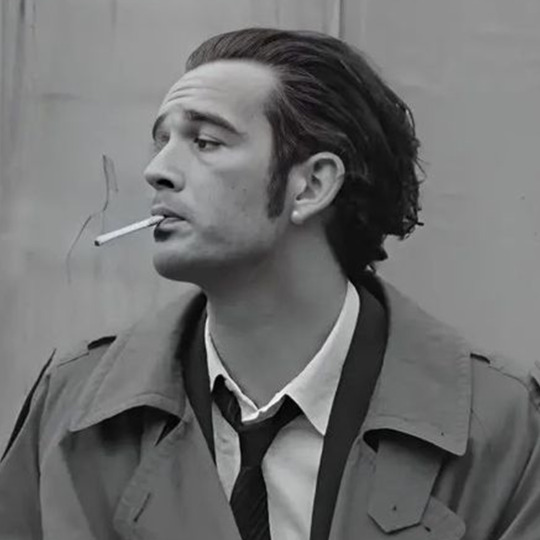
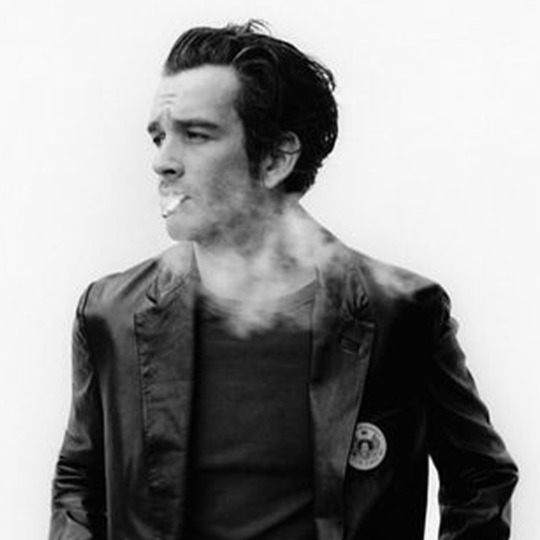
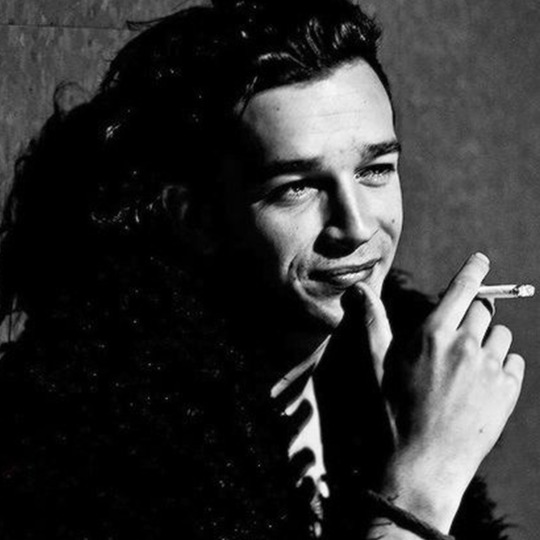
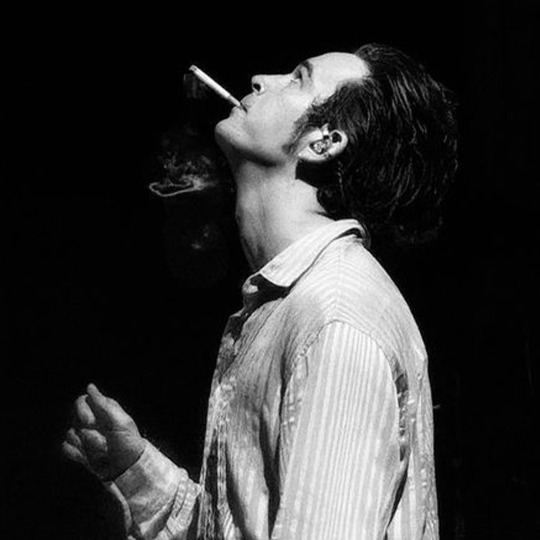
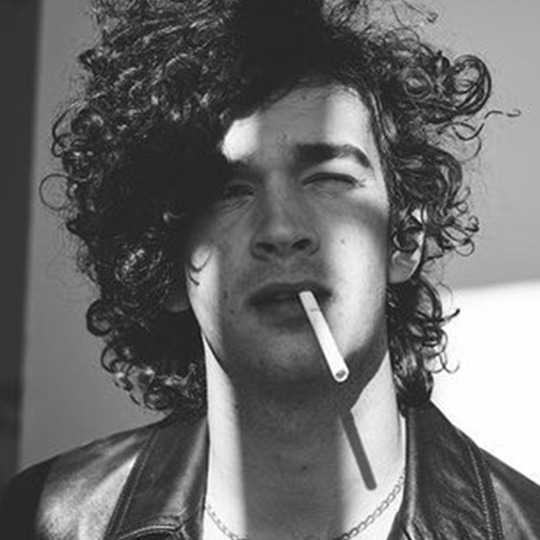
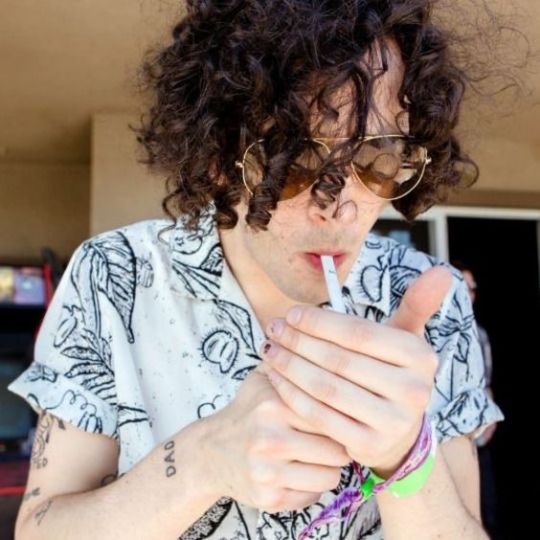


the way i'd immediately pick up smoking if he asked me to lol
#these are fun to do haha#hope y'all don't get sick of them#matty#matty healy#the 1975#a matty collection
22 notes
·
View notes
Text
i have GOT to stop going and checking out the notes on... that one post.... but it's CRAZY to me that people keep reblogging it very seriously being like "HOW CAN PEOPLE LIKE HENRY HE MURDERED 20 CHILDREN"
you mean the fictional child murder?? you mean the fake fictional child murder?? you mean the fake fictional telekinetic sci fi child murder by fake fictional telekinetic sci fi murder man on fake fictional telekinetic sci fi horror netflix show stranger things??? YOU MEAN THAT FAKE MURDER???
no you're so right there's never once been a history of fandoms liking a guy even if he did a bit of fake fictional murder what an insane concept
#one of the members of the fan club found it and was very seriously defending themselves in the notes too#like “I NEVER SAID IT WAS COOL THAT HE MURDERED THOSE KIDS I LIKE HIM BC I THINK HE DIDN'T DO IT”#which like I get why you're rolling up in defense since the post is calling you fucking crazy but the defense itself is also funny as hell#bc it's just not that serious lmao. stan him AND the murder if you want idfc#in fact I think the fan club is a bit annoying and I'd probably like them better if they DID think he murdered all those kids#say it with your whole chest. child murderer jones murdered all those children and he's my pookie#but like. I'm sure plenty of people are reblogging it lightheartedly like ''yeah haha funny#he murdered a bunch of kids and people edit him with cat ears or whatever isn't that crazy!'' but like. some people seem like#they're taking it seriously lol#and it's just like. not that serious lmao I'm sorry this is our most hysterical discourse yet#I don't even really LIKE the fanclub but wtf lol#anyway. y'all ever heard of like. a horror slasher fandom?#should I main tag this?#nah. I want to a little bit but I should not#ok nvm I will#I will regret it maybe but I'll do it#stranger things#byler#henry creel
62 notes
·
View notes
Photo
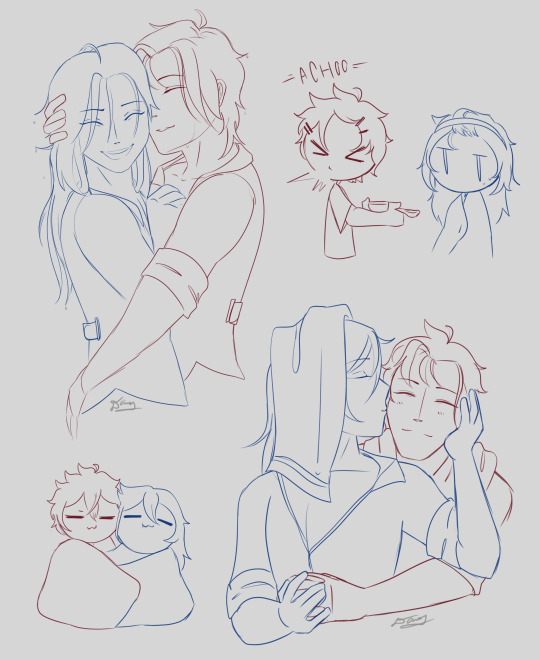

[blasts you with miscellaneous rinky doodles from our heartbeat event]
#enstars#rinne amagi#niki shiina#rinniki#insanabean#this was just supposed to be an extra funny haha thing but it made me ill so now y'all get subjected to it too#the last bunch are just gesture sketches 'cause. i couldn't do it i couldn't fucking do it#also 'cause i've spent the entire week drawing rinky so i have less than 2 days to read two chapters and answer 123 questions#and exam monday-wednesday (i can choose between which of those days to take it but. still)#yahoo#[throwing gays onto your dash again]#they are in love and it makes me sick (affectionate)#this does not add to the note count btw i am aware we surpassed 1500#but due to the previously mentioned reason on top of the editing required it. it's gonna take me a minute#hopefully by the end of next week but no promises
96 notes
·
View notes
Text
okay, i know i’ve rambled about this before, but i don’t care.
i just wanted to say thank you to everyone who leaves such nice comments on my art. seriously, the käärijä fandom here on tumblr is probably one of the nicest ones i’ve been part of.
i originally thought i would post one, maybe two drawings here and that’s it.
but all your nice comments gave me so much motivation to make more, it’s insane.
there were times, when i would draw one picture in an entire year, now i’ve drawn nine pictures in the span of a month and i still haven’t lost my motivation.
which is incredible, especially considering, that i have been doing really bad mentally for a while now, and i usually don’t touch a pen during those times at all.
so yeah... i appreciate you all so much, you have no idea!
seriously, thank you! ♥
#i never expected this kind of feedback#i thought my stuff would get a handfull of notes and that's it lol#i don't know if anyone will even read this but whatever#i just had to say it#y'all are the best#i would honestly love to interact with you more#but i've got some severe social anxiety and that makes it kinda hard haha#anyway i'll stop being sappy now lmao#do i tag this?#ah why not#käärijä
66 notes
·
View notes
Text
I typed up a response to like four different super sweet asks I got and compiled them and then tumblr dumped them in the shitter and now they are gone, so I guess just, overall thanks to @mmarycontrary, @wendycomet, @uncannycory.....oh no I don't have screenshots of the other couple of them still pulled up oh no QoQ BLANKET THANKS FOR THE INCREDIBLY SWEET MESSAGES I'M SORRY.
#somebody said they've been following my main for like ten years which like#holy shit my dude were you around when I was doing individualized welcome art for every follower??? a long-hauler damn#So glad I can continue to help y'all stay entertained and get vicariously Soft Touched via fictional lads haha#one of the many services I provide
24 notes
·
View notes
Text

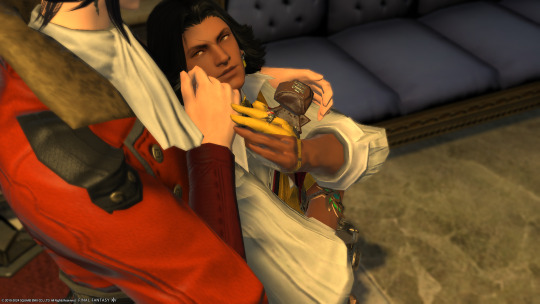

Let there be damage ensued and tabloid news
In that kind of love
#ffxiv#nero plays ffxiv#gpose#nika perseis#artoirel de fortemps#wolship#wolartoirel#nika x artoirel#ffxiv wol#hyur wol#if you look at nika's thumb for long enough i will combust so please don't#the amount of trouble i had with his hands is immesurable#if you told me 30% of gpose is posing hands i wouldn't believe you#but here i am#posing. fucking. hands#anyways. haha they again#when i get a hang of expressions it's over for y'all#jk jk#i do think it's fun tho#and they are in love so#you just know artoirel's an anxious mess sometimes and he will not show it but he will Hug Husband about it#and for the first time in his life nika senses others' distress. revelation.#i love them sm
6 notes
·
View notes
Text
Sometimes I look at other Countryhumans fans and wonder if we're in the same fandom
#NEED y'all to remember these are also whole ass countries with history when you characterise them#Croatia characterizations piss me OFF sometimes#buddy these people celebrate operation storm😭😭😭#I won't say Serbs are any better either some of them mfs want a second srebrenica#but it's always “haha Serbia warcrime haha😂”#never ONCE did I see the Croats get the same treatment we do#also the characterization of Kosovo??? lol#“Serbia's ex” buddy#what#help#WHAT led you to that conclusion#“oughh but if Kosovo is Serbia's child that implies-” buzzer sound#asexual reproduction. next question#the way mfs portray Japannnnn#buddyyy#can we keep in mind what the Japanese did pleaseeeee#also mfs who think Serbia and Montenegro would have a good relationship make me laugh#i don't think they'd have a BAD one per se but a complicated one surely#Montenegrins are the same motherfuckers who joined NATO and recognized Kosovo#I think Serbia's parasocial relationship with like. everyone tbat exists is like really funny#Bro thinks someone cares about her😂😂🔥🔥🔥🔥#I think like the few people that do actually like her and enjoy her presence are Romania Greece and China#everyone else she cares about just kinda does NOT care back#Russia? No. Montenegro? Ehhh.#Bulgaria? Serbia didn't think this guy particularly liked her in the first place but#when she caught the guy literally stalking her she solidified that thought#smells like EU business!#on the topic of EU im sick of mfs portraying the organisations as competent lol#ok I'll shut the fuck up#⭐ ;; zaharije
12 notes
·
View notes
Text
Welp I have some incredibly kind mutuals so I went and finished(?) that Nicky sketch from the other day lol. :] Mostly the same but I gave him some silly little tattoos and bling (and sweatpants- I can't draw clothes for the life of me but he deserves to be cozy lol)
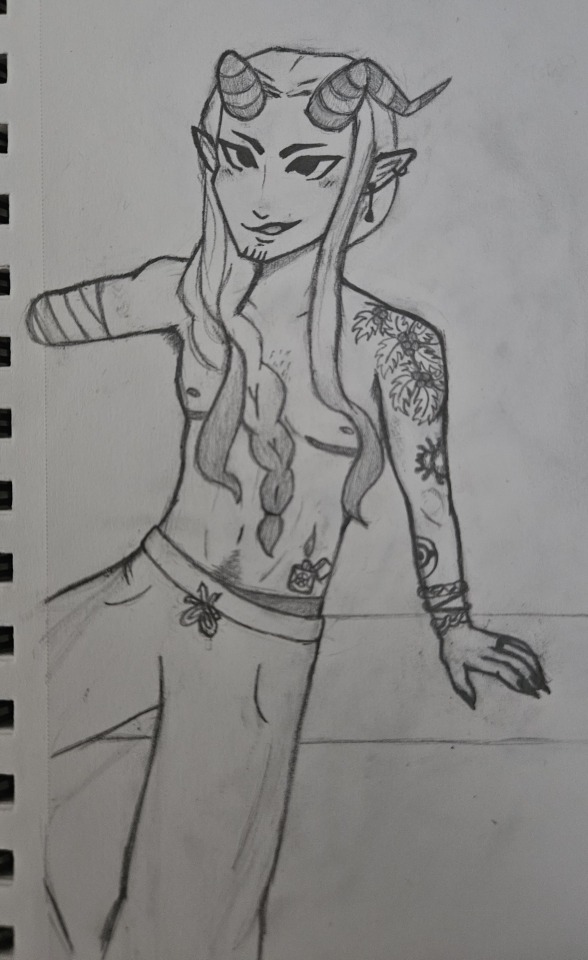
Also bonus repost of an old Taylor doodle lmao ignore the eraser marks pleeease
#dndads#nick foster#see normally this is where I would get all self-depricating but actually I don't have the energy for that rn lol#Didn't have the heart to delete the og post either cause y'all left some very sweet comments haha warmed my heart tbh 💜#dndads fanart#“Now baba why on earth would Nick get a spider tattoo when he's afraid of spiders?” tbh idk either you should ask him#If you're wondering- I sort of imagine he's in the kitchen (Hell's kitchen) propping himself up onto the counter#to sit and chat with whoever is cooking- a habit that he got from Glenn which Jodie hates lol#dungeons and daddies#nicky freeman#taylor swift dndads#taylor swift#fanart#art#I imagine he would have gotten tattoos on his other arm too- maybe ones to remind him of his friends but. Well.#Also yeah I'm one of those freaks who draws Taylor without glasses lol- despite this I'm definitely pro Taylor with glasses#I do think he would wear contacts though- especially colored ones
60 notes
·
View notes
Text
Requestober 2023 Sketches
The playlist has returned for this year! There will be a few in between, but it should be updating at least once a week on either Wednesday or Friday or both - keep an eye out for your req(s)!

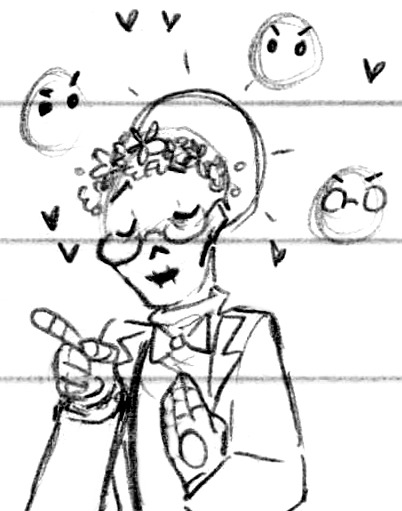
Day 4 got some subtle Black Eye, they are a great pair ♪ You can see I couldn’t fully decide on posing - this will be a theme lol - maybe Sylvia loafing and poking her nose up at Peepers? Or just man-handling him into a snuggle lol, I almost went with that one! But I still ended up going with the first sketch after all, his half-squinted eye was too cute to pass up!
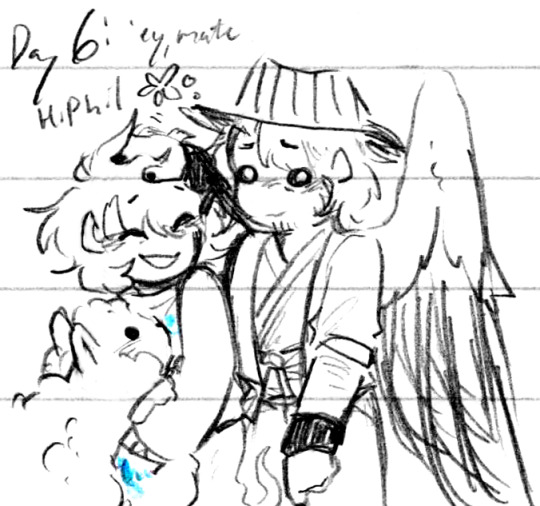
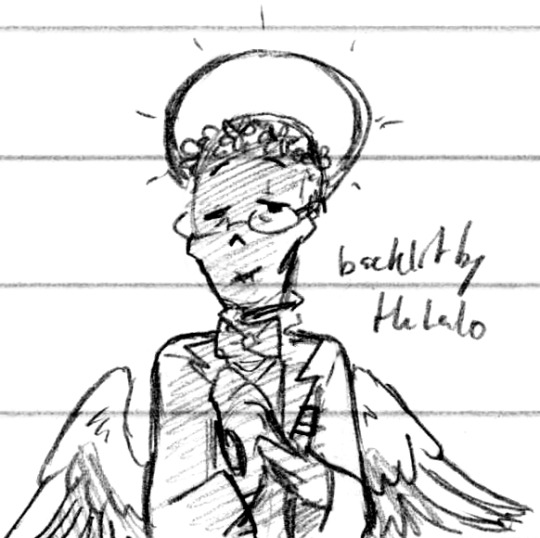
Day 6′s first sketch was also a first-try-correct but lemme try something else lol, I’m glad I went with this one though! Friend looks very fluffy, as does Ghostbur <3 Thank goodness for digital cleaning, Phil’s arm completely confounded me traditionally lol, same with the wings actually
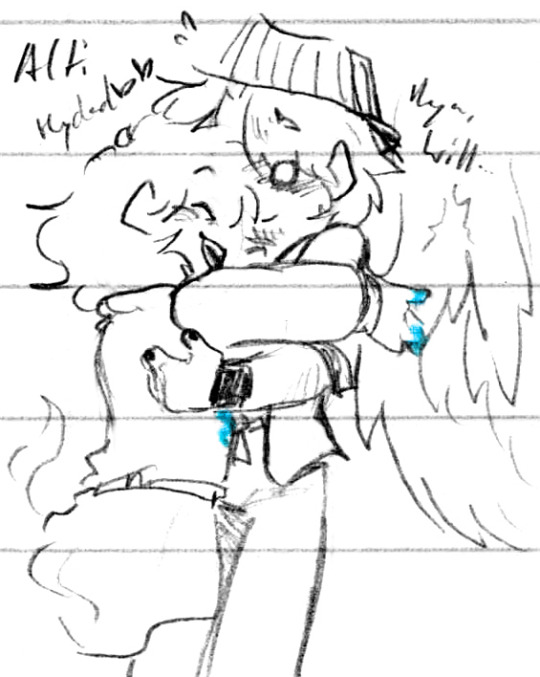
The alt is still cute tho, and sad :’) Ghostbur would still consider Phil his dad! And yes he’s not exactly Will, Phil’s kid ahh </3 And yet he still gets to hug him!! The piece of him that remembers him! It hurts ♥
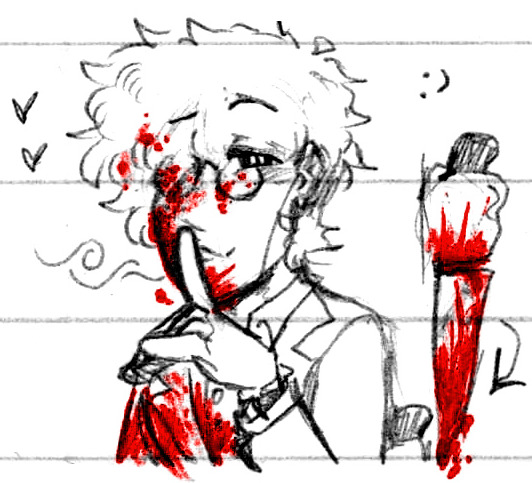
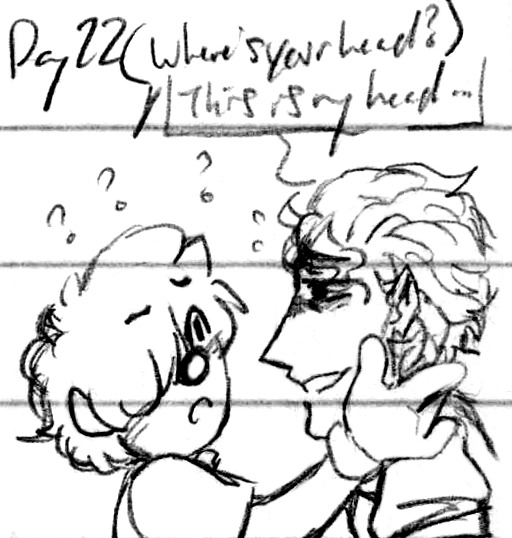
Day 10 was a great excuse to draw blood lol, I can’t not ♪ I ran out of room since this was the last sketch of the page so while I fully intended for the bloody knife to be continuous with the rest of him, I had to puzzle-piece it all together haha ♫ He’s so scribbly lol
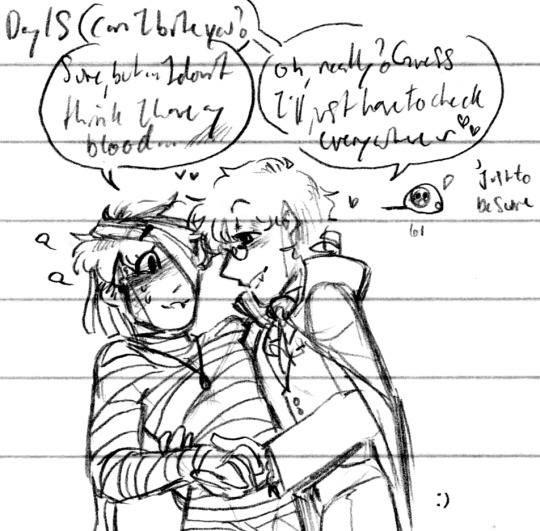
Day 15 was so fun!! Ahhh!! As I mentioned in the tags, I got the notification for this one while I was offline and dozing but even in that state of mind, this was the image that immediately bloomed in my head! I am so pleased I got to make it exactly as intended haha ♪ They’re so cute <3 And it’s always fun to draw Mitsu reacting like “O//o//O” even just in emoji form lol
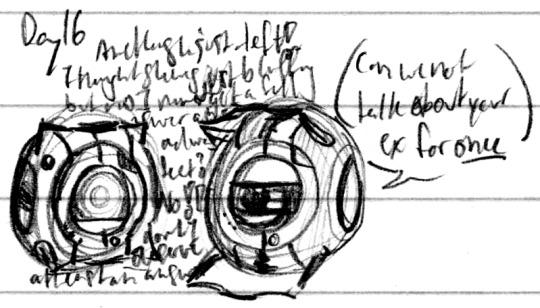
Day 16′s was fun and silly - I only ended up with the one sketch, it’s been too long since I’ve drawn a Core! It hasn’t been all that long since I’ve watched a Meet the Cores but it has been long while since I’ve picked up Portal 2 or Mel, it’s too bad ‘cause they’re both so cute haha. But I mean, all this Portal stuff has inspired me to get back to playing so hmmm :3c
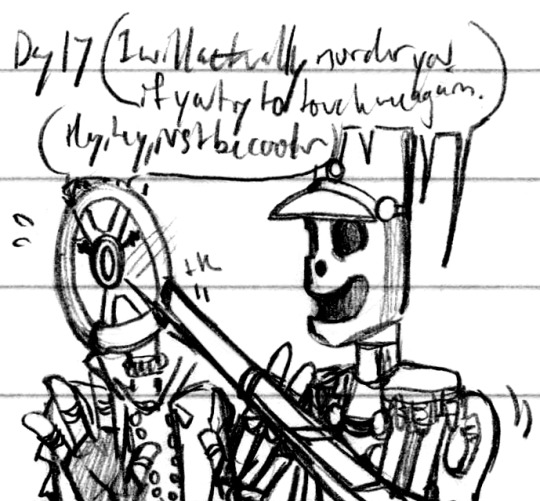
Day 17 had those two options but for me it wasn’t even a question lol - I do of course love RGB but I’ve made a habit of drawing him! And I did get to draw him later as well, so I got all the character diversity I could ask for haha. I’m so sad that I missed out on the “tk” SFX in the final version, I made it and then just forgot to turn the layer back on before exporting lol, just hear it in your head if you would ♪
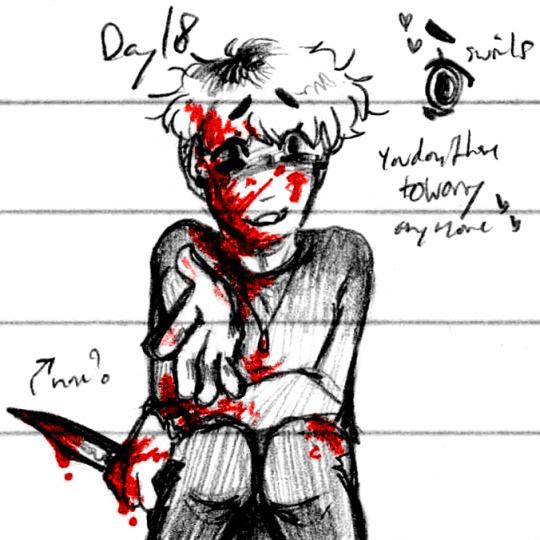
Day 18, more blood! Moreeee! Thank you for all the Yanderapy attention this year ahhh, it’s so gratifying to know these boys are being enjoyed ♥ I love them too! And it was doubly fun to imagine them playing into their baser urges, yandere-wise haha ♪ What’s the fun of a yandere if they can’t have a little blood, as a treat? Hehe ♫ Mitsuru’s swirly eyes are one of my favourite yandere features of his, drawing it in full swing was really fun :D

Day 19, a bit of Ranboo ♥ It’s been long enough that I’d forgotten how much I enjoy Ranboo! c!Ranboo as well as The Guy haha, they’ve gotten more chaotic lately it seems, good for them. He’s also still quite fun to draw, that’s just good character design for you ♪ A cute little squished face, wanting to go out and play. You can kinda tell from the flower boxes that even traditionally I wasn’t all that detail-oriented for this one lol

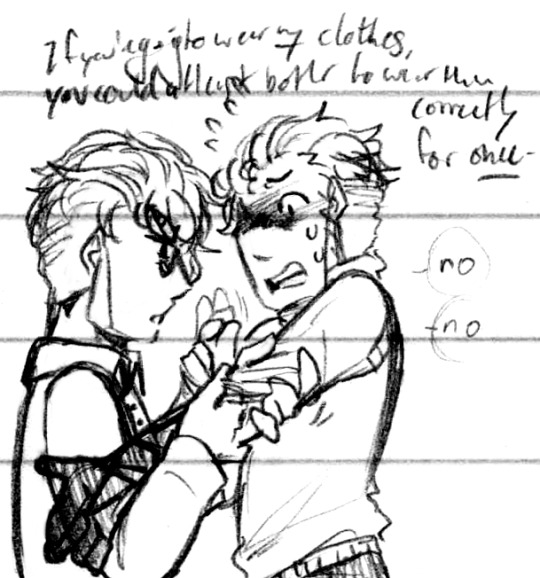
Day 20 got a lot of concept art! Making new outfits will do that lol, started with just deciding what their sweets theme would be - Mitsuru was so obviously ube and buttercream that it hurts lol, and you can see there was a bit more deliberation with Ishida. Salted lemon, and he was supposed to keep the lattice motif - we’ll get there :P

Outfit designing! Ishida’s was a OHKO - you can’t see it in the final version since he’s angled away but his buttons are salt stones! And he’s also got asymmetrical salt “freckles” around his left eye :) Mitsu’s was a little over-complicated so he needed a second pass
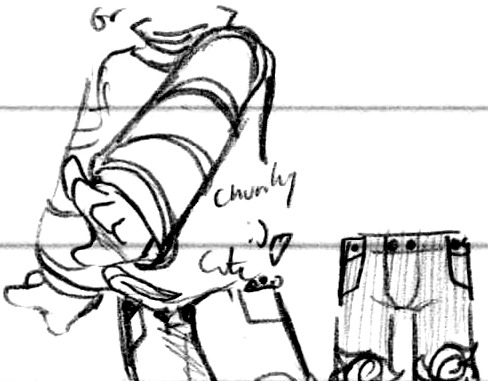
But only a second pass! A chunky sweater with the swirls was absolutely the correct choice, and then since zippers don’t exist in the JD universe (lol) he gets buttons!

Finally they got their final version! You can see from the sliced version that originally they were meant to have three sections apiece for both limbs, buuut that ended up being overly visually busy, so I gave them two for their arms and three for their legs :) All the other posing and everything was pretty much perfect though! :D
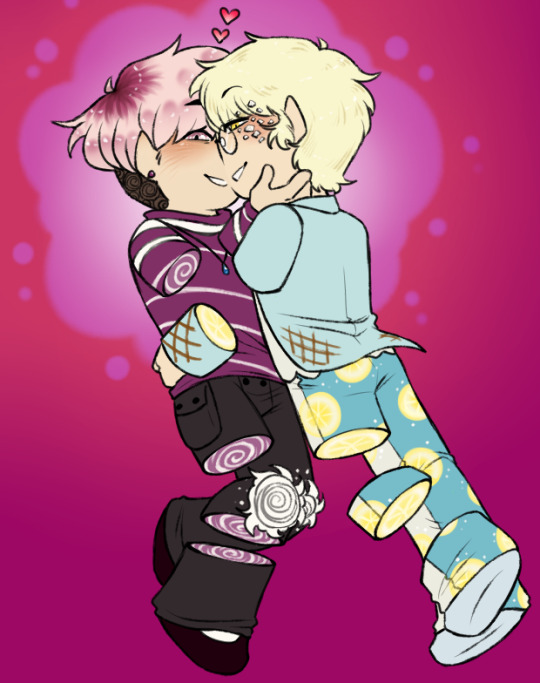
This is the most correct version of their clothes for their cut-up frame; I was in a bit of a rush for the gif version so a few elements are missing, like Ishida’s aforementioned lattice design element :’D Just try to not look too hard at the final version for these details specifically lol ♪ Oh the foibles of trying to be speedy!
Technically not Requestober but I was inspired by my own idea of them switch-stitching their limbs back together lol - lemon ube?? I guess that might work...

Day 21 got a concept sketch before starting - Luci’s glares are very cute hehe ♪ I was sure I could push it cuter tho >:3c

And I was right! I called this an alt but honestly this was the correct choice from the beginning lol ♪ Long ears are so fun to pose, extra expressions! I had a bit of trouble with his arms, but I think that’s just a me-not-knowing-how-to-draw-arms-lately thing lol
Day 22 was also very close to the end of the page so I was a bit cramped! Their faces are definitely the most important element - especially considering RGeeBs has one here! - so I wanted to give them a bit of extra attention. I really like his sharp nose hehe ♪ And Hero’s hand doing the classic cartoony pinky-up with her white gloves ugh it’s so cute <3

They did get a very tiny fullbody sketch tho haha ♪ For how it turned out here, I’m doubly happy with RGB’s pose in the final! Especially his legs :D

Speaking of tiny, day 24 was super tiny!! I always draw the stick figures tiny tho haha, they’re such cute little pops of colour on my page :) I’m glad as well that I could make all the colours clean digitally - the colours got a bit mixed traditionally lol
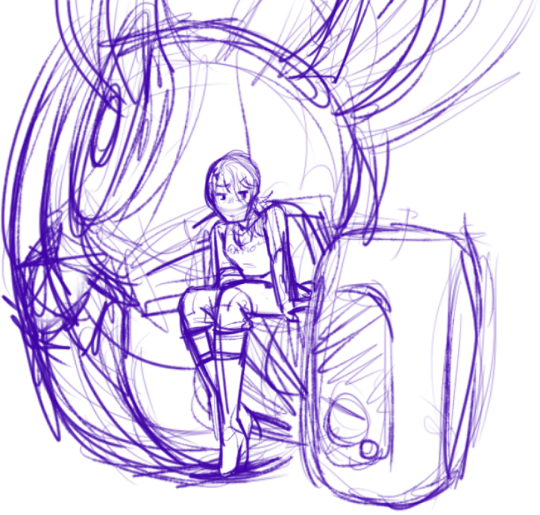
Fun fact: Day 25 didn’t get a traditional sketch! It’d been too long since I’d drawn GLaDOS so I felt a little better to just have the references right there in the same canvas lol. My initial digital sketches are always a bit chaotic, lots of very energetic lines! It does make me all the more determined to make her design readable in my style >:3c

I started forgetting to label what day they were around day 26 haha, but I started with them side-by-side - I wanted them to show off their outfits a bit more but it felt a little stiff :P Obviously Sinister would be uncomfortable in heavier clothes tho, so I went with that thought ♪ Poor Stanley haha
The alt ended up taking it since interacting is way more fun than not! I haven’t drawn Stanley using sign language in a hot minute which is too bad! It’s very fun to do! He’s not going to listen to you Stanley, no matter what you do
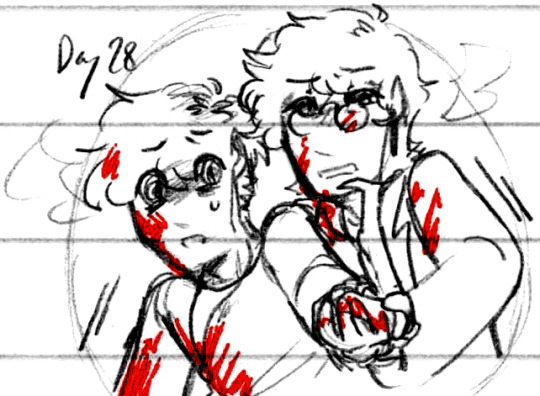
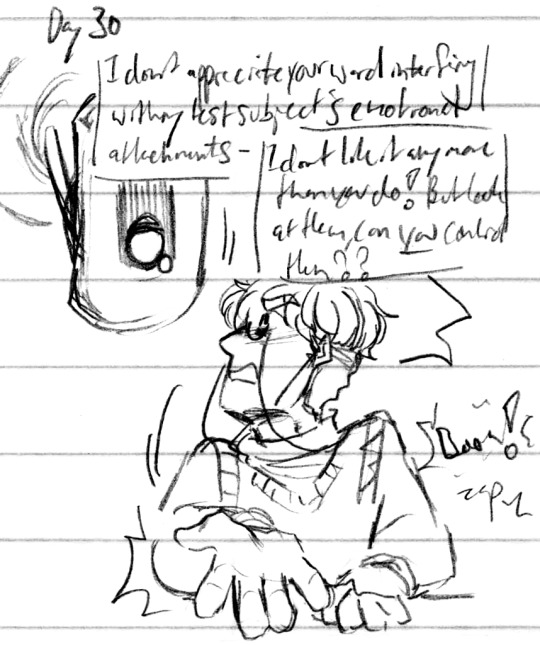
Day 28 gave me a bunch of thoughts but since it was fairly open-ended, I wasn’t sure where to take it at first! Angst just has so many possible roads! Initially, featured here, I considered them getting caught - them in a police light was a very cool concept for my lighting-focused brain this season haha - but it still wasn’t quite right. Maybe because Ishida actually looks stressed, noo D:

The plot just kinda picked up from there, the idea of Ishida killing Mitsuru since they were caught, and then what I eventually ended up with - all while trying to fight against limited space and a not-the-best art day, just gotta keep powering through despite the obstacles!

But I did finally land on the idea I wanted the most :) Originally this one was going to have two panels but I couldn’t make it look right, switching back and forth between them :P I’m glad I finally got to it in the end! It was a struggle haha

Day 29 got Fellplates!Gaster! Heck yeah! :D It’s been a while since I’ve drawn him so I had to get back into the swing of it lol - I actually booted him on “April 1st” by changing my clock and then my internet refused to connect to certain sites?? What the heck is that about. Well either way, I got him! He is cute haha
I really was tempted to give him something to do with other Fellplates members, but the lack of references confounded me! Ah! You can probably tell which one was meant to be Alphys huh lol ♪ Him and his sense of loyalty ah 💔 Well, self-destruction is a common ley line for him huh haha
And then what I finally ended up with ♪ He has a slightly more open expression here, but I do like the somewhat sinister edge the final version ended up with :3c The backlighting begged for it!! And everyone needs cool backlighting haha
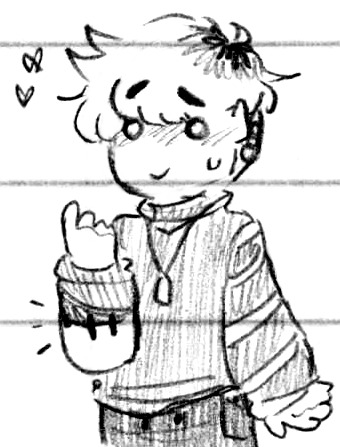
Day 30′s TSP/Portal crossover!! It’s such a classic idea, I am actually honestly surprised that this is my first foray into it - I’ve thought about it forever! I’ve drawn them adjacently! But this is my first time actually drawing them interacting?? How?? Well I’m glad I have now haha, they’re so- they’re just so them, y’know? Lol
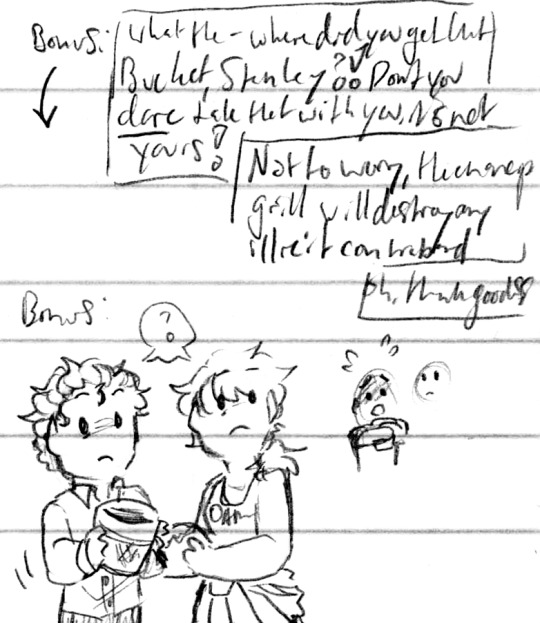
Y’get a bonus because the idea of Stanley and Chell just kinda vibing in a test chamber and Stanley reacting - which you can see the barest of unfinished sketch there on the right lol - to having his Bucket taken from him, it was too good not to haha. Chell is indifferent lol
Day 31, last day! I actually drew this the night beforehand, very quickly thus the scribbliness haha. Sometimes that’s all you need, just to get the image out! You can see with the SFX, despite being noiseless in the final version, I was thinking of the static right away :) I’m quite happy with how it all turned out hehe <3
That’s all the general sketches from this year! A good solid mix of things! Very fun :D
#Doodles#Requestober#Blood#The usual tag roundup except it's all in one tag lol - Wander Over Yonder - DSMP - lots of Yanderapy thank you <3 - several of Portal -#A few TPoH - technically some Just Desserts - Animation vs. - The Stanley Parable - and Undertale! Specifically Fellplates haha#A very fun lineup! A well-mixed bag of enjoy :D#There's also a couple digital additions here hehe ♪ It's unusual but needed this year!#I'm not usually one to go back in and edit something after the fact (noticeably - I did actually do that at least once last year lol)#But with this one ahh I was silly on colouring :P I was too hasty!#That said I do still - for the most part - believe in setting down and doing better next time haha ���#This is more for my own sake in the future in case I come back and look at it and be like ''Ah this version is correct'' but it's not! Haha#As for the rest it's all the usual :D#I have to say thank you again because that's how big I feel it haha - thank you for all the love towards my Yanderapy boys!!#It makes me very happy to see them being enjoyed :D I love them so I'm happy happy that they're getting love from others too! <3#I got to draw a lot of favourites this year :) I always love when that happens!#And y'all inspired me to get back into Portal hehe ♪ Thank you! It's been fun replaying it so far :D#In fact I think I'm gonna go try and beat it today hehe ♫ I think I've earned it haha
12 notes
·
View notes
Note
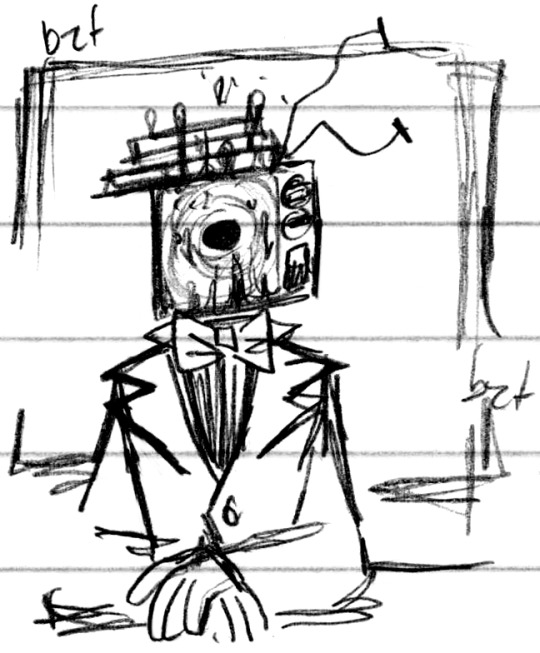
hii :))) sprinkles these into ur inbox <33 got inspired by recent asks lol


DJSAF Ofmg more well-drawn memes?!? You spoil me. 😄 These are fantastic; Idk how to put it, but you chose really great memes for everyone, it's very in character lmao. I've actually seen the original picture for the first one before and thought "hmm Sanfo 🤔", so you legit read my mind with that.
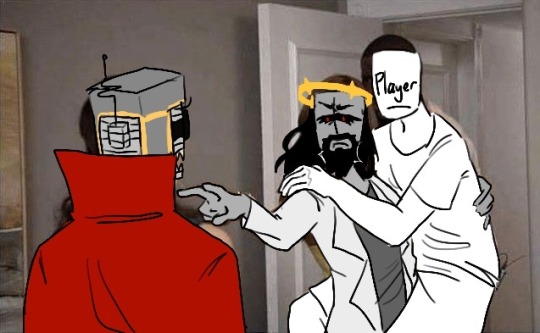
The thought of Deimos having that conversation with the Player is also incredibly believable tbh, I can fully imagine that happening (because they have a bit of a tendency to go off the deep end whenever you give them anything to think about). Plus, that pic with Phobos and Jeb just encapsulates Jeb's general feelings about his Director's obsession with you so well. The sheer blasphemy the man shows towards you genuinely disgusts him, so of course he'd deem himself your protector from the Director as well.
Seriously though; I love these so much, thank you!! :) ❤️💕💗♥ I just love the way you draw people, they're very "friend shaped" in your art style.
#sorry for being out yesterday y'all#(I was v tired from weekend projects and studying for finals haha)#but tomorrow the doc stuff should be here#[80-90% done atm#but I want to polish it more since it's my first time doing 'gendered' stuff and I want to get it right.#And it's a legit scenario so may as well.]#chat tag#other's art#meow-mp3#<3#fav
128 notes
·
View notes
Last Seen Blogs

therealmcgee
TheRealMcgee Art

royasworld
인투더 화이어
ibluebu
‘Lovesick Girls’
lightyearsinsidemyself
Deepest Inner Space
bubblepaints
Yuli's Art Blog