#how to draw hair
Text
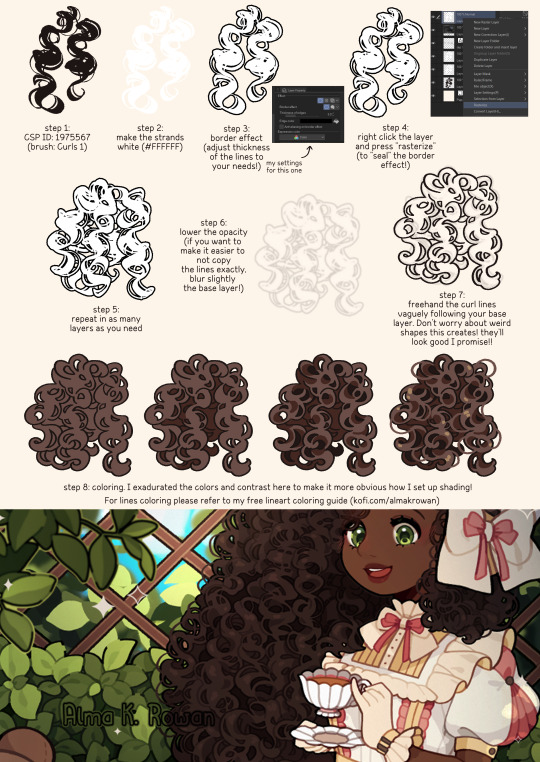
This is how I drew the curly hair on my last original artwork! 🥰💕
And YES it IS possible to do this without the special brush!!! I mentioned it since this little guide is an explanation of how I did it in that illustration (and i wanted to feature this cool FREE brush)!!!!
#tutorial#almakrowantip#how to draw#art tutorial#digital art#art resources#artists on tumblr#curly hair#textured hair#curly hair tutorial#how to draw hair#stylized hair
683 notes
·
View notes
Note
hey holo mom! i was wondering if you had any tips on how to make hair loose like yours? i'm an artist myself but the way i draw hair looks pretty stiff and i'd like to draw mine all loose and fluff, similar to yours! hope you're having a great day and remember to take breaks whenever you need them
yep I have a trick;
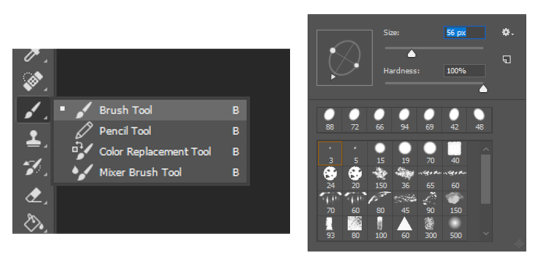
After I finish the figure, I'm picking the same brush that I use for drawing figure. My brush is round, has no fade effect and texture.
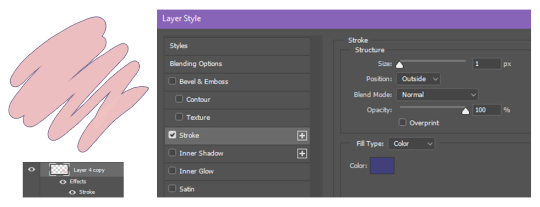
then I pick a random color to get ready to start drawing the hair (it's helping me to not to confuse hair layer with others). The trick is; giving out lines to brush strokes. For ps; click on current layer which is hair layer aka my Layer 4 copy > Stroke > Outside. You can use my settings, but the colors and sizes are depends on ur choice.
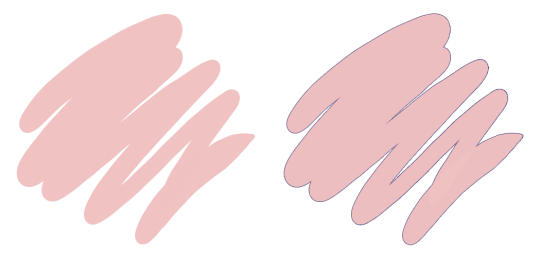
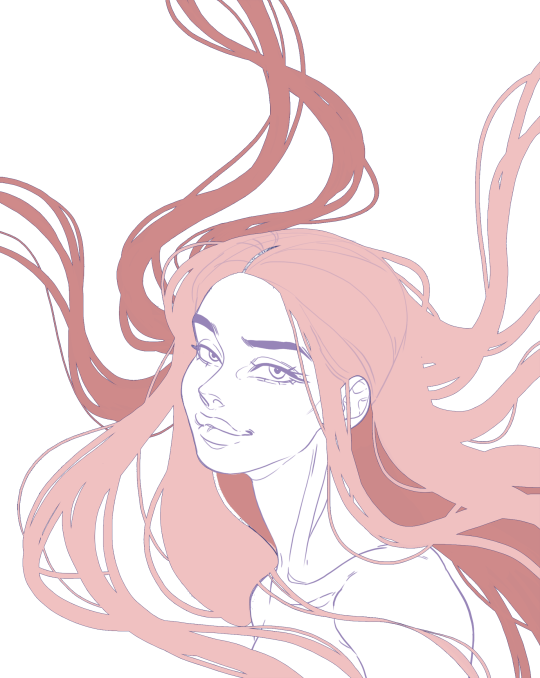
with this layer setting, every brush stroke is fuse together and create a lineart effect. At this stage, I freely draw the hair as I like (creating extra messy hair strings etc to make the hair look more natural and fluffy). Another lil trick: I'm using another layer w/ different colors for different parts of the hair. So I can see the back parts.
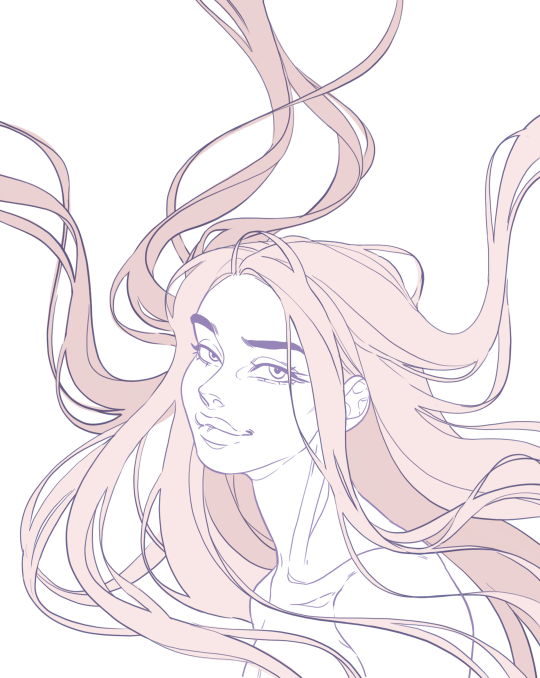
If i like the brush strokes, I'm lowering the opacity of the hair layer around %30-50. Then I start drawing my clean and detailed lines over it. Sometimes I change a lots of detail at this stage, it's totally ok.
I use brush stroke hair technique as a guide to draw hair and re-drawing over it. But I saw some artists that drawing hair in this way and avoiding the lineart stage. They're mostly adding details and painting over the plain color layer. It's all about your choice.
hope it helps ✨
#tutorial#tutorials#photoshop#photoshop tutorial#art tutorial#drawing tutorial#how to draw hair#hair#hair drawing#art#illustration#digital art#brush#siguun
277 notes
·
View notes
Photo

Zaat | 1971
#Zaat#Blood Waters of Dr. Z#Don Barton#Florida horror#regional horror#mst3k#drawing#how to draw hair#monster movie#artists on tumblr#horror#halloween#monster suit#Hammersmith Horror
337 notes
·
View notes
Text
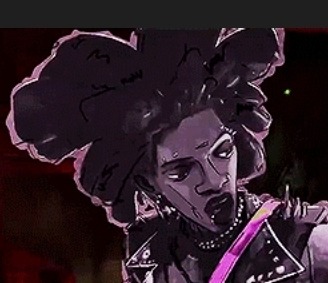
I thought some of the lines in Obie's hair were stylistic nonsense until I realized it's new growth that hasn't been added to his wicks yet

32 notes
·
View notes
Note
how do you draw hair
Idk how old this is or if this anon is still active BUT this is the number 1 question I get asked when I visit schools and libraries too, SO
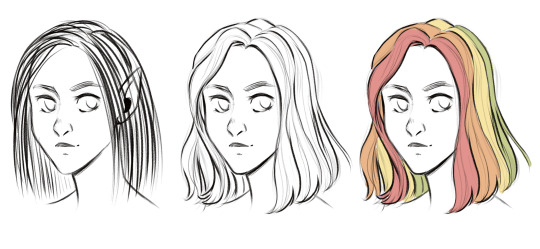
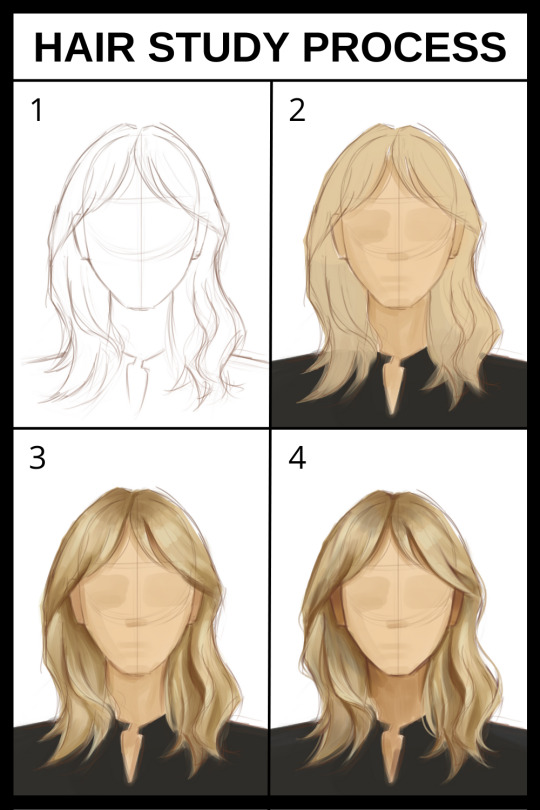
Firstly hair tends to look weird if you just try to draw every strand, like in the first picture. It's better to divide it into bigger chunks! Also illustrated in color for clarity.

The shape of these chunks determined the type of hair (straight, wavy, curly, coily).

Start with a bald head and decide where the hairline goes. There isn't just one type of hairline!

Then, if you're drawing long hair, decide where it parts. Does it part in the middle or on the side? Then draw the general shape of the hair falling like curtains from the parting. Erase the part of the head that's covered in hair, and divide the hair into pretty chunks!

If you're drawing shorter hair, instead of deciding where it parts you decide where the main...uh...swirl??? is located. Then use that to draw the direction of the chunks as you draw the general shape of the hair first, then erasing the now hidden part of the head. And lastly, you add more chunks and detail!
If you live in Norway I have a whole-ass book with this stuff.
876 notes
·
View notes
Text
Screams and withers on the floor as I try and figure out how to draw Julia's bangs in a way that I actually like

14 notes
·
View notes
Text
How to draw hair
#art#drawing#sketch#portrait#artists on tumblr#girl#charcoal#model#black and white#woman#art tutorial#how to draw#How to draw hair#timelapse
3 notes
·
View notes
Text
youtube
A really awesome tutorial on how to draw hair (with different hair styles) from the front, profile, etc. By Kuroshiro
Be sure to check out the rest of videos in their channel, tons of amazing art!! <3
5 notes
·
View notes
Text
I tried
nnew bwrush :3
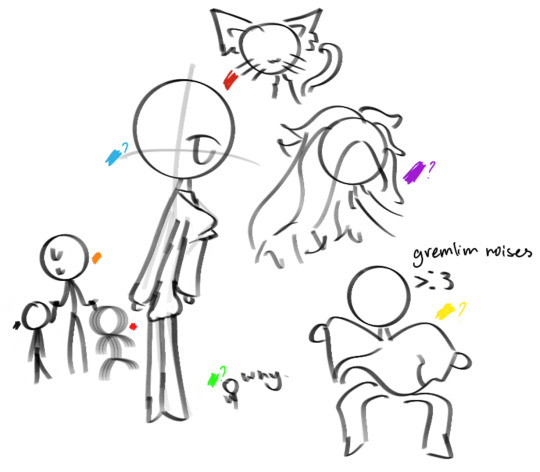
Cringe.
#Ignore question mark#lilart#alan becker#animation vs minecraft#animation vs animator#ava/avm red#avm purple#ava/avm the second coming#ava the chosen one#ava/avm green#ava/avm yellow#ava/avm blue#ava the dark lord#how to draw hair
18 notes
·
View notes
Text


How to shade hair✨طريقة تظليل شعر
28 notes
·
View notes
Text
youtube
I made this video to sum up all my tips & knowledge in drawing any kind of hair. I have a little trick that helped me a lot develop a good understanding of hair and how to draw it, hope it helps! 😊
#drawing hair#drawing hair tips#drawing hair tricks#drawing hair tutorial#digital art#hair art#how to draw hair#how to draw#drawing tips#Youtube
10 notes
·
View notes
Text
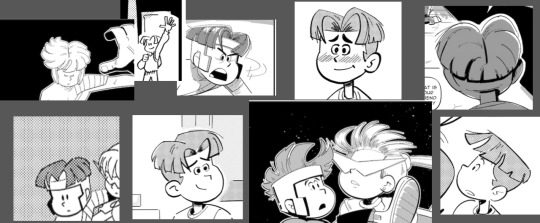
Figuring out how to draw hair
I always think that I can just draw something off the cuff and quickly. But for me personally it rarely works out. For the comic I ended up working out how I would construct Tristan's hair, what it would look like from different angles. It took me maybe 20 minutes in a sketch book.


The funny thing is, is that once I had figured it out, I was then able to draw it off the cuff from memory. Play around with the shapes and be a bit looser.
3 notes
·
View notes
Text
How I Draw Hair: Part 1
As promised to @myearts-uwu here is my tutorial on how I do hair!
@sanhatipal I think you might be interested in this too, fren!! :D
Other people are free to follow this tutorial too, of course!

The first five brushes (technically four because I accidentally duplicated the blur brush and forgot to delete it oops) are the only brushes I normally use to complete a whole artwork. I still haven't yet figured out any of the other brushes. The program I am using is FireAlpaca, but I'm sure this will work with other programs too.
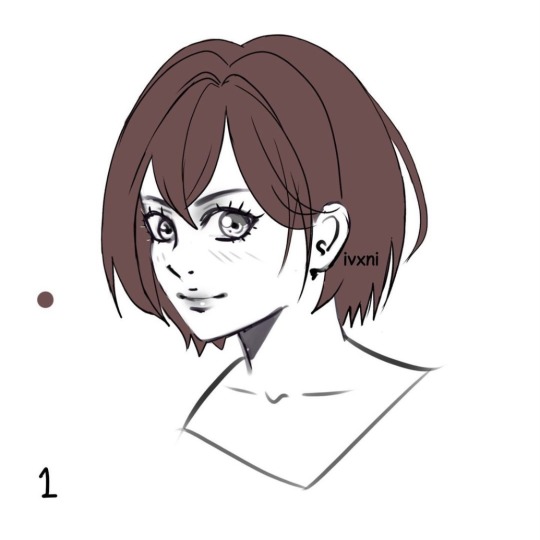
Stage 1: Draw the hair

For this tutorial I won't be using a whole head of hair but use this little bit as my example.
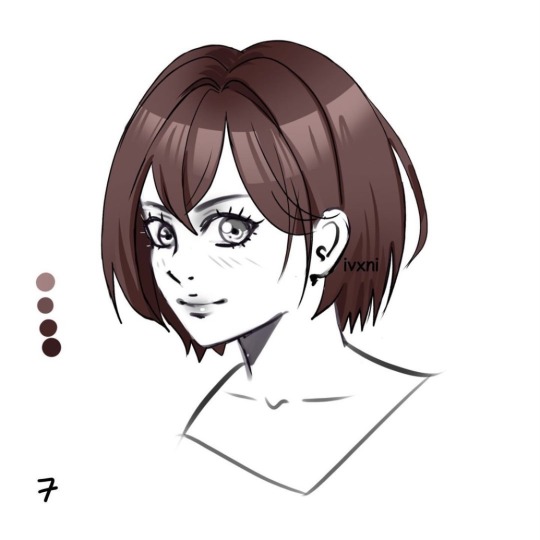
Stage 2: Pick out the palette
Now it's time to pick your colours! With my method you will need 5: base colour, darker colour, darkest colour, lighter colour, lightest colour. Here are some examples of the palettes I've used in the past:
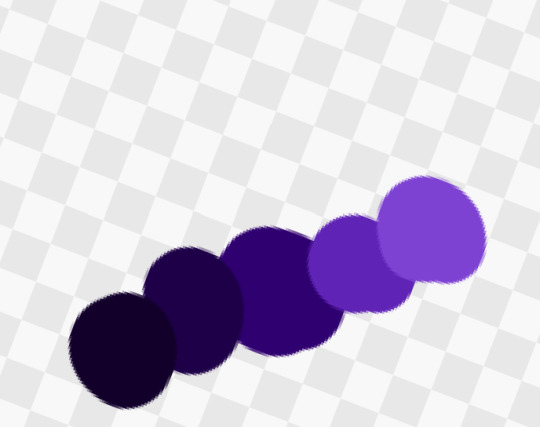
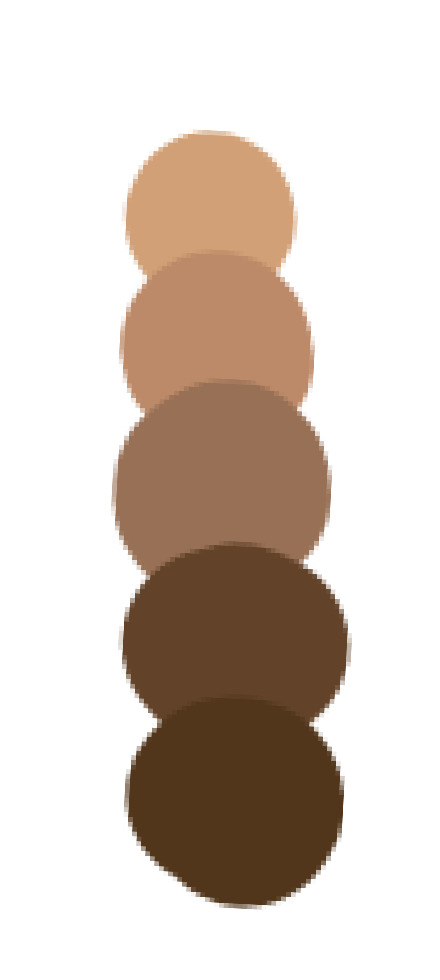

The outlier one was the palette which served for two characters instead of one, they both had red hair but one was a darker red than the other so I didn't bother making a new palette.

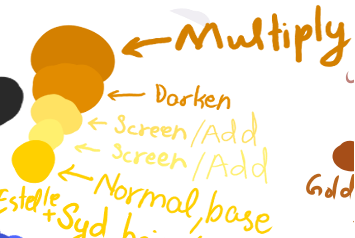
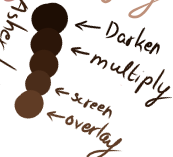
Now you might've noticed the notes I've made on some of the palettes. There will be one layer for each colour, and the layer modes can vary between darken or multiply for the two darker colours and screen, add or overlay for the two lighter colours. Mostly I stick to just screen for the lighter colours, add doesn't tend to work out so well. For the darker colours I tend to use darken-multiply or darken-darken or multiply-multiply depending on the colours I've already chosen and the final shade I want to achieve.
Stage 3: Fill in the base colour
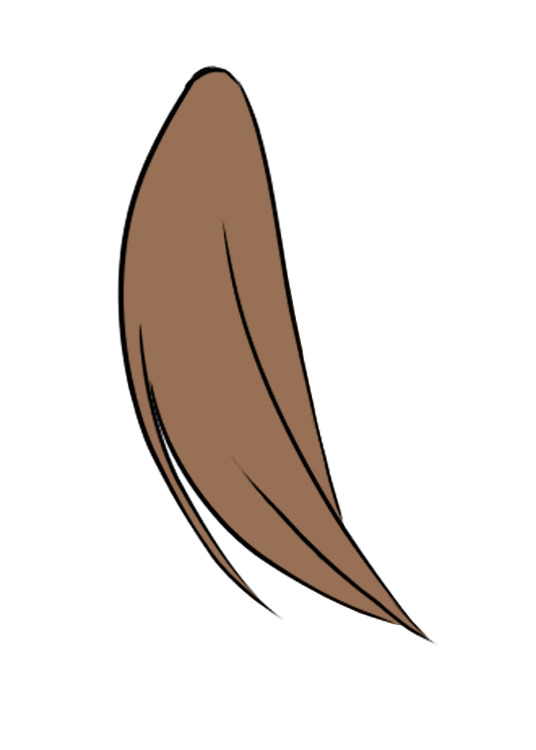
Make a layer below your lineart, and fill in the base colour with the basic pen brush!
Stage 4: First darker colour
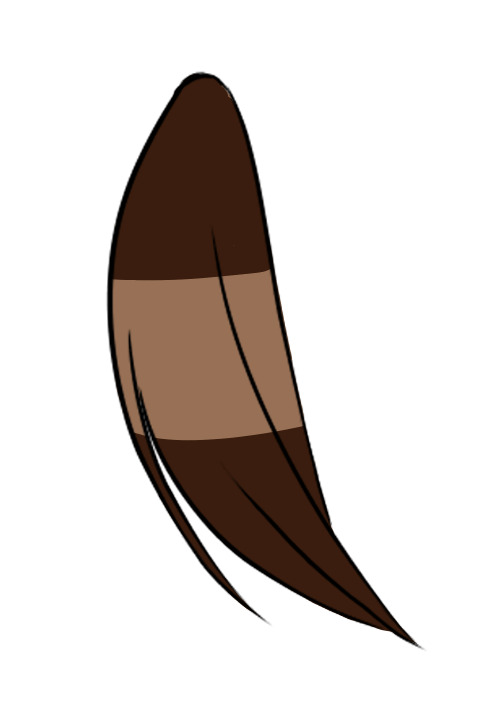
Then you will paint in the second darkest colour, also with the basic pen brush. You want to leave a moderate window between the two sides, but not too big or not too small. I unfortunately don't have a way to put it in words so you'll just have to feel through it. I'm using multiply mode here.
I have reached the image limit so this will have to be broken up into parts! The other parts will be in the reblogs.
35 notes
·
View notes
Text
I can’t draw for shit lmaoo 😭🤡
5 notes
·
View notes
Text
I rly like making these. At first, I found balancing social media with drawing but now, I actually enjoy the back and forth. There are so many things I could focus on that I (almost) never feel bored
follow me on instagram! @majestics0ck
#digital artist#art#digital art#artist#digitalart#how to draw hair#drawing hair#hair drawing#tutorialsntips#tutorial
16 notes
·
View notes
Text

3 notes
·
View notes
Last Seen Blogs

tictochub
TicTocHub

alexwhiteblog
Alex White Blog
thebigsleep-rpg-blog
The Big Sleep

motorscoopy
ASSISTIR!! SUPER MARIO BROS. - O FILME Completo Dublado e Legend