#iPhone tutorial
Text
Fix “Screen Recording Not Available When AirPlay…” Error on your iPhone?
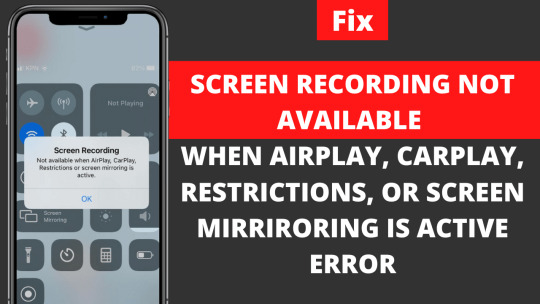
Are you unable to Screen record your iPhone? Receiving a pop-up error message saying screen recording is not available? error on iPhone? Whether it is AirPlay, CarPlay, Restrictions, or Screen Mirroring is an Active Error on your iPhone, Don’t worry We will fix it by following these troubleshooting steps.
Before that, you should know Enabling Parental Control on your iPhone will also enable Screen Recording Restrictions. By having these kinds of restrictions, users cannot screen record or screen mirror their device to a TV or computer.
Peruse the further article to fix the screen recording not available error on your iPhone. If you find the helpful article consider sharing it with your friends who are seeking help in fixing the error and will also make use of the article.
Read More - Fix “Screen Recording Not Available When AirPlay…” Error on your iPhone?
0 notes
Text
iPhone tutorial
Nimblehand is focused on helping tech users to maximize their devices. Easy to understand how-to and tips covering Android, iOS, Windows, and macOS.
0 notes
Text
🎧 make video sounds into ringtones (iOS) 🎧
wanna save tiktoks or videos you have as ringtones or text tones? i’ll go over how i’ve been doing it!
🤍 first you download ringtone maker (black and yellow icon) and GarageBand (orange icon with white guitar) if you don’t have them:

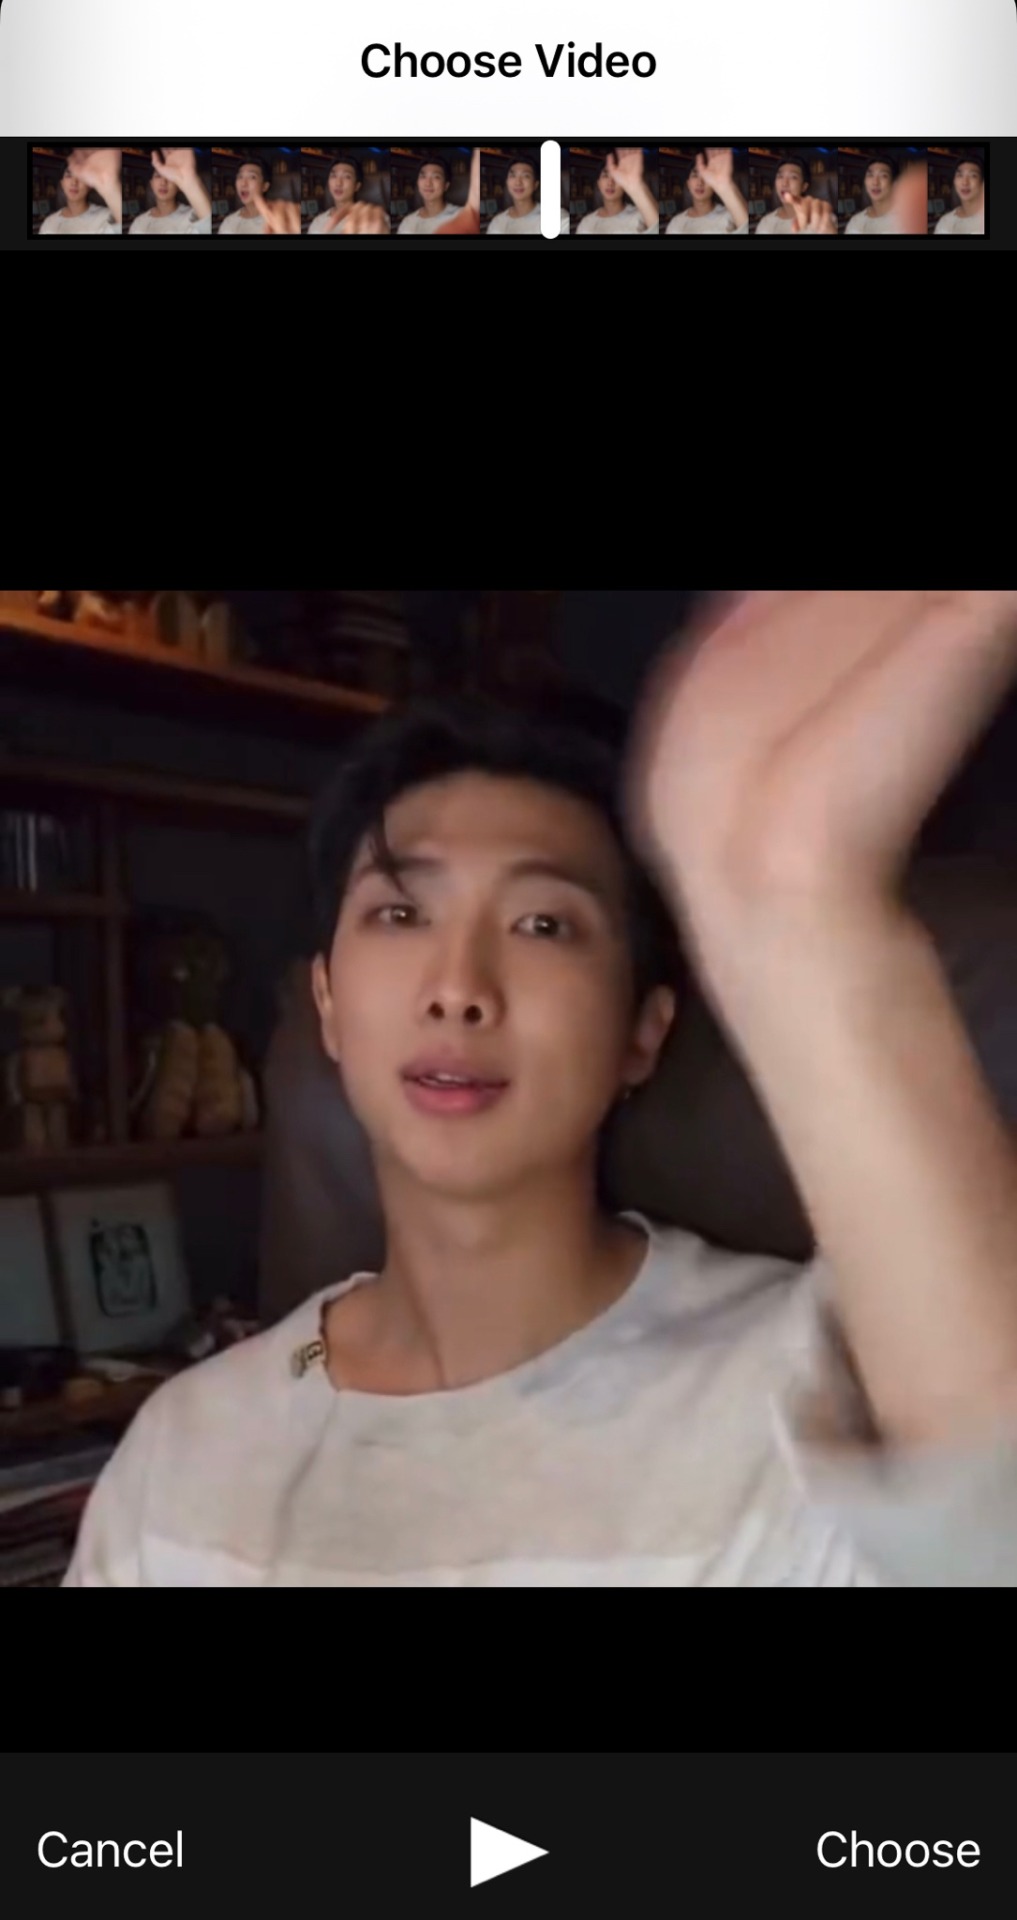
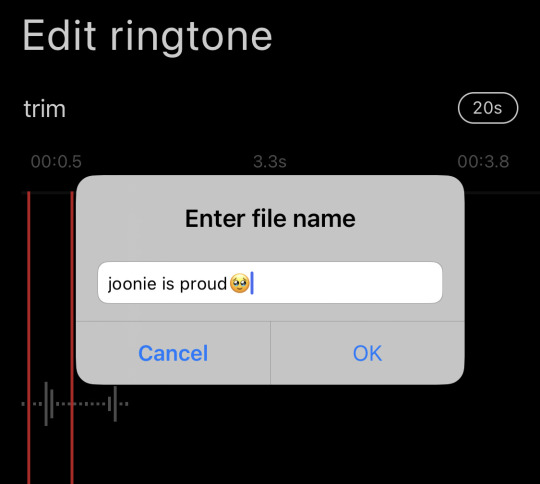
🤎 to start, head into ringtone maker and select the “make from video” option (and i’m choosing this random joon vid saying he’s proud of us, too🥺):

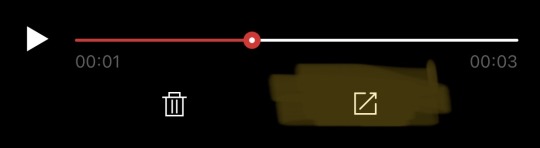
🧡 when you’ve trimmed your audio to your liking, save it!
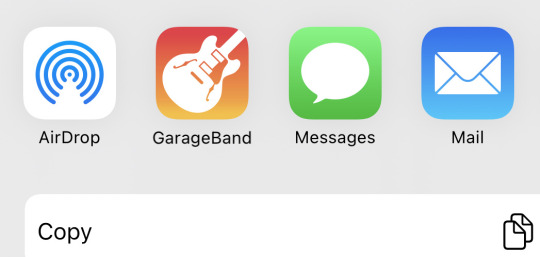
🤍 click on the share icon under the recording you made and GarageBand should be an option. once there, click on your file and let it load into a project.
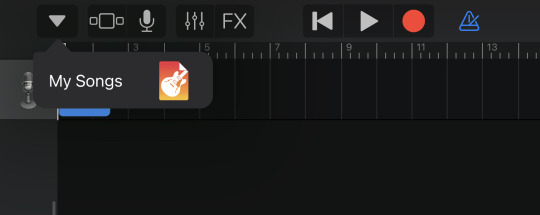
🤎 below is what the project should look like. save the project by clicking the top left down arrow and select “my songs”
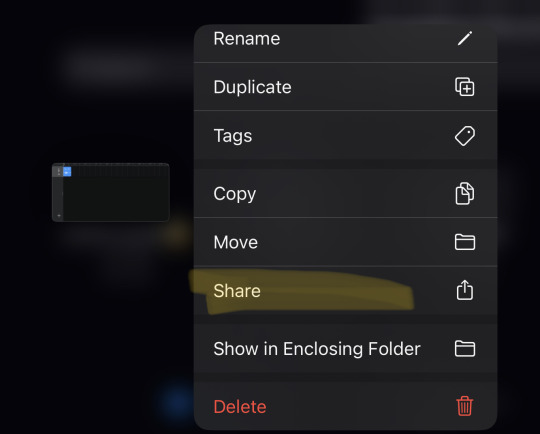
🧡 once you long-press on the saved project, click on the Share option and there will be a menu with three items, with Ringtone being the one to click on in the middle.
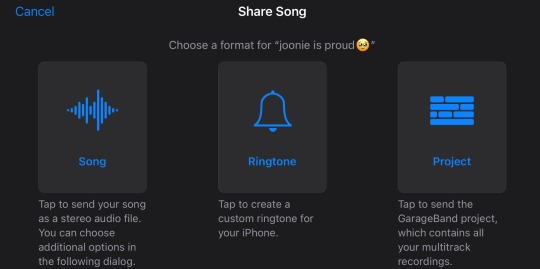
🎧 and then it’ll save to your sounds & haptics library in your phone’s Settings! let me know if y’all have any questions👩💻
#figured this could be useful to some of y’all!#b i hope this is easy enough to follow😂#tutorials#iphone#*tips#bts#kpop#tiktok#long post
118 notes
·
View notes
Text
Couldn't help to make my vision board here


#compliment#good grades#iphone#best friends#culture#anime#kpop icons#tv shows#barbie#straight a student#topper#mindset#glimore girls#vanilla girl#art tutorial#friends#pinterest#baddie#mascara and lipgloss#more people#manifesting#workout#meditation#language
10 notes
·
View notes
Text
iOS Stranger Things Theme
Since it took me a lot to finish my iOS16 theme I wanna share it. I don’t even know if anyone cares but I’ll leave a guide down below on how to make this!
Firstly, Lockscreen and Homescreen:
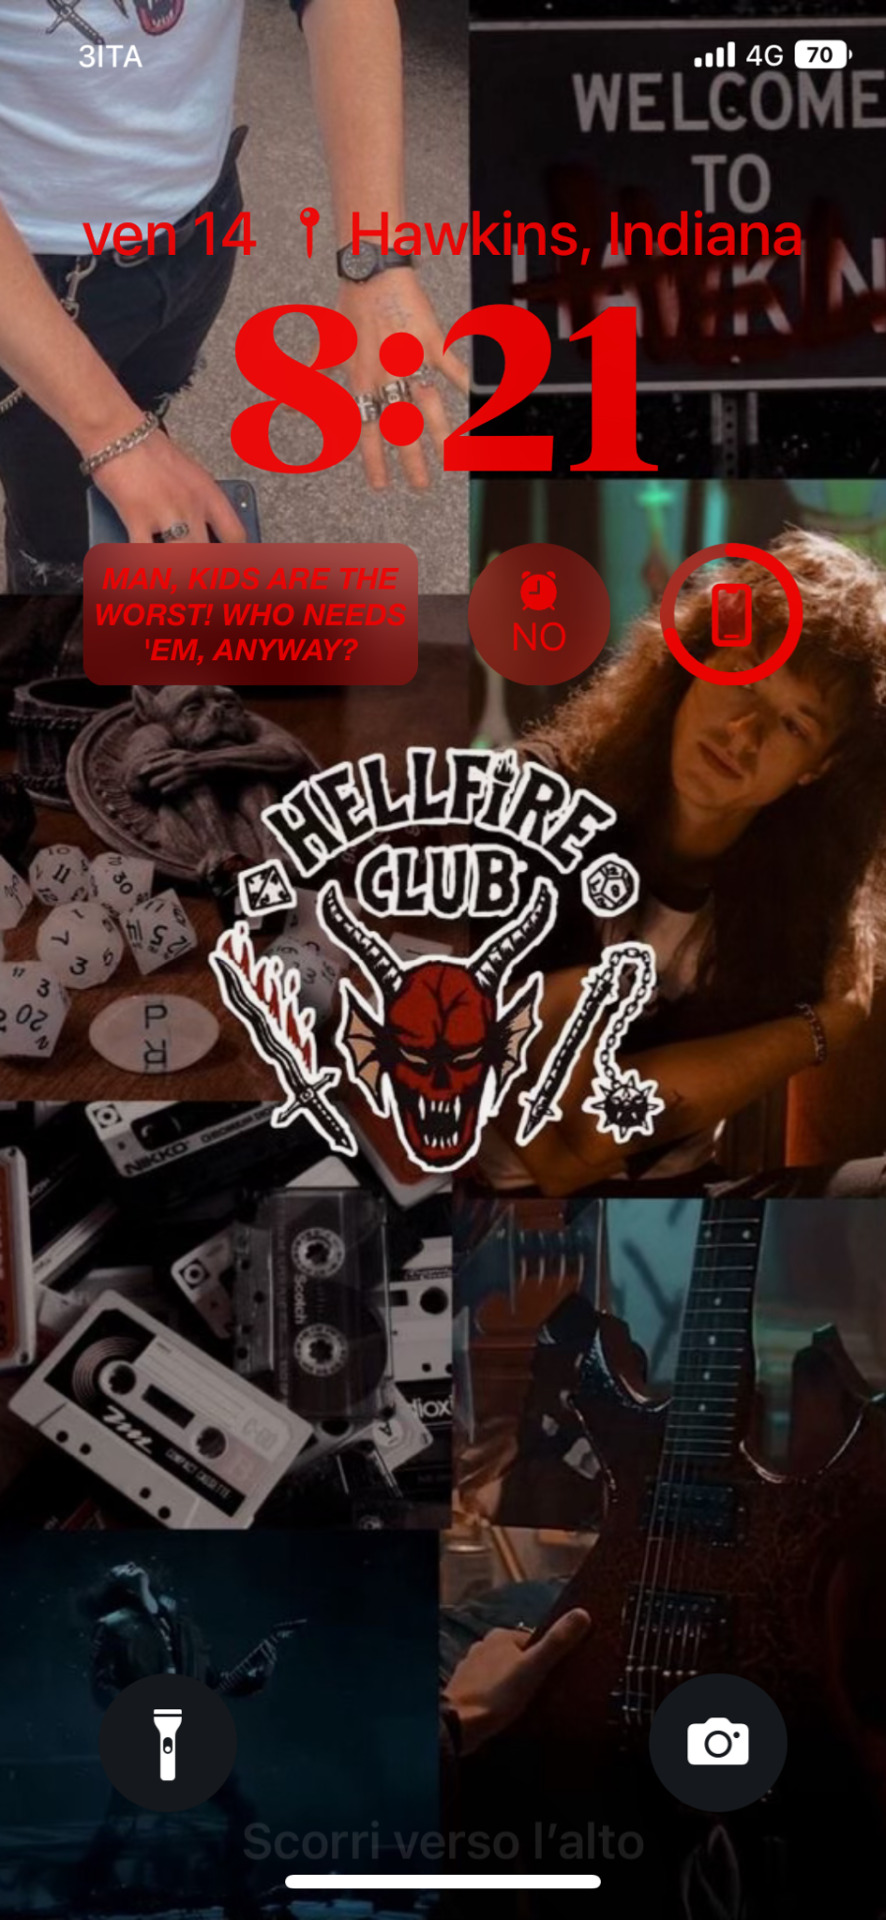


And this is the animation:
The homescreen changes to the red picture at sunset and to the upside down picture at 11:00 pm.
Every photo I used I took it from Pinterest, except one that I made on PS. I’ll leave the original photos in the guide down here!
.
.
.
The Guide
In order to make this you need the app Color Widget, which it’s completely free.
Let’s unpack this screen by screen.
Lockscreen
Unfortunately you can make this only with iOS16.
1. Open Color widgets
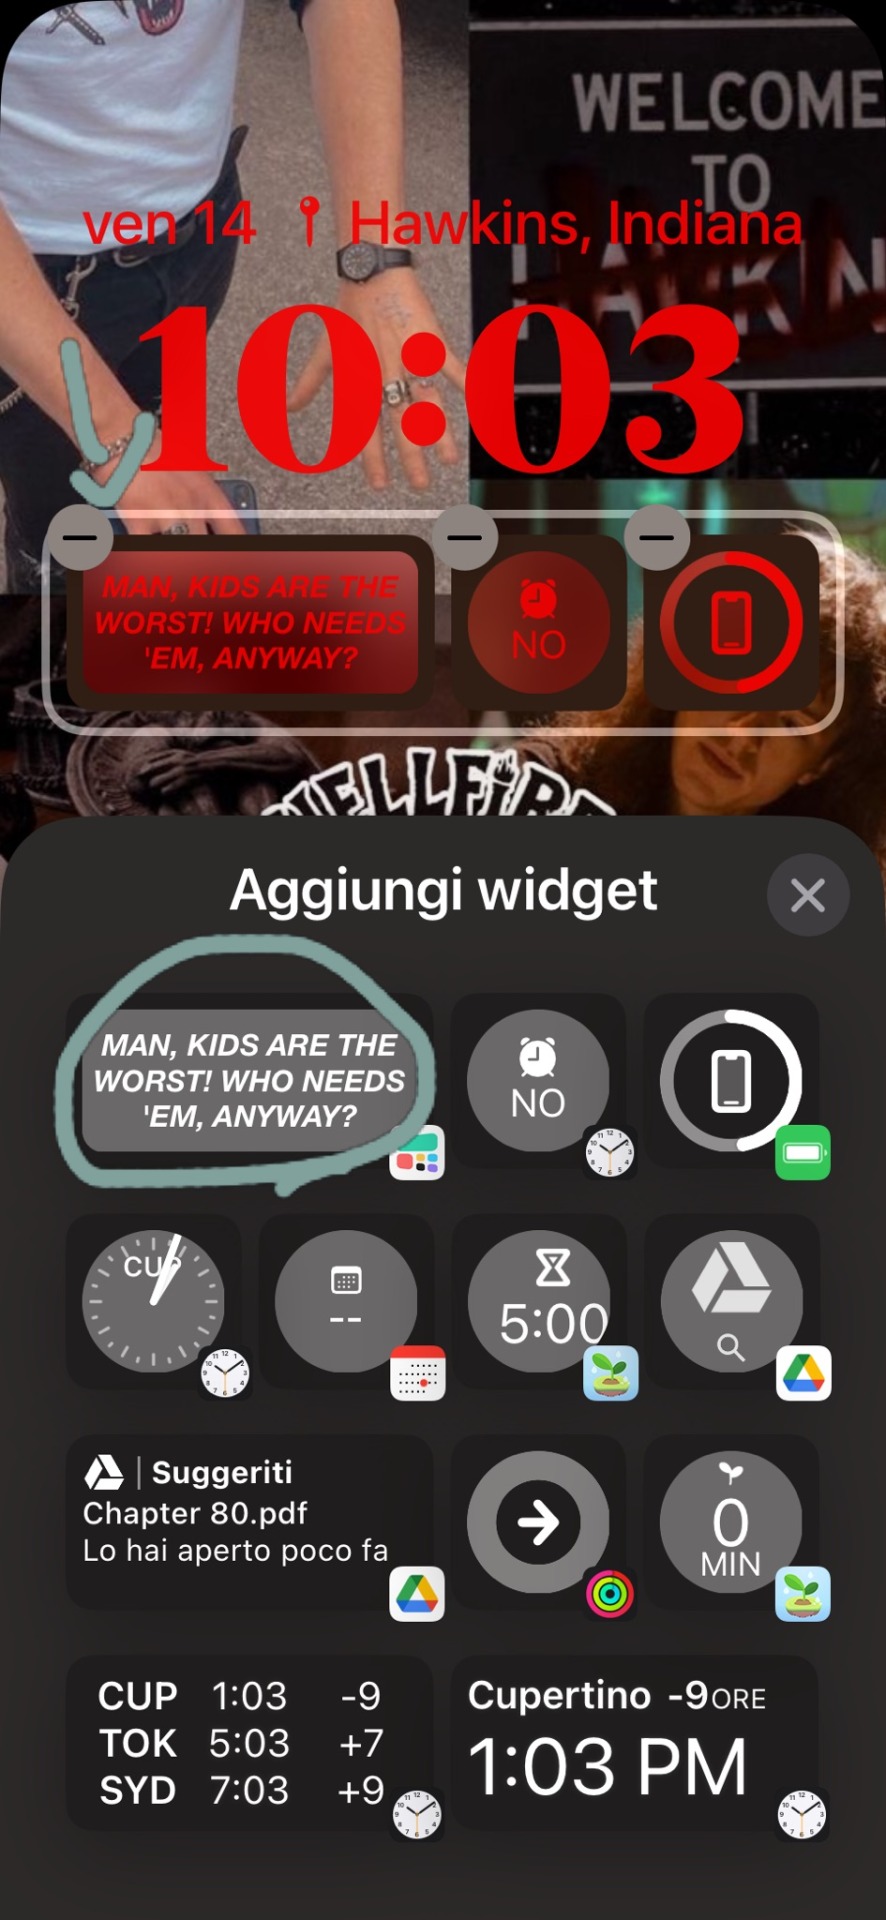
2. Go to widgets, then your Lock Screen widget
3. I’ve made 2 widgets (A-B), these are my settings
(the quote from widget B is a Steve Harrington quote lmao)


4. Go to Lockscreen settings, select each section to add the widget you made, these are my settings and my Lockscreen picture


Homescreen
I have 4 different types of widgets: calendar, sunset & sunrise, pictures, and music.
1. Go to color widgets, then your widgets
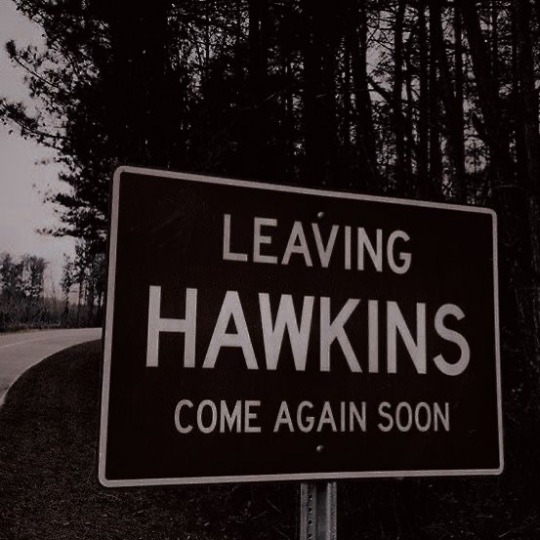
2. Create a new widget, you can change pictures, select fonts, colors, and types of widget. These are the pictures I used:
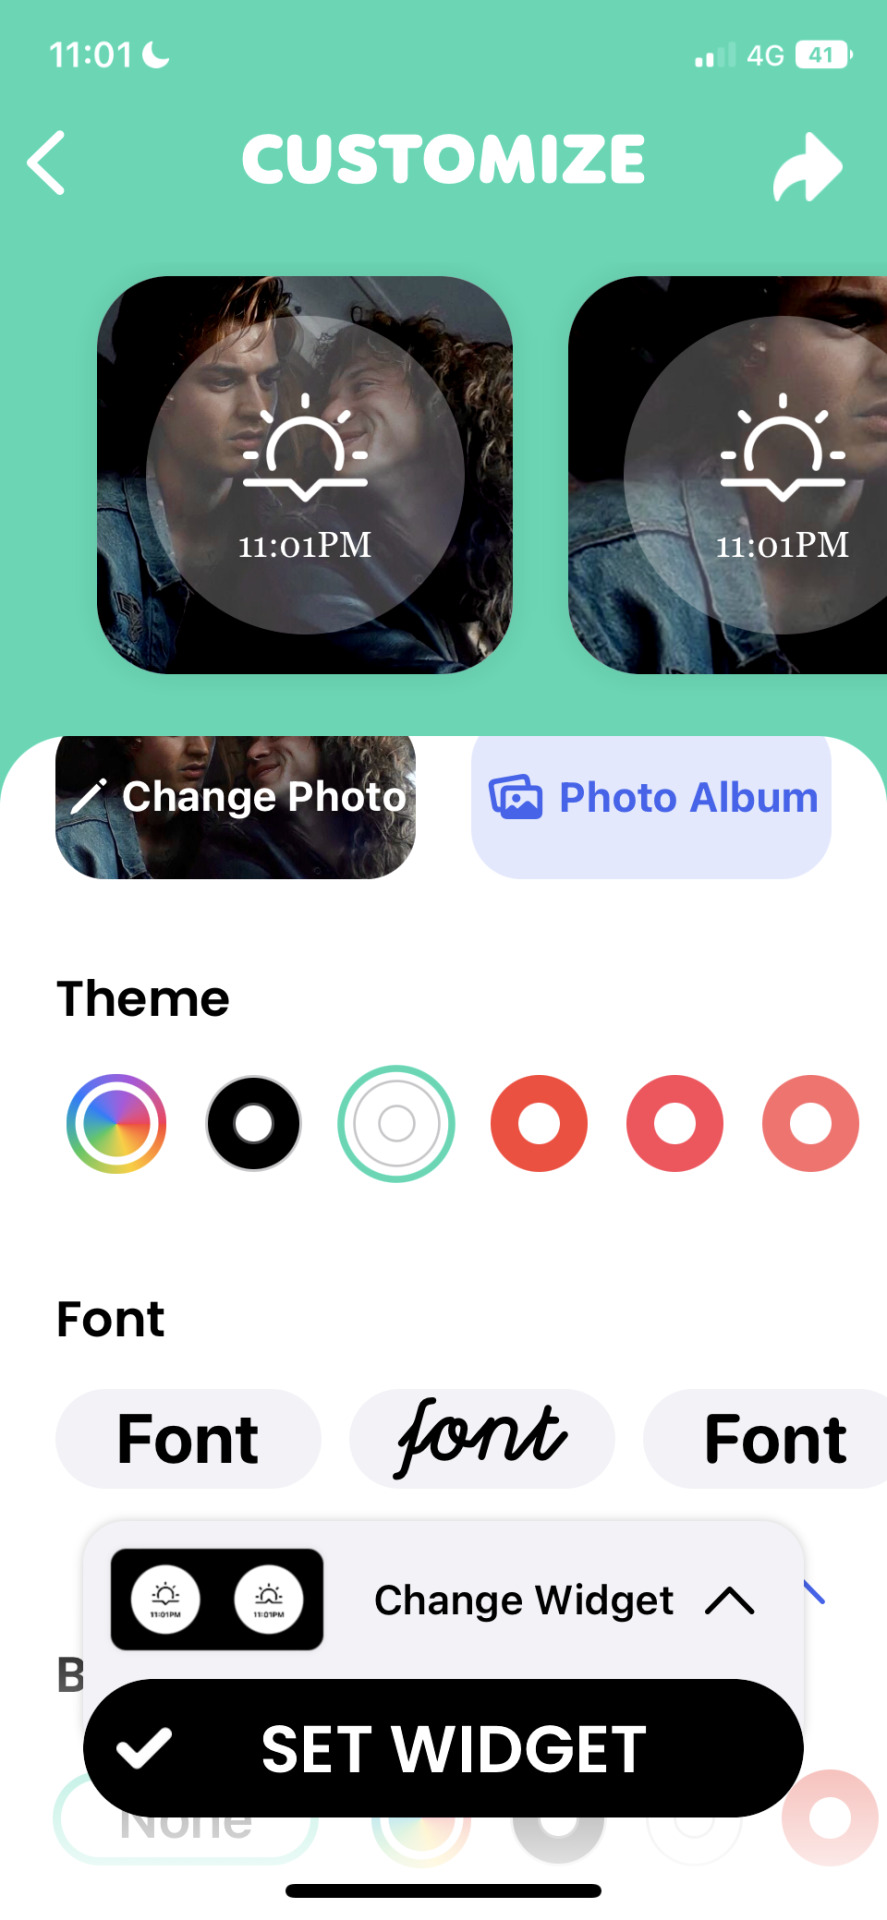


3. The music widget can be connected to Apple Music or Spotify, I selected a playlist with stranger things Inspired songs. I created a background that would match the Homescreen (it's blurry on purpose ahah)


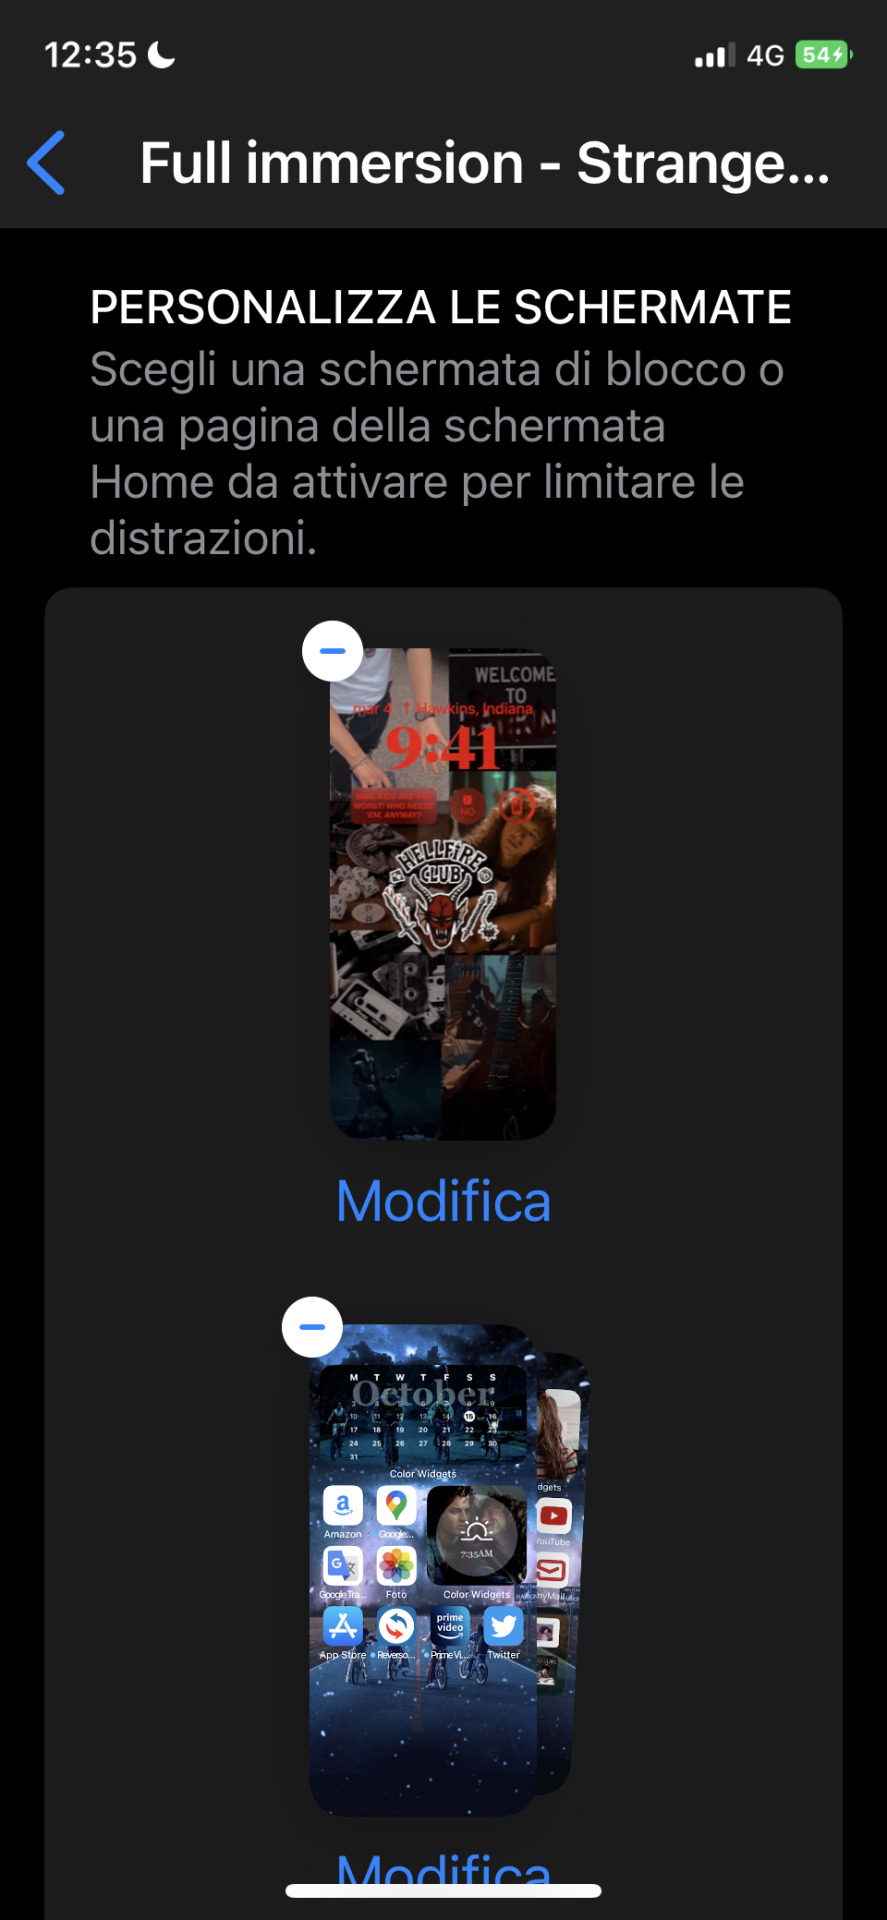
Homescreen animation
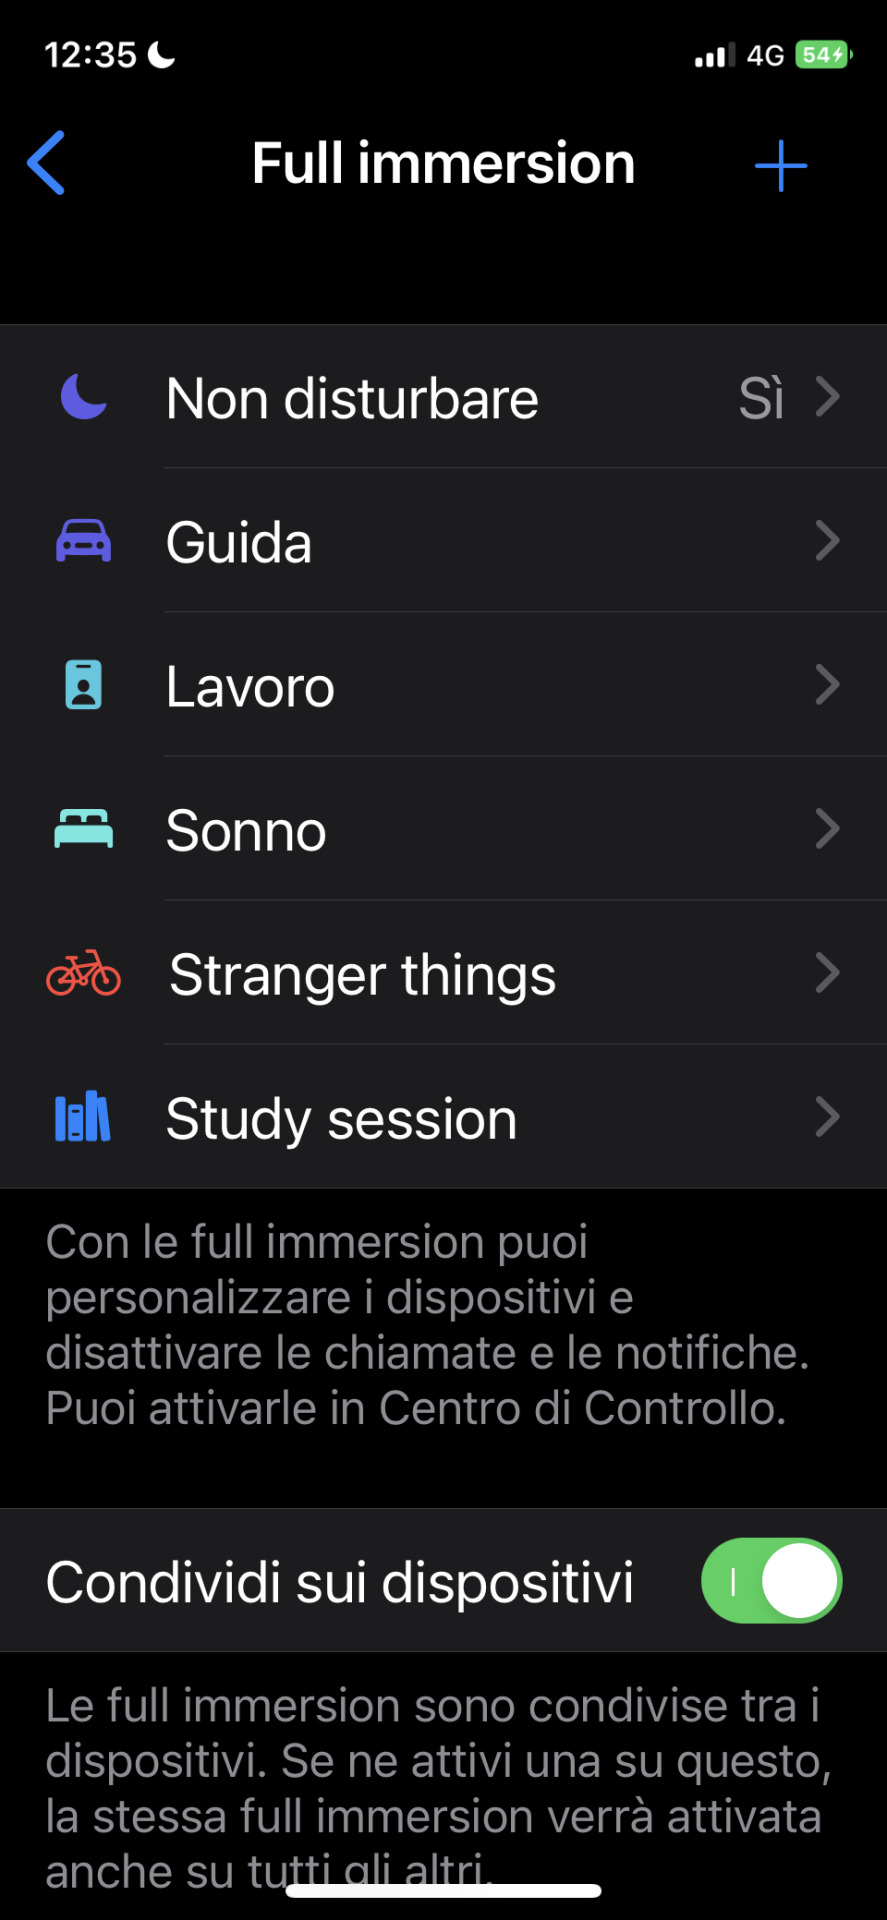
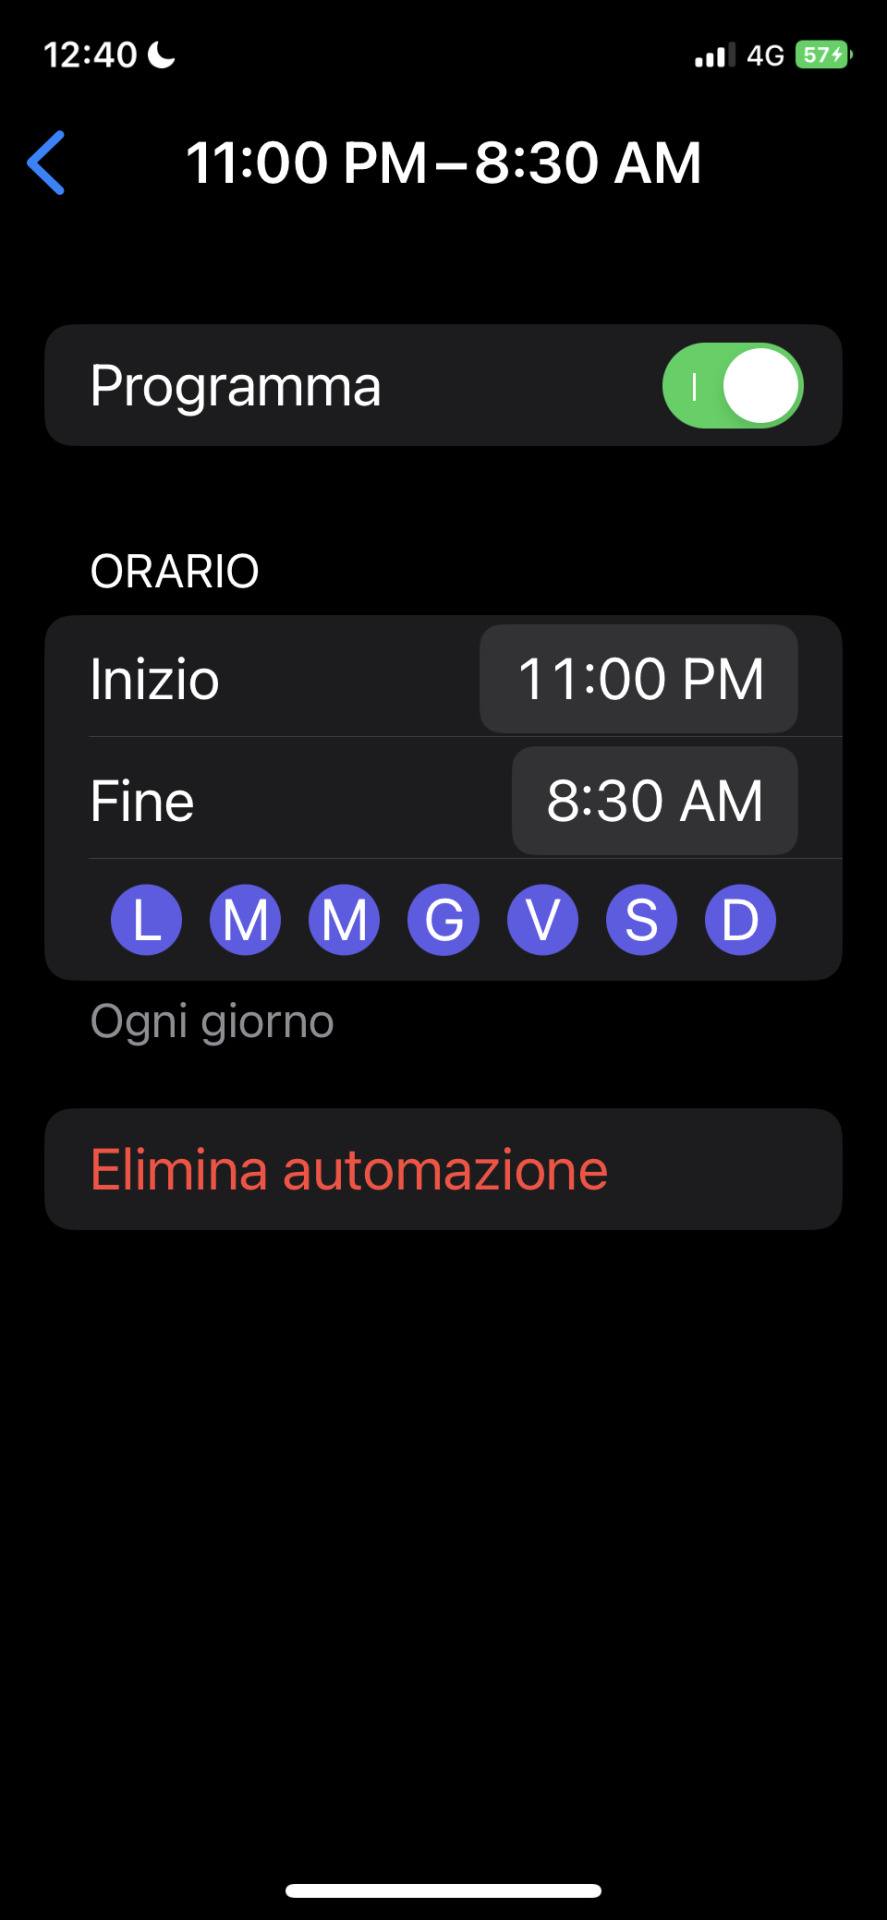
You can do this in different ways, personally, I created 2 full immersions and set a time to automatically change them throughout the day. The fist one is called "stranger things", has the red background, starts at sunset and ends at 11:00 pm; the second one is called "do not disturb", has the upside down background, starts at 11:00 pm and ends at 8:30 am.
To create a full immersion:
1. Go to settings, then full immersion, then either modify a full immersion that you already have or tap the + on top right to create a new one
2. Select “personalized” then name the full immersion and give it an icon if you want (ex. “stranger things” and bike icon)
4. Change the settings however you like then select the red homescreen as a background for this immersion.
5. Select add automation to set the timer in which you want the homescreen to be changed.

6. Repeat the process for the second homescreen, selecting the Upside Down picture.
These are the three homescreens I used (third one made by me!), I hope this was helpful to someone!


#ios 16#steve harrington#stranger things#eddie munson#iphone#stranger things iOS theme#iOS stranger things#iOS16 theme#the fruity four#eleven hopper#max mayfield#tutorial#ios 16 tutorial#hawkins#my edits
28 notes
·
View notes
Text
Ringtones on iPhone: A shitty tutorial by crispy
Sup fuckers, do you wanna have a fictional character screaming at you to wake up? Or perhaps tell you that someone is calling? Maybe even have sound effects from your favorite game play when you get a text? Well, here’s a tutorial on how to do it!
Note: This tutorial is compatible for iPhones only, as I don’t have an Android.
Now, here’s the things that you’ll need in order to make your custom ringtone:
A 30-second audio clip of your choosing
A computer
Google Drive [optional]
iTunes [optional]
A file converter [optional]
Your charger cord [optional]
Step One (1): Creating your clip
There are two ways to go about making your clip. It depends on how long you’re willing to wait and how many clips you’re going to use.
First, you need to convert your audio clip into an .AAC audio file. This can be done several ways. You can use iTunes, or you can use an online converter.
If you are using iTunes…
1. Import your clip by dragging and dropping it into iTunes
2. Go to Edit > Preferences
3. Find and click Import Settings

—
4. Set it to AAC Encoder and High Quality (128 kbps)
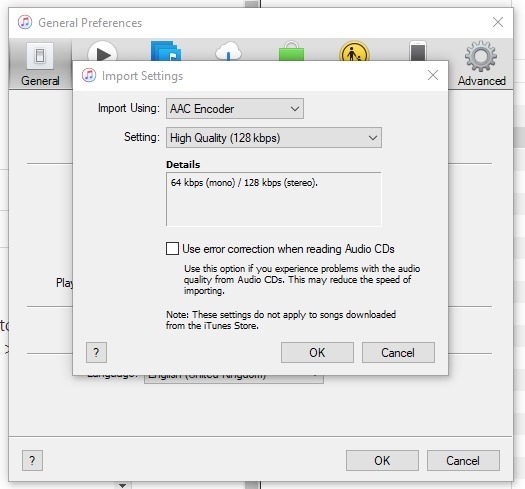
—
5. Select the clip within iTunes
6. Go to File > Convert > Create AAC version

7. Once the duplicate of your clip shows up, delete it from the iTunes library, but not from your files. There will be a pop-up that will prompt you for this.
Step Two (2): Converting your clip
Now that you have your file, you have to convert it from m4a to m4r, as iPhone only reads m4r as ringtones.
With iTunes…
1. Go to your iTunes Media folder, which is typically found in your Music folder in your file explorer, and find your audio clip.
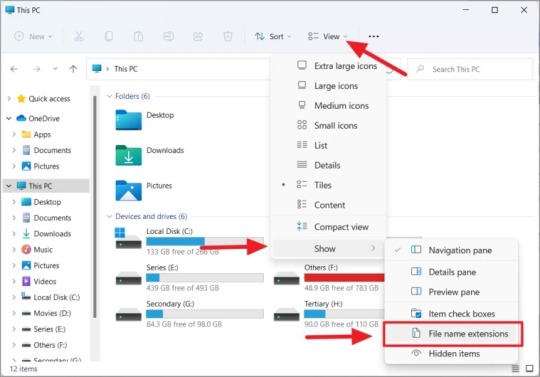
2. When you find the .m4a file, change the last three letters after the dot [the file extension] to .m4r
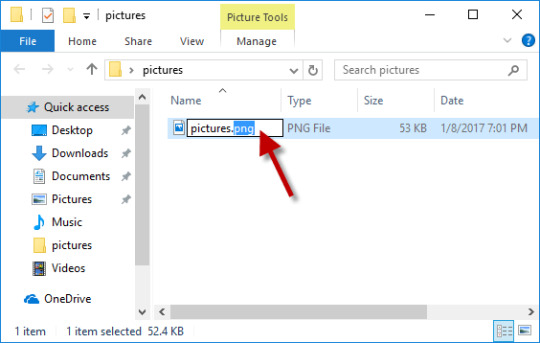
—
Note: Make sure you can edit the file extension first!
—
3. Double-click the file and open it in iTunes
Without iTunes…
1. Find a file converter that supports converting to .m4r [Zumzar is a good example]
2. Convert your file to .m4r
Note: This method is recommended for those who have only two (2) or less files they want uploaded. Unless you have the patience or money, then this method is NOT good for converting in bulk
Step Three (3): Transferring your files
Now that you have your .m4r files, it’s time to add them to your phone.
With iTunes…
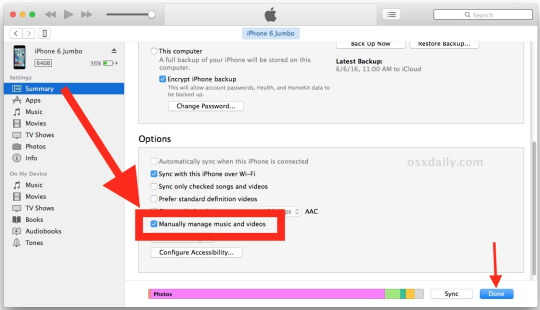
1. Connect your phone to your computer using your charger cord
2. Turn on ‘manually manage music and videos’
—
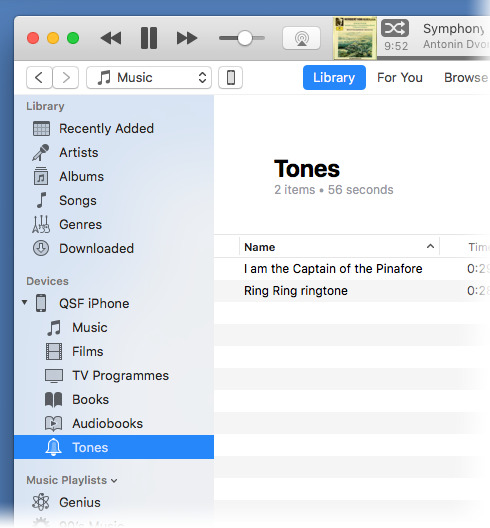
3. Drag and drop your .m4r files into the Tones folder on your phone
Without iTunes…
1. Open Google Drive on your computer
2. Import your .m4r files into the Drive
3. Open Google Drive on your phone
4. Download the files
And Voila!
You can now use your custom ringtones :D
tutorial made for @shash4
7 notes
·
View notes
Text
PSA: Sharing files from an andriod phone to your windows PC via bluetooth is easy and painless!
We've all been in a situation where you have some photo or file on your phone and it has to get onto your PC for some reason. This often involves uploading it to a third party service like google drive, or sending it to yourself on discord, or plugging in a cable and navigating the unfamiliar android file structure to find the file in question. Listen, there's a better way!

left click on that little arrow on your task bar, then right click on the bluetooth symbol
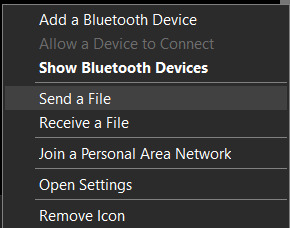
You should get another menue like this. From here you can click on "Recieve a file". That will put your computer on standby mode. Then you go onto your android phone, find the file or photo you want to send, use the "share" widget, and pick bluetooth. Your computer will show up on the list of devices to connect to, so tap on that!
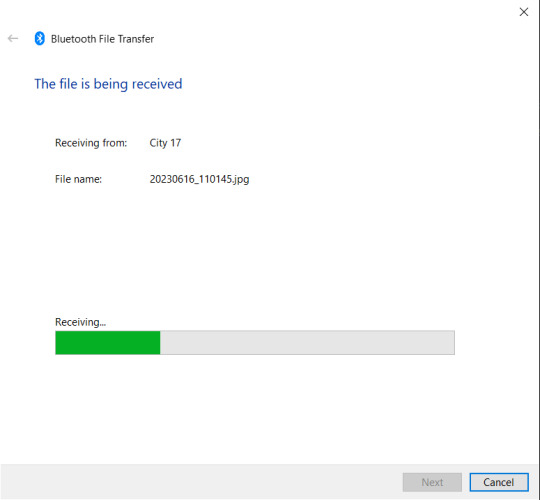
Yay! now you're receiving the file!
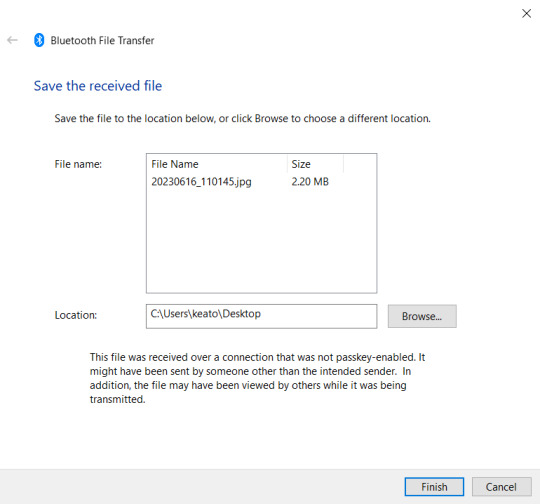
Once the transfer completes you get this helpful screen that lets you pick exactly which folder you want to send it to so the file doesn't get lost.
You can do this with as many files as you want in a big batch. It doesn't take any matching cables or ports, it doesn't even take internet. It's compatable with basically every single android smart phone (and probably some old feature phones could do this too).
We always assume that the bluetooth standard is only for audio and sometimes game controllers, but you can actually do so much more with it.
#yeah it's not as pretty as airdrop but it gets the job done#No clue if/how this works with iphones and macos#no clue how this works on windows 11 because I do not endorse windows 11 it is an affront to god.#bluetooth#tech tutorial#you should know#tech psa#windows 10
2 notes
·
View notes
Video
youtube
How to Download HappyMod on iOS/iPhone/iPad 2024 Full Tutorial Happymod ...
0 notes
Text
youtube
How to turn profile view history on or off || How To Stop People From Seeing That I Viewed Their Profile On TikTok || How To Turn Off Profile Views On TikTok! || How To Turn Off Profile Views On TikTok 1. In the TikTok app, tap Profile at the bottom. 2. Tap the Menu ☰ button at the top, then select Settings and privacy. 3. Tap Privacy, then tap Profile views. 4. Turn the Profile view history setting on or off. This setting is turned off by default.
#iPhone#signingdocuments#digitalsignature#technology#iPhonehacks#productivity#easysigning#howto#tutorial#iPhoneguide#documentmanagement#efficiency#mobilesigning#easysignature#electronicdocuments#iOS#mobiledocuments#easysigningprocess#iPhoneapps#productivitytips#Youtube
0 notes
Text
How to Fix iCloud Sync Problems Between Devices?

Is your iCloud Sync not working on your iPhone, iPad, or Mac? The ability to sync data between devices on iCloud has recently been disabled even though it used to sync normally earlier. Don’t worry; we can determine the issue by following various troubleshooting steps.
Earlier, it was working normally. All of a sudden your iCloud Sync is not working between iPhone, iPad, and Mac Computers. All you have to do is to follow each troubleshooting step and look which one helps you to sync data on your iPhone, iPad, and Mac. If you have a problem with iCloud Drive, then do read our How to Fix iCloud Drive is Loading Error on iPhone and iPad? to get it fixed.
If you are facing consistent issues with the iCloud Sync issue, then it is advisable to follow the further article for the way to fix it.
Read More - How to Fix iCloud Sync Problems Between Devices?
0 notes
Text
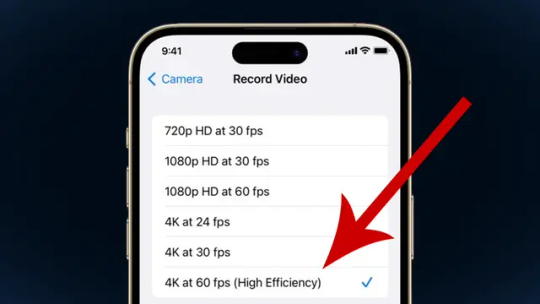
Como gravar vídeos em 4K a 60 fps no iPhone em 2024?
Os iPhones são alguns dos melhores smartphones para gravar vídeos. Eles possuem câmeras de alta resolução e alta qualidade, que permitem capturar vídeos com uma excelente qualidade.
No entanto, para obter a melhor qualidade de vídeo possível, é importante configurar a câmera do seu iPhone corretamente. Neste tutorial, você aprenderá como gravar vídeos em 4K a 60 fps no seu iPhone.
Veja mais:…
View On WordPress
#4K#4K a 60 fps#60 fps#Apple#apple brasil#celular#Como gravar vídeos em 4K a 60 fps no iPhone#Como gravar vídeos em 4K a 60 fps no iPhone em 2024?#gravar vídeo#iOS#Iphone#Tutorial
0 notes
Text
Any andriod users wanna walk me through shutting off the automatic downloading of apps I didn't ask for?
#promise ive done all the tutorials and walk thrus and reddit threads i can get my grubby hands on#but alas#my fucking carrier is forcing games onto my phone and taking up storage. i thought i got this fixed but. here i am pulling my hair out#seriously so close to going back to my shitty iphone#bc at least apple products dont allow random shit to get downloaded ???#like i dont WANT your shitty over advertized game!!!!!! do you think the millions of ads about it wasnt enough????? ill kill you#anyways dont mind me im. fucking furious
0 notes
Text
youtube
Unleashing Creative Photography: How to Create Green Screen Photos on the iPhone with Green Screen by DoInk
Step into the world of imaginative photography with our tutorial! In this blog post, we'll guide you through the exciting process of creating stunning green screen photos right on your iPhone using the Green Screen by DoInk app. Whether you're an aspiring photographer, a content creator, or simply looking to add a touch of magic to your pictures, this step-by-step guide is your key to unlocking the full potential of green screen photography on the go.
What you will learn:
Understanding the basics of green screen photography
Navigating the Green Screen by DoInk app on your iPhone
Capturing photos with a green screen background
Adding creative overlays, effects, and text
Real-world examples for inspiration and application
Elevating your photography with the magic of green screen
Green screen photography has never been more accessible! With the Green Screen by DoInk app on your iPhone, you have the power to create captivating photos that stand out. Embrace the magic of green screen photography and watch your images come to life with creativity and imagination.
Embark on this journey of creative exploration with Green Screen by DoInk. Share your captivating green screen photos with us, and let your imagination run wild!
#Green Screen by DoInk#Green Screen Photography Tutorial#iPhone Photography Tips#Creative Photo Editing#Visual Effects on the iPhone#DoInk Tutorial for Photography#Elevate Your iPhone Photos#Green Screen Magic#On-the-Go Photography#Creative Imaging with Green Screen#Doink#Do Ink#Green Screen Photos on Iphone#Iphone green Screen#iPhone Green Screen Magic#Youtube
1 note
·
View note
Text
How to Make Money from Internet
How to increase Instagram followers in a 100% safe and effective way
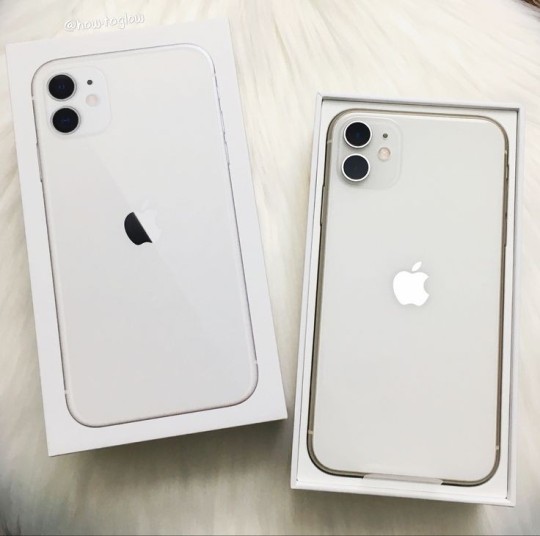
Review Iphone 15
Explanation: The Adsterra website is similar to AdSense and without condition
This and more Visit our website
https://techstudyyhub.blogspot.com/
#tech#tutorial#make money from home#make money online#site#review#iphone 15 review#google adsence#adsterra#ads
1 note
·
View note
Text
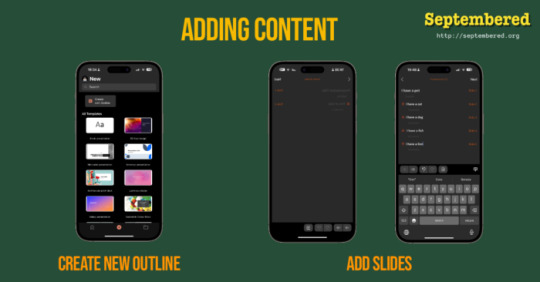
Creating PowerPoint Presentations on iPhone: Guide
I have published a new guide on how to create PowerPoint presentations on your iPhone
Recently, I have needed to do a lot of work while on my iPhone. One of the things that I needed to do was create a few simple PPTs for classes. These PPTs only need to be a keyword or a sentence, so nothing too complicated. The Microsoft PowerPoint mobile app did a fantastic job with these. At first, I only planned to build the first draft on my phone, but some of the results have been good. It’s…
View On WordPress
#classroom#E-learning#Education#iPhone#Microsoft#Mobile Apps#PowerPoint#Presentation#Productivity#tutorial
0 notes
Video
youtube
Copy Your iPhone Photos & Videos IN SECONDS (Without iCloud or iTunes)
Easily backup/copy, store, and transfer all your iPhone Files without iCloud or iTunes by using this simple method with a USB Drive, External Hard Drive, or SSD you have laying around the house. iCloud Maxes out at 2TB but you can have virtually unlimited storage using any SSD, Hard Drive, or USB Drive you have laying around. Sure you lose the benefits of cloud storage, but at least your data is completely yours, offline, and ready whenever you need it 🤷🏾♂️.
All you need is a Lightning to USB 3.0 camera adapter. In this video, I show you how to use this cheap dongle to extend your iPhone storage, transfer all you pictures, music, documents and videos and backup your life. It's so versatile it can even be used for Professional USB microphones and cameras with your iPhone. It can even be used to quickly transfer all your iPhone files back and forth between a Windows PC or Mac. A true life saver! It also works with older iPhones & iPads.
Here's where you can get yours:
1. Affordable Lightning to USB 3.0 adapter: https://amzn.to/3Dexzbb
2. OEM Apple Lightning to USB 3.0 adapter: https://amzn.to/3WxtN3j
#youtube#Copy Your iPhone Photos & Videos IN SECONDS#icloud#backup your iCloud photos#apple#iphone tutorials#itunes
0 notes
Last Seen Blogs

ciphdizzle
Ciph Dizzle

edellweiss
forever & always

wonuwrites
Wonu Writes

aouko
Aouko

queenrayxo
Life As I Know It