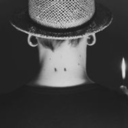
#imageediting
Text
#retouching#photomanipulation#modeling#beauty#bestoftheday#photography#retoucher#portrait#backgroundremove#photoediting#girlsphotographer#skin#eyemakeup#lipstick#bestphoto#packshotimage#colorcorrection#photoeditor#imageediting#clippingpath
4 notes
·
View notes
Text

Get editing services at the lowest prices.
The main reason for hiring me:
1. We are available to work 7 days a week.
2. Our turnaround time is usually 24 hours.
3. Professional, fast, and Quality Service at a fair price.
4. ASAP Delivery
5. You will get free samples to verify our work
7. We provide unlimited revision service
#photoretouching#photoshop#emiliaevaph#emilia_evaph#photography#photoediting#retouching#backgroundremoval#imageediting#clippingpath#portrait
2 notes
·
View notes
Text
High Quality Photo Editing Service
Contact US:
[email protected]
https://join.skype.com/invite/v8WpX8d4z7eb
WhatsApp:+8801921022065
Website: https://clippingedits.com/
#clippingedits#clippingPath#backgroundremoval#imageEditing#imagesmasking#PhotoEditing#ImageProcessing#neckjoint#clipping#imageResizing#AdobePhotoshop#graphicdesign#retouching#shadow#ecommerce#stopmotion#ecommeceimageediting#clippingpathservice#imagebackgroundremoval#amazonimageediting#AmazonProductPhotography#removebackground
4 notes
·
View notes
Text
2 notes
·
View notes
Text
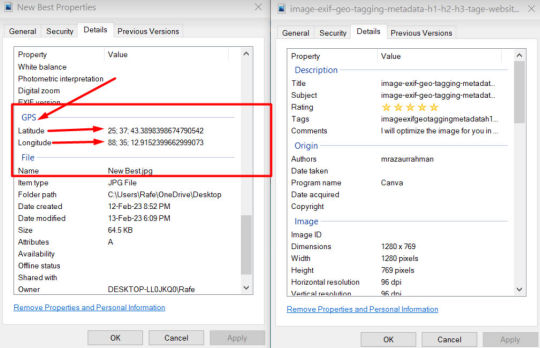
Image Exif And GEO-Tagging
Contact Me:

Geotag Images For Google My Business Optimization:
What is Geo Tag?
Geo Tag is an electronic tag that assigns a geographical location to a photograph or video or a posting on a social media website.
What is Image Optimization?
Optimizing web images is a process of delivering high-quality images in the right format, dimension, size, and resolution while keeping the smallest possible size.
Why it is Important to Optimize Image EXIF Data & Geo Tagging?
This will help you to rank your image on the first page on Google.
Since Geotagging images helps search engines like Google, and Bing to understand the website properly. As the search engines don't read the actual content, they read codes.
So Geo Tagging adds extra authority to your website. The website will load faster, rank on keywords, and people can find by location. So it could reach your viewer fast.
If you are a local business and looking to get some extra juice to push your rankings, then Geo-Tagging your images is the best way to go.
So if you want a boost on local SEO or Google my business optimization then try my service.
Contact Me: Cybernet It Agency
#imageexif#geotagging#metadata#h1h2h3tage#websiteurl#imageoptimization#imageseo#imageediting#googlemybusiness#digitalmarketing#socialmediamarketing#socialmediamanager
10 notes
·
View notes
Text
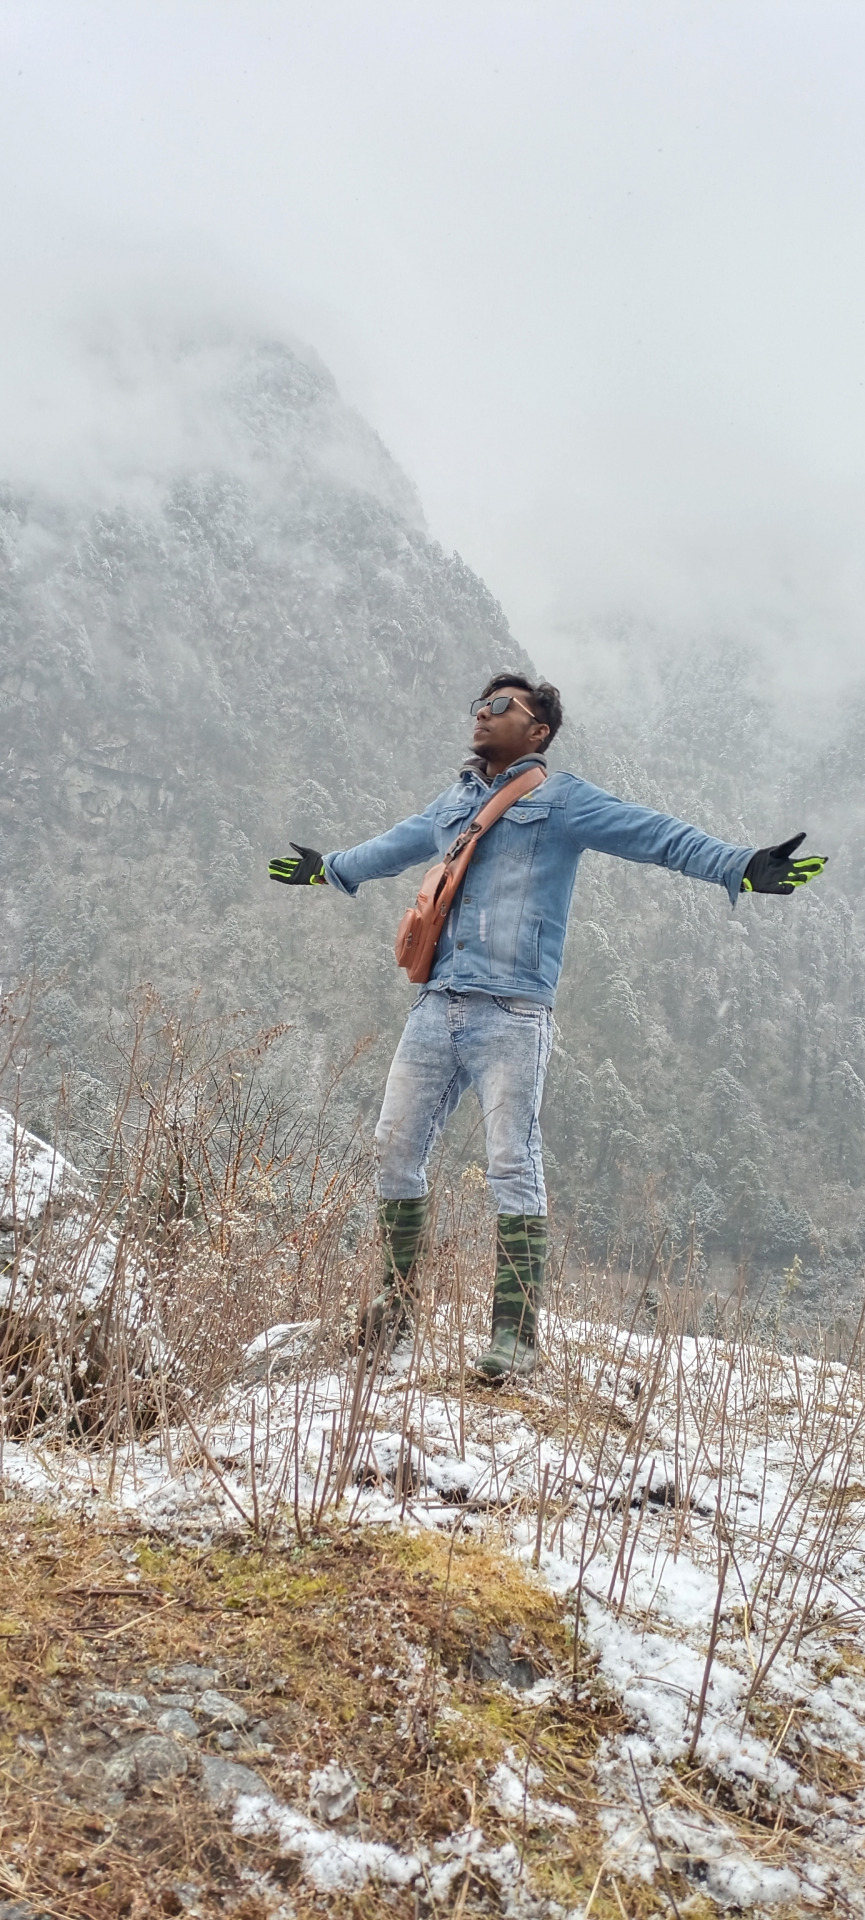
Let travel change you.💔
#imageediting#mdishakrahman#shadow#graphicdesign#photography#clipping path#photo retouching#neckjoint#ghostmannequin#background#travel#sikkimtrip#sikkim#tourism#gangtok#car photography#photoshop#i sell photos#photo edit#photoshoot#my photos#photographer#munshiganj#bikrampur#india#tour
2 notes
·
View notes
Text
Looking for a car photo editing service that can help you sell your car faster?
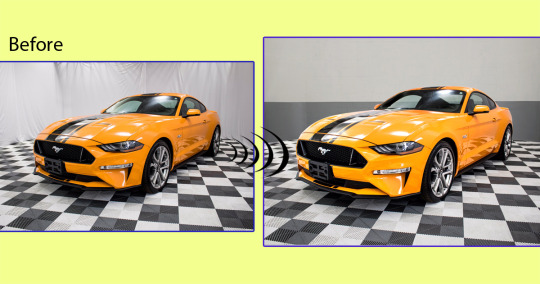
We offer a wide range of car photo editing services, including:
Background removal
Color correction
Image enhancement
Vehicle modification
Shadow and reflection removal
And more!
Our team of experienced photo editors can help you make your car look its best, so you can sell it faster and for more money. We work quickly and efficiently, and we always deliver high-quality results.
We offer a free quote for all of our services. To get started, simply upload your photos to our website or send us an email. We'll get back to you with a quote within 24 hours.
#imageediting#backgroundremove#clippingpath#imageeditor#photoeditor#graphicsdesign#photography#photoretouching#photoediting#clippingpathservice
2 notes
·
View notes
Text
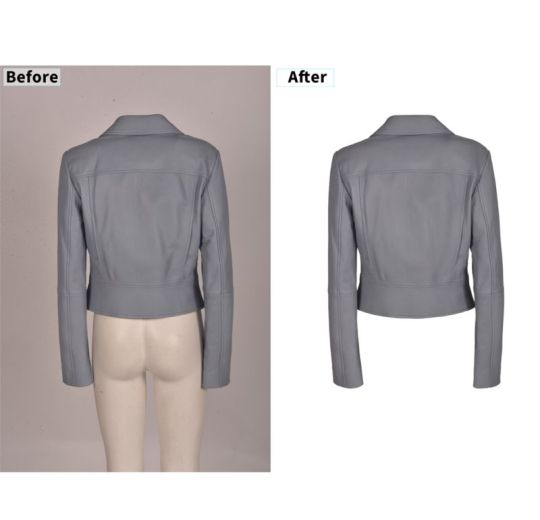
Color Correction, Ghost Mannequin , Symmetric and Many More In Your Budget !
Only at Image Edit Expert,
We are now offering Special Discounts If you have bulk images (Min 500+) or larger projects. Feel free to contact us for details.
Only At https: www.imageeditexpert.com/ .
Try Free Trial: https://lnkd.in/eib839Jx
#ghostmannequin#symmetry#clippingpathservice#ImageMaskingService#shadowmaking#neckjointservice#backgroundremoveservice#photorestoration#ecommerceimageediting#editingservices#productimageediting#imageediting#colorcorrection#realestatephotoediting#photoeditingservice#editingphotos#editingskills#retouching#fashion
2 notes
·
View notes
Text

NEUROSYNTH POSTER DESIGN
Full Graphic Design + Image Editing & Maniplation by Toni Alexander (Antonio Alexander Feliciano)
Collaborative Credits: 3D Renderings by Adnan Mistry
#design#graphicdesign#graphic design#printandgraphicartwork#printdesign#print design#print#graphicartwork#graphic artwork#imageeditingandmanipulation#image editing#imageediting#image manipulation#imagemanipulation#archive#poster design#posterdesign#poster#poster art#posterart#3d render#3d rendering#3drender#3drendering#partners#partner projects#partnerprojects
2 notes
·
View notes
Text
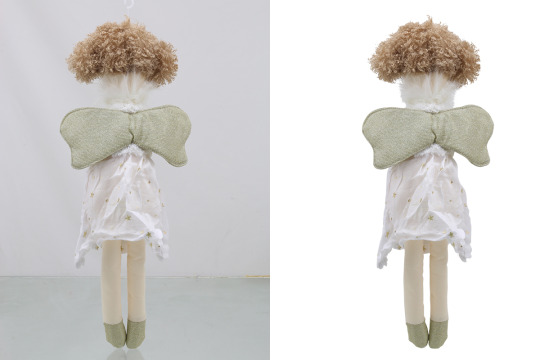
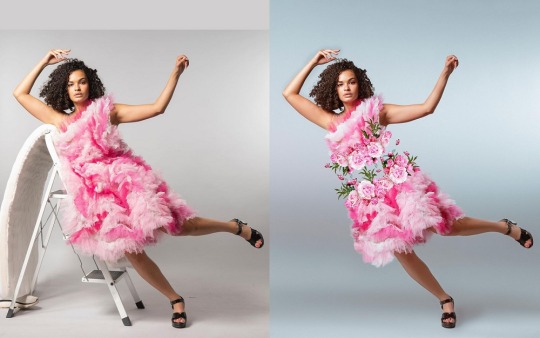
Transform your photos from ordinary to extraordinary with our top-notch refine edge masking service! Whether you're a professional photographer or just looking to spice up your personal social media feed, our expert editing team will help you achieve stunning results. Don't settle for mediocre images - let us refine them to perfection.
#RefineEdgeMasking#PhotoEditing#ExtraordinaryResults#ExpertEditors#TransformYourPhotos#ImageMasking#PhotoRetouching#ImageEditing#ClippingPath#GraphicDesign#PhotoManipulation#CreativeDesign#ProductPhotography#Ecommerce#PhotoCleanUp#PhotoEnhancement#ProfessionalEditing#VisualContent#MarketingMaterials#SocialMediaContent#BrandIdentity#VisualMarketing#VisualIdentity#DesignInspiration#graphic_aid
2 notes
·
View notes
Text

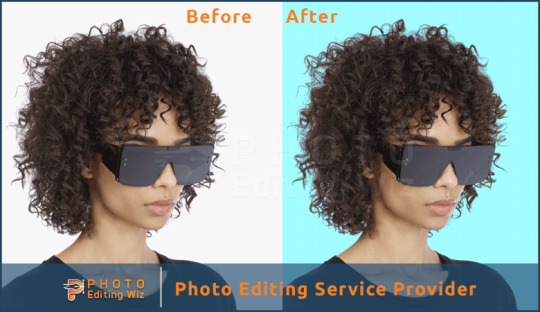
#retouching#skincare#packshotphotography#portrait#photoediting#modeling#colorcorrection#backgroundremove#makeuplook#photoeditor#retoucher#imageediting#clippingpath
3 notes
·
View notes
Text
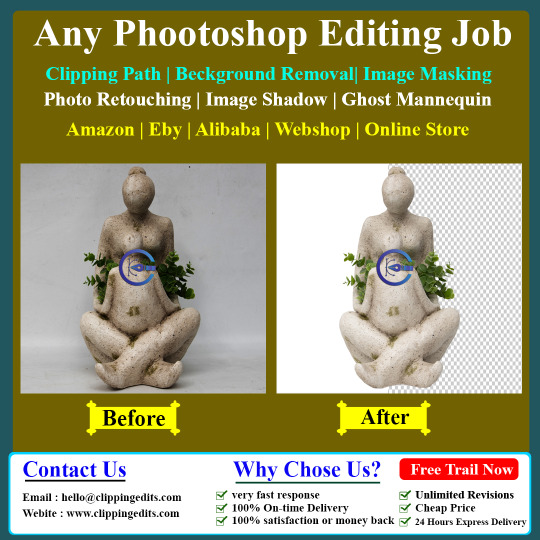
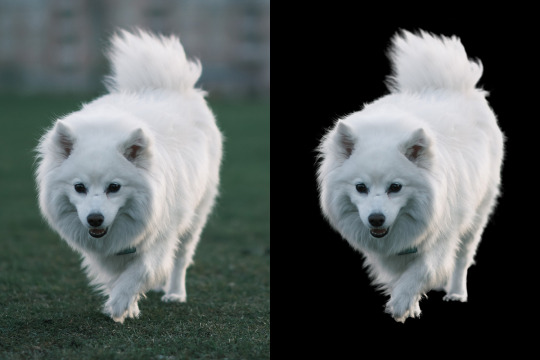
Best Remove Photo Background with Photoshop | Background Removal Service

How to Remove Photo Background with Photoshop
Imagine your photo subject with removed photo background with photoshop that you designed from scratch with your imagination. Before placing an object in an entirely new landscape, you must remove photo the background with photoshop from the original image. Removing the background is a complex art and requires more than an eraser, but you don’t have to be a graphic designer to learn the steps in Adobe Photoshop CC.
Remove Photo Background in Photoshop.
Different programs are used in the Remove photo background in Photoshop. Adobe Photoshop came first in this matrix. You may prefer it over others because of its wide range of photo editing tools and options. The best tools to remove the background are Pen Tool, Magic Wand, Lasso Tool, Layer Mask, Channel Mask, Plug-in, etc. This article will discuss the best Photoshop tools to remove background from photos, along with a guide for the process.
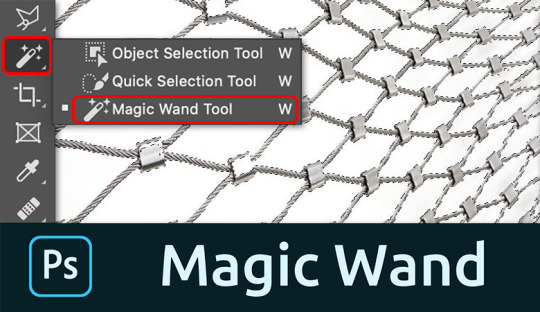
#1. Magic Wand Tools [remove photo background with Photoshop]
It is a great tool that can remove a photo background with Photoshop. It’s a magic wand because it works like a bit of magic. It looks like a great magical tool. Very effective on shaped images. The tool works well if the background is solid and the image’s outline is strong.
As you know, the image of this tool should have a solid outline. So we selected this image and opened it in Photoshop to remove the background.
We select the Magic Wand tool in the left pane of Photoshop. You can select this tool by clicking the tool or just pressing “W/Shift + W” on the keyboard to select it.
Click on the background you want to select. A dotted line may flash around the selected layer.
If you feel confused with options like dashes, you can move on to something else, namely tolerance, as we show in the snapshot below. We used a tolerance of 50% to select this image, with proven and continuous anti-aliasing. This part will vary with different images. You should try if the selection is imperfect.
Press Ctrl+D to deselect the main theme. Go to the layer palette, create a new layer and place the new layer below the main layer by dragging it from top to bottom.
Set the background color, and make sure it is cropped properly. By the way, after all these steps, you can remove the background with the magic wand.
# 2.Quick Selection Tool [remove photo background with Photoshop]
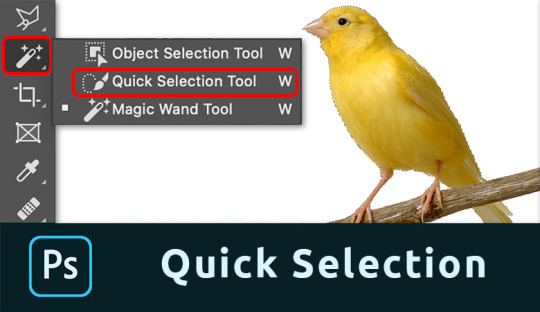
The quick selection tool will do a lot of the work for you and works best when there is good contrast between the subject and the background.
Take a photo with Photoshop. We use the same football image here. You can apply the method to any image you want to process.
Before starting work, ensure that the image’s background is locked or open. Double-click the lock icon to unlock the layer if it is locked.
Select the Lasso tool from the toolbar. Draw a line around the main object by dragging. Hover over the starting point.
After drawing the line, click the Path palette in the Layers palette and create a path by clicking the Path Trace image.
Next, click on the Selection tool from the toolbar.
We think you are still concerned because your drawing is wrong. No problem, click on the drawing line with the Pick tool, and you will get several reference points to help you resize the line.
Press Ctrl + Enter to select the rows. Return to the Layers palette.
To separate the subject from the background, click Select at the top and then Invert. You can do this from the keyboard by pressing Ctrl+Shift+I. Now press Delete to remove the background.
Take a new layer below the main layer and give it a background color. This way, you can remove unwanted background.
# 3. Pen Tool [remove photo background with Photoshop]
The pen tool works best with simple objects. It is ideal for making a selection of objects with solid, straight, or curved lines.
Select pen tool
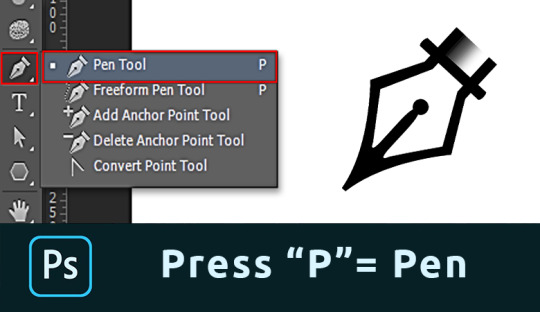
Select the Pen tool from the toolbar on the left. You can also use the key combination “P.” Make sure to set “Path” in the top menu.
Make path

Click any edge of the object to create the first anchor point. Create another landmark. If correct, click. If you want a curved line, click and drag an arc from the line.
This allows you to work smoothly around rounded and curved edges.
Always press the Option key (Alt in Windows) on the last reference point after the curve. If you don’t, the next row will automatically appear according to the previous row.
Pressing the Option key resets the reference point, allowing you to recreate the line.
It takes some practice to master, but you will progress much faster after a while. Continue the process until you have created a path around the object.
When you reach the first character, click it. The road will be closed automatically.
Convert Path

In the Paths window, hit the “Load path as selection” icon.
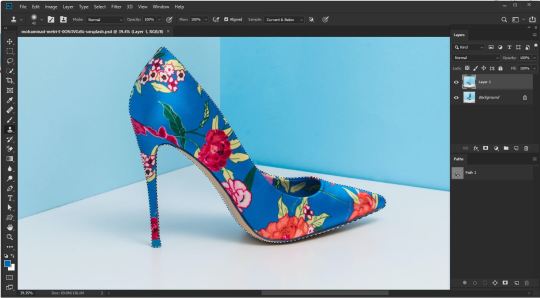
Remove background with Photoshop.
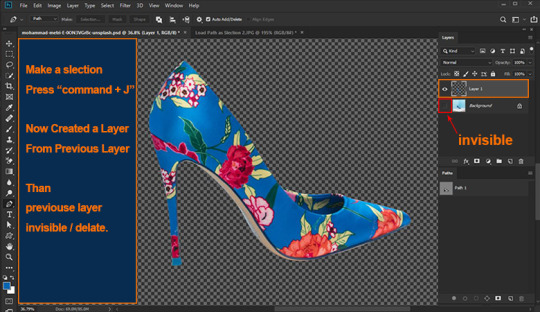
Now there are several options. To remove the background, select> Invert and press the Remove button. You can also use the keyboard shortcut Cmd + Shift + I (Ctrl + Shift + I for Windows).
Just press Cmd + J (Ctrl + J for Windows) to copy the object to a new layer. That’s it; you’ve isolated the subject and removed the background in Photoshop.
# 4. Background Eraser Tool [remove photo background with Photoshop]
Next, we have the Background Eraser tool. Again, it works best with a clean background.
Background Eraser Tool
Select the Background Eraser tool from the toolbar on the left. It is usually hidden behind the eraser tool. Hold down the eraser tool to reveal it.
Erase the Background
Start by removing the background. Automatically detects edges of objects that are not in the background. It is better to set a smaller brush size for more complex areas.
Selection edge on image
The background eraser is great but not perfect. Sometimes the subject and background have the same colors and shades. You must select these fields yourself. We recommend selecting the bottom layer and clicking the Add Mask button in the Layers panel.
Fill the layer mask with black. To do this, select the Paint Bucket tool, set it to black and click on your photo with the mask thumbnail selected. Now use the brush and set it to white or black. Black color erases parts, and white shows parts.
Make sure the mask size is selected and start painting the image. This way, you can manually adjust the areas that need more work.
FAQs about removing photo background with Photoshop
How do I remove background from hair in Photoshop?
You remove the background from hair in Photoshop using the steps in this post:
Set up your layers
Create a high-contrast layer
Remove the background around the hair and model
Replace the background
How can I change my hair background?
You can change the background of your hair by removing the background by following the steps in this guide. Then choose a background color or a new image to replace it, or leave it as transparent background.
How Do I Make a Background Transparent in Photoshop CC?
To create a transparent background, you need to open the background layer. Double click on it and click OK. Now start erasing the areas, and you will see a shiny background.
How Can I Remove a Background From a Picture?
There are two options here. First, select the background and click the Remove button. The background disappears.
You can also add a layer mask instead of removing the background. This way, you can always re-expose the background.
#Backgroundremoval#clipping path#cutoutimage#removebackground#silopath#deepetching#adobephotoshop#imageediting
8 notes
·
View notes
Text
How a PNG Image Converter Can Make Your Life Easier: Convert to PNG with an Online Free PNG Image Converter

In today's digital age, images play a critical role in our daily lives. Whether it's for personal or professional use, we need images in different formats. However, not all image formats are compatible with every device, and that's where a PNG image converter comes in. A PNG image converter is a tool that can help you change the format of an image from one format to another, primarily to convert image to PNG.
PNG (Portable Network Graphics) is a popular image format that offers excellent image quality and supports transparency. It is widely used in web design, graphic design, and digital photography. However, many images are saved in different formats, such as JPEG, BMP, GIF, and TIFF, and they may not be compatible with all devices.
This is where the importance of a PNG image converter comes in. With a PNG image converter, you can easily convert images to the PNG format, making them more compatible with different devices. It's a great tool to have in your arsenal, whether you're a professional designer or just someone who wants to convert a photo to PNG.
One of the best things about a PNG image converter is that it's easy to use. There are many online free PNG image converters available that allow you to upload an image and convert it to the PNG format in just a few clicks. You don't need to download any software or have any technical skills to use these online free PNG image converters.
Using an online free PNG image converter is also a cost-effective solution. You don't need to purchase any software, and you can use it anytime, anywhere, as long as you have an internet connection. This makes it a convenient and practical tool to have, especially for those who need to convert images to PNG frequently.
Apart from compatibility, there are many other benefits of using a PNG image converter. The PNG format offers excellent image quality, which means that your images will look sharp and clear even after conversion. PNG files also support transparency, which is useful for web design and graphic design. Additionally, PNG files are smaller in size compared to other formats, making them easier to share and download.
In conclusion, a PNG image converter is a must-have tool for anyone who works with images. It offers compatibility, convenience, and cost-effectiveness, making it an essential tool for personal and professional use. With an online free PNG image converter, you can easily convert images to the PNG format and enjoy the benefits of excellent image quality, transparency, and smaller file sizes. So why not try it out today and see how it can make your life easier?
to know more Visit : https://www.onlineimageconverters.com/
#PNGImageConverter#ConvertToPNG#OnlinePNGConverter#FreePNGConverter#ImageFormatConversion#ImageQuality#Transparency#GraphicDesign#WebDesign#DigitalPhotography#DeviceCompatibility#ProfessionalDesign#ImageEditing#ImageManipulation#ImageConversionTools
2 notes
·
View notes
Photo

💯 Official GD Creative Solutions 🇮🇹 𝐏𝙧𝙤𝙛𝙚𝙨𝙨𝙞𝙤𝙣𝙖𝙡 𝙈𝙤𝙩𝙤𝙧𝙨𝙥𝙤𝙧𝙩𝙨 𝙚𝙙𝙞𝙩𝙤𝙧 𝗪𝗘 𝗜𝗡𝗩𝗜𝗔𝗧𝗘 𝗬𝗢𝗨 𝗧𝗢 𝗧𝗥𝗬 𝗦𝗢𝗠𝗘𝗧𝗛𝗜𝗡𝗚 𝗡𝗘𝗪 𝗔𝗡𝗗 𝗢𝗥𝗜𝗚𝗜𝗡𝗔𝗟! ➖ 𝙉𝙚𝙚𝙙 𝙖 𝙥𝙧𝙤𝙛𝙚𝙨𝙨𝙞𝙤𝙣𝙖𝙡 𝙜𝙧𝙖𝙥𝙝𝙞𝙘𝙨 𝙛𝙤𝙧 𝙮𝙤𝙪𝙧 𝙫𝙚𝙝𝙞𝙘𝙡𝙚 𝙤𝙧 𝙢𝙤𝙩𝙤𝙧𝙗𝙞𝙠𝙚? We transform your favorite photo of your motorcycle or car into a beautiful graphic masterpiece. A perfect personalized gift for any bikers, cars owners and motosport lovers in general. All you have to do is send us the image and we will do the rest. ➖ 𝙉𝙚𝙚𝙙 𝙖 𝙥𝙧𝙤𝙛𝙚𝙨𝙨𝙞𝙤𝙣𝙖𝙡 𝙜𝙧𝙖𝙥𝙝𝙞𝙘𝙨 𝙛𝙤𝙧 𝙮𝙤𝙪𝙧 𝙫𝙚𝙝𝙞𝙘𝙡𝙚 𝙤𝙧 𝙢𝙤𝙩𝙤𝙧𝙗𝙞𝙠𝙚? For information on prices and the procedure to create an incredible graphic starting from your photos, visit our website online for pricing and procedure or send DM ➖ Tag @gdcreativesolutions on reposted content ::::::::::::::::::::::::::::::::::::::::::::::: 📍 🇩🇪 📸 Image reference: @racer_bladez_vf 💨 🏍 KTM 1290 Superduke R 2.0 ::::::::::::::::::::::::::::::::::::::::::::::: #ktm1290 #instamoto #instabiker #creativeai #cyberpunk #cyberpunkart #superduke #superduke1290 #1290superduke #ktm #readytorace #bikelife #aiart #stablediffusion #stablediffusionart #ImageEditing #BeforeandAfter #nakedbikes #motorcyclemafia #superbikesgram (presso New York, New York) https://www.instagram.com/p/CoaN0WWLToK/?igshid=NGJjMDIxMWI=
#ktm1290#instamoto#instabiker#creativeai#cyberpunk#cyberpunkart#superduke#superduke1290#1290superduke#ktm#readytorace#bikelife#aiart#stablediffusion#stablediffusionart#imageediting#beforeandafter#nakedbikes#motorcyclemafia#superbikesgram
4 notes
·
View notes
Text
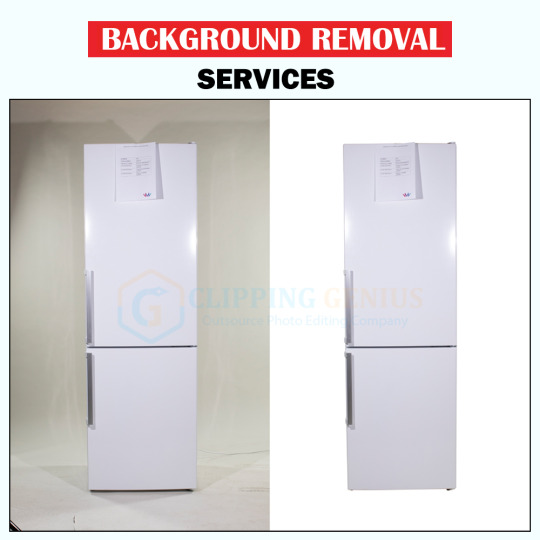
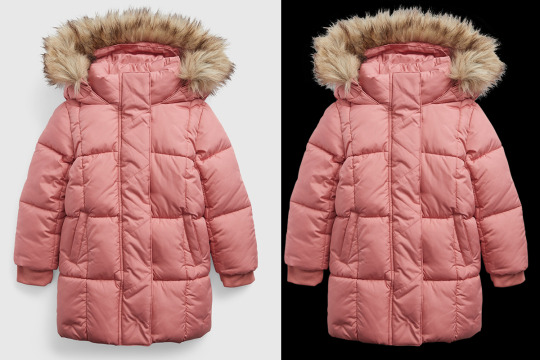
Best Image Background Removal Service in Clipping Genius
#Best Image Background Removal Service in Clipping Genius#BackgroundRemoval#PhotoCutOut#ProductImageRetouching#Ecommerceimageeditingservice#ProductPhotoEditing#productphotography#AmazonProductEditing#clippingpath#imageediting#Whitebackground#ChangeBackground#https://clippinggenius.com/image-background-removal-services/
2 notes
·
View notes
Text
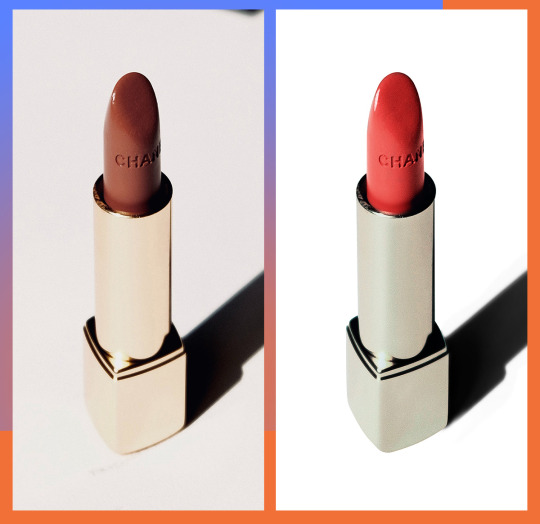
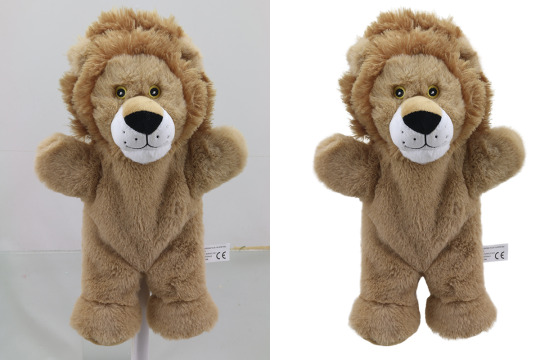
If you’re looking for the greatest ecommerce product image editing or product photo retouching services with a quick turnaround, you’ve come to the right place! My goal is to deliver high-quality work on time to enhancing the chances of sales.
To fulfillment to the demands or requirements, I’ll optimize your product photos exactly how you want them to be shown in your E-commerce store and can make your images more clean, realistic, and attractive to generating product-focused images.
What you’ll get:
✅ High-end ecommerce product image editing services
✅ Remove dust, scratches, and unwanted objects
✅ Background remove, cutout, editing or enhancement
✅ Adjust white balance, exposure and contrast
✅ Adjust Color Correction, vibrancy and saturation
✅ Add a natural/drop shadow or reflection
✅ Sharpen images & Crop out unwanted detail
✅ Fixing lighting & reflections issues
✅ Optimize & Re-sizing Image according to Amazon or other site requirements
More info 👉 https://bit.ly/3nT0Vni
#productimageediting #imagemasking #clippingpath #imageediting #ecommerceimageediting #colorcorrection #shadowmaking #photorestoration #neckjoint #backgroundremove #imageeditingservices #image #photoediting #realestateimageediting #automotiveimageediting #shadow #realestatephotoediting #imageeditingservice #amazon #backgroundremoveservice #productphotoedting #removewhitebackground #clippingpathservices #ghostmannequin #photoeditingservices #retouching #editingskills #editingphotos #photoeditingservice #editingservices
#productimageediting#imagemasking#clippingpath#imageediting#ecommerceimageediting#colorcorrection#shadowmaking#photorestoration#neckjoint#backgroundremove#imageeditingservices#image#photoediting#realestateimageediting#automotiveimageediting#shadow#realestatephotoediting#imageeditingservice#amazon#backgroundremoveservice#productphotoedting#removewhitebackground#clippingpathservices#ghostmannequin#photoeditingservices#retouching#editingskills#editingphotos#photoeditingservice#editingservices
3 notes
·
View notes
Last Seen Blogs
loco-de-amor
Enfrentando la realidad

chelneko
Evil Kitty~♪
satansdildos
no

mapledrum3
Arapça Kursu Ankara 2022

vlddaily
VLD DAILY