#india ink is not copic proof
Text

Does anyone have trouble with using Higgins Eternal black ink in sketchbooks? Mine always rubs off onto the opposite page (and sometimes around the drawing), so I always have to protect it with taped-in wax paper.
My Higgins Eternal was so old that it dried up. But I was too cheap to throw away the remnants, so I ground it up and mixed it with water. So I don't know if that's the reason why the ink keeps rubbing pigments onto the opposite page, like it no longer has the proper binders, or if regular Higgins Eternal does that.
I was about to buy dye-based ink, instead of pigmented, so I don't have to worry about pigments rubbing onto the opposite pages. But reviews keep warning about how non-lightfast it is, how it won't last long, and isn't water resistant. It also seems a little more expensive and I'm a cheapskate.
So should I just get more Higgins Eternal? Higgins Black Magic? A black dye based ink? Black acrylic ink? India ink?
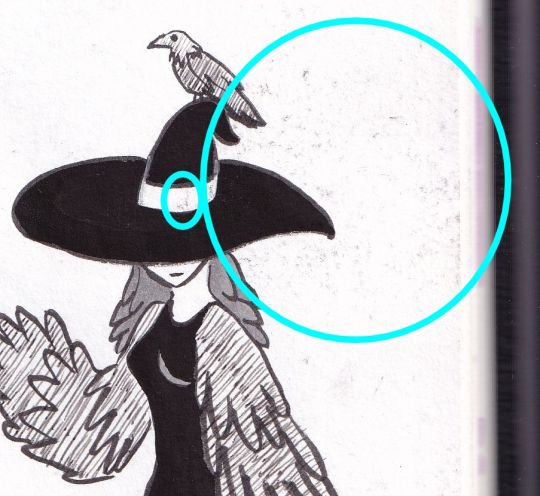
I just want to be able to cover big areas with black ink, without the pigments rubbing off onto the opposite pages, and without worrying about wasting my expensive Copic ink---because again, I'm a cheapskate. (Waterproof and Copic-proof would be nice too.)
#artist problems#inks#bottled ink#ink bottles#higgins eternal#higgins black magic#higgins ink#shopping#art supplies
1 note
·
View note
Text
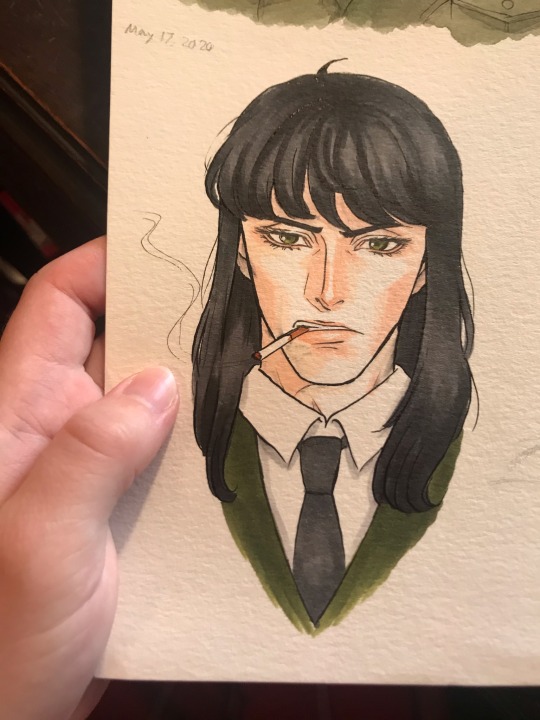
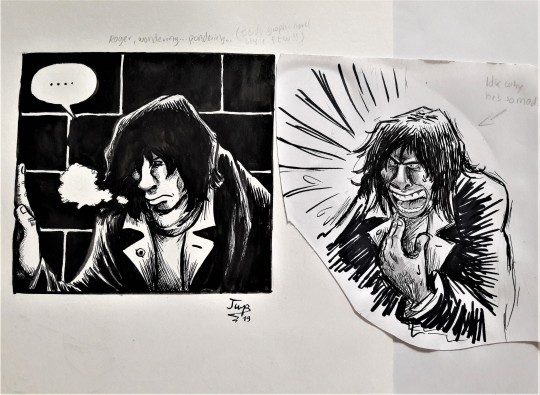
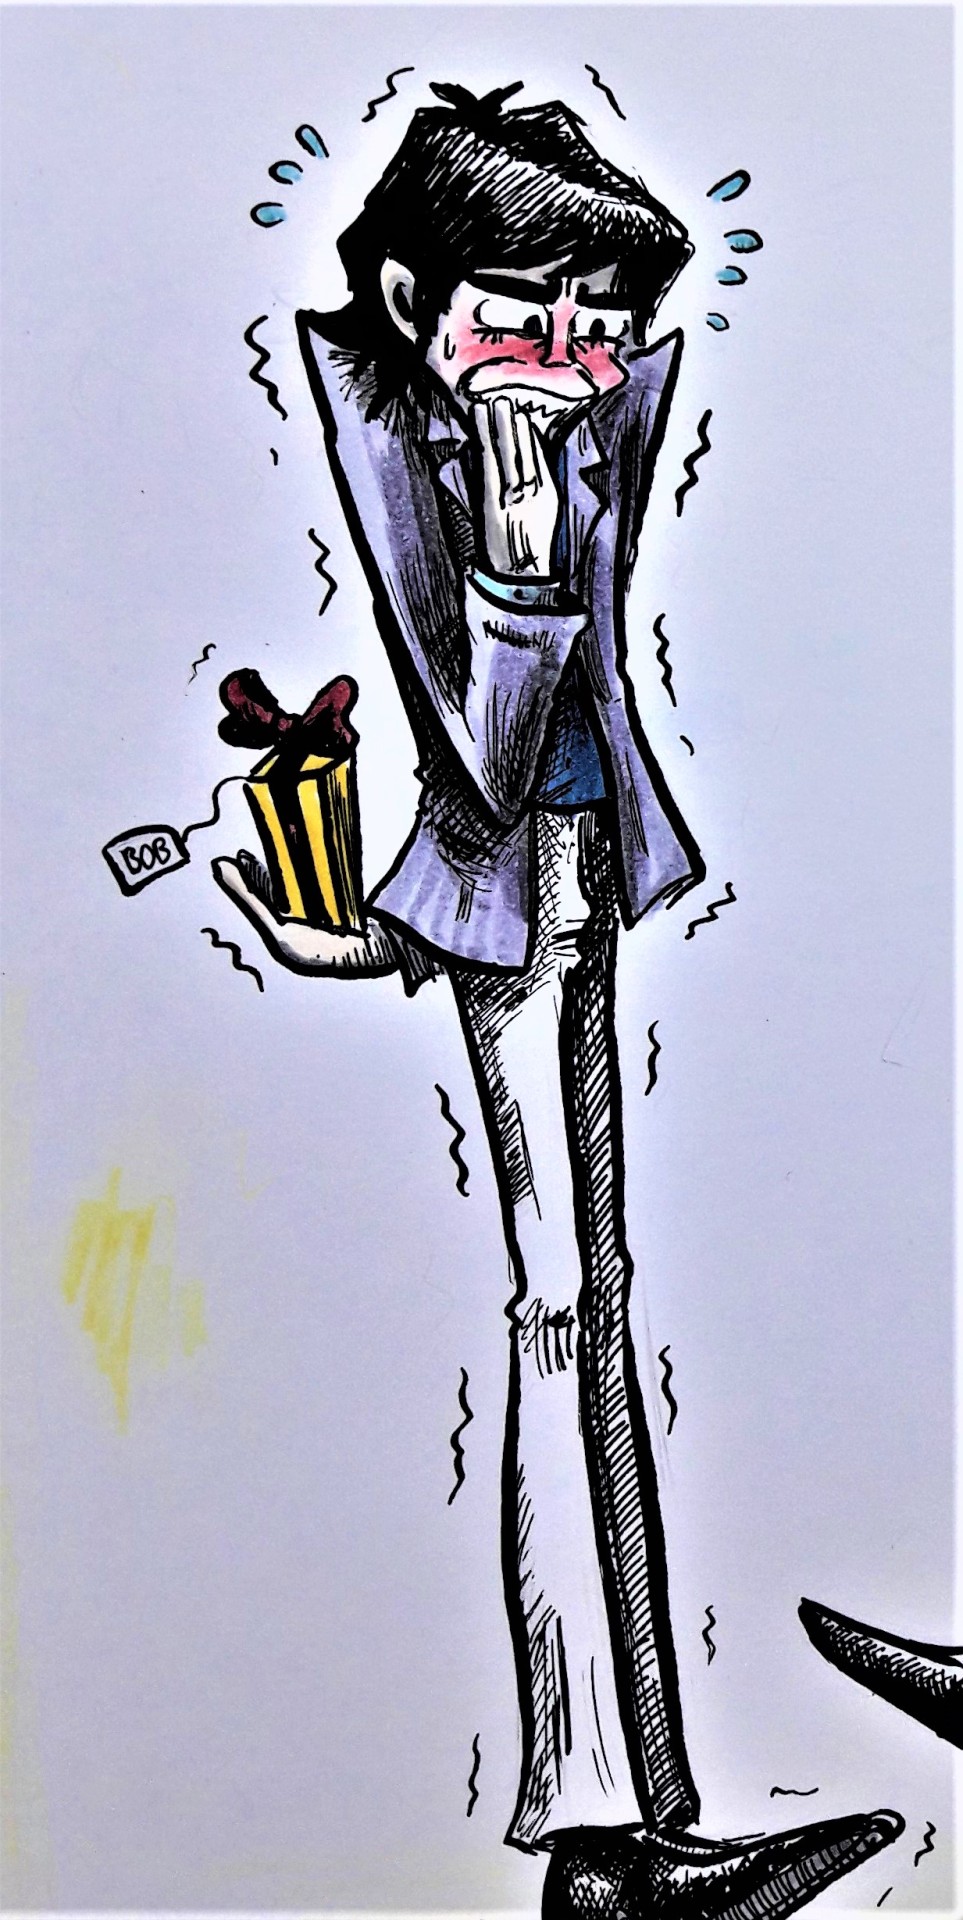
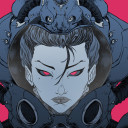
His poor face got smudged.
#klaus heinz von dem eberbach#from eroica with love#eroica yori ai wo komete#copic markers#copics#markers#india ink is not copic proof
26 notes
·
View notes
Text
Inktober reflection! Late!
Woops lost track of time.... Let's play catch up!
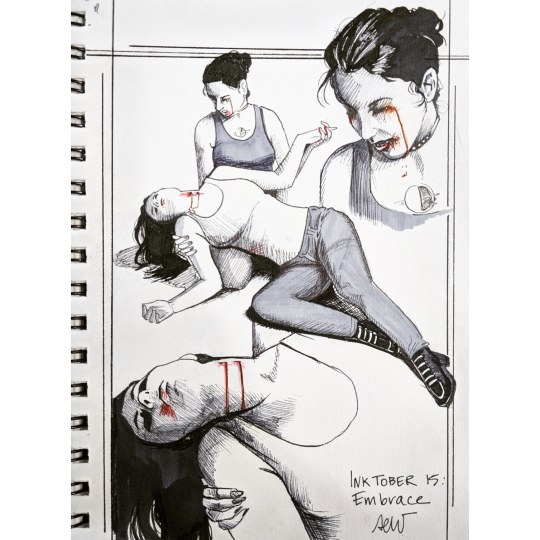
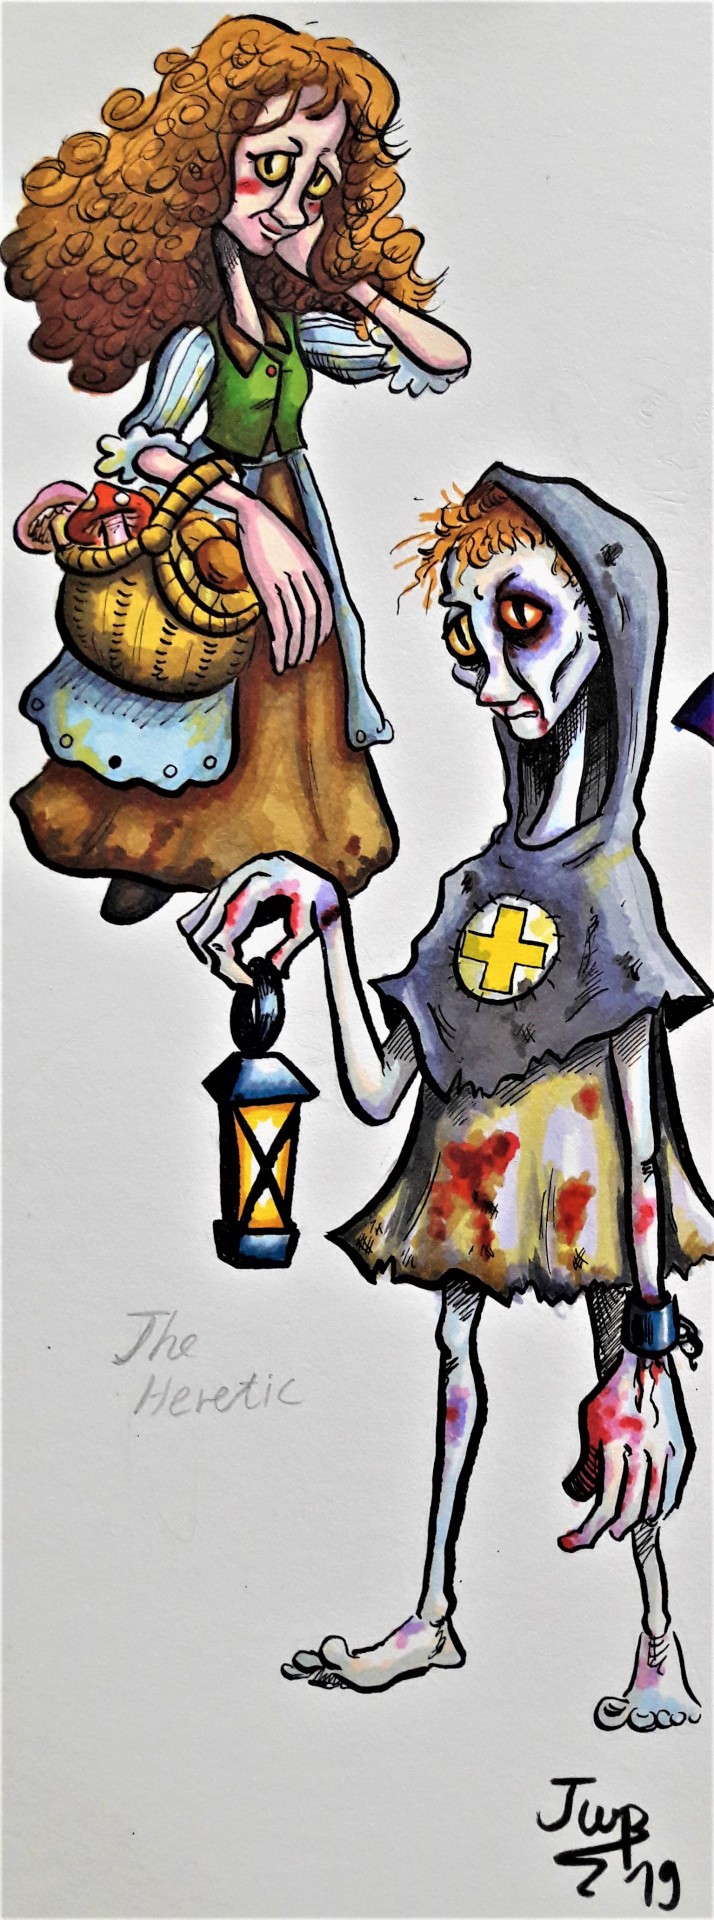
Inktober 15: Embrace
Didn't really have a plan for this one going in...just knew that I wanted to illustrate something different. I figured a lot of the narratives about the Embrace we're going to be ah! Surprise bite! In nature. Instead I turned a bit more tragic and focused on the thinbloods- who might not be able to embrace.
I think I could have gotten heavier with my shading. I also think the blood tears are a little messy, but they convey the right point. This one was done without a good reference image. But, the proportions are very good.
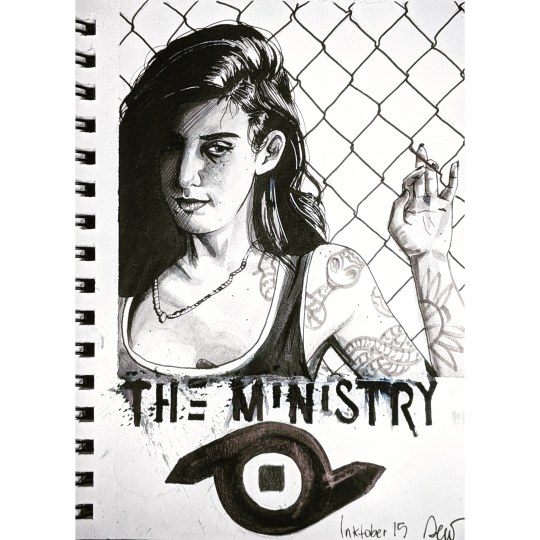
Inktober Day 16: the Ministry
I actually don't know a lot about this new clan. I have the book and the passage on them and read through it a couple times. The thing I learned here was that my ink can be watered down and make nice gradations. I also learned the chisel tip pen I bought was not water proof and a little blue! I went to shade and the ink just started running. Lesson learned: read the ink pen labels

Inktober Day 17: Blood sorcery
Ooooh this one was so good. The expression. The shading. I love the sharp shadows and I can't wait to digitally color this one!
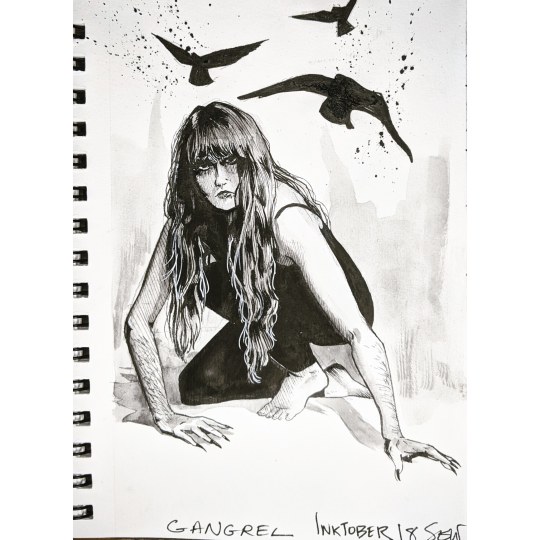
Inktober Day 18: Gangrel
I was at a loss for inspiration and asked our favorite Hound of the Isle of Lewis if I can capture her likeness. I think the important thing I wanted to convey was the beast marks. Her claws and body hair were really fun to draw.

Inktober day 19: Anarch hideout
I'm currently the ST for a chapter based chronicle set in Richmond Virginia. Having lived in Richmond, Byrd theatre is definitely home to some vampires and it ain't the toreadors. I love how dark the ink got and the shadow shapes were precise. I wish I had done this bigger, I could have captured more of the details of the photo.
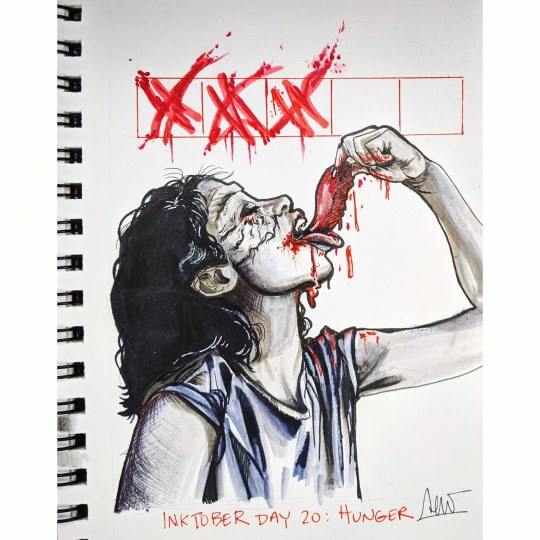
Inktober Day 20: Hunger
Was chatting with a friend on insta who is known for her tzimisce cosplays. I love watching how her work and makeup skills have improved over the last few months. So I dedicated this fledgling organovore Tzimisce to her.
The composition of including the hunger tracker was a good choice. The red ink was sweet here, I just think I should be more careful with my copics. My warm tone and my cool grey are very different colors and this piece showcases it.

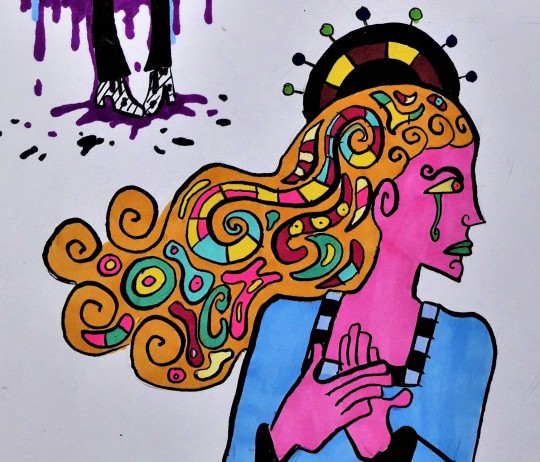
Inktober Day 21: Presence
I was torn for what to do in this piece. I was also in a heavy brain funk and just drew Elif. I clearly learned my lesson from the previous drawing and kept the copics separated. The shadow shapes are crisp. Her expression is cool. And the touch of violet in her eyes was a good choice
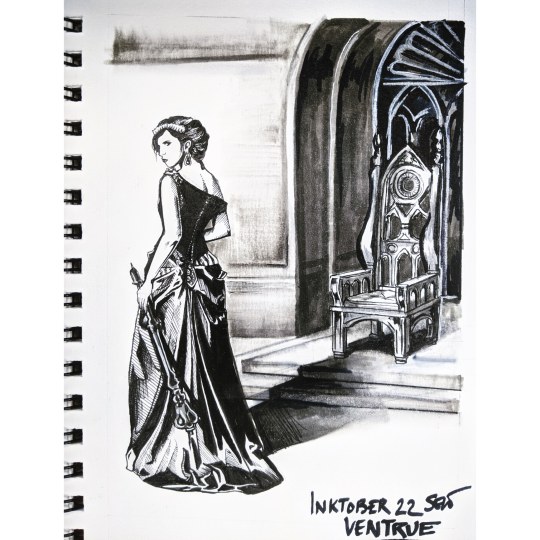
Inktober day 22: ventrue
I reached out to one of the more prolific Ventrue mun's on this site and got some awesome inspiration.
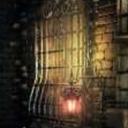
My critique for this piece had to be that I needed to plan my environment a bit more advance. I had the reference for the dress and pose ready- I thought o I can whip up an elaborate throne no problem. No. No. Find. Reference. The stain glass behind the throne had the potential to be way more powerful. And way cleaner. Her casting her shadow on it is a nice touch - the narrative in this single frame is quite interesting and open to a lot of interpretation.

Inktober day 23: True Faith
I originally wanted to draw Alia and the npc with True Faith from the Gehenna Wormwood chronicle. I ended up sticking with the chronicle and put three players in the church, and read the passage about the mark of immortality upon their foreheads. I dig that imagery. I was a bit more subtle with the christian allegories in this one- cuz I want to smack the church with heavy and blunt objects- I put a cross in shadow over their face.

Inktober 24: Frenzy
Okay okay this is a high note to end on. This one. Is so good. The lettering trick I did with the Malkavian (day 7) worked again- but I need to buy more masking fluid. This one was done with my new india ink and it is so nice to have new materials. The shadow shapes are superb. I am so pleased with this.
Reflection:
As I am approaching the end of this process I'm focusing less on technique and more about composition. I feel more comfortable with the ink and am glad that I get to experiment with it. I am also experimenting with that splatter technique- something that is starting to become a calling card ... I just love the way it looks.
I usually hide this info, but I have been working on the 31st drawing all month. It's taking all the techniques I learned and discovered and trying to make something really extraordinary. It is a self portrait- since the final prompt is yourself as a vampire. So I'm going full Toreador. Vain, covered in paint, and willing to kill for some windsor newton products. And you'll see it when it's done!
6 notes
·
View notes
Text
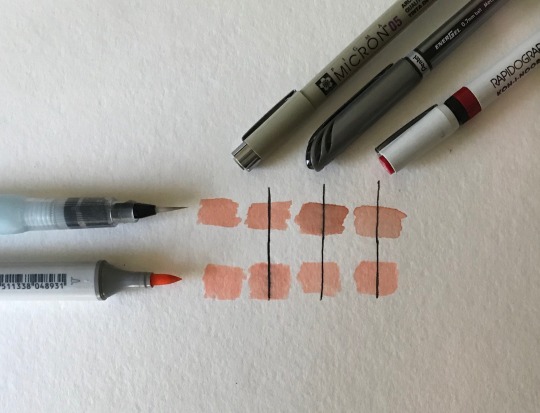
This post is about why you should be using India ink!
The columns here are, from left to right, the coloring medium alone, a new Micron liner (alcohol based ink), a Pentel gel pen (water based ink), and a Rapigograph full of good ol India ink. The top row is watercolor, the bottom is a Copic Sketch marker. The inks were given about five minutes to dry.
So what makes India ink great is that, once it dries, it’s both waterproof and alcohol-proof, which is important if you like to mix your media or just don’t want to have two sets of lining pens. This is because, though india ink is mainly water, any india ink labelled as “waterproof” contains a binder to hold the water-soluble pigments in place.
I’m told by my professor that Microns used to contain India ink, but they’ve since switched to an alcohol-based ink, so they’re waterproof but smudge under markers. This is also a problem because if you work on smooth surfaces like acetate or Denril, the new ink sits on top and never dries. This is why we were all instructed to either get refillable technical pens like my Rapidographs, or to buy black Faber-Castell fineliners, which have India ink. I highly recommend the Faber-Castell pens, though they don’t have as many sizes as I would like - Copic Multiliners also look like a good bet since they claim to be waterproof and alcohol-proof and run at a similar price.
#art tips#watercolor#copic#india ink#traditional art#i love my rapidographs even though they’re a pain in the ass
30 notes
·
View notes
Note
i absolutely love how you line/ink your work, do you have any tips? The way you do shading is amazing
..okay first of all: I’m so sorry for the late reply I couldn’t draw for almost a week :`D
well ink/line art tips? let’s see what I can do.

I draw most of my line art using drawing nibs and India ink.

The type I prefer doesn’t seem to have a specific name in english but they’re labeled as “Plume tubulaire, dessin” in french. I love using them because they can produce very thin and fine lines...

...as well as really thick lines by applying some pressure while drawing.
For even thicker lines a brush is helpful...

...as seen in this portrait wich is exclusively drawn with a little brush (the grey tone is water diluted ink). But since I started doing line art using brushes only a short while ago I still have to practise a lot :D
My third most used line art tool are ink pens (pigmented ink) in 8 different sizes.
They are much easier to handle than nibs or brushes but their tone and colour is lighter and less expressive than real ink.
In comparison ink (left) vs ink pen (right)
furthermore, since drawing nibs require a lot of focus and careful handling I automatically draw slower wich makes the lines cleaner. The ink pen line art tends to be messier. They are perfect for sketching,almost all of the doodles in my sketch book are done with them...

Now none of these techniques are necessarily superior. Their impact often depends on just what you want to accomplish in your drawing.
Because if you plan on making a coloured illustration that focuses on creating visual imagery mostly through colour effects like this one...
...your line art should be a clean line (”ligne claire” style).
There are muliple methods. The shading of a drawing can also be done with the inking itself rather than the colouring. It’s a method I really like...
...my technique is inspired by old comics (ecole marcinelle style) that got coloured later on. (btw inking a comic page is another level and probably deserves a post on it’s own...)
Some more examples where the ink does most of the shading and the colours are minimalistic...
as you can see all of the examples above are inked with nibs and coloured with copics and/or fibre-tip pens. I would recommend using them for colouring an ink drawing. Don’t use ink pen line art if you plan on colouring via copics and co. The lighter and softer lining will get lost in contrast to the strong colours.
It doesn’t look terrible but it’s just lacking the impact real ink would have had accomplished.
btw ink is also water proof so you can even use it as line art for an acryl painting
Okay back to ink pens and when to use them.
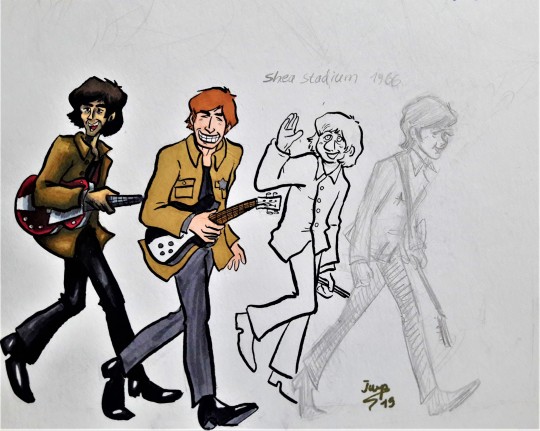
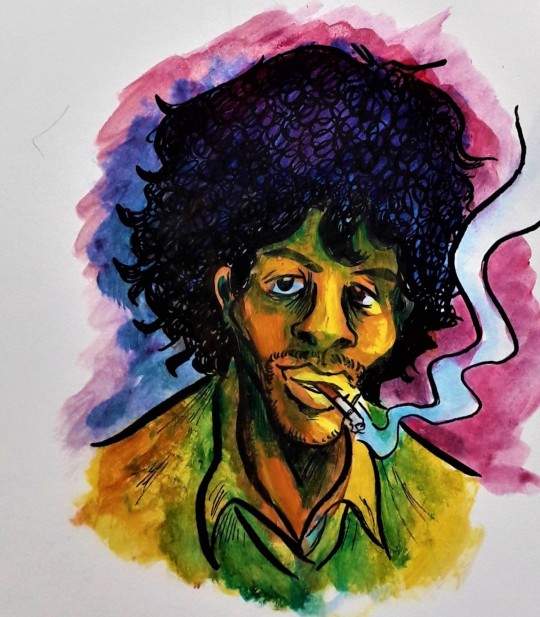
Let’s take a look at this older Floyd drawing of mine:
A prime example of my inking methods in one pic (okay Roger’s potrait is a pencil only drawing without real line art so let’s ignore him :D)
All of them are inked using nibs and Indian ink...with one noteable exeption:

Rick’s line art is drawn using ink pens and that’s because the colours are done by pencils rather than copics. The lighter tone of the ink pen harmonizes with the softer pencil colouring (my colouring via pencil differs greatly from my coluring via copic and/or fibre-tip pen)
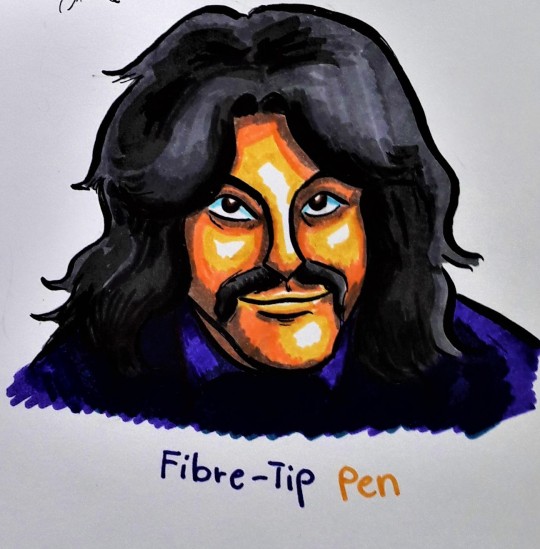
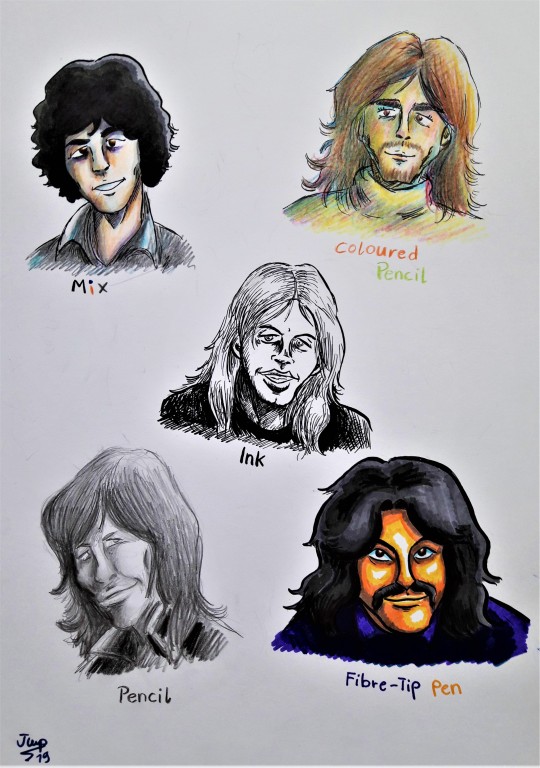
Nick is the polar opposite: Thick ink line art, strong vibrant fibre-tip pen colouring and stark contrasts.
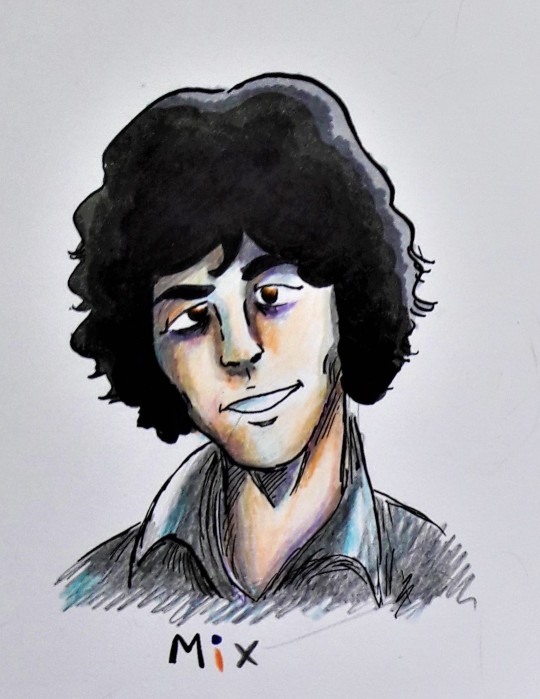
Syd is a mix between every other technique on the paper: Skin and clothing by pencils, shading and hair by ink and copics. And while I wouldn’t recommend coloured pencils on an ink drawing (fragments of the pencil can get stuck on ink and spoil the lining) it works for this one because the lines are really thin and fine.

David’s is an ink only drawing so the lines are medium sized and and a lot more scribbly because every effect has to be accomplished by the ink alone.
So in conclusion: Inking is hard work, especially nibs require a lot of practise, ink pens have their flaws and benefits and colouring is fun :DDD
I don’t know wether any of this is helpful or not XD just practise and explore different techniques and never give up. Let me tell you I started using drawing nibs and ink when I was 14 and I was so bad at it in the beginning that I almost quit art alltogether :’D

Allright then...just draw!
15 notes
·
View notes
Text
Ash’s Inktober Art Supply Megalist
a Because Inktober is such a huge event and because it’s relatively new and doesn’t have a huge masterlist of art supply lists associated with it, I have decided to post and maintain a masterlist of art supplies ranging from inks, pens, and sketchbooks to use as well as art supply stores online and other useful hints based off of my own, my friends, and other helpful artists who have given me pointers on this site.
INKS
Author’s Note: Anything called India Ink is waterproof by default most of the time. Shellac based ink tends to have a sheen, though there are exceptions. Most if not all color ink aside from black and white will not be light fast.
Dr. PH Martin’s Black Star India Ink
It is water proof and lightproof and does not contain a sheen like most other illustration inks, which means it won’t have light reflections when you scan or photograph your work. I have used it in dip pens and brushes, and it works well even when diluted with water to create shading effects. It has a rich black tone.Not entirely copic proof.
Koh-I-Noor Water-resistant Inks
These inks are water-proof and ideal to use in dip pens. It isn’t lightfast, at least the color versions aren’t, but the black and white inks are. Black and white are opaque colors while the other colors (numbering 17 in all) are transparent, similar to watercolors. Unlike a few others on this list, they come in plastic bottles rather than glass.
Yasutomo Black Sumi Ink
It’s a good brush ink, although there are some drawbacks. One would be the fact that if exposed to air long enough it will get thick, as well as the fact that it has a strong scent due to the fact that it does contain various eye and skin irritants, so don’t get any on your hands. It is very waterproof though, and works nicely if you know how to use it. It is not copic proof. It does come in a plastic container. There’s a vermillion color I haven’t used, but looks nice and bright.
Windsor-Newton Inks
Basically the go to for all and any illustration inks you’ll ever worked with. This is the ink you’ll use in art class (at least the art classes I’ve been to). They come in two different sets, though you are most likely to see the first set. They also come in metallic colors, which is a good thing if you want to go fancy. They are waterproof, but not light proof, so care must be taken when displaying them. They come in glass bottles that do not tip over.
Deleter Black 4
The ink for manga artists. It’s not only a rich solid black, it’s also resistant to fading from erasers, as well as being copic/marker proof. Excellent to use with dip pen and brush. Also waterproof, like most Deleter brand inks.
Keimei Manga Pen Ink
Not only is it waterproof and copic proof, it also has a matte finish, excellent for scanner in your work.
PENS
Staedler Pigment Liner
Lightproof, waterproof, and smear proof. Similar to microns, but from what I’ve heard better. It is erasable though on certain surfaces. Does not bleed through and won’t dry out for 18 hours if left uncapped.
Sakura Pigma Microns
Won’t feather, won’t bleed through, and a favorite of many artists. It is not Copic proof however, so try to use them after using copic. I’m not too big of a fan of these, as the think nibs do break if you use them on sharp curves and such.
Marvy Le Pen
This is becoming a surefire favorite of mine. Not only is it quite cheap, it’s also waterproof and copic proof (the permanent pen however, is not copic proof). It has a stronger nib than the Micron and it does comes in a brush tip, unlike a few others.
Windsor-Newton PITT
One of the more famous pens used for illustration, the PITT pen comes in a variety of nib sizes as well as brush pens. They are waterproof, lightfast, and acid free. They are not copic proof however, and should be used after a copic drawing.
Pentel Technica Stylo Pen
I think these pens are servely underrated. Not only are they a cheap alternative to a lot of other pens on this list, they are also waterproof and copic proof. They come in a variety of sizes and excellent with any medium, including watercolors. However you need to watch out as the ball point can get clogged up. I own at least four and they have lasted me for at least a year.
Pentel Color Brush Pen
Waterproof and really neat for those who like using brush pens, these are nice for those who travel around and use ink. It’s technically a brush pen with a reservoir of black ink you can squeeze out. Warning, there’s a few setbacks, as it does take a while to dry if laying in thick amounts of black ink. It is not copic proof, but can be used on top of copics. A good note of caution is not to squeeze too hard as the ink will drip right out. If the ink runs out, you can refill it with your own ink.
Copic Multiliner
If you are using copics, you should definately have a number of these at your disposal. They are waterproof, smearproof, and won’t bleed through paper. The other good part is the fact that they come in a SP version which can be refilled and reused, although they’re more expensive.
Sakura Gelly Roll
The white pens are excellent for making highlights and contrast.
Watercolors and Markers
Copic Markers
Literally the go to markers and my favorite markers to use overall. They come in a wide variety of colors and types and can be refilled. However they are pricey, but I feel like all in all they are worth the extra cash. Many come in pre-made sets in certain color combinations, though I would start in either a blue palette, a red palette or a grey palette to test them out. Like many markers, they will bleed through, and I would use either marker paper or a thick paper to use them on.
Sharpies
Not too much of a fan of these. but they are cheap and found everywhere. They come in a range of sizes and types, but like most markers, they bleed through paper. They are waterproof and fast drying.
Windsor Newton Watercolors
These come in either pans or tubes, but I use a mix of them. The ones I use are cotman, which are the cheaper version and comes in a plastic travel palette kit which can be put in a lot of places. I have added a number of tubes, due to the number of colors avaliable. They have rich and vibrant colors. The pan colors don’t mix as well in my experience, but the tube colors work lovely. The fact that they come in travel kits is the main reason why I put them on here.
M. Graham Watercolors
A professional set of watercolors, and they have super rich colors. They only seem to come in tubes, which aren’t as good for travel.
Ecoline Liquid Watercolors
I wasn’t sure to put these in inks, but given that they are called watercolors, I’m putting them here. They are dye based and bright and come in wide mouth jars. They can also be dluted with water. Unlike any of the watercolors here, you can use them in dip pens and airbrushes.
Sketchbooks
Author Notes: The paper to get is paper that is 100 gsm and up, as anything 100 gsm and up will hold to water better. The higher you get the better the paper will hold to washes and won’t buckle.
Moleskien Cahier Journal
I personally find the whole Moleskien brand pretty expensive, but they are recommended by the Inktober site. However, you’ll need to watch out as ink won’t dry fast and markers will bleed through the paper
Bee Creative Mix Media/Marker
I really like this paper as it’s thick and holds up to watercolors and markers well. It also doesn’t warp as badly as the watercolor version of this sketchbook. It has a thick black cover but it is wirebound so watch out for shoving it into backpacks and bags.
Bee Sketchbooks
These tend to have thicker paper, and good tooth for pen and ink, copics and illustration.
Canson Sketchbooks
A lot of these are good for watercolors and pen and ink, especially the Mix Media Art Book, Artist Series Mix Media, and the field books. The XL series is also great for those looking to save a little for a big bang.
Derwent Sketchbooks
These are a thing, but unfortunately the only one I can find at the moment is one that has premade designs in it.
Online Stores
Oozak
I have used this store in the past and it has some great deals on Copics
Jetpens
A new store I have discovered, it offers a large variety of pens, inks, and nibs
Blick’s
A very famous art store, they do offer gifts in your online purchases and have some good shipment deals
Poses and Reference
Senshi-Stock
Offers a lot of awesome poses, must be on DevArt to view. They also have a Pateron if you want to support them.
Pose-Maniacs
Rather limited, but good for some poses
Photo Reference for Comic Artists
A site I just discovered which has lots of royalty free pose references ranging from action and everyday to clothing reference
Music
Dark5 Radio
Offers dark syth-techno tunes
Electronic Gems
Some really good tunes here
Artzie Music
Mainly Future Funk and Vaporwave
Walt Ribeiro
Ever wanted to hear “Take on Me” done by an orchestra? This is the place
NOTES
Have at least two erasers at your disposal, one of them should be a kneaded eraser as they lift graphite marks and do not leave a dusty mess.
It’s alright to draw with pencil first
Take breaks to drink water and stretch every 30 minutes or so
It’s good to invest in B nibs and manga art nibs if you plan on using bottled ink. Maru and school points are the best for manga and illustration style.
Round and liner brushes are the best brushes to use for inking lines
You can plan ahead your drawings, sometimes it helps.
Listen to music while drawing helps in getting some ideas.
Official Page for Inktober
Thanks to @ancaxbre , @ayasunflower ,and @ps-art for suggestions
#inktober#art supplies#inktober art supplies#ink#copic#art#art supply masterlist#inktober masterlist
22 notes
·
View notes
Photo

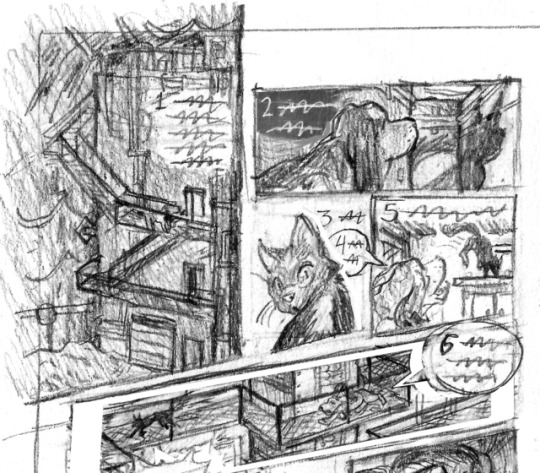


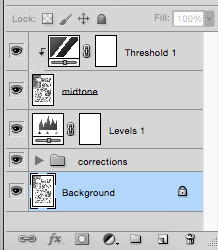
You guys!!! I’m so happy because the Tim’rous Beastie Kickstarter just hit $30k!!! This is a really amazing achievement because it means the artists each get paid an extra $10 per page! Thank you guys all so much for your generosity in backing this anthology that we all worked so hard to make!!
I thought it would be fun to share a little about my process on my comic, “Myths of the Wild Bassets.” Specifically, these are all process images for the top half of page six. I described each step of the process in the captions. I tend to assume this is boring to anyone who isn’t also a comic artist, but who knows!
If anyone finds this particularly interesting, I can post more process stuff for a different page!
And, for those interested, here’s a list of materials and techniques I used:
Paper: Fluid hot-press watercolor paper (140 lb)
Lettering: Ames lettering guide, Copic Multiliner 0.5 (normally I use a 0.6 Rapidograph, but it’s currently out of order and I can’t figure out how to fix it -- that said I think I like the multiliner better anyway)
Inking: Rapidograph “Universal” black india ink, Daler-Rowney “Luma” bleed-proof white, Dr. Ph. Martin’s Pen-White, black watercolor, misc. brushes, misc. tech pens, Sharpie china markers (white and black), HB Conte crayon pencil
#timrous beastie#kickstarter#myths of the wild bassets#iron circus comics#comics#anthology#process#writing#inking#thumbnailing
8 notes
·
View notes
Text
What You Need to Know Before Drawing with Markers and Ink
Photo courtesy of Getty Images
Learn to Draw with Markers and Ink like a Pro
Drawing with markers offers almost instant gratification—markers are simple to use, require little prep time and dry quickly. Because the marking material is fluid, the smooth marks are unlike those made by dry drawing mediums.
Drawing with markers will offer you a range of brilliant color that surely will excite your creativity. They’re ideal for creating loose lines, calligraphic designs and precise technical illustrations.
One drawback to using them is that it’s not easy to correct mistakes. To work successfully, you need a bit of confidence and some drawing experience.
The many different types of markers go by various names, such as art markers, marker pens, artist pens, brush pens and paint markers. Art pens and markers come in every color you can imagine and can be purchased in sets to save money. They vary in size and tip shape and are further distinguished by their colorant, which can be dye, ink or paint, and alcohol-, water- or solvent-based.
“I Live Here” (Copic markers and Pigma Micron pen, 6×9.5) by Miguel Herranz
Different Types of Markers
When learning how to draw with markers, it’s important to consider the different types. Three common kinds of markers are listed below: alcohol-based, water-based and solvent-based. Knowing the different qualities of each will help you choose which markers are best for your drawing needs.
Alcohol-Based
These markers are fast-drying and waterproof. They don’t smell as strong as solvent-based brands, but they can still cause eye or respiratory irritation. Make sure your workspace is well ventilated.
Because alcohol-based markers dry quickly, the paper you work on doesn’t stay wet and is less likely to be torn as you layer colors. Popular brands among artists and designers include Prismacolor, Letraset Tria and Copic, whose pens are refillable. Sharpies, the all-purpose permanent markers, are also alcohol-based.
Water-Based
Because they are odorless and safe to use, water-based markers are the best choice for children. But adults can obviously make good use of them, too.
Some have brush tips made of foam or dense fiber. Others are chisel-shaped or have nylon brush tips that distribute the color.
Water-based paint markers, such as Sakura Permapaque markers, are opaque, generally quick-drying and water-resistant when dry.
Most brush pens and markers are water-based and have flexible nylon or foam tips shaped like traditional brushes. They make marks similar to small round bristle brushes and have a similar feel in the hand.
Many brush markers are double-ended, with a fine point on one end and a wider tip on the other. Brush pens and markers often use acid-free ink, which is ideal for calligraphic work, art journals and book arts. Try Staedtler Marsgraphic 3000 Duo, Pitt Artist Pens, Pentel Brush Pens or Marvy Brush Markers.
Solvent-Based
This type of marker creates brilliant color and is waterproof and long-lasting. A popular solvent-based brand for design and drawing is Chartpak Ad markers, whose solvent is xylene.
The solvents in markers can be xylene, methyl isobutyl ketone or butyl acetate, all of which can cause dizziness, headaches and nausea. Markers with these solvents should be used only in studios with excellent ventilation. Solvent-based markers aren’t suitable for children.
Many paint markers are solvent-based and opaque. You can use paint markers on porous and nonporous surfaces. They’re generally waterproof, but not necessarily permanent.
Paint markers are most useful for craft or decorative projects and signage. Shake them to mix the paint inside, and ensure your workspace has proper ventilation. This marker type, which come in many colors including metallics, can be blended with Turpenoid or other solvents.
Using Dip Pens
Hand-Carved Bamboo Pen
Long before markers hit art store shelves, artists drew with pen and ink. Dip pens have been made from reeds or quills since ancient times. The simplest is a Japanese hand-carved bamboo pen that has its shaft shaped into a tip that can be dipped into a pot of ink.
A bit more refined is a pen with an interchangeable metal nib held in a simple wooden or plastic handle. Drawing nibs are pointed metal tips that are somewhat flexible so the lines produced are thicker or thinner depending on the pressure of the hand.
Similar nibs are also available in pens that hold a reservoir of ink inside the handle, like a fountain pen, obviating the need to dip the pen into a pot of ink. The reservoir can be a disposable or refillable cartridge.
Refillable Mechanical Pen
Mechanical pens have a metal, needle-like tip instead of a nib and produce a controlled line of predetermined width from 0.13 to 1.4 millimeters. Mechanical pens can be used for precise drafting and technical work or for sketching, although the unchanging width can become monotonous.
Black India ink is pigment-based ink that is permanent, lightfast and waterproof. Colored inks are acrylic- or shellac-based and can be thinned with water. Some colored inks aren’t lightfast and shouldn’t be exposed to direct sunlight for long periods.
3 Easy Ways to Improve Your Drawings
Now that we have covered the basics, here are three easy tips for drawing with markers and ink.
Line and wash: First do a line drawing in pen or ink. When it’s dry, add light washes with markers, watercolor or brush and ink. If the initial drawing is done in water-soluble ink, the wash will soften the ink lines, creating an interesting fusion of line and tone.
Layering: Markers lend themselves perfectly to blending and layering color. Start with the lightest colors, building up rich layers of color and texture. Colorless blenders, such as those from Prismacolor and Chartpak, can be used to soften edges and combine colors.
Combining media: Watercolor brush markers can be blended and lightened with a brush dipped in water or can be used in combination with traditional watercolor
techniques.
Try Transferring an Image
Another great drawing technique is to use solvent-based colorless blenders to transfer laser-printed images to paper. Run a wide tip colorless blender over the area of the image you want to transfer.
Flip the paper over onto the surface you want to mark, and run the blender over the image area on the back side.
The printed image, to which you can add color, will appear in reverse on the surface.
Learn more image transfer tips here.
Sign up for the ArtistsNetwork newsletter by entering your email below, and you’ll get a free, instant download with tons of drawing tips and techniques for beginners!
*
FAQs for Drawing with Markers and Ink
Whether you’re new to drawing or just new to drawing with markers and ink, here are the answers to commonly asked questions.
Are art markers permanent and lightfast?
Art markers were originally developed for design and illustration work that only had to retain its color long enough for the artist to make a presentation or reproduce the work for printing. The dyes weren’t lightfast and would fade, some relatively quickly, when exposed to light.
Markers today are more permanent, but this varies by manufacturer. Check the product literature to see how permanent the marker are. And, to ensure the longevity of your art, take a picture of your work as soon as it’s completed.
At this time, there are no American Society for Testing and Materials for Artists’ Materials (ASTM) lightfastness or permanence testing standards for markers. If a marker is described as “permanent,” it means you can’t wash the marks off—not that the mark will never fade.
What are good surfaces for marker work?
Fine art papers, bristol board and illustration board are all good surfaces for marker artwork. A smooth, cold-pressed surface resists the bleeding that can occur with markers.
Bristol board is heavier than drawing paper, but lighter than illustration board. It comes in two finishes: plate (hot-pressed), which is slick and hard; and vellum (cold-pressed), which is softer and has more tooth. Illustration board has only one working surface, which comes in hot- or cold-pressed.
Several manufacturers make paper specifically for markers. This paper is bleed-proof and retains the true colors of the markers. Some examples are Canson Pro-Layout and Bienfang 360.
Can you work with multiple brands of markers at a time?
It’s best to stick with one brand through a whole piece. Each marker line has a unique chemical formula, so blending brands may lead to unsatisfactory results.
Is India ink really from India?
India ink was first used in Asia during the 4th century B.C. and was made from soot and burnt bone. Colonists later introduced it to Europe. Formulas today generally use shellac.
This article is written by Greg Albert and first appeared in a past issue of The Artist’s Magazine.
With the right materials, techniques, and information in hand, you are well on your way to drawing with markers and ink like a pro. Be sure to share your favorite drawing materials, advice and techniques in the comments. Happy drawing, artists!
The post What You Need to Know Before Drawing with Markers and Ink appeared first on Artist's Network.
from Artist's Network http://ift.tt/2uhCTWB
0 notes
Last Seen Blogs

funworkingmom-blog
Fun Working Mom
daydreamer2035
Untitled
crimsonemperor01
Red

definitelymaybeguy
Untitled
voiceatthewindow
This town is cursed