#marvelous designer
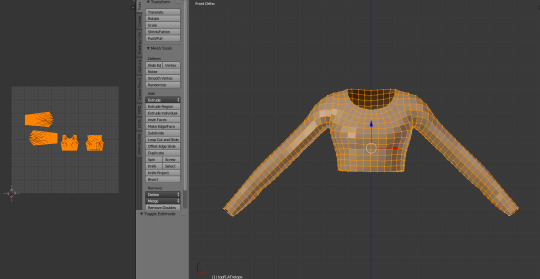
Text

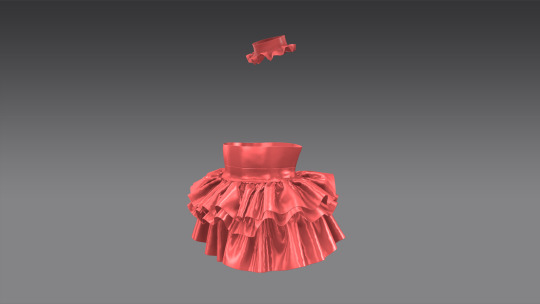
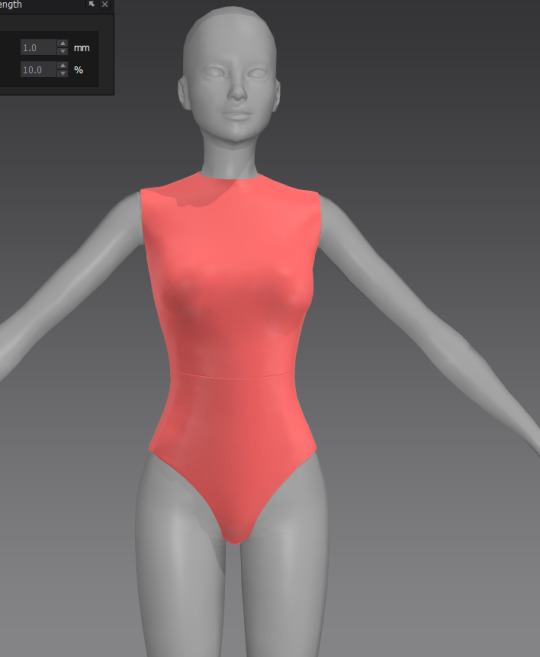
I adored PearlescentMoon's new postmaster skin, so I decided to model her outfit <3
#big pockets for holding mail!#hermitcraft#pearlescentmoon#pearlecentmoon fanart#marvelous designer#3d modelling#hermitcraft fanart#my art
158 notes
·
View notes
Text
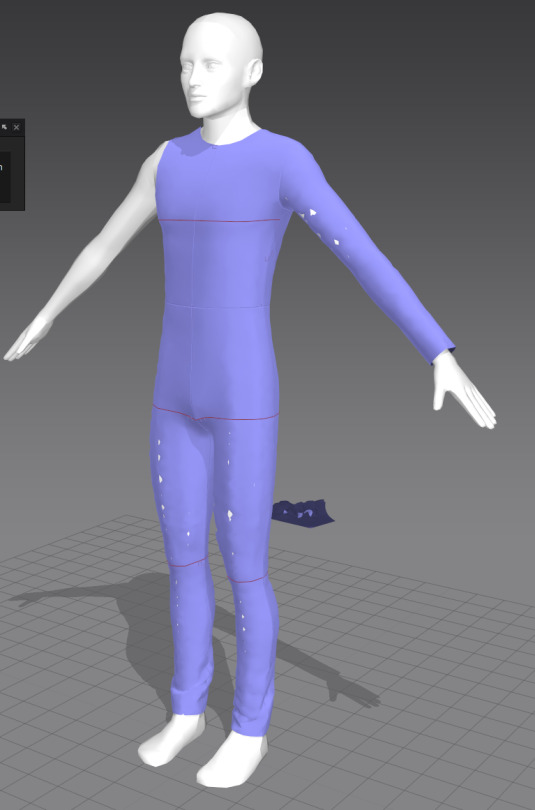
KoS WIP: Invisible/Headless-Horseman Genya in today’s kefta/eyepatch progress update! I finally figured out how Substance Designer works.
#genya safin#king of scars#rule of wolves#grishaverse#leigh bardugo#nikolai duology#Maya#substance designer#marvelous designer
94 notes
·
View notes
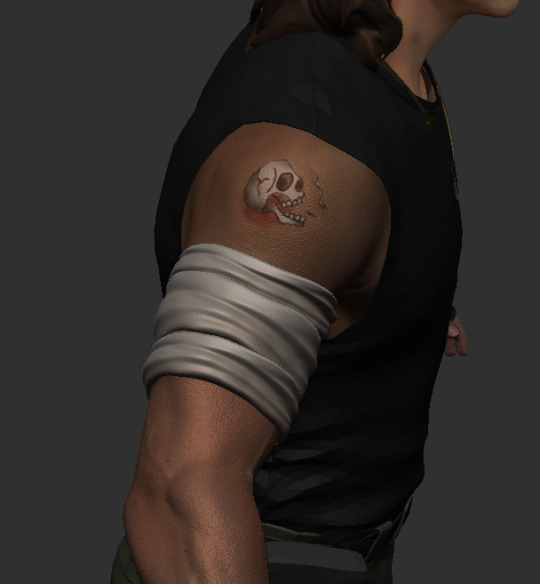
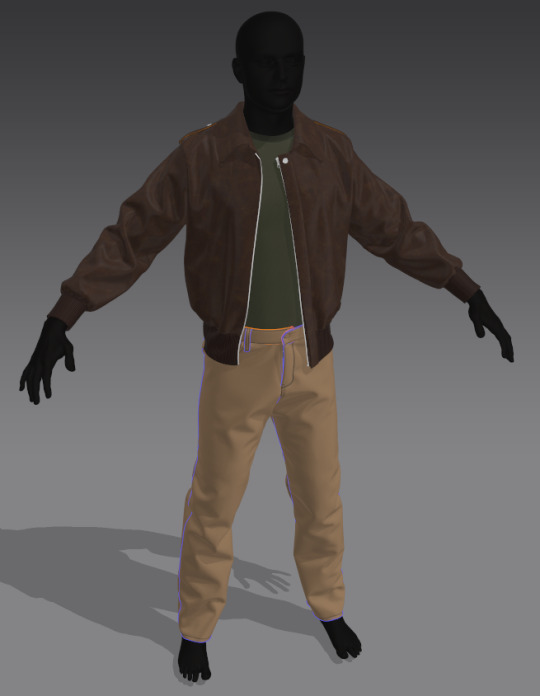
Text
Billy and Steve 3D models: day 4
The update I already shared on twitter but haven't done so on here. My bad
Still some likeness to be done but I wanted to move to blocking out the clothing
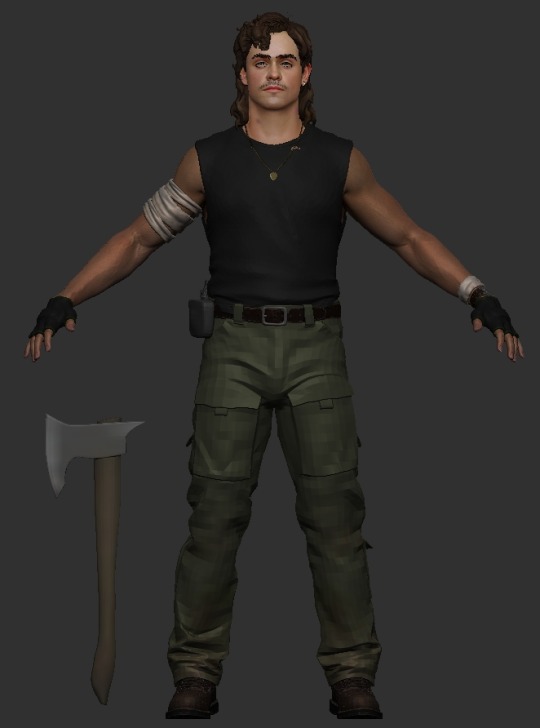
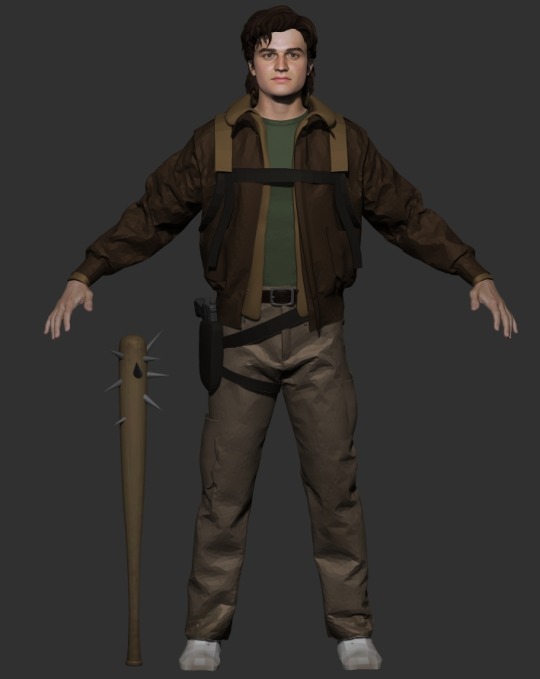
Once both game models are ready, i'll be printing their faces for my headless figure bodies. More on that later
#stranger things#harringrove#billyhargrove#billy x steve#steveharrington#3d character art#3d modling#3d sculpting#3dart#game models#3d printing#zbrush#marvelous designer
59 notes
·
View notes
Text
136 notes
·
View notes
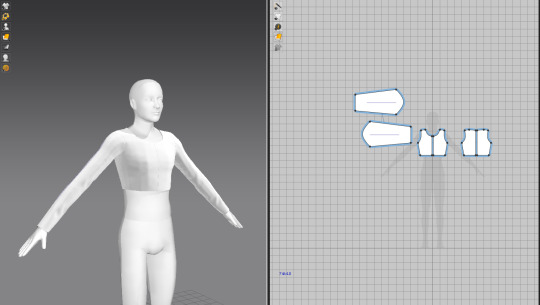
Photo
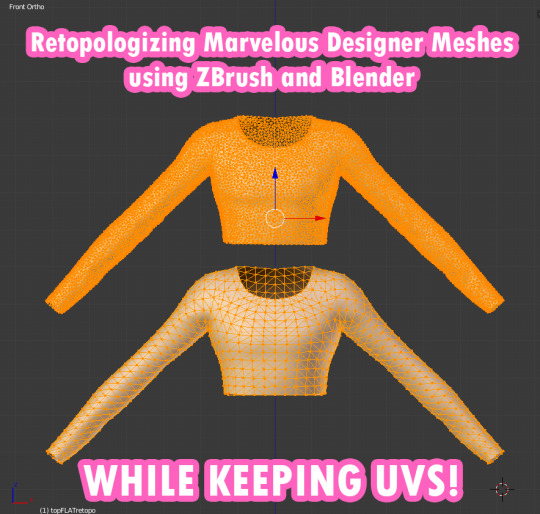
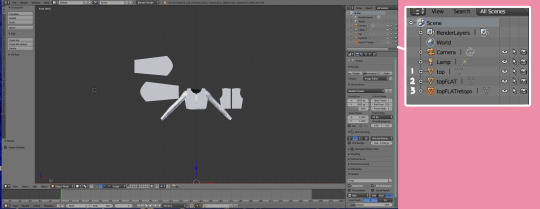
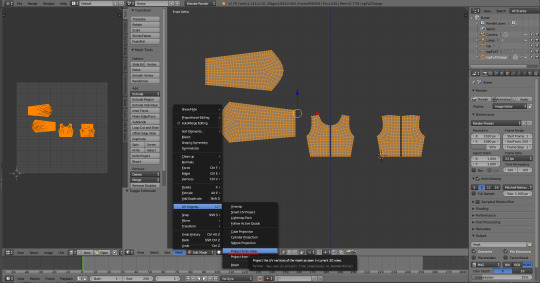
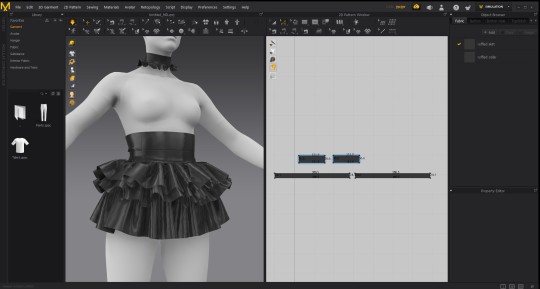
Okay guys, here’s a mini tutorial I thought I’d whip up in the dead of night. I’m very tired so sorry if there’s spelling errors. If you have any questions, just ask BTW. So, anyway, this quick tut is for retopo-ing MD meshes with Zbrush and Blender in a way that preserves the UV islands so you don’t lose the nice neat UV shape that MD generates. Ready? Okay.
You will need:
Marvelous Designer
Blender
Zbrush
Note: This tut doesn’t cover how to use these programs. You have to already know that.
Okay, here we go.
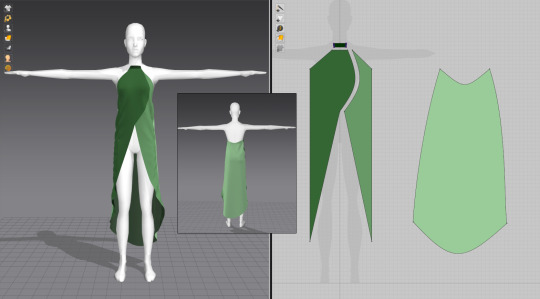
1. Make your mesh as normal and export from MD. Make sure the mesh is unwelded in the export options. I’ve called mine top.obj. Here it is.
2. Now highlight all, right-click the 3D garment and chose Reset 3D Arrangement (selected) or Reset 2D Arrangement (selected) - either one of these commands should flatten your mesh into the pattern-shaped pieces you started with in MD.
3. Export this from MD, again make sure the mesh is unwelded in the export options. I called mine topFLAT.obj
4. Import FLAT version into Zbrush.
5. Under Geometry tab, ZRemesher, hit the ZRemesher button. Depending on your mesh, yours might be fine to export with the default settings. For mine, however I’m going to lower the Target Polygons Count to make it lower poly.

6. When you’re happy with the poly count, export your mesh. I called mine topFLATretopo.obj
7. In Blender 2.79, import all three obj files. Sometimes the Zbrush mesh will be split into pieces, so you can go ahead and merge these pieces in Blender with CTR+J if that is the case. We want 3 meshes: the original MD mesh, the flat version, and the retopologised flat version. You can go ahead and tick the eye button to hide the original MD mesh and the FLAT version for now. First we will do things to the FLATretopo version.
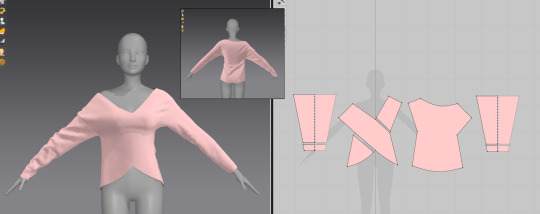
8. With the FLATretopo version selected, divide the window so that you have the 3D version to one side and the UV/Image Editor to the other side. Now you can ender Edit Mode, Mesh -> UV Unwrap and Project From View to get the same UV island shape that MD generated. Make sure you are in orthographic front view before doing this (hit 5 and 1) or your UVs might be skewed. With that done, return to object mode.
9. In the Modifier tab chose Surface Deform. Set the target as the FLAT version, turn the Interpolation falloff up as far as it will go (16) and hit the Bind button. Now you can hide the FLATretopo mesh.

10. Unhide the original MD mesh and the FLAT version.
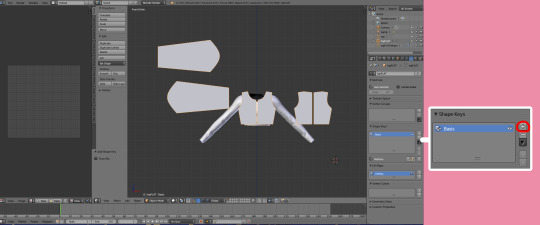
11. With the FLAT version selected, switch to the Object Data tab. Under Shape Keys, hit the plus sign. ‘Basis’ key should appear.
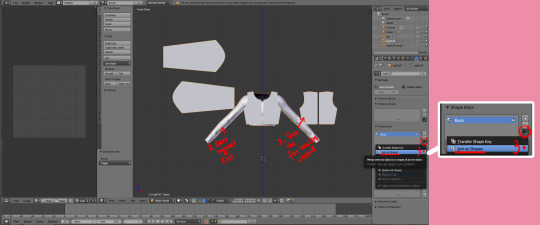
12. Now you must deselect everything, then select first the original MD mesh and second the FLAT version. It is important they are in that order. Once you have selected them, hit the little downwards arrow to the side of Shape Keys and chose Join as Shapes. Another key should appear, named the same as your original mesh.

13. Unhide the FLATretopo mesh.
14. Click on the newest key and slide the Value slider all the way to the right. The FLAT mesh and the FLATretopo mesh should morph into the position and shape of the original MD mesh.
15. Select the FLATretopo mesh and hit Apply on the modifier to confirm the movement. Then you can delete both the original MD mesh and the FLAT version. You don’t need those anymore.
16. Now you should have a final mesh that has a nice topology from what we generated in Zbrush as well as a neat UV map, plus it’s still in the shape as the original garment you made. It isn’t finished yet, however. Now you need to close up the seams, fix the UVs for TS4 usage, and make everything pretty.
Note: I personally start this next step by Shading Smooth in the 3D window. This will highlight the seams that need fixing. If the item is symmetrical, I find it easier to just delete half of the mesh and use a mirror modifier while I work on it. It cuts the workload in half. Now I just go around the seams and close them manually. It doesn’t usually take very long once you get the hang of it. I also bind all my repetitive keys to shortcut keys (eg. Merge, rip, cut, loop select, etc) so it’s quicker.
When the FLAT version is still flat, you can also edit the topography directly onto the mesh to make sure the seam verts will match up. You can also remove any unnecessary loops easily as well as adding extras.
Anyway, that’s all for now. Hope it helps some people! :) Have a nice weekend.
PS. thank you @bluecravingcc for the amendments.
#other#sims 4 tutorial#sims 4 clothing tutorial#blender tutorial#marvelous designer#marvelous designer tutorial#marvelous designer sims 4#sims 4
516 notes
·
View notes
Text
Sims 4 CC Slideshow Tutorial
Hey guys, just posting this here for those who like written instructions on how to make CC and for those who may need a refresher. This tutorial was made by a beginners FOR beginners

https://docs.google.com/presentation/d/e/2PACX-1vRbny2e3AJSFfb4I_T-3JtLeDPIbvrKmmC_ib2gIKy8ifIGgHbd4Nb42hgCK-KowvDPjJVxz1DZQBFJ/pub?start=false&loop=false&delayms=60000
#the sims 4#the sims 4 cc#the sims 4 cc tut#tutorial#ts4#alpha cc#marvelous designer#blender#gimp#the sims 4 custom content#the sims 4 custom clothes#sims 4 alpha#sims alpha cc
70 notes
·
View notes
Photo
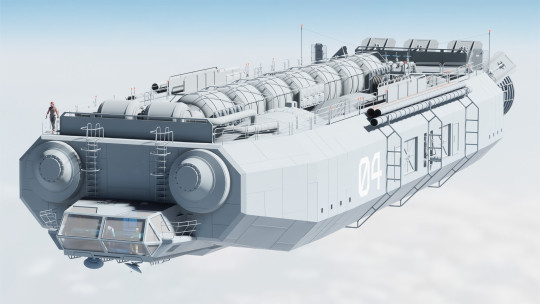


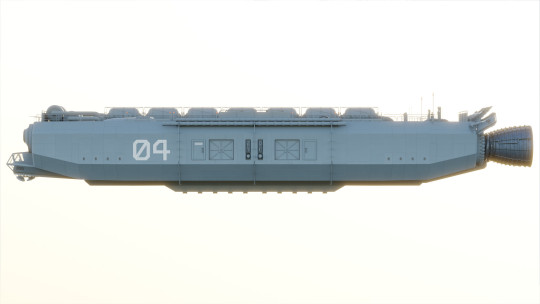

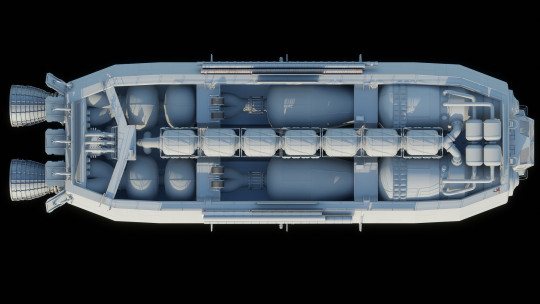

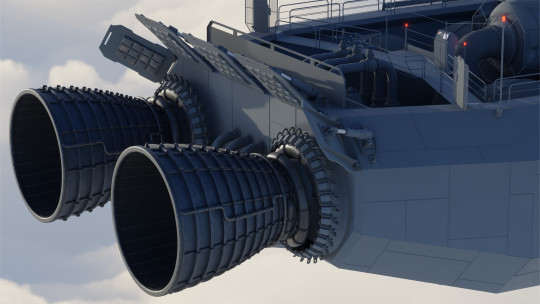
Medium Range High Altitude Utility Vessel
The vessel and all suits for the engineers and roughnecks modelled over the course of a “few” evenings. An 8 figure amount of polys in total. So game-ready...
#sci-fi#spacecraft#stratosphere#roughneck#space engineers#high altitude#art#blender3d#b3d#substance painter#marvelous designer
62 notes
·
View notes
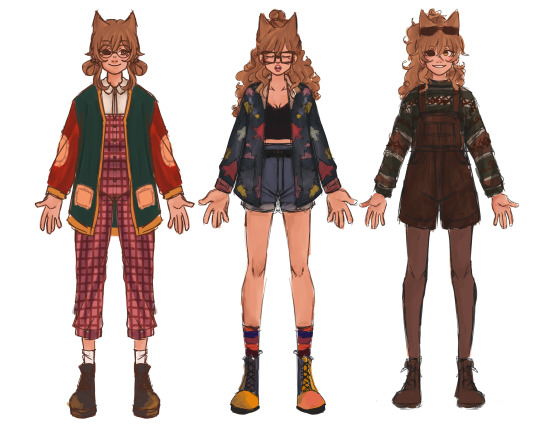
Text
WIP FRIDAY
Thank you @theviridianbunny for always tagging me !
So i'm finally touching to Marvelous Designer for the first time and man it's amazing how intuitive this software is !
I followed some tutorials on youtube of making some garments and imported V's model to work on , these are some stuff I made:

28 notes
·
View notes
Text
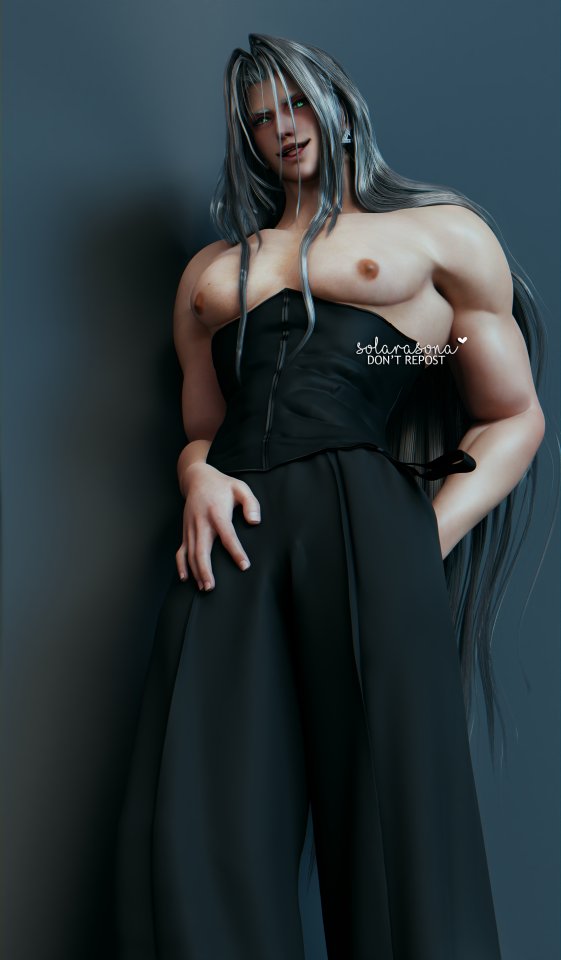

Another friend requested that I put Sephiroth in this so I did. X3
I'm still a beginner at making clothes from scratch, so I'm sorry if it ain't accurate. T^T
#sephiroth#final fantasy#final fantasy vii remake#final fantasy vii#ff7r#ff7r intergrade#square enix#marvelous designer#leonardo hazrak
147 notes
·
View notes
Text


Yes.
18 notes
·
View notes
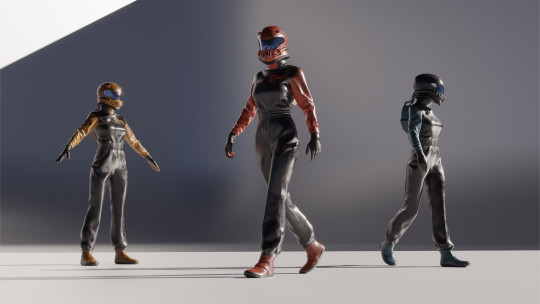
Text

Soft little render (he/it)
35 notes
·
View notes
Text
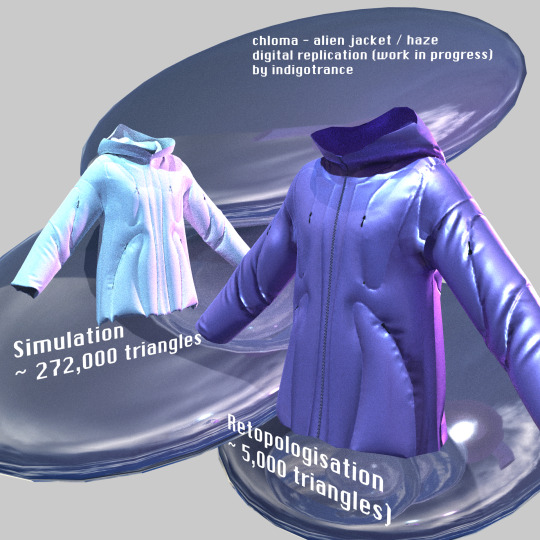
chloma (@chlomagearsonline) - ALIEN JACKET / haze digital replication (work in progress)
#y2k#digital fashion#cyber y2k#y2kcore#y2k aesthetic#marvelous designer#clo3d#blender#blender3d#y2k fashion#futuristic fashion#metallic#jacket#alien#haze#chloma
98 notes
·
View notes
Text
I've been making and remaking Sekka in blender for a while now and it's fun to see how much better I'm getting at 3d modeling. Also made the clothing with simulation and made the textures myself.


#digital art#ffxiv#digitalart#ff14 ffxiv#art#ffxiv oc#ff14#ffxiv au ra#final fantasy xiv art#ffxiv art#blender3d#blender#3dmodel#blender 3d#3d render#3d model#marvelous designer#ffxiv viera#rava viera#ff14 viera#viera#ff14 oc#ff14 art#ff14 au ra#final fantasy xiv endwalker#final fantasy 14 endwalker#final fantasy oc#final fantasy 14#final fantasy xiv#Final fantasy
5 notes
·
View notes
Text
me: -looks at my tasha yar cosplay that still needs to be hemmed-
me: -looks at kinktober picture that i started in. october.-
me: -looks at enterprise mini i need to finish painting for xmas-
me: I think it's time for a New Project
#just imagine...#star trek sims#there are no S1 TNG jumpsuits for ts4#and i believe in#s1 data supremacy#sooo guess im adding this to the kanban board#why yes i do have adhd why do you ask#ts4#marvelous designer
8 notes
·
View notes
Text

72 notes
·
View notes
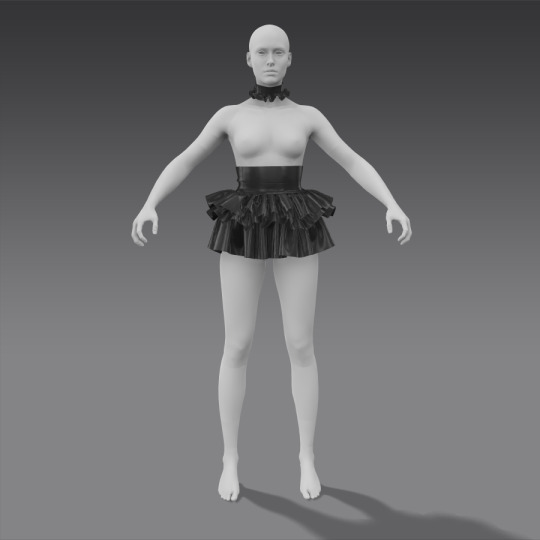
Text
I've been learning more things in Marvelous Designer, like tacking to the avatar and making certain designs for interesting results. This one still needs a lot of work.
Inspiration:

Insipration:
32 notes
·
View notes
Last Seen Blogs

everythingiscuterwithbowties
Untitled

georgronald
Product Prospect

fleshlightprincxss
Fleshlight Princxss

jellyacy-blog1
Jellyacy

urshbaker
Ursh101