#metal psd icons
Photo


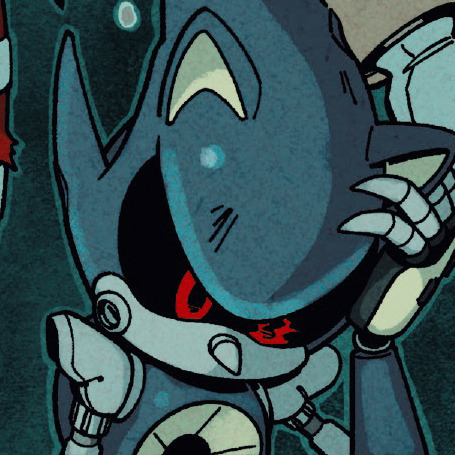

‘‘♡‘‘ or reblog if you save
#sonic#sonic icons#sonic the hedgehog#sonic the hedgehog icons#games#games icons#comics#comics icons#video games#video games icons#aesthetic#edits#icons with psd#metal sonic#metal sonic icons#twitter icons
256 notes
·
View notes
Text
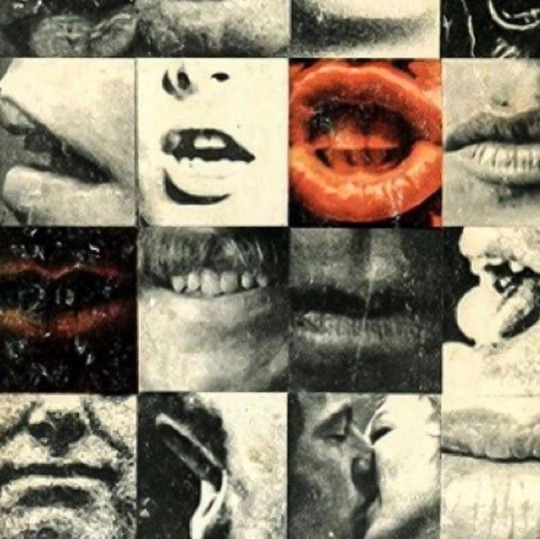


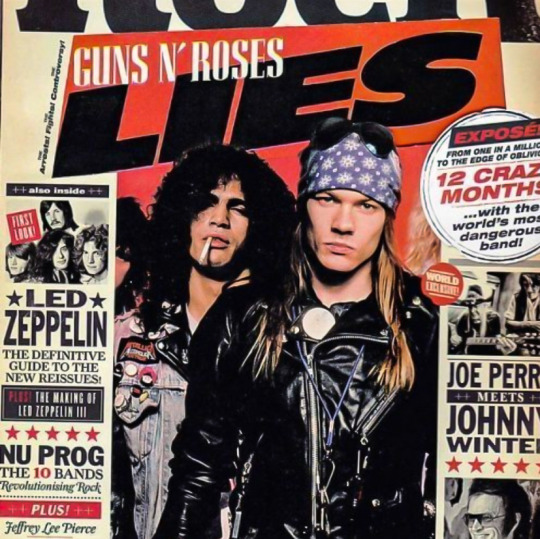


#Spotify#packs#moodboard#grunge#metal#brad pitt#brad pitt icons#guns n roses#motley crue#without psd#aesthetic#grunge aesthetic#fight club#tyler durden#tyler durden icons#tyler durden gifs#tyler durden layouts#tyler durden fight club#fight club 1999#pedrometal#metallicw#metallica
46 notes
·
View notes
Text
Eddie
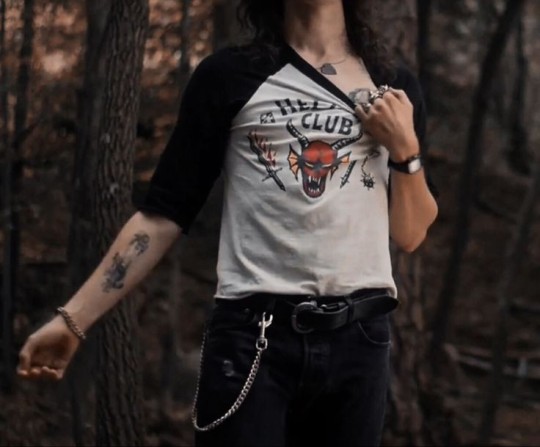
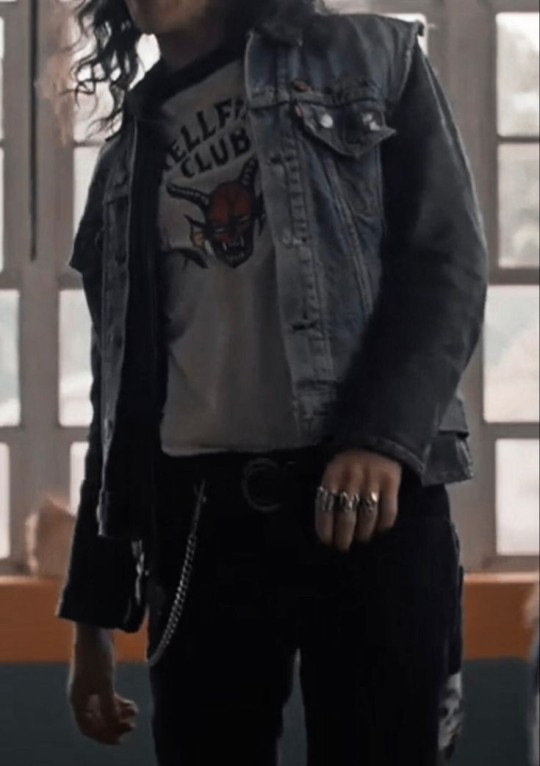

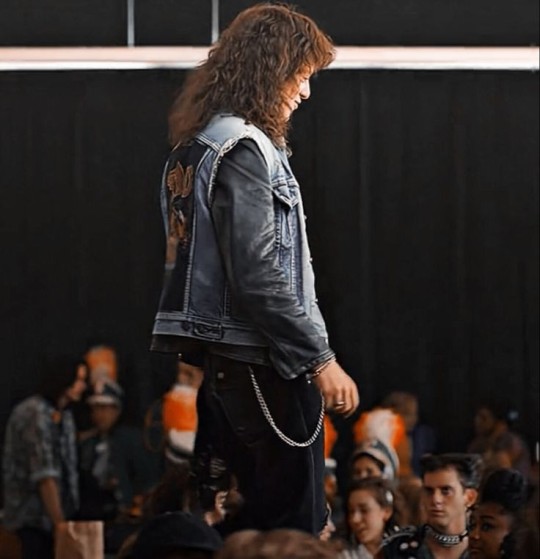
#eddie munson#stranger things#icons#black moodboard#red layouts#layout icons#twitter layouts#twitter#twitch#rock aesthetic#goth aesthetic#red aesthetic#icons whitout psd#icons with psd#detals#metal#icons metal#heavy metal#rock
164 notes
·
View notes
Text
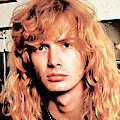

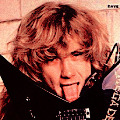

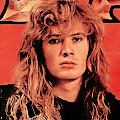


⠀⠀ ❟ ࣪ ᜓ 🎸 ࣪ Pack ࣭ ♥︎̶ 𝕯ave 𝕸ustaine ࡛ 120x120 🦴 ๋ ࡛ ⃙𝇋⠀
#cobskurt#cobskurt on spiritfanfics#icons 120x120#cobskurt icons#120x120#spirit fanfics#icons without psd#psd icons#rock icons#packs#dave mustaine icons#dave mustaine#megadeth icons#megadeth#megadeth headers#icons rock#icons 80s#90 icons#heavy metal icons#heavy metal#pack#matching icons#metadinhas
92 notes
·
View notes
Text

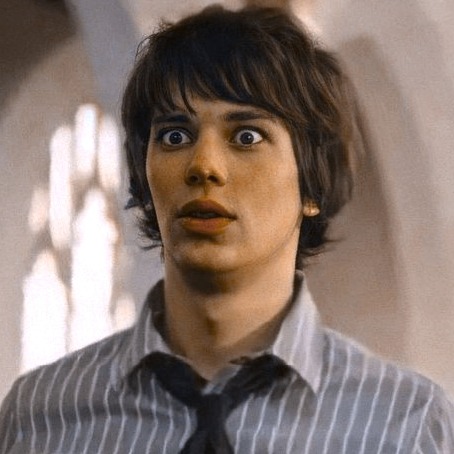

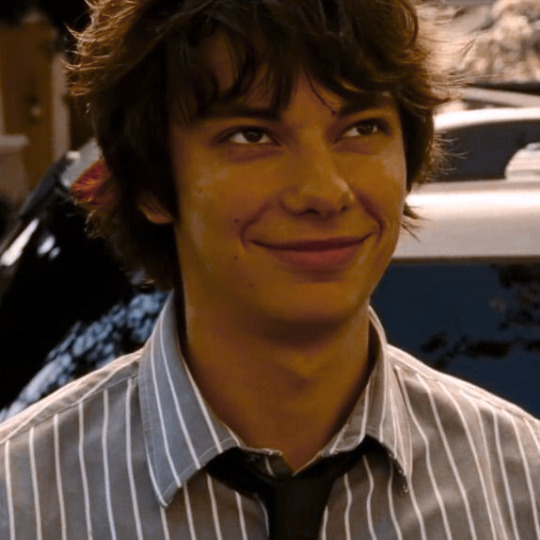
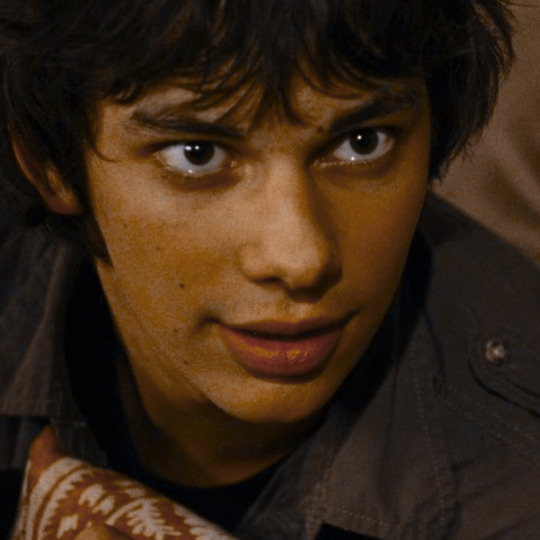
⊹˚RODRICK HEFFLYE ICONS 4 ◌‧₊˚·
;LIKE/REBLOG IF YOU SAVE/USE.♡̷̷ˎˊ-
• Créditos;🎧
#icons with psd#Movie#Movies icons#Diário de um banana#Diário de um banana icons#Diary of a wimpy kid#Diary of a wimpy kid icons#Rodrick Heffley#Rodrick Heffley icons#Rodrick Heffley pack#Devon Bostick#Devon Bostick icons#Devon Bostick pack#Randon icons#Boys#gothic#punk rock#rock music#metal#icons psd
87 notes
·
View notes
Text


ᓚᘏᗢ hunter (metal lord), icons — 120x120? fav/rb or credit if u use!

#soft icons#icons#psd#spirit icons#messy icons#120x120#vampicons#hunter metal lords#metal lords#hunter metal lords icons#metal lords icons
61 notes
·
View notes
Photo
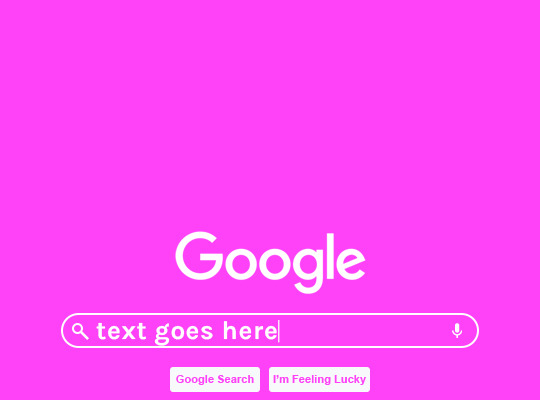
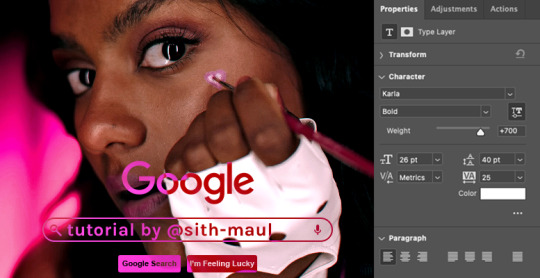
HOW TO: Make an Animated Google Search Overlay
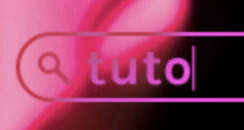
A few people have asked how I did the effect in my pinned post and this set. So, in this tutorial, I’ll show you how to do this typing animation and give you a download to a template I made for the overlay! Disclaimer: This tutorial uses Video Timeline and assumes you have a basic understanding of gif-making in Photoshop.
PHASE 1: THE BASE GIF
I’m not going to show how I made this gif, but if you need any tips on basic gif-making, I have my full gif tutorial here. Instead, here are some tips for making a gif with this effect:
1.1 – Make your gif 540px width, especially if you’re using my template. My gif is 540x400.
1.2 – Use more frames. If you have a lot of characters in your search bar text, you’ll want to make a longer gif (i.e. one with more frames). The gif I made above was only 50-ish frames, so I doubled them and reversed the duplicates so it would play like a boomerang. That gif is a total of 98 frames 😅
1.3 – Have a “feature color” aka choose one color to make pop and make it the same as the overlay. Also, lots of contrast is especially ideal when you have an overlay set to Difference/Exclusion. (Check out the color tutorials on @usergif if you need help making your colors pop!)
PHASE 2: THE OVERLAY
2.1 – Download my template if you’re doing this layout
I made this template myself, so all I ask is that you don’t claim it as your own and that you give me proper credit if you decide to use it! Get the PSD with the transparent background here!
2.2 – Download the font Karla (optional)
The font I used for the search bar is Karla, a Google Font. It’s not THE Google Font, but I like the way it looks — which is more important to me than accuracy for this part. Here’s the Google Font link.
2.3 – Import the overlay
You can either drag the whole folder onto your gif from tab to tab or right-click the folder, select Duplicate Group, and select your gif as the destination document. Just make sure this overlay group is above your base gif!
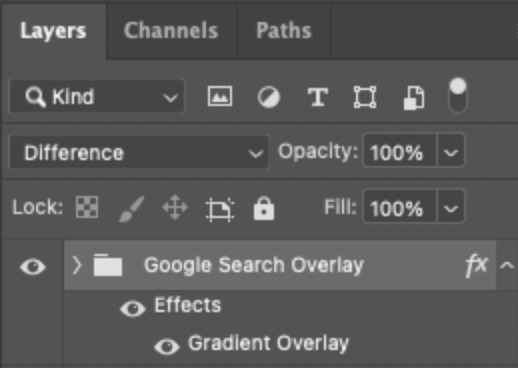
2.4 – Set the overlay blending options
If you’re using my .psd, all the settings are already in place! If not, to get the metallic color effect, simply set the overlay to Difference:
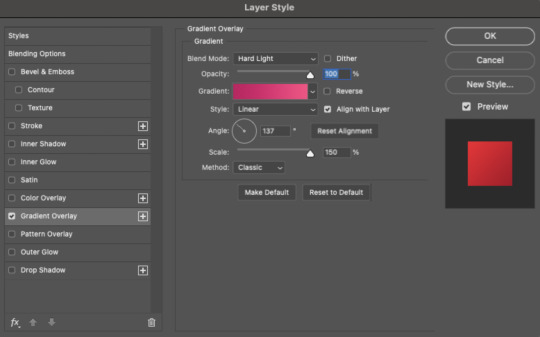
Then, add a gradient overlay that matches your base gif feature color. Here are my settings:
PHASE 3: THE TYPING ANIMATION
*Anakin Skywalker voice* This is where the tedious stuff fun begins...
3.1 – Add your full text
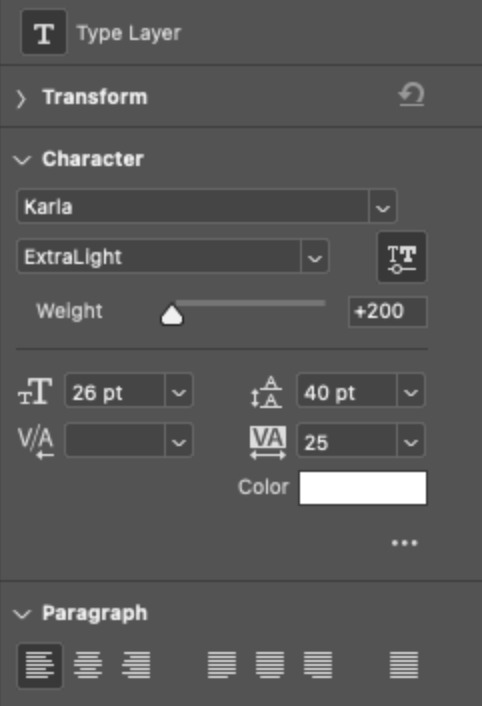
Create a text layer with the full text you want in the search bar! Here are my text settings:
— Font: Karla Bold
— Size: 26 pt
— Letter Spacing: 25
3.2 – Create a layer mask
This is how we’re going to create the typing effect without typing a new layer each time. You can add a layer mask to your text layer, use the Marquee tool to create a box around all but the first letter of your text, then fill the box with black to erase it. Now, all you can see is the first letter ‘t’
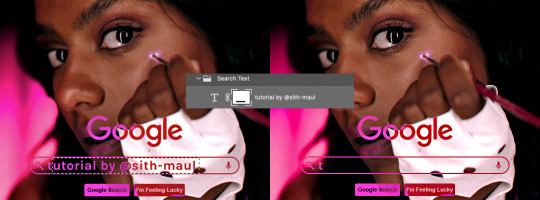
Btw the reason we wouldn’t use keyframes for something like this is because we want each letter to appear in a flash, not with a smooth, sliding reveal like a fade transition.
3.3 – UNLINK THE LAYER MASK
This is super important so you can freely move the layer mask with each letter. Just click that chain so it disappears!

3.4 – Trim the text clip SEVERAL times
When I say several times... I’m not joking lmao:

Btw, you can click these images to view them at full size and zoom! Now, this part is a little tricky for me to break down into steps, but here are some key tips:
TIP A – Trim, Move Layer Mask, Repeat
To make it as easy as possible on yourself, the best method is this:
— Start with your original text layer (pre-trim) with the layer mask only exposing 1 letter
— Move the playhead (red vertical line with the blue arrow) to the spot you want to trim (see Tip B) and click the scissor icon to split the clip
— On the copied layer, move the layer mask (white box in the layer panel) to the right to expose another letter. Make sure your layer mask is unlinked (See Step 3.3)! You can see my layer mask moving by the dotted lines in the gif below.
— Move the playhead the same amount of spaces as before and trim again: you should now have the original trimmed clip (first letter) and a second trimmed clip (second letter)
— Repeat until you’ve done all the letters AND the spaces
TIP B – Make your trimmed clips about 0.03 seconds long.
I’ve found this works well for me, especially because I’m working in Video Timeline. It reduces the amount of duplicate frames I get because, for whatever reason, Timeline pauses every 0.03 seconds (at least for me when I click the forward button).
In the section above the pink line (image below), you can see I started with my full text clip. Then, under the pink line, you can see how I used the scissor/trim tool to clip them each to a duration of 00:03.

↑ Note: That screenshot is zoomed into the Timeline 100%. The other screenshots are zoomed out which is why the clips look bigger here.
TIP C – Your text shouldn’t start at the very beginning.
Give yourself some space to let the cursor blink a few times, just like when you pause while typing on a computer. Where you start your typing animation is up to you! In the image below, you can see the first small purple block starts about 1.06 seconds into the gif:

TIP D – Backspace
I’m sure you’ve probably figured this out already, but to get the backspace effect I have in my gif, you just move the layer mask to the left to cover the letters you want to “delete.” Then once they appear “deleted,” just edit your next text layer clip with the new word you want to replace it with! (In my gif, I deleted “nik” and replaced it with “@sith-maul.”)
Here’s what the gif looks like without the blinking cursor animation:
Now that’s all explained, you basically do a similar thing with the blinking cursor! But no layer masks are involved :)
PHASE 4: THE TEXT CURSOR ANIMATION
4.1 – Create a text layer with just a vertical line like this one → |
I’m using the same Karla typeface as before, but thinner. Here are the settings:
— Font: Karla ExtraLight
— Size: 26 pt
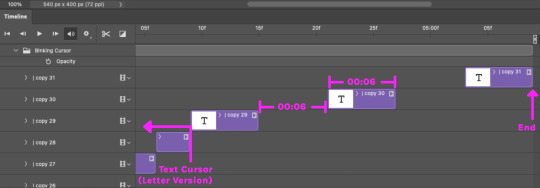
4.2 – Trim, Move, Repeat (Letter Version)
This step will be super easy because each cursor clip that follows a letter will be the exact same duration as the letters you’ve already done: 0.03 seconds long. Take a look:
For each letter you reveal, move the text cursor so it’s slightly to the right of the letter, like this:
Do this for all the letters and even the spaces!
4.3 – Trim, Move, Repeat (Blinking Version)
This type of text cursor is slightly different because:
— These clips are “slower.” The reason is that the Letter Version cursor goes too fast for the Blinking Version. So I doubled the duration of the blinking cursor to 0.06 seconds!
— There are spaces between these clips that are the same duration as the clips themselves: 0.06 seconds.
— This text cursor starts at the very beginning of the gif and continues after the text is finished “typing,” directly after the last Letter Version cursor.
Just add however many blinking cursors you want to the beginning and end of your gif, skipping over the parts where you already did the Letter Version!
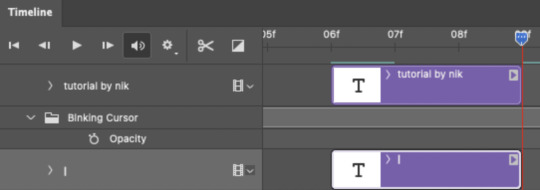
Here’s how it looks in the Timeline at the beginning of my gif:

Here’s how it looks in the Timeline at the end of my gif (note: it continues directly after the last Letter Version cursor):
Here’s how the blinking cursor would look at the same speed (0.03) as the letter version:

Here’s how the blinking cursor looks at double the duration (0.06):

PHASE 5: EXPORT
That’s it!! Just convert from Timeline back to Frames and export your gif! As always, I recommend checking your frames when you convert from Video Timeline back to Frame Animation — just in case you may have gotten any duplicate frames. Again, if you want to know more about that process, my full gif tutorial is here!
And ta-da, here’s the final gif!

And that’s it! I really hope this makes sense because I’m not really sure it does 😅 But if you have any specific questions, my ask box and DMs are open! <3
Also, check out these gorgeous recreations of this effect from @steverobin (Keke Palmer set) and @jakeyp (Jake Peralta set)!
#gif tutorial#completeresources#allresources#userelio#userannalise#usershreyu#useryoshi#useralison#uservalentina#userkosmos#usernums#tuserkay#userk8#tuserabbie#uservivaldi#userstar#usersole#resource*#gfx*#google*#this tutorial is long overdue oops lol
2K notes
·
View notes
Text

Glossy Metal iOS Icons PSD
#apple#art#black#blue#design#frutiger aero#graphic design#graphics#icons#iphone#ios#mobile#psd#queuetiger#technology
55 notes
·
View notes
Text


(#163 GIFS OF NEVE CAMPBELL in TWISTED METAL 2023

in the SOURCE below you'll find 163 gifs (sized 268x151) of neve campbell in as raven in twisted metal 2023. all gifs were made by me and are for roleplaying purposes. she's white (scottish/dutch/sephardi jewish), please cast accordingly and use appropriately! feel free to make into gif icons, add psd coloring, add into edits. please DON'T claim as yours and add to other gif packs. reblogs and likes are appreciated!! enjoy.🫧 ps. there might be spoilers!!
#neve campbell#neve campbell gif hunt#neve campbell gif pack#gif pack#gif hunt#female fc#older fc#rph#twisted metal
85 notes
·
View notes
Text
—EMERGENCY COMMISISONS.
So uh, hi guys! While I sold at a convention this past weekend and did pretty okay, most of that money went towards a few bills, paying for my table. Ect. I’m actually still behind on some bills and wasn’t able to pay for everything. I also won’t have enough for groceries tomorrow either.
I do have a queue right now, but starting next week I will be hunkering down on commissions. Most of my spare time will be working on commission work so activity may be slow.
I live as a single income home right now and my partner is having a hard time finding work, so sometimes things like this come up where we don’t have enough money for stuff.
If I can maybe *somehow* get $100-$200 by tomorrow, I can pay for groceries to last us until next pay day. I am even slicing my prices in order to get more to my queue.
I do have merch that I sold at the con too ( prints, stickers, charms, buttons ). Lots of Pokémon, some original stuff, metal gear solid, twisted wonderland and street fighter. If interested in any of that stuff please DM me and I will give you pricing + shipping.
— GRAPHIC PRICING.
Promos ( 2, 3, or 4 panels ) - $15.00-$30.00 ( depending on gif or not and complexity ) FLAT FEE OF $15 T
Post Splitters - $5.00
Dash Icon - $5.00
Icon Borders - $5.00
Icon Borders + Icons - $5.00 for the border, 0.50 0.25 cents per icon ( i will put a psd and the icons in the border for you. )
Banners (Headcanons, pinned, ect) - $10 $5 for 5 banners.
Header - $10.00 $5.00
Full Package ( everything above as a deal ) - $60 $40( only includes 30-50 icons depending on resources )
—ART COMMISSIONS.
These are much slower then graphics due to my mental health. I have a lot of examples so if interested in this I can DM you examples and my pricing list—I just can’t fit all examples here and I don’t have a proper sheet.
If this isn’t possible I’d appreciate sharing this regardless. I’m desperate and it sucks. While I don’t expect handouts, I will leave my PayPal here for those who want to help but don’t want to actually purchase anything: [email protected]
#I’m so tired of being broke#I wish the job market in my city didn’t such so bad because my partner is trying SO HARD to find work and is even enrolling in school#in January but#yeah#0. — cat. | out of character.#commissions#art commissions#graphic commissions#emergency commissions
30 notes
·
View notes
Text

B2467//METAL SEA.an icon coloring psd.
this psd focuses on glossy and textured surfaces, it focuses on purples and magentas and lilacs. you must use the adjustment folder in order to get the desire coloring (specially leves + selective color + color balance.)
remember to reblog if you save/use. credit has to be visible on your carrd/doc if you use. (reblog, not like. please.)
consider donating through paypal or buy me a coffee through ko-fi.it truly helps me a lot. i am currently in the need of some cash so if you can spare a dollar, that would be great! if not, please just spread the art!
this psd is 4 DOLLARS VIA PAYHIP.
5 notes
·
View notes
Text

FACECLAIM: Both Moka from Rosario + Vampire and Bishamonten from Noragami. Icons are from fractalflare.
PSD USED: Jasmine by peachcoloring.

FACECLAIM: The Unknown from Metal: Hellsinger.
PSD USED: QUINN by waatsone.
2 notes
·
View notes
Text
Pixelmator pro icon

PIXELMATOR PRO ICON FULL
PIXELMATOR PRO ICON PRO
PIXELMATOR PRO ICON MAC
PIXELMATOR PRO ICON PRO
Designed exclusively for macOS, Pixelmator Pro supports almost every major macOS feature and integrates seamlessly with macOS Monterey.Pixelmator Pro is a Universal app that is fully optimized for all M1 Macs, including ones powered by the M1 Pro, M1 Max, and M1 Ultra chips.Share your images to Photos, Mail, AirDrop, and other locations.Open and export Photoshop images with layers.Edit images in all the most popular image formats, including JPEG, TIFF, PNG, PSD, HEIF, SVG, PDF, GIF, BMP, TGA, WebP and JPEG-2000.Get suggestions for eye-catching crops from ML Crop.Quickly and easily make accurate selections using the Quick Selection tool.Copy the look of different photos with ML Match Colors.Remove noise from images with ML Denoise.Use ML Enhance to intelligently enhance photos with an ML algorithm trained on millions of pro photos.Increase the resolution of images without blurriness or pixelation using ML Super Resolution.Pixelmator Pro comes with a wide range of tools powered by machine learning.Use multicolored and textured SVG fonts in your designs.Easily create curved and circular text or even type text along the edges of shapes and paths.Add text and customize all its typography features, including font, size, emphasis, alignment, ligatures, spacing, indents, and much more.Enjoy incredibly fast and responsive painting thanks to a cutting-edge painting engine powered by the Metal graphics technology.
PIXELMATOR PRO ICON FULL
Take advantage of full support for graphics tablets to paint with pressure and tilt sensitivity just like on paper or a real-life canvas.
Paint digital or traditional paintings with a collection of beautiful, handcrafted dual-texture brushes.
Customize the look of layers using layers styles, such as Fill, Stroke, Drop Shadow, and Inner Shadow.
Combine any of over 60 versatile, nondestructive effects to develop any artistic or special effects you can imagine.
Quickly and effortlessly lay out and align objects using the intelligent Arrange tool.
Harness the full power of layer-based editing to design posters, webpages, apps, or whatever you can imagine.
Import and export vector files in SVG format.
Add customizable Smart Shapes to quickly create your custom shapes.
Speed up creating illustrations with over 200 stylish shapes designed by the Pixelmator Team.
Create vector designs using a full set of vector tools, including Pen and Freeform Pen tools.
Make precise selective edits using color adjustments layers.
Enjoy full support for RAW photos from over 600 of the most popular digital cameras.
Quickly make good-looking shots spectacular with over 40 presets that create cinematic, vintage, photographic film, and many other looks.
Automatically remove the background from images using the AI-powered Remove Background feature.
Magically remove unwanted objects from images using the incredible Repair tool.
Use machine learning-powered tools to automatically enhance photos, increase resolution, correct white balance, and remove noise.
Adjust the colors in your photos in any way you want using a powerful collection of pro-grade color adjustments.
PIXELMATOR PRO ICON MAC
Designed to be the ultimate Mac app, Pixelmator Pro has won multiple awards, including the Mac App of the Year awarded by Apple, and is one of the best-rated apps on the Mac App Store. With over 50 image editing tools, Pixelmator Pro has everything you need to edit photos, draw illustrations, create designs, paint digital paintings, and be creative in just about any way you can imagine. Pixelmator Pro is an incredibly powerful, beautiful, and easy-to-use image editor designed exclusively for Mac. Pixelmator Pro is rated 4.8 out of 5 stars worldwide with over 30,000 five-star ratings.
1 note
·
View note
Text
Logoist app

#Logoist app software
Native Photoshop PSD export - Use Photoshop, Pixelmator, or any other graphics app supporting the Photoshop file format to refine your logo or include it in an existing project. Export - Logoist works independent of resolution, but allows export up to 600dpi in several file formats. Samples - Logoist comes with over 100 samples you can use as templates. Fonts - A font selector previews all fonts installed, as well as a live preview of the text including all shaders and effects applied to it. Snapping - A snapping algorithm allows you to accurately align the layers in your composition. Ready for OS X 10.8 - Logoist supports iCloud document storage and Share Sheets. Easy to use - Logoist features a well thought-out user interface which makes it easy to understand and use. Paths - Logoist comes with a sophisticated tool to edit paths. Transformations - Text and clipart can be transformed using several built-in methods like trapezoid, pinch, ripple, wave, or shear. Patterns - A huge collection of patterns is also included. Clipart - Logoist includes over 3,000 vector clipart images. Borders - Use either a flat color, a pattern, a gradient, or even using a shader. Effects - Effects such as inner and outer shadow, glow, blur, and borders. Shaders - Create metal, glass, plastic and several other materials. Layers - Insert objects and combine them with boolean operations like substract or add. Logoist comes with a large collection of effect presets, clipart, and patterns free for you to use in your projects! you name it! Logoist allows you to design images using layers, sophisticated effects, and eye-catching shaders. Logoist lets your create logos, title art, icons, banners, Web-site elements, greeting card headings, buttons, iBooks Author titles, picture collages.
#Logoist app software
Multimedia Design Illustration Synium Software Logoist 230912 KBį?film=aHR0cHM6Ly9tYWNwa2cuaWN1Lz9pZD00MzY5NCZzPWJhbmRjYW1wJmt3PUxPR09JU1QrVkVSUyszLjI=
0 notes
Text


- ⩩🎸› 𝘼𝙙𝙧𝙞𝙖𝙣 𝙂𝙧𝙚𝙚𝙣𝙨𝙢𝙞𝙩𝙝 𝕚cons 120x120⊰❞
📸 give credits if you use.
#spirit fanfics#cobskurt#cobskurt on spiritfanfics#icons 120x120#cobskurt icons#120x120#icons without psd#psd icons#adrian greensmith#metal lords icons#metal lords#netflix icons#netflix film#actors icons#boys icons#psd coloring#random aesthetic#random moodboard#films icons#movies icons#follow me
40 notes
·
View notes
Text
Handbuch icona
HANDBUCH ICONA >> DOWNLOAD LINK
vk.cc/c7jKeU
HANDBUCH ICONA >> READ ONLINE
bit.do/fSmfG
Icona Metallics · Icona Capitals · Argento Flora · Icona Vintage Icona Capitals Grillgeräte Zurück zur Startseite; Benutzerhandbuch DetailseiteKostenlose Icons von Handbuch im All-Stil. Verfügbar als PNG und Vektor. Lade Icons in allen Formaten herunter oder bearbeite sie online für Mobile- und Ansicht Und Herunterladen Comelit Icona Sbc Benutzerhandbuch Online. Icona Sbc Monitore Pdf Anleitung Herunterladen. Auch Für: 6801W. Bedienungsanleitung. Sehen Sie sich hier kostenlos das Handbuch für DeLonghi Icona ECO310 an. Dieses Handbuch fällt unter die Kategorie Kaffeemaschinen und Bedienungsanleitung. Sehen Sie sich hier kostenlos das Handbuch für DeLonghi Icona CTO 2003 an. Dieses Handbuch fällt unter die Kategorie Toaster und wurde 4274 „handbuch“-Icons. Vektor-Icons im SVG-, PSD-, PNG-, EPS- und ICON-FONT-Format. Das Handbuch ansehen und herunterladen von DeLonghi Icona Vintage EcoV 311 Espressomaschine (Seite 1 von 6) (Englisch). Auch Unterstützung und erhalten Sie Manual de uso del monitor en color Icona Art. 6601W - 6601W/BM. Manual de utilização do monitor a cores Icone Art. 6601W - 6601W/BM.
https://guwosejub.tumblr.com/post/694283253578940416/brother-m-4318-bedienungsanleitung-sony, https://kufimimifuhu.tumblr.com/post/694283539376750592/lifetec-mikrowelle-4-in-1-bedienungsanleitung, https://guwosejub.tumblr.com/post/694283253578940416/brother-m-4318-bedienungsanleitung-sony, https://guwosejub.tumblr.com/post/694283374462910465/jvc-rm-c1512-bedienungsanleitung-huawei, https://guwosejub.tumblr.com/post/694283562800840704/dolmar-bc-212-bedienungsanleitung-huawei.
0 notes
Last Seen Blogs

aqwzsx-78
Sans titre
nashermilesmarketing
Nasher Miles
icemavs
negative ghost rider, the pattern is full

biscuitdoricky-blog
Biscuit do Ricky

aqueenandherlittlejewel-blog
Come wander with us...