#modelmaking
Text

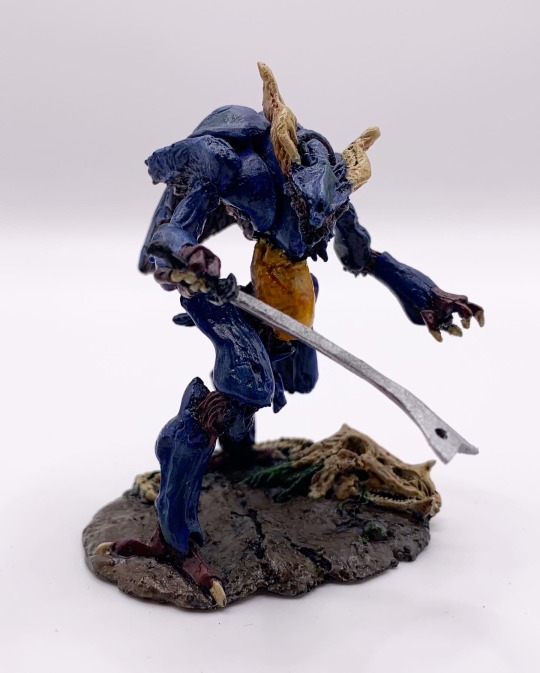
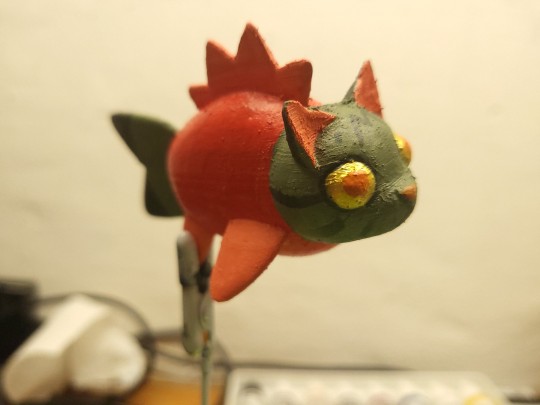
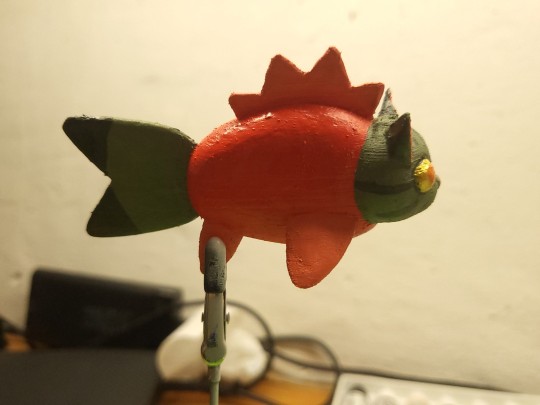
cursed hands of the pugilist
messing around with clay again after many year
#illustration#character design#art#artists on tumblr#scifi#sketch#comic#concept art#my art#alien#clay#claymation#modelmaking#spooky#ghost#paranormal
100 notes
·
View notes
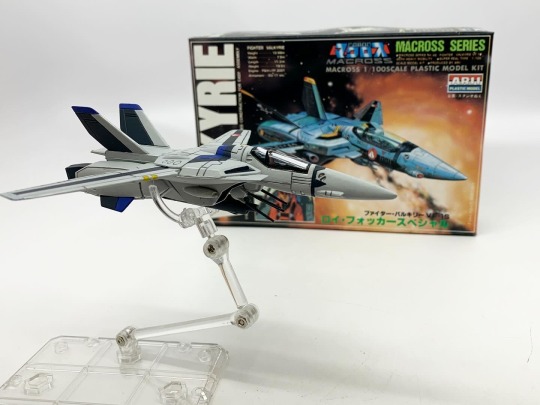
Text
Building my little Revell F-19 kit
More of my stuff
#mini painting#model making#scale model#art#miniature art#artist#artwork#plamo#plamodel#model kit#modelmaking#scifiart
28 notes
·
View notes
Text

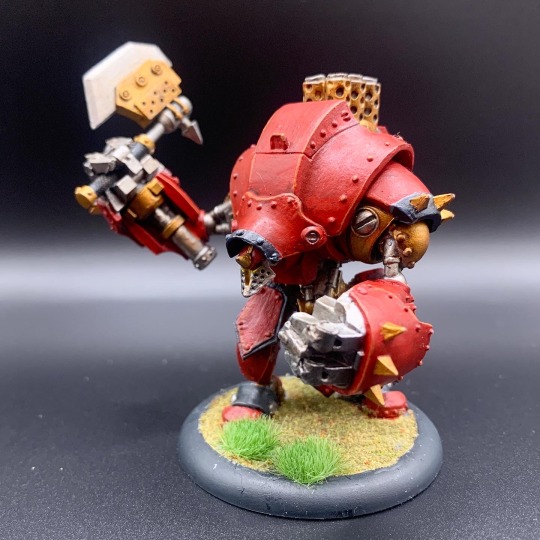
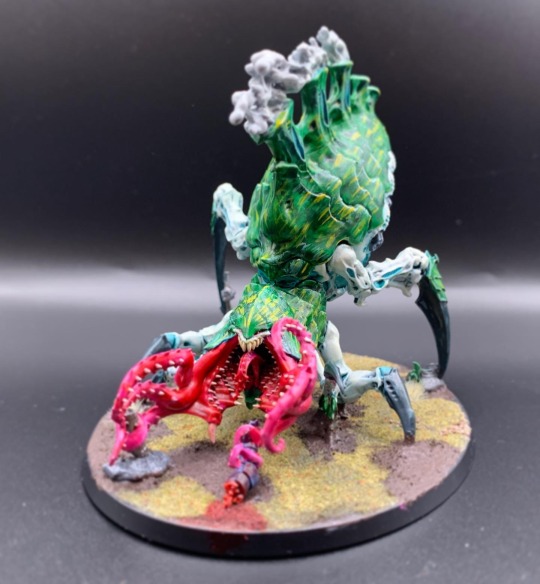


Alright! We’ve got part 2… miniatures! I definitely got better at painting small scale kits like these as time went on, I’ve got a lot of love for Wargaming now that I’ve given miniatures a good try!
#mecha#citadel#modelmaking#miniatures#warhamer 40000#tyranids#warmachine#Cryx#Khador#Warjack#Bonejacks#プラモデル#Plamo#wargaming#Votoms#Dunbine#aura battler dunbine#resin#garage kits#Warhammer Horus heresy#Horus Heresy#black Templars#alpha legion#Scopedog#ボトムズ#ダンバイン
18 notes
·
View notes
Text

M4A3E8 Easy Eight
Jason Wong made this lovely Box art for Andy’s Hobby HHQ001 1/16 M4A3E8
I really want to put my hands in something like this.
Via Twitter
#tank#Andy's Hobby Head Quarters#youtube#M4#sherman#american tank#medium tank#wwii#ww2#ww2era#illustration#box art#twitter#easy eight#model making#plastic kit#plastic model#modelmaking#jason wong
22 notes
·
View notes
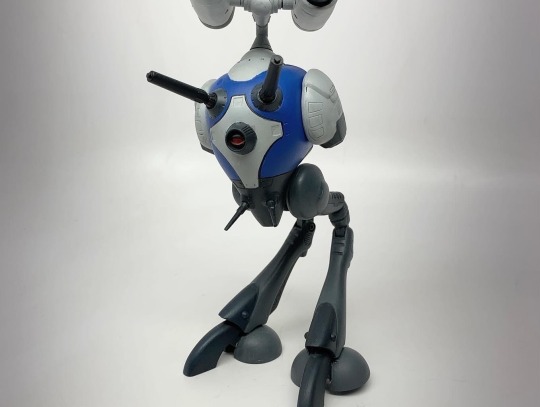
Text
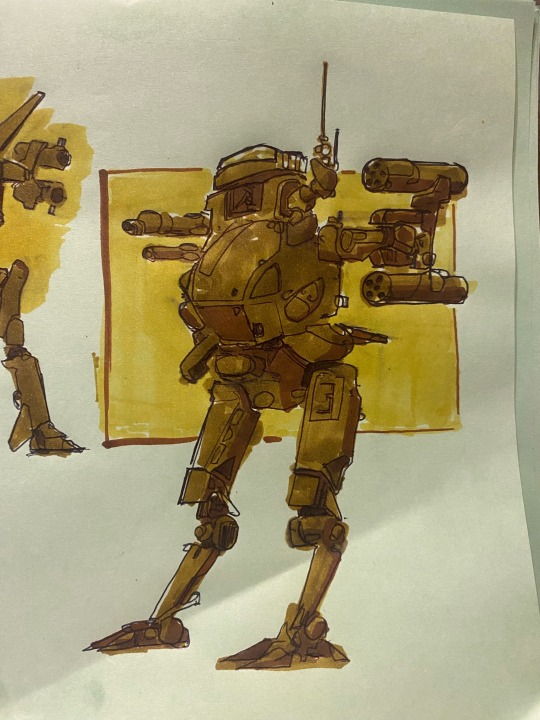
Sketch.
#artists on tumblr#robots#mecha#concept art#scifi#toys#mech#3dprinting#painting#prismacolour pencils#photoshop#toystagram#japanese robot#japan#china#modelmaking
13 notes
·
View notes
Text

I've started drawing more details on half-model Rocky. So I've shown the main parts they created.
It's really cool that I personally drew a scene where Rocky is coming but without color (it's a template).
And I watched them suddenly Rocky kind of looked like a robot from the future world
But I don't understand why it's so cool OMG =)))))
#chicken run#aardman#armature#modelmaking#model#robot#ibispaintx#no color#rocky#it's very cool :)#fanart#chicken run 2#IT IS SO UNSURPRISE#future world#my post#my ocs
2 notes
·
View notes
Text
La Creatura
5 notes
·
View notes
Photo
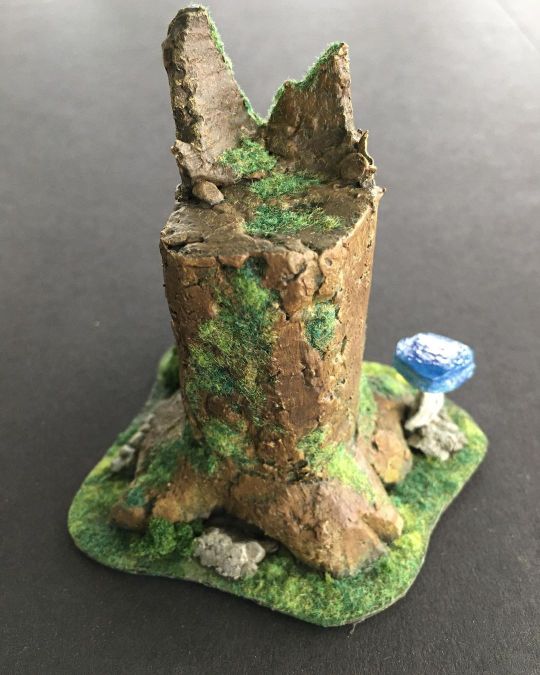
Tree stump with blue mushroom. Recycled foam, cardboard, foam ore and sponge. Acrylic paint and flock. #mushroom #treestump ##dnd #d&d #ttrpg #miniatures #rpg #modelmaking #dungeons #dragons #tabletop #roleplayinggame #5e #fantasy #sculpting #moldmaking #resin #chrisbolduc #hermeticdungeon https://www.instagram.com/p/CpDXdpSutvn/?igshid=NGJjMDIxMWI=
#mushroom#treestump#dnd#d#ttrpg#miniatures#rpg#modelmaking#dungeons#dragons#tabletop#roleplayinggame#5e#fantasy#sculpting#moldmaking#resin#chrisbolduc#hermeticdungeon
16 notes
·
View notes
Text
Weyland Yutani UD-4L drop ship.
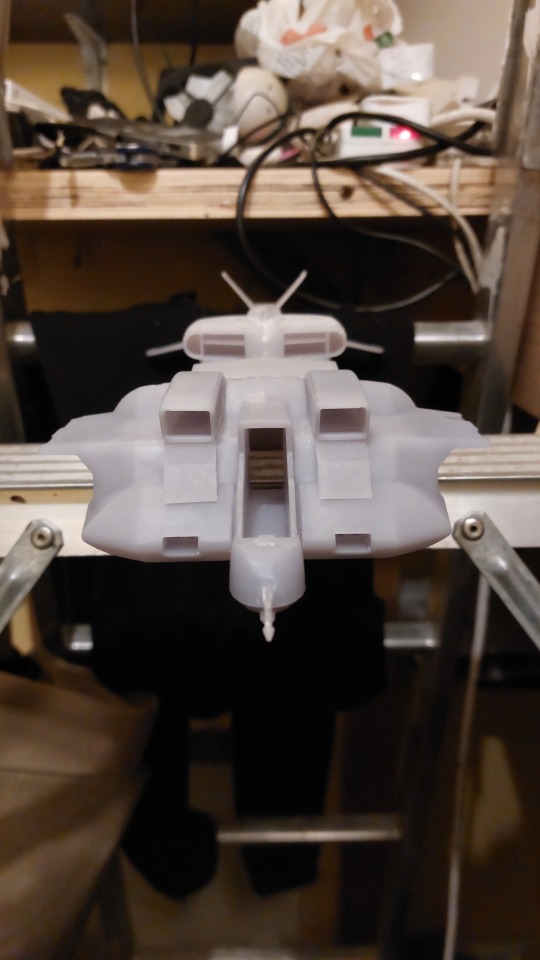
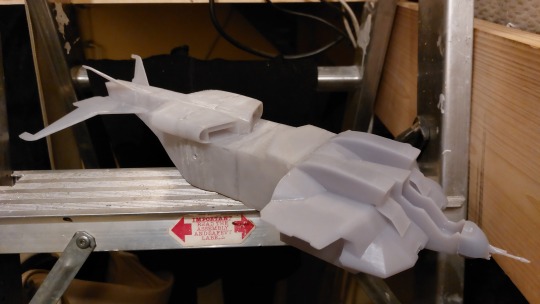
I found a nice model of this on thingiverse, by alpokemon
https://www.thingiverse.com/thing:3536997
I made some cuts in meshmixer to open out the main gear bays, cockpit and engines. Its printed in several parts on my elegoo mars 4.
I upped the scale to 110% to get it to 1/72 scale. This is going off the marines tech manual putting it at 25m long irl. I will make decals for it on my alps printers.
6 notes
·
View notes
Photo

A fabulous tyrannosaurus from the artwork on a model kit. #ModelT . Images from company website. . . . . . . . #dinosaurs #dinosaur #paleoart #vintage #awkward #trex #legsfordays #vintagetoy #actionfigures #instagram #illustration#paleofail #paleontology #prehistoric #jurassicpark#modelkit #dinosaursofinstagram #jurassicworlddominion #modelmaking #art #monsters #science #डायनासोर #dinosaurus #dinosaurier #공룡 #dinosaure #динозавр#恐竜 (at Chicago, Illinois) https://www.instagram.com/p/Cfsmg11sOyd/?igshid=NGJjMDIxMWI=
#modelt#dinosaurs#dinosaur#paleoart#vintage#awkward#trex#legsfordays#vintagetoy#actionfigures#instagram#illustration#paleofail#paleontology#prehistoric#jurassicpark#modelkit#dinosaursofinstagram#jurassicworlddominion#modelmaking#art#monsters#science#डायनासोर#dinosaurus#dinosaurier#공룡#dinosaure#динозавр#恐竜
52 notes
·
View notes
Photo

Sydney Opera House - concept model
Jørn Utzon
66 notes
·
View notes
Photo

The Observatory WIP 🚧 2.0. It’s coming along! The build got a couple different washes and some vegetation. . . . . . #boardgamegeek #dnd #dungeonsanddragons #ttrpg #d20 #dice #dnd5e #paintingminiatures #warhammer #warhammerterrain #tabletopterrain #terrain #dioramas #modelmaking #wargameterrain #dungeonmaster #game #gamer #games #gaming #geek #lotr #magic #miniature #monster #pathfinderrpg (at The Forgotten Realms) https://www.instagram.com/p/CmPL7OPuDDU/?igshid=NGJjMDIxMWI=
#boardgamegeek#dnd#dungeonsanddragons#ttrpg#d20#dice#dnd5e#paintingminiatures#warhammer#warhammerterrain#tabletopterrain#terrain#dioramas#modelmaking#wargameterrain#dungeonmaster#game#gamer#games#gaming#geek#lotr#magic#miniature#monster#pathfinderrpg
13 notes
·
View notes
Text


The New Year has come and I’ve made a lot kits! It’s weird seeing them all like this but this isn’t actually everything! This is just the kits I made for my job’s Instagram page (@wiseguyshobbies) ! I’m looking to double the amount of kits for the page this year!
Let’s call this part 1 of… 3?
#mecha#マクロス#vintage#macross#modelmaking#プラモデル#80s anime#anime#plamo#plastic model kits#aircraft#scale model#hobby#sci fi model kit#maschinen krieger#robotech#dorvack
6 notes
·
View notes
Photo
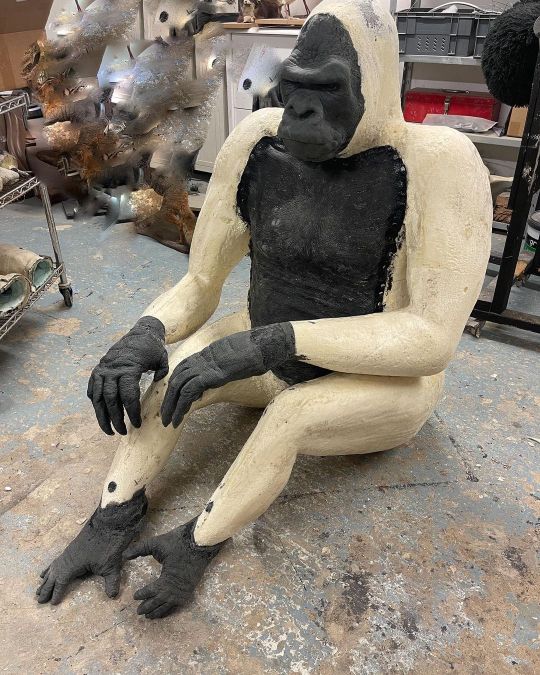
Gorilla replica coming on. Looking a bit naked at the moment. #modelmaking #taxidermy #taxidermyreplica #reproduction #gorilla #ape #interior #interiordecor (at London, United Kingdom) https://www.instagram.com/p/CnnUB_Uqhrw/?igshid=NGJjMDIxMWI=
8 notes
·
View notes
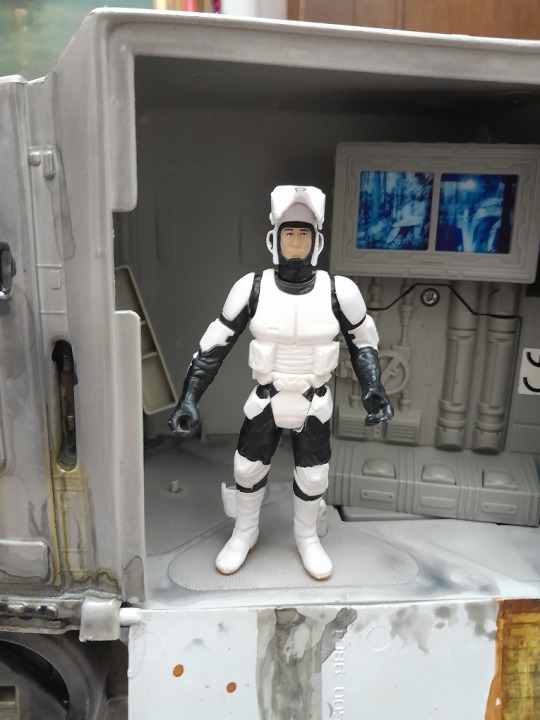
Text
The Hasbro AT-AT project
Our dear friend Neil arrived at our door one day, with the ultimate gift that any Star Wars loving kid from the 80s would want, a three and a half inch tall Hasbro Scout Trooper, with opening helmet, complete with an AT-AT Imperial Walker!
These items had been rescued from a skip and as such were incredibly dirty. However, Neil could see that these items would be of great value to the Star Wars fan in me and so he handed them over accepting only a hug in return. The odyssey of the Imperial Walker was about to start as it sat on a shelf in my office, ready to be given the Jayney treatment. The weeks went by, slowly becoming months and every time I looked at the walker, I could see the damage, the missing parts and the broken sound module. Finally, I put a post on Facebook asking my friends what I should do with it and the resounding reply was that I needed to give it the Jayney treatment and resto-mod it to within an inch of it's armoured life.
Step one was to strip it down and scrub away the filth that it had gathered, clearly sat in someone's loft before entering a skip to be scrapped. It saddens me that someone would throw a toy like this away when it could be played with by a child who would love it, but I am sure that the Rebel Alliance would approve of it being scrapped! However, as a confirmed adherent to the Dark Side, I could not allow such a thing to happen to Imperial property and accepted my fate. The cleaning went surprisingly well and under the filth was a very good condition body, with only minor damage to the legs that was easily fixable. The biggest problem however was the missing chin mounted heavy blaster cannons. With some on-line research I found out that this was the Endor Edition Walker, released in 2006 and in it's incomplete state was next to worthless, making it the perfect candidate for what I was planning. Replacement blasters were available, but at just under twenty pounds per side, I was not keen and started to look into constructing my own. Here I went down a strange and unusual path delving into the depths of Spru-Goo, sculpting and chemistry.
Wobbly time slip time... Wooo! On the 7th of February of this year, I took some old model sprues and chopped them up into small sections and dumped the lot into an old cherry jar. I then poured on a bottle of acetone based nail varnish remover and screwed on the lid good and tight, not only to keep the smell in, but to prevent spillage if it got knocked over when I left it to work its magic on my shelf for months. The styrene reacted with the acetone and over time melted in the liquid, forming a strange rubber like compound that could be easily sculpted by gloved hands.

When it came to making the chin blasters, I needed a nice curved shape to hold the barrel and my home made Spru-Goo worked a treat. I scooped out the goo from the jar and laid it out on a work mat and started to roll and shape the spongy mass into shape, carefully folding it into layers that gave it a good thick base to work with. When I was finished, I was left with a smooth, one centimetre thick patty of styrene and I left this on a shelf to cure. As the acetone evaporated from the styrene, forming into a strong, rigid plastic once again. It took three days for the Spru-Goo to become workable and then I was able to saw, file and sand it into the shapes I needed to make the barrel holder. Then it was back to the cardboard supply and then e-Bay. I needed a pair of blaster barrels and during my investigations I had found someone who was 3D printing barrels for the original Kenner AT-AT from the early eighties. These although completely useless for my AT-AT were very, very cheap at only £2.50 including the postage and they took less than a month to arrive thanks to sitting in the local sorting office for three weeks due to a major staff shortage and restructuring by post Office management that has still to be resolved.
When I started to build up the blasters, using the Spru-Goo, the 3D printed barrels and some cardboard, I used the bottoms of some vitamin bottles to make the plasma generating chambers and then made a discovery. The 3D printed barrels were hollow, meaning that I could drill out the ends and install some LEDs directly into them to give them the muzzle flash of a firing weapon. The electronics was the easy bit, but shaping the rigid structure of the cannon to hold them was a little more tiresome. It slowly came together and I was left with something I liked, if looking a little more industrial and weapon like that the smooth sculpted original that had been lost. Being made of a mix of materials though, the cannons needed something to pull them all together. The 3D printed barrels visible ridge lines of the printing and although they were smooth to the touch I still didn't like it. I decided to seal the lot with UV resin, a product I have been using more and more of late and have really come to like. So using a small brush, I painted a thin layer of resin all over the complete cannon assembly and got out my UV torch to start fixing the resin... which failed to set. There was simply not enough power in the torch to set the amount of resin I had ended up using and the result was that the resin remained tacky and unpleasant to handle. I finally left it under a sheet of tin foil with the torch switched on until the batteries finally failed, but each cannon remained sticky and wet. In a fit of rage, while sat bored in a hospital waiting room waiting for wifey to come back from an MRI, I scanned Amazon Prime and found the answer to my problem (purely the setting of the resin, my other problems are to discuss another day!). A huge, plug in, resin curing lamp so powerful that it came with a warning about it being dangerous to the eyes and skin! The next day it arrived and I began baking the tacky cannons until they were glassy smooth and everything was coated with a firm, strong layer of plastic. Unfortunately, it was too shiny for the paint and I had to lightly sand it back to give it a key for the paint to stick too before using my airbrush to give each cannon a coat of gunmetal grey.

With the paint on the cannons drying, I turned my attention to the head of the walker and set about making the modifications to the carriers for the chin cannons. This was deeply infuriating and just when I thought I had it all set, the gears would jump, the sliding plates would slip and the whole lot would stop working. Luckily, I have the power of the Dark Side and thus was able to hold all of the pieces together, like a lightsabre under construction before I finally got it to work as I wanted. I cut away the wiring for the useless wheat seed bulbs that came with the unit and replaced it all with the wiring for the LEDs. I also took a razor saw to the horribly printed windscreen of the beast and cut away this awful looking piece of plastic. Using a pin vice, I was able to drill about twenty tiny, half millimetre holes in the cockpit control desk for the optical fibres I wanted to use. Again, the UV resin and curing lamp came to my rescue. I have in the past tried to secure the optical fibres with super glue, hot glue and plastic glue and all of these attempts have been less that successful. UV resin however is optically clear, easy to apply and cures in less than ten minutes with no damage to the fibres. I was able to bunch the fibres and then use resin again to attach LEDs to the other end of the braid. Optical fibres are great and being flexible are easy to use because the light travels along the inside through internal reflection, allowing the light source to be some distance away from the output end, without issue. So bending the woven fibres around inside the head, I was able to hide the LEDs in the base, away from the cockpit. I then lit the cockpit interior with a menacing red light to give the newly fitted windscreen the appropriate evil red glow, just like in the movies.
The wiring was a little more complicated because there is already quite a large wiring loom fitted as standard to the AT-AT and when it arrived with me, something was very wrong with the sound module and failed to work, even when new batteries were fitted. The only option I had was to open the module up and see if I could find the cause of the failure. Removing it from the superstructure of the walker was a royal pain in the arse and I was quickly left with a pile of parts, held together with the long strands of wire that had been fed through small access holes in the plastic parts. Without wanting to rip through it all, my testing had to be done with the parts in place, which was annoyingly awkward at times as bit fell from my work top or got caught around the cat who had wandered past. However, I quickly found the source of the problem, several cracked joints and a fault in the battery box. Cutting away the wiring felt like a bad move, but what choice did I have? It was already broken, if I failed to fix it, nothing was lost. The fault with the battery box however is still present and when changing batteries, the lid must not be screwed forcefully into place because it will damage the box and break the connection to the power lead. I suspect that somewhere in the past, the battery box screw was over tightened and damaged the housing. However, while I had it apart, I also took my razor saw to the housing of the battery box and fitted a hidden switch, which cannot be seen, even with the hold door open. If you did not know it was there, you would never know about the extra cockpit functions I added. Putting the sound module back together, I accidentally pressed one of the activation buttons and was presented with the noise of the walker slowly stepping on Luke's speeder, from Episode Five, The Empire Strikes Back. The other buttons also worked, as did the chin cannons and the sound module sounded great, if rather loud.
Final assembly and paint was the bit I was looking forwards to. Painting something to look factory fresh and clean is all well and good, but everything in the Star Wars universe is grotty. Ships have oil stains, dirty marks and carbon scoring from blaster fire. The smooth grey paint of the AT-AT just looked too fresh and so I raided the paint drawer for the box of texture paints that live at the back. Texture paint is a new thing to me, but having used it for this, I will undoubtedly use it again, despite my having got it almost everywhere including on my lap top screen! The feet of the walker are now covered in mud and sand, all of which came from the box of texture paints. Weathering is most exciting part of any build and for this one, I wanted it to look abused and filthy. I splattered the chassis with crusty dirt, oil stains, rust stains and filth from wading through water. I used roughly six colour washes and stains to give the effect and what I was left with looked OK, but it also still had that shine of fresh paint. It is hard to explain, but freshly applied texture paint is just too clean and dries with a slight sparkle. What kind of filth shines in the sun, I ask you? The wrong kind...
I used a flat matt varnish from Army Painter to finish the model and then left it to dry for four days before I touched it again. The effect is fabulous and I am now very happy with the result.

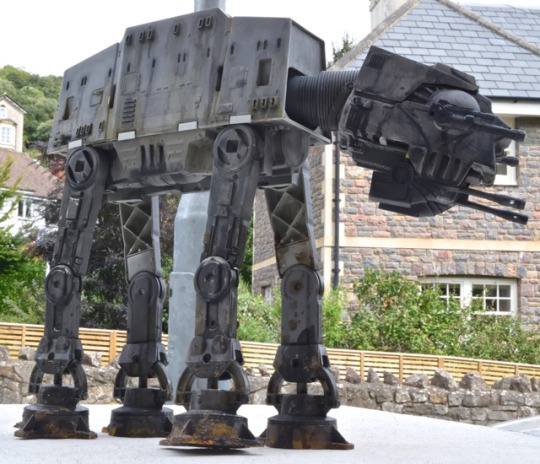

There is just one problem. The model is roughly sixty centimetres long, twenty centimetres wide and fifty centimetres tall and thus is too big for my office. The obvious answer is that the AT-AT needs to go, but where? This is where you come in. If you would like a one off, Jayney Magicked, Hasbro Imperial Walker, I am prepared to sell the great beast, although I might just keep the little Scout Trooper, because he's cute and I may have other plans for him...
Seriously though, the Walker is now for sale. I am aware that having put over thirty hours into the restoration and rebuild, I am never going to get that time back, but this is not the reason for doing what I do. As a disabled person who has lost her hobbies and her career, I have little else to fill my free time. However, the paint and parts used are not cheap and if I can cover the cost of them, that would be helpful. If you are interested, do please make me an offer and I can deliver it locally (around Weston Super Mud) or mail it anywhere else in the world. With all of painting and modifications, this Walker is now more of a display piece than a playable toy, so it is unsuitable for a youngster to fill with their figures and take it into battle in the sandpit in the garden. However, with care, the older child in us all can have a bit of fun with it. I remain unconvinced by the Hasbro figure scale, given that according to the Star Wars Vehicle manual I have read (thanks to Carol's Mom for that one, last Christmas) the cockpit should house three or more people. The cargo and crew deck in the main body should be two levels, with storage for two speeder bikes, however, if you put a three and half inch figure in there, you will be lucky to get two in the head and three more in the body, with no room for even a single speeder. I imagine that if the Walker were in true three and half inch scale, it would be close to four feet in height and weight more than is safe to risk falling onto a child playing with it!
As always, I am indebted to those who helped me with this project. Carol has made a fabulous video of the finished model and taken some lovely photos of it too.
youtube
My close friend Ginny supplied the air brush that I have been abusing with all sorts of paints and of course there is Neil who supplied the AT-AT. Finally, thank you to everyone on Farcebook who encouraged me to undertake this restoration project. I hope that you approve of my work... If not, tough titties, I have done it now!
#art#modelmaking#disability#womanartist#lady artist#star wars#the empire strikes back#AT-AT#Imperial Walker#airbrush#model painting#restoration#restomod#electronics#hasbro#star wars figures#Kenner Toys#Youtube
3 notes
·
View notes
Text

Perhaps this is the part of Rocky that looks like a robot or a model?
At first I thought so...
Photo taken from:[Unnamed] (Twitter)
#chicken run#aardman#modelmaking#armature#model#rocky#other#behind the scenes#twitter#google chrome#image
4 notes
·
View notes
Last Seen Blogs

rookiespropeller
gadzooks!

noshuffle
No Shuffle

diazperaltiago
Peraltiago

scaredofheroin
FlowerPimp

wlwtw
isn't it lovely?