#old images
Text
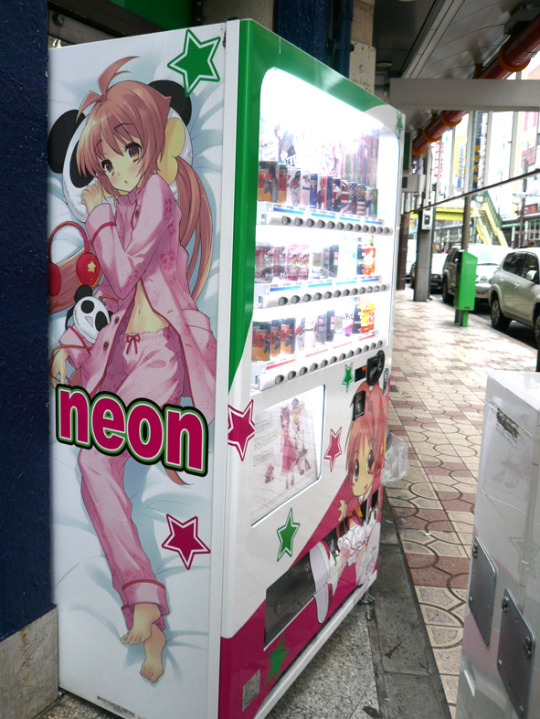

#animecore#old images#old web#old internet#internet archive#webcore#2000s internet#internetcore#kawaiicore#cutecore#vending machine#moecore#web find#bug posts#2000s core#2000s anime#2000score#2000s web#2000s#2000s anime girl#old anime
218 notes
·
View notes
Text
Abandoned Project: Old Ink For New Ink
Last year in the midst of waiting to hear back on whether I was going to get the funding to do the project that has now consumed my every waking hour, I came up with a fun little project. I never DID the project because of the aforementioned thing that now occupies all my time. But I thought others might find the idea fun:
My friend and I called it "Old Ink For New Ink" and it was basically an Instagram/Tumblr account that reposted cool old art that we think would make for good tattoos. This kind of exists in a few places but the key thing that we wanted to do to make ours different was to actually include a bunch of information about the history of the image, where it came from, the context of the time, that kind of thing.
We also thought about offering up basically an Ask box for the blog where we could find images for people or find information about images that other people found.
I still have a whole folder of these images. And I even built out an AirTable project with a little form for us to use to fill in info as we stumbled across images. Here are a few of my favorites:

L’oeil, comme un ballon bizarre se dirige vers L’INFINI (The eye, like a strange balloon, mounts toward Infinity), 1882, by Odilon Redon, part of his À Edgar Poe series. (More on this image and others here.)

An illustration from a French book of fairy tales written by Sophie Ségur, illustrated by Virginia Frances Sterrett, published in 1920. (More here.)

“Death blowing bubbles,” 18th century plaster on the Holy Grave Chapel in Michaelsberg Abbey, Bamberg, Germany. Apparently I'm not the only one who thinks this would make for a killer tattoo. (More on the abbey here, image via Lindsey Fitzharris.)
7 notes
·
View notes
Photo

Bird's-eye-view of Mount Desert Island- Bar Harbor, Maine published by G. W. Morris, 1886
#maine#travel#maps#vintage map#cartography#mount desert island#bar harbor#acadia#visit maine#travel blogger#old images#old maps#vintage cartography#public domain
23 notes
·
View notes
Text
Reposting these old images because they're cool.
You ever take VRChat photos that are so good that they look like high-quality SFMs?
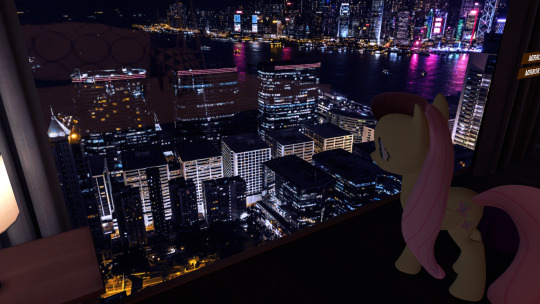
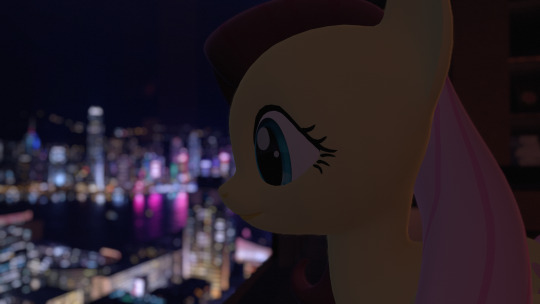
This is on a underpowered laptop that doesn't meet the game's minimum system requirements even.
#mlp#my little pony#mlp fim#fluttershy#mlp fluttershy#fluttershy mlp#vrchat#vrchat photography#repost#old images
2 notes
·
View notes

Text

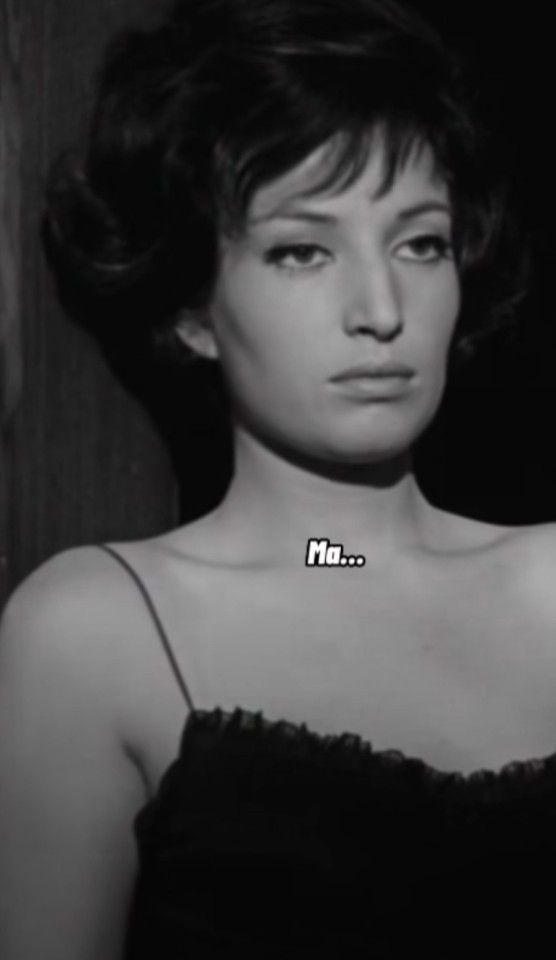

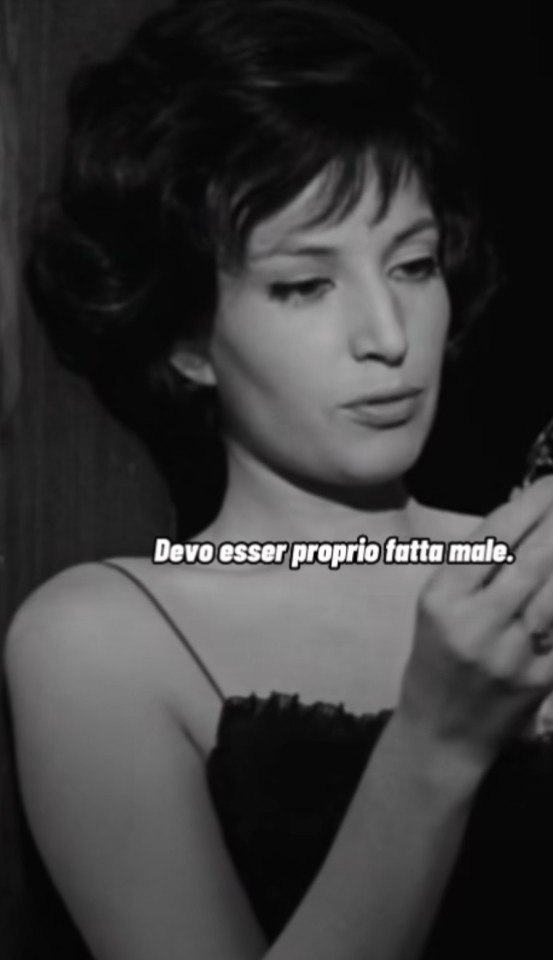


"LA NOTTE", Michelangelo Antonioni (1961)
#black and white#la notte#1961#monica vitti#marcello mastroianni#60s#60s movies#60s icons#old#old movie#movies#vintage#films#old films#cinema#old images#images#scenes#movie scenes#bnw#bwphotography#bnw of our world#bw#quotes#deep inside myself
4 notes
·
View notes
Text
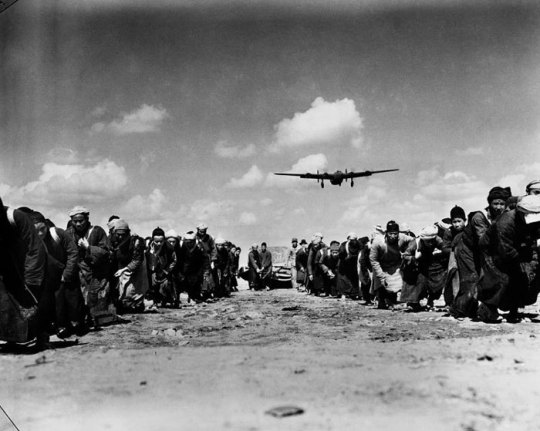
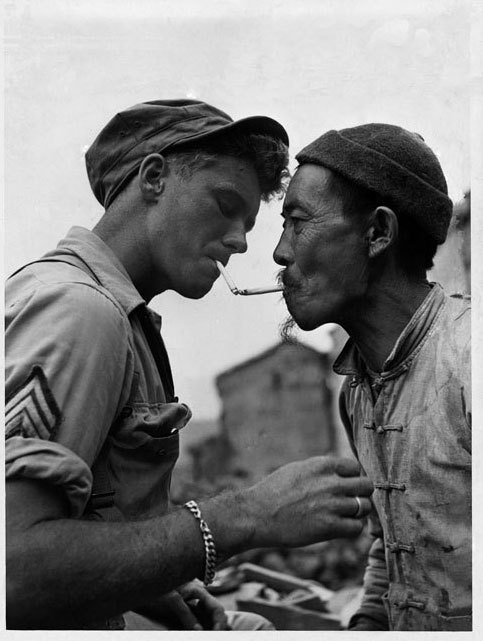
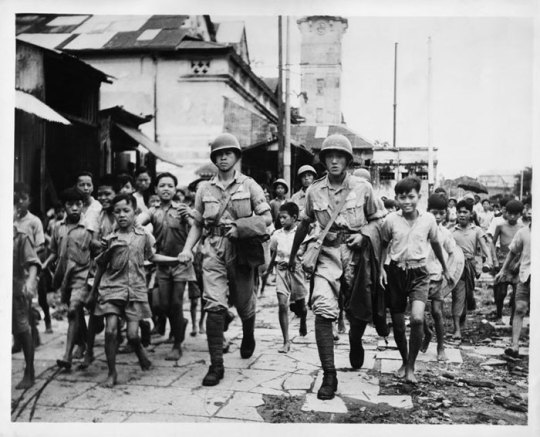
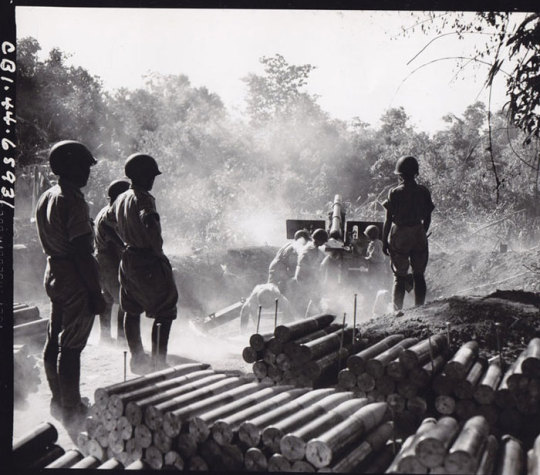
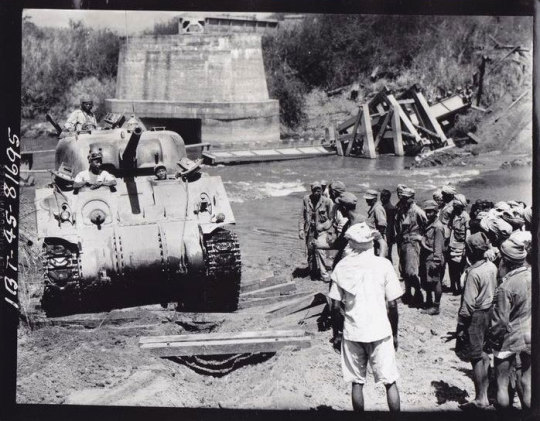
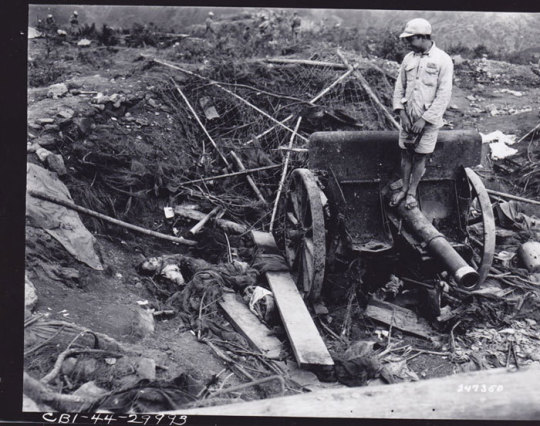
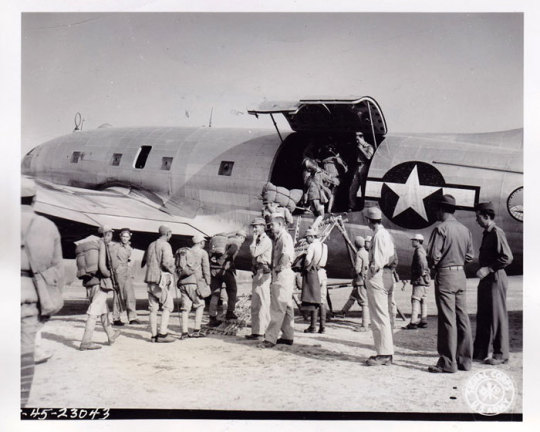
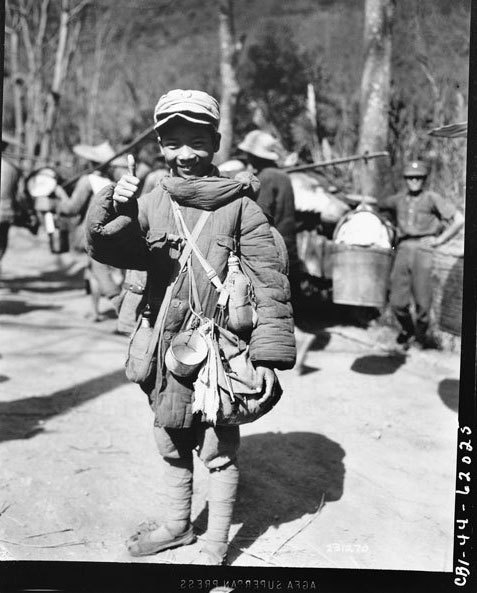
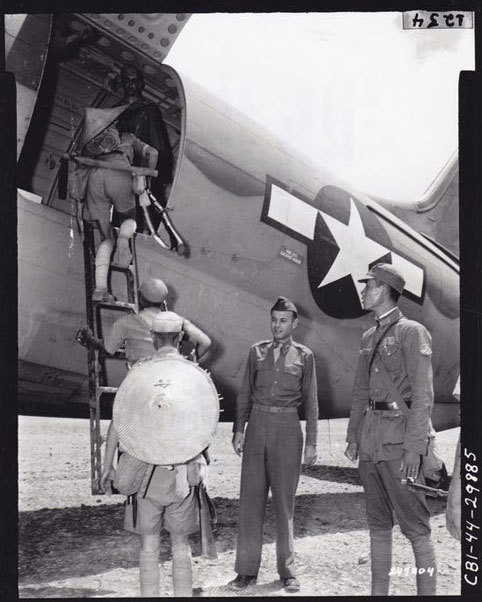
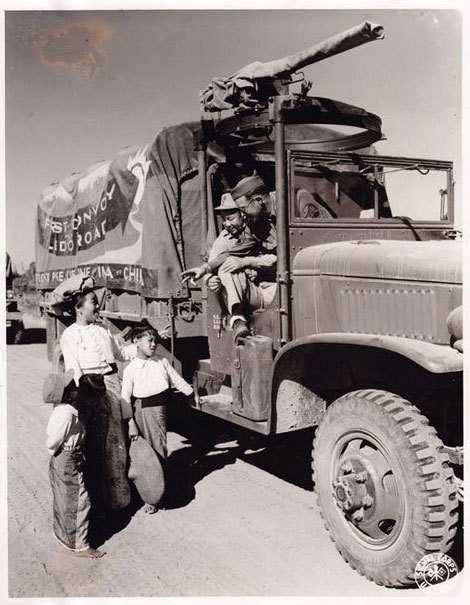
Flying Tigers: 35 old great images of American and Chinese soldiers fighting side by side
New Post has been published on https://china-underground.com/2011/04/04/flying-tigers/
Flying Tigers: 35 old great images of American and Chinese soldiers fighting side by side
Images & Facts if the Flying Tigers
During the war of resistance against Japanese forces, American military photographers snapped thousands of photos of American and Chinese soldiers, engaged in military actions or in everyday life moments in Southern China and Burma.
American military archive has collected over the years, historical photographic and video material of inestimable value.
Related articles: Rare images of The Flying Tigers: from Chinese pilots training camp in Arizona to the war in China against Japan, The Photographic Work of Arthur Rothstein in China: Signal Corps, the Great Famine, the Jewish Refugees in Shanghai
The Flying Tigers (First American Volunteer Group of the Republic of China Air Force) between 1941–1942 were a group of pilots from the United States Army Air Corps (USAAC), Navy (USN), and Marine Corps (USMC), recruited under President Franklin Roosevelt’s authority before Pearl Harbor and commanded by Claire Lee Chennault. They were officially members of the Republic of China Air Force. The Flying Tigers consisted of three fighter squadrons of around 30 aircraft trained in Burma to help defend the Republic of China against Japanese forces. The Flying Tigers began to arrive in China in April 1941. The group first saw combat on 20 December 1941, 12 days after Pearl Harbor.
Flying Tigers images
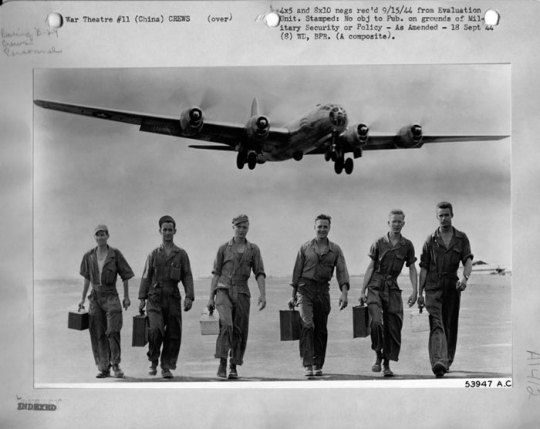
War Theatre #11 (China) CREWS (over) 4x5and 8×10 nges rec’d 9/15/44 from Evaluation Unit. Stamped: No obj to Pub. on grounds of Military Security or Policy – As Amended – 18 Sept 44


” U.S. SUPPLIES FOR ALLIED FORCES FIGHTING THE JAPANESE IN BURMA
U.S. Army trucks, loaded with troops and supplies, plow through soggy terrain to forward positions in Northern Burma where Chinese and American forces are now engaged in fighting the Japanese.”


” 4/1/44 U.S. PLANE CARRIES WOUNDED CHINESE SOLDIER TO MEDICAL STATION
A wounded Chinese soldier lieas aboard a U.S. observation plane to be transported from the battle area in Hukawng Valley in Northern Burma to a medical dressing station behind the front line. Under the direction of Liutenant General Joseph W. Stilwell, Commander in Chief of U.S. forces in China, Burma and India, combined Chinese and American forces drove the Japanese from the strategic valley. “


Source: Sohu
topics: flying tigers images, old photographs of the flying tigers in China
#AmericanSoldiers, #Burma, #FlyingTigers, #Japan, #JosephWStilwell, #Myanmar, #OldImages, #SecondWorldWar, #SinoJapaneseWar
#American soldiers#Burma#flying tigers#Japan#Joseph W. Stilwell#myanmar#old images#Second World War#sino japanese war
18 notes
·
View notes
Text
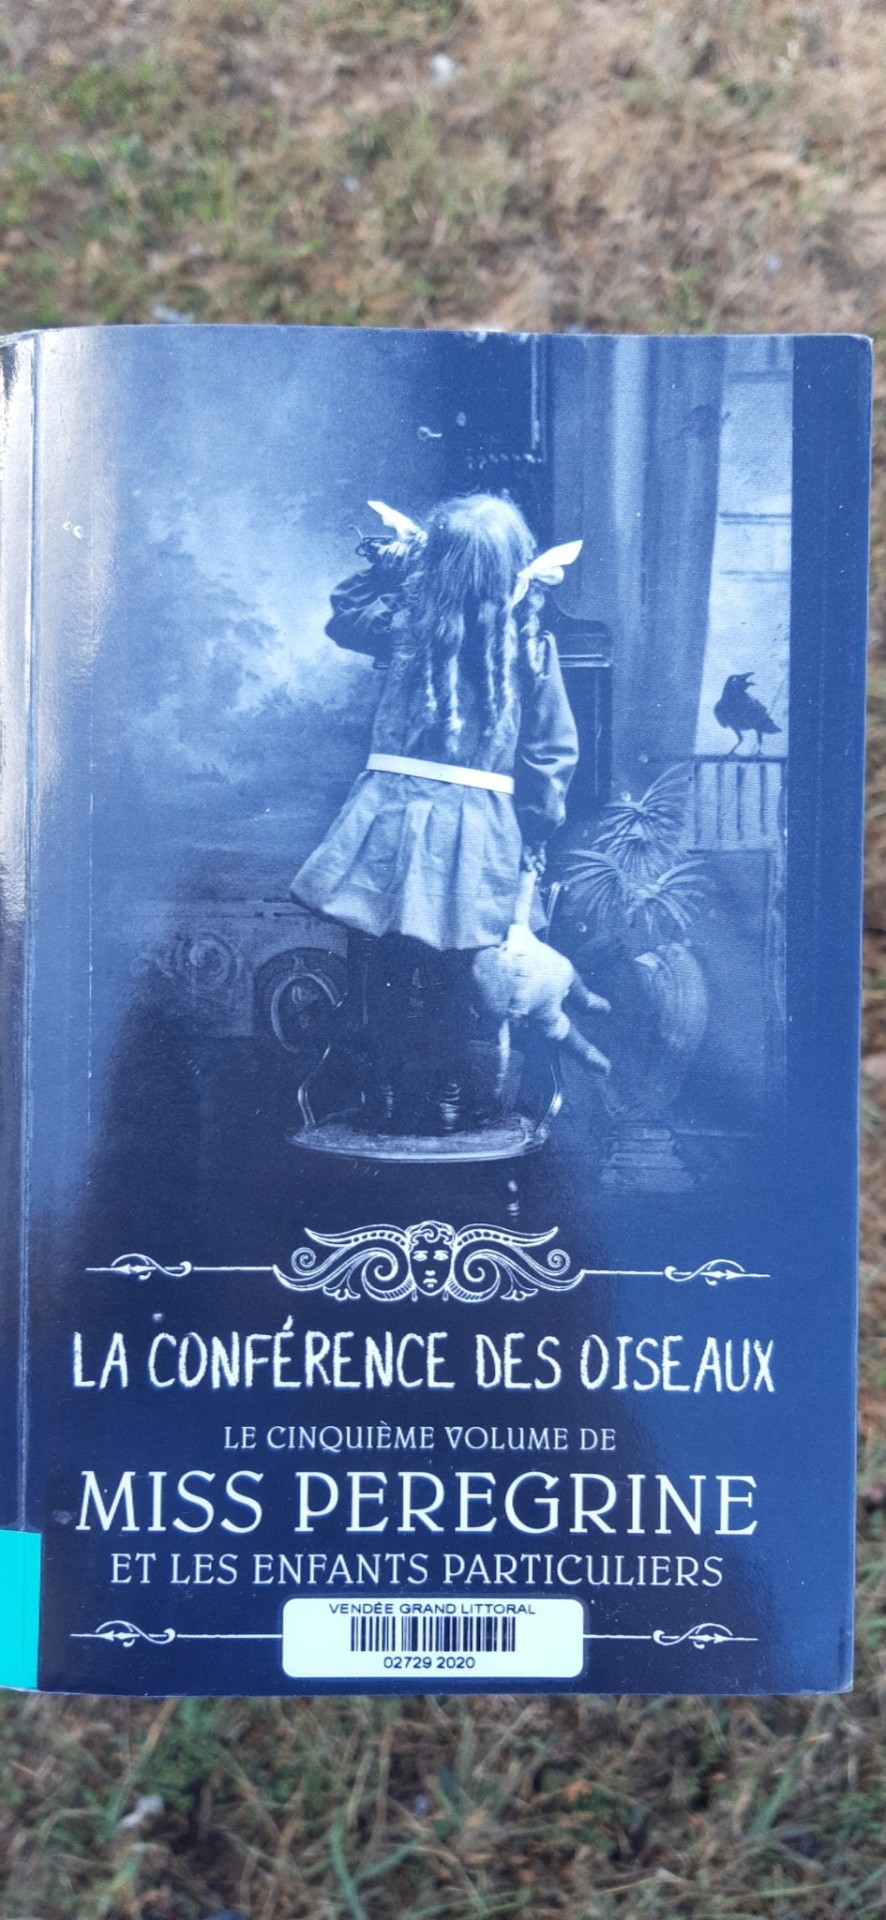
Love this book 🥰😻


#miss peregrines home for peculiar children#miss peregrine x reader#fantasy#tim burton#old picture#old images#photography#old photo#old phography#french girl#french books#ilovereading#booksarelife#booksaremyfriends#booksaremagic#books are amazing#booksarelove#ilovebooks#ransom riggs#american literature
12 notes
·
View notes
Text
How to Make a Calotype - Regis' Calotype Recipe
How to Make a Calotype - Regis' Calotype Recipe
Recipe by Regis Casillas
Public domain
Version 1.0
Yes I am aware there are grammatical and tense errors in this passage, I just wanted to get this info out ASAP. Proofreading will be done in a later version of this passage.
PREFACE:
For those who don't know, a calotype is an early photography process invented and patented by Mr. Fox Talbot in the early 1840s, recognized for being the first photography method to introduce the positive-negative relationship, allowing for multiple duplicate positive images to be made from one negative, compared to the daguerreotype. I had been looking online for a recipe on how to make my own calotype, but I couldn't find anything past "he used silver iodide (silver nitrate + potassium iodide), writing paper, acetic acid, and gallic acid". All I got were the ingredients, but not measurements or chemical strengths. I couldn't even find the original calotype patent papers online. Despite being an important piece in photography's history, I couldn't find much info on how to make one (other than that there supposedly exists a calotype recipe in a photography college textbook). But after relentless searching and experimentation, I finally cracked the secret on how to make a calotype, and I'm making my recipe public! It might not be the original 1841 recipe, but it's pretty close. Acetic acid was substituted with strong vinegar, and gallic acid was substituted with green/black tea in this recipe.
Ingredients:
Distilled Water
Silver Nitrate (at least 5g will do)
75% Vinegar (40% could also work, but adjust measurements if you're getting undesired results)
Potassium Iodide
Potassium Bromide (Optional)
Green and/or Black Tea
Sodium Thiosulfate (or a weak solution of ammonium thiosulfate)
Beeswax (Optional)
Equipment:
Gloves, Eye protection
3 liquid containers with a cap/lid, with no metal parts in contact with whatever gets put in there
A bowl or dish for holding liquids, big enough to hold the paper you will be using, ideally 3 to 5
Tweezers or Tongs
Measuring cup
Measuring spoons
Coffee filters
Funnel
A red light source (such as a darkroom light, or a flashlight with a red filter, the light CANNOT be any regular colored bulb)
Something to heat up water (hot plate, jar warmer, kettle, etc.)
Foam brushes
Paper that can handle getting soaked (ideally paper that's 60lbs or above)
An analog camera (preferably a plate or large format camera) capable of long exposures (as indicated by "T" [time] and/or "B" [bulb])
SAFETY NOTICE:
Please wear gloves and eye protection when mixing and handling chemistry. Silver nitrate can cause burns and skin discoloration, and even blindness if it gets in your eyes. You are also advised to make this in a well ventilated room or space, as the 75% vinegar will release strong fumes. Vinegar of this strength is considered a poison (for reference, 10% is used as weed killer), and can cause burning sensations if inhaled or comes into skin contact for instance. Please consult a Material Safety Data Sheet (MSDS) for more info. I AM NOT RESPONSIBLE FOR ANY DAMAGES OR INJURY, FOLLOW AT YOUR OWN RISK!
PREPARING THE SOLUTIONS:
Note: For both solutions, especially the silver nitrate solution, you will need some sort of liquid container (glass bottle, glass jar, plastic bottle, etc.) that does not have ANY metal parts in contact with the liquid inside. It's due to the fact that silver nitrate is an oxidizer, and will rust out a metal mason jar lid for example. The iodizing solution can also corrode metal over time due to the strong vinegar solution. So whatever you're storing your fluids in, please make sure the container is made out of plastic or glass, and the same applies to the cap or lid.
And before anyone asks, the purpose of the vinegar (acetic acid) is to act as a retainer. Without the acetic acid, the calotype paper would turn completely black (if not mostly darkened up) as soon as the developer (gallic acid) was applied, regardless if it was exposed or not. The vinegar prevents that, and allows a proper negative to form upon development.
To get started, let's make an iodizing solution. We'll start with 300ml of distilled water, and then add 50ml of the 75% vinegar. One issue with this type of vinegar, at least the one I'm using, is that there tends to be an oily residue on the surface, that if left, could cause spots on the paper that will result in unexposed white spots on the final developed image. If your vinegar has this oily surface, get another liquid container like a jar, and place a funnel on top. In the funnel, add two layers of coffee filters and pour the liquid to filter the oily residue off the surface. Repeat for the best results. Once that's done, add 1/8 teaspoon of potassium iodide, and stir the mixture. Optionally to increase the light sensitivity of the calotype, you could add a pinch or another 1/8 teaspoon of potassium bromide. This will drastically reduce the exposure times from 4 minutes to 45 seconds (in my experience) for example.
To prepare our silver nitrate solution, measure 25-50ml of vinegar solution, and tap that at 200ml with distilled water. As previously mentioned, filter the liquid with new filters. Then take 1/2 teaspoon of silver nitrate, and mix it into the liquid. Once done, you should now have a silver nitrate solution ready to use. The best part is that the silver nitrate solution is also compatible in the production of salt/albumen prints.
To make our fixer, place 1/2 teaspoon of sodium thiosulfate in 350ml of distilled water. Using a weakened version of an ammonium thiosulfate based fixer (such as Ilford's Rapid Fixer) will also work, but make sure the solution has been weakened prior to use, as ammonium thiosulfate will erase the image if the solution is too strong.
PREPARING THE PAPER AND DEVELOPER:
Cut the paper to the size that your camera will accept (i.e. if you use a 4x5 camera, trim the paper to 3.8 x 4.8). Then fill your dish or container with the iodizing solution. Now place your sheet of paper into the solution, you may place up to 4 papers in one dish at a time. You may see bubbles coming out of the paper, this is normal. Use your tongs or tweezers to press the paper down if they start floating up to the surface. Soak the paper for 5 to 7 minutes, flipping halfway through for an even soak (if you're soaking multiple sheets, be sure to separate the sheets after flipping them). Once the paper has been soaked thoroughly, remove the paper (one by one if you soaked multiple sheets) from the bath, and place them somewhere to dry, such as on a paper towel on a piece of cardboard. If you're impatient, you can also blow dry the paper with a hair dryer, though it's not advised. Once dried, the iodized paper will be able to last for ages in storage; it's only once that you add the silver nitrate, that the expiration timer starts.
Once you're ready to take a photograph, we'll need to prepare our developing solution for the calotype. This solution is also what helps amp up the light sensitivity of the calotype. In a jar or cup (can't be plastic), place 3 black or green tea bags (I personally use two green tea bags and one black tea bag), then either pour in approx. 25ml of hot water (from a kettle or a stove for example) or pour approx. 25ml of distilled water, and place the container on a hot plate or a jar warmer for a few minutes until the liquid is heated up. The end goal is to create a very strong and hot/warm tea solution. The reason why we need to use green/black tea specifically is because those two teas contain a chemical known as gallic acid, which was originally used as the developer for Talbot's calotype. There is enough gallic acid in the tea solution (given we placed 3 tea bags in a minimal amount of water) to act as a developer for our calotype, and by heating up our "tea developer", that will increase the strength of the developer compared to using a cold solution. Be advised that the tea developer is very weak, and is only good for use on one (or two if you're lucky) calotype(s), so I recommend you buy a big pack of tea (you can get a 100pk of green tea from a dollar store, which is what I use) if you plan on making several calotypes.
In a dark room, under red or very dim light, place your paper on a clean non-metal surface (such as another paper towel on a cardboard, or a clean plastic dish). Take your two foam brushes, run it under some water and squeeze it all out to soften up the brushes, as they could shred up the paper if too hard. Grab your silver nitrate solution, and using a foam brush, brush a liberal amount onto the surface of the paper, coating the entire surface (if brushing isn't giving you good image results, try blotting with the foam brush instead). If your tea developer is on a heat source, remove the container from the heat source (also power off your heat source as you'll be heading outside for the next step). Wait at least 30 seconds after applying the silver nitrate on the paper to allow the silver nitrate to react with the iodized paper to form silver iodide (and silver bromide if you opted to add potassium bromide to the iodizing solution) on the paper's surface. After some time has elapsed, take your second foam brush (do not mix the brushes) and brush the developer solution onto the paper. This is what really activates the paper to become light sensitive. If your paper darkens up upon application of the developer solution, that is a sign that you might have not added enough vinegar to either one of the two solutions. If your paper remains white, place your sensitized paper into your camera or your film/plate holder.
Once that is done, you can turn on the lights as your paper should be protected from the light.
TAKING THE PICTURE:
Now you are ready to take a picture! Please note that calotypes work best when wet. Set up your picture and set the focus. As for exposure times, that is dependent on various factors, such as type of camera, your aperture settings, if your paper uses silver bromide, and the like.
Let me try to guide you to how I expose my papers:
I set my camera to the "T" (time) mode, which means the shutter remains open until I press the shutter again. If your camera only has a "B" (bulb) setting, you may need to tape down the shutter to perform a long exposure.
My plate camera's lowest aperture setting is F8, so on a bright sunny day outdoors, I typically only have to expose the image for 45 seconds (silver iodide + silver bromide) or 5 minutes (silver iodide) to get a good exposure. If I set my aperture to F16, I double the exposure time to 90 seconds (silver iodide + silver bromide). That should give you a good baseline for exposure times, the rest is experimentation. Just remember it's better to overexposure than it is to underexpose. I have not been able to successfully photograph a calotype indoors, regardless of exposure times or aperture width.
After you've taken your photograph, it is now time to develop it. Return to your dark room, and under a dim or red light, take the paper out of the camera or plate/film holder. You might see a faint negative of your image on the surface of your paper. Take your paper and place it in a clean plastic tray, and pour your tea developer onto the paper. Squeeze out any tea from your foam brush into the tray if there's some developer still absorbed. Rock the tray for the first minute and let it rest for 30 seconds. You can add a few drops of the silver nitrate solution into the developer if you want a little more OOMPH in the developing process. Keep alternating between rocking the tray and letting it sit, occasionally checking the density of the negative by holding it up to the red light; you don't want the negative to be too faint when held to the light. Once you’ve determined the development process is complete, rinse the paper 3 or 4 times to clean off the developer. As for the developer, you can dump that down the drain, but if you added silver nitrate to your tea developer, it's best that you put the liquid in a separate collection container, again with no metal parts in contact with the fluid inside, for safe disposal later.
With the room still dark/under red light, pour your fixer into a separate tray, and place your paper in that tray. Rock the tray for the first minute, and let it sit afterwards. Let your paper sit in the fixer for 5 to 7 minutes (depending on the strength of the fixer), continuously alternating between rocking the tray and letting it sit every minute to ensure that all the unexposed silver is washed away. After that, you should be okay to turn on the light.
Now we'll want to give our paper a final rinse to remove any chemicals the paper had absorbed. Rinse the paper under a running faucet of warm water 3 to 4 times, and place your paper in a clean tray. Fill the try with cold water, and let the negative rest for 7 minutes in the water bath. After the paper is done soaking, give the paper one final rinse, and hang the calotype to dry.
Now that we've finished making our calotype, you can scan your calotype on a flatbed scanner to digitize it. I recommend you scan at 1200dpi as a .PNG format image for the best image quality. Please note that calotype images are mirrored due to how cameras work. You can also apply beeswax onto the calotype to increase its transparency (for making a salt print from the negative) and to add contrast to the negative.
TROUBLESHOOTING
"My paper keeps darkening up when I brush on the tea developer, even when it's not exposed!"
A: You might have not used enough acetic acid, or used a weaker strength than what is mentioned here. Please note that the vinegar you can get at a grocery store is only 5% vinegar; you'll need at least 40% or 75% to properly do this experiment. If you're using 40% vinegar, you may need to add more vinegar to the solution than what is listed here, making sure the solution still caps off to 350ml (iodizing solution) or 200ml (silver nitrate solution).
"Nothing appears on my paper upon development"
A: There could be various causes for this, such as possibly using too much vinegar, not exposing the paper long enough, shooting the image in low-light environments, or maybe your tea developer is too cold/old for use. Try troubleshooting those variables and see if that fixes your issue.
CONTACT:
Reddit - u/Regis_Casillas
Twitter - @RegisC_Animates
Tumblr - regiscasillas
Dates:
v1.0 - Oct. 14, 2022
#photography#analog photography#vintage#calotype#art tutorial#photo tutorial#images#early photography#film photography#darkroom#paper negative#old images
3 notes
·
View notes
Text
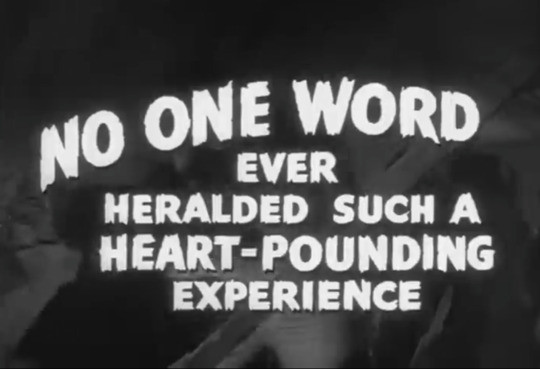
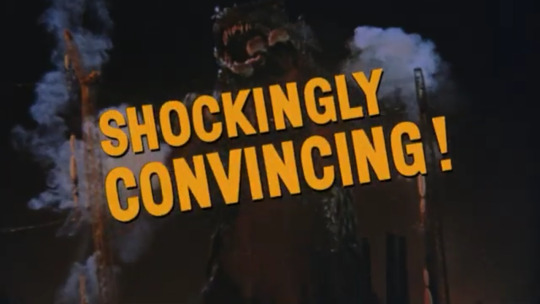
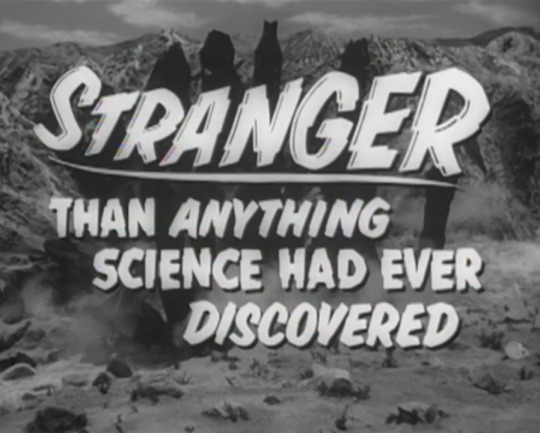
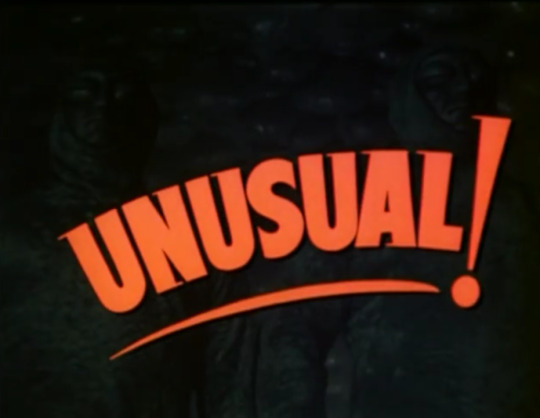
Kinda feel like there's some untapped meme/reaction image potential from old horror movie trailers...


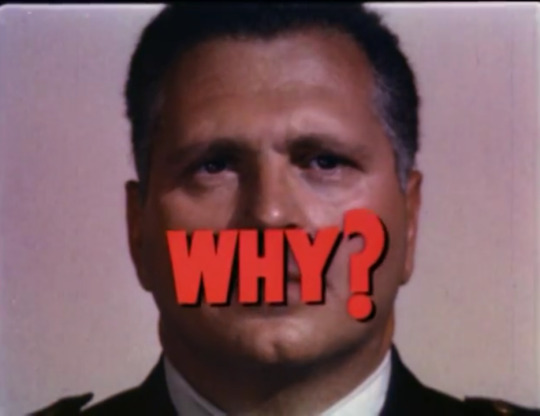


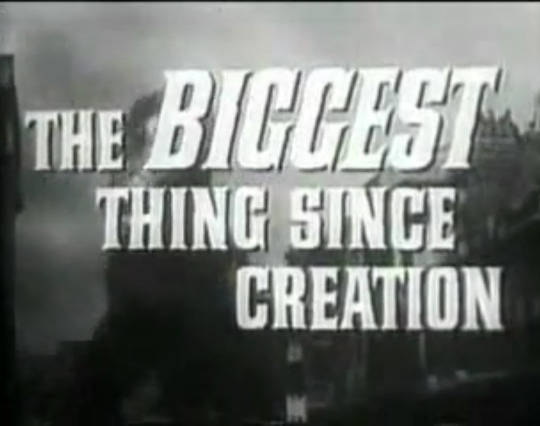
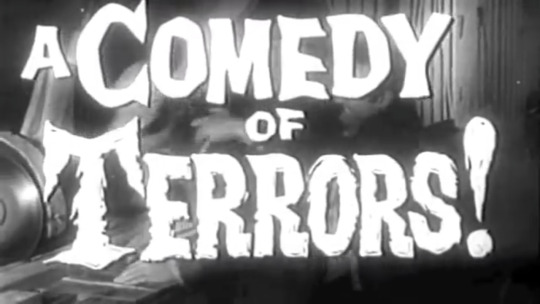

#just saying#b movie#horror movies#50s horror#memes#reaction image#old horror movies#this is stupid#meme template#movie trailers#horror#schlock#exclamation points#i was bored#50s movies#why?#reaction meme#this is dumb#i'm so tired#why not
87K notes
·
View notes
Text

guess what i watched on new years (a redraw kind of)
#hee hee#it was cute#(disclaimer i do not subscribe to d+ so my dollar was not going there iykyk)#pjo#percy jackson#grover underwood#annabeth chase#my art#fanart#hoo#i had to take silly pics of myself 2 get percys arm hand thing right#and then just cropped it bc yea#i almost gave annabeth the hair i did in the last one but i thought#why do i feel compelled to change her hair to fit the old image i had from the books and not the others#and i drew her actual hair from the show#and it looks sm better
30K notes
·
View notes
Text
heres my advice to any followers i have who are young. Don't delete things when you think you've outgrown them or they're cringy. If you make youtube videos just private them don't delete them. Save your files, you can bury them in multiple sub-folders if you think they're cringe now but DON'T DELETE THEM! It doesn't feel like it now but years in the future you will look back fondly at who you were and wish you still had those things.
#i mourn losing my old youtube poops thats just rotating a image of squidward and putting filters on it#and my minecraft lets plays#it is invaluable stuff and i desperately wish i still had it all
36K notes
·
View notes
Text


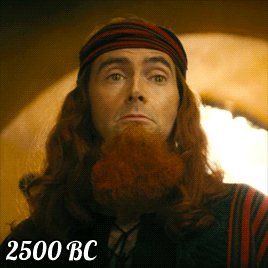
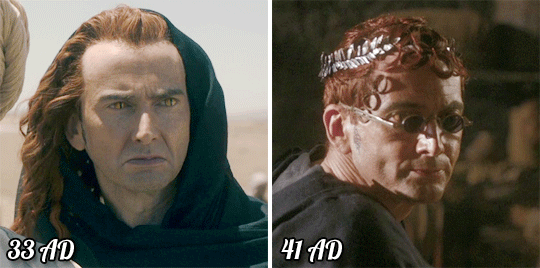

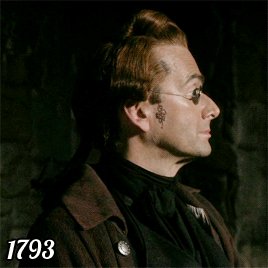
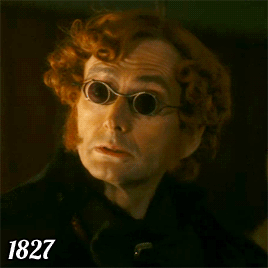
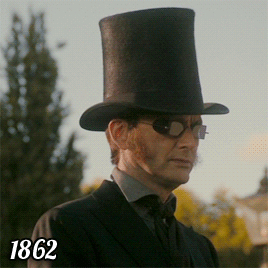
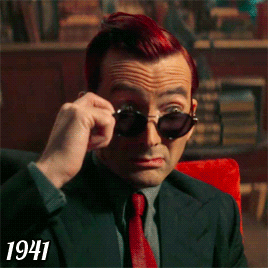
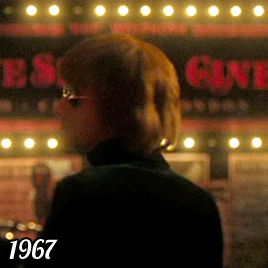


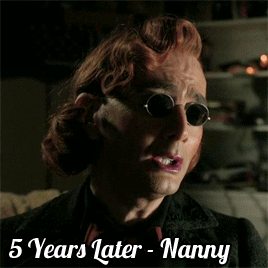


Crowley’s hairstyles/looks - down through the ages
...now including Good Omens Season Two
The original Season One post [ x ]
#good omens#david tennant#crowley#ineffable husbands#tennant tuesday#anthony j crowley#thank goodness for the new higher image limit on a post#my old season one post couldn't have been updated to this#go2#gos2#good omens spoilers#gos2 spoilers#go2 spoilers#bless david and his willingness to go there#stuff i posted#good omens season 2
43K notes
·
View notes
Text
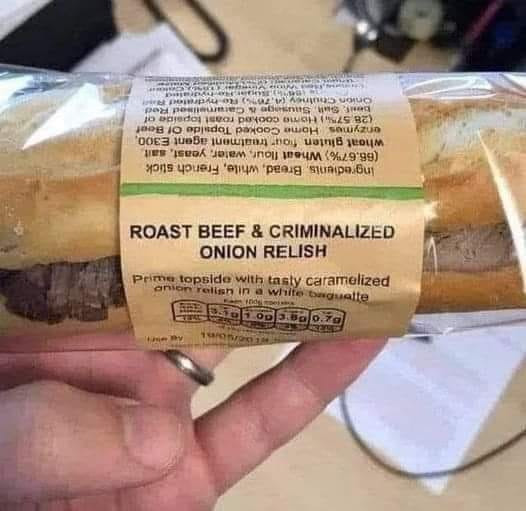
your man thinks onions should be incarcerated for 5-10 years
11K notes
·
View notes
Text
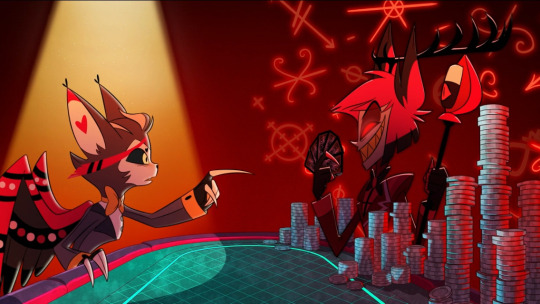
Bro stole his shirt, his hair, and his soul, I'd become an alcoholic too.
#hazbin hotel#image#text#id be pissed if some old man stole my clothes#hazbin hotel husk#hazbin alastor#hazbin spoilers
10K notes
·
View notes
Text
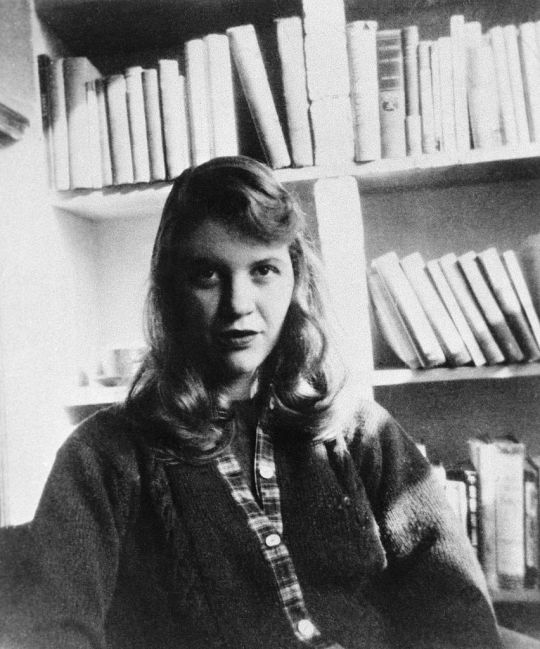
"It is not possible to unravel the tangle of our lives, to invent another one just for us. I am satisfied with this: give you an appointment in the air, make you sit next to me on the rock, even if you're not there".
Sylvia Plath
#sylvia plath#poetry#poets#authors#old authors#black and white#bnw#bwphotography#old images#literate#american literature#literature
12 notes
·
View notes
Last Seen Blogs

falseglory-blog
False Glory

yourlittlelove
brat babe

lalalands9
Untitled

dlfdz-blog
Fernández

achoo-products
ACHOO