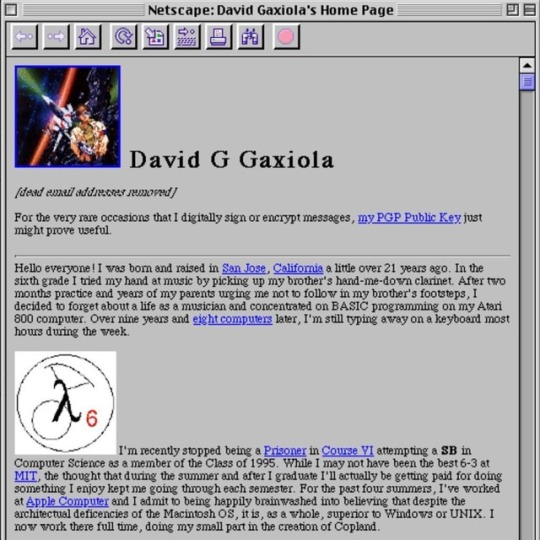
#oldwebsite
Text
Where did children's spaces on the internet go????
I think a number of our persistent adult-teen-child interaction issues are related to the lack of true spaces for children alone anymore on the internet.
Who remembers old school websites like Poptropica, Toontown, Neopets, the Fox Kids website, KidsWB website, AnimalJam, Cartoon Network website, PBS Kids etc.? Did older people invade these spaces? I mean, yeah, it did happen BUT these spaces were purposefully set up for and aimed at young people and not intended for older people, even if they did have older fans. Meanwhile today, kids are on spaces with few actual filters and people tweeting/posting/reposting stuff that could be appropriate for age 5, 10, 13, 15, 17, or strictly 18+! But it's all consolidated on one platform that EVERYONE of all ages is using.
And yes, I do know that sites today still exist that are targeted to children and primarily utilized by them but like...it just isn't the same IMO.
0 notes
Photo

Gave the ‘ol website a bit of an overhaul. Take a gander, I know you don’t have anything better to do. Link in bio... #quarantineprojects #oldwebsite #neweebsite #ceethreedom #losangelesphotographer #artnotcontent (at Highland Park, Los Angeles) https://www.instagram.com/p/B_5sQUkBdQr/?igshid=jfr7urbosx86
0 notes
Photo

ultra86 website graphics pictures 1996-1997 #ultra86band #mcmurdomurphy #powerpop #oldwebsites (at Dallas, Texas) https://www.instagram.com/p/B--0DDiHiwu/?igshid=171wj94khtzr8
0 notes
Photo
Happy 30th birthday to the idea of the World Wide Web! It made information across the Internet accessible in an elegantly simple and compatible way. 25 years ago, I discovered the nascent web and made my first website. My pages and links on anime got me 15 seconds of fame in a Wired magazine. Sometimes I wonder how things would've been different if I had continued down that path... #Web30 #worldwideweb #oldwebsites https://www.instagram.com/p/Bu8HxyagrpA/?utm_source=ig_tumblr_share&igshid=1s6ypvyojlb2d
0 notes
Text
chroot Jails are actually surprisingly simple
This week I had a client come to me and ask whether I could set up 'an FTP account for a third party provider'. They have a piece of really old legacy Software and wanted this person to look into it.
After looking around a little, I found that you can actually really easily create chroot jails for SFTP users specifically.
I immediately felt better about it, because setting up unsecured and unencrypted FTP servers kinda freaks me out in 2020.
In our case, we don't need the user to actually have shell access. So I set up a user with a command like this:
# useradd -gsftp -d / -s /sbin/nologin sftpguest # mkdir -p /sftp/sftpguest/uploads # chown sftpguest: /sftp/sftpguest/uploads
Then we just add these three lines to our /etc/ssh/sshd_config file:
Match Group sftpusers ChrootDirectory /sftp/%u ForceCommand internal-sftp
After reloading the ssh service, you should be good to go.
Adding external directories to your jail
In our case, we wanted our user to be able to inspect and suggest changes to a folder withing /var/www to do so we just mounted the directory like this
# mkdir /sftp/sftpguest/project # mount --bind /var/www/old-website /sftp/sftpguest/project
And we're ready to go. You may need to remember to give the user permissions to read and or write to the /var/www/oldwebsite folder
Sources:
https://www.thegeekstuff.com/2012/03/chroot-sftp-setup/
https://serverfault.com/questions/440426/sftp-file-symlinks-in-a-jailed-chrooted-directory#440431
0 notes
Link
I’ve been working on a new website for my employer. To make things easy, I’ll refer to oldwebsite.com as the old website and newwebsite.com as the new.
oldwebsite.com is hosted with a marketing company, which overcharge and frankly provide a poor service. The domain name is hosted with namesco. newwebsite.com is hosted with IONOS and the domain name is too.
After months of work, newwebsite.com is ready for go-live and created in WordPress. The plan has always been for the content of newwebsite.com to replace oldwebsite.com. And then newwebsite.com will simply redirect traffic to oldwebsite.com (oldwebsite.com has a better domain name).
Normally, I’d look to change the nameservers of the namesco records to point to IONOS. And within there, use the DNS records to point to the IONOS webspace. But, running this past the company, they’re concerned around emails and other DNS setup and don’t wish for a blip in their performance.
For the past couple of days, I’ve been trying to put DNS records in place for oldwebsite.com that point a blank A record and www CNAME record to newwebsite.com. (Going from namesco and into IONOS). These seem to work to an extent, where the IP addresses are being hit but the content of the site isn’t. Often, I get nginx 404 errors, that I have no experience with. Looking into nginx, my IONOS dashboard has no function for it and putting a custom nginx.conf file on the webspace does nothing either.
Occasionally, for some unknown reason, it can work. Yet, I encounter another issue – the newwebsite.com redirects to oldwebsite.com, but we want newwebsite.com to be the URL name the site has. So its more of a replacement than a redirect.
One option we are considering is simply copying + pasting the content of the site over the old website; which the marketing company aren’t too happy with!
I’ve been trying to wrap my head around all this and have been in contact with IONOS support but this is way above my head.
In a couple of days, investors for my employer are coming in and we’d like to have the site live.
Any ideas on how to fix this?
Submitted September 06, 2019 at 05:59PM by DugtrioUsedDig https://www.reddit.com/r/webhosting/comments/d0pg8w/dns_dilemma_replacing_a_website/?utm_source=ifttt
from Blogger http://webdesignersolutions1.blogspot.com/2019/09/dns-dilemma-replacing-website.html
via IFTTT
0 notes
Photo

@jensimmons : RT @WebDesignMuseum: The must-visit destinations from early cyberspace are mostly gone now. https://t.co/iHlmG1Xh7T #WebDesign #WebDesignHistory #OldWebsites
0 notes
Text
A guide to redesigning a website without affecting SEO
One of the biggest misconceptions among website owners is that SEO only needs to be done once. Unfortunately, this isn’t the case.
Numerous fractions are altered during redesign including code and pages. If they are not properly handled, it can negatively impact the website’s SEO and affect the long-term growth of the site. If done correctly, however, redesigning a website can also increase your SEO strength.
In today’s article, we will go through a detailed guide on how to redesign your website without affecting SEO.
Step 1: list of all pages from the old website
The first step is to download the URL structure of your website. Redesigning means a lot of changes which will also affect the URL re-structure. It is important therefore to back it up otherwise you run the risk of impacting your website ranking.
You can use plugins to get the URL structure. If you are using Yoast SEO plugin, you can crawl the website and then download the updated sitemap.
Step 2: the redesign needs to be done on a temporary URL
Never do the redesign on your existing website. It can cause visitor issues and give you problems in the long run. The best approach is to copy your site and set it up into a temporary URL. Once done; you can start making changes to it. An alternative would be to switch the domain once all the required redesign changes are made.
If there is a potential for you to struggle with this, you can always get help from your developer. Another option would be for a hosting company to do it for you. It is important for you to ping your hosting provider to do the setup for you as this step will protect you from unforeseen issues in future.
Step 3: test the new website
Great, you copied your existing website into the new website.
However, before you start your redesign project, it is a good idea to do an end-to-end checkup of your website. In this checkup, you should look at multiple aspects of your website including broken links, features, CSS, etc.
You can also use the XENU, a free-to-use tool that will find all the broken links on your website.
Step 4: do proper 301 redirects
The next step is to do 301 redirects between old and new URLs. For example, if you have an “About Us” page on the old website, and its URL was “www.yourwebsite.com/aboutus.html.”
If during the redesign, your designer changed the URL to “www.yourwebsite.com/about-us.html” – it is better to implement proper 301 redirects to ensure that both URLs work and you don’t lose SEO benefits gained from your previous URL.
If you don’t do it correctly, the search engine will get 404 web pages not found. By doing 301 redirects, the old URL will be redirected to the new one. This is the technical way to tell the search engine that the URL has been changed. Google will not downgrade your previous SEO efforts.
You can add redirects using the .htaccess file. It would look like the following code.
Redirect 301 /oldwebsite http://yoursite.com/new-url
If you are confused and don’t know how to do it manually on WordPress, you can also try out redirect plugins that let you do it by filling in a form.
Note: This step is very important, and you should do it no matter what.
Step 5: make the jump to the new website
Once everything is finalized, both design and redirection, it is time for you to switch to the new website. You can also make an incremental change in stages if your website is big.
Step 6: run Google Webmaster tools
The next step is to ensure everything has been successful so far.
To do so, you can utilize tools such as Google Webmaster. This tool will enable you to check there are no broken links. If you are any broken links found, to avert penalty it is advised to get them fixed quickly.
Step 7: check verification status and re-submit
It is common for developers or designers to stop the search engine to crawl the website. If that’s the case, then you will need to resume the crawler on your website. To check the status, you need to use the “Fetch as Google” option under crawler. Once done, click on the “Fetch and Render” option. If both tests return positive – your website is entirely crawlable.
Also, it is advised to check if the redesigned website is verified. You can do so by logging into the respective webmaster’s tool provided by Bing and Google. If it lacks verification, then redo it and claim your website.
And finally, re-submit your website URL into Google index by clicking on “submit to index” button.
Step 8: Robot.txt
During the redesign, there is a chance that your robot.txt file can get corrupted. To check if it has, you can use “robot.txt” option under crawl.
Step 9: sitemap submission
As your website now has a new and modified structure, submit the website XML to Bing and Google. Once submitted, your new website will be crawled in the coming hours.
Step 10: monitor the changes
Finally, it is important to monitor the changes and look for any potential growth. Keep a close tab on the rankings of your top keywords. There are many SEO tools available that enable you to keep track of these keywords. If there is a considerable change in your SEO, then endeavor to understand why this is happening and look to find a solution if your website traffic slows down quickly.
You should monitor your website for at least two to three months.
Author: Pawan Sahu is a digital marketer and blogger at MarkupTrend.
from Digtal Marketing News https://searchenginewatch.com/2018/07/06/a-guide-to-redesigning-a-website-without-affecting-seo/
0 notes
Text
A guide to redesigning a website without affecting SEO
One of the biggest misconceptions among website owners is that SEO only needs to be done once. Unfortunately, this isn’t the case.
Numerous fractions are altered during redesign including code and pages. If they are not properly handled, it can negatively impact the website’s SEO and affect the long-term growth of the site. If done correctly, however, redesigning a website can also increase your SEO strength.
In today’s article, we will go through a detailed guide on how to redesign your website without affecting SEO.
Step 1: list of all pages from the old website
The first step is to download the URL structure of your website. Redesigning means a lot of changes which will also affect the URL re-structure. It is important therefore to back it up otherwise you run the risk of impacting your website ranking.
You can use plugins to get the URL structure. If you are using Yoast SEO plugin, you can crawl the website and then download the updated sitemap.
Step 2: the redesign needs to be done on a temporary URL
Never do the redesign on your existing website. It can cause visitor issues and give you problems in the long run. The best approach is to copy your site and set it up into a temporary URL. Once done; you can start making changes to it. An alternative would be to switch the domain once all the required redesign changes are made.
If there is a potential for you to struggle with this, you can always get help from your developer. Another option would be for a hosting company to do it for you. It is important for you to ping your hosting provider to do the setup for you as this step will protect you from unforeseen issues in future.
Step 3: test the new website
Great, you copied your existing website into the new website.
However, before you start your redesign project, it is a good idea to do an end-to-end checkup of your website. In this checkup, you should look at multiple aspects of your website including broken links, features, CSS, etc.
You can also use the XENU, a free-to-use tool that will find all the broken links on your website.
Step 4: do proper 301 redirects
The next step is to do 301 redirects between old and new URLs. For example, if you have an “About Us” page on the old website, and its URL was “www.yourwebsite.com/aboutus.html.”
If during the redesign, your designer changed the URL to “www.yourwebsite.com/about-us.html” – it is better to implement proper 301 redirects to ensure that both URLs work and you don’t lose SEO benefits gained from your previous URL.
If you don’t do it correctly, the search engine will get 404 web pages not found. By doing 301 redirects, the old URL will be redirected to the new one. This is the technical way to tell the search engine that the URL has been changed. Google will not downgrade your previous SEO efforts.
You can add redirects using the .htaccess file. It would look like the following code.
Redirect 301 /oldwebsite http://yoursite.com/new-url
If you are confused and don’t know how to do it manually on WordPress, you can also try out redirect plugins that let you do it by filling in a form.
Note: This step is very important, and you should do it no matter what.
Step 5: make the jump to the new website
Once everything is finalized, both design and redirection, it is time for you to switch to the new website. You can also make an incremental change in stages if your website is big.
Step 6: run Google Webmaster tools
The next step is to ensure everything has been successful so far.
To do so, you can utilize tools such as Google Webmaster. This tool will enable you to check there are no broken links. If you are any broken links found, to avert penalty it is advised to get them fixed quickly.
Step 7: check verification status and re-submit
It is common for developers or designers to stop the search engine to crawl the website. If that’s the case, then you will need to resume the crawler on your website. To check the status, you need to use the “Fetch as Google” option under crawler. Once done, click on the “Fetch and Render” option. If both tests return positive – your website is entirely crawlable.
Also, it is advised to check if the redesigned website is verified. You can do so by logging into the respective webmaster’s tool provided by Bing and Google. If it lacks verification, then redo it and claim your website.
And finally, re-submit your website URL into Google index by clicking on “submit to index” button.
Step 8: Robot.txt
During the redesign, there is a chance that your robot.txt file can get corrupted. To check if it has, you can use “robot.txt” option under crawl.
Step 9: sitemap submission
As your website now has a new and modified structure, submit the website XML to Bing and Google. Once submitted, your new website will be crawled in the coming hours.
Step 10: monitor the changes
Finally, it is important to monitor the changes and look for any potential growth. Keep a close tab on the rankings of your top keywords. There are many SEO tools available that enable you to keep track of these keywords. If there is a considerable change in your SEO, then endeavor to understand why this is happening and look to find a solution if your website traffic slows down quickly.
You should monitor your website for at least two to three months.
Author: Pawan Sahu is a digital marketer and blogger at MarkupTrend.
from IM Tips And Tricks https://searchenginewatch.com/2018/07/06/a-guide-to-redesigning-a-website-without-affecting-seo/
from Rising Phoenix SEO https://risingphxseo.tumblr.com/post/175609670830
0 notes
Text
A guide to redesigning a website without affecting SEO
One of the biggest misconceptions among website owners is that SEO only needs to be done once. Unfortunately, this isn’t the case.
Numerous fractions are altered during redesign including code and pages. If they are not properly handled, it can negatively impact the website’s SEO and affect the long-term growth of the site. If done correctly, however, redesigning a website can also increase your SEO strength.
In today’s article, we will go through a detailed guide on how to redesign your website without affecting SEO.
Step 1: list of all pages from the old website
The first step is to download the URL structure of your website. Redesigning means a lot of changes which will also affect the URL re-structure. It is important therefore to back it up otherwise you run the risk of impacting your website ranking.
You can use plugins to get the URL structure. If you are using Yoast SEO plugin, you can crawl the website and then download the updated sitemap.
Step 2: the redesign needs to be done on a temporary URL
Never do the redesign on your existing website. It can cause visitor issues and give you problems in the long run. The best approach is to copy your site and set it up into a temporary URL. Once done; you can start making changes to it. An alternative would be to switch the domain once all the required redesign changes are made.
If there is a potential for you to struggle with this, you can always get help from your developer. Another option would be for a hosting company to do it for you. It is important for you to ping your hosting provider to do the setup for you as this step will protect you from unforeseen issues in future.
Step 3: test the new website
Great, you copied your existing website into the new website.
However, before you start your redesign project, it is a good idea to do an end-to-end checkup of your website. In this checkup, you should look at multiple aspects of your website including broken links, features, CSS, etc.
You can also use the XENU, a free-to-use tool that will find all the broken links on your website.
Step 4: do proper 301 redirects
The next step is to do 301 redirects between old and new URLs. For example, if you have an “About Us” page on the old website, and its URL was “www.yourwebsite.com/aboutus.html.”
If during the redesign, your designer changed the URL to “www.yourwebsite.com/about-us.html” – it is better to implement proper 301 redirects to ensure that both URLs work and you don’t lose SEO benefits gained from your previous URL.
If you don’t do it correctly, the search engine will get 404 web pages not found. By doing 301 redirects, the old URL will be redirected to the new one. This is the technical way to tell the search engine that the URL has been changed. Google will not downgrade your previous SEO efforts.
You can add redirects using the .htaccess file. It would look like the following code.
Redirect 301 /oldwebsite http://yoursite.com/new-url
If you are confused and don’t know how to do it manually on WordPress, you can also try out redirect plugins that let you do it by filling in a form.
Note: This step is very important, and you should do it no matter what.
Step 5: make the jump to the new website
Once everything is finalized, both design and redirection, it is time for you to switch to the new website. You can also make an incremental change in stages if your website is big.
Step 6: run Google Webmaster tools
The next step is to ensure everything has been successful so far.
To do so, you can utilize tools such as Google Webmaster. This tool will enable you to check there are no broken links. If you are any broken links found, to avert penalty it is advised to get them fixed quickly.
Step 7: check verification status and re-submit
It is common for developers or designers to stop the search engine to crawl the website. If that’s the case, then you will need to resume the crawler on your website. To check the status, you need to use the “Fetch as Google” option under crawler. Once done, click on the “Fetch and Render” option. If both tests return positive – your website is entirely crawlable.
Also, it is advised to check if the redesigned website is verified. You can do so by logging into the respective webmaster’s tool provided by Bing and Google. If it lacks verification, then redo it and claim your website.
And finally, re-submit your website URL into Google index by clicking on “submit to index” button.
Step 8: Robot.txt
During the redesign, there is a chance that your robot.txt file can get corrupted. To check if it has, you can use “robot.txt” option under crawl.
Step 9: sitemap submission
As your website now has a new and modified structure, submit the website XML to Bing and Google. Once submitted, your new website will be crawled in the coming hours.
Step 10: monitor the changes
Finally, it is important to monitor the changes and look for any potential growth. Keep a close tab on the rankings of your top keywords. There are many SEO tools available that enable you to keep track of these keywords. If there is a considerable change in your SEO, then endeavor to understand why this is happening and look to find a solution if your website traffic slows down quickly.
You should monitor your website for at least two to three months.
Author: Pawan Sahu is a digital marketer and blogger at MarkupTrend.
source https://searchenginewatch.com/2018/07/06/a-guide-to-redesigning-a-website-without-affecting-seo/
from Rising Phoenix SEO http://risingphoenixseo.blogspot.com/2018/07/a-guide-to-redesigning-website-without.html
0 notes
Text
A guide to redesigning a website without affecting SEO
One of the biggest misconceptions amongst website owners is that SEO only needs to be done once. Unfortunately, this isn’t the case.
Numerous fractions are altered during redesign including code and pages. If they are not properly handled, it can negatively impact the website’s SEO and affect the long-term growth of the site. If done correctly, however, redesigning a website can also increase your SEO strength.
In today’s article, we will go through a detailed guide on how to redesign your website without affecting SEO.
Step 1: list of all pages from the old website
The first step is to download the URL structure of your website. Redesigning means a lot of changes which will also affect the URL re-structure. It is important therefore to back it up otherwise you run the risk of impacting your website ranking.
You can use plugins to get the URL structure. If you are using Yoast SEO plugin, you can crawl the website and then download the updated sitemap.
Step 2: the redesign needs to be done on a temporary URL
Never do the redesign on your existing website. It can cause visitor issues and give you problems in the long run. The best approach is to copy your site and set it up into a temporary URL. Once done; you can start making changes to it. An alternative would be to switch the domain once all the required redesign changes are made.
If there is a potential for you to struggle with this, you can always get help from your developer. Another option would be for a hosting company to do it for you. It is important for you to ping your hosting provider to do the setup for you as this step will protect you from unforeseen issues in future.
Step 3: test the new website
Great, you copied your existing website into the new website.
However, before you start your redesign project, it is a good idea to do an end-to-end checkup of your website. In this checkup, you should look at multiple aspects of your website including broken links, features, CSS, etc.
You can also use the XENU, a free-to-use tool that will find all the broken links on your website.
Step 4: do proper 301 redirects
The next step is to do 301 redirects between old and new URLs. For example, if you have an “About Us” page on the old website, and its URL was “www.yourwebsite.com/aboutus.html.”
If during the redesign, your designer changed the URL to “www.yourwebsite.com/about-us.html” – it is better to implement proper 301 redirects to ensure that both URLs work and you don’t lose SEO benefits gained from your previous URL.
If you don’t do it correctly, the search engine will get 404 web pages not found. By doing 301 redirects, the old URL will be redirected to the new one. This is the technical way to tell the search engine that the URL has been changed. Google will not downgrade your previous SEO efforts.
You can add redirects using the .htaccess file. It would look like the following code.
Redirect 301 /oldwebsite http://yoursite.com/new-url
If you are confused and don’t know how to do it manually on WordPress, you can also try out redirect plugins that let you do it by filling in a form.
Note: This step is very important, and you should do it no matter what.
Step 5: make the jump to the new website
Once everything is finalized, both design and redirection, it is time for you to switch to the new website. You can also make an incremental change in stages if your website is big.
Step 6: run Google Webmaster tools
The next step is to ensure everything has been successful so far.
To do so, you can utilize tools such as Google Webmaster. This tool will enable you to check there are no broken links. If you are any broken links found, to avert penalty it is advised to get them fixed quickly.
Step 7: check verification status and re-submit
It is common for developers or designers to stop the search engine to crawl the website. If that’s the case, then you will need to resume the crawler on your website. To check the status, you need to use the “Fetch as Google” option under crawler. Once done, click on the “Fetch and Render” option. If both tests return positive – your website is entirely crawlable.
Also, it is advised to check if the redesigned website is verified. You can do so by logging into the respective webmaster’s tool provided by Bing and Google. If it lacks verification, then redo it and claim your website.
And finally, re-submit your website URL into Google index by clicking on “submit to index” button.
Step 8: Robot.txt
During the redesign, there is a chance that your robot.txt file can get corrupted. To check if it has, you can use “robot.txt” option under crawl.
Step 9: sitemap submission
As your website now has a new and modified structure, submit the website XML to Bing and Google. Once submitted, your new website will be crawled in the coming hours.
Step 10: monitor the changes
Finally, it is important to monitor the changes and look for any potential growth. Keep a close tab on the rankings of your top keywords. There are many SEO tools available that enable you to keep track of these keywords. If there is a considerable change in your SEO, then endeavor to understand why this is happening and look to find a solution if your website traffic slows down quickly.
You should monitor your website for at least two to three months.
Author: Pawan Sahu is a digital marketer and blogger at MarkupTrend.
from Search Engine Watch https://searchenginewatch.com/2018/07/06/a-guide-to-redesigning-a-website-without-affecting-seo/
0 notes
Text
Fetching Results
Just wrote a program to fetch results from BPUT website. The program is available at https://gist.github.com/VijayKumarHackr/a307391430f3b7768d0a4af0d6a05163
0 notes
Text
DNS Dilemma - Replacing a website
I've been working on a new website for my employer. To make things easy, I'll refer to oldwebsite.com as the old website and newwebsite.com as the new.
oldwebsite.com is hosted with a marketing company, which overcharge and frankly provide a poor service. The domain name is hosted with namesco. newwebsite.com is hosted with IONOS and the domain name is too.
After months of work, newwebsite.com is ready for go-live and created in Wordpress. The plan has always been for the content of newwebsite.com to replace oldwebsite.com. And then newwebsite.com will simply redirect traffic to oldwebsite.com (oldwebsite.com has a better domain name).
Normally, I'd look to change the nameservers of the namesco records to point to IONOS. And within there, use the DNS records to point to the IONOS webspace. But, running this past the company, they're concerned around emails and other DNS setup and don't wish for a blip in their performance.
For the past couple of days, I've been trying to put DNS records in place for oldwebsite.com that point a blank A record and www CNAME record to newwebsite.com. (Going from namesco and into IONOS). These seem to work to an extent, where the IP addresses are being hit but the content of the site isn't. Often, I get nginx 404 errors, that I have no experience with. Looking into nginx, my IONOS dashboard has no function for it and putting a custom nginx.conf file on the webspace does nothing either.
Occasionally, for some unknown reason, it can work. Yet, I encounter another issue - the newwebsite.com redirects to oldwebsite.com, but we want newwebsite.com to be the URL name the site has. So its more of a replacement than a redirect.
One option we are considering is simply copying + pasting the content of the site over the old website; which the marketing company aren't too happy with!
I've been trying to wrap my head around all this and have been in contact with IONOS support but this is way above my head.
In a couple of days, investors for my employer are coming in and we'd like to have the site live.
Any ideas on how to fix this?
Submitted September 06, 2019 at 05:59PM by DugtrioUsedDig https://www.reddit.com/r/webhosting/comments/d0pg8w/dns_dilemma_replacing_a_website/?utm_source=ifttt
from Blogger http://webdesignersolutions1.blogspot.com/2019/09/dns-dilemma-replacing-website.html
via IFTTT
0 notes
Text
DNS Dilemma - Replacing a website via /r/webhosting
DNS Dilemma - Replacing a website
I've been working on a new website for my employer. To make things easy, I'll refer to oldwebsite.com as the old website and newwebsite.com as the new.
oldwebsite.com is hosted with a marketing company, which overcharge and frankly provide a poor service. The domain name is hosted with namesco. newwebsite.com is hosted with IONOS and the domain name is too.
After months of work, newwebsite.com is ready for go-live and created in Wordpress. The plan has always been for the content of newwebsite.com to replace oldwebsite.com. And then newwebsite.com will simply redirect traffic to oldwebsite.com (oldwebsite.com has a better domain name).
Normally, I'd look to change the nameservers of the namesco records to point to IONOS. And within there, use the DNS records to point to the IONOS webspace. But, running this past the company, they're concerned around emails and other DNS setup and don't wish for a blip in their performance.
For the past couple of days, I've been trying to put DNS records in place for oldwebsite.com that point a blank A record and www CNAME record to newwebsite.com. (Going from namesco and into IONOS). These seem to work to an extent, where the IP addresses are being hit but the content of the site isn't. Often, I get nginx 404 errors, that I have no experience with. Looking into nginx, my IONOS dashboard has no function for it and putting a custom nginx.conf file on the webspace does nothing either.
Occasionally, for some unknown reason, it can work. Yet, I encounter another issue - the newwebsite.com redirects to oldwebsite.com, but we want newwebsite.com to be the URL name the site has. So its more of a replacement than a redirect.
One option we are considering is simply copying + pasting the content of the site over the old website; which the marketing company aren't too happy with!
I've been trying to wrap my head around all this and have been in contact with IONOS support but this is way above my head.
In a couple of days, investors for my employer are coming in and we'd like to have the site live.
Any ideas on how to fix this?
Submitted September 06, 2019 at 05:59PM by DugtrioUsedDig
via reddit https://www.reddit.com/r/webhosting/comments/d0pg8w/dns_dilemma_replacing_a_website/?utm_source=ifttt
0 notes
Last Seen Blogs

fxxk-yeah-jisoo
👑JI SOO

the--days
the days are just packed!

applechoke
Apple Choke

qualitygardenservice-blog
Quality Garden Service

yellowraincoat
Hey i’m Rai