#pattern making
Text
798 notes
·
View notes
Text
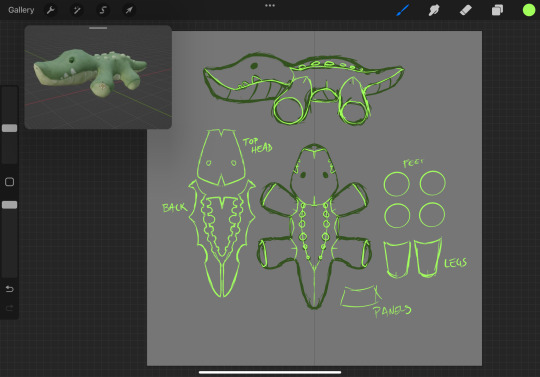
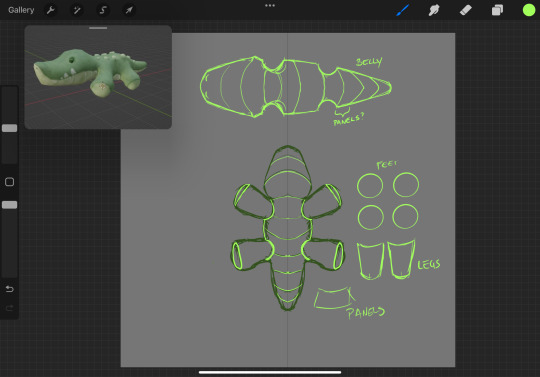


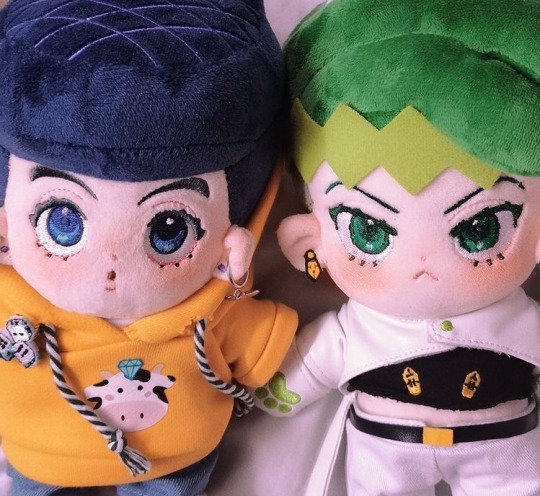
plush makers get in on this:
want to make fred the alligator (alligator plush from l4d2) and these are my pattern rough drafts. too many seams? what should i fix?
#plush#plushie#plush maker#plushie maker#sewing#plushies#art#pattern making#l4d2#left 4 dead#left 4 dead 2#l4d
153 notes
·
View notes
Text
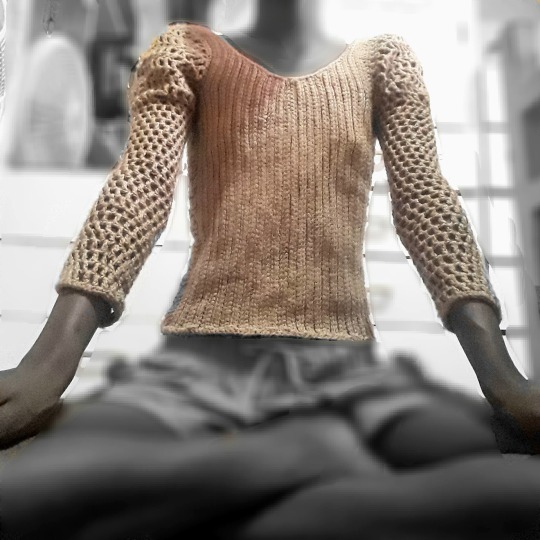
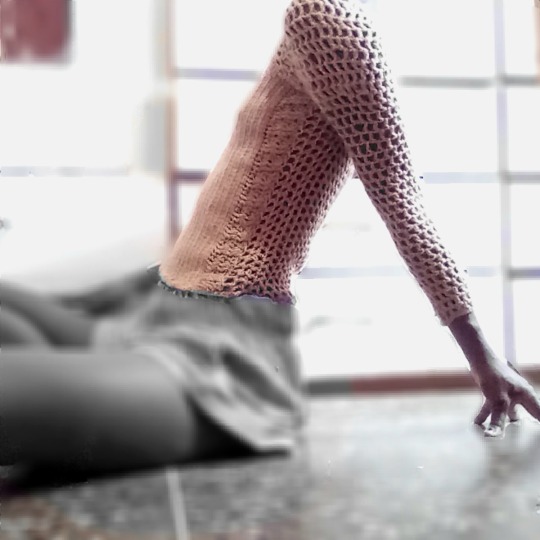
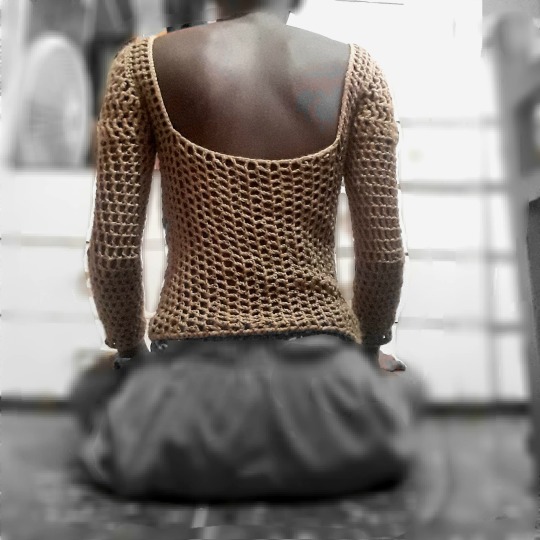
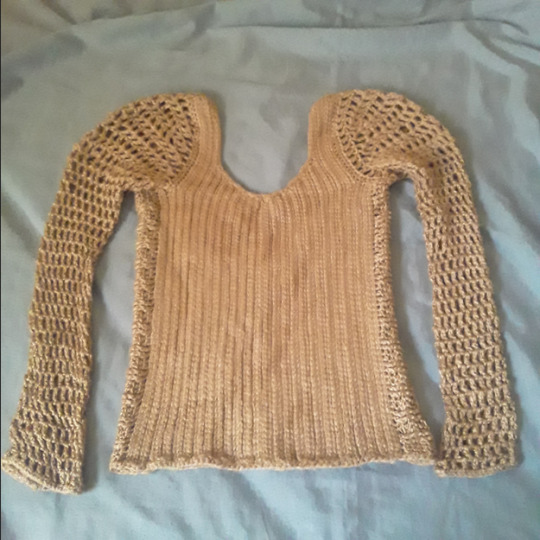
so this top has like four parts to it an opaque as possible front a mesh back and mesh sleeves and a small underarm 'contrast' panel. it was worked in rows running up down and the back and first half of the front was worked as one continuous piece then the 2nd half of the front was worked onto the other side of the back then the sleeves were joined and worked in spirals. stitches used are 3rd loop only dc for the front with hdc sl st and sl st to make the decrease for the neck. the sleeves and back are double crochet mesh (the kind of granite stitch dc variation). the side panel was made with a combo of fpbpdc and hdc blo. the neckline (all around from back to front) was 'finished' with sc and sl st. and the hem of the top and the sleeves were finished with reverse sc. it took about 2 skeins of 200 g weight 3 yarn and a 4mm hook. oh and the coolest part is the sleeves are set in! i really want to share the pattern bc it's pretty simple except for when you get to the sleeves but wow pattern writing is hard cri. but dw i'll get arnd to it some time surely
47 notes
·
View notes
Text

First swatch for a mosaic crochet grucifix! Hopefully I can use this idea soon in an upcoming cosplay 👀👀
Came out a bit stretched, but hey! First time trying mosaic crochet in general, let alone making my own design 💀 I know where I can improve, and I’ll make another post when I make my second attempt. This time, I’ll try crocheting in the other direction too, just to see how that would look. Maybe I’ll get cleaner lines?
#crochet#crochet ideas#papa scelus#mosaic crochet#crochet swatch#pattern making#first attempt#grucifix#ghost band#the band ghost#cardinal copia#papa terzo#papa secondo#papa primo#papa nihil#sister imperator#ghost ghouls
40 notes
·
View notes
Text

link
#sewing#sew#diy fashion#pattern#pattern making#free sewing pattern#pdf pattern#how to#video#sewing for beginners
140 notes
·
View notes


Text

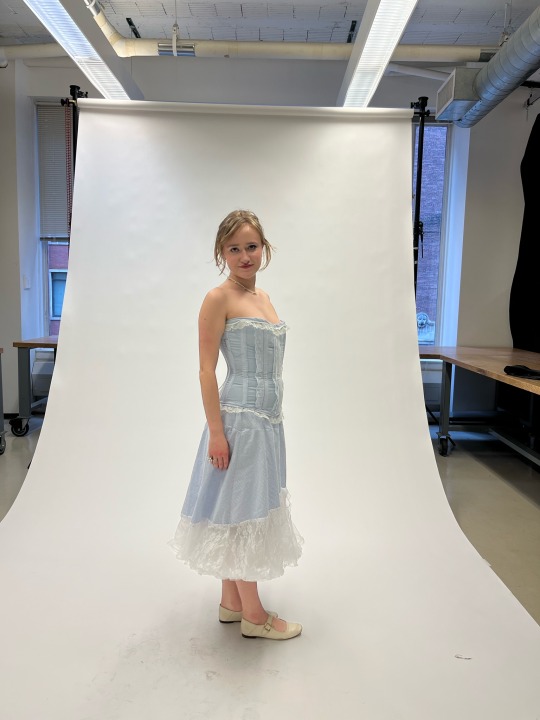
BABY BLUE princess dream come true
my corsetry class final project
#jesush8r#pattern making#fashion#corset#it’s too big on me rip#so it doesn’t snatch as well as it should#anyway plz show love
36 notes
·
View notes
Text


Cheers, loveys!
Here is post 1 of 3 about Pattern Construction. I’ll make a diagram post like this and then also take photos of my actual coat and with me in it.
I don’t remember how I started off doing the pattern, but I will guess that I took a tailcoat that I already possess and used it as a base, which in general seems to be a helpful way to start making clothes that fit if you’re not a master pattern maker (which I’m not, and I made plenty of mistakes which we’ll get into.)
There are two people I want to thank, and the first is Aria Couture [X] and their quality photos and observations, vocabulary and groundwork. They are the shoulders I stand on. Their photos were how I made all of the notes discussed in these diagrams, and how I discerned what kind of pattern needed to be made.
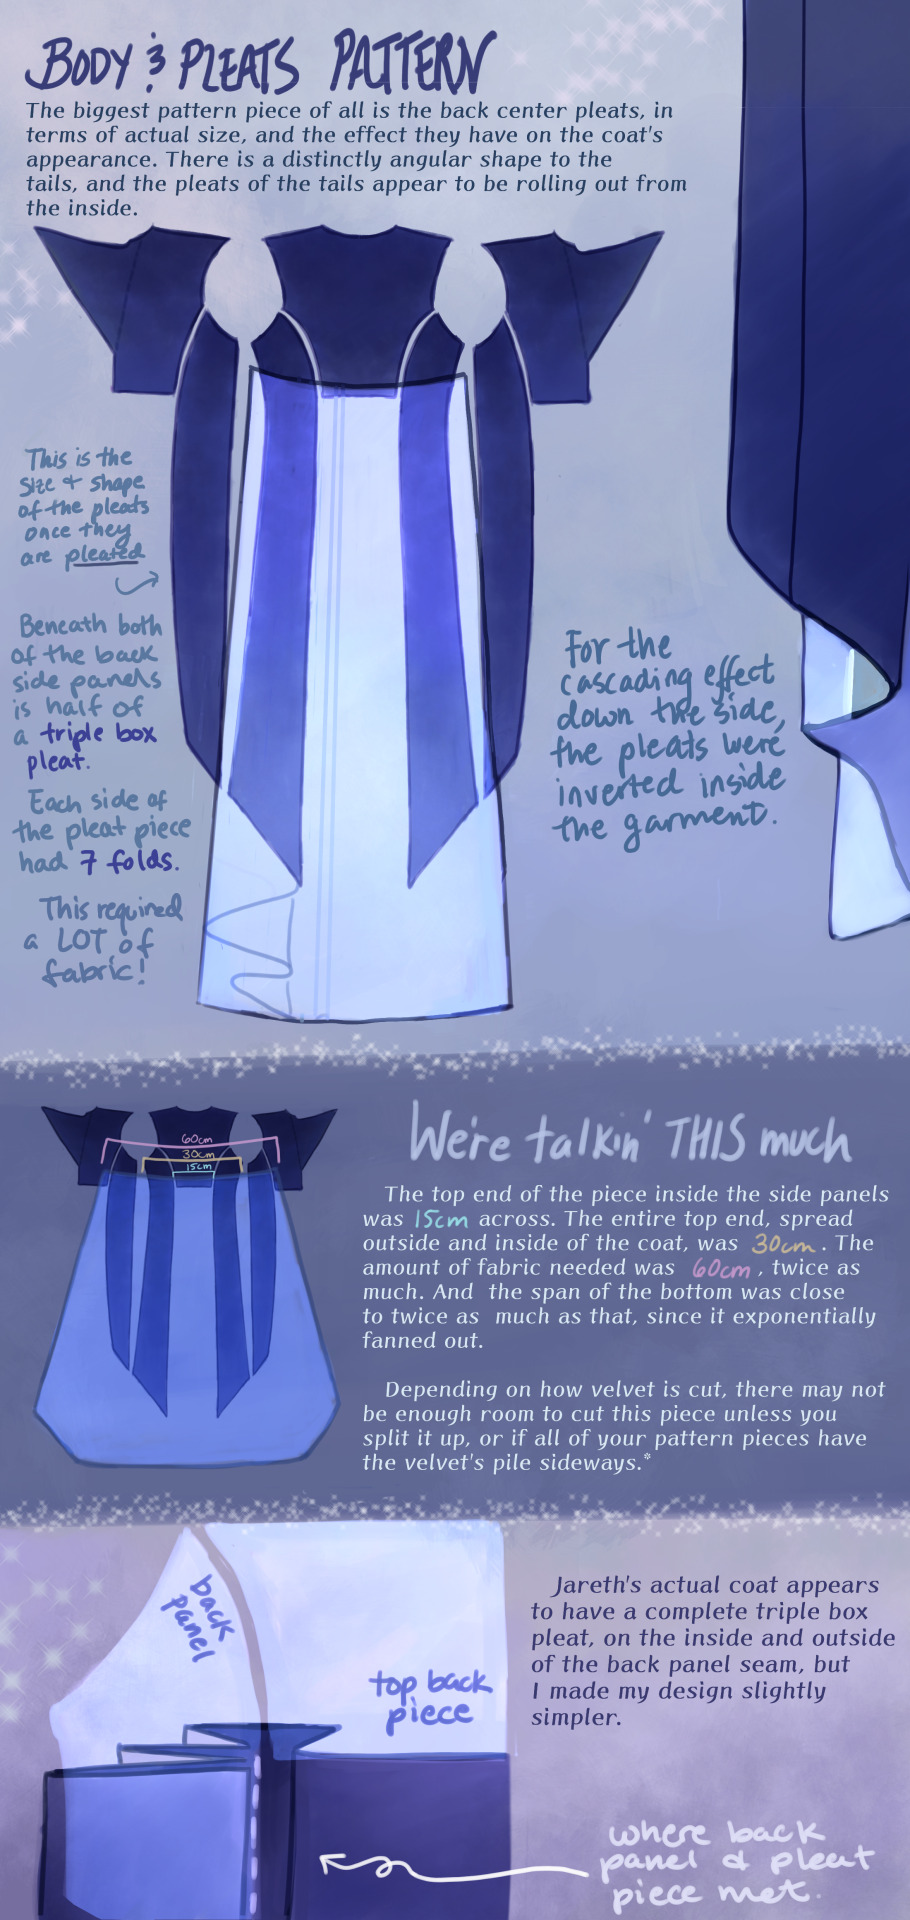
So the main changes that needed to happen to my base pattern was 1.) jacking up the shoulders to high heavens, 2.) elongating the side pieces (which I’ve come to call panels so go with me), 3.) adding pleats in that squared off spot in the back between them, 4.) adding a custom collar and cuffs, 5.) designing my own lining.
THE PLEATS were a nightmare. There was a lot of math involved, and math that was not necessary, but the most important thing was creating a shape that would fold together into a straight line on top, look cascading on the sides, and marry the rest of the coat in a reasonable place. After a lot of trial and error, I ended up with this rounded wedge that spreads out on the inside of the coat, but also folds backwards onto itself (like half of a box pleat), to reattach to the back side panels. This is what gives the coat its look of all this shiny velvet blossoming from beneath the back buttons and gushing out the sides.
As to why the pleat piece is rounded, all of the pleat lines were diagonal, so that the coat would flare out. Cutting this piece as a completely straight line on top meant it ran out of fabric in the top corners, and more of it needed to be pulled in, more and more sideways. Adding a sloped height to its corners helped it do what it was supposed to and become a mostly straight line when folded together.
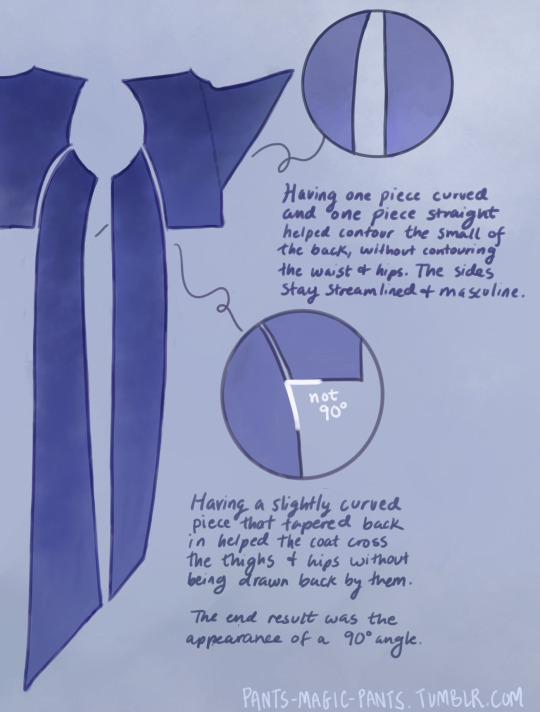
THE PANELS (second image), there are just a few notes about those which I think are important. As I am female cosplaying a male and wish to keep the masculine shape of the garment, some tricks needed to be pulled to hide my waist and hips, so this is what I came up with.
PROPORTIONS MATH. It’s a thing I started doing a couple cosplays ago, to get accurate shapes and lengths of garments, to give me the same silhouette as characters. It’s worked out really well for me. It’s been a real life application of algebra that I wasn’t expecting, as a former student who hated math. Now, I love math! Armed with a ruler and a protractor, I have taken down a lot of notes about such silly things as: what degrees the angles of the lapels are, and how wide are the shoulders compared to the head? (In Jareth’s coat’s case, the ratio of head:shoulders is 1:4.) With that knowledge, I took a photo of myself in the bathroom, measured my own head and shoulders in pixels, wearing a mock-up, and corrected shoulder span measurements to fit this ratio. It was a whooole thing, but I think it was worth it.
And I used proportions math for everything. How much of the arm do the cuffs take up? Where along the legs did the dramatic slope of Jareth’s “fishtail” start? Those things aren’t listed here, but hopefully this post gives you enough tools to figure it out on your own for your specific garment, or any garment you ever want to make.
THE COLLAR. Not much to say about it, but there’s how it looks.
SLEEVES. Dear God. I was stuck on sleeves for months because go ahead and look around online for detailed information about how to add basically football gear sized padding to your shoulders, and all of the intertwined modifications that needs. It isn’t out there.
One thing I can at least say is that it helps to start off with a great base, and the other person I have to thank is a tailor on YT called Chris Sartorial [X]. This guy hasn’t been active for years, but when he was, he was no nonsense, such a professional who knew what he was doing that he couldn’t even take the time to properly light his videos. Such a king. His channel helped me with my dress shirt, and also with making the base sleeves for this coat, which were of the “2 piece” variety. This kind of sleeve is used for blazers and coats so that it appears to fall in a nice boxy shape off the arm, usually from a shoulder pad, and then slightly turn at the elbow. While he doesn’t go into shoulder pads, this still halfway set me up for success, and knowing the relationship between shoulder and sleeve.
However, there are a few things I learned about shoulder+sleeve modification as shown above, and hopefully it’s a good “bouncing off” observation.
THE CUFFS. Again, not much to say, but this is how my pattern came out, to create that nice tear-drop shaped gap, with that sort of blooming and expanding height that his cuffs have, like a vase. The lace trim will be in another post. One thing I should mention is that the lace trim is tall enough that the bottom of the cuff won’t end on your wrist if you want to be able to see your own hands. The cuff needs to be measured so that it will end 2-3 inches up from your wrist.
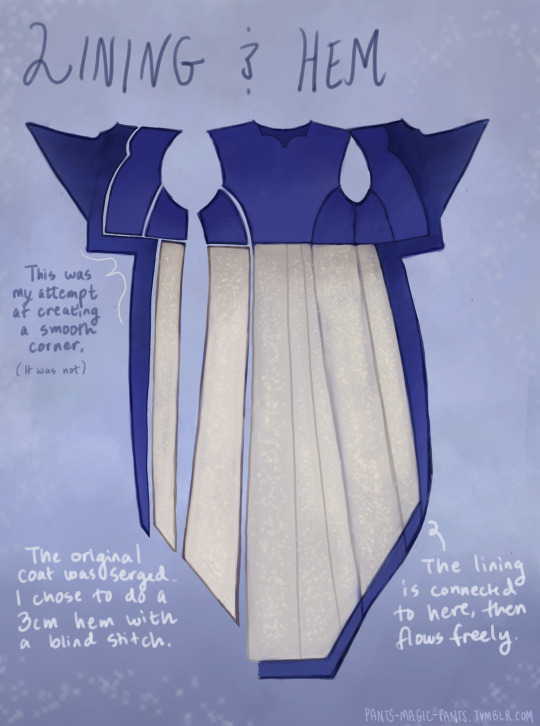
THE LINING
Dear God, she’s still writing. I am a huge fan of lining even though I’m not good at it, and my actual lining didn’t turn out looking as smooth as my drawings, but this is what I came up with, which in theory should look good. haha Any deviations from the norm that you see are just stylistic choices. I wanted the area in the top back to look sort of dripping like the back lace piece.
Was this interesting? I sure hope so. Please ask me questions if I’ve glossed over something.
53 notes
·
View notes
Text
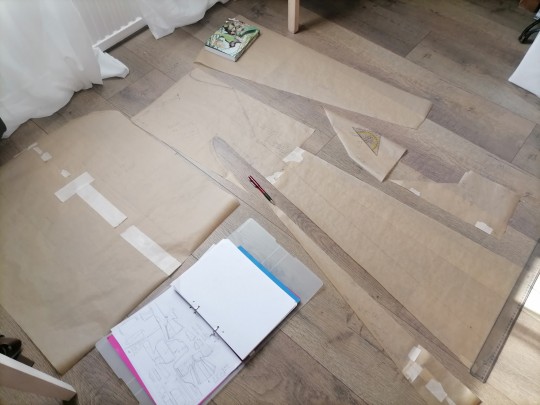
Layer 3 深衣 (#1)
Shen QingQiu's third layer (and second of shown layers) is some kind of white shenyi. Main color is white with blue(ish) decorated collar. I had a hard time deciding the pattern design I was gonna use, since I needed it to have a collar that's cut streight thought the chest and which ends up in the waist and not the arm pit, like my previous pattern. I also want there To be no seam in the weist line, meaning that I will Need a LOT of fabric...
Two weeks back, when I'm editing this, I got a change to go to bigger city and ended up buying the fabric and some other stuff. I took 5 meter of fabric, just to be on the safe side. Somehow it still ended up not being enought. Thankfully they had same fabric in the store where I live.
It took me way too long to make a pattern design that i was happy with. At first I had tought that I would want to make shenyi that that had those Nice big sleeves and streight rectangular pieces that optimize fabric use, as shown down in that very bad image...
Problem was that, becouse I also will be having beizi that has curved sleeves, i Need To háve undergarment with same sleeve design but smaller. Also, I have read the first book. The original SQQ would not have given up a change to stealthily show off how much money he has by having a garment that will use more fabric than needed. spoilers, I think I succesed... but at what cost... Well actually under 30€, since i used the cheapest one i could find :) Then there's about a weekend of criminal about of orange Juice and me suffering in between, but here's the final plan as Bad of an image as before.

Just realised that these are probably not very comprehensive to anyone else. I might do a post later about pattern drawing process, but basicly i just use few basic principles of hanfu making and rest is just improvisation with springle of inspiration from historical garments and c-drama costume designs.
Drawing the patterns here. My mom helped me To keep my sanity and hold the measure tape becouse those pieces are so long.
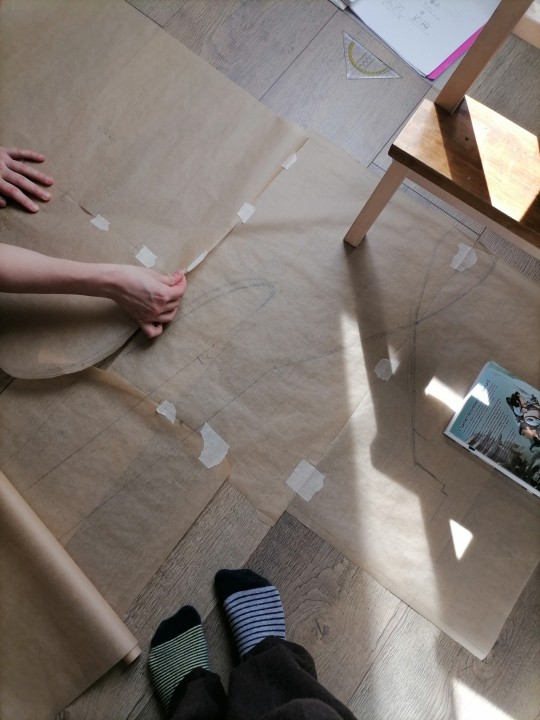
Here are all the pattern pieces cut out. Since most of the side seams are streight lines, I didn't want to waste my paper to them, instead I'm just going to use the fabric sides To my advantage and measure the neened lenght on the fabric.
Next, I will sleep a little.
#svsss cosplay#svsss shen qingqiu#shen qingqiu#sqq#scum villian self saving system#svsss#sewing#pattern making#cosplay#hanfu#汉服#R4sqq#progress update#sewing project#sewing progress
67 notes
·
View notes
Text

knitted a small sitting up bunny, which is a pattern i have been attempting to design for a long time and finally did!
#handmade plush#plushies#plushblr#fiber art#alt text#handmade stuffed animal#knitting#knitted toys#bunny#rabbit#soft sculpture#pattern making#handcrafted#etsy#support small business#radiofrogs
37 notes
·
View notes
Text


Well, I may not be the best at drawing, but I'm a little decent at sewing.
10 notes
·
View notes
Text
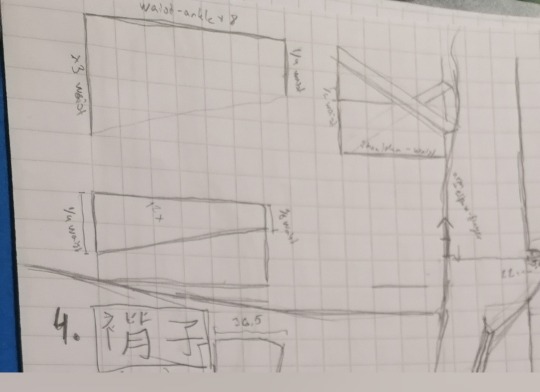
Does anyone know a pattern for Rohan’s hair like in the pictures below?
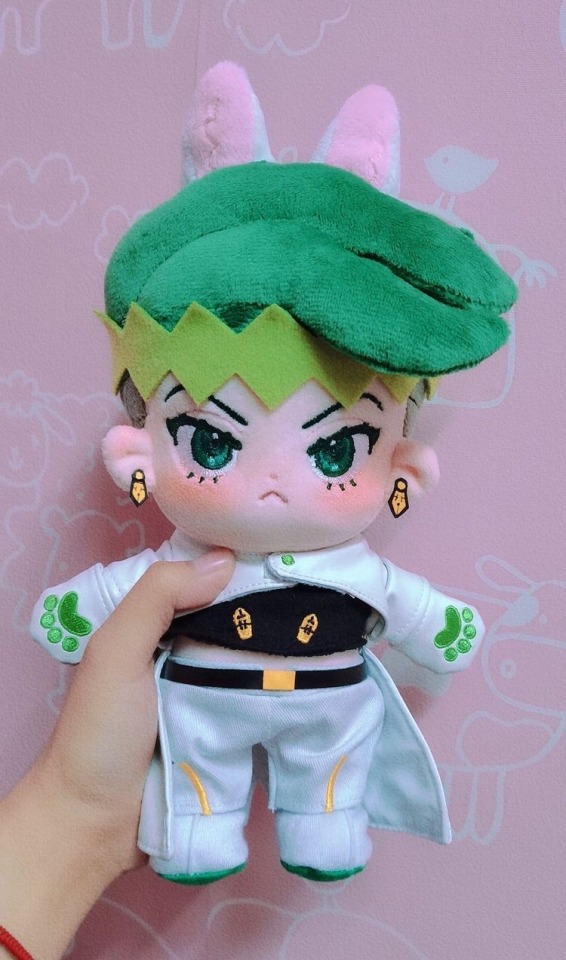
#jojo#plushies#sewing#pattern making#patterns#sewing patterns#someone help#jjba#rohan kishibe#jojos bizzare adventure vento aureo#jojo stardust crusaders#jojo part 4#diamond is unbreakable#jojo diamond is unbreakable#jjba rohan#jjba diamond is unbreakable#plush maker#plushblr#jojo plushies#plushes#handmade plush
30 notes
·
View notes
Text
forgive me father for i have to frog this project again ALKDJFALKDSJF;KALSDJF;KLASDJF;LKJADSL;K FADSLKFJ;DSLKJFK;LDSJ;FLKASDJFKLJASD;KLFJKADS;LJKLJFALK;SJFDL;KAJ;LDSKJF;LAKSDJF;LKAJSD;FLKFAJSD;KLFJ;ALKDSJF;LKAJSDF;LKAJSD;LKFJA;SLKDJF;LKAJDS;FLJ;FLDJ;ALKSDJF;LKAJSD;LKFJ;ASDKLJF;LAKSJDF;KLJASD;LKFJ;A
😀😀😀
18 notes
·
View notes
Text

Working on a new skirt pattern. I'm still not a 100% happy, but that is why we make (wearable) mock-ups.
#sewing#sewingblogger#sewingblog#nähen#pattern making#sewing patterns#patternlabel#sewingpatternlabel#skirt
7 notes
·
View notes
Text
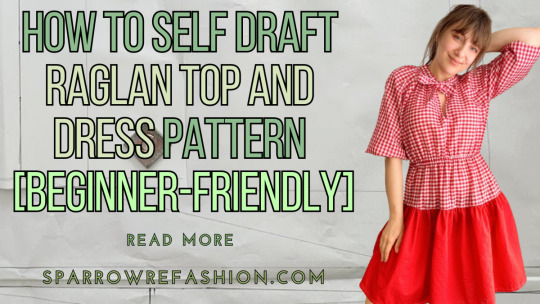
How to Create and Customize a Raglan Top or Dress Pattern [Beginner-Friendly]
In this post , you will learn how to self draft and hack sewing pattern for raglan dress or top.
A raglan top or dress is a garment that has sleeves that extend to the neckline, creating a diagonal seam from the underarm to the collarbone. They are flattering and comfortable styles that suit any body type.
In this post, you will learn how to create a raglan top or dress pattern from scratch.…
View On WordPress
#beginners tutorial#blouse tutorial#draft#drafting#dress tutorial#for beginners#pattern drafting#pattern hack#pattern making#raglan#raglan dress#raglan top#self draft#sewing pattern
36 notes
·
View notes
Text
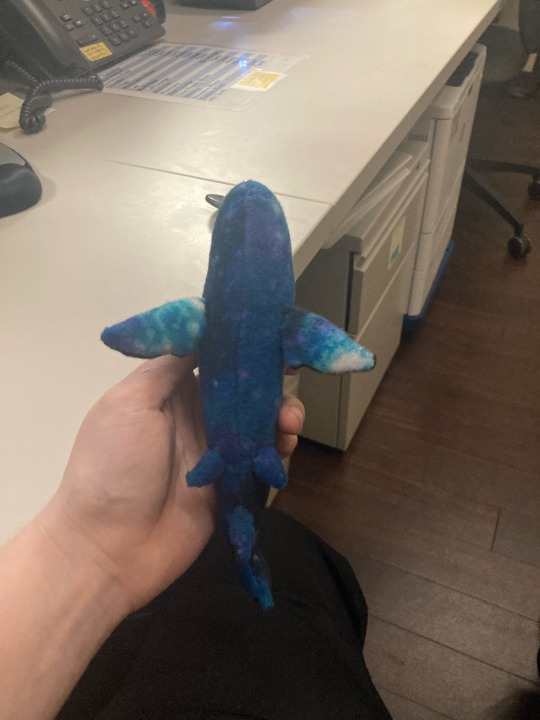
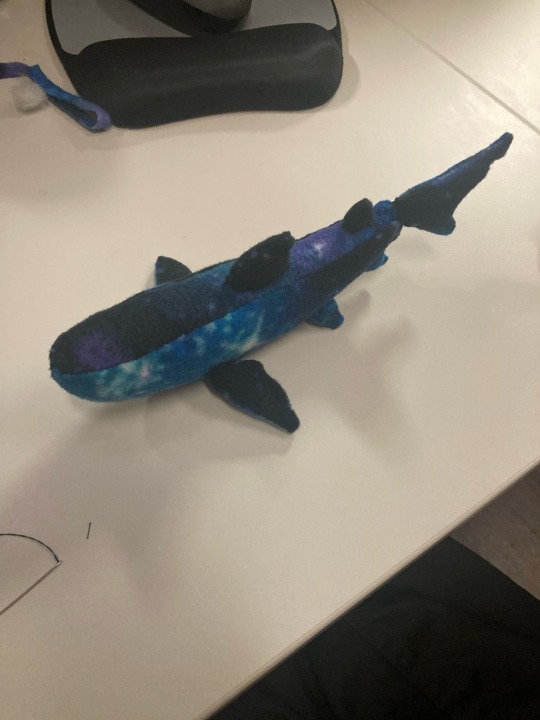
GUYS I MADE A SHARKKKK!!!!! :)
#he’s space patterned :)#he’s for my friend!!#if you want help making a pattern for ANY CREATURE lemme know!!! I love to create or help lol :)#I would also love to take commissions if anyone wants a lil buddy like this :) I’m gonna embroider his eyes today 💖#and gills too hehe :)#<3#craft#sewing#pattern making#shark#lemon shark#space#:)#commisions open
9 notes
·
View notes
Last Seen Blogs
bigpaksview
BigPaksView

linguaebellae
观察世界的窗户
rbf451
" Without literature, life is hell."
eseyurtikncielesyaalanlar
esenyurt 2.el eşya alanlar 0534 733 11 71

killasims
The KillaSims Tumblr