#preview post linked if you would like a refresher
Text
heres a few links from my bookmarks folder full of HTML and CSS resources that i used when first making my neocities website because i want other people to make their own sites as well because its fun :)
how to actually do html and css
web design in 4 minutes - this is the site that really made HTML and CSS click for me, following along as the author describes what’s he’s doing to the webpage and showing how it changes the presentation (you don’t need the book he shills at the end. i did without)
w3schools introduction to html - takes you through the very basics of creating a website, lesson-by-lesson. big goldmine for code to grab and scaffold off of once you have some basic skills
mozilla’s html guide - also a great beginner’s guide by the people who made mozilla, although i didnt use it as much as w3 schools
brackets.io - this is the program i use to write the files i use for my website. lets you do splitscreen to work with two files at once, gives you a breakdown of all the files in your website’s folder, and will let you autofill commonly-used tags and files in the code. supposedly has a live preview function but it doesnt work that well for me when i’m using a second monitor, which i normally do when coding. just save the file and refresh the page instead.
(side note: i work in a software external to neocities instead of directly in the neocities editor because 1. local files update with a refresh and neocities has to update the cookies AND download all the website info again once you update, and 2. it effectively gives you a mass undo button if you fuck up because you have your files hosted in multiple places (local and online). yes its kinda annoying to have to manually upload all my files especially bc you cant upload whole folders AND you cant move their locations once uploaded but i prefer it to working directly on the site. if you have a neocities pro subscription ($5/month) you can mount your website directly on your machine as opposed to the neocities dashboard, which basically means you dont have to manually upload the code every time you change something -- it’ll update automatically)
codepen - if you prefer something browser-based to work in then try codepen, i used it a little bit at the beginning when trying to troubleshoot some code i didn’t quite understand. you need an account to actually save your work and im not sure if it actually lets you upload folders bc i never signed up lol
premade engines/sites/themes/etc etc
neothemes or eggramen or templaterr - if you wanna get a quick start on a neocities site, you CAN use a theme generator/premade theme. if you go this route i would still heavily recommend trying to learn HTML and CSS, and then go into the guts of your own website to try and pick it apart and change it to your liking
zonelets - a static blogging engine that uses HTML, CSS, and javascript. made for use on neocities but theoretically useable elsewhere. takes about 15 minutes to set up (if you use a default theme, but its pretty customizable if you know what you’re doing) and requires you to 1. write blog posts in html and 2. modify some code in a script file every time you want to upload a post, but it will automatically let you browse posts in order once you get everything uploaded
rarebit - a neocities webcomic template — havent used it yet but looks cool, and seems to operate off of the same principles as zonelets.
glightbox - this is the lightbox javascript code i use when i want to display a lot of images on one page. i found this code via clicking “inspect element” on a neocities fanpage that the webmaster drew a lot of fanart for. you should click inspect element on neocities pages that you like so you can understand how they do what you like (you can even look at their css by clicking the style.css link you have to include at the top of your page)
plus a couple masterlists/directories:
yesterlinks
sadgrl.online’s webmastery directory
#unidentified gay noise#html#neocities#i took a 2.5 hour nap today and drank coffee at 4 pm and im still sleept#edit oct 22: removed the anti-t*rf disclaimer bc i havent seen any sus reblogs in a while and i didnt wanna keep seeing it in my notifs#but it still stands :)
6K notes
·
View notes
Note
hi hiii i wanted to say that your account is so refreshing to see, esp with the passion you have for the arts. as someone who's been meaning to read (and write) more poetry, do you have any recommendations? some classics that everyone and their mothers know? perhaps some underrated pieces that changed you? or even just authors you like, I'm very open to suggestions :]]
Hi! Thank you so much for this kind ask :) So exciting that you’re looking to delve deeper into reading and writing! I had to take a little time to answer this because my thoughts were all over the place lol.
For a review of notable/classic poems/poets, I honestly just recommend looking at lists online or, hell, just binging Wikipedia pages for different countries’ poetry if that’s something you’re into, just to get a sense of the chronology. I read one of those little Oxford Very Short Introductions on American Poetry and thought it was pretty good, but online is quicker if you’re just searching for poets or movements to hone in on. Poetry Foundation also has lots of resources, in addition to all the poems in their database. I guess my one big classic recommendation would have to be Emily Dickinson (<3), but really the best move is just to find a poet you already enjoy and then look around to see who their peers were/are, who they were inspired by, who they’ve maybe translated here and there, etc. and follow it down the line as far as you can.
For some personal recs, here are some collections I’ve really enjoyed over the past two years or so. Bolded favorites, and linking where select poems from the book have been published online. But also, if you want a preview of a couple poems from another of the books to see if they interest you, DM me and I can send them over! You can also feel free to pilfer through my poetry tag for more stuff lol
Autobiography of Death by Kim Hyesoon trans. Don Mee Choi
Conflict Resolution for Holy Beings by Joy Harjo
DMZ Colony by Don Mee Choi
Hardly War by Don Mee Choi
Whereas by Layli Long Soldier
Geography III by Elizabeth Bishop
Dictee by Theresa Hak Kyung Cha
Don’t Let Me Be Lonely: An American Lyric by Claudia Rankine
Mouth: Eats Color—Sagawa Chika Translations, Anti-Translations, & Originals by Sawako Nakayasu
The Selected Poems of Osip Mandelstam trans. W.S. Merwin and Clarence Brown
The Branch Will Not Break by James Wright
This Journey by James Wright
God’s Silence by Franz Wright
Duino Elegies by Rainer Maria Rilke (the translation I read was by Alfred Corn—I thought it was great, but idk if there are better ones out there!)
DMZ Colony, Hardly War, Dictee, Don’t Let Me Be Lonely, and partially Whereas are all book-length poems with some prose poetry and varying levels of weirdness/denseness/multilingualism—if you were to pick one to start with, I’d say do Don’t Let Me Be Lonely or Whereas. Mouth: Eats Color is some experimental translations of Japanese modernist poet Chika Sagawa, with other translations and some of Nakayasu’s original stuff mixed in—it's definitely a bit disorienting but ultimately I remember having such fun with it, as much fun as Nakayasu probably had making it. It’s a book that emphasizes co-creation and a spirit of play, and completely changed my attitude towards translation.
If you’re less interested in that kind of formal fuckery stuff though (I get it), can’t go wrong with the other books! Conflict Resolution for Holy Beings is the one I read most recently, and it’s great—Harjo also featured in Round 1! Franz Wright also featured, and God's Silence is the collection which "Night Walk" comes from. James Wright (father of Franz) is one of my favorite poets of all time, though his poetry isn’t perfect. Even so, I’m honestly surprised he’s not doing numbers on Tumblr—Mary Oliver was a big fan of his, even wrote her "Three Poems for James Wright" after his death.
I mentioned in another post that one of my favorite poets is Paul Celan, so I’ll also recommend him here. I read Memory Rose into Threshold Speech which is a translated collection of his earlier poems, but it’s quite long if you’re just getting to know him as a poet—fortunately, both Poetry Foundation and Poets.org have a ton of his poems in their collections. There’s also an article by Ilya Kaminsky about him titled “Of Strangeness That Wakes Us” (!!!!!) that’s a great place to start, and is honestly kind of my whole mission statement when I’m reading and writing poetry. Looking at the books I’ve recommended above, a lot of them share feelings of separateness or alienation—from others, from oneself, from one’s country, from language—that breed strange, private modes of expression. That tends to be what I’m drawn to personally, and that’s some of what Kaminsky talks about.
Sorry of the length of this—I hope it's useful as a jumping-off point! And if you or anyone ends up exploring any of these poets, let me know what you think! If folks wanna reply with recommendations themselves too that'd be great :)
#ask#not a poll#i originally was going to link to previews of the books directly on this post but for some reason I suddenly feel very paranoid about#copyright LMAO. ik this blog is already like copyright infringement central but I feel like I can at least make an argument for the polls#being fair use lol. in the way that i could not for the pdf previews I made. (i also have a full pdf of hardly war if anyone wants lol)#and i know it's not entirely rational bc this is tumblr and nobody looks on tumblr. but i'm not used to having this many followers lol so i#admittedly just getting anxious about silly things#but please please feel free to DM me! or send an ask off anon#discussion
293 notes
·
View notes
Text
How to add a page with custom theme
If you want to create a WIP page, character page, page for all your interests (e.g., reading or gaming catalogue, etc.) or whatever.
I tried to keep this as simple as possible; hope it's helpful!
Note: You can only do this on desktop. And this tutorial was made using the new tumblr layout.
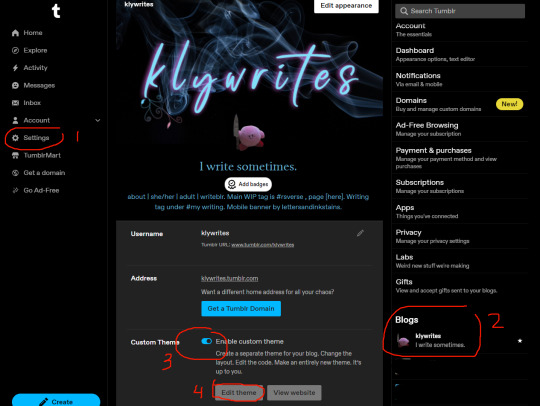
1. Go to Settings.
2. on the right side, under Blogs, click on the blog you want to add a page to.
3. In the middle you will see the basics of your blog that you can edit, such as appearance, enabling asks, choosing whether to show your likes/followers.
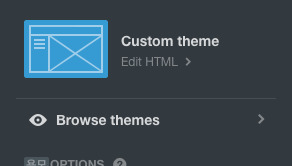
Where it says Custom Theme, click the slider to Enable custom theme.
4. Click on the Edit theme button that appears.
Next you will see a left sidebar where you can customize your main theme (theme of your entire blog). On the right side will be a preview of your blog.

But that's a different tutorial. For now we want to create a page.
5. Scroll down and look for Add a page in the left sidebar.

Once you add a page, you can give it the Standard Layout or a Custom Layout or Link.
You can choose which one in the top left corner of the box that appears.

Standard Layout: The page will use your blog's main theme. If you just started out on tumblr you most likely have some default theme. You can type normally in this box, like you would when making a text post.
Link: The "page" can go to an external link.
Custom Layout: The page will have whatever theme you put here in code. Every page can have a different theme. It's great and fun.
6. Choose Custom Layout.
Paste your own code if you know how to make one. Or get one that's made already. Some places to find tumblr themes:
magnus themes
theme hunter
vault themes
shudesigns
glenthemes
You will find some instructions on how to use each theme. I do recommend knowing some basic HTML because it's useful.
7. Once you choose a theme you like, copy the theme's code. Usually the instructions will have a link to an external source like pastebin, where the code's text will be stored.
8. Paste the code in your Custom Layout box.
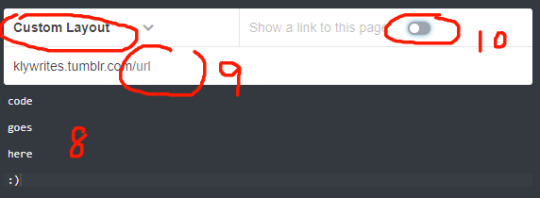

9. Give your page a URL.
10. If you want, you can click the slider to Show a link to this page. If you enable it, a link to the page will appear on your homepage. In this case, give it a title.
Alternatively, you might be using a custom main theme and don't want the link to show up in its default way on your homepage because you would rather play around with the custom code. Or perhaps you want the page to be "secret" (e.g., it's available, but not ready to be shown). Or you might have minor pages and it doesn't really matter to you if people can find it or not. A page could be entirely just for you. In that case, disable Show a link to this page.

You can click Update Preview to see how the page will look. This will show on the right side.

12. When you're done, click Save.
Note 1: The preview isn't always accurate due to spacing constraints so I recommend having your new page open in another tab. (You must save it initially otherwise it won't exist.) So any time you make changes, save your code and see how it looks in another tab.
Edit code > save > open new tab > type in URL of your new page. Any time you make changes, refresh if changes don't show immediately.
Update Preview is good though for minor edits like font colour.
Note 2: If you exit custom theme editing, you will lose prior progress. So remember to save! But sometimes you don't know if you want to keep the changes you made. That's another reason I recommend having your new custom page open in a separate tab. If you exit custom theme, you won't be able to restore previous saves in the event you decide you actually prefer some previous changes. If you keep editing open, you can freely undo (ctrl+z) any changes you made and save when you're happy.
Congratulations you have added a page to your blog and given it a custom theme!
If you're unable to create/save a custom theme and you get the dumb javascript message (“Looks like you’re trying to add some Javascript or invalid html to your page. You’ll need to contact Support if you’d like to use Javascript.”) go here on how to fix that.
45 notes
·
View notes
Text
Sneak Peek (HR Nightmare Ch4)
Hi everyone! I know this is long-awaited, but Chapter 4 of HR Nightmare is finally complete and officially posted to my Patreon.
Here's the link to Story Time Patreon if you're interested.
Also, here is a link to each chapter of HR Nightmare, if you haven't read them yet or just need some refreshing.
Chapter 1: Perpetually Late
Chapter 2: First Night at Freddy's
Chapter 3: Watching Paint Dry
Chapter 4 will be posted here eventually, but for now, here is a preview of what's to come:
________
HR Nightmare (4)
Mr. Cooper told me you left the office early for a meeting. I was wondering if I would be able to send you the finished designs to critique and approve of.
You stare at the message typed onto your phone, deciding to press send. It was unlikely you’d be able to come up with something better. Besides, you’re certain if you tried again, you’d end up sitting at the office for hours on end.
Waiting for your train home with your tablet and laptop placed in the bag hung over your shoulder, you feel your phone buzz.
Did you want to stop by my apartment?
Her text message stares back at you. Elle was inviting you into her home- the place she lives, cooks, sleeps, relaxes. You felt like you were being invited into a part of her life that you were not supposed to see.
You had expected her to tell you to simply email the pieces to her, but you should have known better by now. Her critiques and instructions were too detailed to go back and forth over email.
Sure! I’ll be there in 10, you respond.
You hop on your train, doing your best to remember how you got to her apartment after Freddy’s the first night you went. You remember to get off at the stop before your usual one, you remember to cross the street, and weave down a side street. You remember the way to her apartment much better than you should.
Your phone buzzes as you reach her apartment, her name lighting up your phone screen as if she could sense you were there. A text message telling you how to buzz into her apartment allows you to get into her place quickly. You take an elevator to the eighth floor and knock on the door she tells you to.
She opens the door, standing in front of you in nothing but a tank top, some sweatpants, and socks. You realize this is the first time you’ve seen her out of her work clothes. She looks softer this way- more relaxed.
“Well are you gonna come in or just stand there?”
#author#writing#girl things#stories#fiction#short stories#short story#shorts#storytime#story#original story#short story series#series#sneak peek#wlw relationship#wlw post#wlw#wlw love#sapphic#lesbian#bisexual#wlw story
8 notes
·
View notes
Note
Hey, i just raed yiur story Daddy’s Home and was flabbergasted 🥵
I have a question if you don’t mind me asking. How do you make the WC and the A/N, change to colour from bluish to gold/yellow?
Thank u and your writing is amazing 🤩🙌🏻🥵
⸜(。˃ ᵕ ˂ )⸝ ♡!! hihi angel, please don’t mind how atrociously late this reply is. but THANK YOU SO MUCH FOR THE LOVE ON DADDYS HOME 🫶🏽🤍 your energy is unmatched, and i can’t wait to try bringing it back onto my blog !! i love you times a million <333
i absolutely do NOT mind you asking abt the gradience, or any questions you may have for me ! the work itself is a bit tedious and hard,, but trust me. that gradient effect on any post is sooooo worth it. i’m gonna take you through what my process is, and in general how i play with the gradient text on my blog !!
.:☆*:・) FIRST (!!)— go to this site in the link.
this is my go to site for gradient text, and it’s pretty easy to maneuver. a lot of it is self explanatory, but i’ll go over it step by step !
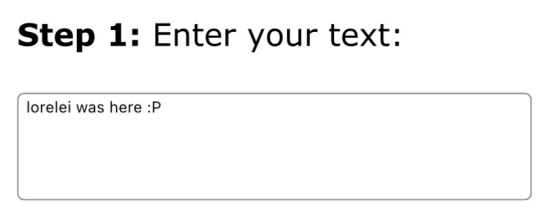
put in any text you’d like— BUT, don’t put any font text. because the code for the gradient can’t read it, so that kinda sucks.

where the blue text is highlighted, you can select whichever effect you want. usually i pick three colored, or middle bc i like how those look the best.
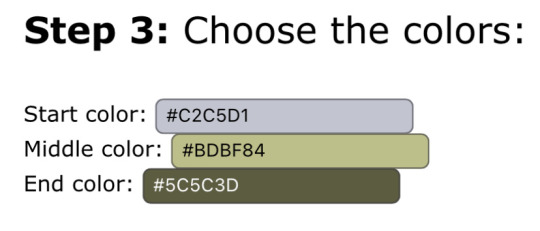
i cannot for the life of me remember which colors i chose for daddy’s home— BUT, if it was that blue-silvery w/ the gold,, im gonna assume it was these hex codes. usually when i pick my three colors, i go from lightest to darkest and kinda play around with it till i think it looks how my mind pictured it to be.

the cool thing abt this too is that as you work with your colors, you also get a preview of what your hex codes would look like. so you can always look back and forth between the preview and the color wheel !

THEN, make sure you copy this ENTIRE thing. if you’re doing it on mobile i suggest you tap wherever and just hit ‘select all’ if it prompts you to do so.
.:☆*:・) SECOND (!!)— go to this site in the link.
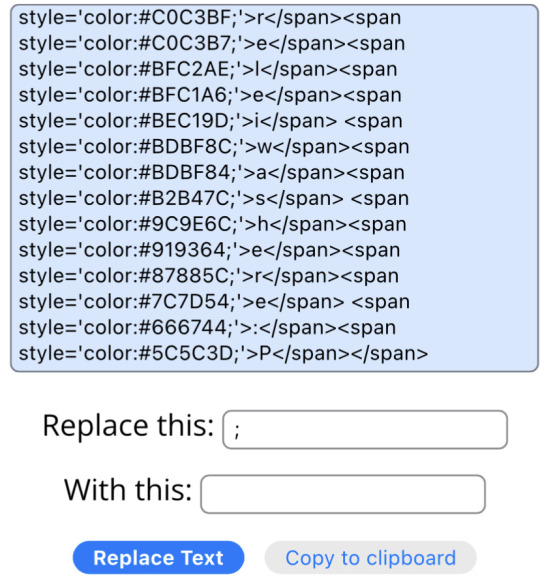
then you’re gonna paste that whole big code you copied, and paste it into what should be an empty blue box. once it’s pasted, where it says ‘replace this’ put a semicolon(;) in there. and where it says ‘with this’, leave it blank. after you do that, hit replace text and then you’re good ! make sure you copy what’s left in that blue box, bc you’re gonna need it.
.:☆*:・) THIRD (!!)— this part is where you have to either be on your computer, OR if you’re using the mobile site,, set it to the desktop view. you’ll have to refresh your page after you change it, that way your post will be compatible with the coding.
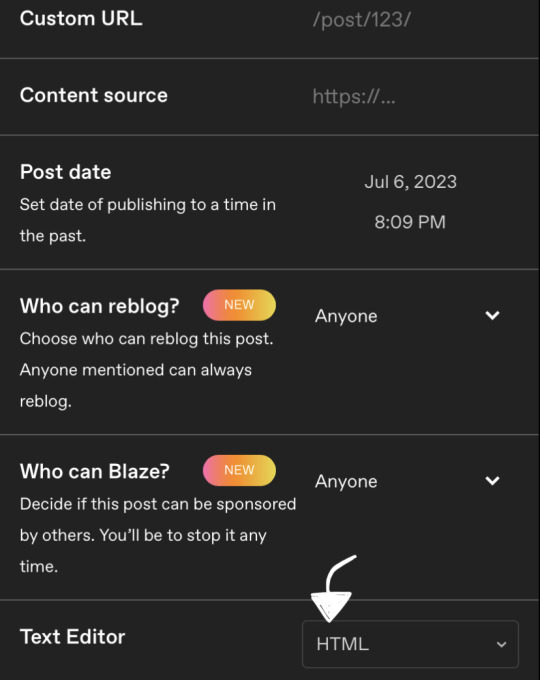
whatever your post is gonna be, click the cog wheel at the top right corner aka your post settings. once you get there, you should see this. and once you see it, go to text editor and change it to html.
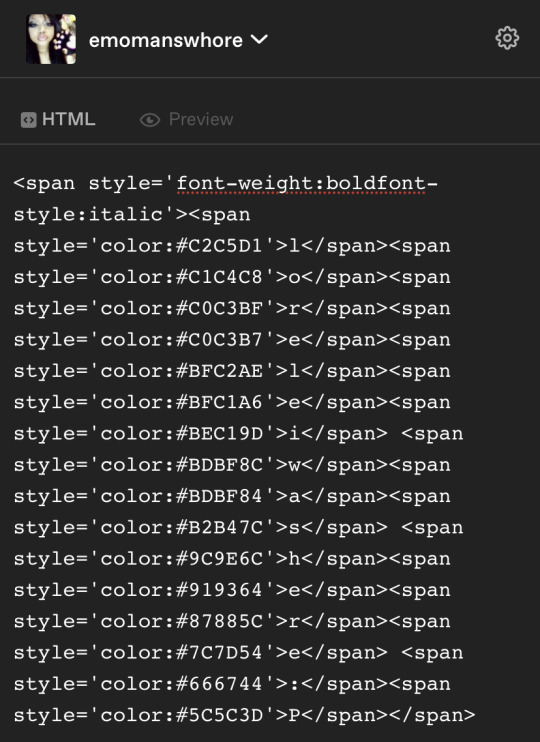
so then you just paste the coding into your post.

then voila !! you’ll see a preview of your text, and it should look like that exactly. thennn, you tweak it to your liking. and that’s how i made the gradient text for daddy’s home (^⩌^) !!
i wanna preface that this tut isn’t MINE. i learned a lot of this from the og, who i’m linking here just incase you need a more in-depth tut or i missed anything. like i said, it’s suppopeerrr tedious and long especially if you’re like me and you’re a perfectionist :’) ,, but it’s worth it !! it’ll make your posts look soooo much prettier and attractive !
#❝ ✎ . . .𝗟𝗘𝗧𝗧𝗘𝗥𝗦𝟮𝗟𝗢𝗥𝗘𝗟𝗘𝗜—જ📩#AND IF I HAVENT EXPRESSED THIS ENOUGH !!#thank you sososooo much for the love on daddys home 🤍🫶🏽 hehe#yknow i rlly wanna know what i put into that fic#that SO MANY of y’all liked#either way i’m super grateful and happy that i get inquiries behind like the process of it
7 notes
·
View notes
Text

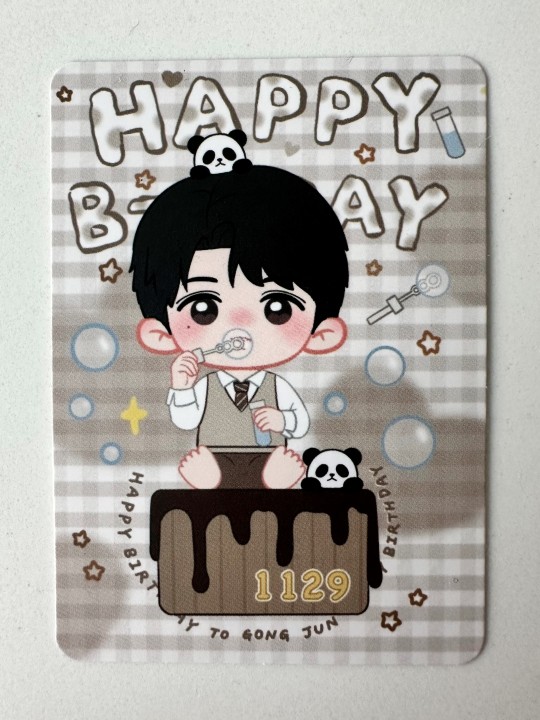
Happy Birthday Junjun - Chocolate Mousse
This set of 4 Happy Birthday figs arrived too late to help me celebrate Gong Jun's actual birthday, but they're just too cute not to share. We'll just be the first ones to wish Junjun happy birthday for this November!
I didn't know a lot of things about myself before I joined this fandom, but it turns out that I have a particular weakness for figs on cakes. Sounds odd to type it out like that, but something about putting a cute fig on top of a cute pastry just makes the MUST HAVE trigger fire in my brain. I must not be the only one, because there's more figs on cakes than just this set coming, equally sweet figthusiast, just you wait! (I can barely wait myself!)
This particular set was done as a collaboration between two fig makers - one maker did 3 (they were a little more experienced) and the second one did the last one. They were all sold individually, which was tough because the first three sold out immediately (yes, I had my finger over the buy button as the seconds counted down). The seller released a second pre-order round, which also sold out immediately. If folks weren't fast enough, they might have not been able to get all three, which is a huge bummer when it's all part of a set. The last one did not sell out, perhaps because people were less familiar with the seller, but is not any less cute.
The inspiration for this figure is Gong Jun's endorsement with BEAST for Panda Poo-poo. This advertisement was for a special Qixi set for 2022, and Junjun is wearing this beautiful brown suit:

Ahh that video refreshed my eyes and my heart.

All of these figs in this series are resin. He came carefully packaged in a cut out polystyrene box.

Thank goodness the two little baggies were on top, because I would have been horrified he lost his hand otherwise! I'm always so worried about breakage in handling or delivery, so if I just saw the fig first I would have thought he met with an unlucky accident. I was relieved that he just required some assembling:

I put a little Museum Wax in the wrist socket and the hand went in perfectly.

Since the fig and panda and cake are all independent of each other, there's a lot of fun posing options you can do with this set. I've seen this fig show up by himself in cute little fig dioramas posted by fans on Weibo.

I realized his hand is detachable because you can actually move it up and down, depending on how you want to pose him with the bubble he's blowing.

His little bare feet are so cute! Very sweet.

You can see how his hand has a smooth transition, you'd never know it was a separate piece.

Oops, I got a fuzz hanging out on the icing on his birthday cake. Didn't see that when I was setting up this pic!

Ooh you get a preview of the others with the box card art! Nice.
Ah I forgot. There were also a couple other individual birthday fig pastries sold. These two were Gong Jun's head in a Swiss roll, as you can see in the box pics there, but I have a personal aversion to disembodied figures of all kinds (including classical statues, so no offense Junjun), so that was a hard pass. If you're at all curious what those figs ended up looking like (they are something else in 3D, and no they do not make me feel any better) I have some pics from Xianyu I could add to further posts, but really only on request! 😅
Material: Resin
Fig Count: 186
Scene Count: 14
Rating: Bubbly and beautiful (early) happy birthday wishes!
[link back to Master Fig Index for more posts]
#gong jun#word of honor cast#shl cast#figthusiast#happy birthday gong jun#never too early to wish someone many happy returns#happy birthday to everyone with january birthdays
4 notes
·
View notes
Text
[since we've come back here full time, we've noticed that the trend of having a pinned information post (or several, even) has migrated over from twitter. it's not bad, not at all! just interesting.]
[that was very well, as far as we could tell, borne out of necessity; twitter doesn't give you much space for your bio, after all (heck, we can't fit all of our girlfriends' @'s on it along side our info, and I don't mention this to brag or anything. )]
[tumblr, though... I'm not sure we've ever hit a character limit on our bio? even after updating it to fit everyones' names, pronouns, a short description for each member, the works. and all the silly little html stuff that you can't even see on mobile or the desktop page preview!]
[and even aside from that, I think folk used to more often have an "about me" button or something of the sort, which would link to that information (though I forget if those were regular text posts or what, honestly.)]
[and again, we don't find that this being a thing is bad or wrong in any way. it's just fun to note a shift that's happened over the years.]
[,..also, mobile tumblr doesn't seem to like us trying to refresh on folks' profiles, so if you have any "before you follow" content pinned, we might not be able to see it until we can get to desktop. I'm kind of hoping this is just an us problem that'll get fixed by next update.]
2 notes
·
View notes
Text
Macro excel

#Macro excel how to
#Macro excel download
#Macro excel crack
Since we like our data to be nice and tidy, we’ll convert all email addresses into lower case. Some customers enter their address in all caps ( ), some in lower case ( ), and some in proper case ( ). Since the customers enter their information online, the email addresses are inconsistent. The first task is to clean up the email address column. The preview just shows what our data will look like when it arrives in Excel. The source data, in our case the CSV file, is left unaltered. Now, it is time to clean up, or transform, our data.īefore we jump in, it is important to realize that the following transformations are done inside of Excel, and are not being made to the source data. This opens the Query Editor dialog, as shown below. Since our data needs to be cleaned up a bit, we’ll click the Edit button. Once we do, we are presented with a dialog that allows us to preview a sample of the data, as shown below. This opens the Import Data dialog, where we simply browse to and select the CSV file.
Data > New Query > From File > From CSV.
To begin, we create a new workbook and then select the following Ribbon command:
#Macro excel download
Note: if you’d like to work along with these steps, feel free to download the sample data file using the link at the end of this post. But, if you are working with data in some other format, you’ll be glad to know that Get & Transform works with tons of data sources. We’ll retrieve orders from a CSV file that was exported from our ecommerce system. We’ll basically take the steps in the same order as the bullets above. Note: if you are working along in a version of Excel other than Excel 2016 for Windows, you may not have the Get & Transform tools, or, you may need to download the Power Query add-in. Sound like a tall order? It is easy these days.
Capitalize the first word of all other namesĪnd, we want to be able to refresh next month with a single click, or better yet, no click.
Put all email addresses into lower case.
Retrieve data into Excel from a CSV file.
Objectiveįor the purposes of this post, here is what we’d like to automate without a VBA macro: Best of all, modifications are easy to make when something changes. The good news is that a Get & Transform Query is an easy alternative to building such a VBA macro.
#Macro excel how to
It took some time to figure out how to resolve the issue, but, it felt great once we got it working again.
#Macro excel crack
Then, we would need to crack open the Visual Basic Editor and troubleshoot. Some type of change like this could break the macro. And life was good, until something in the data changed….like a new column. Yes, it was difficult to write initially, but, it felt great when we got it working. We basically need to clean up the data, remove some columns, change the headers, and so on.īack in the old days, we could automate such a task with a VBA macro that reformatted the data. Perhaps to import into another system, or perhaps to use in a PivotTable or formula-based report. We export data out of some system, and save it in a CSV file. In this post, we’ll see how a Get & Transform Query can be used as an alternative to a VBA macro. In previous versions of Excel, these capabilities were included in the Power Query Add-In. Excel 2016 includes a set of features called Get & Transform.
0 notes
Text
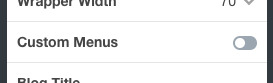
Q: How do I add another custom menu/link to the navigation?
1. After opening up your blog’s Customize editor, find ‘Custom Menus’ from the list of theme functions along the left side of the editor and make sure it is turned on. (It will be Blue if it is active, and grey if it’s inactive.)
2. Scroll back to the top of the editor page and click 'Edit HTML' to open up the theme's coding.
3. Click the gear in the top-left corner of the HTML editor and click 'Find and replace.'
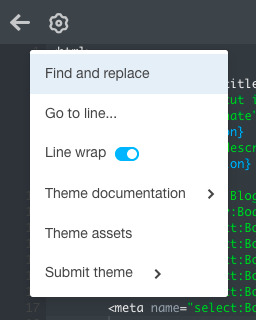
4. Type 'REPLACE' in the text box and hit your 'Enter' key on your keyboard. This should take you directly to where the coding is for your newly activated custom drop-down menu.


5. Replace the word ‘REPLACE’ with your own tags and then ‘Custom1,’ ‘Custom2,’ ‘Custom3′... etc with what you want the links to say. Here is an example:
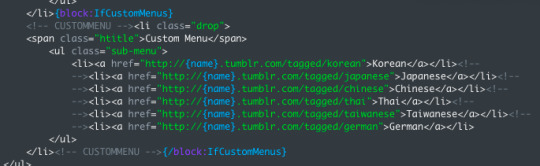
(Make sure that you do not erase any other text than this —unless you really know what you are doing— because you run the risk of damaging the theme and in turn causing it to break on you.)
If you would like to add another link to this drop-down menu, click your cursor at the end of the last “<li> ... </li>” line just before “</ul>” and hit your ‘Enter’ key on the keyboard. Add this line of text and replace the points of it I specified at the beginning of this step with your own information.
<li><a href="http://{name}.tumblr.com/tagged/REPLACE">Custom7</a></li>
You can do this as many times as you would like, but keey in mind that you are going to end up with a VERY long menu, so I personally would stick to 10 links at the most and then you can make a “more” link using this method and link to an endless amount of things in a devoted post or page.
6. If you wish to add an entirely new custom list (beyond the 1 default one that is already built into the theme for you to use if you should activite this feature) you can simply select the text from “<!-- CUSTOMMENU -->” to “<!-- CUSTOMMENU -->” and paste this same chunk of coding on the next line underneath. Doing this should appear as below if done correctly.

7. When you are finished adding your new menus/links, don’t forget to hit the ‘Update Preview’ and ‘Save’ buttons at the top-right of your editor before heading to your blog link, refreshing the page and enjoying your fancy new menus. :)

0 notes
Photo
Theme08: Inuyasha Kagome
A contained theme which based on accessibility
[STATIC PREVIEW] [INSTALL] [GUIDELINE]
Main Features
Responsive
Unlimited links
Unnested caption
NPF friendly
Popup navigation
Dark Mode
Semi-dyslexic friendly
Search bar
Custom cursor
To view the full features, kindly go to its static preview.
References
Please visit the credits section to view all the references.
Notes
All the accessibility options are only available at the destop version. The mobile version does not provide such accessibility.
Once the user has activated the dark mode, such mode shall remained the same until the user click the said button again to go back to its original version.
For dark mode, except for the dark mode accent and dark mode link post, other parts are not available for customisation. However, feel free to manually tweak it as I've already added comments for each section of the code.
The reasons why I said this theme is semi-dyslexic friendly are because:
The title headings for both the blog title and the posts will remain the same once the user change the font to Open-dyslexic.
Unlike dark mode, this option will not be permanent. Whenever the users would like to go to a different link or even to refresh the blog, the font shall change to its default option.
For custom cursor, if you do not want any custom cursor, simply omit the link. If you want to change the custom but do not know how, you can follow the second half this tutorial of mine.
I realised that there's a weird tooltip inside the static preview. Just ignore it as it will not appear unnecessarily inside your blog.
General terms and conditions apply.
Please like and reblog this post as a sign of support! You can also consider joining this survey to help me improve myself as a theme maker :)
#tumblr themes#tumblr theme#Inuyasha theme#kagome higurashi#inukago#inukag#blog#theme hunter#themesbyphantasyreign
400 notes
·
View notes
Text
Shingeki no Kyojin's Ending Interview (May 2021)
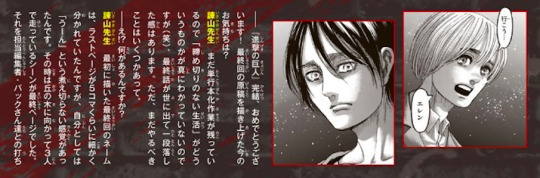
Translation commissioned by @goldsword07, DO NOT REPOST in full, always include credits and a link to this post if you use or share any parts of it.
Question: Congratulations on completing Shingeki no Kyojin’s serialization! How do you feel now that you have finished writing the final chapter?
Isayama: There’s still some work left to do when it comes to putting together the final manga volume*, so I don’t actually know how a “life without deadlines" feels like yet (laughs), but by publishing the final chapter, I feel like I can finally breathe again. However, there are still several things that need to be done.
(*Translator’s note: usually, putting together a volume includes: fixing drawing mistakes, sometimes even redrawing certain scenes if the author wasn’t satisfied with how they looked/their composition, fixing text (both wording or simply changing the Japanese characters used), drawing omake/extra pages, like the High School Caste fake previews, which usually take up 2 pages, and so on. So, of the 8 extra pages he mentions below, probably only 6 at max will be used to add new original story content.)
Q: What?! What else is there to be done?
Isayama: At first, the draft for the last page of the chapter was neatly divided into 5 panels, but I was feeling quite indecisive about it. At the time, that last page was a scene of 3 people running towards a tree on a hill. After having a meeting about that with Bakku-san and my other editors, I decided on a last-minute change, and I turned it into the one that is now published in Bessatsu Shonen Magazine. The limit for each printed chapter in Bessatsu Magazine was 51 pages, but since up to 8 extra pages can be added in manga volumes, I want to finish up everything that I couldn’t draw in the printed magazine and add it in the final manga volume.
Q: As for the serialization, which spanned 11 years and a half, have there been any changes about the way you think about mangas?
Isayama: Up until recently, I had drawn as if sexism wasn’t a thing, but when drawing the Marleyan military, which was comparatively more modern, if I had added, with no explanation whatsoever, female soldiers like I did for Paradis Island, it could’ve given the impression that Marley was quite a developed nation. It would’ve felt out of place. That’s why, as long as I was drawing a story set in an era of the past, I couldn’t draw female characters as part of the top brass of the military, because it would’ve meant acting as if there was no actual history of gender discrimination at the time.
It might be a story set in a fictitious world, but if you don’t connect it in some ways to the real world, it could end up becoming a story people cannot relate to.
Q: The unraveling of events that led to the final chapter has been quite shocking. Especially when it comes to Eren…
Isayama: I have been frenetically checking any and all reactions to that. There are as many honest opinions as there are people, and they’re all correct. With how I portrayed that part, it’s not so strange that it was interpreted as if Armin accepted the massacre. My portrayal was lacking. Armin didn’t approve of the despicable measures taken by Eren, but he ended up benefiting from the mass slaughter, regardless of his intentions. Armin, who couldn’t possibly understand Eren, faced their last farewell with a firm “Thank you for becoming a mass murderer for us”, essentially conveying how he himself was also an accomplice. He wanted to feel closer to Eren, even if just a little. I realized the final stage in particular had too difficult themes, and my portrayal was inadequate. I deeply regret that I wasn’t able to fully express them in the manga proper.
I’ve been drawing this manga for 11 years and a half, and when I completed the manuscript I truly believed that “everyone will be happy with this”. I was conceited. I apologize to those who have supported me until the end but have felt let down by the ending.

Q: During these 11 years and a half of serialization, have there been any memorable events?
Isayama: I’m happy that I could deepen the relationship with my assistants, as “manga friends”. When the serialization started, everyone was in their twenties, but now some of them are married and have even become parents, and we have become close family friends.
Q: Was the manga becoming an anime a memorable moment, too?
Isayama: The anime adaptation can certainly be considered another part of Shingeki no Kyojin. Lots of people got to know this story through watching the anime. Personally, it was refreshing for me too, as I could experience the story anew. In addition to that, the characters were taken out of my hands - in a good way - by the directors and voice actors, they began moving as independent “existences”. It was a first and interesting experience.
Q: Do you have a favorite scene?
Isayama: As far as drawings go, the scene I like the most is the one in chapter 104, “Victors”, when the Jaw Titan claws at the Attack Titan. Besides the fact that I feel like I can’t draw anything better than that, there also haven’t been that many action scenes with titans after chapter 104.
Q: Well then, what about your best chapter?
Isayama: One of them is chapter 71, “Bystander”. I feel like that chapter exceeded my abilities at the time. I like the way it doesn’t feel like “Shingeki no Kyojin”, as the spotlight was on the life of a single character who isn’t involved with the original story.
Q: Chapter 69, “Friends”, also depicts some characters’ personal life.
Isayama: I like that chapter, too! At the time of drawing its draft, I flattered myself with words such as “Uh? Aren’t I so mature?!”. Normally, I would draw the main story’s continuation, but in chapters 69 and 71’s case, it felt like I was drawing stories that were complete on their own.
Q: With the start of the Marley arc in chapter 91, “The other side of the ocean”, both titans and modern times’ weapons made an appearance in battle.
Isayama: That battle scene was the time I had the most fun while drawing mangas, I was in a state of total concentration and full energy.
Q: How has Shingeki no Kyojin been for you?
Isayama: It’s as if youth has come a bit late, a third of my life has been packed into this work. …Of course, there have been hard times, too, but it’s been a chapter of my life that normally you wouldn’t be able to experience and even now I struggle to think it was real. Although I’ve been spoiled by my readers, I had planned to draw all the while accepting even harsh opinions.
Q: Finally, a message to the readers, please!
Isayama: Through Shingeki no Kyojin, I could connect with an unfathomable number of people. I’ve been happy to share this time of my life with my readers, which is something that, if I had had a normal life, I would have never experienced.
Also, now that the serialization is over, I have been freed, so I want to stroll around a small city with a can of One Cup sake in one hand. That’s what I would call freedom.

#shingeki no kyojin#isayama hajime#armin arlert#eren yeager#snk official#snk translations#vivitranslates#snk spoilers
161 notes
·
View notes
Text
Something to share before the end of 2021! 😊🎉🤩
Instagram's Best/Top 9
Here's all 9 of my top posts on Instagram. And what do you know, Hogwarts Mystery practically takes up 6 boxes in this collage 🙃
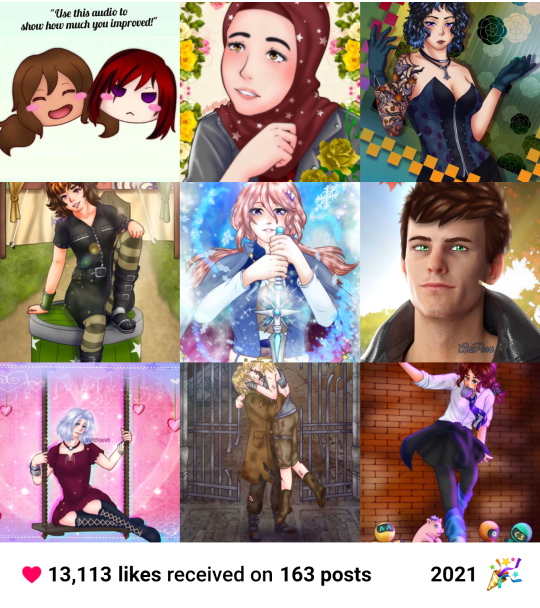
Art Summary of 2021
And here's my art summary for the year! Would you look at that! I actually made content for other things 😅
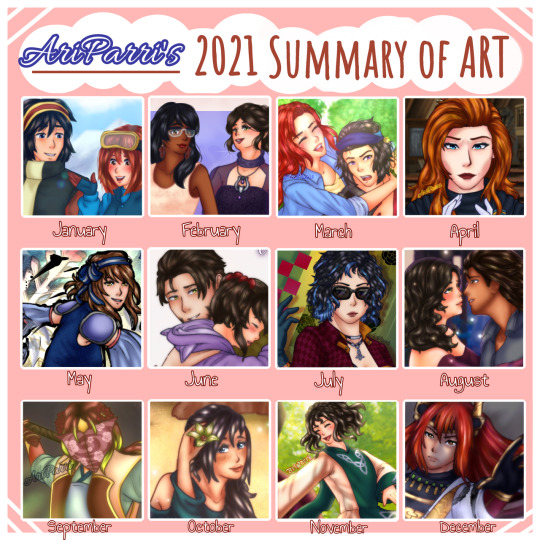
In Jaunary, I got back into W.I.T.C.H. and made some fanart for it. I also started working on some content aside from HPHM during that month... but ah, I went straight back to it in February 😅
And then throughout March to April, I was still stuck in that Hogwarts Mystery phase. It wasn't until May was when I put my focus on other OCs of mine from games and anime. Even if it was only for a little bit. I was glad I started on my old Bleach OC, Haruna. Then of course, back to HPHM in June!
Not much else to say other than, June had HPHM content, and July I went back to other OCs and fanart. I created a concept for my JJK OC, Takara (preview image in the summary). I also went back to my Bleach OC and made some more content for Haruna for the mobile game Bleach Brave Souls. I haven't played since July, and I need to get back into it.
August of course went back into HPHM. And September started with real content for my Genshin OCs! It was honestly refreshing getting into some other fandom. And in October was the start to my obsession with another mobile game, Harvest Town. In that month, I started sharing some info and content about my HT OC, Teegan Holt. Novermber of course went back to Hogwarts Mystery, especially with this drawing highlighting the traditions Veruca and Carson celebrate in their cultures. And last December! Nothing much really going on this month, I haven't really been in the mood to make anything lately. Though I am more content in making other fandom stuff compared to HPHM and other HP content.
But oh my god! I said I was gonna take a break so why are ideas only NOW coming to me! I just saw a reel perfect for Carson and Tulip but I must stick to my break!!!!!!!!
Here's the links to each post!
January | February | March | April | May | June | July | August | September | October | November | December
Art Vs Artist
I won't ever be sharing pictures of me on this platform ever, so don't bother asking for any 😅 I don't like my face
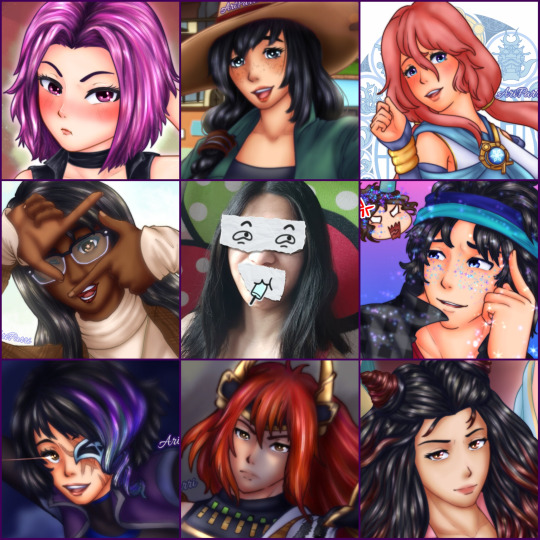
Oh my god I just realized! All my OCs, but Juria in the bottom right, are characters I made for games 😆 Of course there's the fanart of Rowan and Ella in the mix.
#ariparri#art vs artist#art summary#art summary 2021#artwork#original character#fanart#just ari things#harvest town#harvesttown#hogwarts mystery#overwatch oc#samurai warriors#genshin impact oc#rowan khanna#hphm mc
17 notes
·
View notes
Text
pacific rim!au — preview
word count: 126
summary: megumi, for reasons he himself doesn't understand, is incapable of drifting with anyone. as far as co-pilot candidates goes, his options are limited to two: gojo, who brings absolutely nothing, no memories, no dreams, no regrets, into the drift; yuji, who wears his heart on his sleeve and is drift compatible with everyone.
and even then, it looks like a lost cause.but things have been strange since the itadori siblings were recruited; they were an odd pair. one can rip through a jaeger's chassis like it was nothing, the other could breathe bloodmist* like it was normal air. things have been... different. and who knows?maybe megumi will be able to overcome whatever is terrorising him. he hasn't felt this optimistic in a long time.
this your obligatory pacific rim au fushiita/itafushi. just? drifting as a concept is already?? and megumi who is only compatible with yuji???
the au/concept has probably been done before... idk, but! i wanted to write this, and if it interests you to read it, then that makes me happy! :)
crossposted from my ao3 & will try to update weekly!! :)
a/n: just a small teaser of this series i'm planning. dunno how much of it i'll write for, but i'll keep writing and try to remind myself to post while i remain inspired :)
comments will be greatly appreciated—is this a bad fic? an ok one? is the idea promising or interesting at all? let me know!
oh, and!! i included definitions for terms that are from the pacific rim universe at the bottom of the fic, in case some of you have never seen it/need a refresher.
heads-up
i write dialogues in what i will call the french/european system? anyway, i see that it's not the dialogue formatting that most english readers are accustomed to so i modified it slightly to be easier to understand.
basically dialogues will be within guillemets (« »), and words that are within the quotation marks but are italicised are actions and/or dialogue verbs.
oh that's right, sometimes, a new sentence will begin with an en-dash (–), which means that it's a different speaker.
hope that clears things out a bit and i hope you give me and my fic a chance :)

« NO NEURAL HANDSHAKE* DETECTED »
the automated voice blared, announcing his failures to the world.
megumi brusquely removes his helmet, head pounding.
« NEURAL BRIDGE EXERCISE INVALID »
these trial runs always ended the same way. why does he bother at this point?
« DRIFT* SEQUENCE TERMINATED »
he’s ashamed. this fucking sucked.
« WOULD YOU LIKE TO TRY AGAIN? »
a part of him wants to say no.
« wanna have another go? »
he looks at his partner’s hopeful expression. if he can’t do it for himself, he’ll try for yuji. for yuji, and for her.
« mm. » he nods.
« ok! loccent*, we’re gonna give it another shot! » yuji relays to control, who gave him the go ahead.
ah, what a tiring and troublesome life he has, he laments, securing his headgear back on.
definitions
from summary:
bloodmist: when the body of a kaiju begins to decompose, its blood becomes a toxic vapor called bloodmist.
from preview:
neural handshake: the final process of the drift and a bind that enables the two pilots' minds to manipulate their jaeger's every movement.
drift: a process that two jaeger pilots undergo prior to synchronizing with the jaeger itself.
loccent: the communication center in the shatterdome responsible for the deployment of the jaegers.
LIKE MY WORK? CONSIDER BUYING ME A COFFEE // CHECKING OUT MY MASTERLIST | LINKS CAN BE FOUND ON MY DESC
#jujutsu kaisen#jujutsu kaisen fanfic#megumi x yuji#itadori x fushiguro#fushiita#itafushi#fushiguro megumi x itadori yuji#pacific rim#pacific rim au#falselywrites#just#the concept of drifting man#i have many ideas for this series#many thoughts head full#hope u will enjoy the ride with me#sort of slow burn#'sort of' because i'm not good at writing fics that are too long#slow burn any% speedrun
5 notes
·
View notes
Text
Tips and Tricks: How do I post to a fest collection?
Check-in mails went out to all our participants who are still working on their creations. If you haven’t heard from us, please message us at [email protected]
So how does posting to a fest collection work?!
Post your beta'd and completed work to the LCDrarry2021 fest collection on AO3. To do this, you can go directly to this link here:
https://archiveofourown.org/collections/LCDrarry2021/works/new
You can also just create a new draft like you normally would and add LCDrarry2021 in the “collection” field of the work header.
Add the AO3 mod account hd_lcdrarry_mod as a co-creator to your submission. This will allow us to set the posting date during the fest. After reveals on June 15, we'll remove the mod account again.
Choose all appropriate tags and information. Ensure that the HTML coding (for italics, bold, centered etc.) is correct on your submission. Images can be hosted directly on discord. Just upload the image to a private conversation or to your personal discord server (totally free) and copy the link to the image (which should end in something like .jpg or .png).
As long as your submission is still a draft, you can find it in your drafts on AO3. I don’t make this link clickable, because you need to have the URL with your own username ;-)
https://archiveofourown.org/users/YOUR-USERNAME/works/drafts
As soon as you post your work to the collection, it will disappear from your drafts and it won't show up in your works either because it is anonymous and unrevealed. You will only find your unrevealed fest work in your statistics:
https://archiveofourown.org/users/YOUR-USERNAME/stats
(Again, I don’t make this link clickable, because you need to have the URL with your own username ;-))
If you have trouble finding back to your draft/work, just drop us a line, we'll be notified by email as soon as someone adds a draft or work to the fest collection, and we can send you the direct link by email.
If you have to update your draft or your posted work, please use the buttons "preview" or "post" to see what your changes look like. Please don't use F5 or refresh -- this might create a new draft every time you press the button ;D If you are working with the "preview" button, don't forget to press the "post" button when you're happy with the result, so that your changes don't get lost.
Don't worry, you can still edit your work (correct typos, add tags, add chapters etc.), even after you've posted to the fest collection.
Once you have posted your submission to the collection on AO3, you will need to send your header information and the link to your work per email to [email protected]
You can find the header information (and all of this information here) in the check-in mail that we just sent out and in the fest rules.
If you have any questions, just drop us a line at [email protected] :))
4 notes
·
View notes
Text

𝐓𝐚𝐮𝐫𝐮𝐬 𝐌𝐚𝐲 𝟐𝟎𝟐𝟏 𝐀𝐬𝐭𝐫𝐨𝐥𝐨𝐠𝐲 𝐇𝐨𝐫𝐨𝐬𝐜𝐨𝐩𝐞
𝗢𝘃𝗲𝗿𝘃𝗶𝗲𝘄
Taurus this is ofcourse your time and your season. Time to be your unique self and reinvent yourself in the way you want to. With Uranus now in your sign till 2026, you are being prompted to live your own truth versus to complying to whats the norm. Wanting to break through the restriction of any past social boundaries that seemingly cage you, you would start this month on a note to not back down from what you now know of yourself. Pluto is empowering your belief in your life path and in your ability to take a leap, even prompting you to take one. It doesn’t want to you to live “small” in any sphere of you life so if your expansive mindset is being made to be “small” in any setting, its pushing to go through rebirth there. We are here to establish our own truth and you certainly start this month pumped to establish yours. Happy Birthday and a very happy & dynamic new season of breakthroughs to all of you.
May 2021 Overview for all signs
𝕂𝕖𝕪 𝔻𝕒𝕥𝕖𝕤
𝟚𝟟 𝔸𝕡𝕣𝕚𝕝 𝕥𝕠 𝟙𝟙 𝕄𝕒𝕪 : 𝔽𝕦𝕝𝕝 𝕄𝕠𝕠𝕟 𝕚𝕟 𝕊𝕔𝕠𝕣𝕡𝕚𝕠 𝟟º𝟘𝟞’
𝟚𝟟 𝔸𝕡𝕣𝕚𝕝 : ℙ𝕝𝕦𝕥𝕠 𝕣𝕖𝕥𝕣𝕠𝕘𝕣𝕒𝕕𝕖 𝟚𝟞º𝟜𝟠’ ℂ𝕒𝕡𝕣𝕚𝕔𝕠𝕣𝕟
𝟛𝟘 𝔸𝕡𝕣𝕚𝕝 : 𝕊𝕦𝕟 𝕔𝕠𝕟𝕛𝕦𝕟𝕔𝕥 𝕌𝕣𝕒𝕟𝕦𝕤 𝟙𝟘º𝟜𝟙’ 𝕋𝕒𝕦𝕣𝕦𝕤
𝟙𝟙 𝕄𝕒𝕪 𝕥𝕠 𝟚𝟞 𝕄𝕒𝕪 : ℕ𝕖𝕨 𝕄𝕠𝕠𝕟 𝕚𝕟 𝕋𝕒𝕦𝕣𝕦𝕤 𝟚𝟙º𝟙𝟠’
𝟙𝟛 𝕄𝕒𝕪 : 𝕁𝕦𝕡𝕚𝕥𝕖𝕣 𝕞𝕠𝕧𝕖𝕕 𝕚𝕟𝕥𝕠 ℙ𝕚𝕤𝕔𝕖𝕤
𝟙𝟘,𝟙𝟟,𝟛𝟙 𝕄𝕒𝕪 : ℕ𝕠𝕣𝕥𝕙 ℕ𝕠𝕕𝕖 𝕔𝕠𝕟𝕛𝕦𝕟𝕔𝕥 𝕄𝕖𝕣𝕔𝕦𝕣𝕪, 𝕍𝕖𝕟𝕦𝕤, 𝕊𝕦𝕟 𝕒𝕥 𝟙𝟘º𝟜𝟝’ 𝔾𝕖𝕞𝕚𝕟𝕚
𝟚𝟡 𝕄𝕒𝕪 : 𝕄𝕖𝕣𝕔𝕦𝕣𝕪 𝕘𝕠𝕖𝕤 𝕣𝕖𝕥𝕣𝕠𝕘𝕣𝕒𝕕𝕖 𝕒𝕥 𝟚𝟜º𝟜𝟛’ 𝔾𝕖𝕞𝕚𝕟𝕚
𝟚𝟛 𝕄𝕒𝕪 : 𝕊𝕒𝕥𝕦𝕣𝕟 𝕣𝕖𝕥𝕣𝕠𝕘𝕣𝕒𝕕𝕖 𝕒𝕥 𝟙𝟛º𝟛𝟙’
𝗗𝗲𝘁𝗮𝗶𝗹𝘀
Listen to the podcast
Watch it on YT
Read it on Medium
Entering the month, there might be an interaction with a partner, a client, a close contact, even a conflict with a critic, a power struggle which can prompt you to restructure your outlook about what you want to do and who you want to be know as or for. For Taurus rising,sun, moon around 7º or April born Taurus sun, it could be a closure or completion or a disclosure in a partnership which can prompt this. The end of April prompts a powerful shift where we transform and even heal through partnerships and others. It might not be a smooth ride but it gets us pumped to make the move. The brush with authority and bosses may not have been walk in the park.
From that place of transformation we are driven to cultivate a new identity. And this might have been in making for past 2-3 years. There is an urge to build, buy, invest, plant a new life. Your normal calm and cool charisma could be tad touchy at start of the month as someone has ruffled feathers. You would assert your needs, your autonomy, your emotions as its time to put yourself first. You are starting a fresh personal cycle on your terms. Time to do something entirely new. And it’s not just what you do, your creative ideas, your looks, your choices will go through a brilliant refresh.
Uranus in Taurus does bring the rebel out in you, you become an agent of change as well as an agent of provocation per the conservatives and traditional. Revel in your unique brilliance and use this month to nurture that bright light that recent events have lit in you even though through friction. Tech, innovation, creative breakthroughs, offbeat projects, ahead of time ideas, different creative choices, unique looks, rebel against whats not fair - are all ways to express this energy. And this does change who are your partners, clients and how you connect one on one with others. The more you try to tell yourself everything is the same, the more stark external expressions of you tell you they are not and will not be.
With Saturn in your house of authority, you could feel you are paying off some sort of karma to authorities, to father figure or to your external identity. Your urge to break free conflicts with these rules and expectations especially for around 11º-13º Taurus rising, sun, moon which is around end April and early May born. This conflict would become louder as month progresses and we move to June. I covered this is details in your 2021 horoscope as its the key theme of breakthrough especially for your sign this year. Do review that as that aspect is activated for the second time, becoming exact on 14th June. Reaching certain peak of your career over this and next year is possible but it would not come without this fight between the old and new. When you reach the peak you want to be sure it’s the right summit you are on.
Saturn Square Uranus 2021 for ♉️
The three chance meetings of 10th, 17th and 31st May that I referenced in part 1 is bringing some sort of fated information on assets, money and skills that become valuable. As you look to reinvent yourself, like a true Taurian you are looking at the financial aspect of it too. There could be some important information in these fated encounters. You would also be driven to find the ways to get more financial abundance, getting more confidence in your skills, looking to cultivate your skills further, looking to become financially independent. In this process it would be helpful to keep in mind that you are being prompted not just to get the ground ready to be independent as Rahu or North Node comes into your sign in 2022 after 19 years, you are also being prompted to release old opinions of others. The thoughts of others and their belief, even their thoughts of you, block you more than you know.
Invest into your skills by taking courses, invest in the assets and you would feel supported in some ways - you might even get guidance from someone experienced on these dates and they are good time to gain support.
Do not become part of someone else’s reality. People’s opinion of what is good for you, is the last thing you want right now. But if there are people who have walked a similar path as you, learn from their practical experiences.
As Mercury would be in shadow post 14th May and would be going retrograde after 29th May in your finances house, it would be best to be careful of investment and documentation with financial underpinning after 14th. They might need review during 29th May to 22nd June period. This could also be a period when some misunderstanding on finances or ego issues could come to surface especially in June and end of month. Words have power and impact - for you financial impact remember that. You might by your own wish might decide to leave some sort of financial support from another as you want that karma to be done.
Month end Saturn retrograde would prompt some structuring changes in your career and relationship with authority and father figure. Healthy boundaries.
Let’s talk of the good news, Jupiter is moving into Pisces on 13th May staying till 28th July and will come for a longer transit in 2022. I spoke of it in details in March, which I will link below but its a fantastic time to grow your big wealth ideas, vision and friend circle. It’s just a preview but I think this would give you some relief from the harshness of the hard aspects that you have been experiencing. This is a great sign and placement of Jupiter and it brings opportunities of expansion in our popularity, social influence, network, friends and wealth from these endeavours.
Jupiter transit for ♉️
If the new moon of 11th May falls on your birthday or 2-3 days around or if you have your rising / sun / moon around 21º Taurus , this could be a very pivotal year for you and new start would have long term support.
In the seemingly benign moments, your new life begins !
#astrology#horoscope#zodiac#freehoroscope#taurus#Taurus may 2021#taurus horoscope#taurus astrology horoscope#taurus man#Taurus woman#taurus baby#may 2021 astrology#may 2021 horoscope#june 2021 astrology#june 2021 horoscope#taurus June 2021#solar eclipse june 2021#lunar eclipse may 2021#new moon#full moon#taurus career#taurus astrology#taurus daily horoscope#taurus boy#taurus girl#mercury retrograde#Saturn retrograde 2021#saturn square uranus 2021#Jupiter in pisces#taurus moon
2 notes
·
View notes
Text
After Effects Cc 2014 Mac Download

(UPDATE: Be sure to install the After Effects CC 2014.1.1 (13.1.1) bug-fix update.)
After Effects Cc 2014 Mac Download Crack
After Effects Cc 2014 Mac Download Free
After Effects CC 2014.1 (13.1) is available.
If you have a Creative Cloud membership, you always have access to the latest version of After Effects. You can install this update by choosing Help > Updates within any Adobe application or by opening the Creative Cloud desktop application. Go to the Creative Cloud site to download applications or to sign up for Creative Cloud.
Download Adobe After Effects CC for Mac Free. It is full Latest Version setup of Adobe After Effects CC Premium Pro DMG for Apple Macbook OS X. Brief Overview of Adobe After Effects CC for Mac OS X Adobe After Effects CC for Mac is an impressive and powerful application which will let you create professional looking photos and render 3D. Download the After Effects CC 2014 Plug-in SDK Macintosh or Windows The After Effects CC 2014 Plug-in Software Development Kit contains headers defining the After Effects Plug-in APIs, sample projects demonstrating integration features, and the SDK Guide documentation.
For more information about Creative Cloud, see this overview video and the Creative Cloud FAQ list.
For information about updates for all of our professional video and audio applications, see this page.
For details of what was new in After Effects CC 2014 (13.0), see this page.
Please, if you want to ask questions about these new and changed features, come on over to the After Effects user-to-user forum. That’s the best place for questions (and, if you follow that link, you’ll find more information about how to communicate with us). Questions left in comments on a blog post are much harder to work with; the blog comment system just isn’t set up for conversations. If you’d like to submit feature requests (or bug reports), you can do so here.
top new features for After Effects CC 2014.1 (13.1)
high-DPI content and UI (Mac OS, Windows)
refreshed user interface design
Copy With Relative Property Links command
color management for Dynamic Link
Adobe Anywhere for Video improvements
Maxon Cinema 4D Lite R16 and Cineware 2.0
Collect Files for Cinema 4D assets
native GoPro CineForm codecs
scripting improvements for text layers
improved Adobe Media Encoder watch folders
mocha AE CC 2014, based on mocha 4.0
many bug fixes
details of all new and changed features in After Effects CC 2014.1 (13.1)
Here is a virtually comprehensive list of changes, with detail beyond the summaries of the top items listed above. We’ll be posting a lot more detail over the coming weeks, and the outline below will be populated with links to in-depth articles and tutorials, so bookmark this page and check back.
high-resolution (high DPI) content viewers and user interface elements on Mac OS and Windows
After Effects CC 2014.1 (13.1) displays content and user interface items at the appropriate resolution on high-resolution displays (sometimes called “high-DPI” or “HiDPI”) on both Windows and Mac OS. This makes After Effects easier to use on high-pixel-density monitors, like Apple Retina displays and Microsoft Surface Pro devices.
In content viewers, After Effects will take advantage of the pixel density of the display to show each pixel of content in a viewer as a single pixel on the display. This affects the contents of the Footage panel, Layer panel, and Composition panel, including both your video content and some UI overlays and widgets within the content area.
Note that for a given piece of content to appear the same on a high-DPI display as on a non-high-DPI display, the zoom value for the former needs to be twice that of the latter, since the points are half the size. If you drag a panel from a high-DPI display to a non-high-DPI display, you’ll see the zoom value change, while the content occupies the same space on the screen.
User interface elements such as icons, text labels, pointers, buttons, etc. will now scale according the operating system display DPI setting. Mac OS computers with a Retina display will scale to 200%. Windows computers with a high-DPI display will scale to 150% or 200%.
refreshed user interface design
The user interface (UI) of After Effects, as well as Premiere Pro and other Adobe professional video and audio applications, has been updated with a new design. Pointers, icons, text, controllers, and button styles have all been refreshed.
The layout of the interface has not changed significantly, but some simplification has been made to panel functionality.
The icon for the panel menu has been moved from the upper-right corner of the panel to the panel tab, making the panel menu easier to discover.
The panel grabber and frame grabber icons have been removed; you can still drag panels using the panel tab.
The close button (x) has been removed from all panels except the Timeline, Composition, Layer, Footage, Effect Controls, and Flowchart panels. In these panels the close button has moved to the left side of the panel tab. To close a panel without the close button, open the panel menu or right-click on the panel tab and choose Close Panel, or use the keyboard shortcut, Command+W (Mac OS) or Ctrl+W (Windows).
The range of the Brightness slider in the Appearance preference category is more limited than in previous versions; there is no longer a “light” mode for the interface. The default brightness setting is darker than in previous versions.
Because some scripts that create ScriptUI panels have not been updated to accommodate the new user interface design, some of these scripts may appear wrong with the new UI skin. If this occurs with a script that you use, you can make an individual ScriptUI panel appear using the old UI skin by enabling the Use Legacy UI option in the panel menu for the ScriptUI panel.
Copy With Relative Property Links command
A new command in the Edit menu, Copy With Relative Property Links, works like the existing Copy With Property Links command, except that it creates expressions that do not reference the source composition by name. This maintains a relative link between the layer with the expression and the composition containing that layer. This can be useful when, for example, you want to move expression-rigged layers from one composition to another but let the layers reference a control layer only in the same composition. The expressions created using the Copy With Relative Property Links command are identical to those created using the expression pickwhip.
For copying a layer’s Position property, the result would be this:
thisComp.layer('control_layer').transform.position
The existing Copy With Property Links command will specifically reference the layer’s source composition in the expression:
comp('source_comp').layer('control_layer').transform.position
color management for Dynamic Link
When color management is enabled for an After Effects project, compositions viewed or rendered over Dynamic Link will be transformed using the HDTV (Rec. 709) color profile. This prevents color or gamma shifts in the appearance of these compositions in Premiere Pro and Adobe Media Encoder.
Dynamic Link always assumes that all incoming frames are in the HDTV (Rec. 709) color space. Prior to After Effects CC 2014.1 (13.1), compositions in a color-managed project were sent to Dynamic Link in the project’s working color space; they were not adjusted for Dynamic Link’s assumption of HDTV (Rec. 709). This mismatch resulted in a noticeable color or gamma shift when the project’s working color space was significantly different from HDTV (Rec. 709) or when Linearize Working Space was enabled.
In After Effects CC 2014.1 (13.1), a color transformation is applied to the composition as a last step before the images are passed to Dynamic Link for use in Premiere Pro or Adobe Media Encoder. This corrects the composition image to the color space used by Dynamic Link, similar to how the View > Enable Display Color Management option in After Effects corrects the image for your monitor.
Maxon Cineware 2.0 plug-in and CINEMA 4D Lite R16
After Effects Cc 2014 Mac Download Crack
After Effects CC 2014.1 (13.1) includes a version 2.0 of the Cineware plug-in, which serves as the primary interface for integration with Cinema 4D.
After Effects CC 2014.1 (13.1) also includes version R16 of Cinema 4D Lite, which provides several new features, such as the new Reflectance channel. (For details about each edition of Cinema 4D, see the Maxon website.)
John Dickinson summarizes the changes in Cineware 2.0 in a video on the Motionworks website.
Automatic Cineware effect settings synchronization: When adding multiple instances of a CINEMA 4D scene layer in a composition, including adding Multi-Pass layers, you will see an on/off checkbox at the top of the Effect Controls panel labeled Synchronize Layer. It is on by default, meaning that the Cineware effect settings on all instances of the layer will automatically synchronize. If this checkbox is disabled for a specific CINEMA 4D scene layer, then that layer’s settings will not synchronize with the rest of the layers in that composition. The Apply To All button from previous versions of Cineware has been removed.
Default Layer: The CINEMA 4D layers dialog box now shows a Default Layer option if the renderer supports it. Objects that have not been assigned to an explicit layer in the .c4d project file will be visible with Default Layer enabled.
Content Browser: When using a full retail version of CINEMA 4D R16 as the renderer, textures applied via installed content libs (.lib4d files) will render in After Effects using Cineware.
region of interest: If you use the region of interest feature in After Effects to constrain the preview to a subset of the frame, the Cineware effect will respect this setting and limit rendering to the area within the region of interest. This only applies when the Renderer control is set to Standard (Final).
Purge Memory: This option only works when the CINEMA 4D render path in Options is set to the default render server Cineware R16, or a full retail version of CINEMA 4D R16 or later. For complex scenes, the render server may use memory for internal caches. To free up that memory click “Purge Memory” in order to extend the length of previews in After Effects.
Collect Files for Cinema 4D assets
The Collect Files command in After Effects now collects assets associated with .c4d footage items, such as textures.
automatic encoding of compositions in After Effects project files in Adobe Media Encoder watch folders
If you place an After Effects project (.aep) file in a watch folder that is being monitored by Adobe Media Encoder, the compositions at the top level in the project (i.e., those not in folders in the Project panel) will automatically be added to the Adobe Media Encoder encoding queue.
For more information about what’s new and changed in Adobe Media Encoder CC 2014.1 (8.1), see this page.
native encoding and decoding of movies using GoPro CineForm codecs
After Effects, Premiere Pro, and Adobe Media Encoder can natively decode and encode QuickTime (.mov) files using the GoPro Cineform codecs on Mac OS and Windows, meaning that you do not need to install additional codecs to use and create such files.
At the higher quality settings, this codec is an excellent choice for intermediate files—i.e., files that you create from one application in a post-production pipeline to pass to the next application in the pipeline. Movie files encoded with the GoPro Cineform codec at the higher quality settings include an alpha channel.
To use the GoPro CineForm codec for output, choose QuickTime as the format in the Output Module Settings dialog box, click the Format Options button, and choose GoPro CineForm as the video codec.
For details about quality and pixel format settings for the GoPro CineForm codec, see this page.
scripting improvements for text layers
You can now read additional information through scripting about the font and style used in a text layer, including the location of the font file on disk.
The new read-only attributes for the textDocument object are these:
fontLocation: returns string with path of font file, providing its location on disk (not guaranteed to be returned for all font types; return value may be empty string for some kinds of fonts)
fontStyle: returns string with style information — e.g., “bold”, “italic”
fontFamily: returns a string with the name of the font family
The value returned is for the first character in the text layer at the current time.
mocha AE CC 2014, based on mocha 4.0
mocha AE has been updated to mocha AE CC 2014 (version 4.0.1). This is a major version update that includes compatibility with mocha Pro 4 project files. For details, see this page
miscellaneous new and changed features
The Anchor Point icon on selected layers has been enhanced for better contrast and visibility, and it is now easier to select and use.
The application title bar now shows the full path to the project file.
The Welcome Screen dialog box will automatically close when you open a project by double-clicking it in Finder or Explorer.
While tracking an effect mask, the mask mode no longer temporarily changes to None. This preserves the appearance of the masked effect during tracking.
The motion tracker (point tracker) no longer offers a pre-processing Blur control. This option never worked as designed.
There is now a Render And Replace command in Premiere Pro for replacing a Dynamic Link After Effects composition with a rendered movie.
Use the new Browse Add-ons command in the File menu to go to the new Adobe Exchange, from which you can download and install animation presets, scripts, template projects, et cetera.
The new Adobe Color Themes panel replaces the panel previously named “Adobe Kuler”. Choose Window > Extensions > Adobe Color Themes to open this panel.
a few choice bug fixes
We fixed a lot of bugs in this update. Here are a few that I think are especially worth calling out:
memory leak when scrubbing to preview audio
slow rendering of After Effects compositions used in Premiere Pro through Dynamic Link when the main After Effects application is open
errors when using the Create Stereo 3D Rig
errors when using and creating custom (pseudo) effects
mismatch in interpretation of layer bounds for imported .psd files in projects from previous versions of After Effects
incorrect rendering of vector objects from Photoshop
pixelation and and other problems with RED (.r3d) files
incorrect VRAM amount reported for some AMD GPUs on Mac OS
crash when copying and pasting layer styles from one layer to another
problems with effect eyedropper control
incorrect date when using Current Date option in Numbers effect
many other causes of crashes and errors
Summary of what’s fixed in the After Effects CC 2014.1.1 (13.1.1) update
If you applied an effect without properties or opened a project containing an effect without properties, then After Effects would give a long series of error messages: “After Effects error: internal verification failure, sorry! (unexpected match name searched for in group) ( 29 :: 0 )”. This bug is now fixed. Examples of effects that triggered this problem inlcude Knoll UnMult and BAO Mask Avenger.
Tooltips now appear correctly in the Timeline, Project, and Effect Controls panels.
The middle mouse button again works as expected for such purposes as activating the Hand tool in viewer panels, using the Unified Camera tool, or repositioning shape layers or masks.
Panels no longer flash red when resizing or rearranging panels.
The Graph Editor works correctly on Windows high-DPI systems. In the previous version (After Effects 13.1.0), clicks within the Graph Editor were registered in the wrong place on Windows high-DPI systems.
RED (.r3d) files no longer cause a 15-second delay when the resolution of the image being requested from the importer is less than 1/8. This could occur when the thumbnail was generated on import, when Adaptive Resolution was engaged, et cetera.
BridgeTalk is now set up correctly, so that scripting calls from ExtendScript Toolkit, Bridge, and Premiere Pro correctly target After Effects.
The installer cleans up stale components better, including updated Cinema 4D components.
Top new features for After Effects CC 2014.1 (13.1)
high-DPI content and UI (Mac OS, Windows)
refreshed user interface design
Copy With Relative Property Links command
color management for Dynamic Link
Adobe Anywhere for Video improvements
Maxon Cinema 4D Lite R16 and Cineware 2.0
Collect Files for Cinema 4D assets
native GoPro CineForm codecs
scripting improvements for text layers
improved Adobe Media Encoder watch folders
mocha AE CC 2014, based on mocha 4.0
many bug fixes
After Effects Cc 2014 Mac Download Free
1 note
·
View note
Last Seen Blogs

uglyimagines
uglyimagines

sei-la-mia-marijuana-blog
Sei la mia marijuana tu mi calmi

scriptorumuniversalis
scriptorumuniversalis

xchronicles2
Xenoblade 2 Lets Play! Weekday:4pm Weekend: 1-2pm

donnuttouch
Untitled