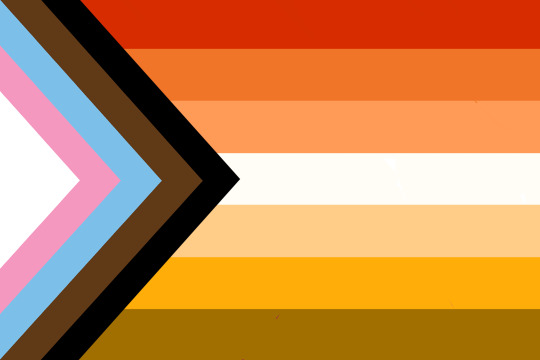
#progress pride flag
Text


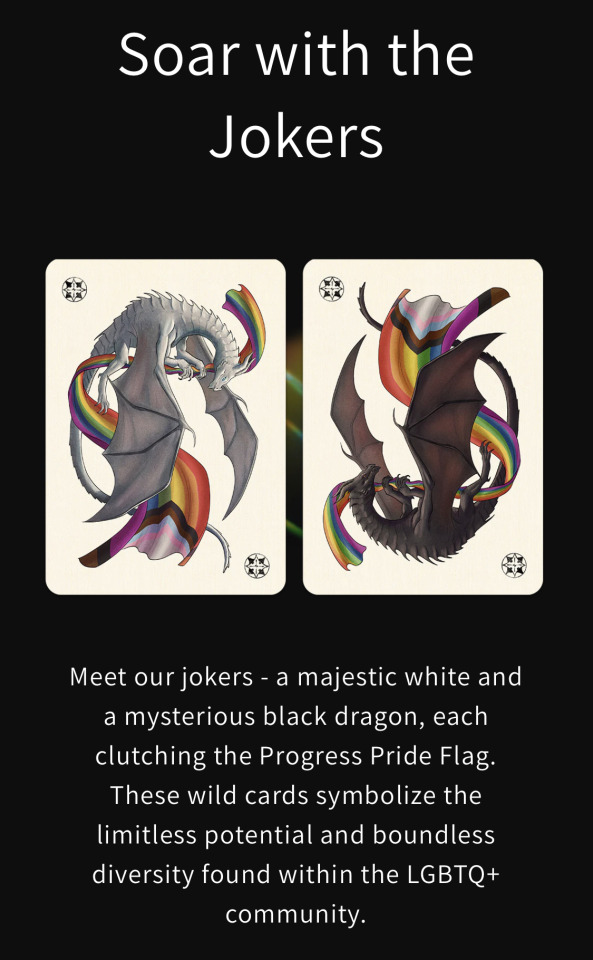
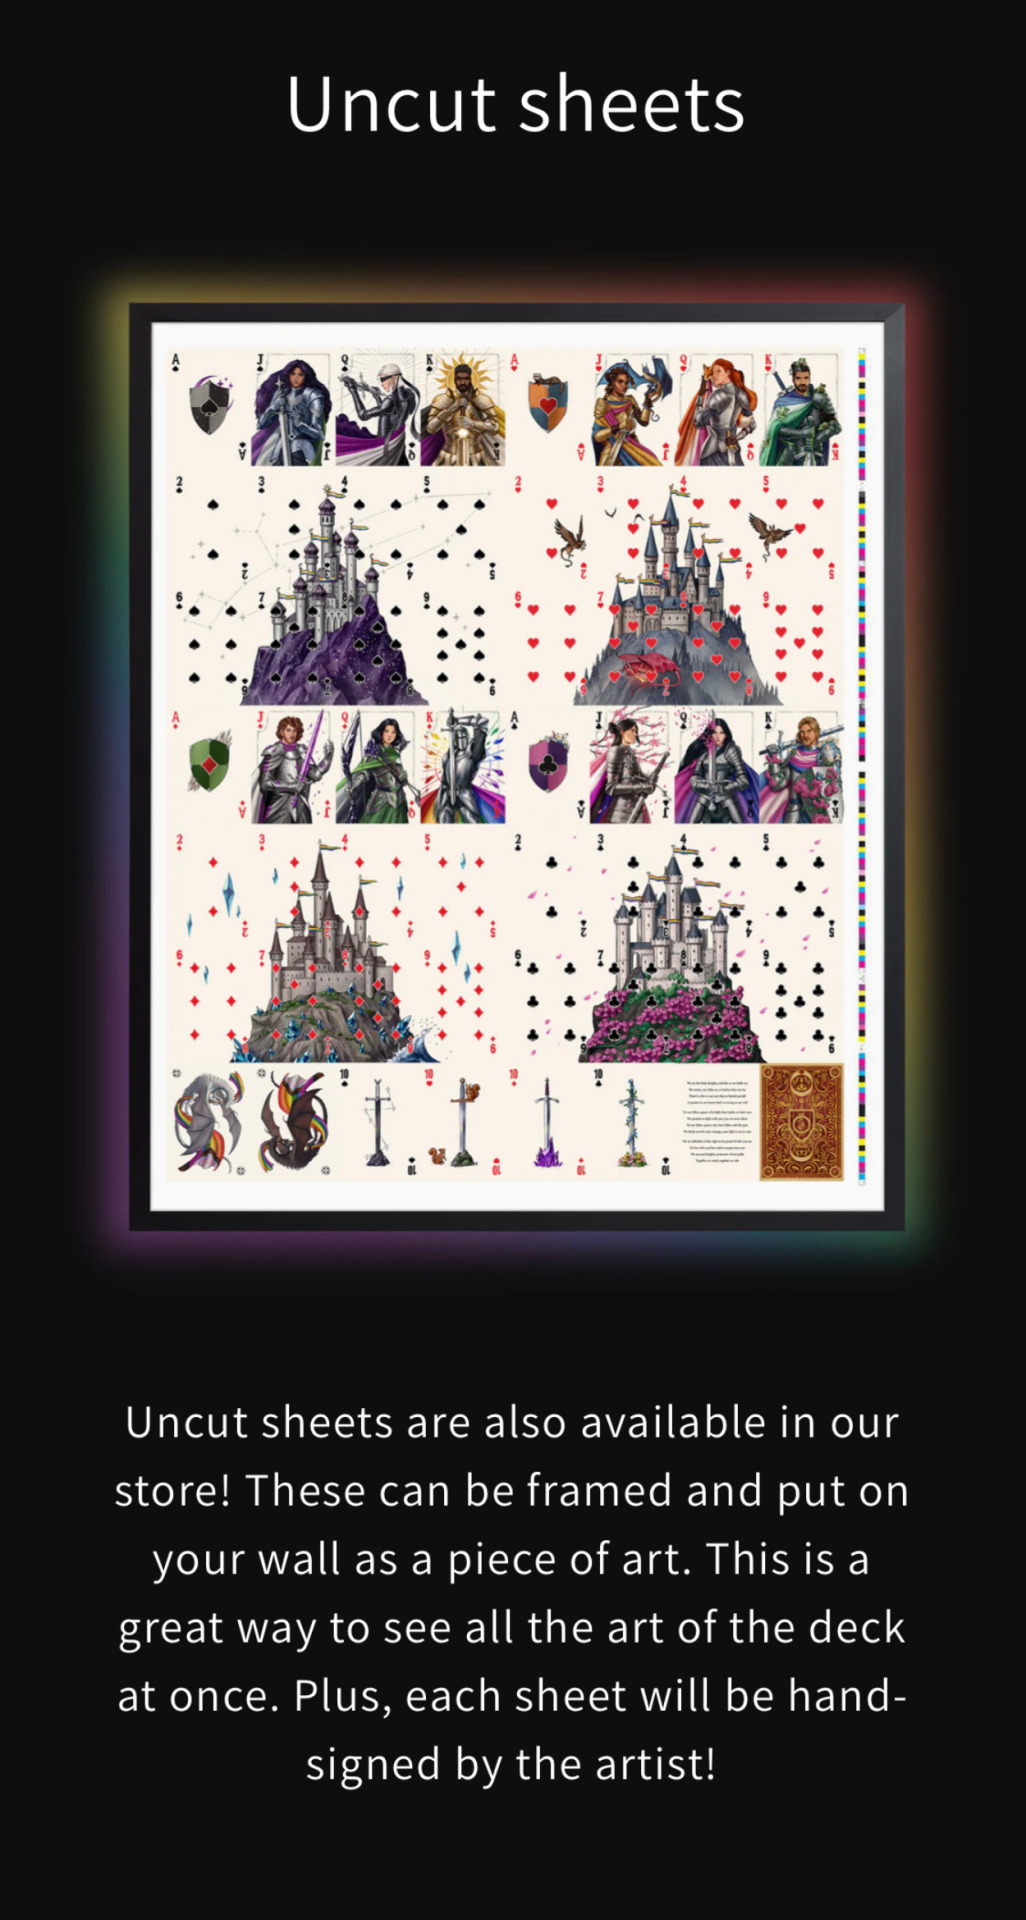
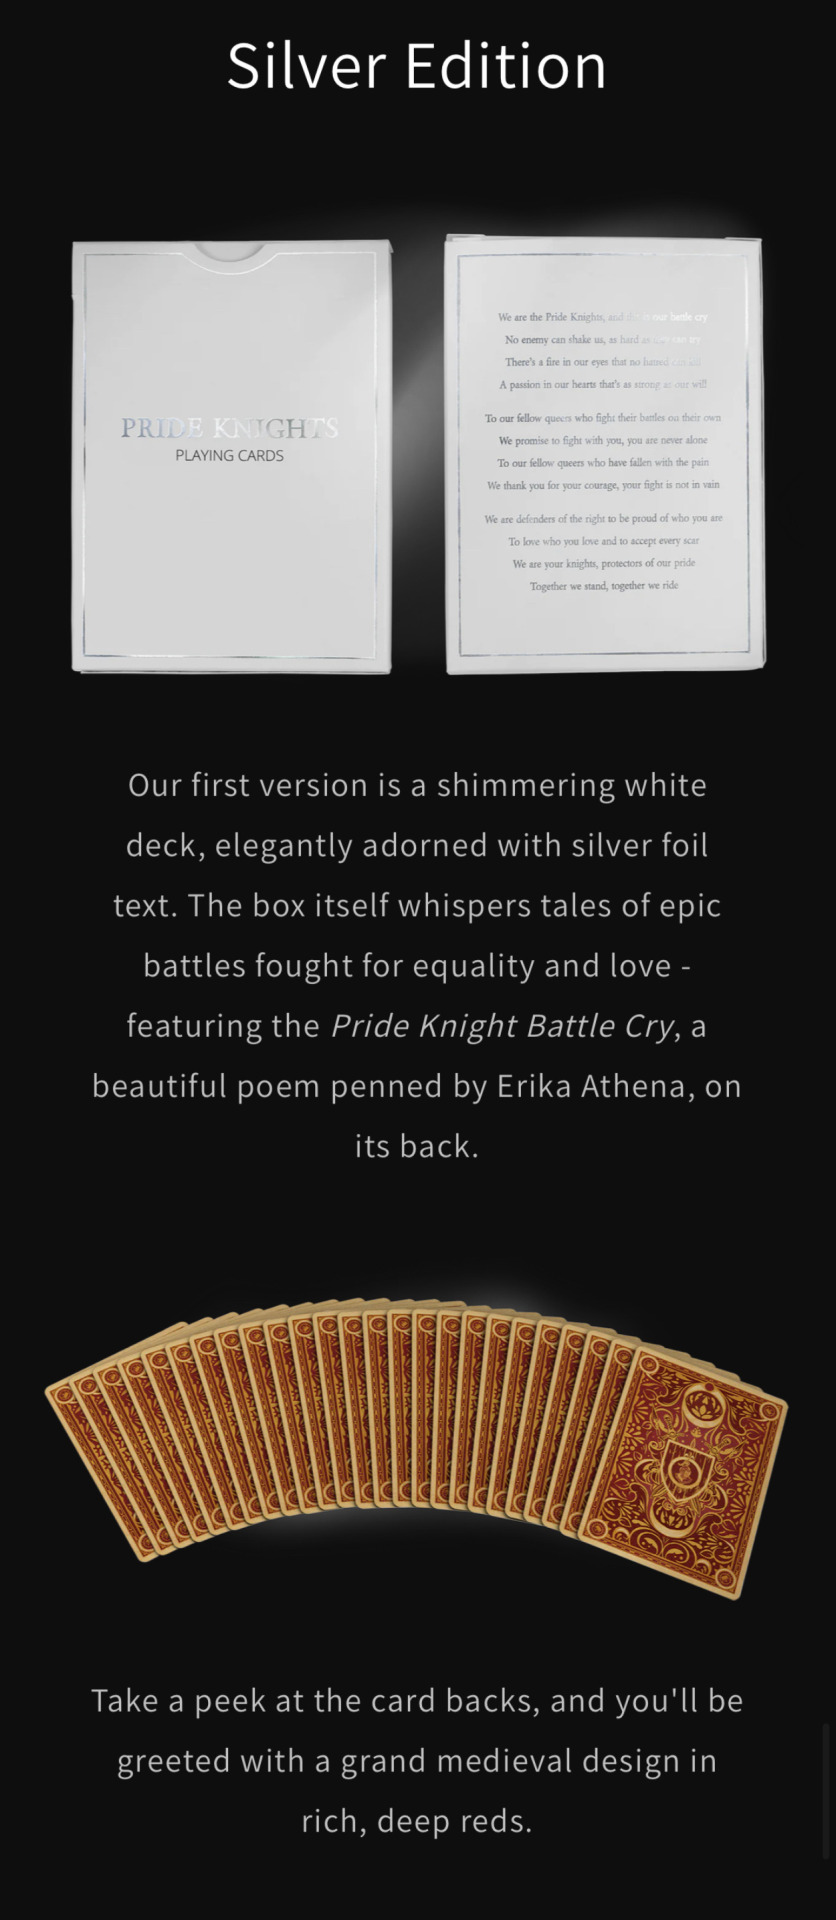
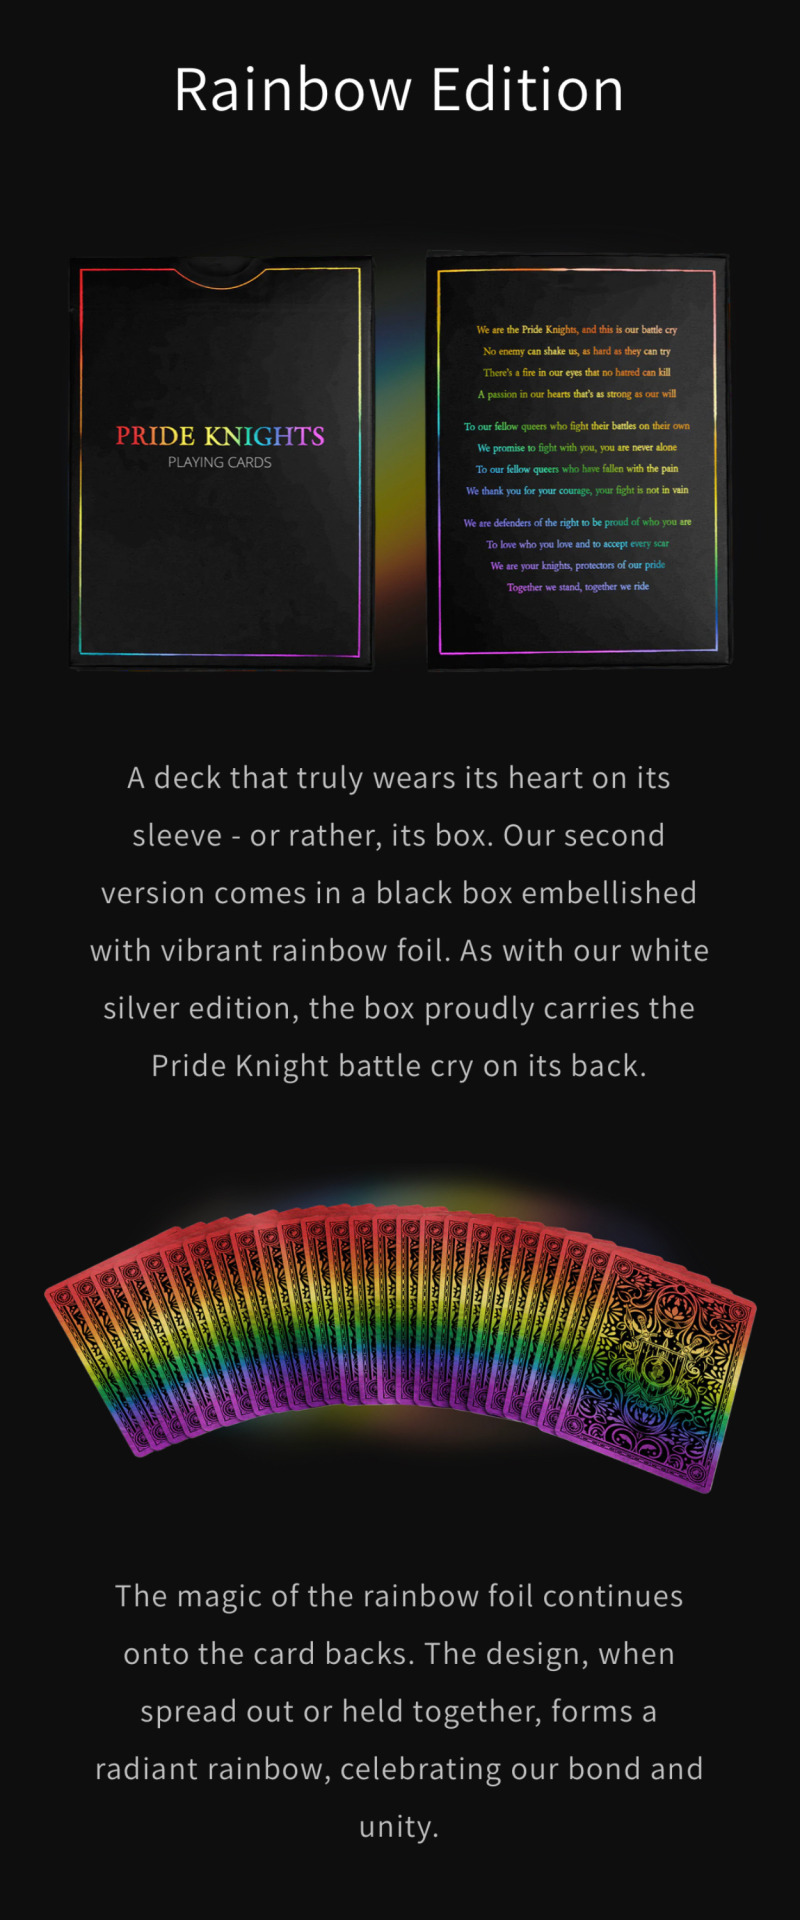
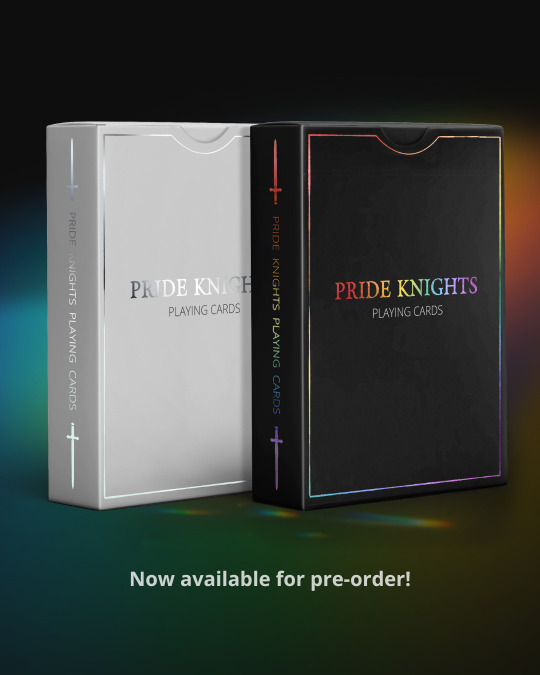
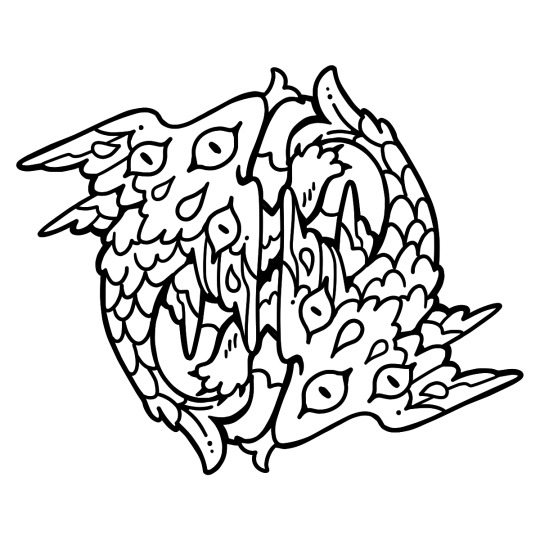
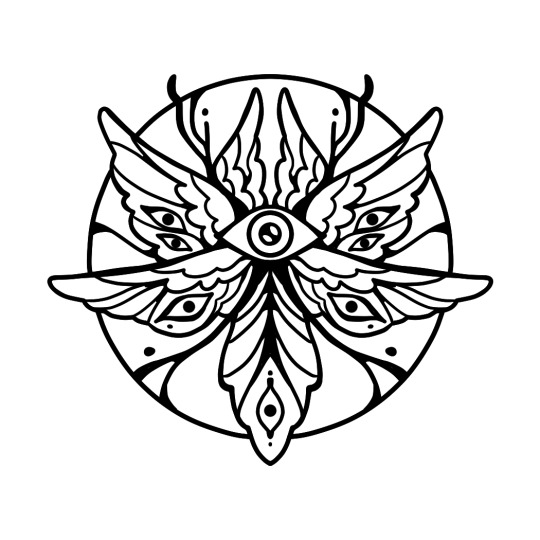
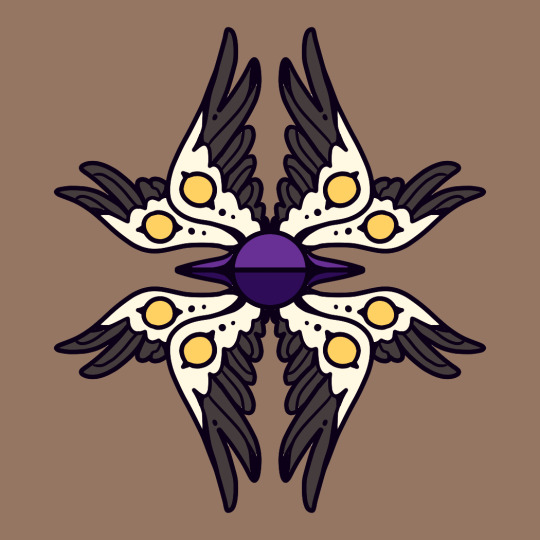
✨LIMITED EDITION✨The Pride Knights Playing Cards are now officially available for pre-order in our store until June 30, 2023!
prideknights.com ⚔️🌈
#lgbtq+#lgbtq#pride month#bisexual#pansexual#transgender#nonbinary#gay#lesbian#asexual#aromantic#demisexual#genderqueer#progress pride flag
21K notes
·
View notes
Photo

First attempt at cross stitch
#I don't think I actually used waste canvas#so getting all the fibers out took probably as long as the cross stitching did#mothman#pride#pride mothman#cross stitch#cryptid#rainbow#progress pride flag#only a tiny bit crooked#trying to decide if I'll want to add some other pride moths as well
11K notes
·
View notes
Text

I put the newest Progress Pride on the Gilbert Baker flag. Enjoy!
#pride#lgbtq pride#queer pride#transgender#gay#bisexual#lesbian#pansexual#asexual#aromantic#aroace#transmasc#trans pride#intersex#ace pride#aro pride#pride month#progress pride flag#gilbert baker#pride flag#transgender pride#neopronoun pride#xenogender pride#lesbian pride#mogai pride#mogai#xenogender#neopronouns
615 notes
·
View notes
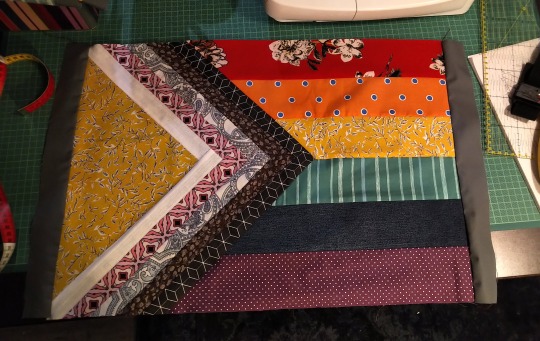
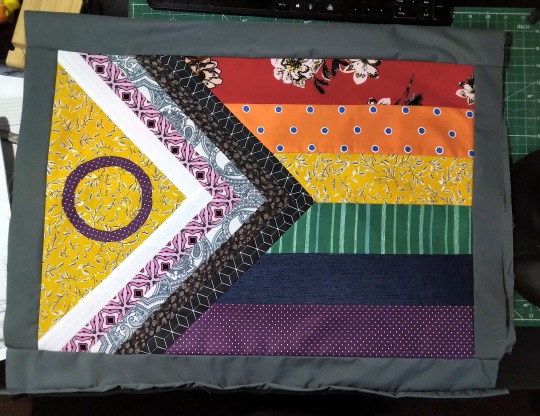
Text
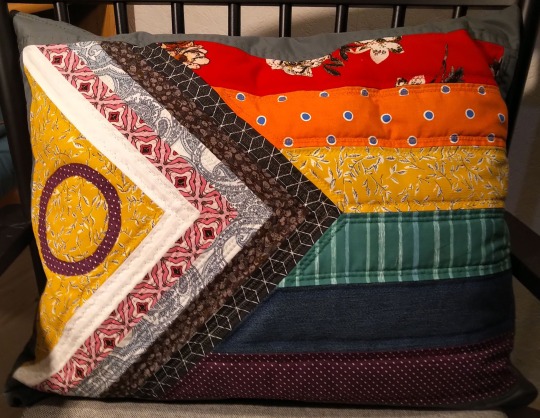
The quilted progress pride pillowcase is finished! Finally used all those fancy decorative stitches my sewing machine has. They are indeed very decorative. First time actually finishing a quilt and being happy with it. Yes, it's a little bubbly and wonky, but I don't care. Because it's a pillowcase, nobody would notice if it were all perfectly neat. The filling is a cobbled together bunch of floof from all the pillows my dog has torn up in the past. Don't worry, she won't get this one.
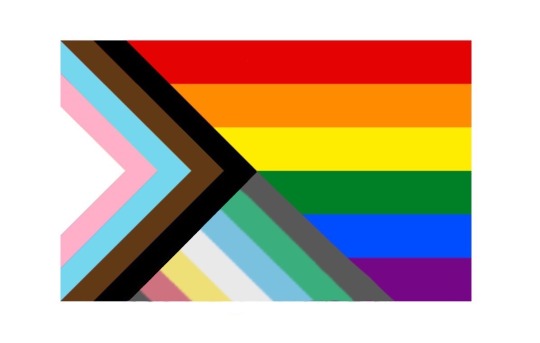
Based on my own pattern, which is in turn based on the progress pride flag design by Valentino Vecchietti.
#quilt#quilt block#quilting#pillowcase#sewing#machine sewing#pride#progress pride flag#valentino vecchietti#lgbt#lgbt+#lgbtqia#queer stuff#rainbow flag#upcycled
400 notes
·
View notes
Text

Sewing store window in Portland
673 notes
·
View notes
Text
HAPPY PRIDE MONTH!!
In honor of the occasion, I, SAXTON HALE have made PRIDE FLAG versions of the Mann Co logo!!!! YOU’RE WELCOME!!!!!

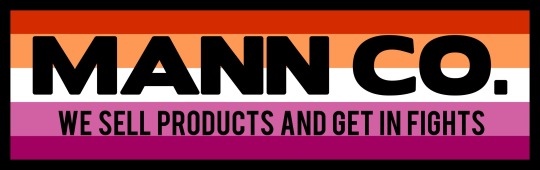


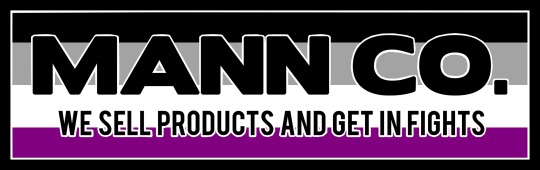
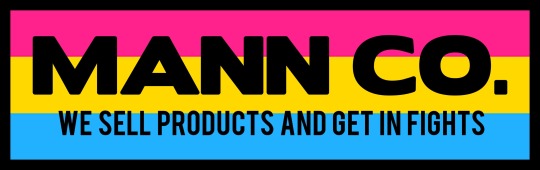
AND IF YOUR FLAG WAS NOT INCLUDED: LET ME KNOW!!!! I WILL PERSONALLY MAKE YOU A MANN CO LOGO WITH YOUR FLAG!!!!!!!
#team fortress 2#tf2#saxton hale#tf2 saxton hale#mann co#tf2 mann co#pride month#pride month 2023#pride flag#progress pride flag#lesbian#bisexual#transgender#asexual#pansexual#mann co pride flag
880 notes
·
View notes
Text


another batch of pride flags! I'm open to doing requests for these aswell! free to use for anything, meant to be viewed small, tags in order of flags.
#bigender#pangender#progress pride flag#demigender#lgbtqia ally#demiboy#demigirl#demisexual#demiromantic#genderpunk#genderfuck#genderfluid#moth's original content#moth's shiny flags#rentry resources#carrd resources#pride pixels#pride badges#pixels#web graphics
460 notes
·
View notes
Text
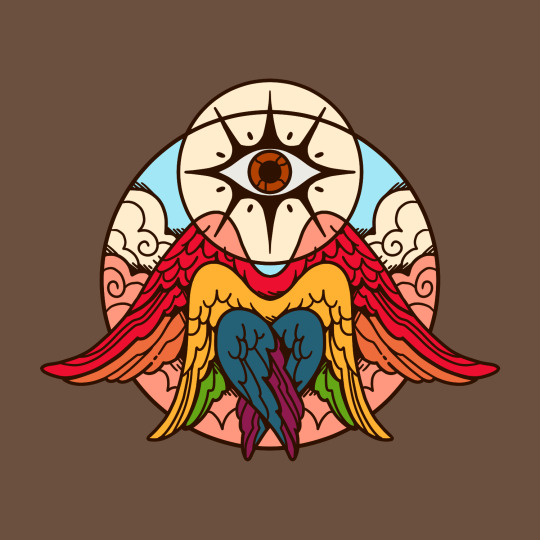


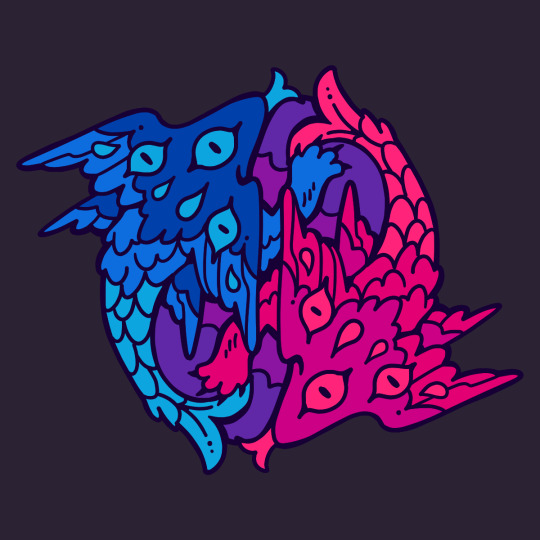
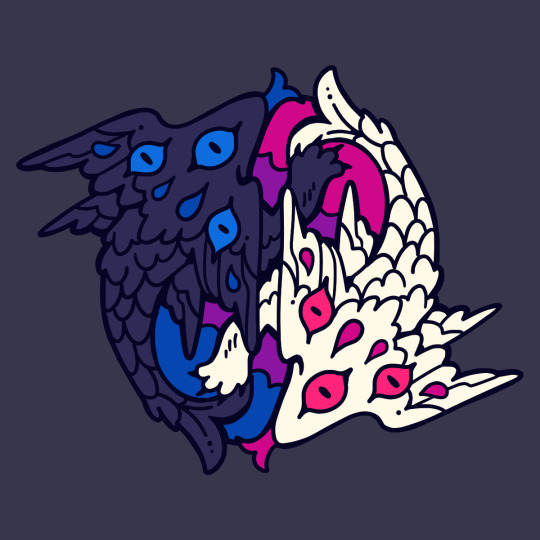


Part 1 of 4 of original and recolored Pride Angels, featuring Rainbow, Bisexual, Transgender, Lesbian, Pansexual, Intersex, Nonbinary, Genderqueer, and Asexual angels.
Free for personal, non-commercial use! Credit is appreciated.
You can find the other angels here, here, and here.
See my #pride angels tag for even more angels I couldn't fit in these posts. And if my colors aren't what you're looking for, you're welcome to take a stab at your own recolors - preferably with each design's intended flag. If you do make one, I'd love to be tagged to see what you come up with!
#pride angels#biblically accurate angels#biblically accurate angel art#biblically accurate angel#biblical angel#seraphim#cherubim#ophanim#seraph#cherub#pride#lgbt#rainbow#progress pride flag#bisexual#trans#transgender#bi#lesbian#pan#pansexual#intersex#nonbinary#enby#nb#genderqueer#asexual#ace#lgbtq#lgbt pride
2K notes
·
View notes
Text
the progress flag color picked from Ash Ketchum (Pokémon the Series: XYZ)


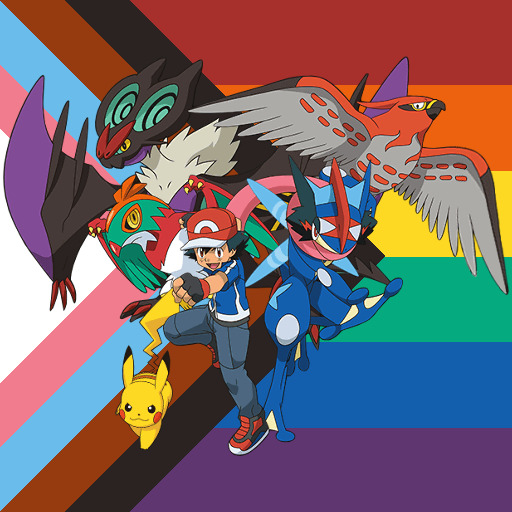
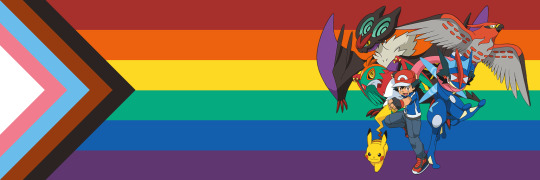
#pokemon#pokemon pride flags#lgbt#lgbtq#queer#pride#pride flag#pride flags#lgbt flag#lgbtq flag#pokemon ash#Ash Ketchum#talonflame#noivern#greninja#ash greninja#hawlucha#pikachu#progress flag#progress pride flag
129 notes
·
View notes
Note
Can i request a drawing of party favor with a rainbow flag!!!
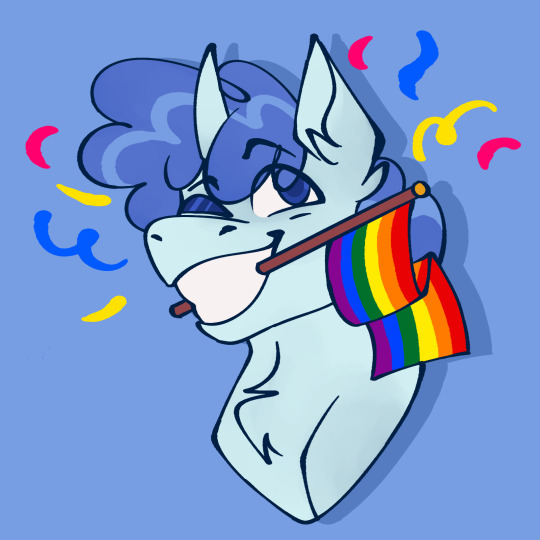

made a ver w the progress flag too !!
#mlp#mlpfim#my little pony#mlp gen 4#mlp art#party favor#party favor mlp#ask#ask blog#pride#rainbow pride#gay pride#progress pride flag#mod zip
189 notes
·
View notes
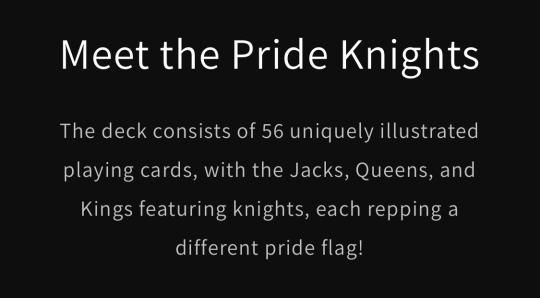
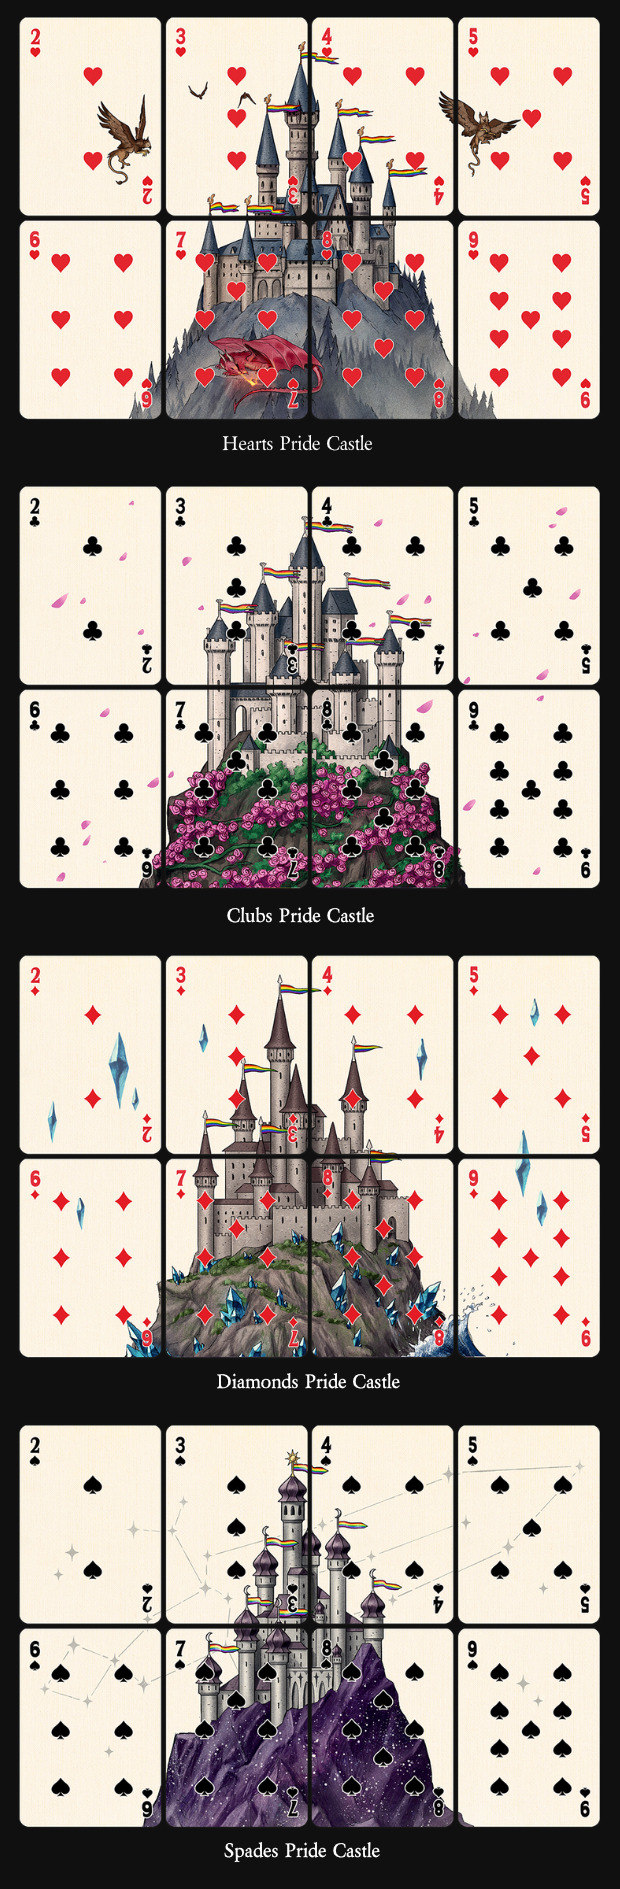
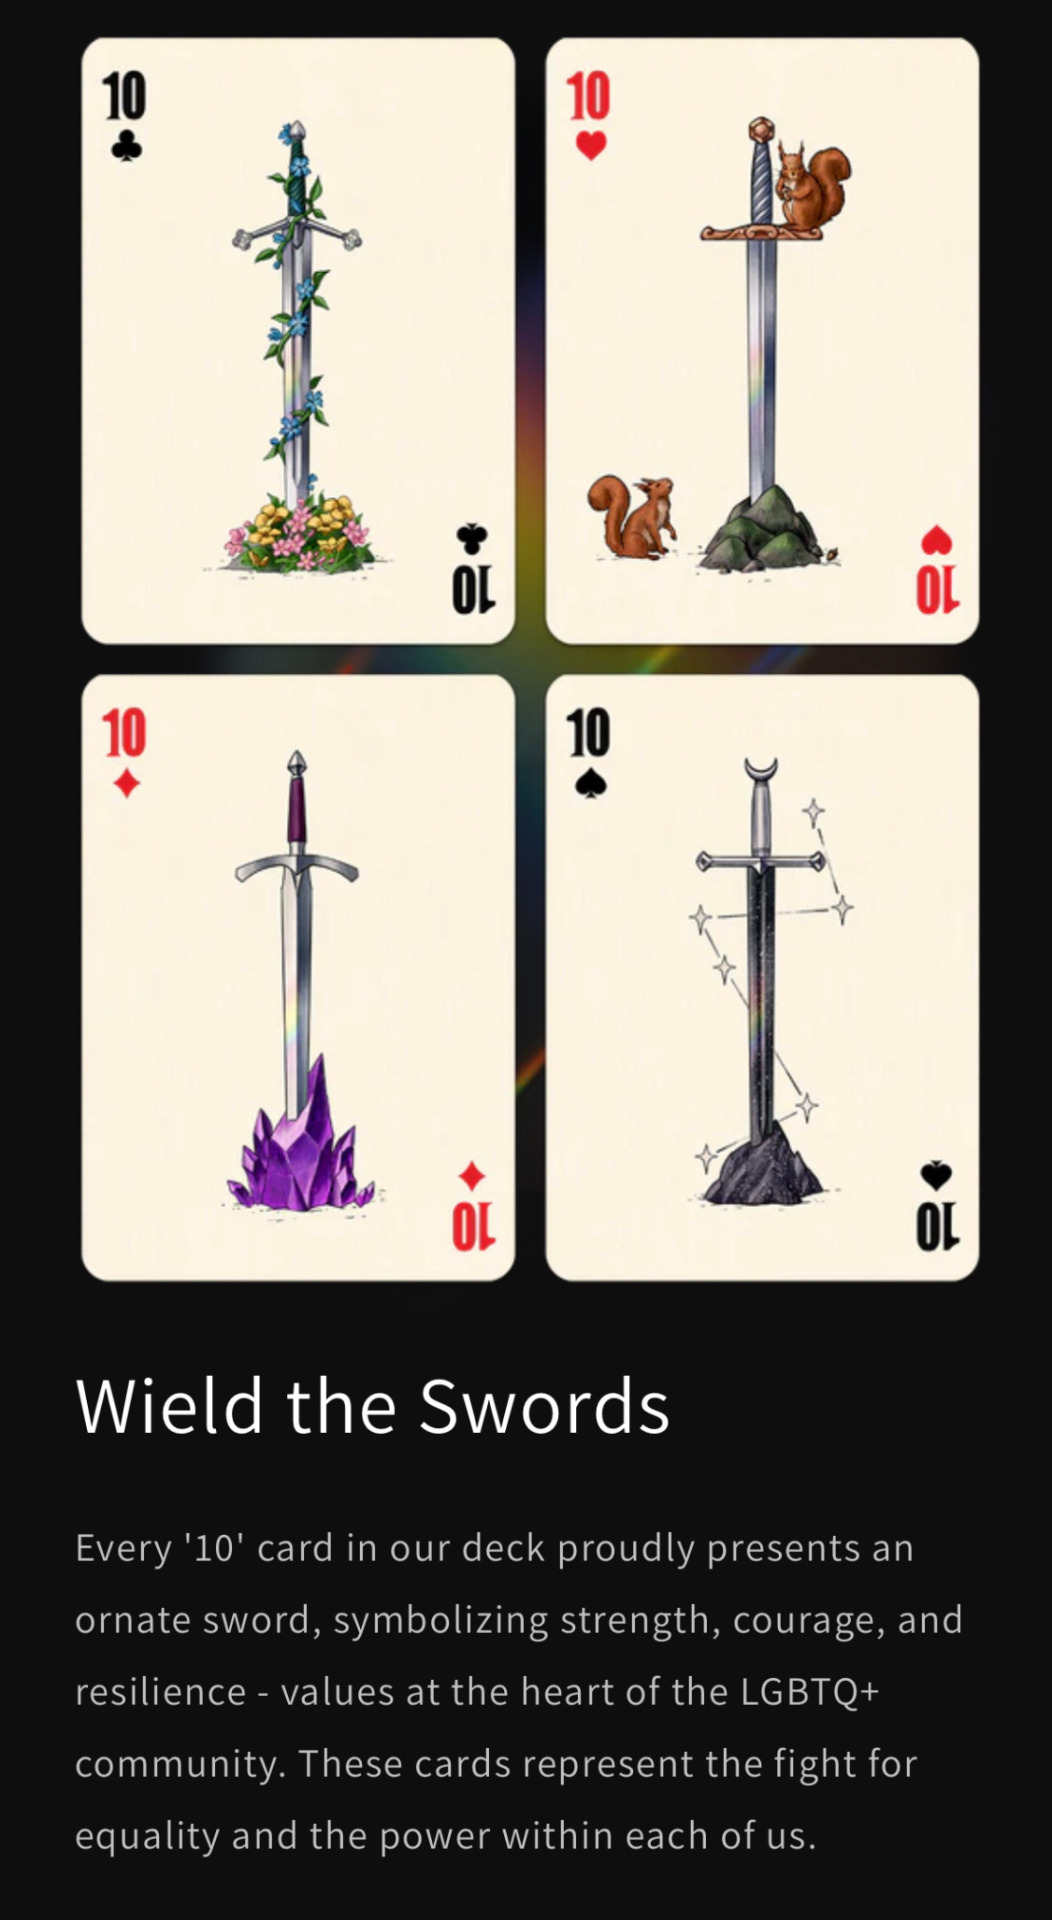
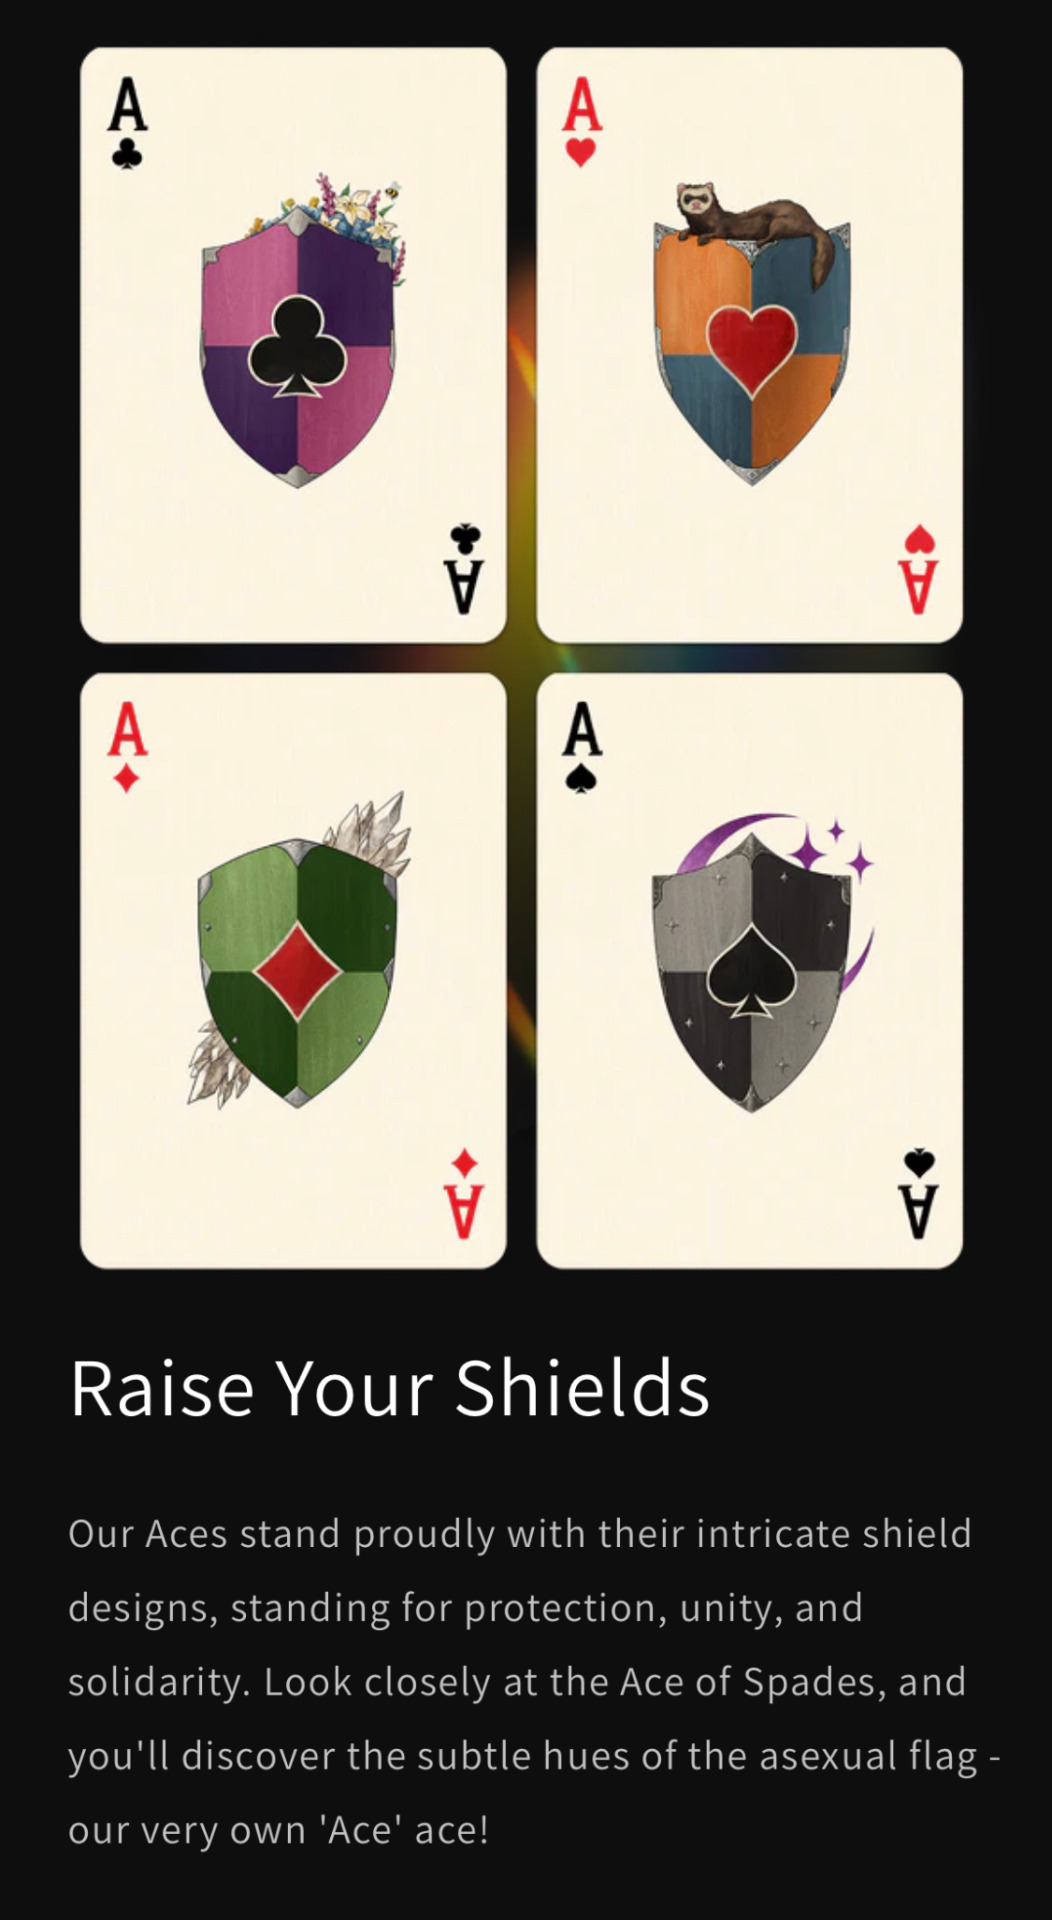
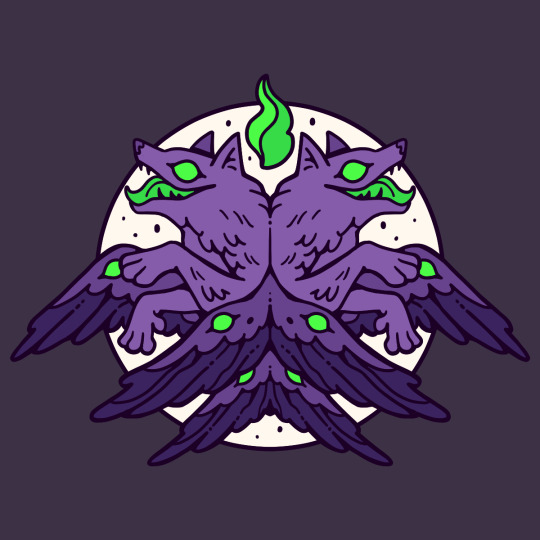
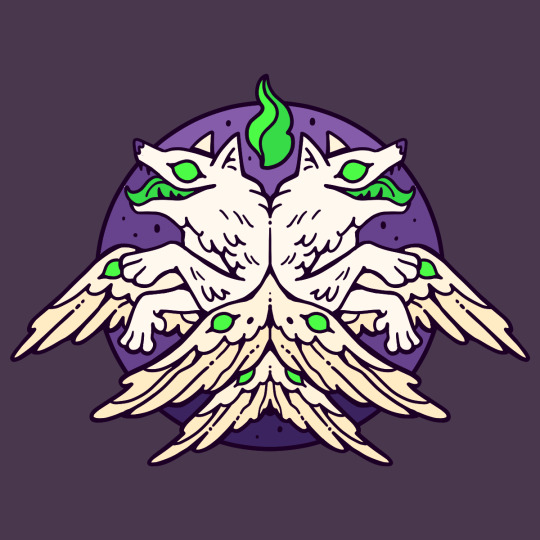
Text
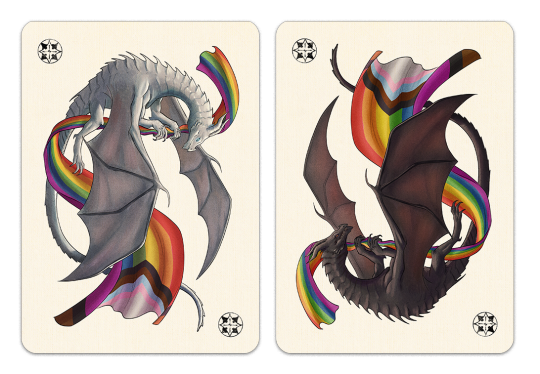
The Pride Knights deck is now available for pre-order here! ⚔️🌈
5K notes
·
View notes
Text
New pfp who dis???

#hobie brown#across the spiderverse#spider punk#spider verse#atsv hobie#pfp icon#pride#progress pride flag
61 notes
·
View notes
Text
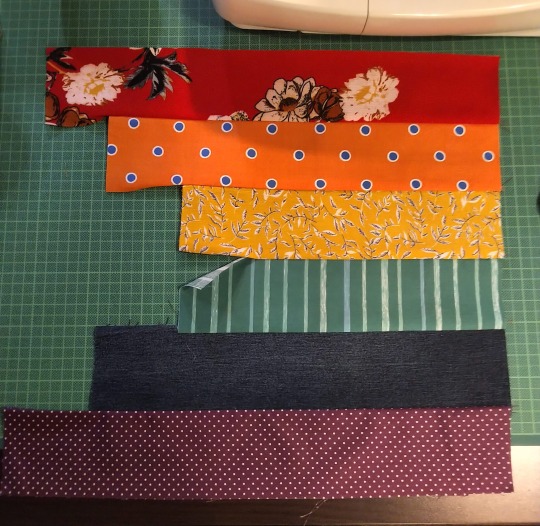
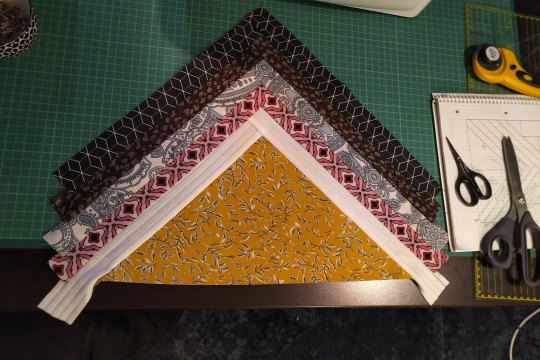
Progress Pride Flag Quilt Block Pattern & Tutorial

Don't you just love the flag of our people? Do you have an inner grandma that years to make stuff? Do you want to combine these two things and make a queer quilt?
Well, I've got you.
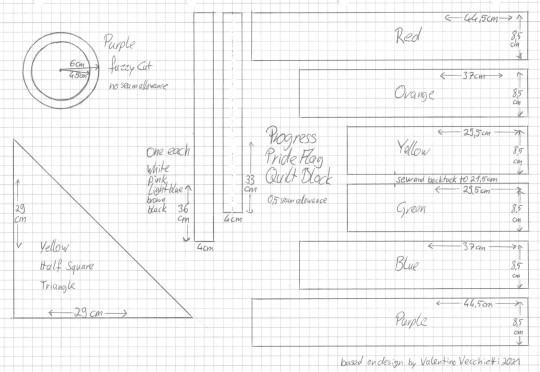
Behold the pattern! And my lack of graphic skills, so I drew it on paper!
Basically it's a bunch of rectangles, one half square triangle and a fuzzy cut circle. I don't know shit about quilting and I was able to come up with it. Why Centimeter, you ask? Because I'm German and that's what I'm familiar with. Why weird measurements and not jelly rolls and layer cakes and stuff? Because I'm German and quilting is not really a thing here.
Onto the tutorial!
You'll need:
A scrap of fabric of red, orange, yellow, green, blue, purple, black, brown, light blue, pink, white each
additional fabric for the border
Cutting mat, quilting ruler, roll cutter
sewing machine
thread
pins
double sided interfacing
iron and ironing board
fabric sheers
compasses
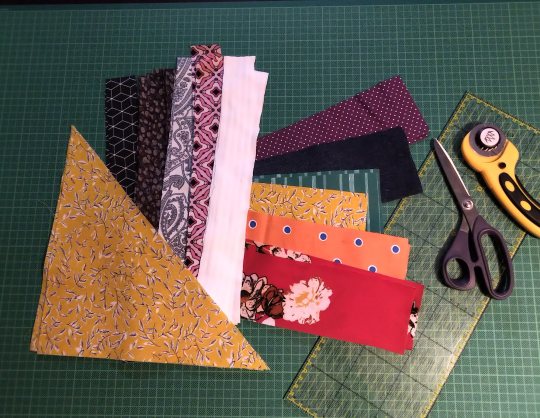
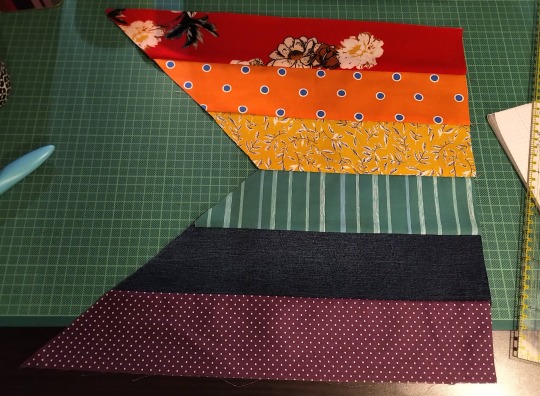
Step 1: Cut everything. Duh. We'll take care of the circle later, don't worry about that now. The half square triangle is exactly what it sounds like. A square and then you cut it diagonally. That's why I didn't give the length of the hypotenuse.
(Note: I'm making two blocks at the same time, that's why there's so much fabric. Also this is a middle of the night project, hence the lighting.)
I'm using all kinds of different fabrics, different weights and drapes, some stretchy, some transparent, so I needed to interface some of them.
Step 2: Sew the rainbow together. 0,5cm seam allowance on everything, that's exactly the edge of the foot on your machine. Double and triple check that everything is facing the right direction before sewing. The seam of yellow and green does not get sewn fully, only 21,5 cm! That's important later! Also backtack there. Don't forget to iron.
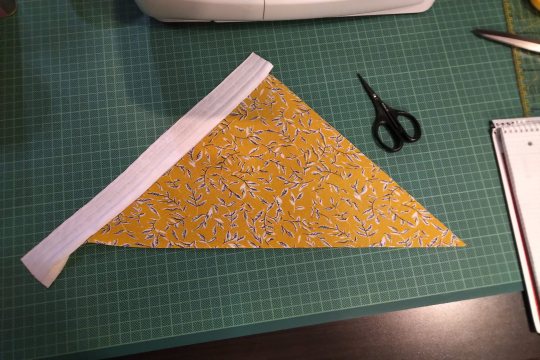
Step 3: Sew the strips to the half square triangle. For this you have to switch between the sewing machine and the ironing board constantly. Attach the shorter strip diretly to one side of the HST, iron it open. The second strip of the same colour gets attatched to the other side of the HST and the first strip. Look at the pictures closely if you're unsure how that works. Also the strips are longer than the triangle. We'll square that up later.
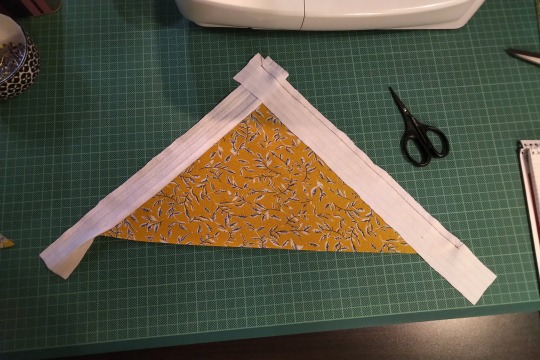
All strips attatched will look like this. See how the two strips meet at the tip!
Step 4: Cut the rainbow part to size. The seam between yellow and green is 22cm long. The shorter seam from before and some seam allowance. The outsides of red and purple are 44,5cm long. You will cut a little triangle from every single colour. Do this slowly and carefully. Maybe your fabrics have stretched a bit (mine did). Don't worry, it will be ok.

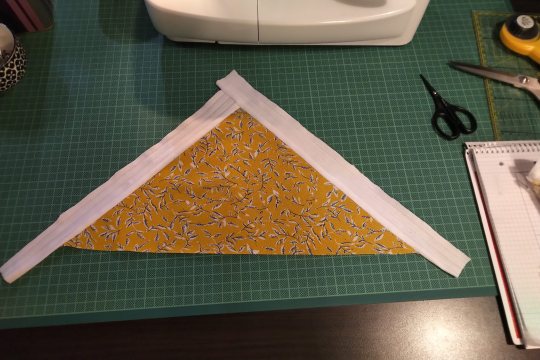
Step 5: The Y seam, part one. Y seams are tricky, but there's only one for this block. So put your straps part on your rainbow part and line them up so that the tip of the strip part overhangs the seam between yellow and green. Remember that it's not about the edges of the fabric, but where the seam will be. So position the strap part so that the 0,5cm seam will meet the yellow-green seam.
But don't sew all the way! Leave 0,5cm at the tip!
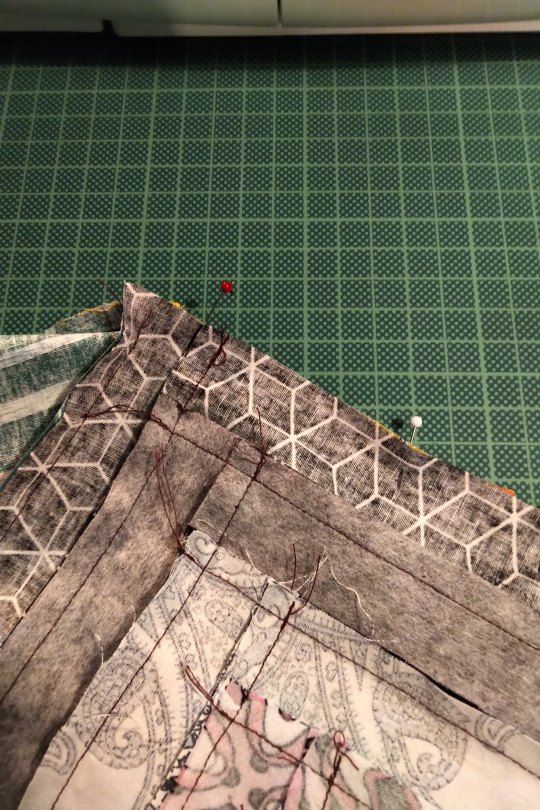
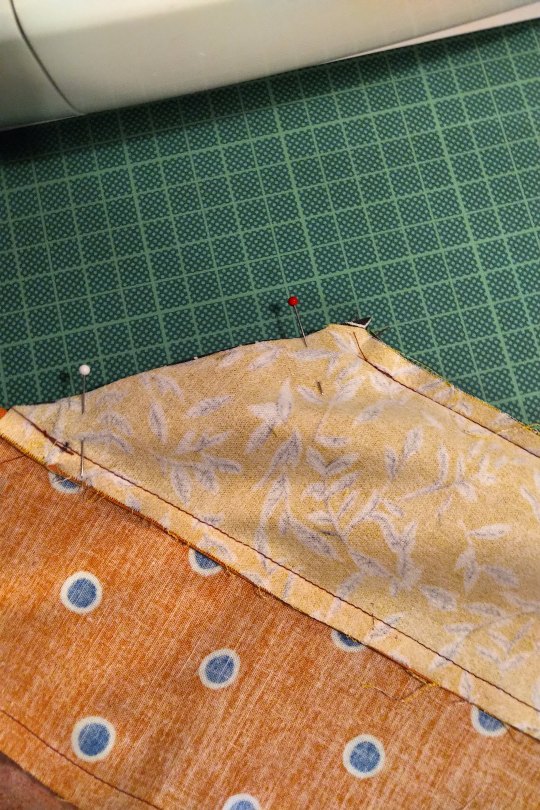
Step 6: The Y seam, part two. Now, fold both the rainbow part and the strips part in half and if you've done the last step correctly, the remaining two edges will allign. Pin and sew.
I can't explain it better than I've done here, I'm sure there are tutorias out there. Good luck!
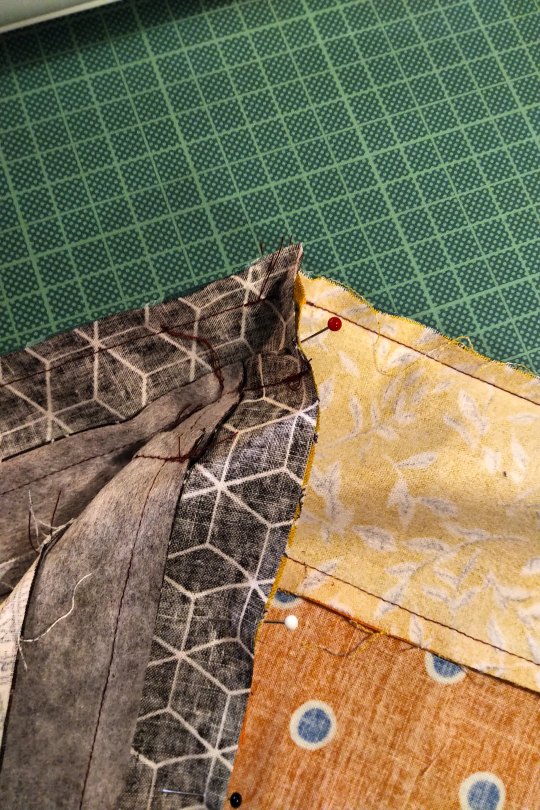
Step 7: Square up. Iron your block to that everything is nice and straight and flat. Then use the fabric edges of the red and purple to cut the remaining ends of the strips. Use the HST to cut the white. Be careful, the long side of the triangle is on the bias and likely stretched a bit.
I already added borders here. I'm making a pillow case.
Step 8: Fuzzy cut and raw edge applique. Double sided iron on interfacing is essentially double sided tape. It has two types of glue, one gets activated by 2 seconds of heat, the other by 5 or so (depends on the product). The second side is also covered with a paper that needs to be removed before the second glueing. Read the instructions of the product you are using!
Use your compasses to draw a circle on the protective paper side of the interfacing. Cut it out roughly. Then place it with the rougher side on the backside of your purple fabric and iron for 2 seconds on middle heat. If you've just ironed your fabric before and the ironing board is still hot, wait for it to cool down. Also let the fabric cool down after applying. Then cut out your circle. The interfacing will have stiffened the fabric, so that shouldn't be a problem. Then remove the protective paper, place the circle on the yellow triangle where you want it and iron for 5 seconds. Let cool.
And you're done! The applique at this point is only secured with the interfacing, but it should hold fairly well. The quilting will secure it further.
And that's it. BTW, did you know that this design was made by Valentino Vecchietti for Intersex Equality Rights UK in 2021? Now you do. Happy quilting!
#lgbt+#lgbtq+#lgbtq community#pride flag#progress pride flag#valentino vecchietti#quilting#quilt#quilt block#quilt pattern#quilt tutorial#sewing#sewing machine#sewing tutorial#sewing pattern
106 notes
·
View notes
Text
Changed my pfp! I did it hastily and with a bad program so it’s not great but it’ll do for now
Image description: The progress pride flag with a triangle shaped area of the disability pride flag edited into it.
edit: i fixed one of the lines, it was not straight enough not to be bugging me
#chronic illness#trans#transgender#fibro#fibromyalgia#disabled#autistic#queer#gay#pride#happy pride 🌈#pride flag#progress pride flag#disability pride month#disability pride flag#disability pride#gay and disabled#queer and sick
161 notes
·
View notes
Text
I have synesthesia and colors have a taste here's what pride flags taste like to me:
Rainbow: vanilla custard with almond extract
Progress pride (specifically intersex inclusive): cold vanilla custard (not frozen) with almond extract and chocolate chips and big pieces of unsweetened coconut with salt
gay/mlm: almond extract, fresh black cherries
lesbian: this one is meal to me. Full on meatloaf with mashed potatoes
Nonbinary: coconut shrimp with hoisin sauce
Trans: specific hard candy i can only get mail order, nectar flavor or maybe rose or somewhere in between. Platonic ideal of hard candy, really. Non sour.
Asexual: cold barbecue salmon (in a good way)
Aromantic: kinda like a very specific jelly bean i only can find on easter, tastes the same as pure green food coloring to me.
Demisexual: still salmon, but a different sauce, hoisin maybe? I guess the shapes do affect the taste a bit.
That's all the ones i can think of right now, drop more pride flags in the notes and I'll respond later with what they taste like to me!
(please don't judge me for not thinking of your identity I haven't taken my medications yet)
#synesthesia#taste#flavor#pride flags#pride#gay#lesbian#asexual#aromantic#progress pride flag#demisexual
78 notes
·
View notes
Text
saw these going round and hadn't seen a butch one yet
204 notes
·
View notes
Last Seen Blogs

angel-kujo
Angel Kujo
stephensfinefoods
Stephen's Fine Foods
bauzeitgeist
Bauzeitgeist

actualzodiacquotes
Actual Zodiac Quotes