#ps the animation on the last gif in the third row
Text

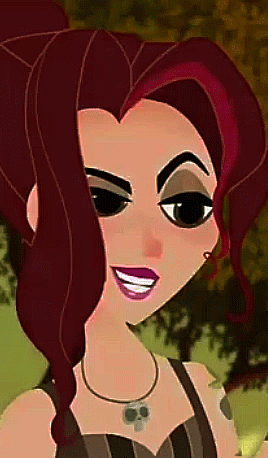

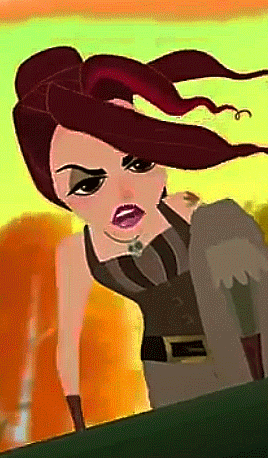

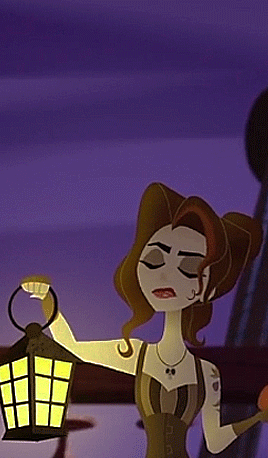
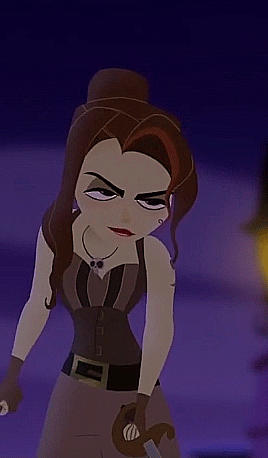

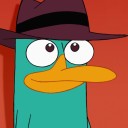
most attractive female character -> lady caine - requested by anonymous
#she was robbed of screen time#she deserves so much#i have a headcanon that she has murdered people#and looks good while doing it! <3#lesbian coded villain with a sword my beloved 🤤#tangled#tangled the series#lady caine#my gifs#ps the animation on the last gif in the third row???? omfg#i love it
264 notes
·
View notes
Text
gif tutorial ♡ by @tifaa
Lately I’ve had a few questions about how I make my gifs, so under the cut is a small tutorial about how I make them! If I forgot something or you have any questions, please just send a message or an ask. It’s also best to view this on desktop because mobile with mess with the quality ; - ; ♡
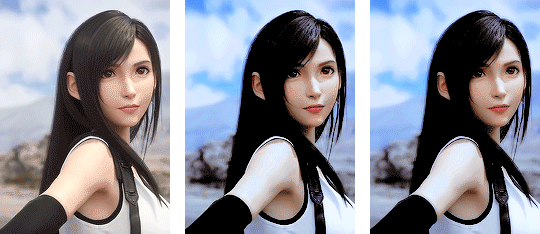
I’m going to show you the process of how I turned the gif on the left into the one on the right. (Please ignore the middle one for now!) Basically, turning a gif with absolutely no editing into a coloured, sharpened, and smooth gif!
1. Downloading Videos
I use 4k Video Downloader to get videos from YouTube.
☆ The most important thing is to download videos in the highest quality possible (I personally never gif a video that is below 1080p)
2. Preprocessing
This is optional, but I do see a big difference between gifs that I have preprocessed and ones that I used to make using only photoshop. It doesn’t take that long and you get a really smooth result, so I definitely recommend it!
Vapoursynth download + tutorial (make sure you download the one that’s titled ‘VapourSynth64Portable(200616).zip’). Since it’s quite complicated to download for Mac, I recommend trying Avisynth instead. I may do a seperate turotial on VS, but since the one I linked is in a video format rather than text, I found it really easy to follow compared to other written tutorials I had found!
These are my VS settings:
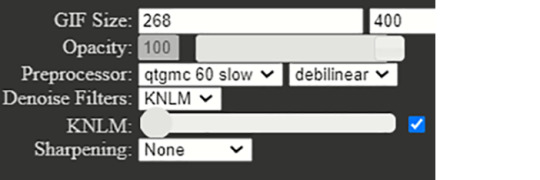
☆ GIF Size will change depending on how many gifs you want to make per row:
1 gif per row: 540px
2 gifs per row: 268px
3 gifs per row: 177px
You can change the height to whatever size you want, but I wouldn’t recommend going over 540px.
☆ Preprocesser is how many frames per second you want your gif to be. qtgmc 60 slow gets you the smoothest possible gif. As for the second setting, I always use debilinear. You can find more information on these here!
☆ KNLM is a denoising filter that basically smoothens your gif and makes it less grainy! You can also choose to utilize the sharpening setting here, but I prefer to do that in Photoshop!
Once you have chosen your desired settings, you can paste the output script that’s on the right-hand side into the VS Editor resizer.html window. (Please refer to the video tutorial〜)
3. Importing into Photoshop
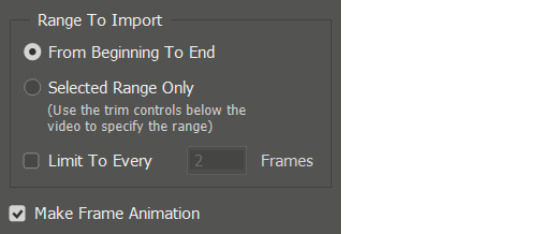
To open the video in PS, go to file > import > video frames to layers (the preprocessed clip will be located in the ‘output’ folder). These are my import settings:
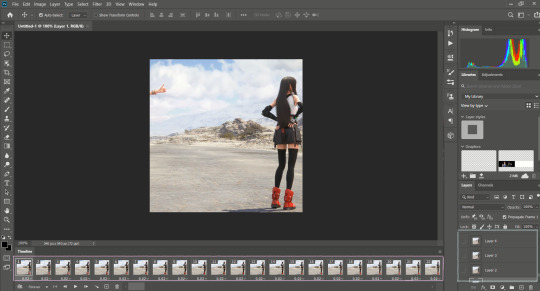
Your workspace will now look something like this: ( I’ve highlighted the frames in pink and the layers in blue, so you can remember!)
Now, delete any excess frames from the timeline if you have any (eg. frames that include a different scene). Then, select all of your remaining frames and click on this little button on the top right-hand side of the timeline:

From this menu, go to > convert to video timeline. Now, look at the layers on the right-hand side of the screen. If you deleted excess frames at the beginning, you should now delete the corresponding layers (that is, all of the layers without the eye symbol next to them).
To be able to colour and sharpen the gif, we have to convert it into a Smart Object. To do this select all of your layers and go to > filter > convert for smart filters.
4. Colouring
Now, you can colour your gif however you’d like! There isn’t necessarily a right or wrong way to do this, but some settings I’d recommend trying out to begin with are colour balance, selective colour, levels, hue/saturation. To apply these settings go to > layer > new adjustment layer.
☆ Below is are some examples of this lovely scene of Tifa ♡ The first one is a base gif (no colouring at all), and the second one is what it looks like once I’ve coloured it. We’ll get to the third one soon, don’t worry!
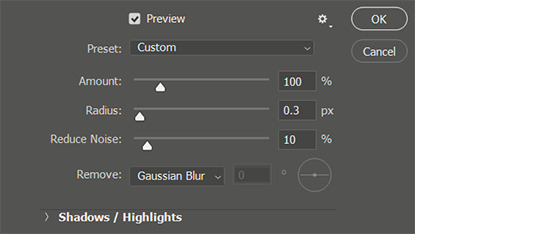
5. Sharpening
Click on your Smart Object in the layers tab and go to > filter > smart sharpen. These are my settings:
☆ The next step is optional, but it’s just a preference for how I like my gifs (it just makes them really smooth and removes a lot of the noise)!
Once I have sharpened my gif, I duplicate the sharpened later (right-click on the layer and select ‘duplicate layer’ from the menu). Then I add a gaussian blur filter to the duplicate layer (filter > blur > gaussian blur) and set the radius to 1.3.Your layers should now look something like this:
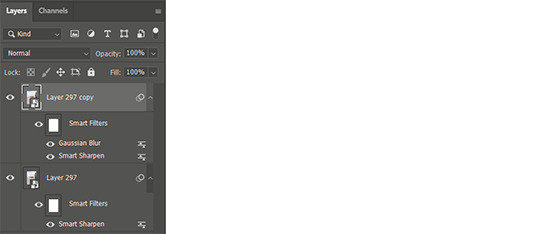
You can see the result is the third gif from the above step. Nice and smooth, right〜?
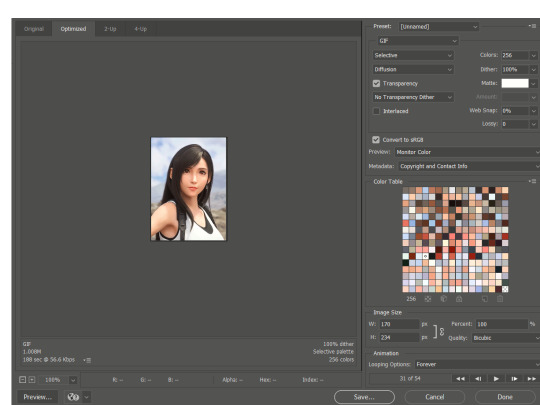
6. Saving your gif
To save our gif, we have to convert it back into a frame animation.
To do this, select all of your layers and press the little bars icon above the timeline (the one we used to convert our frames into the video timeline from before!), and select convert frames > flatten frames into clips. Now, select all of the visible layers (the ones with the eye symbol shown), and from the same menu as last time, convert frames > make frames from clips. Again, from the same menu, go to convert to frame animation.
To set the speed of your gif, select all of your frames and click on the little number icon below it (it should say something like 0.03), then click ‘other’. Here you can set the speed. I usually put it somewhere between 0.02 - 0.04 depending on the scene, so just try out which speed you prefer.
Now, we can finally save the gif: file > export > save for web (legacy)! These are my output settings.
☆ To make sure that your gif plays more than once, you must have looping options (near the ‘save’ button’) set to ‘forever’ ! ! !
Again, this is just the way I make gifs, so there are many other tutorials out there that may be more suited to your preferences! You can find some examples of my gifs here.
☆ I’ve never made a tutorial before, so I really hope that it helps you even a little bit! Please please do ask if you have any questions, either by dm or inbox! ♡
#gif tutorial#yeahps#itsphotoshop#wehearttutorials#completeresources#anon who requested please let me know if you see this!#i hope it's OK!#♡♡♡#daily gaming#videogamewomen#videogameedit#gamingedit#gamingnetwork
69 notes
·
View notes
Last Seen Blogs
eluvii
eluvii

baodurs
baodurs

benjamingordonlavallie
Untitled
104-days-of-gifs
104 Days of Phineas and Ferb GIFs

e-uph0r1a
1306 2410