#quilt block
Text
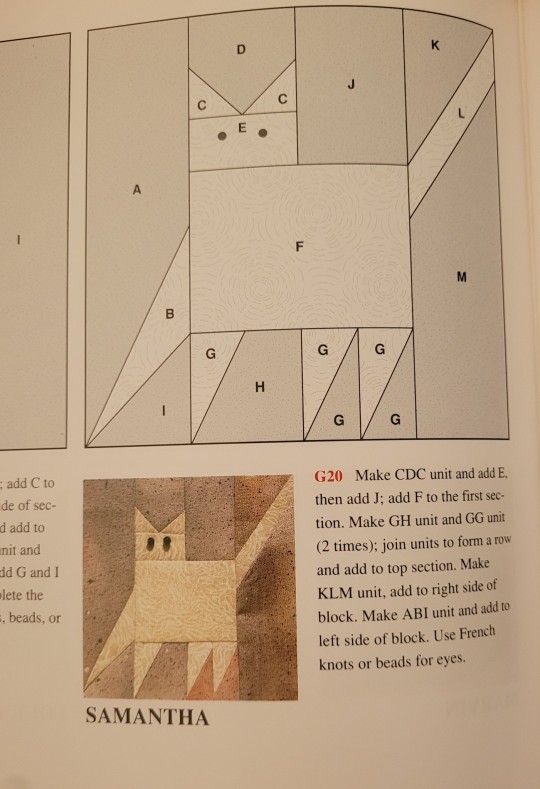
just admiring this fantastic block- damn that is a cat
from 501 quilt blocks treasury published by Murdoch Books (designer unknown)
2K notes
·
View notes
Text
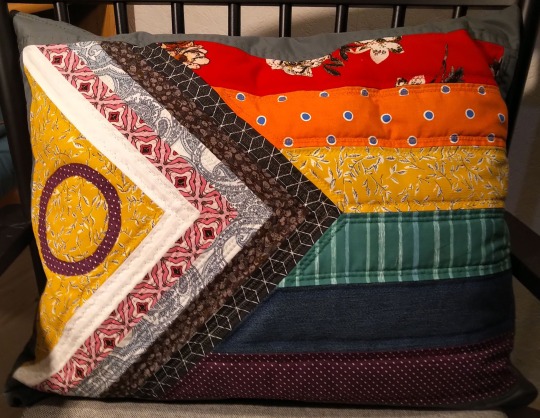
The quilted progress pride pillowcase is finished! Finally used all those fancy decorative stitches my sewing machine has. They are indeed very decorative. First time actually finishing a quilt and being happy with it. Yes, it's a little bubbly and wonky, but I don't care. Because it's a pillowcase, nobody would notice if it were all perfectly neat. The filling is a cobbled together bunch of floof from all the pillows my dog has torn up in the past. Don't worry, she won't get this one.
Based on my own pattern, which is in turn based on the progress pride flag design by Valentino Vecchietti.
#quilt#quilt block#quilting#pillowcase#sewing#machine sewing#pride#progress pride flag#valentino vecchietti#lgbt#lgbt+#lgbtqia#queer stuff#rainbow flag#upcycled
399 notes
·
View notes
Text
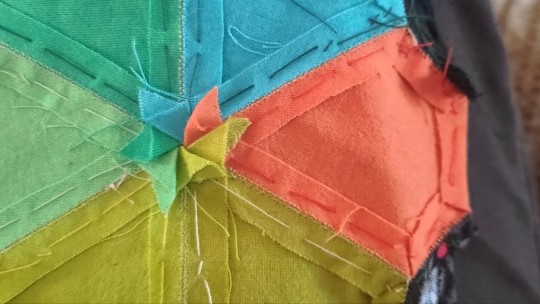
Twirly seams?
Twirly seams.
#quilt#quilting#quilt block#hexieharvestquilt#hexie quilt#hand piecing#prepared edge piecing#fibre arts#made by va#va fibre arts
201 notes
·
View notes
Text
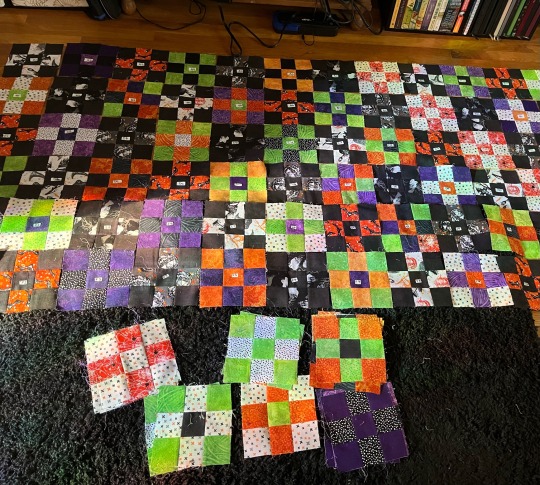
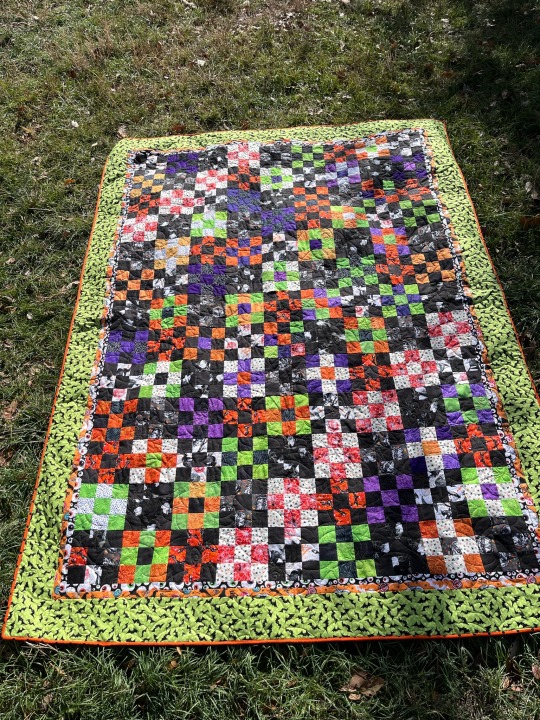
This Quilt has been a struggle. I bought most of the fabric four years ago, when I didn’t know what a 1/4 in seam was, and getting any corner to match was a goddamn nightmare. I almost threw everything out, but I ripped all of the seams and was left with so fucking many 2.5 in squares that weren’t cut very well, and piecing this fucker back together was also a goddamn nightmare. I made two trips to the Quilt shop for more fabric, changed patterns at least three times. And spent a lot of time rearranging the order of the blocks before I settled on this scrappy -and might I say adorable - Halloween quilt.

I threw a couple of borders on it to try and use as much of my Halloween scraps as possible, and I sewed on the binding very sloppily. I just wanted to get it finished before Halloween, and despite this post date, I did! The ladies at the quilt shop let me help with the quilting, and I felt like a little kid helping mom in the kitchen.

Because of the nature of the beast (the bad cutting, the sloppy piecing, and my overall haste to finish) there are a few tucks around the borders. Did you know you’re supposed to measure the borders, not just sew on the strips and cut where it ends? Measuring keeps it Square. Slapping borders on gives you tucks. I’m still learning so much, but I’m having a good time.
#handmade quilt#quilter#quiltlove#quilt pattern#quiltblr#quilters#quilt block#quilt comforter#quilting#quilt#quilt making#quilt art#cotton quilt
68 notes
·
View notes
Text

Sir, you are NOT helping me organize this quilt! SIR! Cease this cuteness at once!
(This guy does not look like a full grown cat to me. He'll be two in August, but he still seems like a kitten.)
32 notes
·
View notes
Text
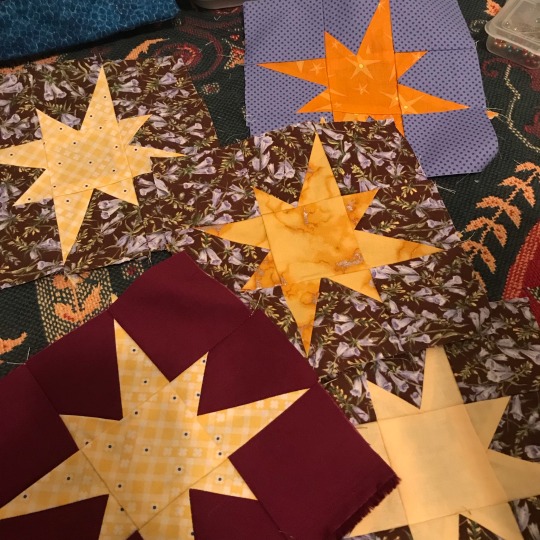
Slow work on a quilted project
#quilt fashion#quilting#quilt block#quiltblr#quilt#sewing#sewblr#stars#star#star quilt block#artists on tumblr#fiber art#my art
61 notes
·
View notes
Text

Preview of some quilted coasters I’ll be selling after American Thanksgiving. All proceeds will go direct to the Massachusetts Bail Fund. DM me if you want dibs!
#quilting#quilt block#quilted coaster#quilt#quilt wip#cottage aesthetic#cottagecore#my art#my quilting#sawtooth star coasters
68 notes
·
View notes
Text

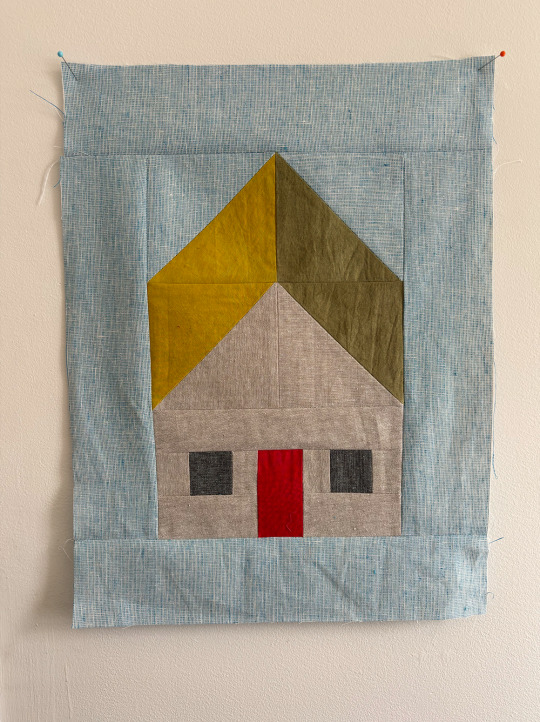
A planned block that I'm a little bit in love with
83 notes
·
View notes
Text
Today was a day of trying new things with sewing.

It was my first time doing EPP with a shape other than a hexagon. I used triangles and the crowns of hexagons.

I made them into a sunflower. Not so new thing was having my coffee while I sew. But, that is a new mug, because...bees!

Onto my next new thing...I appliqued the sunflower onto a block of white on white patterned fabric. I have appliqued only once before, but never an EPP piece. I also used a "new to me" sewing machine for this endeavor. I got my mom's old machine and now I have to learn its little quirks and idiosyncrasies. All, in all, I very much like how this turned out. This block is going into a quilt that my quilt retreat group is making for one of the ladies who was just diagnosed with colon cancer.
#sewing#quilting#english paper piecing#epp#crafts#crafty#applique#quilt block#handmade quilt#cancer quilt#sunflower#new adventures in sewing#new to me sewing machine#sunflower quilt block
40 notes
·
View notes
Text

Unknown Artist (Made in Hawaii)
Hawaiian Quilt, Lei Mamo Pattern
ca. 1930
The Metropolitan Museum of Art
#quilt#quilting#hawaiian quilt#hawaiian quilt pattern#lei mamo pattern#hawaiian art#american art#art history#aesthetictumblr#tumblraesthetic#tumblrpic#tumblrpictures#textiles#textile art#needlecraft#quilt making#quilt makers#quiltblr#quilt block#women artists#women artisans#tumblrstyle#artists on tumblr#tumblr art#tumblrposts#tumblrlove#beautiful#beauty#hawaiʻi#beautiful beautiful beautiful
82 notes
·
View notes
Text
TADA

now i just need to decide how to finish this, i.e. what to do for the back and how to quilt and which color to bind with, lol. i love how the block turned out though i'm so happy!! 🍓
16 notes
·
View notes
Text
new quilt block idea
13 notes
·
View notes
Text
Progress Pride Flag Quilt Block Pattern & Tutorial

Don't you just love the flag of our people? Do you have an inner grandma that years to make stuff? Do you want to combine these two things and make a queer quilt?
Well, I've got you.
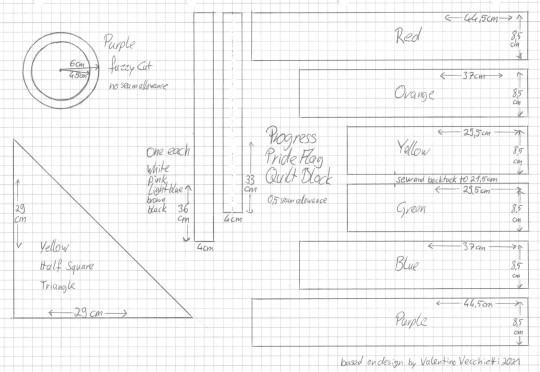
Behold the pattern! And my lack of graphic skills, so I drew it on paper!
Basically it's a bunch of rectangles, one half square triangle and a fuzzy cut circle. I don't know shit about quilting and I was able to come up with it. Why Centimeter, you ask? Because I'm German and that's what I'm familiar with. Why weird measurements and not jelly rolls and layer cakes and stuff? Because I'm German and quilting is not really a thing here.
Onto the tutorial!
You'll need:
A scrap of fabric of red, orange, yellow, green, blue, purple, black, brown, light blue, pink, white each
additional fabric for the border
Cutting mat, quilting ruler, roll cutter
sewing machine
thread
pins
double sided interfacing
iron and ironing board
fabric sheers
compasses
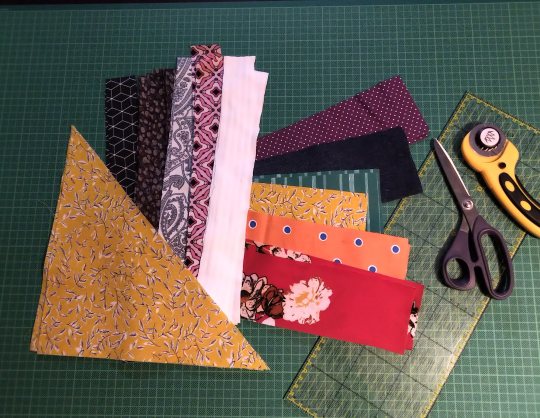
Step 1: Cut everything. Duh. We'll take care of the circle later, don't worry about that now. The half square triangle is exactly what it sounds like. A square and then you cut it diagonally. That's why I didn't give the length of the hypotenuse.
(Note: I'm making two blocks at the same time, that's why there's so much fabric. Also this is a middle of the night project, hence the lighting.)
I'm using all kinds of different fabrics, different weights and drapes, some stretchy, some transparent, so I needed to interface some of them.
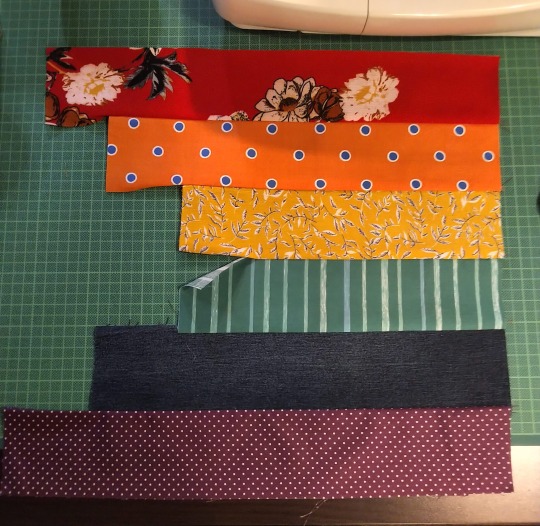
Step 2: Sew the rainbow together. 0,5cm seam allowance on everything, that's exactly the edge of the foot on your machine. Double and triple check that everything is facing the right direction before sewing. The seam of yellow and green does not get sewn fully, only 21,5 cm! That's important later! Also backtack there. Don't forget to iron.
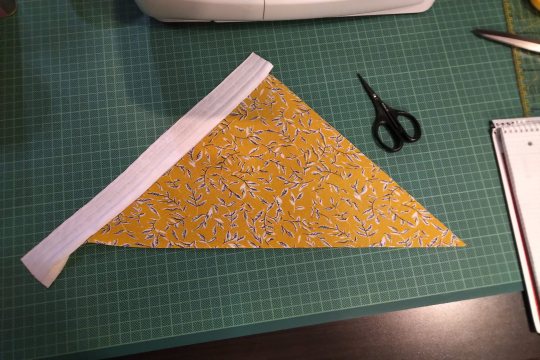
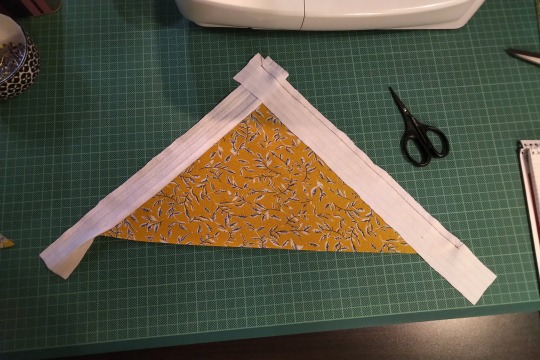
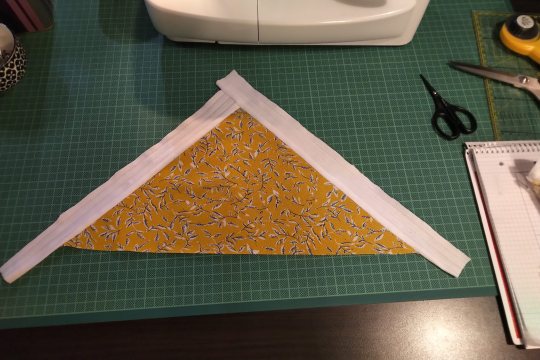
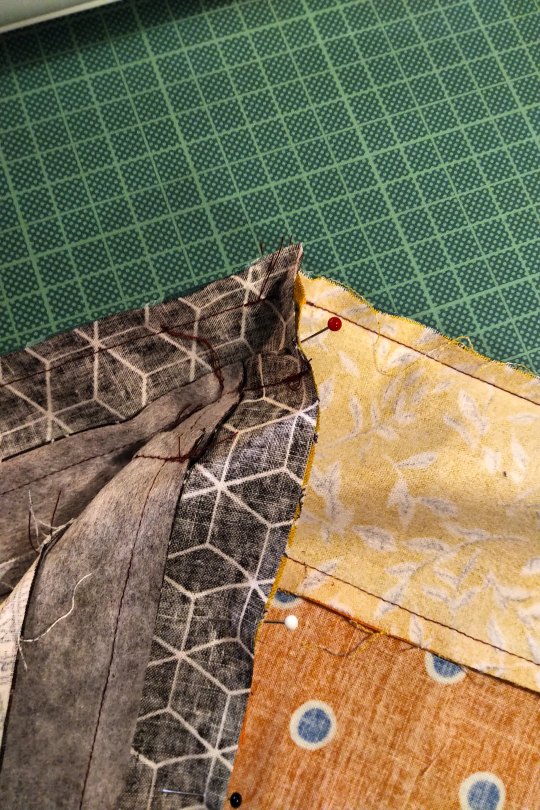
Step 3: Sew the strips to the half square triangle. For this you have to switch between the sewing machine and the ironing board constantly. Attach the shorter strip diretly to one side of the HST, iron it open. The second strip of the same colour gets attatched to the other side of the HST and the first strip. Look at the pictures closely if you're unsure how that works. Also the strips are longer than the triangle. We'll square that up later.
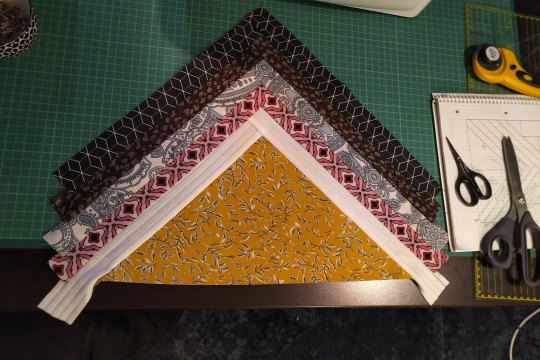
All strips attatched will look like this. See how the two strips meet at the tip!
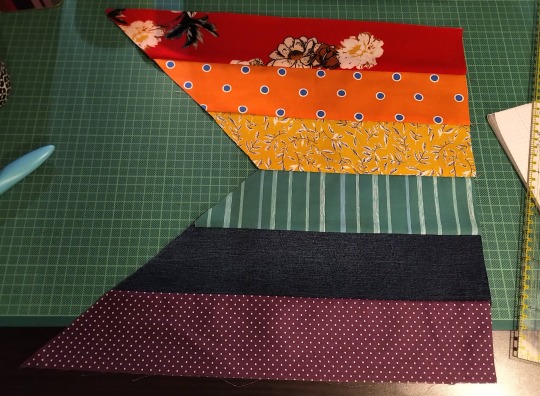
Step 4: Cut the rainbow part to size. The seam between yellow and green is 22cm long. The shorter seam from before and some seam allowance. The outsides of red and purple are 44,5cm long. You will cut a little triangle from every single colour. Do this slowly and carefully. Maybe your fabrics have stretched a bit (mine did). Don't worry, it will be ok.

Step 5: The Y seam, part one. Y seams are tricky, but there's only one for this block. So put your straps part on your rainbow part and line them up so that the tip of the strip part overhangs the seam between yellow and green. Remember that it's not about the edges of the fabric, but where the seam will be. So position the strap part so that the 0,5cm seam will meet the yellow-green seam.
But don't sew all the way! Leave 0,5cm at the tip!
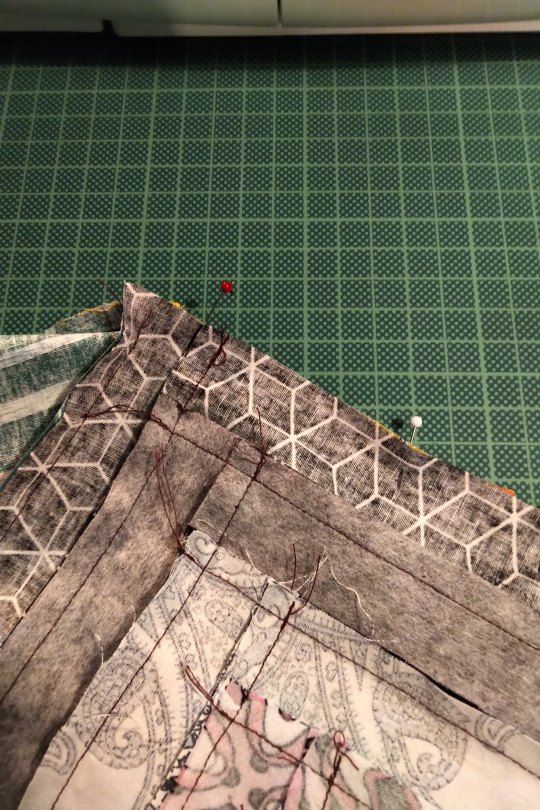
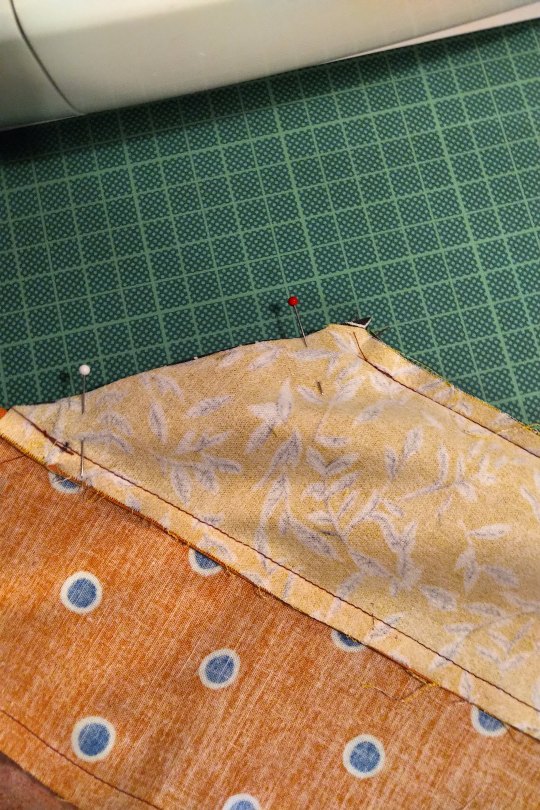
Step 6: The Y seam, part two. Now, fold both the rainbow part and the strips part in half and if you've done the last step correctly, the remaining two edges will allign. Pin and sew.
I can't explain it better than I've done here, I'm sure there are tutorias out there. Good luck!
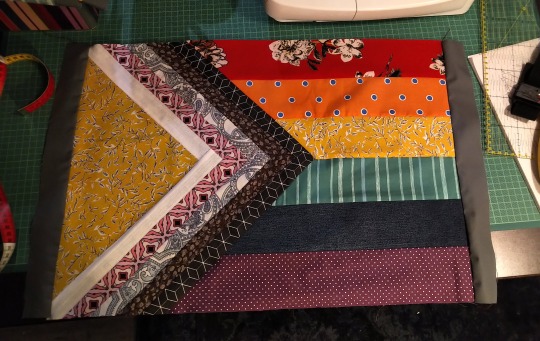
Step 7: Square up. Iron your block to that everything is nice and straight and flat. Then use the fabric edges of the red and purple to cut the remaining ends of the strips. Use the HST to cut the white. Be careful, the long side of the triangle is on the bias and likely stretched a bit.
I already added borders here. I'm making a pillow case.
Step 8: Fuzzy cut and raw edge applique. Double sided iron on interfacing is essentially double sided tape. It has two types of glue, one gets activated by 2 seconds of heat, the other by 5 or so (depends on the product). The second side is also covered with a paper that needs to be removed before the second glueing. Read the instructions of the product you are using!
Use your compasses to draw a circle on the protective paper side of the interfacing. Cut it out roughly. Then place it with the rougher side on the backside of your purple fabric and iron for 2 seconds on middle heat. If you've just ironed your fabric before and the ironing board is still hot, wait for it to cool down. Also let the fabric cool down after applying. Then cut out your circle. The interfacing will have stiffened the fabric, so that shouldn't be a problem. Then remove the protective paper, place the circle on the yellow triangle where you want it and iron for 5 seconds. Let cool.
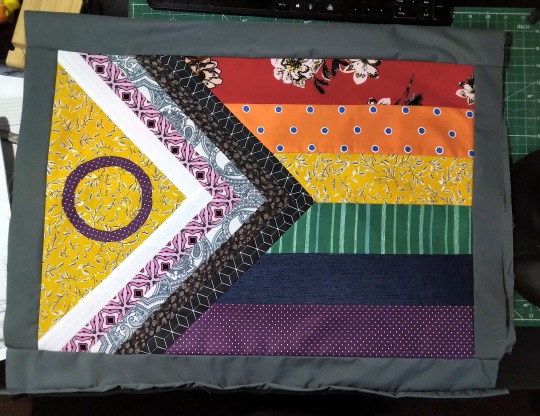
And you're done! The applique at this point is only secured with the interfacing, but it should hold fairly well. The quilting will secure it further.
And that's it. BTW, did you know that this design was made by Valentino Vecchietti for Intersex Equality Rights UK in 2021? Now you do. Happy quilting!
#lgbt+#lgbtq+#lgbtq community#pride flag#progress pride flag#valentino vecchietti#quilting#quilt#quilt block#quilt pattern#quilt tutorial#sewing#sewing machine#sewing tutorial#sewing pattern
106 notes
·
View notes
Text

Another one finished! It still needs to be pressed, but there's a lot of really fun detail in this one and I'm super happy with how it's turned out!
#quilt#quilting#quilt along#quilt block#icecreamsodaquilt#bee quilt#prepared edge piecing#epp#hand piecing#fibre arts#made by va#va fibre arts
13 notes
·
View notes
Text
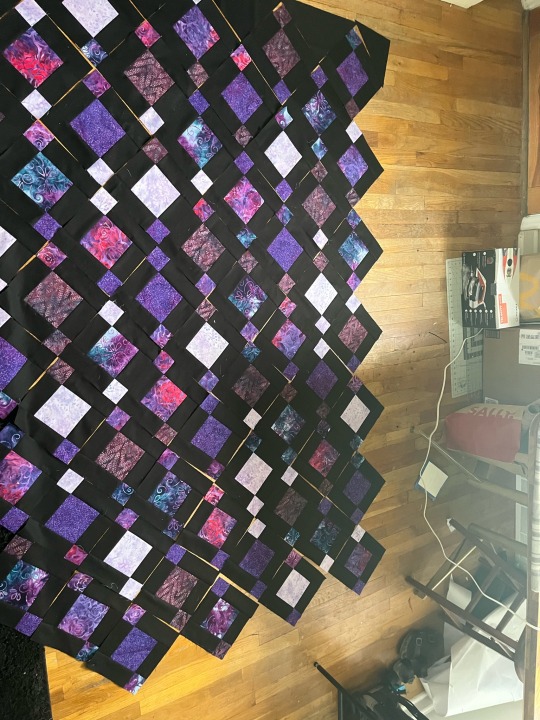
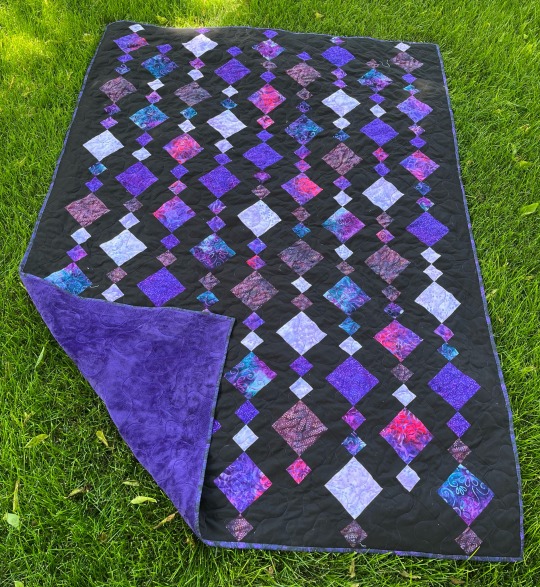
Page’s quilt. I did the math myself, but the design is called “Chandelier” and I’m not sure where it’s from. I learned a lot about bias edges, and batiks and why I should have used a lot more starch than I did. But I love it! It’s got a minky backing and I did the binding by machine which was a first for me. Not perfect, but I’ll keep trying.

#handmade quilt#quilter#quiltlove#quilt comforter#quilt block#quilt pattern#quiltblr#quilters#quilting
116 notes
·
View notes
Text
Quilt, continued
I'll make it a separate post, because crabs are special, but the other non-vertebrate block for the fish quilt is a gauzy jellyfish.

The blue gauze I bought because my then-toddler daughter fell deeply, madly in love with it at the fabric store. I actually made a little blue dress for her with this stuff as an overskirt. Because of the little sparkles on it, it is a nightmare to work with. My sewing machine took one look and then shied nervously like a stressed horse. Even for handstitching it's a trial & tribulation. However, it just screams "jellyfish" to me. So I set aside ALL common sense and put this block together. The fish blocks took about 7 minutes each to sew. This has taken almost two hours SO FAR and is not completed. However.

Sparkles. What else can I say.
I think I have all 70 fish blocks (if I have kept accurate count, nervous chuckle) and two nonfish, which is all I need. I also cut the triangle pieces I will need, because these blocks will be pieced "on point", ie the squares will be diagonal. All is ready, maybe, to lay them all out on a flat surface and start sewing them together.

#artists on tumblr#artist#sewing#sewblr#quiltblr#hand sewing#sewing machine#quilt block#fish#jellyfish#sea creatures
24 notes
·
View notes
Last Seen Blogs

asianhotgirls1012
Untitled

duswp1121
제목 없음

onyxonline
OnyxOnline
artuchix
artuchix
artuchix
artuchix