#renaisasance
Text
‘Leaf Flap’ over shoulder bag.
Hi Guys, here we are with another fun project on ‘Beginners Journey into LeatherCraft’ here @HandMadeCP. let’s jump right in.

First, get yourself a nice piece of Leather, I’ve used a 2mm thickness. Some time ago I made a ‘Stitchless tote bag’ , original idea by a company called Corter Leather, Find their Youtube Video and in their link you will find their pattern. I have taken that pattern and ‘Halved’ the front panel to give the back panel a ‘flap’ as you can see later on. I drew out my ‘New’ template on card as shown here.
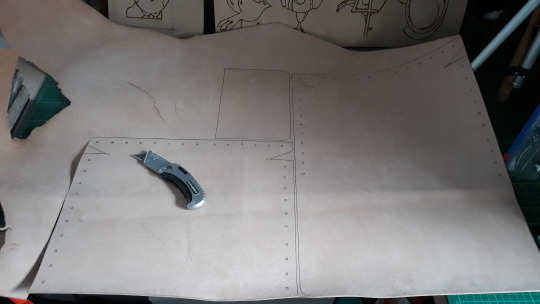
I then drew the template shapes onto the leather.

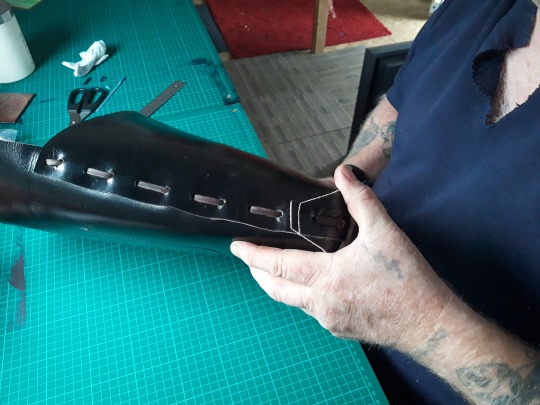
Once the shapes are cut out, draw on the necessary holes for stitching and / or punching as seen here.
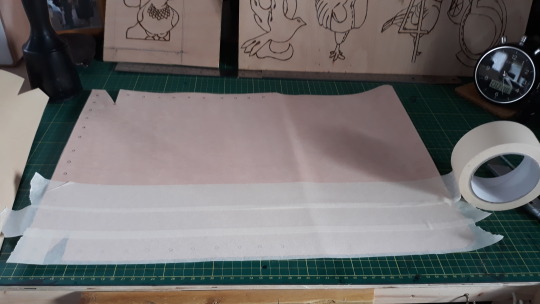
If dying the leather pieces but leaving the inside ‘flesh’ colored as I did, then you should Tape the areas you do not want to dye as seen here, I used Decorators tape as it doesn’t damage the leather and comes off easily.

I then dyed the pieces. I used a Black ECO FLO Waterstain dye and spread it on with a sponge as it’s a large area to cover, would take ages with a dauber.
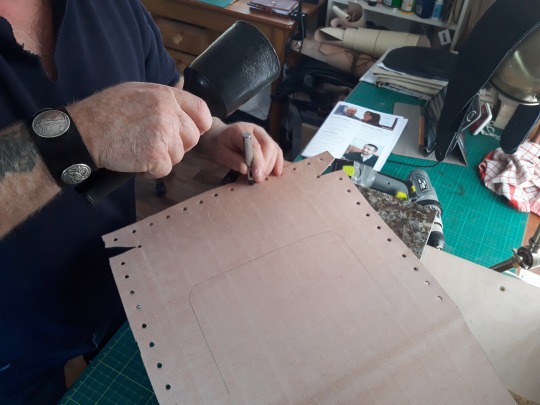
I then punched the holes for the Lace.

Glued the inner pocket in place ready for stitching.

I used a rolling pin to help stick it and I used Bostick at this point…only because my favourite 528 glue ran out, you can use any.
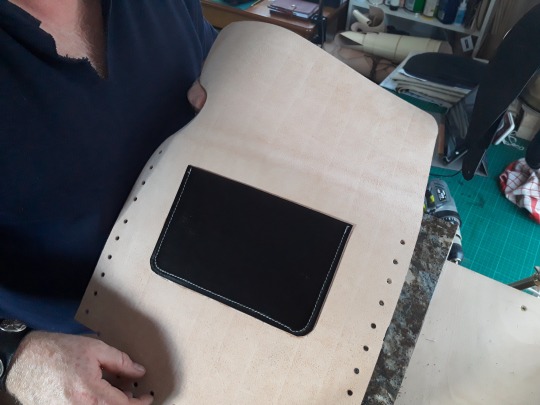
Here the inner slot pocket has been stitched on with a machine stitch just for speed.

Here you see me using the Stitch Master Pro to sew the inner slot pocket.

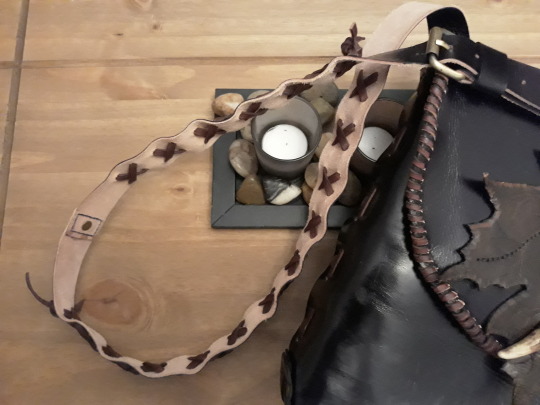
Then it’s a simple step, using a Leather lace of your choice, mine is a 4mm dark tan lace. I hand threaded it along the bottom edge first as seen here and tie knots at either end when done.
Continue the lacing around the side, tie it off as before.
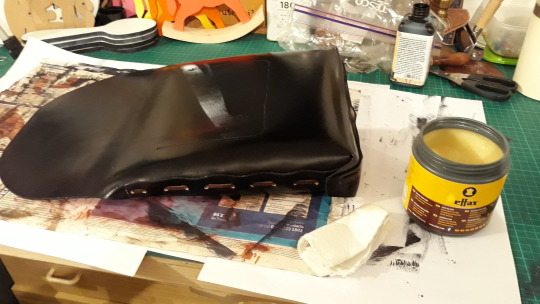
After sealing the dye with resolene, I used ‘effax’ wax to coat the bag on the outside just to seal it and waterproof it a bit more.

A View inside the bag, the leather stretches open well to fit quite a bit of stuff inside it.

Here you can see I have added Antique brass double sided rivets for looks but also for added strength.

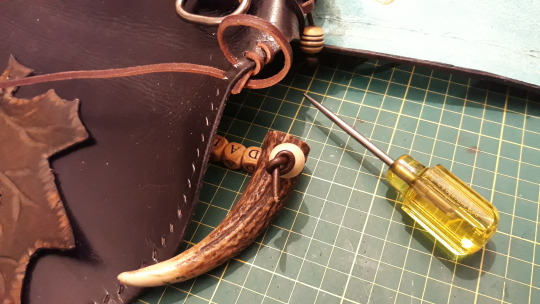
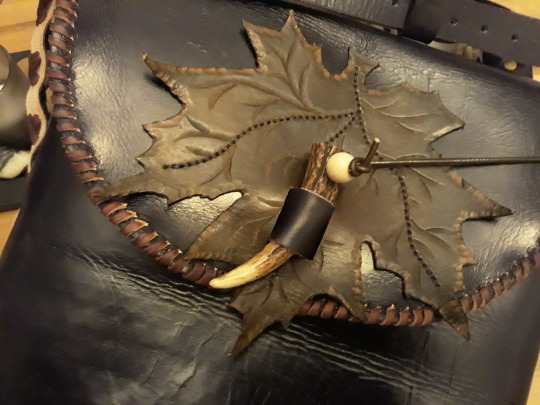
I added an Antler tip for a closer and a short strap to slot it through, I cut a hole to fit it through and rivetted it in place.
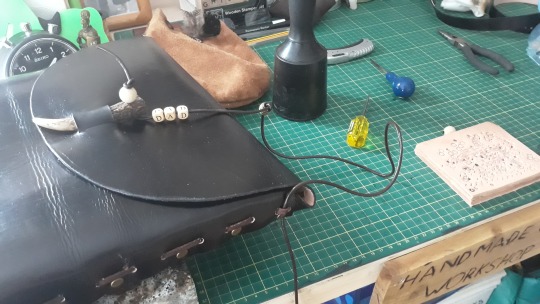
Note here I have rounded the edges of the flap for a better look, drilled the antler tip to fit a leather lace ( round lace.) and added some decorative ball pieces. The whole thing was then attached, I just tied it to the side as shown.
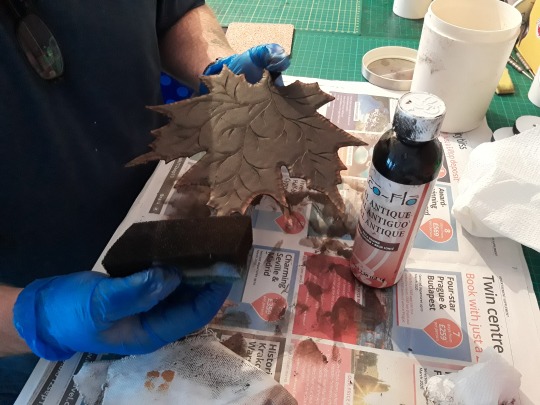
I drew, cut out, transferred to leather, cut tooled and dyed the leaf to decorate the front, I used an antique dye as this gave a good look and also polishes up well. Then I hand stitched the leaf along certain lines to hold it in place but not look ‘Glued’ to the bag.
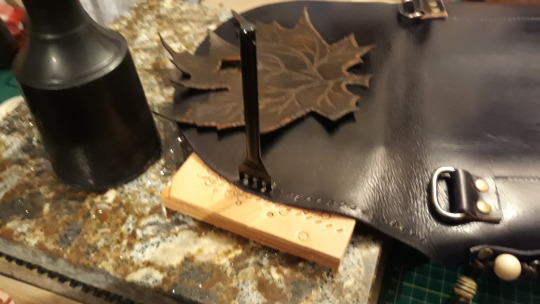
I punched stitch holes all around the flap edge as seen here ready to lace. You can also see the short straps I rivetted on the back to hold the ‘D’ rings for the strap.
Here I just hand threaded a whip stitch with the lace all around the edge, making the holes larger if needed with the awl.
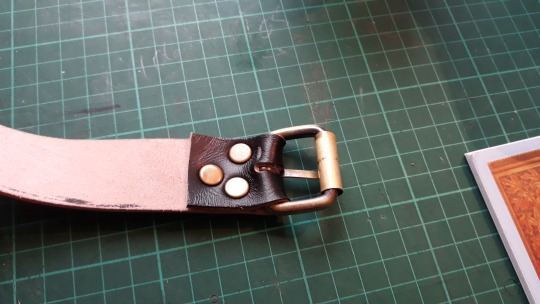
I cut a strap width to fit the ‘D’ rings, cut it the legth needed, dyed it the same way as everything else was done and riveted a brass buckle on as shown.

The strap was then attached to the ‘D’ Rings as seen here…simply done with rivets to keep the ‘Simple’ look I wanted .
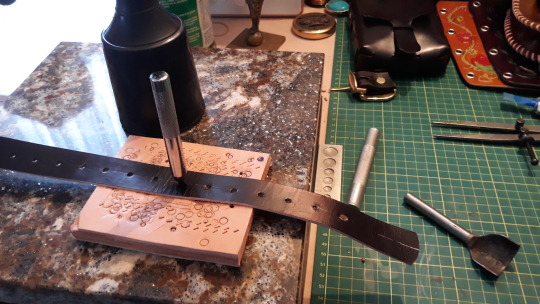
Add as many belt holes as you see fit. I drew a line down the center with a ‘paint’ pen re-fill …it wipes off…to keep the holes central for a more professional look…another tip given to me by other great leather workers.
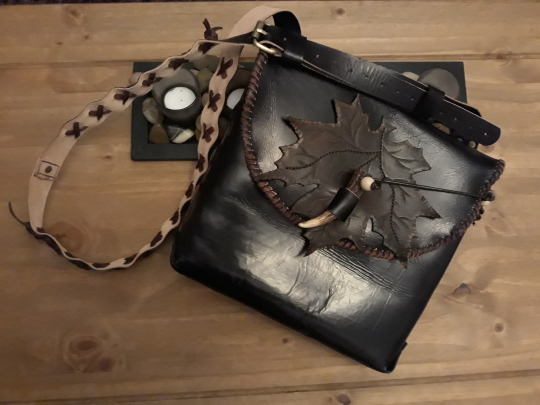
Finally I decided to add a threaded cris crossed lace along the strap which I think adds a lovely touch, but that’s just how I decided to go with it, you do what ever you choose, your style.

I love how this bag came together, so simple, so useable, a tough bag that will last for years if the leather is looked after and ‘treated’ occassionally with a leather balm or similar product to keep it suptle. I hope you have enjoyed this latest project, I feel it’s a good one for all levels…as long as you know a bit about dying and tooling…if not..practice, you’ll get there. More to come this year still, watch this space, good luck with your projects and Stay Crafty.
27 notes
·
View notes
Photo
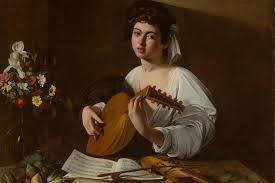
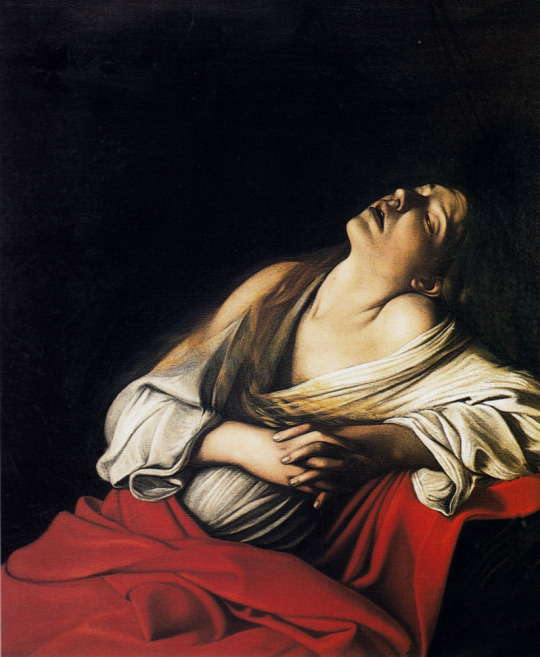

renaisasance portraiture of the human form lovely reference. we see the form of the muscles the musculature the roman and greek nude inform the way these poses are made we draw on a deep tradition of depicting the human body as an organism and an architecture
0 notes
Last Seen Blogs

beelsbaby
Nani wo?

legal-translation-dubai
Legal Translation Dubai

queen-of-thunder
Untitled

remindhimoflove
Remember